To avoid these ads, REGISTER NOW!

Lets see your vintage shop work lights

Beerhippie

Well-known member
Joined
Oct 13, 2023
Messages
9,959
Location
Far NE Oregon
This thread needs some fresh blood!

I went out to my old storage shed this morning to look for something else and found this instead:

53698372918_a262aa9a3a_b.jpg

Dazor! Not sure it's going to be doing any floating, 'though, as it weighs at least 15 lb.

53698503904_5c9c77ee40_b.jpg

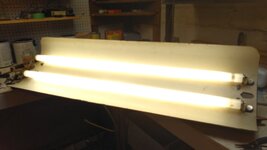
It works with the one old F15T8 bulb that's in it!

53698372913_e97284641b_b.jpg

I has the old manual pre-heat switch.

I'd completely forgotten it was in the shed, which unfortunately has a leaky roof, so there's a lot of rust--mostly screw heads, but those should be easy to replace.

I'd also forgotten how sickly "Daylight" fluorescent lighting looks compared to my daylight-balance LED shop lights. I've already ordered a pair of LED replacements for it. I got the kind that require re-wiring, as they're dimmable. Now to find a dimmer I can use with the old light without modifying it too much.

Now, what the hell was it I went to look for?
 
To avoid these ads, REGISTER NOW!

fishwatcher

Well-known member
Joined
Jan 26, 2023
Messages
759
Please let us know how that works out-- I've got about a half-dozen of these Dazors in the garage and at work, all with fluorescents still.
@Beerhippie nice light! I have the same, put in LED tubes and they work great. No mod for mine (no dimmer either though).

@Nutria see my post on the LED tubes I got.

Picture as of today, it still works well!IMG_9754.jpeg
 
Last edited:

Beerhippie

Well-known member
Joined
Oct 13, 2023
Messages
9,959
Location
Far NE Oregon
Cool, @fishwatcher!

I took another look at the lights I ordered. By "dimmable", they mean the tubes have translucent covers that can be rotated in front of or behind the tubes to "dim" them. Well, that saves me about $30 for a dimmer, and after looking at prices for these old lights, I don't want to be drilling any holes it anyway. I guess I could use an in-line dimmer, but... at sixty-some years of age, there really aren't many times I say "Hey, it's too bright to work in here!"

I wish there I could find some way of dating this thing. Dazor just gave a range of 1940-'90--not real helpful. From the arty-deco looks, I'm guessing closer to the '40 end of things. Seems like the decals would be a good way of going about figuring out ages, as there seems to have been a lot of changes in the same model over the years.

Rewiring the lamp to eliminate the ballast and start features requires no wire clipping on mine:

53698452411_71a3431a20_b.jpg

And any worries about the ballast going bad should be allayed, too. Two big choke coils and one big capacitor that looks like a common motor-start cap is all it is. I'll still be disconnecting all that, as ballasts make heat and heat is wasted energy--unless you need heat.

This also explains the weight (16 3/4 lb): Look at that big hunk of CI!
 
Last edited:

Outlawmws

Well-known member
Joined
Aug 9, 2011
Messages
39,308
Location
The Badlands
Timm, Its always fun to get an "in my own garage" score! I just recently got one of that model Dazor at a Flea a couple weeks ago. it came with 2 black light bulbs! So I'm interested in what you ordered as well. (Link please?)

I always liked the built in pen/pencil tray on these.
 

Beerhippie

Well-known member
Joined
Oct 13, 2023
Messages
9,959
Location
Far NE Oregon
Timm, Its always fun to get an "in my own garage" score! I just recently got one of that model Dazor at a Flea a couple weeks ago. it came with 2 black light bulbs! So I'm interested in what you ordered as well. (Link please?)

I always liked the built in pen/pencil tray on these.
Wait 'til you see the rest!

Here you go:

https://www.amazon.com/dp/B08SWC8L7K/?tag=atomicindus08-20

As for the pencil/pen trays... I thought those were just design elements!

I've got an hour or so of work to do and get the old Dazor cleaned up.
 
Last edited:

fishwatcher

Well-known member
Joined
Jan 26, 2023
Messages
759
Rewiring the lamp to eliminate the ballast and start features requires no wire clipping on mine:

53698452411_71a3431a20_b.jpg

And any worries about the ballast going bad should be allayed, too. Two big choke coils and one big capacitor that looks like a common motor-start cap is all it is.


I'll still be disconnecting all that, as ballasts make heat and heat is wasted energy--unless you need heat.
I have zero experience with electrical wiring. This is why I’m glad I could just insert LED tubes and it worked.

If there’s an easy, step by step set of instructions, that would make the lamp more efficient by disconnecting something, I’d be very interested. I also don’t want to break what’s not broken.

Thanks!
 

Outlawmws

Well-known member
Joined
Aug 9, 2011
Messages
39,308
Location
The Badlands
Address on yours shows no Zip code so pre 1963 for sure. Same on mine, and both are showing 118V - I'd think they would be rated 115v in the 40's (Fluorescent tubes came to being 1938-39 ., probably didn't take off big until after the war). So I'd guess 50's for these @118v:

My decal is a bit different, no "framing", and different format:

Dazor.jpg
 

Beerhippie

Well-known member
Joined
Oct 13, 2023
Messages
9,959
Location
Far NE Oregon
Thanks, Outlaw!

I got the 1940 date for the P 2324 from Dazor's site. But I agree with your analysis based on voltage--not that there's actually a national standard voltage in the US today.

Got to work cleaning the lamp up some. Dawn dishsoap and a soft, barely damp sponge so I don't damage the decal, followed by Mother's California Synthetic wax--my favorite car wax.

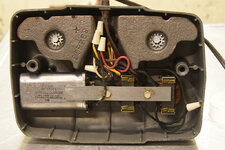
While I have the bottom hinge housing apart, here's what's inside:

53698670391_1ae599ab4e_b.jpg

53698670401_09e7b02776_b.jpg

Very little rust, given it's spent a couple of decades in my leaky storage shed--which is very good, as there's no way I'm messing with that big ballast spring!

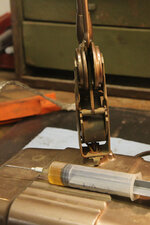
I gave every moving contact point a drop of 30wt, using one of my precision oilers:

53699010184_ca5de9da55_b.jpg

The screws for the side panels are soaking in some dilute phos acid to try and de-rust 'em a bit. They're the rustiest parts on the whole lamp, and of course, our local "hardware" stores have nothing like them. If anyone has a good picture of the screws showing original finish, I'd appreciate seeing it. I may just clean up the ones I have and either paint or nickel-plate them, depending on original look.

I replaced the fabric tape that was falling apart with vinyl electrician's tape. I suspect it protects the wiring from abrasion, as does this leaf-spring here:

53698880903_24c60cc300_b.jpg

@fishwatcher : I'll post a blow-by-blow here when I install the new LED tubes. Since it's all wire nuts and color-coded wires, it should be very simple.
 

Outlawmws

Well-known member
Joined
Aug 9, 2011
Messages
39,308
Location
The Badlands
Timm, My screws are painted "Dazor brown" (don't know what else to cal it...)

I was looking at the decal diffs - and your's is patented and patents pending. Mine has no patent references, so likely 20 years newer? :dunno: If we knew which patents, that would narrow things a bit...
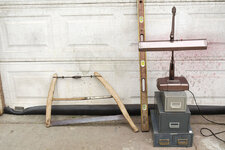
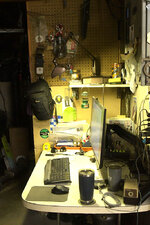
 

Beerhippie

Well-known member
Joined
Oct 13, 2023
Messages
9,959
Location
Far NE Oregon
Thanks, Outlaw. Mine are now bare, bright steel. Good enuff for gummint work. Paint on mine is a dark metallic bronze. I see ones which appear to be newer with silvery or lighter bronze color.

I guess dating of these things will have to remain a mystery for now.

Here it is, all cleaned up--as best I can--and waxed:

53699223260_282d5e5d82_b.jpg

It's with the rest of today's haul from my own garage.

Tip: If you don't need to remove the side shells from the lower hinge, DON'T! It took me forty-five or fifty minutes of fiddling and cussing to get them back on, including a couple of dry-fits off the lamp and making some very minor and not visible mods. I finally did get them back together and properly aligned and hope I never have to do it again.

Then I had to find a place for it to live. This will be fine:

53698018942_aacf6db600_b.jpg

That's my little office cubby at the back of the shop where they keep me safely out of sight until something goes wrong.

The Dazor replaces one of those cheap-*** desk lamps that never stay where you put them and feel like they're going to break every time you move them.

Recall what I mentioned about the sickly color of fluorescent light? Yeah, I wasn't making that up. This is what was called "warm white". It looks more like "hospital green" to me. I'll just live with it until the new tubes arrive.
 
Last edited:

Outlawmws

Well-known member
Joined
Aug 9, 2011
Messages
39,308
Location
The Badlands
Thx for the link Timm, and that's looking good! I'm trying to figure the best place for mine. still thinking...

Tip: If you don't need to remove the side shells from the lower hinge, DON'T!

I can echo that! I had to do one at work once. What a pain! I had assumed someone had bent the dang thing!
 

Bert_

Well-known member
Joined
Dec 24, 2016
Messages
9,771
Location
NW Iowa
I must be the only one that actually likes the old halophosphor fluorescent lamps.

I have this daily driver that runs 4-6 hours a day.
KIMG1817.JPG
 
Last edited:

Outlawmws

Well-known member
Joined
Aug 9, 2011
Messages
39,308
Location
The Badlands
I don't miss the florescent lighting at all Bert. when I was doing a lot of drafting/Drawing work, we had Vemco, work lights that clamped onto the top vertical of the drafting machines. A ring florescent with an incandescent. Great lighting as the incandescent took the pulsing out of the Florescent.

I still have mine here at home (came with me when I left...) and SWMBO used it for a while on her art table. I should get an LED Ring light for it and get it into action again.

1714873986616.png better pic: 1714874056491.png
 

Beerhippie

Well-known member
Joined
Oct 13, 2023
Messages
9,959
Location
Far NE Oregon
@fishwatcher : I guess I'll have to just say, if you're not comfortable with electrical wiring, stick with the bulbs that use the ballast. It was fairly simple, until I tried to get both tubes working. It turns out, after re-wiring the entire head, that one of the tube sockets is dead. SO I have it running on one tube, but that's good for a comparison as it only had one fluorescent tube to begin with--and now I know why.

At least the light color is much more pleasant, and to be honest, I probably wouldn't use both tubes for general lighting as it's plenty bright.

Before:

53698018942_aacf6db600_b.jpg

After:

53703050227_9c9e106ff1_b.jpg

The ballast and all wiring is still in place if, for some unknowable reason, I should ever want to switch back to the mercury vapor and phosphor bulbs.

Dazor still sells all the parts for this model lamp. I might just lay out the $30 or so for a whole new set of bulb sockets, just for the satisfaction of knowing it can work with two bulbs.
 

fishwatcher

Well-known member
Joined
Jan 26, 2023
Messages
759
@fishwatcher : I guess I'll have to just say, if you're not comfortable with electrical wiring, stick with the bulbs that use the ballast. It was fairly simple, until I tried to get both tubes working. It turns out, after re-wiring the entire head, that one of the tube sockets is dead. SO I have it running on one tube, but that's good for a comparison as it only had one fluorescent tube to begin with--and now I know why.

At least the light color is much more pleasant, and to be honest, I probably wouldn't use both tubes for general lighting as it's plenty bright.

Before:

53698018942_aacf6db600_b.jpg

After:

53703050227_9c9e106ff1_b.jpg

The ballast and all wiring is still in place if, for some unknowable reason, I should ever want to switch back to the mercury vapor and phosphor bulbs.

Dazor still sells all the parts for this model lamp. I might just lay out the $30 or so for a whole new set of bulb sockets, just for the satisfaction of knowing it can work with two bulbs.
The improvement in quality of that light color is awesome! So what does bypassing the ballast do with a LED tube when compared to using the ballast with an LED tube? What are the benefits?
 

Beerhippie

Well-known member
Joined
Oct 13, 2023
Messages
9,959
Location
Far NE Oregon
The improvement in quality of that light color is awesome! So what does bypassing the ballast do with a LED tube when compared to using the ballast with an LED tube? What are the benefits?
Think of it like a 4wd rig you want to run on RWD. Sure, you could just unlock the front hubs, which gives you RWD, but the whole drive and gear train is till getting spun when you drive--not very efficient. Or, you could use a transfer case and disconnect the front drive entirely--while still unlocking the front hubs--and be much more efficient.

That's kinda what eliminating the ballast does--but different.
 
To avoid these ads, REGISTER NOW!

Beerhippie

Well-known member
Joined
Oct 13, 2023
Messages
9,959
Location
Far NE Oregon
It turns out I was wrong about Dazor stocking all parts on their website. They have almost all parts, except for the T8 bulb sockets! These mount with a screw through a tab at the front, which is making it very hard to find replacements. "Modern" T8 sockets mount by sliding into a slot in the reflector. Maybe I could mod my reflector....

I e-mailed Dazor about the sockets. None of mine are in great shape.
 

Beerhippie

Well-known member
Joined
Oct 13, 2023
Messages
9,959
Location
Far NE Oregon
I got a reply from Dazor this AM! It seems the sockets can be removed from the mounting brackets, which explains why I couldn't find any with the brackets. Anyhow, I'll be getting a new set from them.
 

Bert_

Well-known member
Joined
Dec 24, 2016
Messages
9,771
Location
NW Iowa
Finding new sockets can really be a pain for some of this old stuff. Luckily all the sockets were made by only a few manufacturers. A look through a leviton catalog has worked for me many times
 

Bert_

Well-known member
Joined
Dec 24, 2016
Messages
9,771
Location
NW Iowa
This is the main light in our living room:

IMG_20240513_080134847.jpgIMG_20240513_080057513.jpg
Uplighting is actually a really nice way to do low level lighting.

I picked up a mogul base floor lamp off the curb last year. It cleaned up really good and I have really started to like it. No idea why we ever went away from these things.
 

Oregon rock crusher

Well-known member
Joined
Jun 28, 2016
Messages
1,911
Location
West of Salem
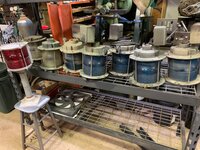
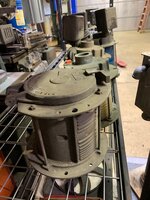
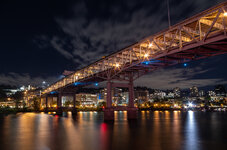
I picked up some under bridge marker lamps at a local swap meet. It is a two week event and the first day of the swap meet I got two of the blue light fixtures which was all the seller had brought. They were priced at only $15 each. These are Solid brass housings with stainless hardware by B&B engineering of Norwood La. and branded TRU-FLIGHT. Seller was a bridge contractor and these were removed from under the Marquam bridge in Portland Or. They were hanging down on stainless pipes and could be raised for service. The glass in these lamps has a heavy film buildup which may have been why they were changed out. They do clean up with some effort.

The 2nd weekend I checked back with the seller and he had brought three more of the blue lamps and two of the white lamps which are only half glass for directional lighting. All are the same nice brass housings. He also had one aluminum housed red lamp which probably marked the piers which I grabbed as well. Price had more than doubled this time to $40 each but still....

I managed to get all six tied to my cart for extraction with two on the backside of the cart. One of the heaviest loads I've had on it in a single trip. I am planning to clean them up nice, polish the brass, and mount them on short sections of brass or stainless pipe with flange bases. Should be a fun project. A few pics of the lamps and a night shot of the bridge showing the lights. Ed.
 

Attachments

  • steamup swap cart full 2024.jpg
    steamup swap cart full 2024.jpg
    403.9 KB · Views: 45
  • IMG_4813.jpg
    IMG_4813.jpg
    685.5 KB · Views: 37
  • IMG_4814.jpg
    IMG_4814.jpg
    889.2 KB · Views: 35
  • IMG_4817.jpg
    IMG_4817.jpg
    496.9 KB · Views: 37
  • IMG_4873.jpg
    IMG_4873.jpg
    965.9 KB · Views: 36
  • IMG_4874.jpg
    IMG_4874.jpg
    478.1 KB · Views: 37
  • IMG_4875.jpg
    IMG_4875.jpg
    599.9 KB · Views: 38
  • 4812a.jpg
    4812a.jpg
    187.2 KB · Views: 44

Davefr

Well-known member
Joined
Jan 7, 2010
Messages
11,845
Location
OR
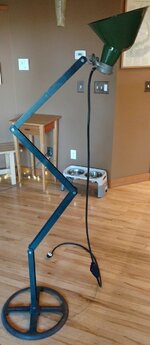
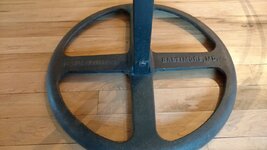
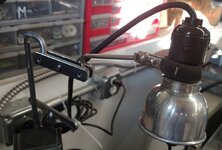
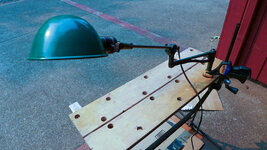
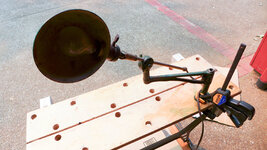
I found this old girl at a FM last week and couldn't resist. It an Ajust-O-Lier with cast iron frame and this thing can extend out to almost 3' or so and can adjust to just about any position. Machinist, medical or draftsman lamp??? I can't find much about Ajust-O-Lier.P1110492.jpgP1110493.jpgP1110494.jpg
 

Beerhippie

Well-known member
Joined
Oct 13, 2023
Messages
9,959
Location
Far NE Oregon
I watched the new Midway film last night. Imagine my surprise and pleasure when they showed sequences in the various planning/war rooms, and on every desk was...

53698372913_e97284641b_b-jpg.2106398


Dazor!
 
To avoid these ads, REGISTER NOW!
Top Bottom