To avoid these ads, REGISTER NOW!

Between 265 & 485 SQ/FT Nick's Two-Car Detached Vdub Garage

Workspaces sized between 265 and 485 squarefeet.
To avoid these ads, REGISTER NOW!

cccoltsicehockey

Well-known member
Joined
Apr 3, 2014
Messages
1,414
Location
Charlotte, NC
Speaking of smart home stuff, lately I have been very tempted to go all-in on Home Assistant. They've rolled out some changes recently that make the automation aspect more straightforward. One of my favorite things I just set up (that's been available for a long time), is actionable notifications.

IMG-5683.jpg


This one sends my phone a push notification when the basement TV is turned on, and when long pressed it gives me an option for my two lighting scenes. This way I don't even have to unlock my phone or open an app. And it pops up when I need it.

Yes... I could automate the lighting, but it's one of those scenarios where my wife and I have different lighting preferences (if I'm alone I like the lights darker), and sometimes we want it bright until we start playing something. Lot's of scenarios. This is a great solution if you want to be able to easily and contextually control something that can't be automated a certain way 100% of the time.

I can see many use cases for this, so it's something I want to explore more.
I had not seen those actionable alerts. Those look cool. I will have to see if maybe I can tie that into my gate open alert and if no response it keeps alerting.

Regarding Home Assistant though I finally went ahead and moved from running it in docker to running HAOS as a VM on my synology box. What prompted it was my Ubiquiti doorbell alert over all my Google Home speakers had stopped working and I later figured out the older version I was running no longer worked with the version of UniFi Connect that I was running. Figured since I needed to update anyway I might as well just move then. The process was super simple. Now that it is a VM I can more easily connect a Zwave dongle to it so maybe I will at least start putting devices directly on it vs the SmartThings hub. Think I am going to order the Zooz 800 adapter.
 
OP
N

nicholam77

Well-known member
Joined
Dec 18, 2016
Messages
2,672
Location
Minneapolis, MN
I had not seen those actionable alerts. Those look cool. I will have to see if maybe I can tie that into my gate open alert and if no response it keeps alerting.

They are pretty sweet. With iOS you can embed images or even live camera streams in the notifications. I'm sure Ubiquiti has a decent native app, but you could set up alerts through Home Assistant, and then in the actions have options to control related items. Like... front doorbell pressed... HA sends you an alert with the live stream embedded, and the options could be 1/ Open Ubiquiti app, 2/ Turn on the entry lights 3/ Trigger alarm... the possibilities are endless. I am thinking of doing a similar thing with my Reolink doorbell, because it does not send rich notifications natively.

The process was super simple. Now that it is a VM I can more easily connect a Zwave dongle to it so maybe I will at least start putting devices directly on it vs the SmartThings hub. Think I am going to order the Zooz 800 adapter.

Nice! Order it! Then you can let me know how it works, haha. I'm going keep using Hubitat as my radios for now, but if I get all my automations moved over, it might make sense to get a stick. Although I'd need Zwave and Zigbee.
 

big_bake

Well-known member
Joined
Mar 19, 2014
Messages
119
Location
VA
What's holding me back is not necessarily that I am scared of Home Assistant, it's that I have ~80 automations in Hubitat (WebCoRE) to port over, and some of them are pretty complex with variables and expressions. I don't know JINJA at all, so that is a bit frustrating. Basically it boils down to a lot of time just to remake what I already have humming along nicely.
There is a template tab in developer services. Should be prefilled with some examples. You can play around here like a scratch pad to test out your own. Also some decent help to follow in the forums too. Not sure if avalanche or snowball is the best method to move that many automations over.
 
OP
N

nicholam77

Well-known member
Joined
Dec 18, 2016
Messages
2,672
Location
Minneapolis, MN
There is a template tab in developer services. Should be prefilled with some examples. You can play around here like a scratch pad to test out your own. Also some decent help to follow in the forums too. Not sure if avalanche or snowball is the best method to move that many automations over.


Thanks, that's great, I'll play around with that. I'm sure the community could jump in and help me format the few things I'd want for templating, too.

As far as avalanche vs. snowball, there's definitely some low hanging fruit that I'd start with. And then once all the easy stuff is done and working, probably dedicated a weekend to the more complicated items that use global variables and such.
 
OP
N

nicholam77

Well-known member
Joined
Dec 18, 2016
Messages
2,672
Location
Minneapolis, MN
Weekend Update

It was a wild one. Car show, IKEA trip, multiple neighborhood hangs, let mom do her thing on Mother's Day, gardening, took my daughter on a pony ride with my parents, patio party, swimming lessons.

Oh, and we were potty training my youngest the whole weekend, too. 😵‍💫

IMG-5754.jpg

But my favorite was the geomagnetic storm event... I was able to see northern lights from my back yard.

Very rare to see them in the cities, I believe they need to be ~ KP 6, and of course the light pollution and cloud cover is a big deal. Saturday night got as high as KP 9 at times, and they were visible to the naked eye. Not super strong but my iPhone still did a decent job picking them up with a 3sec exposure. I did not boost the saturation on these.

IMG-5742.jpg
IMG-5737.jpg
IMG-5739.jpg
IMG-5743.jpg
IMG-5740.jpg

So yeah, there's a bit of an eye candy post! Did anyone else see them?

I have some small house chores updates but I'll save that for the next one.

🍻
 
Last edited:
OP
N

nicholam77

Well-known member
Joined
Dec 18, 2016
Messages
2,672
Location
Minneapolis, MN
I tried, but wasn't able to catch more than a smudge of green on the horizon. Others in my area had much better luck.

Yeah, it can be hit or miss depending on your timing and cloud cover. About 10min after I got my photos it died down. I had texted my dad and he didn't see anything and he's just a 15min drive from me. Saturday around 7-9pm, and then Sunday morning around 1-4am were the peaks from what I heard.

We saw them up in Charlotte NC— very cool!

Nice! In retrospect I wish I would have driven out to a darker spot north of the cities and gotten a better show. I didn't plan ahead though.
 
OP
N

nicholam77

Well-known member
Joined
Dec 18, 2016
Messages
2,672
Location
Minneapolis, MN
Odds and ends around the house

Now that it feels like Summer has hit (definitely Spring anyways), we've been focusing on plants and trying to repair our back yard from the tree removal.

IMG-5680-2.jpg

This new little shade garden by the back of the house is visible out my basement office windows, which is pleasing.

IMG-5653-2.jpg

Happy to see the serviceberry we planted last fall made it through the winter:

IMG-5679-2.jpg

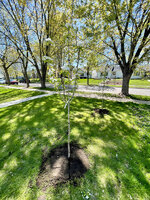
And I planted a few pear trees in the front! A bit hard to see in the photo...

IMG-5704.jpg


Officially time to put the snowblower away. It barely saw any action last winter.

IMG-5657-2.jpg

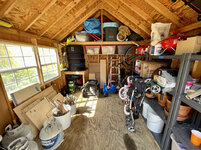
While in the shed I found some extra shelf brackets, and decided to add a shelf to the back wall. Because my shed is usually a disaster.

IMG-5654.jpg
IMG-5659-2.jpg

This let me move some bins that were up top, and make more room up there for other stuff to get off the floor.

IMG-5727.jpg


I also mounted my creeper on the roof.

IMG-5655-2.jpg
IMG-5656-2.jpg

Not perfect but it's better.

IMG-5771.jpg


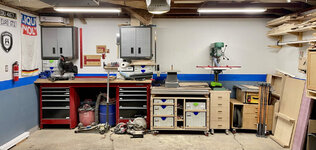
In cutting the shelf and painting some trim for the basement in the garage, I'm started to really get annoyed by how much stuff is in front of or on top of my back workbench wall.

IMG-5724.jpg
IMG-5735.jpg

I often have to move stuff just to access other things.

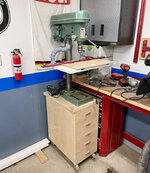
One thing that's always bugged me is the drill press being in front of half my tool drawers (where I currently have all my sockets and wrenches). And with the GTI in I can't move it out of the way, so not only do I have to move something, I have to back the car out.

IMG-5733.jpg

There's really not much other place for it to go... but it got me thinking... maybe I should cut down my table saw cart?

IMG-5734.jpg

Somewhere around that dotted green line. Then I could fit the drill press next to the MFT, in between in at the table saw.

IMG-5732.jpg

I made the table saw cart and the MFT before I got the drill press, so it was kind of just arbitrarily sized.

The only downsides I can see to this is the drill press table overlapping the MFT surface a bit if I want to set something big on it (like a cabinet) and not have to pull the cart out. And I wouldn't be able to open the drill press cart drawers when my wife's car is in the garage, where I store some drill bits and drills and such. Dang cars!! 🤣
 

bdbecker

ALLIANCE MEMBER
Joined
Nov 18, 2015
Messages
5,574
Location
Iowa
How difficult is it to install/remove the drill press top? If it's fairly easy, it might be worth hanging it on the wall. That would solve the overhang issue while still leaving the drill press accessible for the quick hole here and there.

While I don't disagree with Austin on the cabinets, another option might be to build a shelf that runs across the open wall with a half sheet of plywood and simple shelf brackets. The shelf could be use to store the sander, miter saws, and systainer boxes, freeing up your workbench space.
 
OP
N

nicholam77

Well-known member
Joined
Dec 18, 2016
Messages
2,672
Location
Minneapolis, MN
@MadeByMiller @bdbecker @Xti04 @Trapps thanks for the input. I think I will cut down the table saw cart and move the drill press. Removing the drill press top and storing on the wall is an option.

I think redoing the upper wall space is in order, probably with all the methods mentioned (cabinets, open shelving, french cleat wall). I have some ideas for layout and hopefully can get to it this summer. I also want to paint the interior all white, which probably should happen first.
 
OP
N

nicholam77

Well-known member
Joined
Dec 18, 2016
Messages
2,672
Location
Minneapolis, MN
Pre-Memorial Day Weekend Update

Going to be at the cabin all weekend so here's a dump of the past week or two.

Basement motivation is severely lacking, and I've sidetracked myself on a few smart home projects. One is a Home Assistant mobile dashboard I've been developing (I think that deserves its own post), and the other is another actionable notification, this time for my video doorbell.

I have a Reolink PoE video doorbell (probably detailed earlier in the thread), that has local AI person detection, local SD card recording and playback, and a great Home Assistant integration. The downside of no cloud service is some features are a little less polished than my old Nest doorbell. One is that the Reolink does not do 'rich' push notifications than contain a preview image, GIF, or livestream. Which is a little annoying when you want to quickly see who's at the door.

With Home Assistant's actionable notifications platform, I was able to create my own! Below is a comparison of the native Reolink vs. Home Assistant notification:

IMG-5834.jpg


And when long-pressed, the Home Assistant one displays a full snapshot, as well as gives some actionable menu items to open the Reolink app or temporarily mute alerts. Cool!

IMG-5892.jpg


I've also had a slow decline with my back pain again since I stopped PT, which has developed into more intense sciatica. Last two weeks have been bad. It's slowed down my projects, and I'm devoting extra time to strengthening exercises every day etc. Despite that, I've been trying to keep up walking even if it's not as far. Now that nice weather is here to stay I've been trying to go to more nature-y places instead of just the neighborhood.

IMG-5917.jpg
IMG-5870.jpg
IMG-5899.jpg


Despite summer time schedules and lack of motivation, I have gotten some basement work done.

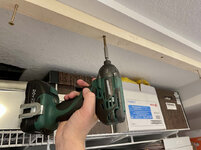
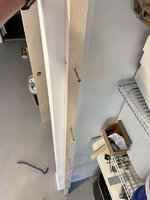
First, I just want to let @jonshonda know I did go back and put construction screws through the door hinges, so you can sleep easy tonight! 🤣

IMG-5811.jpg

Which gave me a chance to use a new tool I picked up on sale via a Woot! deal I actually happened across here on Garage Journal!

Wera Kraftform Kompakt 27 RA 2 Ratcheting Screwdriver.

IMG-5813.jpg

Next was varnishing the jambs with General Finishes High Performance polyurethane.

IMG-5823.jpg

And then I could do the casing.

IMG-5826.jpg
IMG-5827.jpg

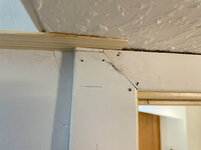
Like pretty much every part of this trim adventure, I had to fit each piece. The sides had to be ripped down and tapered a bit.

My 'miter saw station':

IMG-5832.jpg

The other side needed some drywall cutting to get a flat fit.

IMG-5831.jpg

And the top piece needed a significant taper. Track saw is great for this. Of course I screwed it up so I had to do it twice.

IMG-5841.jpg

And if you're reading @jar944 this is another one of those times you should look away.

IMG-5842.jpg

I didn't know what to do here since all the pieces were different sizes coming together so I ended up with this monstrosity. With some sanding and filler and paint it will go away, but, yikes!

IMG-5843.jpg

I'm using Titebond Instant Bond CA glue on the joints, and shims to apply some pressure while it cures.

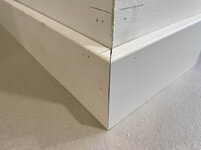
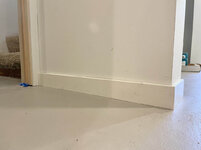
Lastly, continuing the baseboard scribing fun.

IMG-5942.jpg
IMG-5944.jpg
IMG-5945.jpg

As I'm going along I'm getting better at my fitting, I guess it's just practice and getting used to it again.

I'm about ready to caulk and fill and paint the office side. Then onto closet doors.


Hope everyone in the U.S. has a fantastic long weekend!

🍻
 
OP
N

nicholam77

Well-known member
Joined
Dec 18, 2016
Messages
2,672
Location
Minneapolis, MN
Table Saw Cart Shrinkage

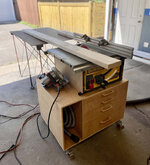
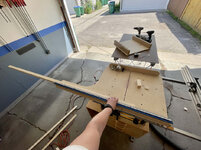
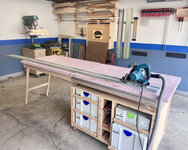
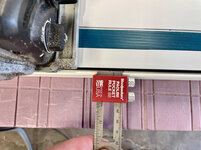
I decided to commit to the drill press move. I spent an evening doing surgery on the table saw cart. It was more work than I expected. First took it apart, and then used its competitor brother the track saw to rip it down.

IMG_6020.jpg

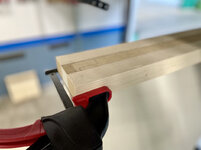
I've become a fan of these PowerTec trigger-style rail clamps for clamping the rail instead of the Festool ratcheting ones.

IMG_6023.jpg

Thanks to pocket screws, the top and bottom were easy to deconstruct from the back.

IMG_6024.jpg

The back of the cabinet is inset a bit, so I couldn't do that with the track saw alone.

IMG_6026.jpg

I ended up trimming it close with the track saw, then screwing in a piece of plywood as a router bush guide, flush trimmed to that, and finished off the edges with a hand saw.

IMG_6029.jpg
IMG_6030.jpg

I reused the old side panel, but added some new pocket holes where I had used brad nails before.

IMG_6032.jpg

Got to use one of my new 50" parallel clamps I got used, for a steal. There was some bowing, and they do such a nice job of holding cabinets together.

IMG_6034.jpg

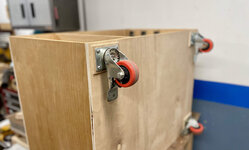
Remounted the casters.

IMG_6035.jpg

And here he is, 30% smaller and cuter.

IMG_6036.jpg

I wanted to retain some surface to the left of the saw for setting stuff, especially when cutting a series of boards it's nice to have a place to put them.

IMG_6039.jpg

By this time it was 10pm. First time an a long time I've had a night working in the garage, on the garage. It felt good.

All tucked in:

IMG_6040.jpg

I think I am going to use the blank wall space behind the MFT / drill press / table saw for a french cleat system. And looking across to below the lumber rack, I might do some larger open shelves there.

IMG_6042.jpg

But I'm already happy with this decision. It's so nice to be able to access my wrenches and sockets, and be able to walk in front of my car.

IMG_6045.jpg

The drill press drawers are not very accessible with my wife's car pulled in, but they weren't very accessible the way I had it before, either. Can't win them all.

That's it for now...

🍻
 
Last edited:
To avoid these ads, REGISTER NOW!
OP
N

nicholam77

Well-known member
Joined
Dec 18, 2016
Messages
2,672
Location
Minneapolis, MN
Love the progress...great work!

Thanks!

@nicholam77 your posts make me feel like I have a surplus of space and a surfeit of motivation. Kudos for the small tweaks and making do with your constraints.

Thanks Jake,
You DO have a surplus of space compared to me 🤣
Of course I'd like a bigger space, but I haven't even finished this one in 8 yrs time so maybe it's a good thing!


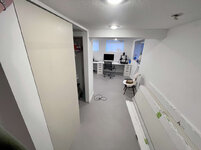
I'm about to start a big project at work, so basement progress will likely halt for the next few months. But I did manage to fill about 300 nail holes, caulk, and paint, so the office side is pretty much done except the closet doors. Which I have on order.

So here's some updated pics to leave off with.

IMG-6059.jpg
IMG-6054.jpg
IMG-6057.jpg

I also got my other desk top in and more computers / printer set up.

IMG-6108.jpg
IMG-6109.jpg

I am loving the new shade garden close to the back windows. I feel the room comes across darker in the phone pics, but the whole office is much brighter and more nature-y.

I've had to shim the IKEA cabinets, and this isn't necessarily the final form for the desk. I have some ideas to customize it, but it was easiest for now to put things back how they were and usable, until I get farther along.


With the 3d printer on the desk, I made a small custom bracket in Fusion 360 for a Thunderbolt 4 breakout box for work.

Sonnet-Echo-11-Under-Desk-Mount-v2.png
IMG-6091.jpg

I've been thinking of switching to OnShape for modeling, but every time I want to design a little project I don't want to take 15x as long trying to figure out a new software, and Fusion is *just* comfortable enough to be a barrier to switching. So far, anyways.


Lastly I cleaned our AC for the first time since living here. 😬 Yes, I know, I'm awful.

IMG-6071.jpg
IMG-6072.jpg
IMG-6073.jpg

I vacuumed and scooped out the seeds and debris, foamed it, and rinsed it.

IMG-6077.jpg
IMG-6082.jpg
IMG-6081.jpg

Not perfect but it's definitely cleaner. We have cold air in the house and it seems to be performing ok, but hopefully this gave it a little boost and I promise I'll be better going forward.

 

kaymccampbell

Well-known member
Joined
Feb 27, 2015
Messages
29,584
Location
Upstate New York
Thanks!


Thanks Jake,
You DO have a surplus of space compared to me 🤣
Of course I'd like a bigger space, but I haven't even finished this one in 8 yrs time so maybe it's a good thing!


I'm about to start a big project at work, so basement progress will likely halt for the next few months. But I did manage to fill about 300 nail holes, caulk, and paint, so the office side is pretty much done except the closet doors. Which I have on order.

So here's some updated pics to leave off with.

IMG-6059.jpg
IMG-6054.jpg
IMG-6057.jpg

I also got my other desk top in and more computers / printer set up.

IMG-6108.jpg
IMG-6109.jpg

I am loving the new shade garden close to the back windows. I feel the room comes across darker in the phone pics, but the whole office is much brighter and more nature-y.

I've had to shim the IKEA cabinets, and this isn't necessarily the final form for the desk. I have some ideas to customize it, but it was easiest for now to put things back how they were and usable, until I get farther along.


With the 3d printer on the desk, I made a small custom bracket in Fusion 360 for a Thunderbolt 4 breakout box for work.

Sonnet-Echo-11-Under-Desk-Mount-v2.png
IMG-6091.jpg

I've been thinking of switching to OnShape for modeling, but every time I want to design a little project I don't want to take 15x as long trying to figure out a new software, and Fusion is *just* comfortable enough to be a barrier to switching. So far, anyways.


Lastly I cleaned our AC for the first time since living here. 😬 Yes, I know, I'm awful.

IMG-6071.jpg
IMG-6072.jpg
IMG-6073.jpg

I vacuumed and scooped out the seeds and debris, foamed it, and rinsed it.

IMG-6077.jpg
IMG-6082.jpg
IMG-6081.jpg

Not perfect but it's definitely cleaner. We have cold air in the house and it seems to be performing ok, but hopefully this gave it a little boost and I promise I'll be better going forward.

I clean mine every fall. That way I don't have to eff with it on spring startup, along with everything else.
 
OP
N

nicholam77

Well-known member
Joined
Dec 18, 2016
Messages
2,672
Location
Minneapolis, MN
Random update / non-update. I know there are quite a few dads on here so a late happy Father's Day to you all.

I was in Ames, IA this past weekend with in-laws. It was jam packed, but a highlight for me was visiting the Reiman Gardens at Iowa State. There was a butterfly enclosure, tropical conservatory, 14 acres of garden grounds, and some modernist architecture to top it off.

IMG-6175.jpg
IMG-6172.jpg

Drove back Sunday, caught a movie (Inside Out 2) with my daughter, and then hit a brewery with my own dad for a couple beers.

IMG-6178.jpg

Other than that, no basement progress, I've just been on the grind at work.

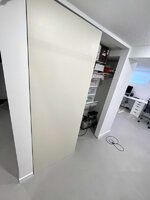
I did get the closet doors picked up. Had to return a warped one. Always something. They are not painted or trimmed or anything, but just holding one up sort of shows the frameless look I am going for.

IMG-6134-2.jpg
IMG-6133-2.jpg

Been working with my daughter on biking, so the training wheels have been coming off and on a lot. Good thing I have that Milwaukee mid-torque 🤣

IMG-6194.jpg

Other than that, just trying to enjoy summer while it's here.

IMG-6151.jpg

🍻
 

Balor

Well-known member
Joined
Feb 2, 2014
Messages
452
Location
Florida
Thanks!


Thanks Jake,
You DO have a surplus of space compared to me 🤣
Of course I'd like a bigger space, but I haven't even finished this one in 8 yrs time so maybe it's a good thing!


I'm about to start a big project at work, so basement progress will likely halt for the next few months. But I did manage to fill about 300 nail holes, caulk, and paint, so the office side is pretty much done except the closet doors. Which I have on order.

So here's some updated pics to leave off with.

IMG-6059.jpg
IMG-6054.jpg
IMG-6057.jpg

I also got my other desk top in and more computers / printer set up.

IMG-6108.jpg
IMG-6109.jpg

I am loving the new shade garden close to the back windows. I feel the room comes across darker in the phone pics, but the whole office is much brighter and more nature-y.

I've had to shim the IKEA cabinets, and this isn't necessarily the final form for the desk. I have some ideas to customize it, but it was easiest for now to put things back how they were and usable, until I get farther along.


With the 3d printer on the desk, I made a small custom bracket in Fusion 360 for a Thunderbolt 4 breakout box for work.

Sonnet-Echo-11-Under-Desk-Mount-v2.png
IMG-6091.jpg

I've been thinking of switching to OnShape for modeling, but every time I want to design a little project I don't want to take 15x as long trying to figure out a new software, and Fusion is *just* comfortable enough to be a barrier to switching. So far, anyways.


Lastly I cleaned our AC for the first time since living here. 😬 Yes, I know, I'm awful.

IMG-6071.jpg
IMG-6072.jpg
IMG-6073.jpg

I vacuumed and scooped out the seeds and debris, foamed it, and rinsed it.

IMG-6077.jpg
IMG-6082.jpg
IMG-6081.jpg

Not perfect but it's definitely cleaner. We have cold air in the house and it seems to be performing ok, but hopefully this gave it a little boost and I promise I'll be better going forward.

What foam did you use? I need to clean mine.

 
OP
N

nicholam77

Well-known member
Joined
Dec 18, 2016
Messages
2,672
Location
Minneapolis, MN
OP
N

nicholam77

Well-known member
Joined
Dec 18, 2016
Messages
2,672
Location
Minneapolis, MN
That office area looks really nice with the plants right outside and all that natural light.

I've got them multiplying on the inside, too. I like plants, but my wife really likes plants. I like to find little ceramics or planters I like, and have her find a plant for them.

IMG-6297.jpg

Pre-4th of July Check-In

Such a busy summer! Outside of GJ projects I've been pulling 10-11 hr days at work, working a weekend, went to North Carolina to visit my brother for 4 days, switched my son into bed from his crib (the plywood bed I made for my daughter way back when in this thread!), and my daughter biked without training wheels for the first time this weekend. Lot's of excitement.

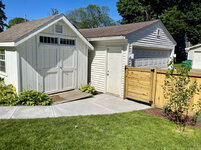
We also got a new back sidewalk.

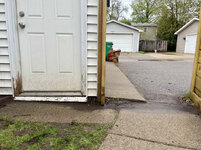
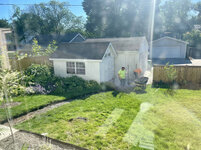
You might recall the maple tree cracked a sidewalk panel when it came down and the arborist filled it with literal gravel that's been disintegrating ever since. And aside from that, I've been waiting a long time to fix our standing water issues at the bottom of the sidewalk.

IMG_6191.jpg

It's rained a ton this season so it's been painfully obvious.

IMG_5667.jpg
IMG_5668.jpg

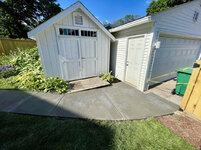
So I had the concrete people widen the whole walk a bit, delete the triangle grass area, meet the garage apron flush, and try to slope away from the door.

IMG_6267.jpg

I wasn't able to supervise but I came home to this.

IMG_6281.jpg
IMG_6270.jpg

I think they did a pretty good job. It rained a bit the day after, and you can see the sloping is keeping it off the door:

IMG_6283.jpg

Here's another pic you can see the path the water / trough / slope takes:

IMG_6343.jpg

And after a heavier rain, it's all wet, but very minimal standing water:

IMG_6294.jpg

So yeah, pretty happy with that. It's not making it out to the alley or anything, and I think some is going off the sides, but at least it's getting to the earth and not pooling and rotting the door anymore.

Our fence gate swings in, which I took off for them so they could have license to slope however needed. Of course when I went to put it back on it was hitting (I figured it would).

IMG_6301.jpg

It was not too hard to shorten it up. I banged it out in about 30min one evening, taking about 2" off the bottom.

IMG_6302.jpg

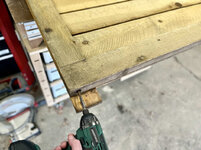
I wanted to keep the bottom rail and everything, just lose the small board towards the bottom of the gate, so I took it apart, and trimmed the "stiles" with the track saw, making sure not to cut through the fascia board on the front that forms a psuedo-halflap joint with the bottom rail.

IMG_6305.jpg
IMG_6306.jpg
IMG_6308.jpg

I finished off the cuts with a hand saw, screwed it back together, and flipped it over to trim the front side:

IMG_6310.jpg
IMG_6311.jpg

Once again, track saw for the win!!

Moved the bottom hinge up on the post side, et voila:

IMG_6313.jpg
IMG_6312.jpg
IMG_6314.jpg
IMG_6337.jpg
IMG_6339.jpg

So yeah, came out good I think. Now I just need to replace the side door on the garage, and some garage trim and it will be in a good spot.

Our flower gardens have been poppin' so I'll leave you with a little flower arrangement:

IMG_6285.jpg

Hope everyone in the U.S. has a great 4th holiday!

🍻
 
OP
N

nicholam77

Well-known member
Joined
Dec 18, 2016
Messages
2,672
Location
Minneapolis, MN
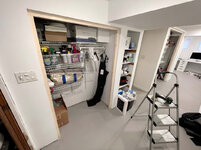
I found time to get a little more done on office closets.

First up is making a wood frame inside the drywalled opening that my hinges will attach to.

I didn't want to spend a fortune on wood for this and each little piece is adding up, so I picked out the straightest 2x6 studs I could find at the big box store.

And ripped those bad boys into 1.5 x 1.5 " strips.

IMG-6349.jpg

This is a bit of a tall order for my saw, and the JessEm guides are essential for handling these type of long, thick boards by myself.

IMG-6359.jpg

I also took a measurement of the closet door thickness, plus the hinge, and made a little plywood jig for how far the frame should be set back.

IMG-6353.jpg
IMG-6354.jpg


Pre-drilled and pre-loaded a bunch of construction screws, and used the set back jig to bend these suckers into place.

IMG-6355.jpg
IMG-6363.jpg

x2 closets, and that's where I left it before the 4th of July.

IMG-6368.jpg
IMG-6369.jpg

Next up is the doors. Big yikes. More to come soon.

🍻
 
OP
N

nicholam77

Well-known member
Joined
Dec 18, 2016
Messages
2,672
Location
Minneapolis, MN
Welp, my son turned 3 today. Where does the time go?

IMG_6468.jpg

Some bad storms this weekend with pretty significant tree damage throughout my area. It's been a rainy summer... and the new sidewalk drainage is working great!

IMG_6481.jpg

Basement Closet Doors - Trimming

Continuing on...

Because I like to make things hard on myself, the doors I ordered for the basement closets need to be trimmed down both height and width.

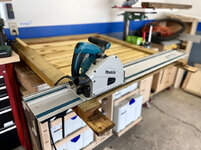
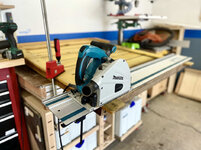
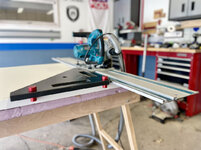
Which means I finally get to use my Makita Big Boi Track Saw Track! I knew I bought this for something 🤣

Had to trim the splinter guard first, and I managed to screw that up a little at one end.

IMG_6410.jpg

I started trying to figure out how much to trim the doors on paper.

When taking measurements, I realized the top of the opening is out of level, and so is the floor. And then reading the very poor instructions that came with my hinges, my head started to spin.

I had the idea to make a drawing in Fusion 360 to help myself visualize it, but then I had an even better idea. Just make use of Fusion's Parameters (basically, variables). You can do expressions (equations) on the variables, even using other variables as input.

I went with millimeters to make it easier. Below I highlighted the calculated variables (what the door height and width *should be* trimmed to, and how much to trim):

dimensions.jpg

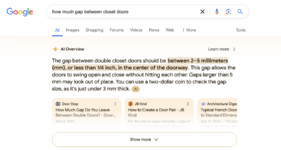
Being that I don't know what I'm doing, I consulted my Google AI Overlords for things like appropriate gaps.

AI.png

Hmmm, don't have my 2 dollar coin handy, as THIS IS 2024 lol.

"Google, install my doors!"

Damn. I guess AI can't do everything.

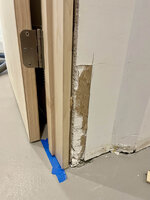
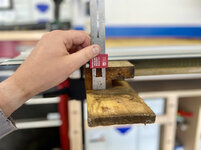
Back to the shop. The doors are hollow core, so they have a skinny (MDF?) frame, sandwiched hardboard faces, and probably a corrugated interior. The frame is really minimal, though. Not great for needing a trim. with 23mm to take off, I decided to split it 10mm from the top and 13mm from the bottom, hoping this would still give the hinges something to bite into.*

*more on that later

IMG_6418.jpg

For the top I used my MFT square. For the bottom, I just tape measure + pencil ticks. Don't really care if the bottom is perfect.

Next up I had to trim the width, and this meant recreating the 4° bevel on the handle side. Fortunately, track saw excels at this.

IMG_6413.jpg
IMG_6430_copy.jpg

In the absence of proper parallel guides, I figured out the amount to trim, and used my Pocket Rule to push the sacrificial strip on the guide track back. That way it maintains parallel to the edge.

IMG_6433.jpg

Next up, I decided to mortise / recess the top hinges in order to reduce the visual gap at the top of the closet. This involved some somewhat sketchy routering on top of my step ladder.

IMG_6419.jpg
IMG_6420.jpg
IMG_6424.jpg
IMG_6425.jpg
IMG_6426.jpg
IMG_6427.jpg

Eh, good enough 🤣

Had to take a quick break part way through because of a hail threat and needed to park the car back in. Hail never came but it did pour rain pretty hard.

IMG_6423.jpg

That pretty much covers the door machining, I'll do the install in the next post!

🍻
 
OP
N

nicholam77

Well-known member
Joined
Dec 18, 2016
Messages
2,672
Location
Minneapolis, MN
You like to live dangerously, don't you? :yikes:

Had my Safety Crocs on, too 🤣

Just to clarify, the router was not on in the photo op, and I did not do it one-handed. I did it *very carefully*

Maybe not the ideal scenario, but I'm pretty good at listening to the little voice inside my head that says "this is sketchy, you shouldn't do this". In this case I felt comfortable because thanks to the MFT the door was clamped in tight, the shoulder boards I clamped gave enough stability, large router base, shallow cut, soft material, etc etc.
 

jar944

Well-known member
Joined
Jul 26, 2010
Messages
5,941
Location
Northern VA
Had my Safety Crocs on, too 🤣

Just to clarify, the router was not on in the photo op, and I did not do it one-handed. I did it *very carefully*

Maybe not the ideal scenario, but I'm pretty good at listening to the little voice inside my head that says "this is sketchy, you shouldn't do this". In this case I felt comfortable because thanks to the MFT the door was clamped in tight, the shoulder boards I clamped gave enough stability, large router base, shallow cut, soft material, etc etc.

It's the perfect reason to pick up the smaller 611 router..😆..

They do work very well for things like that.
 

bdbecker

ALLIANCE MEMBER
Joined
Nov 18, 2015
Messages
5,574
Location
Iowa
If you don't mind switching away from yellow, the Bosch Colt is on sale right now at Menards for $90, closer to $80 with the 11% rebate. I find myself reaching for the Colt more often than not, and it allows me to leave the big router mounted on the table.


jar944

Well-known member
Joined
Jul 26, 2010
Messages
5,941
Location
Northern VA
If you don't mind switching away from yellow, the Bosch Colt is on sale right now at Menards for $90, closer to $80 with the 11% rebate. I find myself reaching for the Colt more often than not, and it allows me to leave the big router mounted on the table.


Imho the 611 is worth the extra $$ over the colt. I have a colt and only grab it when both of my 611s are setup for something else. I will concede the colt plunge base has less slop when doing critical plunge operations (like shelf pin holes)
 
OP
N

nicholam77

Well-known member
Joined
Dec 18, 2016
Messages
2,672
Location
Minneapolis, MN
If you don't mind switching away from yellow, the Bosch Colt is on sale right now at Menards for $90, closer to $80 with the 11% rebate. I find myself reaching for the Colt more often than not, and it allows me to leave the big router mounted on the table.


Oooh, that is a good price. In general, I'd love to stick to a brand across the board, but I don't because I also love a deal and tend to get whatever looks best to me at the time. That's one reason I'm not really into a battery ecosystem other than a few drill/drivers... it gives flexibility. However, within a tool 'genre' (drills, routers, etc) I feel like it would *slightly* bug me to not have them match. Not enough to stop me from getting something like the Colt, but worth noting all the same. The Colt, DeWalt mentioned below, and whatever Makita has are probably what I'd be considering.

Imho the 611 is worth the extra $$ over the colt. I have a colt and only grab it when both of my 611s are setup for something else. I will concede the colt plunge base has less slop when doing critical plunge operations (like shelf pin holes)

Interesting. The 611 would be my first choice, only because I like my full size DeWalt and they seem to be well-reviewed. What makes you grab the DeWalt more?

Nick, as long as we're spending your money, you might consider a cordless M20 DeWalt trim router. It's usually $239 but on sale for $160.

🤣

I've heard good things about this one as well. I don't have any DeWalt batteries or charger so that would add a bit. Despite the fact that I probably *should* own a trim router, all three of these options are probably going to go on the back burner. I've been buying too much stuff lately.

NICE TRY BOB 🤣
 

jar944

Well-known member
Joined
Jul 26, 2010
Messages
5,941
Location
Northern VA
Interesting. The 611 would be my first choice, only because I like my full size DeWalt and they seem to be well-reviewed. What makes you grab the DeWalt more?

The depth adjustment is night and day faster/easier to use/set, the base removal is easier and it has a built in light. I actually like the base more as well.

 
To avoid these ads, REGISTER NOW!
Top Bottom