To avoid these ads, REGISTER NOW!

Between 265 & 485 SQ/FT Nick's Two-Car Detached Vdub Garage

Workspaces sized between 265 and 485 squarefeet.
To avoid these ads, REGISTER NOW!

kaymccampbell

Well-known member
Joined
Feb 27, 2015
Messages
29,588
Location
Upstate New York
I've been to PT on and off, so I have some exercises in the repertoire that I still regularly do. Less than a full program, but some basic core ones. Stretching is tricky... I have a ton of tightness, but lately I've found some stretching maneuvers seem to make things worse.

My latest thought is I have Piriformis Syndrome, which is a chronic tightness or injury of the piriformis muscle. It completely aligns with my current symptoms, including my sciatic-like symptoms. In an effort to try to help myself I made the mistake of using the foam roller too aggressively this weekend, and now it's extra sensitive. I did a lot of reading this weekend, and I think as much as I DON'T want to give up walking, I think I need to give it a break and rest the muscle for a month or so. Even in the two days I've stopped walking it's helped.

I did get the New Balance shoes and I like them, so hopefully I can *slowly* work back up to my walking routine after it's had a chance to calm down and heal.
I've enjoyed back n leg pain since I was 19. It's one of the many gifts that keep on giving.

Try massaging the inside of your knees, from the middle down about 4 inches. You'll find a hollow that'll really send ya. I've had some significant relief by doing that.

Also, there's a matching spot and hollow on the outside. It's a little more around the curve towards the back of the calf. There's a very hard edge, then a soft bit. Harder pressure on that one can sometimes drive back up higher into your spine and the tops of your glutes.
 

hobie18

Well-known member
Joined
Apr 29, 2024
Messages
1,181
I know back pain too. In fact, I have avoided surgery for a long time. But it may be in my very near future. 😞
 
OP
N

nicholam77

Well-known member
Joined
Dec 18, 2016
Messages
2,673
Location
Minneapolis, MN
Doors look great. You nailed the gaps.

By some miracle 🤣

Thanks

I would either go with your idea of some type of push button closure or some really simple but large bar pulls. I know its two ends of the spectrum but I think with the modern look of the doors one of those two options would look the best.

I have considered large minimal bar pulls, that's still on the table. In my usual fashion I'm overthinking it.

I appreciate all the storage, but I never liked how the old bi-fold closets looked like "closet alley". The intent with removing the trim, mounting them flush, and using flat panel doors, painted same as the walls, was to hopefully make them more or less '"disappear".

And now that I see it, I really like that ultra-minimal look. I'm fully aware that they need to be easy to open and practical... at the same time pulls can be a design element that I don't want to distract from the simplicity.


I like those. Maintains the concealed / flush concept. Will keep in mind for sure.

I've enjoyed back n leg pain since I was 19. It's one of the many gifts that keep on giving.

Sorry to hear, Kay, that is frustrating I'm sure. Thanks for the tips.

I know back pain too. In fact, I have avoided surgery for a long time. But it may be in my very near future. 😞

Uggg. I completely sympathize. Good luck to you. I know everyone's situation or root cause is different, but I know my neighbor did get some improvement and relief from surgery.


Quick recap before the long weekend, during which I anticipate getting zero work done because we are headed to the family cabin.

I got my foam sprayer, a new wash sponge, and some sticker goodies:

IMG-6772.jpg

Speaking of stickers, I also added these from Integrated Engineering to my rear triangle windows...

IMG-6770.jpg
IMG-6773.jpg

I'm sure stickers are controversial, but now all the 17-yr-olds in WRX's will know I've got a tune on this bad boy 🤣 Stage 2? Big Turbo? Water-Meth injection? Gotta keep 'em guessing
Plus I figure they added at least 10 HP a piece. Yep, that's right, my car is a lot faster now, and I've got the **** dyno to prove it!


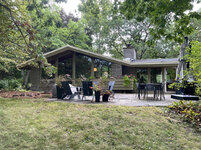
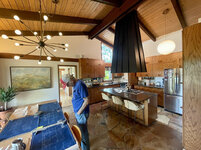
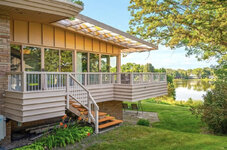
As you all know, I've been feeling very stagnant on the basement reno. This past Wednesday I toured a Modernist house on a small lake somewhat near me, and let me tell you, it was HUGE. Like 6,300 sq ft huge.

dickey-1.jpg
dickey-2.jpg
dickey-3.jpg
dickey-4.jpg

Any chance to actually be inside a Modern house is inspirational to me, but this one was loaded with built-ins and custom joinery.

dickey-5.jpg
dickey-6.jpg
IMG-6748.jpg

I mean talk about panel gaps. If this walk in looks big... there was maybe 20x this amount of storage across home. Not just the master, but each of the four bedrooms had it's own massive bathroom, walk in closet, and built in dressers. All completely custom.

The point being, I left feeling inspired by the craftsmanship, realizing how small my project is by comparison.

On the flip side, as someone one who does DIY housework but also has a full-time job and young family, I recently enjoyed this video quite a bit (despite not being a builder!):


It made me feel a little better about slow progress.

Cheers everyone, hope you all have a great long weekend (in the U.S.)

🍻
 
Last edited:

loganb

ALLIANCE MEMBER
Joined
Dec 29, 2011
Messages
5,594
Location
Omaha, NE
Enjoy the weekend good sir!

Thanks for sharing the pic's of that house....that level of built in's in functional useful locations is hard to find anymore!

And that video is spot on....thanks for sharing as his channel has some good stuff
 
OP
N

nicholam77

Well-known member
Joined
Dec 18, 2016
Messages
2,673
Location
Minneapolis, MN
Thanks for sharing the pic's of that house....that level of built in's in functional useful locations is hard to find anymore!

The built-ins / sheer size of the place was the most impressive part. Other than that the plan was fairly confusing and despite an awesome site, I felt like it lacked wow factor. Still, very cool and original.

OK this is a great idea... stealing it!!

Steal away, I stole it from someone else (@jbrentd I think?)
 
OP
N

nicholam77

Well-known member
Joined
Dec 18, 2016
Messages
2,673
Location
Minneapolis, MN
It's been an unusually long time since I've had a post, but it's because I've been so busy I haven't had time to do one. I have a number of updates to post but for now I'll just do some catch up. Since last time...

My daughter started Kindergarten. Hello 6am wake ups and dual drop-offs.

IMG_6835.jpg

Went to the cabin a few times. Got some final lake time in.

IMG_6817.jpg

Both kids back in swim lessons.

And my daughter started horse riding lessons (something my mom wanted to do with her).

Did a bunch of yard work and gardening. Check out our giant sunflower, the only one the squirrels didn't eat the seeds at the beginning of the summer.

IMG_6845.jpg

Celebrated my wife's birthday.

Went to an Italian car show.

Went to the Wisconsin Dells.

Started a huge project at work that is stressing me out.

Replaced the air filter element on my intake. I had bought it 2nd hand and it was always beat up and dirty.

IMG_6839.jpg
IMG_6840.jpg

Did some contemplating about the house but not much work on it.

IMG_6934.jpg

Well, I did have one short burst of progress.

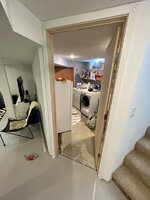
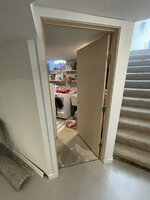
I trimmed out the laundry room door, which had the usual fun challenges of awkward joints and drywall issues.

IMG_6784.jpg
IMG_6788.jpg
IMG_6779.jpg
IMG_6783.jpg
IMG_6824.jpg

Still needs caulk, nail holes filled, paint.

Then started on the TV room side baseboard, cut a bunch of little bits with fun angles. Many trips to the garage. Scribing. Mitering. Painting.

IMG_6827.jpg
IMG_6833.jpg
IMG_6832.jpg

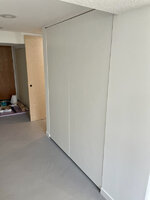
And I installed these push-to-open mechanisms for the office closet doors:

IMG_6976.jpg

They have magnetic catches on the back of the doors, so the doors finally stay closed 🤣

They work pretty well.

IMG_6973.jpg
IMG_6974.jpg

The below closet on the TV side needs some drywall work, so got started with corner bead.

IMG_6825.jpg
IMG_6849.jpg

And I quick rearranged the TV room furniture, still contemplating how to flip things around and do my entertainment center cabinets (that I was hoping to be building by this time!)

IMG_6850.jpg

That about covers the past month.

More soon.

🍻
 
OP
N

nicholam77

Well-known member
Joined
Dec 18, 2016
Messages
2,673
Location
Minneapolis, MN
I finally had a chance to try the new foam sprayer I got for car washes. Even since my last wash you can see my wheels are brake-dusty-AF. What should be a bright silver is a dark gray.

IMG-7112.jpg

If you need a refresher, it's this one

IMG-7114.jpg

My quick review is, in short, it works.

I tried pressurizing it with my air compressor... and honestly I'd skip this feature and get the cheaper one. Maybe I was expecting too much, but I find it doesn't maintain pressure long at all, and it's just as easy to hand pump (if not more so) than fiddle with the compressor. The whole reason I got it was not wanting to have extra tools out (like pressure washer), so adding the air compressor into the routine just complicates it for me.

I'd say it stays pressurized long enough to adequately coat one side of my small-ish car, or certainly a few body panels. Then needs about 15-20 pumps to reset it. But it's low effort.

It's no way near as good as my Chemical Guys foam cannon for my pressure washer, but it does a decent job, enough that I am happy with it and don't want to bother with that extra equipment!

IMG-7115.jpg

I might even pick up the non-compressor inlet version to use for wheel cleaner next summer. This is just shampoo, but you can see up close it does a nice job coating.

IMG-7116.jpg
 

legenddc

Well-known member
Joined
Aug 19, 2012
Messages
1,073
I finally finished your entire thread. Great stuff. Your floating nightstands have been added to my list of projects to make. My son needs a nightstand in his bedroom and has drawers under his bed so floating it is!

Multi-room remodels take forever and drag out even longer when you have young kids. We had our floors redone 2 years ago on our main floor and half our basement. I had the baseboards up the following weekend or two. Anddddddddddddd then I spent the next 2 months patching holes, sanding, caulking painting etc. After losing all motivation, approximately 6 months after I finished the last pieces.

It's so hard to start working on things at 8:15-8:45 when our kids go to bed now. Usually that's time to start the dishes not fire up a nail gun and risk waking them up.

My kids are a bit older than yours (9.5 and 7). Some parts of it are easier. They have friends come over and I get loads of free time. But, I'm also going to sports/dance and forcing them to do homework.

Forgot to finish my thoughts. The basement looks great! We had all flat panel doors in our house but we changed them and now I feel a bit guilty.

I like your couch where it originally was. You could make some shelves in that niche being the sofa instead of putting the TV there. The columns in basements make it hard to place things where you want them at times. I usually find myself wishing I had 2 more feet of space in one direction.
 
Last edited:
OP
N

nicholam77

Well-known member
Joined
Dec 18, 2016
Messages
2,673
Location
Minneapolis, MN
I finally finished your entire thread. Great stuff. Your floating nightstands have been added to my list of projects to make. My son needs a nightstand in his bedroom and has drawers under his bed so floating it is!

I am impressed you made it through 🤣

Glad you found some of it interesting... the night stands are probably my favorite woodworking project to date! They've held up great, match the bed perfectly, and in my opinion look amazing. I can't say that for all my projects haha.

Floating nightstand is a great idea for your son... would love to see your version!

Multi-room remodels take forever and drag out even longer when you have young kids. We had our floors redone 2 years ago on our main floor and half our basement. I had the baseboards up the following weekend or two. Anddddddddddddd then I spent the next 2 months patching holes, sanding, caulking painting etc. After losing all motivation, approximately 6 months after I finished the last pieces.

It's so hard to start working on things at 8:15-8:45 when our kids go to bed now. Usually that's time to start the dishes not fire up a nail gun and risk waking them up.

Yes, the current phase of life I'm in is making it very difficult. Technically I could work after they go to bed, but most days I struggle to find the motivation or energy and am not in the right headspace.

I still make my kids go to bed at 7:30. My oldest (6) stays up as long as she wants in her room drawing and reading and puts herself to bed when she's ready. I know it's going to get harder as they get older but I'm going to try to ride that 7:30 line as long as I can.

Glad to know it gets *a little* easier 🤣

The basement looks great! We had all flat panel doors in our house but we changed them and now I feel a bit guilty.

Thanks! I'm still kinda angry about the floors (waviness, not color), but I think I'll be able to get to 90% of my vision for it, which is good enough.

I like your couch where it originally was. You could make some shelves in that niche being the sofa instead of putting the TV there. The columns in basements make it hard to place things where you want them at times. I usually find myself wishing I had 2 more feet of space in one direction.

Thanks for the input. I'm still undecided, but you're not wrong, and sometimes I need to hear hard truths out loud from other people.

The columns are definitely cramping my style.

I do think it's a bit of an advantage in either orientation.

The original layout makes the most sense for furniture placement and general Feng Shui, if you will — I hate having my back to a room entrance. It also provides the best flow for foot traffic. The big downside to me is the TV is cramped in between the column and the wall, and (surprise, surprise) the floor is not level so the whole TV stand and TV are slanted a bit. It just looks stuffed in the corner. I'm not going to go as far as to call myself a cinephile, but I am an avid film and TV watcher, went to film school, work in advertising as a creative editor... and as such the "entertainment center" is a focal point to me. I want that part to look good, have a proper home, be on display, and have good characteristics for watching. Ever since we've moved in I've been unhappy with the TV placement and how it looks.

The new / proposed layout does the opposite, glorifying the TV with a wall mount and bank of built in cabinets, but puts the couch in a bit of an awkward spot. My initial thought was to build a bench top / console table instersecting the column to make use of the space behind:

basement-1.jpg
basement-2.jpg

It would be a bit awkward because there is a drop ceiling.

The other option could be a bookcase or shelving system.

I'm not ruling this out yet, but like you brought up I think I'm not 100% convinced, either.

After your comment I had the thought of building a birch TV console where the TV originally was, but larger, that connects to the wall and intersects the column. I'm not sure exactly how that would work, but it would allow a more built-in home for the TV. Not as good as wall mounting, but I might try to flesh out a design for that.
 

legenddc

Well-known member
Joined
Aug 19, 2012
Messages
1,073
Yes, the current phase of life I'm in is making it very difficult. Technically I could work after they go to bed, but most days I struggle to find the motivation or energy and am not in the right headspace.
I'm always amazed at how much time I have anytime our kids sleep over at one of our parents. Besides the ~ 5-6 hours at night after work we usually end up getting ready for work and sitting around for an hour before work.
I'm still kinda angry about the floors (waviness, not color), but I think I'll be able to get to 90% of my vision for it, which is good enough.
I don't think anyones floors are perfect. Ours have some issues but you get used to them. Carpets and furniture cover up a lot of our issues.
Thanks for the input.
When we first set up our basement we went back and forth where to put the projector 'screen'. I wasn't sure if I should keep the couch where it is now, flip it and the screen or even move it to 90* and have the screen be where the movies are on the wall. Putting it at 90* would mean I could set up bar seats like in your render but would have you sitting your back to the entrance.
IMG_6560.jpeg

Whatever you decide, I wouldn't go with a random cut out in the wall.

IMG_6561.jpeg

Your Sketchup skills are quite impressive. I've been needed to learn how to do it for a while but can't seem to motivate myself to sit in front of a computer more at night.
 

bdbecker

ALLIANCE MEMBER
Joined
Nov 18, 2015
Messages
5,576
Location
Iowa
Without seeing the space in person, it's tough to know if what I'm about to suggest makes any sense, but here we go...

What if you walled off that section between the column and the wall and made that your TV wall? I'd be tempted to install the wall flush with the backside of the column to create a similar nook like you already have behind where the couch used to be. This might restrict TV size down the road, so keep that in mind if you are ever thinking of going bigger someday. Install a door on that end that faces the hall so you can still access the space behind as a long, narrow storage closet. You could even leave the backside of the new wall where the TV mounts unfinished so you have easy access for connecting wires to speakers and equipment. Maybe it would make sense to even extend the wall past the column a foot or two, but flush with the front of the column so it feels more intentional. The couch gets swapped back to the spot you prefer it. Install shelving in the nook behind the couch for books or display.
 
OP
N

nicholam77

Well-known member
Joined
Dec 18, 2016
Messages
2,673
Location
Minneapolis, MN
When we first set up our basement we went back and forth where to put the projector 'screen'. I wasn't sure if I should keep the couch where it is now, flip it and the screen or even move it to 90* and have the screen be where the movies are on the wall.

Looks like you found the right orientation for your space! Love the projector... I forgot to mention that's another reason for wanting to do the flip... I've always wanted a projector. My TV is 65", and it's really great (Sony X900H), but I've always wanted the movie theater experience. I can't really do a projector screen on the column side, so I would have to flop for that. It's not imminent, but it is a thought for the future.

Your Sketchup skills are quite impressive. I've been needed to learn how to do it for a while but can't seem to motivate myself to sit in front of a computer more at night.

Once you get the hang of it it's not too hard. Anything complicated you see in my drawings (furniture, lamps, etc, is all pulled from the free 3D warehouse). Most of my designs are simple and rectilinear, so that makes modeling easy.

What if you walled off that section between the column and the wall and made that your TV wall? I'd be tempted to install the wall flush with the backside of the column to create a similar nook like you already have behind where the couch used to be. This might restrict TV size down the road, so keep that in mind if you are ever thinking of going bigger someday. Install a door on that end that faces the hall so you can still access the space behind as a long, narrow storage closet. You could even leave the backside of the new wall where the TV mounts unfinished so you have easy access for connecting wires to speakers and equipment. Maybe it would make sense to even extend the wall past the column a foot or two, but flush with the front of the column so it feels more intentional. The couch gets swapped back to the spot you prefer it. Install shelving in the nook behind the couch for books or display.

Brad, I've had all the exact same thoughts. 🤣

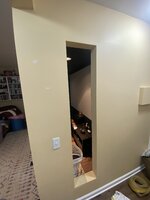
The conclusion I came to is it would be awkward to completely wall it off / make a closet. There is no adjoining hallway... there is a 2nd column and 3-way entrance to stairs / laundry / office. It would sort of solve the TV problem, but add some additional funkiness to the flow of the room. There is also a large HVAC vent behind the current TV location.

The other thing is the column is kind of in the middle of the viewing area, so the TV has to be stuffed off to the left in the corner, which would likely be true even if I build a wall there.

IMG-7221.jpg

When you're physically on the couch in the space, it's not as bad, but even in the photos you can see how the TV and stand are slanted from the floor 🤣

IMG-7222.jpg

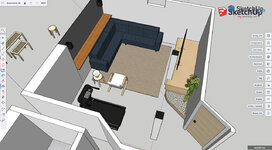
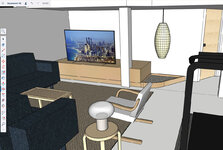
After hearing yours and @legenddc 's thoughts, I tried a quick pass at a built in that intersects the column, to try to keep the couch where it is but have the TV feel more intentional and less of an afterthought.

This is what I came up with.

basement-01.jpg
basement-02.jpg
basement-03.jpg

It's missing some details (like shelves for AV equipment, speakers, etc), but the goal was to give it an anchor to the walls. Yes, it's a bit of wasted space, but it doesn't have the visual weight of a full wall and closet.

basement-04.jpg

The little addendum with the rock fill follows the same angled plane as the laundry room door, and adds a curve, to help extend the design past that awkwardly-placed column. My thought of stepping down to something lower was again to reduce visual weight. The room isn't huge and I don't want it to feel even smaller.

I don't know how to solve this without a new couch, but it would help things if this arm was gone, and instead of a full L-couch, it was just a chaise that was flat in front of the TV, and didn't extend so close to it.

basement-05.jpg

The recessed pebble rock bed thing is something I've wanted to put somewhere for a long time. And we used to have a very similar vine planter in that spot. But, it could be anything really... a platform for some books or art sculpture, a cushion, a small recirculating fountain, or an interesting pendant light feature like this cigar bubble lamp:

basement-06.jpg

This was a quick 20min exercise for me, but it has the creative juices flowing again.

There are still downsides like not being able to wall-mount the TV, no room for larger speakers, no possibility for future projector. It would also be a tricky thing to build. But maybe that's worth saving the orientation?

In this scenario, as recommended, I would likely do some sort of lightweight shelving system in the indent behind the couch (think Cadovius style) for some light books and small objects.

Thanks for humoring me...

🍻
 
Last edited:

legenddc

Well-known member
Joined
Aug 19, 2012
Messages
1,073
The projector sadly doesn't get used enough these days. We used to go downstairs and watch a movie or two a weekend but that was pre-kids. The "screen" is just white paint on the wall. I'm wavering back and forth between buying a screen or just a large TV. 12 years ago when we bought the projector it was $500-600 and a 50" screen was $1,000. I like how big the screen is but it's not as vibrant of colors as a television.

Since it's not my money, I think you just need to get rid of that column!

In all seriousness, I like where you're headed with that design. I think you need to embrace the fact that it won't be symmetrical. If you're able to mount the TV you could keep it centered when it's not on and pull it out towards the column when you want to watch something.

The couch can be swapped out for a straight couch and a massive bean bag chair for the kids. There's a few designs on this site you might find inspirational. This one would allow you to hide any slope in the floor.

1727891094924.png
 

jake28

Well-known member
Joined
Aug 28, 2018
Messages
488
Location
SF, CA
Tossing it out there, with a quick phone doodle:

IMG_9722.jpeg

One option, if you want the TV to feel more intentional, is to build a nook and cubby system surrounding the TV. You could sandwich it between the wall and the pillar and recess the TV a few inches so it’s framed by the cubbies. Would this be a pain in the *** to build? Probably. Does it limit your flexibility for a bigger TV down the road? Absolutely. Do you get mid-century modern vibes and a ton of storage and some nice cable management? Sure.

Advice worth as much as you’re paying for it.
 

Tommo3

Well-known member
Joined
Oct 23, 2014
Messages
101
Location
Blackfen, Kent UK
Tossing it out there, with a quick phone doodle:

IMG_9722.jpeg

One option, if you want the TV to feel more intentional, is to build a nook and cubby system surrounding the TV. You could sandwich it between the wall and the pillar and recess the TV a few inches so it’s framed by the cubbies. Would this be a pain in the *** to build? Probably. Does it limit your flexibility for a bigger TV down the road? Absolutely. Do you get mid-century modern vibes and a ton of storage and some nice cable management? Sure.

Advice worth as much as you’re paying for it.
Building on that idea. If he moved the recess for the TV flush to the column and wrapped or enclosed the center column into a cabinet could improve the look?
 

Bob Heine

ALLIANCE MEMBER
Joined
Oct 24, 2009
Messages
10,707
Location
Boca Raton, Florida
Nick, I'm with Jake and @Tommo3 but I would build the cabinets to fit a larger TV. I don't recall know how big your current TV is but I would size the cabinets for an 84" TV. The platform you show in your rendering could include a slim cabinet to the right of column and disguise the column with doors that close over the column. If the cabinets also went all the way to that dropped ceiling it would hide the column even more. Some 84" TVs are priced below what we paid for a 50" a few years ago:
 
To avoid these ads, REGISTER NOW!
OP
N

nicholam77

Well-known member
Joined
Dec 18, 2016
Messages
2,673
Location
Minneapolis, MN
@legenddc @bdbecker @jake28 @Tommo3 @Bob Heine

Thanks guys for all the advice and ideas.

In general I think I'm going to continue to let this percolate while I finish up the rest of the boring work. But to respond to a few specific things:

Since it's not my money, I think you just need to get rid of that column!

I wish, but I've looked into it and it's more $$ than I want to put into this.

In all seriousness, I like where you're headed with that design. I think you need to embrace the fact that it won't be symmetrical. If you're able to mount the TV you could keep it centered when it's not on and pull it out towards the column when you want to watch something.

Thanks. I don't need the cabinets or built-in design to be symmetrical. Ideally the TV would be centered in front of the couch, but it's not a huge issue for me. I am against using any sort of wall-mounted arm to reposition the TV for watching. I'd rather it be a bit off to the side in an intentional setup, than have to adjust every time we watch.

One option, if you want the TV to feel more intentional, is to build a nook and cubby system surrounding the TV. You could sandwich it between the wall and the pillar and recess the TV a few inches so it’s framed by the cubbies. Would this be a pain in the *** to build? Probably. Does it limit your flexibility for a bigger TV down the road? Absolutely. Do you get mid-century modern vibes and a ton of storage and some nice cable management? Sure.

I appreciate the doodle, Jake! The part I struggle with building any sort of wall or full-height cabinets in the same plane as the column, to hide it or whatever, is the column is 3 feet off that back wall. I'm not sure if that is apparent in the photos or rendering.

column-width.jpg

Building a slimmer wall leaves an awkward dead space behind it that is not very accessible, and building the whole depth (3 feet deep cabinets!) is not only a huge structure, but would significantly close off the room. Minimum 27 sq ft lost, but I think visually the impact would be bigger.

There is a 2nd column to navigate as you walk into the space. That plus the drop ceiling, and I fear closing it off so much is going to be tough.

If it were building against a flat wall, I would be more open to the bookcase "entertainment center" build, but even then I think I'd lean towards something more minimal and visually light weight. More of a low horizontal plane than a full height surround.

houzz-tv-2.jpg
houzz-tv-1.jpg

Building on that idea. If he moved the recess for the TV flush to the column and wrapped or enclosed the center column into a cabinet could improve the look?

That would hide the column and let me position the TV more centered, but same problems (in my opinion) as above in regards to reducing the room size and hurting the entry flow.

Nick, I'm with Jake and @Tommo3 but I would build the cabinets to fit a larger TV. I don't recall know how big your current TV is but I would size the cabinets for an 84" TV. The platform you show in your rendering could include a slim cabinet to the right of column and disguise the column with doors that close over the column. If the cabinets also went all the way to that dropped ceiling it would hide the column even more.

My TV is 65". Size is accurate in the Sketchups. I know in home theater some would say there is no such thing as too big a screen. But I'd probably have to move an 84" forward, because I don't think it would fit comfortably between the column and side wall. I would likely step up to a 75" someday, but I think 85"-100" is too big for the room, and I also really love my current TV.

But absolutely, I would not build cabinets tight around the 65" with no room to ever expand. Purely from a design perspective I'd like more negative space around the TV for visual simplicity.

I could see doing something like a slim cabinet that wraps the column with my current design, but that doesn't connect to the back wall to close it off. Basically just wrapping the column in a cabinet, but keeping the low base from my render.


I really do appreciate all the ideas. Most of these have gone through my head already and hopefully I was able to communicate why I've moved away from some of them. Although it's hard to "show" over a forum and it's a different feeling when you're standing in the space. It's kind of why I previously arrived at flipping things 180° to avoid the TV / column battle altogether. To be honest, I don't hate the new render I put out there yesterday, but I need to let it marinate. I move slow when it comes to these things.

🍻
 

cccoltsicehockey

Well-known member
Joined
Apr 3, 2014
Messages
1,416
Location
Charlotte, NC
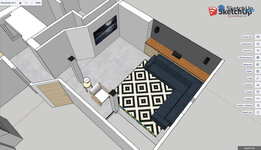
Maybe this was tossed out back at the last planning phase but what if you put a projector screen where the treadmill is and put the treadmill where the TV is. Now you back is never to the door you have gotten the post out of your view. High end in ceiling front speakers have come a long way and there are some really great ones out there with square boxes that angle the speakers towards the sitting area. Obviously this involves basically pulling all the ceiling drywall down to get it wired but it could give you the best result and use of your space and would be cheaper than trying to get rid of the post.
 
OP
N

nicholam77

Well-known member
Joined
Dec 18, 2016
Messages
2,673
Location
Minneapolis, MN
Maybe this was tossed out back at the last planning phase but what if you put a projector screen where the treadmill is and put the treadmill where the TV is. Now you back is never to the door you have gotten the post out of your view. High end in ceiling front speakers have come a long way and there are some really great ones out there with square boxes that angle the speakers towards the sitting area. Obviously this involves basically pulling all the ceiling drywall down to get it wired but it could give you the best result and use of your space and would be cheaper than trying to get rid of the post.

@cccoltsicehockey I appreciate the idea, but I don't think it would work for me for a few reasons.

It is something I considered, but I didn't even make a Sketchup for it (until today for illustrative purposes).

basement-v6-1.jpg

I assume the above is what you are referencing.

While not drawn in the Sketchup, that area adjacent to where I had the treadmill and where I put the TV is actually a closet:

IMG-7225.jpg

I could lose the closet entirely and that angled wall of the closet and gain a bit of space back in the room.

But I think the couch would have to come forward, because where it is now across the room in the proposed layout, is quite far from the TV. That's a 65" TV in the model (what I actually have). Going projector + closet delete might solve that somewhat, but I think the couch still needs to move forward towards the screen.

basement-v2.jpg
basement-v6-3.jpg

I don't think my current couch would work very well for that. Yes, there could be a purposeful space behind it (console table divider, and then a card table or kids play area), but the L-couch is larger and moving it by the columns ruins the walking flow. It also doesn't leave a good place for end tables or auxiliary chair.

I could also not move it that far, maybe split the difference, but then there wouldn't be much of a usable area behind it, and I'd probalby have to lose the treadmill.

In any scenario I can't put the treadmill under the drop ceiling where the TV was before — it's too low. My basement ceiling is only 7' to begin with, and the area under the drop is only 6' 2". It would have to go behind the couch or not at all.

There is no way I'm doing drywall ceiling myself, although it is textured and I'd love to redo it... but I'm sure it would cost $1500 to get it done. If you add the cost of a better couch, removing the closet, projector setup, new speakers, etc, we are talking $5k easy, probably more, and that is beyond the scope of this build.

I've also considered the opposite wall for the TV:

basement-v6-2.jpg

This is a possibility, but not sure it's better than my other layouts. Again — your back to the entrance of the room, and lose a lot of usable space for chair and walking flow.


I feel a little guilty rebuking everyone's attempts to solve it, but I've been thinking about this project for quite some time. My first Sketchup for it was 4 years ago! Over the years I've physically moved the furniture many times to get a feel for it.

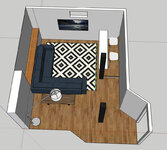
After rehashing it with you guys the past week and trying to be open minded, I'm still feeling one of the original two proposed layouts is the best combination of openness, flow, visual appeal, usability, and intentionality.

#1

basement_02.jpg


#2

basement-v4.jpg


I was hoping to be done with any sort of TV cabinet build by now, but I am expecting this part to be put on hiatus for the time being. It's going be a chaotic stretch through the holidays, and I am burnt out from all the other pieces of the basement. Hopefully I'll get bored and find some motivation this winter.
 

cccoltsicehockey

Well-known member
Joined
Apr 3, 2014
Messages
1,416
Location
Charlotte, NC
I thought you had a closet there so my suggestion was really to not have a TV at all and only a projector with a motorized screen mounted to the surface of the ceiling. Basically no TV in the way when not in use. Obviously, your issue for the treadmill makes any of that a non factor though.

Out of the two options that you listed there I think that #2 makes the best use of the space as well as having the TV centered on the view area. That said I like the other option as well where you put it on the outside wall. It seems to center the TV on the couch even better than layout #2 but the only issue then becomes is that wall drywall or a block wall and thus what do you do with cables if it is block wall.
 
OP
N

nicholam77

Well-known member
Joined
Dec 18, 2016
Messages
2,673
Location
Minneapolis, MN
That said I like the other option as well where you put it on the outside wall. It seems to center the TV on the couch even better than layout #2 but the only issue then becomes is that wall drywall or a block wall and thus what do you do with cables if it is block wall.


I'm a bit less convinced on that one because I really don't like my back to the entrance of the room. It would also pose an issue with my 5.1 system — I prefer the rear satellites wall-mounted with in-wall wiring vs. floor stands and trying to figure out how to hide the speaker wire. I know you're saying I could get new speakers in-ceiling, but for now I'm happy with what I have.

The exterior is block wall, but 2x4 wall in front of it under the drywall (there are multiple outlets along that side, too). So it is a possibility.


Where does the time go? Weather is starting to turn and we got the Halloween Ghost out. Of course I have the lights automated with Home Assistant. 🤓

IMG-7276.jpg

My daughter turned 6 on Oct 12th.

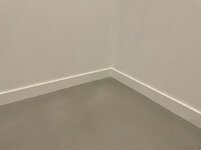
Amidst daycare illnesses, a tough work schedule, and many family obligations, I managed to bang out the rest of the baseboard trim. Or 98% of it. Gotta leave a few pieces to haunt my wife for the next 10 yrs.

In that process of working too hard and doing too much, I've suffered a major flare up with my Piriformis Syndrome. It's been getting worse so much that I stopped my daily walks beginning of September. Disappointing. Things got a bit better and now after a burst of activity it's worse than ever with sciatica symptoms and difficulty sitting in a chair for my day job. At least I got the baseboard done, right?

IMG-7224.jpg
IMG-7236.jpg
IMG-7237.jpg
IMG-7238.jpg
IMG-7239.jpg

It was the cutting and scribing, but also the installation, nail-filling, caulking, and painting. A lot of work.

I also got the push-to-open mechanisms installed on the small office closet (2nd closet), and did 3x coats of paint on those doors.

IMG-7295.jpg
IMG-7294.jpg

So yeah, still have a lot of things to wrap up:

— custom inset door for the small closet nook pictured above
— varnish the birch passage doors
— mud and install bi-fold closet in the TV room
— few little pieces of baseboard here and there
— finish support column bases (either mud them out or baseboard wrap?)
— new carpet + hand rail for the stairs

I don't know that I'll do updates for all that... I think I'm kind of calling it 'done' for the time being.

The entertainment center build will be it's own endeavor in the future. And I plan to build out the office desk and shelves, too. And eventually, the bathroom. So the basement should keep on giving for quite some time. Need a break, though.

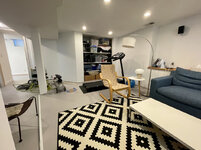
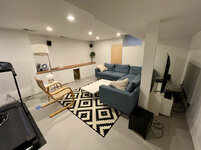
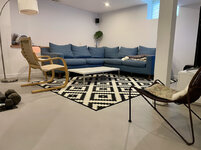
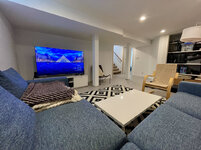
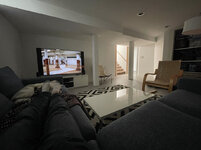
Here's the reveal of the TV side as it stands.

IMG-7279.jpg
IMG-7280.jpg
IMG-7281.jpg
IMG-7288.jpg

Even keeping the TV where it is, hopefully you can see it's not THAT bad to have it between the column.

Painting everything white has brought a ton of light. Below is around 10am on a sunny day with all the lights off... even with no windows there is a ton of natural light pouring down the staircase.

IMG-7303.jpg

And for a (fun?) reminder, here's where I started in February, 9 months ago. NINE!

IMG-4565.jpg

Time to go rug shopping 😁

I have a few more updates I'm sitting on, including a new 3D printer 😲 but just need to collect the images and find time to write them up.

Thanks to everyone who has followed along and gave me help and ideas on this project.

🍻
 

cccoltsicehockey

Well-known member
Joined
Apr 3, 2014
Messages
1,416
Location
Charlotte, NC
The basement is looking great. Sorry to hear about your pain flairups. Can't imagine dealing with not being able to sit for a day job since I am sitting all day for mine.

The transformation from where you were in the basement 9 months ago is huge. What a drastic improvement.
 
OP
N

nicholam77

Well-known member
Joined
Dec 18, 2016
Messages
2,673
Location
Minneapolis, MN
Looking good! Hope the flare up symptoms ease soon....

Your basement looks really good!
The before/after comparison is incredible.
(sorry to hear about the resulting aches & pains)

The basement is looking great. Sorry to hear about your pain flairups. Can't imagine dealing with not being able to sit for a day job since I am sitting all day for mine.

The transformation from where you were in the basement 9 months ago is huge. What a drastic improvement.

Thanks guys, on both counts (y)
 
OP
N

nicholam77

Well-known member
Joined
Dec 18, 2016
Messages
2,673
Location
Minneapolis, MN
Docomomo Fall Tour 2024

It doesn't really pertain to my thread other than my interest in residential Modernism... but I feel like it's tradition at this point that I share a few pics from the local chapter Modern house showcase I went to a few weeks ago. This is my 3rd year doing it.

This year, all houses were by the same Minnesota architect — Carl Graffunder. My dad had him as a professor in architecture school at the University of Minnesota where he taught building infrastructure (more mechanics, less design). He has a few noted public works like churches, but my dad was surprised to learn he has a handful of thoughtfully designed MCM houses around the Twin Cities.

Yogel House, 1952

IMG_7028.jpg
IMG_7031.jpg
IMG_7015.jpg
IMG_7007.jpg
IMG_7005.jpg
IMG_7018.jpg
IMG_7020.jpg

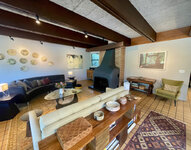
This one was generously-sized, but great proportions. Skylights and large glazing everywhere. Soft natural light throughout. 10/10.

Leighton House, 1955

IMG_7046.jpg
IMG_7048.jpg
IMG_7060.jpg
IMG_7066.jpg
IMG_7080.jpg

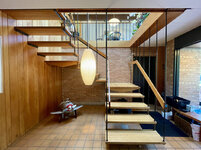
This one had a very unique suspended staircase in the center of the plan (the bottom stair does not touch the ground!), with the main living area on the 2nd story overlooking a park. Again, skylights throughout. Floating range hood. Sculptural fireplace.

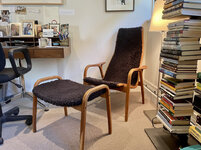
I was delighted to see this Swedish Yngve Ekstrom Lamino chair in the office... it's a chair that's on my list to acquire.

IMG_7090.jpg

And I couldn't help but notice the white, flush set, flat panel, no trim closets in the hall... 🤣

IMG_7083.jpg

Taeko Tanaka-Perry Residence, 1966

taeko.jpg
IMG_7098.jpg
IMG_7100.jpg
IMG_7105.jpg
IMG_7108.jpg

(my dad looking over the plans)

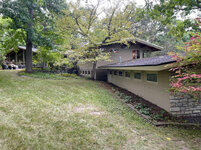
Sadly my phone died halfway through this house. Mildly Japanese-inspired, this was a favorite of mine. It had an expansive wrap-around deck overlooking a hard-scaped bluff (corner lot) with mature pines that made you feel in the tree tops.

On the lower level it actually had a workshop extension with floor-to-ceiling glass and walk-out slider... filled with vintage woodworking machinery including table saw, bandsaw, lathe, etc.


I was was blown away at how unique each house felt, how thoughtfully it was tailored to the lot and presumably the original clients.

If you have *any* interest in these types of houses, I highly recommend trying to find an in person tour. I cannot overstate how much physically being in the space gives a feeling you cannot get from pictures online.

10 yrs ago I would have had zero idea these types of houses existed in Minnesota. Now I notice them all over the place.

Ok, back to regular programming...

🍻
 
OP
N

nicholam77

Well-known member
Joined
Dec 18, 2016
Messages
2,673
Location
Minneapolis, MN
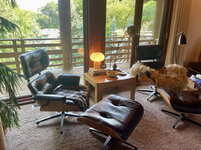
I laughed when I saw the Eames chair in the 1st house....then laughed more when another showed up in house 3!

That staircase/lightwell detail in the Leighton house(house 2) is really cool! Thanks for bringing us along!

Yeah... each of those houses had 2x Eames lounges each... and they looked right at home

The suspended staircase was definitely a highlight

Alway appreciate the photos from your house tours. I love architecture and don't do enough to see it. The design detail in those houses is cool. I particularly like that staircase.
Thanks for sharing. I appreciate this style of architecture and design more and more.

Glad you guys found it interesting!

Wish I had known. That would have been a great experience

I assume you're in MN? (I think I knew that... hard to remember sometimes)

Docomomo is a national entity (Documentation and Conservation of the Modern Movement), that has a local chapter in MN. This is their website and events page. I would recommend following their instagram account if you're on there — @docomomousmn — I turn on push notifications to make sure I don't miss their posts. Their posts are *usually* about upcoming events, and they don't post a ton, so it's not bothersome.

Many of their tours are self-guided and free, although they also have hosted events with speakers, films, etc. The Fall tour is annual, and I *highly* recommend if you are local... it is eye-opening and might challenge your idea of what a home can look like, even if you're not a die hard fan of modernism.

They also tend to offer tours of unique or notable properties as they are going on the market (part of their Going, Going, Gone series), and in the past have even had walk-throughs available for a Frank Lloyd Wright, some of his disciples like John Howe, and many other significant MN architects.

If you live near the Twin Cities, there are several neighborhoods that are fun to walk or drive around and look at houses from the street. Including University Grove in Falcon Heights, North and South Tyrol Hills (especially Tyrol Trail, Alpine Pass, Sunset Ridge roads) on both sides of 394, and then Normandale Park neighborhood in Edina, specifically Whiting Ave there is a whole tract of Cliff May style ranch homes. With our current fall colors it would be a perfect time to take a drive!

Nick, that basement is looking pretty awesome...way to hang in there.

Thanks, Dennis!
 

Matias

Well-known member
Joined
Feb 28, 2015
Messages
616
Location
Finland
Being away some time means I have a lot of catching up to do!

First of all, nice work on the saw cart and the closet doors look great! The basement is turning out really nice, lot of professional looking work there. I´m sure your work standards are so high it´s actually good you do it yourself :)

There was some excellent advice from D.F.B and others regarding wheel cleaning. Even though you already got some products, for future reference, I really like the wheel woolies. I have them in addition to the blue/white one shown earlier in the thread. I´ve used the smallest one for tight angles/curves on the wheel and bolt holes, and the next ones for bigger areas.
Wheel Woolies

Waiting on the updates on the 3D printer. If I get a job, I´ll probable get a new one here, 3D printers are just fun_and_useful :D The ratched holder looks good and it seems to hold them in a very compact space.

P.S. Sorry to hear about the health issues, hopefully it get´s better and you´re able to also resume your walks.
P.P.S. The kids have grown up so much!
 
OP
N

nicholam77

Well-known member
Joined
Dec 18, 2016
Messages
2,673
Location
Minneapolis, MN
Being away some time means I have a lot of catching up to do!

Thanks for taking the time to check in!

Thanks for the kind words about the basement... I do have high standards (and I'm not sure my work always lives up to them, but I try!). I know there are professionals out there who do great work, but more often and not I've been burned, and the main thing I struggle with is contractors not listening to me and delivering what I want. They just want to do it their way (probably easiest for them) and don't care about the details that are important to me.

Waiting on the updates on the 3D printer. If I get a job, I´ll probable get a new one here, 3D printers are just fun_and_useful :D The ratched holder looks good and it seems to hold them in a very compact space.

I was going to say that would be a great hobby for you in your new location! Maybe you should just jump the gun and take advantage of Bambu Lab's Black Friday sale going on... 😁

I'll detail the new printer in the next post!

P.S. Yes I can't believe how fast the kids are growing. My leg issues are likely not going to be a quick fix, but that is the nature of a chronic injury / pain. I've done a bunch of reading lately and started doing some exercises and yoga moves that hopefully *actually* target the weaknesses. I also have an orthopedic appt scheduled to try and get imaging and rule out any spine / disc issues. And get a new order for physical therapy. So... it's been frustrating, but I'm actively trying to improve it slowly.
 
OP
N

nicholam77

Well-known member
Joined
Dec 18, 2016
Messages
2,673
Location
Minneapolis, MN
NPD (New Printer Day!)

This is a delayed post, but a few weeks ago @loganb forced my hand into buying another 3d printer when my current one was working perfectly fine 🤣

Those following along for awhile might remember my printer trajectory:

Creality Ender 3v2 = lot's of issues, replacement parts, frustration. When it worked it worked, when it didn't it was maddening

Creality Ender 3 S1 = much better reliability, direct extrusion, no clogs... but bed leveling didn't work and I had some 1st layer issues, some stringing issues, and top layer issues, especially on larger parts. Custom firmware took care of the bed leveling, and it's mostly been good, but not perfection.

So that leaves us with my newest printer, the Bambu Labs A1 + AMS Lite:

IMG_7128.jpg

At first glance it looks pretty similar to the Enders... it's a bed slinger, open air chassis, similar size.

So why upgrade? What makes it so much better? These were genuine questions I had. Well, turns out a lot.

First off, the packaging, instructions, and design are excellent. It was so easy to assemble, and it is very well thought out. Not just for ease of assembly, but alignment, dust protection, the way the cords interface. It all feels premium and substantial. Just holding the parts in my hand I already had more confidence in it.

Other points:

— It doesn't use the stupid plastic/rubber V-wheels from the Ender
— The X-axis has a linear rail
— There is no play in any of the axis
— No stupid bed leveling wheels to mess with
— The build plate is actually flat
— The PEI sheet is way nicer than the Creality one, and it's self-aligning
— It has an extrusion indicator wheel so you can see what the extruder is doing
— The fan ducts are designed in a way that you can actually see the nozzle when printing (unlike the S1)
— Much nicer touch screen
— It's more aesthetically pleasing with it's filleted plastic shrouds and white color
— It can do multicolor printing with the AMS!
— Speed!!!

When first booted, it did a self-calibration sequence, including a bed level, and tuning the motor frequencies to make them as quiet as possible. You can do your first print without doing any manual calibration. No leveling, no Z-offset bull :poop:

The screen always tells you what's going on, and if there is an error, it has a descriptive error assistant that so far, has been 100% spot on.

The first thing I printed was a 15 min Benchy off the SD card it came with, and it looked fantastic. As good as any of my Enders, but twice at fast. I'm not used to these speeds so watching it go was a bit surprising.

IMG_7127.jpg

Oh yeah, and the screen always shows an image of what you're printing. Neat-O.

The slicer can calibrate flow for the filament you're using before the print. And the purge line is better. And it has a little rubber pad that it cleans the nozzle of drips right before the print starts.

With the AMS... the filament loads and unloads itself into the extruder. So cool.

I could go on and on.

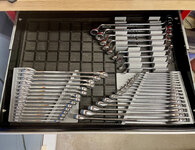
Next I printing some modular wrench organizers to continue my wrench drawer. I thought about a custom Fusion 360 design, but didn't feel like the effort. This worked out fine.

IMG_7200.jpg

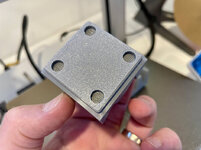
Came out beautiful, and the PEI sheet leaves a lovely texture on the bottom.

IMG_7201.jpg

In the drawer (the offset wrenches)

IMG_7207.jpg
IMG_7206.jpg

I also dove head first into Bambu Studio slicer, moving away from Cura. Bambu Studio is easy, well-laid out, has some features Cura doesn't (to my knowledge), and works perfectly with the A1 since it has provisions for the AMS system and multi-color printing.

This would be a good time to mention the Bambu Handy iOS companion app is... great!!

IMG-7202.png

Multicolor Prints

Multicolor prints are pretty wasteful depending on the model, so apparently every Bambu user needs a "poop bin" to collect the color change poops it makes.

I found a model I liked and it printed beautifully.

IMG_7145.jpg
IMG_7155.jpg
IMG_7156.jpg

Loading the AMS is pretty easy. There are motors that automatically grab the filament as you feed it in. And it has a library of filaments. I was able to find most of what I had (Overture and eSun PLA). Otherwise there are generic settings for different materials. You can configure right from the printer touch screen, or in Bambu Studio.

IMG_7169.jpg


I happened to have these colors, so I did my first multi-color print... these friendly ghosts for the kids!

IMG_7184.jpg
IMG-7413.jpg

Feeling Halloween-y, then I made these tea light ghosts:

IMG_7403.jpg

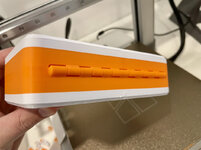
And then probably the. most impressive print to me so far, a print-in-place storage box for the A1 accessories.

It came with this thin plastic tray:

IMG_7218.jpg

And I printed this:

IMG_7209.jpg
IMG_7212.jpg
IMG_7213.jpg

Shout out to the creator for this awesome design. The bottom and top are nicely textured, multicolor was clean, and all the details came out perfect.

IMG_7215.jpg
IMG_7216.jpg
IMG_7217.jpg
IMG_7219.jpg

Needless to say I'm over the moon with it. Not that I doubted, but know I know why everyone raves about Bambu Labs. It's not *just* the print quality, because let's be honest there are plenty of printers that can do a good job. Even my S1 was pretty damn good most of the time. But it's the total package... the software, the hardware, the ease-of-use (almost everything is automated), the multicolor capability. I don't feel the need to babysit the start of a print at all.

I'll add a long term update after I've had it for longer. But now I need to figure out what to do with my Ender 3 S1. Because I don't really see myself going back to it.

🍻

EDIT: Added pic of multicolor ghost
 
Last edited:

patlun

Well-known member
Joined
Apr 12, 2015
Messages
242
Location
Värmland, Sweden
Congratulations to the new printer, I think it will work well for you and hopefully for many hours of printing. Bambu Lab create great printers without doubt, and they are known to just work.

I was looking at the A1 a while a go, but choose to buy my fourth Creality printer as I never have had any problem with them that I have not introduced myself. I bought a K1C as it is enclosed and a corexy. The downside compared with the A1 is that there is no multi-color enhancement available yet. It is said that the CFS will be compatible, CFS is Creaity's multicolor solution. After about 200 hours of printing I am very happy with it, it just works. I am still thinking about an A1 just to have something to compare with, and it is a damn good printer.
 
To avoid these ads, REGISTER NOW!
Top Bottom