To avoid these ads, REGISTER NOW!
Between 705 & 1200 SQ/FT The 'NOT' a garage, CABIN build.

Workspaces between 705 and 1200 squarefeet.
To avoid these ads, REGISTER NOW!
OP
P

PWC Repair

Well-known member
Joined
Dec 27, 2012
Messages
3,189
Location
Arkansas
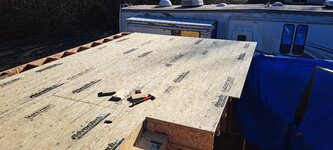
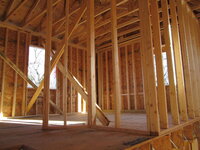
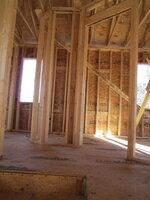
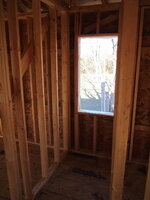
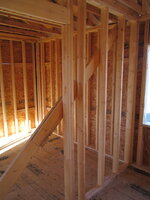
My wife and I put down almost all the rest of the subfloor upstairs today. We quit at 2pm because the other 2 sheets of Advantech I needed to finish up were at home on my trailer. I didn't want to pack up all my stuff to go get it and then come back.
 

Attachments

  • 20250101_132816_040141.jpg
    20250101_132816_040141.jpg
    788.1 KB · Views: 355
  • 20250101_110710_040218.jpg
    20250101_110710_040218.jpg
    860.4 KB · Views: 150
  • 20250101_132833_040049.jpg
    20250101_132833_040049.jpg
    1 MB · Views: 157
OP
P

PWC Repair

Well-known member
Joined
Dec 27, 2012
Messages
3,189
Location
Arkansas
We got that floor finished before some ice and snow.........then it rained......then it turned off weather in the teens......then it warmed up a TINY bit and snowed 9 inches......then weather in the single digits.....
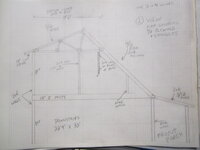
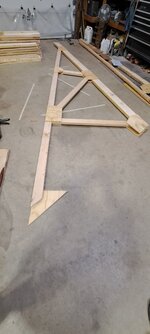
LOL...needless to say, the house has just been sitting there wrapped up! Yesterday I spent several hours on my shop floor with masking tape, chalk lines, and finally paint marker, to finalize the rafter/truss design. I've done LOTS of reading on truss design and load forces and I'm pretty sure I've got this figured out. Here is the final design. It's half fink and half queen post with an extended rafter tail. Arrows are showing compressive and resistive forces.......I think LOL!
 

Attachments

  • IMG_3551.JPG
    IMG_3551.JPG
    589.8 KB · Views: 165
OP
P

PWC Repair

Well-known member
Joined
Dec 27, 2012
Messages
3,189
Location
Arkansas
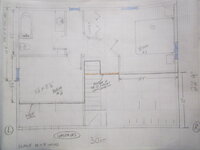
OK.....the local truss company ran my drawing in their program and the squared off center area I wanted to leave for a bit of attic space won't work. BUT here is the new drawing that WILL work and there is still a bit of attic space. We also finalized floor layout upstairs and mapped it all out.
 

Attachments

  • IMG_3554.JPG
    IMG_3554.JPG
    484.8 KB · Views: 133
  • IMG_3553.JPG
    IMG_3553.JPG
    487.5 KB · Views: 133
OP
P

PWC Repair

Well-known member
Joined
Dec 27, 2012
Messages
3,189
Location
Arkansas
Gotcha.......raised heel. It looks like I will still have room down there for R30 and a wee bit of venting.
Oops, nope, only R21 with venting.......EH.......probably OK in my area considering only this one vaulted section. I already have a plan though. Before finishing the vaulted part we'll add xps foam sheets. That will give about another R6......good NUF!
 
OP
P

PWC Repair

Well-known member
Joined
Dec 27, 2012
Messages
3,189
Location
Arkansas
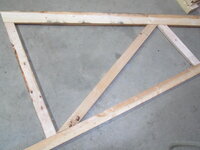
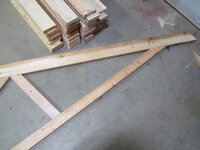
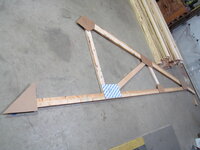
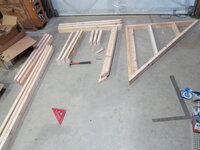
We've talked to a guy about finishing the upstairs framing, setting trusses, and sheathing everything. Waiting to see about the cost cause I really don't want to have to do it LOL! Also I cut some lumber and guess what........when you draw everything out to scale, it FITS LIKE IT'S SUPPOSED TO!!! Here is the truss layout, and the templates for the 1/2" plywood gussets. 5/12 top chord will be 2x6 and the long 12/12 part will be 2x8. Once these 'half' trusses are set, the 2x8 'tail' can just be slid into place, in between the already attached plywood gusset pockets.
 

Attachments

  • IMG_3576.JPG
    IMG_3576.JPG
    527.6 KB · Views: 84
  • IMG_3577.JPG
    IMG_3577.JPG
    459.4 KB · Views: 60
  • IMG_3578.JPG
    IMG_3578.JPG
    523.5 KB · Views: 61
  • IMG_3575.JPG
    IMG_3575.JPG
    541.2 KB · Views: 74
Last edited:
OP
P

PWC Repair

Well-known member
Joined
Dec 27, 2012
Messages
3,189
Location
Arkansas
I got in 3 hours worth of "plywood tetris" today. After a LOT of cardboard templates and rearranging........I can get gussets for BOTH sides of 3 trusses plus 1/2 of another truss out of ONE SHEET!!!
 
OP
P

PWC Repair

Well-known member
Joined
Dec 27, 2012
Messages
3,189
Location
Arkansas
.......And here's the reason for the "plywood tetris".......
I've got gussets for BOTH sides of 21 trusses sitting there! And this is the small amount of scrap leftover from 6 sheets of plywood. I screwed the sheets together and cut out 3 at a time. Still took over 4 hours today.
 

Attachments

  • IMG_3584.JPG
    IMG_3584.JPG
    599 KB · Views: 77
  • IMG_3583.JPG
    IMG_3583.JPG
    1,023.8 KB · Views: 74
  • IMG_3579.JPG
    IMG_3579.JPG
    787 KB · Views: 91
OP
P

PWC Repair

Well-known member
Joined
Dec 27, 2012
Messages
3,189
Location
Arkansas
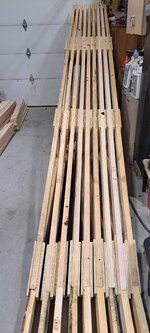
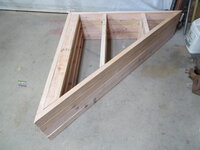
It was cold and rainy today. My wife and I put several hours in on our knees pounding in nails.........A LOT of nails! Not too shabby if I do say so myself. This "open" end will recieve a web, I just don't have any cut......DOH!! It was not in my plan but I realized on the vaulted section these will rest on a wall right out near the end. I figured I needed some support in there so the 2x doesn't bow until that long 2x8 tail is slipped in, which will be AFTER they're all setting up in place.
 

Attachments

  • 20250212_172629_064154.jpg
    20250212_172629_064154.jpg
    416.3 KB · Views: 79
  • 20250212_161724_064256.jpg
    20250212_161724_064256.jpg
    373.5 KB · Views: 74
Last edited:
OP
P

PWC Repair

Well-known member
Joined
Dec 27, 2012
Messages
3,189
Location
Arkansas
For anybody still actually watching this thread.......or maybe just wondering about the trusses.....For starters I spent SEVERAL nights, multiple hours, learning about loads and stresses, and how to engineer a truss. Of course I erred on the side of caution and overbuilt like I do everything. Oh my gosh,...sine, cosine, vector angle forces, tension, compression, multipliers for pitch,.....it's enough to make your head spin. But in the end I'm confident everything is A-OK with my design. And the final numbers.......$71.50 per each truss including taxes, construction adhesive and ring shank nails. The local truss company wanted 2.43 times that much!! Yep,...that's money in the bank.....my son's bank LOL!!
 

captain14

Well-known member
Joined
Dec 19, 2012
Messages
7,067
Location
Near College Park Maryland 20740
I’m still Watching this thread. Did I miss your jig that you made up for the trusses? Or is it just a pattern you laid on the floor?

I know I’ve seen jigs built on the floor of a shed, then the lumber is laid and out and fastened with the plywood gussets.
 
OP
P

PWC Repair

Well-known member
Joined
Dec 27, 2012
Messages
3,189
Location
Arkansas
I’m still Watching this thread. Did I miss your jig that you made up for the trusses? Or is it just a pattern you laid on the floor?

I know I’ve seen jigs built on the floor of a shed, then the lumber is laid and out and fastened with the plywood gussets.
Just marked out on my shop floor with sharpie and masking tape. I would have my wife stand on the peak, top chord, while I glued a gusset and drove a few nails. Then same for the main bottom. Then the 5/12 eave section. Then double check to make sure nothing moved around. Then we'd both be crawling in the floor driving a gajillion nails, then flip it and do the other side. With a jig such as blocks fastened to a table or subfloor, one person could do it no problem. But with one person standing on the boards and one nailing, they don't move so a jig was not necessary.
 
OP
P

PWC Repair

Well-known member
Joined
Dec 27, 2012
Messages
3,189
Location
Arkansas
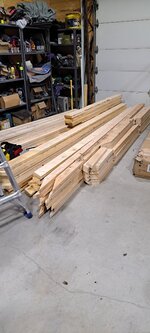
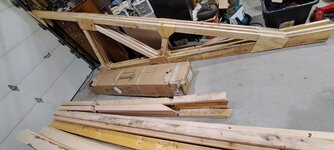
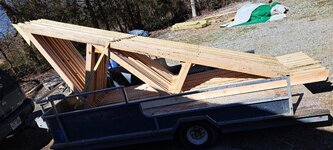
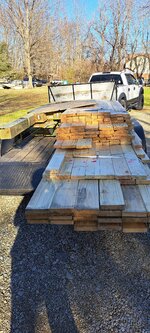
We finally had a nice week. Wife and I finished up the trusses. I also got the baby dormer trusses built and we got another big lumber load.
 

Attachments

  • 20250227_113453_081841.jpg
    20250227_113453_081841.jpg
    864.4 KB · Views: 49
  • 20250225_143119_081721.jpg
    20250225_143119_081721.jpg
    456.7 KB · Views: 48
  • 20250225_160522_081752.jpg
    20250225_160522_081752.jpg
    1.1 MB · Views: 94
OP
P

PWC Repair

Well-known member
Joined
Dec 27, 2012
Messages
3,189
Location
Arkansas
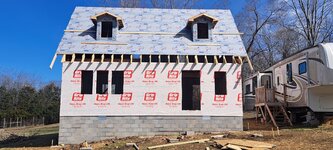
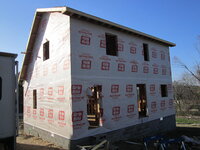
AND THEN............since I just wasn't comfortable up high I had spoken with some framers. They had some time and gave a good price. In 2 days, they've done this!
 

Attachments

  • 20250226_150455_081958.jpg
    20250226_150455_081958.jpg
    918 KB · Views: 94
  • 20250227_115822_082051.jpg
    20250227_115822_082051.jpg
    760.1 KB · Views: 94
  • 20250227_115847_082131.jpg
    20250227_115847_082131.jpg
    789.3 KB · Views: 102
  • IMG_20250227_190029_082214.jpg
    IMG_20250227_190029_082214.jpg
    357 KB · Views: 117
OP
P

PWC Repair

Well-known member
Joined
Dec 27, 2012
Messages
3,189
Location
Arkansas
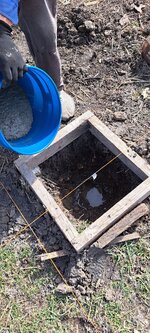
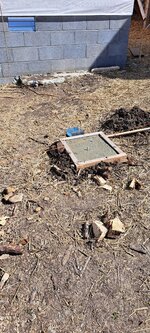
I got a bit of concrete poured and J-bolts set for half of the porch poles today.
 

Attachments

  • 20250301_114111_025411.jpg
    20250301_114111_025411.jpg
    1.1 MB · Views: 96
  • 20250301_132415_025207.jpg
    20250301_132415_025207.jpg
    1.2 MB · Views: 81
  • 20250301_132411_025311.jpg
    20250301_132411_025311.jpg
    1.3 MB · Views: 78
To avoid these ads, REGISTER NOW!
OP
P

PWC Repair

Well-known member
Joined
Dec 27, 2012
Messages
3,189
Location
Arkansas
We finished the concrete for the porch poles today.
 

Attachments

  • 20250302_155645_102504.jpg
    20250302_155645_102504.jpg
    1.3 MB · Views: 64
OP
P

PWC Repair

Well-known member
Joined
Dec 27, 2012
Messages
3,189
Location
Arkansas
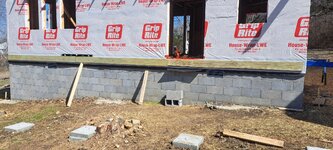
I'm ready to start building the porch. I went old school and slipped some felt paper behind the house wrap for a bit of added protection where the ledger boad will attach. I figured even though it will be covered, there can't be TOO MUCH protection. I also took a pic of the BACK of the house.
 

Attachments

  • IMG_3588.JPG
    IMG_3588.JPG
    776.6 KB · Views: 70
  • IMG_3589.JPG
    IMG_3589.JPG
    703 KB · Views: 75
OP
P

PWC Repair

Well-known member
Joined
Dec 27, 2012
Messages
3,189
Location
Arkansas
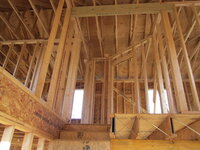
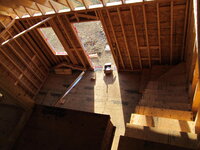
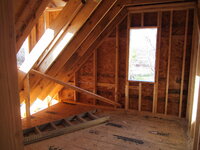
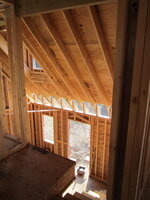
Some inside pics now that it looks more like a house. Here we are at the bottom of the stairs looking up. There's a 3x3 "perch" at the top just right of the stairs. And from the top of the stairs looking down.
 

Attachments

  • IMG_3590.JPG
    IMG_3590.JPG
    705.7 KB · Views: 74
  • IMG_3599.JPG
    IMG_3599.JPG
    710.4 KB · Views: 62
  • IMG_3601.JPG
    IMG_3601.JPG
    749.7 KB · Views: 62
OP
P

PWC Repair

Well-known member
Joined
Dec 27, 2012
Messages
3,189
Location
Arkansas
Top of the stairs looking right......the "perch" and wall into the master bedroom. Then the angled wall with master bedroom doorway. And the little hall going to a back window
 

Attachments

  • IMG_3591.JPG
    IMG_3591.JPG
    679.2 KB · Views: 61
  • IMG_3592.JPG
    IMG_3592.JPG
    645.8 KB · Views: 55
  • IMG_3593.JPG
    IMG_3593.JPG
    566 KB · Views: 50
OP
P

PWC Repair

Well-known member
Joined
Dec 27, 2012
Messages
3,189
Location
Arkansas
Now standing in the little hall looking left into the upstairs bath. And top of the stairs and a hard left puts you into the spare bedroom.
 

Attachments

  • IMG_3594.JPG
    IMG_3594.JPG
    663.5 KB · Views: 48
  • IMG_3595.JPG
    IMG_3595.JPG
    696.6 KB · Views: 44
  • IMG_3596.JPG
    IMG_3596.JPG
    622.1 KB · Views: 44
  • IMG_3597.JPG
    IMG_3597.JPG
    678.6 KB · Views: 50
OP
P

PWC Repair

Well-known member
Joined
Dec 27, 2012
Messages
3,189
Location
Arkansas
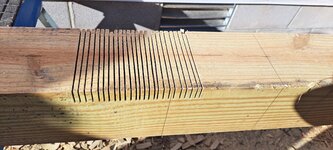
We attached the porch ledger today. Then with carefull measurements I started "letting in" the 6x6 posts. This one's a corner. Face rim board sits lower so the joists will sit ON the rim. We'll find out tomorrow if these measurements are correct LOL!!!!
 

Attachments

  • 20250309_141601_064036.jpg
    20250309_141601_064036.jpg
    968.5 KB · Views: 71
  • 20250309_151527_064129.jpg
    20250309_151527_064129.jpg
    802.3 KB · Views: 100
OP
P

PWC Repair

Well-known member
Joined
Dec 27, 2012
Messages
3,189
Location
Arkansas
I made a million more cuts to "let in" the rim boards into the posts. And we got those HEAVY bastids set up today!
 

Attachments

  • 20250310_171626_093515.jpg
    20250310_171626_093515.jpg
    700.7 KB · Views: 81
  • 20250310_181302_093423.jpg
    20250310_181302_093423.jpg
    950.8 KB · Views: 81
  • 20250310_181104_093601.jpg
    20250310_181104_093601.jpg
    839.9 KB · Views: 96
OP
P

PWC Repair

Well-known member
Joined
Dec 27, 2012
Messages
3,189
Location
Arkansas
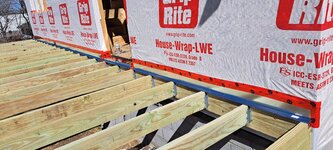
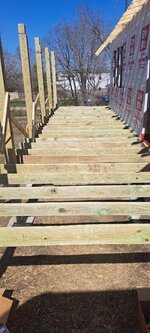
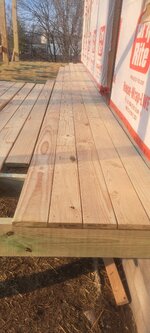
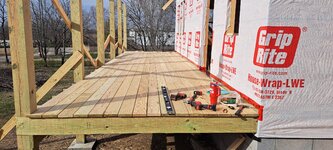
We sifted through the stack of deck boards until we found enough that weren't crooked. We finished putting in joists, flashed it to the house, then we started putting down the decking today.
 

Attachments

  • 20250311_143006_070539.jpg
    20250311_143006_070539.jpg
    853 KB · Views: 70
  • 20250311_132338_070428.jpg
    20250311_132338_070428.jpg
    893.1 KB · Views: 65
  • 20250311_174126_070626.jpg
    20250311_174126_070626.jpg
    734.6 KB · Views: 81
OP
P

PWC Repair

Well-known member
Joined
Dec 27, 2012
Messages
3,189
Location
Arkansas
My wife has been the "cut woman" for the deck. We put a long day in and it's pretty much finito! It's 30x8........and dealing with the decking that's not the same size between any 2 boards has NOT been fun. I'd just make about 3 rows, then snap a chalk line and try to keep a semi straight consistency.
 

Attachments

  • 20250312_162943_055609.jpg
    20250312_162943_055609.jpg
    922.9 KB · Views: 70
To avoid these ads, REGISTER NOW!
Top Bottom