To avoid these ads, REGISTER NOW!

Between 485 & 705 SQ/FT The What Hut V3.0 along with some house updates eventually.

Workspaces between 485 and 705 squarefeet.
OP
P

PhantomEB

Well-known member
Joined
Feb 6, 2006
Messages
6,821
Location
Medicine Hat, AB, Canuckistan
D6076CFE-C253-42A6-81E9-0AE2E089AB84.jpeg

lengthened the power feed wires and swapped out the 15 amp fuses for 20s then put the 15s in the fuse box. Way easier to trouble shoot a blown fuse in the auxiliary fuse box on the passenger footwell. Don’t know why I didn’t just eliminate the fuses off the switch panel…..another time I guess.

time to wire the sniper to this panel so I have a kill switch to that system as well my light bar.
4751D587-07B3-4A03-9A74-FB7FA92CF510.jpeg
added in a little 5/16” bolt thats wired to the aux fuse box, ground side for an easy place to ground my trouble shooting light. Will be putting in a couple more. One kitty corner up by the drivers side head light and one on each side of the the Center console inside.

now also waiting on a shorter leak free oil line and longer serpentine belt. No way a belt shold need me to be a contortionist just to get it on!
 
To avoid these ads, REGISTER NOW!
OP
P

PhantomEB

Well-known member
Joined
Feb 6, 2006
Messages
6,821
Location
Medicine Hat, AB, Canuckistan
Wasn’t in my garage much this weekend but did get a kill switch wired in for my Sniper and ignition switch wired in but not to the starter yet.

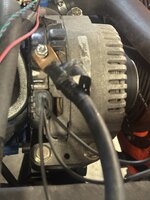
jumped over to my alternator too…..

to figure out my new alternator, every specs I find show colored wires out of the pigtail….mine are all black.

so far the cable off the lug goes to a starter solenoid then down to the starter and back to the battery.

the top wire goes to the electrical system.

is this right for these two? I am only getting 11.89 volts off the lugB7EF1E0D-15A5-497D-9E1B-219ACBE3CA22.jpeg
 
OP
P

PhantomEB

Well-known member
Joined
Feb 6, 2006
Messages
6,821
Location
Medicine Hat, AB, Canuckistan
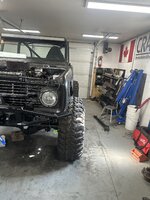
Took a step back from the bronco as she’s not gonna be ready for the spring trip this year (getting close though).

cleaned out the trailer of unnecessary **** thrown in this winter…. Then put a lot of camping gear from the garage accumulated this winter too…

then did a major clean up.1AB99B7B-E0FC-4AA8-B952-DA0777CC3DD2.jpeg

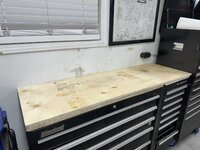
time to put this back into a side work bench again.

F675546A-5CE0-4913-8BC7-E8AC9D353645.jpeg

this summer after the resheeting of the lower walls with 1/2” plywood and painting of the whole garage once more holes are filled I plan to add more outlets via extension boxes and conduit Down both sides.
 
OP
P

PhantomEB

Well-known member
Joined
Feb 6, 2006
Messages
6,821
Location
Medicine Hat, AB, Canuckistan
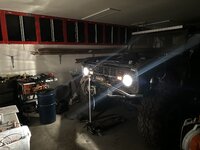
With the ability to do way more work outside, I shoved the bronco over 2 feet until the garage door opener linkage was within 2” of the cage.

been looking a lot of the half assed wiring harness with a beer or 4 and have decided to go with a bronco specific wiring harness that will have new proper pigtails and switches.

brakes are my main focus now When I get some down time from work.

52C801ED-B3EA-4385-8F60-8BB1B25A2469.jpeg
 
OP
P

PhantomEB

Well-known member
Joined
Feb 6, 2006
Messages
6,821
Location
Medicine Hat, AB, Canuckistan
Might be time to bring back this thread more often.

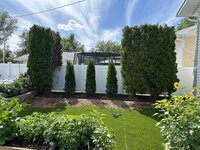
better half got a shed assembled for her garden ‘****’ (wasn’t fun hitting up Home Depot 3 times that day). Also have a solar flood light to mount above the door so if anyone on the very minimal whim, then we will know! More so I wanted this as eventually I plan to put a camper on the carport next to the trailer.

then I built a new wood rack to move the wood closer to our fire pit area. Buddy is to bring over tin to keep the snow off wood but I may also get Canvas Unlimited to make us a curtain for the front.D6B6D380-7DC5-49CB-9C76-10D2C6A09252.jpeg
 
OP
P

PhantomEB

Well-known member
Joined
Feb 6, 2006
Messages
6,821
Location
Medicine Hat, AB, Canuckistan
58B6E48E-AE2D-494D-887E-A90C3BC38196.jpeg

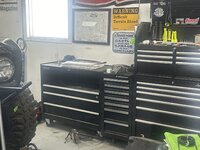
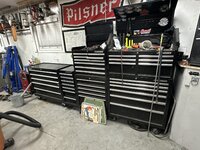
all a work in progress, this tool box corner now has plans for A red roller cabinet with one or two intermediate boxes to go in along with my first ever high school box to go onto in place of the black top and bottom which will slide all my black boxes down 27” along the wall and room to put a side work bench again.
1642E2E2-DD24-4135-8DF2-D213F318076F.jpeg

ditched my steel rack in favor of less floor space taking of 5 gallon pails and milk crates. Mountain bike got hung up on a ceiling lift. Chainsaws hung until I figure out which can live where.


D550824D-D4F0-406F-A63A-FCE9F7F88E8C.jpeg

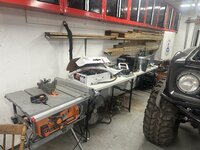
brought home my table saw for spring projects as well started stock piling wood as well Up on the wall. Tables brought out from trailer and said get all your bronco parts out on there for your down time. It’s gonna be GO TIME soon!
44842736-87D5-4779-BBEB-1569AB545A3F.jpeg
wanted my main bench a lot more cleaner for diagrams and notes.
 
OP
P

PhantomEB

Well-known member
Joined
Feb 6, 2006
Messages
6,821
Location
Medicine Hat, AB, Canuckistan
Now before the next update will happen here I am to undergo double cochlear implant surgery then some recovery time

but with two months off I plan to get this bronco mobile with only small stuff to build/do.

along with at least resilicone my shower unit and paint the basement bathroom in two shades of grey and replace the cabinet doors with white smooth melamine ones.

also I gonna maybe paint the OLD paneling in the laundry room up a brighter color as well replace the cabinet doors with white ones here too. But she don’t know I also intend to put up shelving here to get the toiletries consummables out of the cold room and up in the laundry room.

when I put those shelves up I have hid some grow lights and will do some wire racking on two adjacent 6-8’ walls for her to start up her garden seeds on for farther along planting in the spring. Biggest surprise will be some sort of old school X legs being built by me for a 6’ long butcher block top to go on for doing her repotting. This table will have a groove routered in around the perimeter to slow down any spillage.

yep lots of things to do but shouldn’t cost me most of my savings.
 
OP
P

PhantomEB

Well-known member
Joined
Feb 6, 2006
Messages
6,821
Location
Medicine Hat, AB, Canuckistan
First time.

Turn 50 in January so with my current pretty good health and always active I can see another 25 years easy but I am maxed out on any real improvements with hearing so time to go an alternative route which will really involve relearning speech and sounds. I am so dependent on lip reading as is.
 

mike93lx

ALLIANCE MEMBER
Joined
Dec 9, 2013
Messages
37,950
Location
Richmond, VA
First time.

Turn 50 in January so with my current pretty good health and always active I can see another 25 years easy but I am maxed out on any real improvements with hearing so time to go an alternative route which will really involve relearning speech and sounds. I am so dependent on lip reading as is.
That's got to be a crazy combo of excitement and fear. Hopefully it's awesome
 
OP
P

PhantomEB

Well-known member
Joined
Feb 6, 2006
Messages
6,821
Location
Medicine Hat, AB, Canuckistan
More excitement for me, I have never had surgery before any more than some stitches or a one severely busted up knuckle. Fear won’t be present until I hit the table I think, thank god for drugs!
 
OP
P

PhantomEB

Well-known member
Joined
Feb 6, 2006
Messages
6,821
Location
Medicine Hat, AB, Canuckistan
2B5F5D39-91FF-46F2-877E-480A14A433C7.jpeg

now to recuperate after an 8 hr surgery. Everyone has said well least they didn’t cut out the smart *** part!

now home on the couch watching CNN on you peoples electio, I know who I hoping wins!
 
OP
P

PhantomEB

Well-known member
Joined
Feb 6, 2006
Messages
6,821
Location
Medicine Hat, AB, Canuckistan
19EA7E87-D7A6-4F5D-9E70-1FAB3BDBCD5D.jpeg


09B530BF-4511-4696-8D9F-FC9325277485.jpeg
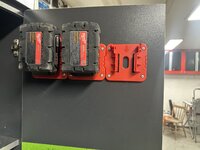
hated my batteries being at the back of the cabinet under their respective chargers behind a bunch of junk.

decided I wanted this cabinet to be a little more useful for when I am working on things so hence 14$ CDN Amazon I got 5 battery holders to mount on the door right where I need them. Now I need to get 2-3 more batteries lol but that will wait til new year as who knows what the rents will get for me.

Ridgid ones have to go back as they did not fit my batteries.

stereo went back into the cabinet too to stay clean as well since I rarely take the radio off of 102.1 classic rock.

now to move more day to day and annual maintenance stuff into that cabinet.
 
OP
P

PhantomEB

Well-known member
Joined
Feb 6, 2006
Messages
6,821
Location
Medicine Hat, AB, Canuckistan
told the better half I need to go to staples to send these wrong battery holders back to Amazon(hope the new ones come on Wednesday are the right ones and get those off my bench…..

then….

Then hit up some big box stores and grabbed me a small can of paint in the shade of ‘Concrete’ for my compressor cabinet.

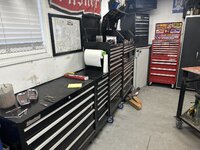
came home painted it and put door back on, welding extension cord now sits on the inside, not the outside. Put tool boxes back where they belong.

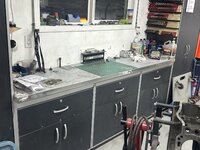
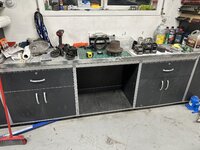
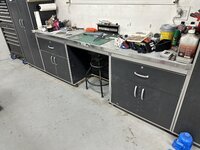
then decided to move a drawer since one was broken thru on the bottom, it was just too deep for any thing where it sat.…removed two shelves and a drawer along with all hardware. Now I got me a sitting spot at a workbench which will help keep it cleaner of clutter.

7186B8EA-4CB6-4ADF-8D9C-B319146760EA.jpeg0C8FBB57-2023-4A35-9EB9-F228CB8BD7B9.jpeg12B909CE-7AD9-4C0A-A387-6F1D6A18128B.jpeg620D5E55-E073-4AD6-A655-599CC33D0132.jpeg
 
OP
P

PhantomEB

Well-known member
Joined
Feb 6, 2006
Messages
6,821
Location
Medicine Hat, AB, Canuckistan
You know the saying, a clean shop is the sign of a sick mind. Well I must be going towards Clinically Insane from Netflix.

went out into the garage and started moving more stuff around and cleaning up behind it while I was at it. Ended with one clean ‘cleaning stuff‘ corner. Even made a little shelf for pressure washer detergents but I am sure after decluttering some more cabinets, the detergents will find a home up in one of them.

what’s gonna happen when this bronco is done…..oh yeah I got to do a VW Bug for her 50th. I farming a lot of that one out though.1837A1DB-27F6-4DC9-80A7-1DD2E4347013.jpeg
 
OP
P

PhantomEB

Well-known member
Joined
Feb 6, 2006
Messages
6,821
Location
Medicine Hat, AB, Canuckistan
Finally some bronco **** to add to this thread.

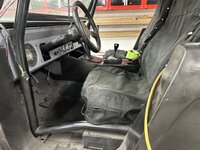
Center console modified for heater box coverage (I rather go thru and add in little details for when people see this truck for the first time) then mocked up in between the seats along with shifters to see how it all played out. Behind the grille in the front half of the console sits my cab heater box. Still need to figure out something for behind the dash to push up enough heat to defrost the windshield. Thinking something along the lines of a 12v deal to stick up there that I could plumb in vents to the stock defroster ducts up.

this truck has become fun to work on all of a sudden.

8120C58F-30A1-4871-BBB9-2131E7E953D3.jpeg

A37279B7-742B-4C8A-9345-1F20F581D48B.jpeg

EC14689B-C2B5-4449-A9CC-ECC8494D6010.jpeg
 
To avoid these ads, REGISTER NOW!
OP
P

PhantomEB

Well-known member
Joined
Feb 6, 2006
Messages
6,821
Location
Medicine Hat, AB, Canuckistan
If anyone needs to rewire their vehicle, and American AutoWorks has a specific kit for your vehicle lIke they do for the 66-77 Bronco…..HIGHLY RECOMMENDED!

started last night around dinner time…..by time I shut it down around 8:30 most of the engine compartment was rough wired and headlight portions laid out, need to think if I need to do the old bronco upgrade harness or will this kit and LED headlights be all I need. Think I will go with the latter and see how it plays out.

Today will be those headlight portions and run the power wire to the kit from battery.

Hellbent on not only having this thing running by Christmas…..I very well could just go after ignition and charging, I gonna aim for wiring is done, just need this and that upgrade.

no longer is it ‘oh I am dabbling in the wiring’ when I get back To work.
 
OP
P

PhantomEB

Well-known member
Joined
Feb 6, 2006
Messages
6,821
Location
Medicine Hat, AB, Canuckistan
E7BB78C0-BB05-434A-9AE5-9719F9F69FC3.jpeg
Solid day on the bronco laying out sections, pulling out wires that aint even connected to the corresponding plug to be added in if need be Then added em in anyways.

my brother is like why, a dome light? You got a 200w light bar on the top of the windshield! Why a third brake light? I replied uhmmm who’s been known to have TRIED to drive over my tent WHILE I was in it?

Everything is just rough wired (no solder), in case of movement or it dont work when I put power to it all when this phase is done. Then move onto the Sniper rewire.

Engine Compartment just needs a Nuetral Safety /back up light switch purchased and installed.

Headlights and front marker lights roughed in (Need two new bulbs, may just go halogen for now but will get LEDs eventually).

Rear Body strung out, may wait til welding on the frame is done

Started on under dash, with the head light switch plug located and connected to the new switch. Need NOS switch bezels for the few ones I will use.

I damn well should have a truck running and all lights working by time I think my mother and sister will be over for Christmas.

Then I be able to focus on the small nickel and dime **** all while back on my path of strengthening my credit score.
 
OP
P

PhantomEB

Well-known member
Joined
Feb 6, 2006
Messages
6,821
Location
Medicine Hat, AB, Canuckistan
Waiting on payday to start on my side work bench, plans are to extend 220 to here as well 110 and air. butcher block top. cant wait to clean up some more metal in the back corner so I can shove my engine crane back farther.

DD6ECED6-BFFA-41BA-8718-A8F45E05B78E.jpeg

waiting on Home Depot receive my bottom red box that my 27” top box from the Early 9Os will sit on, amd will fit in That spot at the front.
 

drivesitfar

Well-known member
Joined
Oct 23, 2013
Messages
36,075
Location
Pacific Northwest
I'm looking for a few good threads to follow and since I always have enjoyed your posts on other member's threads I thought I'd try to catch up on your doings and not only see what I could learn, but maybe help occasionally too.

have a great day!!
 
OP
P

PhantomEB

Well-known member
Joined
Feb 6, 2006
Messages
6,821
Location
Medicine Hat, AB, Canuckistan
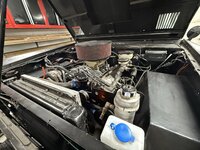
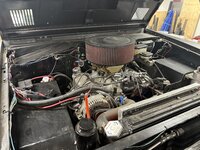
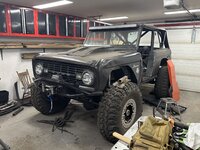
Bronco now runs on her own. Starts and shuts off by key. Electric fan isn’t hooked up yet but she’s managed to get up to 200*F, 65 lbs of pressure and 13.7 volts.

So in between call outs over the weekend, I managed to get the engine compartment cleaned up with wire modifications and into loom then the pretty lady helped me get the hood on.
AF6505EB-8D8F-48EE-844D-C6D86A366DB2.jpeg
8E76F622-FB16-41B4-A248-6316E689C065.jpeg2063635D-7D95-4A10-9DCB-9AB969D8FC61.jpeg
 
OP
P

PhantomEB

Well-known member
Joined
Feb 6, 2006
Messages
6,821
Location
Medicine Hat, AB, Canuckistan
Off on some other endeavours that if prove to be fruitful will allow me to get new tires on her CRV so I can get hers out of the garage….hell the weather is cooperating pretty good this year that I could punt them back outside.
 
OP
P

PhantomEB

Well-known member
Joined
Feb 6, 2006
Messages
6,821
Location
Medicine Hat, AB, Canuckistan
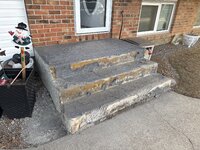
We happier with this small but huge detail…

4000$ to remove and replace this……then add in railing etc…..

3E8BA954-957A-4504-9ED0-03C70EB6A36D.jpeg

or 350$ so far and add in added curb appeal for using Wood Over the concrete instead. Need to get 6” aluminum angle iron for the roof to divert snow when snowmelt comes around Next winter.

told the wife a pair of half JD barrels flanking it plus she can now hang planters off the side too.
still some work to do and she’s got to pick out a shade of brown for the stain.

CC811D4E-0128-4284-9F52-EC66621D2469.jpeg
 

mike93lx

ALLIANCE MEMBER
Joined
Dec 9, 2013
Messages
37,950
Location
Richmond, VA
We happier with this small but huge detail…

4000$ to remove and replace this……then add in railing etc…..

3E8BA954-957A-4504-9ED0-03C70EB6A36D.jpeg

or 350$ so far and add in added curb appeal for using Wood Over the concrete instead. Need to get 6” aluminum angle iron for the roof to divert snow when snowmelt comes around Next winter.

told the wife a pair of half JD barrels flanking it plus she can now hang planters off the side too.
still some work to do and she’s got to pick out a shade of brown for the stain.

CC811D4E-0128-4284-9F52-EC66621D2469.jpeg
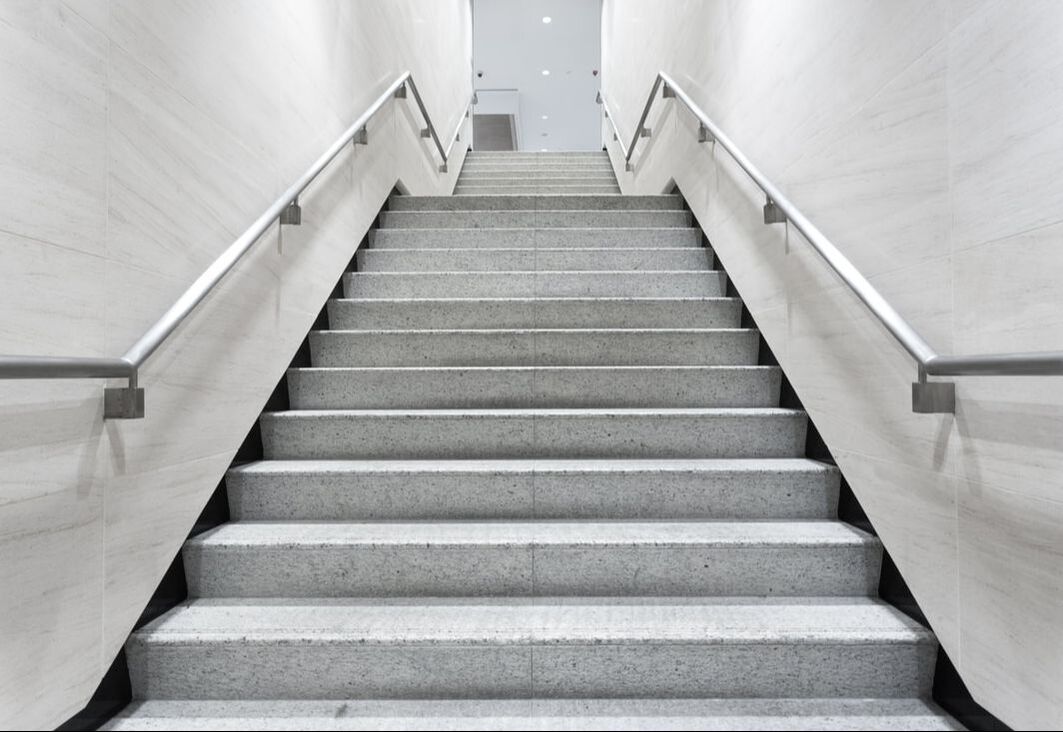
What's up with the bottom step? Looks lower rise and deeper tread than all the rest
 
OP
P

PhantomEB

Well-known member
Joined
Feb 6, 2006
Messages
6,821
Location
Medicine Hat, AB, Canuckistan
Yup. Had to deal with a taller rise on the first one if I hadnt just whipped out the lowest one. I originally wanted deeper tread if I went concrete.

works anyways for us as most of our visitors are our senior parents.
 

mike93lx

ALLIANCE MEMBER
Joined
Dec 9, 2013
Messages
37,950
Location
Richmond, VA
Yup. Had to deal with a taller rise on the first one if I hadnt just whipped out the lowest one. I originally wanted deeper tread if I went concrete.

works anyways for us as most of our visitors are our senior parents.
Varying heights and depths are a trip hazard. They really should be consistent

Especially for the elderly
 

mike93lx

ALLIANCE MEMBER
Joined
Dec 9, 2013
Messages
37,950
Location
Richmond, VA
Gotcha there. It’s still in the adjustability stage so I can still change it up and split the difference on that lowest one.

this is what I like about GJ…..we all here to help each other out with advice and spend each other’s money.
I'd read through this


Stair Treads and Risers (R311.7.5)
For projects falling under the IRC, the minimum tread depth is 10 inches, plus a required nosing of at least ¾ inch. If a tread of at least 11 inches is provided, there is no required nosing. The maximum permitted nosing is 1.25 inches. In any stairway, the tread depth and nosing depth have a maximum permitted variation of ⅜ inch. Note that under the IRC, the tread depth is measured horizontally between the vertical planes of the foremost projection of adjacent treads and at a right angle to the tread's leading edge.

The maximum riser height is 7.75 inches, with a similar maximum permitted variation of ⅜ inch in any single stairway. Risers must be vertical or have a maximum slope of 30 degrees from vertical.
 
OP
P

PhantomEB

Well-known member
Joined
Feb 6, 2006
Messages
6,821
Location
Medicine Hat, AB, Canuckistan
Buddy’s wife blew up at me so said don’t need to owe favors no more as I know buddy wouldn’t give two rats ***.

Got my flatdeck off their property and with in my confines of my gravel pad. Now I have both of my trailers home to do all the little things to them.

it’s tight with the diesel but I am sure Bronco will make it look easy with just the spare tire to be a blind spot as it’s 4’ shorter easy. Camper when it comes will be stored at a RV storage lot on my way home from work, make it easy on myself. Take truck to work, slide it under on camper then hooked up to either trailer at home after pulled out with bronco then load up a toy.

510987F2-2905-41CC-8504-CF046381F8E2.jpeg
 

drivesitfar

Well-known member
Joined
Oct 23, 2013
Messages
36,075
Location
Pacific Northwest
I had to sell my big flatbed cause my bride didn’t want it sitting in front of our house. It also wasn’t smoother I used it even needed but it was sure nice to have at the ready if I needed to haul something 20 foot long.

Space is always less than ideal for all of us but sounds like you’ve got it figured out for now.
 
To avoid these ads, REGISTER NOW!
Top Bottom