To avoid these ads, REGISTER NOW!

Above 1200 Sq/FT Overcoming Good-Deal-Itis One Project at a Time

Wokspaces above 1200 squarefeet.
To avoid these ads, REGISTER NOW!

zmotorsports

ALLIANCE MEMBER
Joined
Oct 20, 2009
Messages
21,477
Location
Northern Utah
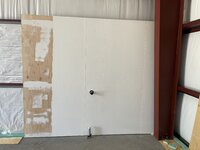
It took them till almost 8:00 last night, but they got it done!5057EC0F-B342-40C9-A436-DBA15A8EE8E7.jpeg
Doors look great and the LiftMaster openers are so smooth and quiet! So happy and relieved to have the shop finally dried in and my wife and I can start on the inside build.
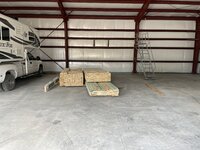
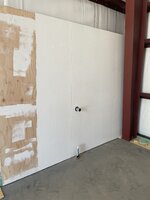
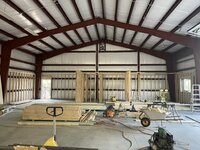
How the inside looks now….
839C9188-D94A-4720-B93D-599CFD5BE56A.jpeg
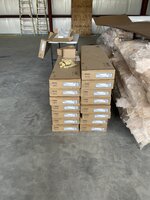
Contractor is having the inner building materials delivered sometime next week after Memorial Day. Over the weekend I’m going to get these installed…

My superhuman wife and I hand loaded 36 of these Versa-Lock cap blocks at the local block plant. We’re going to place them at all the man doors as landings to pass code temporarily until we can afford to do our apron pour. Those blocks weigh about 70 lbs each. I was wore out, good thing she’s tougher than I am!

Dayum Sterling. That thing is freakin' HUGE. Dwarfs your truck and camper. Looks fantastic and turning out great. Happy to see the progress and to hear it's dried in and you can begin the next phase.
 
OP
S

SilverJimmy

Well-known member
Joined
Apr 14, 2012
Messages
1,688
Location
Prescott/Flagstaff, AZ
Thanks Mike! Your shop build was the first one I saw that had a 50’ depth instead of the usual 30’-40’ depth. My existing shop is 40’ deep, and that depth is such a waste of space. Too deep for one vehicle and not deep enough for two. Very frustrating when I realized I would have been better off with a narrower but deeper shop than what I had. Very important detail if you are actually wanting to work in a shop instead of just using it for parking cars!
 

zmotorsports

ALLIANCE MEMBER
Joined
Oct 20, 2009
Messages
21,477
Location
Northern Utah
Thanks Mike! Your shop build was the first one I saw that had a 50’ depth instead of the usual 30’-40’ depth. My existing shop is 40’ deep, and that depth is such a waste of space. Too deep for one vehicle and not deep enough for two. Very frustrating when I realized I would have been better off with a narrower but deeper shop than what I had. Very important detail if you are actually wanting to work in a shop instead of just using it for parking cars!

Same here Sterling, I hadn't seen many 50' deep shops, around here they are either 36', 40' or then jump up to 60' deep, but after working in my previous shop at 34' deep for 25+ years it suited the space fine for a single vehicle depth wise, I wanted to be able to get 2-deep for those few times it would be necessary. While designing my new shop and running some tape measures plus accounting for workbench depth, I opted for the 50' depth and 60' width to try to maximize usage. So far I am still pleased with my decision. I think you will like the 50' deep workspace.
 
OP
S

SilverJimmy

Well-known member
Joined
Apr 14, 2012
Messages
1,688
Location
Prescott/Flagstaff, AZ
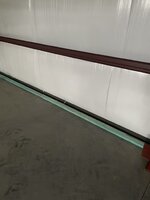
My wife and I have been busy doing projects in the shop that we can do and not ones that we can afford to pay professionals to do. The building crew left a couple cases of this Sika elastomeric tape caulk in the trash pile…61F1E615-ACB7-4821-A933-3EE6DAFCF73D.jpeg0BA928F3-2155-488A-B34F-FC92D6ACADE4.jpeg
Not wanting to waste that material I figured we should put it to use. I’ve been seeing ants and other small insects crawling inside the shop from under the base trim moulding, so maybe we can slow them down a bit! This stuff is really sticky, once it gets stuck you have to use a putty knife to get it back up. Crawled around on our knees and rolled and pressed it onto the edge of the trim and the concrete, even around a couple vertical posts that might allow bugs into my world!
D5E403DA-0D96-4139-9EF9-6BAE90FD8939.jpeg65EE01A9-3D49-4F85-A933-3D1EC4C4FBC9.jpeg
After that was done we installed all the pressure treated 2x4 boards for the 4x8 3/4” T&G plywood to get screwed to. Used subfloor glue and 1/4” TapCons screwed into the slab to make sure they never move!
A831182D-B21A-486B-896C-686645E252CE.jpeg
697520B5-A2C1-4B6C-8D68-8DF586EDF8E2.jpeg
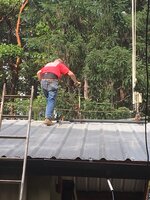
After two laps around the shop on our knees (600’) I’m thinking we should have bought some knee pads. I‘ll be 64 next month and I’m not sore today, so I thank my father for giving me great genes! Here he is 6 month before he passed from mesothelioma up on the roof of his building he built by himself. He was 81 years old and an avid HAM. He was moving to Arizona and was taking down his antenna off the roof of the building. I tried to get him to let me do it but he said I’d fall off the roof and die!02F3A210-C455-456B-8359-D31C9F0FD080.jpeg
After he passed I tossed that cheap ladder into the aluminum recycling bin! LOL!
 
OP
S

SilverJimmy

Well-known member
Joined
Apr 14, 2012
Messages
1,688
Location
Prescott/Flagstaff, AZ
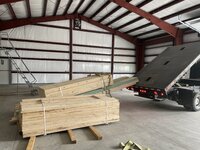
The material for the inside build got delivered today. Guy shows up with a dump flatbed truck cuz they thought they were delivering outside. Used a bunch of cribbing from the metal building and got it unloaded without damage.397C9DDF-5B09-4CC0-A952-9B4ACDBAF9F4.jpeg
F02D266A-5B75-4CB0-AF83-EDA61621DC03.jpeg73A12DB7-FDC6-4452-BE31-E6C9D1E07B26.jpeg
Right where it needs to be, 10’ away from the last bay where the build will be. Contractor and I decided that we can upgrade the rooms to a 9’ ceiling height and still have over 6’ at the eave end of the mezzanine area and 16’ at the peak! Little extra $$$ but will make every room better and more useable.
 
OP
S

SilverJimmy

Well-known member
Joined
Apr 14, 2012
Messages
1,688
Location
Prescott/Flagstaff, AZ
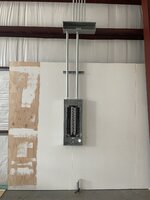
Got the first couple sheets of the 3/4” T&G plywood installed last night. Had to get these up so that the electricians can get the main panel mounted and start running EMT overhead.E9013E0C-6B61-4A0F-83F2-BD0D8750D054.jpegF10DFA66-03A2-48B8-B005-22DB76812AEA.jpeg
Really liking how these look and with them being T&G they’re really solid even though I’m only screwing them down in 3 places on 16” centers. I’ll be able to mount pretty much anything I want on these walls anywhere I want! I’m using scrap 3/8” plywood to space the 3/4” up off the concrete but I am thinking I might install some of that rubber wall cove base so in the future I can hose out my shop and not soak the walls. Anybody have any experience with that stuff?
Thanks again for following along on my build, so much more to come!
 

signcrafter

Well-known member
Joined
May 9, 2012
Messages
12,523
You talking about vinyl cove base? If so I've done a ton in restaurant builds. Pretty easy to work with and makes a pretty good seal at the floor. They make different grades of it and the higher the grade the easier it is to work with. Buy the rolls and not the 4' strips. If you have a trash can wheel base for the rubbermaid trash cans it works great to set the roll on and be able to wheel the roll around to unwind it. Use the big caulk tubes of the glue for it and the special nozzle tips for the glue that has 8 or so holes in the end to apply the glue to the vinyl. When you place it on the wall kind of roll it by starting the top edge just a bit lower then where it will be and then push the bottom in. This keep the glue from squeezing out the top as much as possible and also gets a nice tight seal on the floor. You want to flex that bottom flap and it will stay tight to the floor. It comes at maybe 45 degree angle and if you just push it onto the wall it doesn't seal the best to the floor. When you flex it more towards a 90 degree angle it kind of acts like a spring to force that bottom flap down tight. You will see what I mean when you do it. For corners get one of these, https://www.amazon.com/Cove-Base-Gouger-Groover-Cutter/dp/B0083IWR0M/?tag=atomicindus08-20. You mark your corner and then groove out the backside to allow it to bend easy and make a tight corner. There is some learning curve to this so practice on a small scrap before trying a corner on a long run. Should be some youtube videos out there to show you how to do it. I also use a heat gun to make the corners more flexible and make tight bends. When you stick it to the wall use one of these to roll it, https://www.amazon.com/ROBERTS-10-964-Vinyl-Roller-Black/dp/B0CCSVKFB4/?tag=atomicindus08-20. It spreads the glue out on the back and makes it stick really really good. I have ran a bead of clear silicone on the edge at the floor also, not sure if it is needed or helps or not but if I know it's going to be getting wet a lot I will do that.
 
OP
S

SilverJimmy

Well-known member
Joined
Apr 14, 2012
Messages
1,688
Location
Prescott/Flagstaff, AZ
Started to think about what’s next and then realized that when the electricians install the panel and run the EMT overhead I probably will hate life trying to paint around that snakes nest. So the wife and I painted the wall today with the paint I’m using, Behr Ultra White Hi-Gloss Enamel, two coats to cover.
C609B4A0-9BE8-42D5-89B2-9B70D3DCA1D7.jpeg
This is the same paint I used on my Over-Kill shelves I built at the old house and it’s held up great and isn’t overly expensive.
Painted the area that would get stuff mounted on and over, even just these two sheets painted seems to have brightened up this corner!
E0E21BB1-2939-4E11-9C7D-6F714200931B.jpeg
672D9A8A-576C-4E5C-A25D-2065BEA808C1.jpeg
Two and a half sheets done, only 37 more to go!
 
OP
S

SilverJimmy

Well-known member
Joined
Apr 14, 2012
Messages
1,688
Location
Prescott/Flagstaff, AZ
I actually picked up a 5 gallon pail of Kilz primer to do a base coat on the majority of these sheets but on these I just did what I’ve done before, two coats. Hopefully the primer will allow me to just do one cover coat and be able to save some loot on this build!
 

legenddc

Well-known member
Joined
Aug 19, 2012
Messages
1,076
If you're not already a Pro at Home Depot you should sign up for it. Eventually you get discounts on paint and possible some rewards if you spend enough.
 
OP
S

SilverJimmy

Well-known member
Joined
Apr 14, 2012
Messages
1,688
Location
Prescott/Flagstaff, AZ
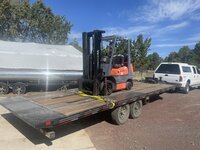
A buddy loaned me his tilt bed trailer so I loaded up my 1998 Toyota Forklift to take it down to have the vertical mast resealed and a bunch of hydraulic hoses replaced.
B1DE595B-8AFD-4A8A-ADBE-13679C1D1C61.jpeg
This is the forklift another buddy gave me cuz it was junk and wasn’t worth fixing. I fixed it back in January 2024 for less than $200.00! I’m hoping that the mast and hoses will be less than 1K to fix, just want it to work and not leak all over my new shop! Hauled it down to Paulden to the forklift Dr. for a bit of attention. First thing he said was that he could feel an ignition miss, that it should be running a lot smoother and have more power…
I’m thinking I’m at the right place!
 
OP
S

SilverJimmy

Well-known member
Joined
Apr 14, 2012
Messages
1,688
Location
Prescott/Flagstaff, AZ
The forklift guy said that these Toyota 4Y motors are so forgiving that they’ll actually still run with the timing almost 180 out! I don’t think I have a compression problem because it doesn’t smoke at all and if the rings were gone or the bore was compromised it would be getting oil into the combustion chamber. Having said all that, it still runs good enough for what I need it to do.
My other forklift, a 1987 Toyota 3FG-15, it smokes like a freight train! I bought it at an auction 25 years ago and it smoked then and I used it almost daily for 20 years. There is something about Toyota durability as I haven’t really been nice to it, I just fire it up and get to work. I only recall having changed the oil in it maybe 3 times in all those years. Yup, I’m not Mike @zmotorsports!
 

LXCam

ALLIANCE MEMBER
Joined
Apr 23, 2013
Messages
19,205
Location
AZ
I’m got that same one at the shop. I can fully attest to the fact you can abuse the **** out of it and it just takes it.

I would offer one piece of advice. While it’s at the shop have them drop a radiator in it. Mines rotten out and needs to be replaced. Problem I got is I need a forklift to lift the counter weight off it to replace it 🙄
 
To avoid these ads, REGISTER NOW!
OP
S

SilverJimmy

Well-known member
Joined
Apr 14, 2012
Messages
1,688
Location
Prescott/Flagstaff, AZ
I’m got that same one at the shop. I can fully attest to the fact you can abuse the **** out of it and it just takes it.

I would offer one piece of advice. While it’s at the shop have them drop a radiator in it. Mines rotten out and needs to be replaced. Problem I got is I need a forklift to lift the counter weight off it to replace it 🙄
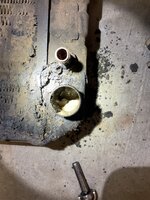
When I replaced the head gasket I had to clean out all the stop leak some master mechanic used trying to “repair” the engine.
FA6FB89D-A4F5-416F-890E-4063509DFFCB.jpeg
Took the radiator to an old customer who does radiator repair. He boiled out the core, steam cleaned the outside, and then pressure tested it. He gave it a clean bill of health. Engine runs nice and cool with no leaks! Only issue that I have with how the lift runs is that after it runs for over 10 minutes or more it doesn’t like to restart. I think it’s a propane fuel issue, like maybe the vaporizer is needing adjustment. One of the reasons I took it to a professional!
 

LXCam

ALLIANCE MEMBER
Joined
Apr 23, 2013
Messages
19,205
Location
AZ
When I replaced the head gasket I had to clean out all the stop leak some master mechanic used trying to “repair” the engine.
FA6FB89D-A4F5-416F-890E-4063509DFFCB.jpeg
Took the radiator to an old customer who does radiator repair. He boiled out the core, steam cleaned the outside, and then pressure tested it. He gave it a clean bill of health. Engine runs nice and cool with no leaks! Only issue that I have with how the lift runs is that after it runs for over 10 minutes or more it doesn’t like to restart. I think it’s a propane fuel issue, like maybe the vaporizer is needing adjustment. One of the reasons I took it to a professional!
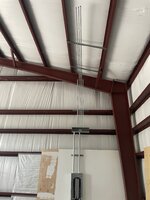
I have that same starting issue when the bottle gets too hot. So I have one major rule at the shop, never park it outside in the summer. Plus it helps I keep my spare tank in the shop.
 
OP
S

SilverJimmy

Well-known member
Joined
Apr 14, 2012
Messages
1,688
Location
Prescott/Flagstaff, AZ
Is your forklift like my 98 or my 87? On the 98 the radiator comes right out without pulling the counterweight. I’d have to look at my 87 to be sure, but that radiator does seem buried!
 

LXCam

ALLIANCE MEMBER
Joined
Apr 23, 2013
Messages
19,205
Location
AZ
I don’t remember but I’m pretty sure it’s 2003. But I do know there’s not a chance in hell it’s coming out without removing the counter weight.
 
OP
S

SilverJimmy

Well-known member
Joined
Apr 14, 2012
Messages
1,688
Location
Prescott/Flagstaff, AZ
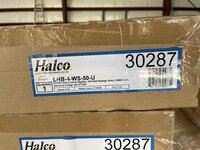
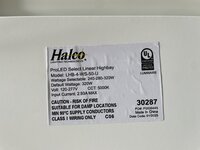
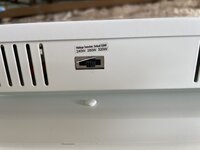
Electricians brought the lights over today. I went with their recommendation as it’s the same as the install they did in my friends shop a couple years ago, just with better lights. Going with 4 of these per each bay 16’ off the floor.
9C3F81A7-D755-46FA-B882-DFD7DBF9A634.jpeg86C020E0-2500-4F9D-A3A0-EB2C4526414E.jpeg897963C7-D1C0-4C27-9C8E-5C45B0309A96.jpeg7FB16834-74B6-4A33-97B3-9755DBF5680B.jpegECF4B92A-E628-4E0D-BF6A-4996C7206F2E.jpeg
Got two of them hung and wired up and then ran an old extension cord to light them up, DAMN! They’re bright! And not a lot of shadows either!
69BCD712-CF83-4401-9210-95ACDECE569C.jpeg
883BD11A-5696-4AE9-8A67-CAB2D18D4F41.jpeg48728DA6-36ED-4AFB-9F59-894C751A1E98.jpeg
I’m going to have to wear shades when all 16 are lit! These guys are real craftsmen, the conduit is like artwork!
 

zmotorsports

ALLIANCE MEMBER
Joined
Oct 20, 2009
Messages
21,477
Location
Northern Utah
Looks great Sterling. :thumbup:

I too went a bit overkill on lighting in my shop. I have just over 100 ft/candles to the workbench surfaces. The contractor told me it was like an operating room, I took that as a compliment. Even though I had pretty good lighting (fluorescent) in my last shop, I wanted extremely good lighting in this shop as I don't like using drop lights for every job.

I think you will be pleased.
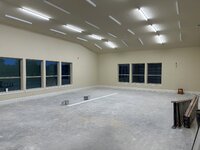
 

fouckhest

Well-known member
Joined
Jul 24, 2013
Messages
1,871
Location
Greer, SC
Looks great Sterling. :thumbup:

I too went a bit overkill on lighting in my shop. I have just over 100 ft/candles to the workbench surfaces. The contractor told me it was like an operating room, I took that as a compliment. Even though I had pretty good lighting (fluorescent) in my last shop, I wanted extremely good lighting in this shop as I don't like using drop lights for every job.

I think you will be pleased.


Funny! My wife said the exact same thing about my shop, don't regret it at all!
 

LXCam

ALLIANCE MEMBER
Joined
Apr 23, 2013
Messages
19,205
Location
AZ
I, too, went maybe a little overboard on lighting in the two additions we did to the garage. There are 30 4’ LED fixtures in each addition, with 1/3 of them being normally used and the rest can be turned on for near daylight!!
Normal -
IMG_7540.jpeg
All on -
IMG_7541.jpeg
Just cannot have too much light!!
Gary, when we got together a couple months back and I said you looked like you could use a little sun…


I was just joking :spit:

Btw :bowdown::bowdown::bowdown: and how come we haven’t seen any update out of you for a while?
 

Swanny1953

ALLIANCE MEMBER
Joined
Jul 28, 2010
Messages
1,082
Location
Lucas, TX
Gary, when we got together a couple months back and I said you looked like you could use a little sun…


I was just joking :spit:

Btw :bowdown::bowdown::bowdown: and how come we haven’t seen any update out of you for a while?
As to updates, I'm notoriously bad about taking pictures until the project is over and then I think about it. As many on here have said, without pics, the thread is worthless!! I'm working on being better on before/after pictures (note to self!!!).
Beyond that, we have done a little traveling (week in Cancun with Sis) and dealing with big projects at both the house and lake place. We had a hail storm in April that totaled our 8-month old roof, so we get to go through that process all over again.
I'll get back to posting on my thread soon.
 

LXCam

ALLIANCE MEMBER
Joined
Apr 23, 2013
Messages
19,205
Location
AZ
As to updates, I'm notoriously bad about taking pictures until the project is over and then I think about it. As many on here have said, without pics, the thread is worthless!! I'm working on being better on before/after pictures (note to self!!!).
Beyond that, we have done a little traveling (week in Cancun with Sis) and dealing with big projects at both the house and lake place. We had a hail storm in April that totaled our 8-month old roof, so we get to go through that process all over again.
I'll get back to posting on my thread soon.
That *****! Didn’t you go with that super whammy stuff that supposed to be rated for hail?
 
OP
S

SilverJimmy

Well-known member
Joined
Apr 14, 2012
Messages
1,688
Location
Prescott/Flagstaff, AZ
Pulling wire today. Head guy asked if I was okay with pink…..
DA7B3AC5-1057-4B0B-8627-A09CD04C267C.jpeg
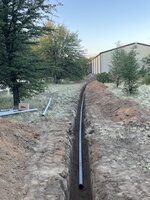
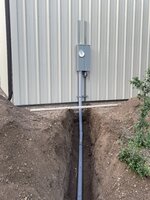
First thing this morning contractors son started digging the trench for the power conduit for the shop. Had to find the existing conduit so power company can intercept it and install a J-Box and then run power to the shop. Currently have 200 Amp to the house. POCO is going to run 400 Amp to J-Box, then split it, 200 to shop and then 200 to house.
582DBF39-A9BD-4F59-870F-5FBEB61A4762.jpeg
Electricians got the new 3” conduit in and all glued up and into the new panel.
703A21F8-A815-453D-ADAD-95E983553CDD.jpegF22614B6-95F8-4E26-AD99-6179728D7745.jpeg14D36DBC-C9D5-4B63-9246-D8ACFECEF2DE.jpeg
Should get inspected sometime next week so most of the trench can get filled back in and then we just wait till POCO can get out and install the J-Box and pull the wire. I’m going to end up with two meters, which isn’t ideal, but the cost for upgrading the panel at the house and then running power back to the shop to have only one meter would have taken more years than I have left to justify.
 
OP
S

SilverJimmy

Well-known member
Joined
Apr 14, 2012
Messages
1,688
Location
Prescott/Flagstaff, AZ
Getting a bunch of stuff done in the shop, but, first things first!
E55456CF-9BC6-44C3-A4F1-5C636ED63701.jpeg
So proud and grateful to be an American and have the freedom to pursue mine and my wife’s concept of happiness and liberty!
Yesterday the contractors crew started the framing, very glad I decided to go with a 9’ ceiling height. It will make all the rooms much more spacious and useable! 90E58E99-08DD-4AD5-98E4-96F722735092.jpeg9263F091-ADF0-4E65-AE9A-78384D4B79FB.jpegB3171CDF-8F30-4119-9B7B-7F2F0858415D.jpeg
The electricians got most of the overhead work done, just need to mount 8 more lights and the ceiling fans.
827AD777-8B8A-442F-897A-5670A7CD5681.jpeg1E158681-D9DF-4409-9CA6-A546873B1F46.jpeg
I’m going to the HomeDespot to order these 120” fans today.
2740EBDE-E480-4F4C-A7A5-86275BBCC7FC.jpeg
I got both man doors finished and trimmed out with 1-1/2” aluminum angle, I think they turned out great!
One last shot before I shut down for the night….EA1444D9-4978-4A5A-8160-B421C9A61695.jpeg
 

Attachments

  • 9CC39850-4463-4CAE-ACC5-CB6B98636928.jpeg
    9CC39850-4463-4CAE-ACC5-CB6B98636928.jpeg
    786.1 KB · Views: 32
  • 91C7FC00-6DB4-4334-B03B-33911D3591A4.jpeg
    91C7FC00-6DB4-4334-B03B-33911D3591A4.jpeg
    634.3 KB · Views: 31
OP
S

SilverJimmy

Well-known member
Joined
Apr 14, 2012
Messages
1,688
Location
Prescott/Flagstaff, AZ
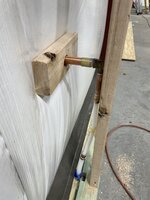
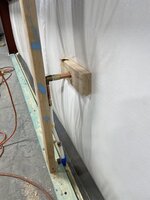
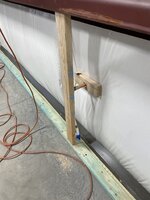
Plumber got all the frost-free hose bibs installed today. Cool how he used some scrap 2x4‘s for blocking and reinforcement of the hose bib into the sheet metal wall. Good thing the building crew left all the hardware and screws, looks great on the exterior!A7105C33-24A4-46C1-A6AE-923C52C2B80E.jpeg3282C539-3528-4DA5-B89F-DB06ADA98545.jpegF50E0B5D-907F-4811-B653-D044295E0357.jpegF56F0DF8-F0E9-4290-B140-017879EDCF21.jpeg
Called for a plumbing inspection, hopefully I can get these walls closed up soon!
 
OP
S

SilverJimmy

Well-known member
Joined
Apr 14, 2012
Messages
1,688
Location
Prescott/Flagstaff, AZ
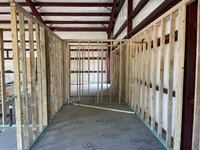
It’s actually happening, I have walls! This will be my clean room for assembling engines! (Note: Happy Wife, Happy Life!)
48F0B5BF-CFA5-4A95-B17D-205FC89FF216.jpeg
This is the shop bathroom. Slight miscalculation on the toilet location!
161C6814-39E7-4856-B384-E54A9E03748A.jpeg
Storage room. You can see the mechanical room behind this room, that’s where the water heater, air compressor, and the washer and dryer will be.
E5C1A5A0-60A2-4030-B3A0-D091FAFD3F12.jpeg
Machine shop/Fabrication bay on the far left with the man door going out the north end of the shop.
EAAC600C-9136-4BEB-81A9-7D40EBB1DDFE.jpeg
Tomorrow the rest of the walls should get stood up and the staircase started. Very glad we decided to raise the ceiling up to 9’, it’s going to be a very nice workspace!
 
To avoid these ads, REGISTER NOW!
Top Bottom