To avoid these ads, REGISTER NOW!

Gridfinity Tool Storage

rdoty

ALLIANCE MEMBER
Joined
Feb 7, 2018
Messages
646
Location
Massachusetts
Tool storage is a popular topic here on Garage Journal. We have a wide spectrum of people here: I suspect that there are some that throw all of their tools into a 5 gallon bucket, dump the bucket out on the floor when working, and pile everything back into the bucket when through.

There may be some that have a full stack of Snap-On chests and tools with each well polished tool lovingly cradled in custom Kaizen foam cutouts. It might be going to far to think that some of them have a separate set of tools hidden away to actually use...

And, of course, most of us are somewhere in the middle!

In any case, "we don't kink shame around here".

Over time and as my skills and hobbies have grown I have moved from a tool bag to a tool chest to a 27" roller cabinet, added a hutch, and then added a second 27" roller. Over the last few years I've had the luxury of building a shop and then upgrading it with a Steevo bench under a set of cabinets. More recently I've been able to add things like mill, engine lathe, surface plate, and industrial drill press. Plus a fairly large welding table. All of these have involved storage of some sort, mostly building them around roller cabinets.

I now have (almost) enough drawers. Mostly with things piled in them.

For me a critical part of an enjoyable project is being able to lay my hands on whatever tool I need when I need it. I hate spending 5 minutes looking for a tool I just laid down. I hate spending time looking through every drawer in every toolchest. I hate digging through a pile of tools in a drawer - I'm looking at you, screwdrivers! And most of all I hate it when a tool is missing and I can't find it.

Socket rails and wrench racks showed what could be done. Is there something more out there? Something to organize at least the commonly used tools? Ideally something with more flexibility and packing density than Kaizen foam? Turns out the answer is yes.

One of the reasons for getting a 3D printer was to print out various types of organizers for the workshop. There are literally thousands of different designs floating around. A search for organizers quickly leads you to the modular Gridfinity system created by Zack Freedman.

Gridfinity is kind of hard to explain – it is in many ways more a community than anything else. Coming from the Open Source software world it seems familiar and comfortable. There are thousands of existing designs available to hold both things you need and things you never thought of. You can also design custom bins for your own unique needs. Gridfinity is used to store both tools and supplies. It comes close to being a universal solution for organization.

At its core Gridfinity is a specification for a baseplate and set of bins that fit into the baseplate, arranged as a 42mm grid. Yes, 42 – the answer to Life, the Universe, and Everything. The baseplate can be scaled to whatever size is needed. The bins can be customized to whatever size it needed – height, width, depth, and internal partitions. Further, you can start with a solid bin and use a CAD system to create custom cutouts to hold pretty much anything. All sizing is done in integer multiples of this 42mm grid size.
Gridfinity1.png
Gridfinity base and bins. Source: Hackaday.com

When used in drawers the Gridfinity base locks the bins into position and keeps them from moving around when you open and close the drawers – just what I need!

Gridfinity2.png
Gridfinity bins holding a variety of tools

While I have no end of “opportunities for organization” in the workshop I decided to start with my socket drawer. Several reasons for this: sockets and ratchets are the single most heavily used tools I own. Sockets are currently organized, but the nine ratchets, three breaker bars, multiple sets of extensions, and various misc. pieces are just loose.

Sockets and ratchets are prime candidates for Kaizen-type organization where you can immediately find everything. Kaizen organization is even better for putting things up – put each socket and ratchet back in its fitted location. You can instantly tell if anything is missing. I’m already spoiled by the combination of knowing exactly where to grab for a tool and easily seeing if everything has been returned to the toolbox. This makes me more productive and less frustrated – few things annoy me more than searching for a tool I set down a couple of minutes ago!

The good news is Gridfinity is modular. The bad news is Gridfinity is modular. Much like Kaizen Foam, you can fit it to whatever space is available and do custom cutouts for each tool you want to store.

Anyone using Gridfinity please share what you have done - and how you did it! I'll be adding posts on what I've done and look forward to learning from your experiences.
 
To avoid these ads, REGISTER NOW!

Max

ALLIANCE MEMBER
Joined
Jun 16, 2018
Messages
3,342
Location
Georgia
Sounds great. I will be following along. I am about 90% of the way there to buying a 3D printer so I can do Gridfinity for a bunch of my tools/drawers. Once I can figure out the best 3D printer for me…
 
OP
R

rdoty

ALLIANCE MEMBER
Joined
Feb 7, 2018
Messages
646
Location
Massachusetts
My general approach to starting something new is to begin with a simple test piece, iterate until I’m happy, and then move through progressively more complex designs until I get what I want.

So, instead of jumping directly into designing a tray for all nine ratchets, grab one ratchet and design a tray for it. One of the goals of prototyping is to minimize the amount of filament you waste, so start with the 3/8″ stubby ratchet instead of the 1/2″ long handle one.

First, how large a bin is needed to hold the ratchet? You can measure and check. Or just lay the ratchet down on a baseplate and eyeball it. In any case, the test ratchet is one bin unit wide and four bin units long.

GridfinityBaseRatchet.jpg
Gridfinity base with stubby ratchet

In Fusion select the Gridfinity Bin generator. Tell it to create a 1×4 solid bin. We start with a solid bin and make a cutout to fit the ratchet. Hit Enter and the bin appears as a new component, ready to edit.

Next, create a Fusion Sketch on the top surface of the bin. Measure the ratchet and create an outline of the ratchet. The easiest way is to create two rectangles, one for the head of the ratchet and one for the handle. Center this outline in the bin.

Make this outline just a little bigger than the ratchet. How much bigger? Big enough to make it easy to remove and replace the ratchet, small enough for a good looking fit. A sixteenth of an inch is probably a good starting point.

Fillet the corners of the outline to make it look better and fit better. While not required this is easy to do in Fusion and makes the end result look more professional.

After finishing the outline extrude it to make a solid body and then extract this body from the bin to create the cutout for the ratchet. The depth of the cutout depends on the tool you are designing the bin to hold. For these ratchets 3/8″ is a good starting point.

Done!

Not quiet. The cutout is a tight fit on the ratchet and roughly half the depth of the ratchet. You can’t grab the ratchet – the only way to remove the ratchet is to pry it out with a screwdriver. Not the greatest user experience…

We need to add a finger relief to the bin so that we can easily grab the ratchet. The finger relief should be located where you naturally grab the ratchet. It should be tall enough to stick your finger and thumb into it – 3/4″ or 1″ is a good starting point. It needs to be deeper than the ratchet cutout so that you can get your fingers under the ratchet and pull it out. I first tried 1/2″ deep, but this cut through the bottom of the bin. 0.450″ was the deepest I could make it.

I couldn’t make the finger relief as wide as I wanted to, so make it as wide as the bin allowed. Extrude it 0.450″ and subtract from the bin.

Looks good, so send it to the printer. Wait patiently.

Pop the finished bin out of the printer, drop the ratchet in, and start checking how well it works. Some room for optimization of size and spacing, but overall a successful first prototype!

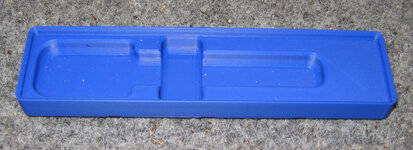
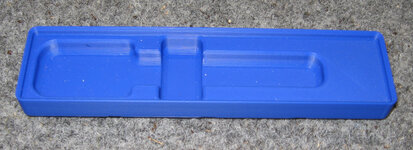
GridfinityRatchetProto.jpg

Prototype ratchet bin

GridfinityRatchetProto2.jpg
Prototype bin with ratchet

It holds the ratchet but could be a bit longer. We can either tweak the model and make another prototype or note what changes are needed and include them in the final design.
 

Attachments

  • GridfinityRatchetProto.jpg
    GridfinityRatchetProto.jpg
    102.9 KB · Views: 40
OP
R

rdoty

ALLIANCE MEMBER
Joined
Feb 7, 2018
Messages
646
Location
Massachusetts
You can print any color you want - and there are some crazy filaments out there! Metallic, silk, translucent,color changing, rainbow, glow in the dark, pretty much whatever you can dream of.

Some people really get into color coding their bins. I can see where it would make sense, like having different colors for metric and SAE hardware.
 

hans109h

Well-known member
Joined
Dec 27, 2017
Messages
261
Location
Upper Midwest
I'm considering going with the 42x42x42 gridfinity solution for storage. I think I'm going to do a test drawer and see how it goes. I heard about it first from the 3d printing thread that is stickied over in the fab forum.

Hans
 
OP
R

rdoty

ALLIANCE MEMBER
Joined
Feb 7, 2018
Messages
646
Location
Massachusetts
I'm considering going with the 42x42x42 gridfinity solution for storage. I think I'm going to do a test drawer and see how it goes. I heard about it first from the 3d printing thread that is stickied over in the fab forum.

Hans
Go for it! And please report your experience - the big reason for this thread is to find out what people are doing with Gridfinity.
 

1/4atatime

Well-known member
Joined
Jun 9, 2024
Messages
164
Location
VA
I've been printing toolgrid plates, wrench holders, and I'm going to be doing multi board for my back wall where my workbench is. https://www.multiboard.io/

A new 3d printer has been the best thing I've bought for my garage. I had a older 3d printer but it was finicky and broke a bunch. So I decided to buy a new one. So glad I did these new ones are so much easier to use. Literally plug and play.1000016682.jpg1000016683.jpg
 
Last edited:
OP
R

rdoty

ALLIANCE MEMBER
Joined
Feb 7, 2018
Messages
646
Location
Massachusetts
I've been printing toolgrid plates, wrench holders, and I'm going to be doing multi board for my back wall where my workbench is. https://www.multiboard.io/

A new 3d printer has been the best thing I've bought for my garage. I had a older 3d printer but it was finicky and broke a bunch. So I decided to buy a new one. So glad I did these new ones are so much easier to use. Literally plug and play.1000016682.jpg1000016683.jpg
What model are you using for the wrench holder? For anyone posting interesting and useful parts that you downloaded, can you provide a link to where you got them?
 

1/4atatime

Well-known member
Joined
Jun 9, 2024
Messages
164
Location
VA
What model are you using for the wrench holder? For anyone posting interesting and useful parts that you downloaded, can you provide a link to where you got them?
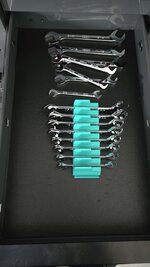
O yeah my bad https://makerworld.com/en/models/556023-snap-fit-modular-wrench-organizer-holder

It's literally an exact clone of the ernst/tekton ones (they even fit together on the real ones I have) a roll of filament did my entire toolbox in my metric size and another roll did all my sae. So compared to the original it's about $12 to print about 60 (I need to check my totals) vs $16 for a set of 20.
 
  • Like
Reactions: Max

elvee

Well-known member
Joined
Nov 1, 2006
Messages
309
Location
Atlanta, GA
So if you want to see how crazy you can go with Gridfinity, check out lilscorpion's thread on getting organized. The printing fun starts around page 16 - https://www.garagejournal.com/forum/threads/lilscorpions-fab-space.521015/page-16 .

Keep in mind that this guy isn't playing around when it comes to the limits he will accept for being organized. There are also some great posts from slodat on modeling parts for the gridfinity system.
 
OP
R

rdoty

ALLIANCE MEMBER
Joined
Feb 7, 2018
Messages
646
Location
Massachusetts
So if you want to see how crazy you can go with Gridfinity, check out lilscorpion's thread on getting organized. The printing fun starts around page 16 - https://www.garagejournal.com/forum/threads/lilscorpions-fab-space.521015/page-16 .

Keep in mind that this guy isn't playing around when it comes to the limits he will accept for being organized. There are also some great posts from slodat on modeling parts for the gridfinity system.
Wow! How did I miss that thread?? LilScorpion is at another level with his shop organization! I can't decide whether to thank you or curse you for providing that link...
 
OP
R

rdoty

ALLIANCE MEMBER
Joined
Feb 7, 2018
Messages
646
Location
Massachusetts
In the last post we made a Gridfinity bin for a single ratchet. The most flexible approach is to make a separate bin for each ratchet. This takes full advantage of Gridfinity flexibility – you can add more ratchets just by making new bins and re-arranging the bins on the Gridfinity baseplate.

The downside of making a bin per ratchet is packing efficiency – in many cases you can fit more tools into a given space by putting multiple tools in a single larger bin. Basically you arrange the tools in a way that minimizes space and then put a bin around them. In many cases this can reduce the required space by more than 25% by using this approach.

The choice is long term modularity and flexibility vs. fitting more tools into given drawer space in a tool chest. Of course it isn’t an either/or decision – in some cases one approach makes sense, in other cases the other is the best choice. And in some cases it makes sense to just pile the tools in a drawer!

I decided on a divide and conquer approach: spend time packaging my most used tools into efficient Gridfinity bins, lesser used tools into generic Gridfinity bins, and pile miscellaneous tools into a drawer.

As part of this approach I also decided to do selective upgrades of certain tools. For example, I have a random pile of screwdrivers that have accumulated over the last 50 years. These range from good screwdrivers – mostly 1970’s Craftsman – to junk that should really be thrown away. I’ll cover the screwdriver strategy in a future article.

I have, ummm, “several” ratchets. And breaker bars. And accessories like extensions and adapters. Some of them are junk. Over the last five years or so I’ve built up a collection of good Tekton ratchets that are my go-to for anything involving a socket. I have nine of these – eight regular ratchets plus a ratchet with a 24 inch handle for heavy jobs. Plus a three foot 3/4″ breaker bar for really heavy jobs, like the ball joints on a 1963 Imperial. I won’t try to put the six foot pipe, AKA cheater bar, that enhances the three foot breaker bar into the tool chest.
Studying the situation I decided to put the two foot ratchet and three foot long cheater bar across the back of the drawer and not bother putting them into a bin.

The remaining 8 ratchets were a mixture of 1/4″, 3/8″, and 1/2″ drive and included regular handle, long handle, stubby handle, and flex handle. All of these are useful and needed for dealing with various fastener situations.
Grab these ratchets and start trying different arrangements. The goal is to fit them into a minimal space while being able to easily pick up any ratchet.

After playing with various arrangements it looks like I can fit them into an 11 x 4 grid unit bin. My 3D printer is capable of printing a 5 x 5 bin, so I used the Fusion Gridfinity Generator to generate two 4 x 4 and one 4 x 3 solid bins.

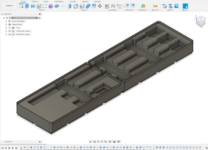
I positioned these bins together in Fusion and then started creating the outlines for each ratchet. Once I had the outlines I arranged them in the bin with equal spacing between each ratchet. These outlines were extruded and subtracted from the solid bins to create the cutouts. After making the solid cutouts for each ratchet I studied the result for a while and then created a set of finger reliefs to make it easy to pick up the ratchets.

As a last step I filleted (rounded) all the edges. On heavily loaded parts this is critical for strength and to avoid cracks. Sharp inside corners are the most common place for cracks to start. It isn’t really critical for these bins, but it is easy to in Fusion, looks better, and keeps my mechanical engineering spider sense from tingling so strongly.

With the three bins designed, send them to the printer one by one. Total time for this was over 12 hours, but 3D printing is “fire and forget”.

GridfinityRatchetBins.png
Gridfinity Ratchet Bins

The three bins drop into the Gridfinity baseplate locking them into position. Add ratchets and done.

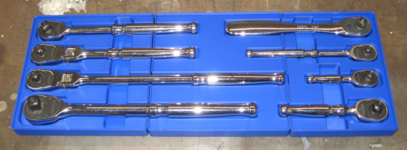
GridfinityRatchetBinWithRatchets.png
Ratchet bin with ratchets

The ratchets fit. Once the bins are dropped into the baseplate they don’t move. This fixes the previous problem with the ratchets moving around when the drawer is opened and closed. You can easily grab whichever ratchet you need. And you can tell at a glance if you have returned all ratchets to their proper location.

Despite pounding my head against Fusion (I still have a lot to learn!) this was actually a fun little project. The results were exactly what I was shooting for: creating the CAD model and learning more about driving Fusion, 3D printing, and fitting the end result into the tool chest.

On to the next project!
 
OP
R

rdoty

ALLIANCE MEMBER
Joined
Feb 7, 2018
Messages
646
Location
Massachusetts
To effectively use sockets you often need extensions. I have a combination of random extensions from the past 50 years which are piled together plus a good set of 3/8″ extensions in a molded factory tray. I prefer using these good extensions, both because they are good and because I can immediately grab the one I need out of the tray without digging around.

Based on the previously described strategy of selective tool upgrades I ordered a set of 1/4″ socket extensions from Tekton.

With extensions in hand (actually, they were piled on the desk next to my CAD workstation) I went through the drill of laying them out, determining what size Gridfinity bin was needed to hold them, and starting the design process.

Creating the outlines was simple: First create a solid bin using the Gridfinity Bin Generator. The extensions are too long to print as a single piece, so create two bins. Create a sketch on the face of the bin. Make two rectangles in Fusion, one for the head of the extension and one for the shaft. The head size was the same for all of the extensions.

The shafts of the extensions were all the same diameter but different lengths. I learned a new way to make these: Create a line the length of the extension from the mid point of one edge of the head – Fusion will select the midpoint of the line when you mouse over it and will lock the line to 90 degrees from the old one when you have the mouse close to 90 degrees. Click on the midpoint, drag the new line at roughly 90 degrees, release the mouse button, and type in the length of the shaft. Bingo! Done!

Select this line, select the offset command with offset both sides, and make the offset the radius of the shaft. Delete the original line or change it to a construction line and then add lines between each end of the offsets. Viola, you have an outline for the shaft. This is much faster and easier than the manual geometric construction techniques I had been using. I tend to go back to my old drafting board geometric construction techniques. Fusion fully supports this old approach, but it also has many additional powerful ways to build things. I have a lot to learn! And I’m making some progress. Slow, but the more you do it the better you get. Amazing how that works!

To add another extension you make a copy of the first extension. Add a dimension to the shaft length and then edit the dimension to change it to the new length. Fusion extends (or shortens) the shaft. The parametric constraints in Fusion make sure that both sides of the shaft are the same length, the ends of the shaft remain connected to the sides, and that the shaft remains connected to the head. Magic! Repeat this process until you have created outlines for alll of the extensions and then finish (close) the sketch.

I generally make the cutouts half the depth of the tool. Select all of the extension heads, extrude them one half of the diameter of the head, and subtract them from the bin. Then select all of the shafts, extrude them one half of the shaft diameter, and subtract them from the bin.

With cutouts for all of the extensions done create the finger reliefs. Create another sketch on the face of the bin. Determine where you want the finger reliefs and add rectangles across the bin. Close the sketch. Select all of the finger reliefs, extrude them, and subtract from the bin.

As a final step go through and fillet all of the sharp edges. Not absolutely necessary, but calms my finer engineering sensibilities.

GridfinityExtensionBinCADModel.png
CAD model of extension bin

While the extension bins are too long to print as a single part the two bins in the design can be placed side by side on the printer and printed in a single print run.

That turned out pretty good. Now repeat the design process for the 1/4″ and 1/2″ extensions.

GridfinitySocketExtBin.jpg
Finished socket bins - 1/2", 3/8" and 1/4"
 
OP
R

rdoty

ALLIANCE MEMBER
Joined
Feb 7, 2018
Messages
646
Location
Massachusetts
After designing custom bins for ratchets and extensions there was space left over. No problem – I have more tools to go there!

First was a distributor wrench. This is a two piece tool with a roughly “L” shape which was a bit tricky to fit. Using the standard GridFinity bin sizes required a larger bin than I really wanted, but no choice in the matter – you have to work in integer multiples of the grid size. OK, push the distributor wrenches to the outside edges of the bin and use the center for something. What about the oxygen sensor socket that didn’t really go anywhere? Nice – fits almost like it was supposed to go there. A few iterations and this bin was done.

Some of the tools didn’t justify the work of creating custom bins. For these simply create a hollow bin in the GridFinity generator and print them out. With GridFinity you always have options!

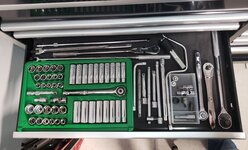
Now for the socket drawer itself. I already had all of the sockets mounted on rails. While many people use GridFinity bins for sockets I like the rails – so, keep the rails and use Gridfinity for everything else.

The process I’ve been describing so far focused on designing the individual bins. While I haven’t mentioned it yet, I’ve been working with a set of GridFinity baseplates sized for the drawer space. In addition to holding the tools, the set of bins were designed to fit the available space. This required a fair amount of arranging and re-arranging the bins, plus some of the bins were designed to fit the available space around other bins.

GridfinityRatchetOrganizers.png
GridFinity organizers for ratchets and extensions

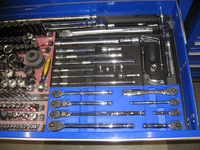
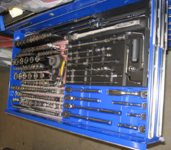
FullSocketDrawer.png
Full socket drawer – now completely organized!
 
Last edited:
To avoid these ads, REGISTER NOW!
OP
R

rdoty

ALLIANCE MEMBER
Joined
Feb 7, 2018
Messages
646
Location
Massachusetts
Some projects, notably the electrical projects, require small screwdrivers. I have one or two that fit, and have to dig through the screwdriver drawer to find them. Time to end that foolishness!

The small Wiha screwdrivers are good, so order a set. And, of course, design a bin for them.

SmallScrewdriverBin.png
Bin for small screwdrivers
 

sansbury

Well-known member
Joined
Oct 7, 2023
Messages
105
It's funny because I bought a Prusa MK3 (3d printer) kit two years ago and Gridfinity is what finally got me to bother unpacking and assembling it last week.

I came close to ordering kaizen foam multiple times over the years but the work to cut the inserts and then being stuck with that layout always stopped me. For my purposes this felt like a much better fit and I have a feeling it's going to keep my printer very busy for a long time.

The one thing I would love to see would be a way to buy premade base plates. This drawer is about 12x15" and I needed to do four separate prints to cover it. I might try machining one out of 1/4" plywood or acrylic on my router table. At least with the bins it's a lot easier to batch a bunch up and let it print overnight.
 

Attachments

  • IMG_1155.jpeg
    IMG_1155.jpeg
    881.8 KB · Views: 52
OP
R

rdoty

ALLIANCE MEMBER
Joined
Feb 7, 2018
Messages
646
Location
Massachusetts
It's funny because I bought a Prusa MK3 (3d printer) kit two years ago and Gridfinity is what finally got me to bother unpacking and assembling it last week.

I came close to ordering kaizen foam multiple times over the years but the work to cut the inserts and then being stuck with that layout always stopped me. For my purposes this felt like a much better fit and I have a feeling it's going to keep my printer very busy for a long time.

The one thing I would love to see would be a way to buy premade base plates. This drawer is about 12x15" and I needed to do four separate prints to cover it. I might try machining one out of 1/4" plywood or acrylic on my router table. At least with the bins it's a lot easier to batch a bunch up and let it print overnight.
You are so right! I'm rather surprised that no one is making baseplates. These would be easy to do. Injection molding of large baseplates would be cheap and there would seem to be a ready market for it.

If I could buy a pre-made baseplate that fit most of a drawer and then extend it with custom filler plates I would be all over it!
 

sansbury

Well-known member
Joined
Oct 7, 2023
Messages
105
Injection molding of large baseplates would be cheap and there would seem to be a ready market for it.
I wouldn't be surprised to see it as the system continues to become more known. I have a small (20T) injection press but its working area is about as big as my Prusa so not much gain there. I have thought about making molds for some of the standard bins but you'd really need to make them in two pieces because of all the undercuts. The design really makes good use of what 3D printers are good at.

When my electrician finishes wiring the 240 outlets for my dust extractor and vacuum pump I'm going to try machining the baseplate pattern on my 2x4' router. I think people have made base plates using just the basic grid pattern in acrylic on a laser cutter and gotten good results. The router can do 2.5D so can reproduce the shape more closely, plus things like magnet or screw holes. I am building new drawers as well so if I can machine it on the router I might just machine the pattern into the drawer bottoms right from the start.
 

cody1325

Well-known member
Joined
Apr 17, 2024
Messages
1,103
Location
Southwest Virginia
These days, almost all my Craftsman stuff save for some larger sizes, pocket knives (as they're a sizeable portion of my collection...), and V-Series is now backup.

However, I have tons of each, and easily found Gridfinity files on Printables for all of it. I bought a handful of these 43373s at a flea market out of several totes of tools for pocket change. My most common bit driver by far.

Here's the start on a small '80s Vermont American styled similarly to the old Craftsman "Rally Boxes" of the '70s. Need to glue magnets into the trays.

KIMG2425.JPG
 
OP
R

rdoty

ALLIANCE MEMBER
Joined
Feb 7, 2018
Messages
646
Location
Massachusetts
If you use the Fusion Gridfinity Generator you can add tabs to the edge of the baseplate to make it exactly fit the drawer. This keeps everything from sliding around without using magnets.
 
OP
R

rdoty

ALLIANCE MEMBER
Joined
Feb 7, 2018
Messages
646
Location
Massachusetts
After finishing the bin for the new Wiha screwdriver set I sorted through my old screwdrivers. Turns out that a lot of them are good. Some are junk, so separate those out, but a bunch are worth saving.

This random assortment of screwdrivers doesn’t seem to merit custom bins. And this collection is likely to change over time. Fortunately there is an alternative – the Fusion Gridfinity Generator will create hollow bins. And create partitions inside bins. This allows you to get around the standard bin sizes – for example, create a bin that is 5×6 Gridfinity bin units in size with 8 partitions across the 5 dimension. This will create a large bin with smaller “bins” inside it. In this case these bins will be just under an inch wide rather than the standard GridFinity 42mm (1.654″) spacing.

Play with the screwdrivers for a while and determine what width of bin will provide the combination of good fit and good packing efficiency. Use the GridFinity Generator to create a set of bins with the desired width and height and will completely fill the drawer. Print out a set of baseplates for the drawer. Drop in the baseplates and then insert the bins. Fill the bins with screwdrivers. Viola! Good to go!

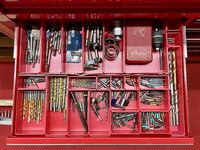
ScrewdriverDrawer.png
Screwdriver drawer populated with screwdrivers
 

draco_1967

Well-known member
Joined
Jan 3, 2021
Messages
207
Location
Utah
If you use the Fusion Gridfinity Generator you can add tabs to the edge of the baseplate to make it exactly fit the drawer. This keeps everything from sliding around without using magnets.
For the base plates, I like this customizable generator. It will divide larger trays into pieces that fit the print area (for bambu at least), and adds little tabs to snap all the pieces together. It gives the option of adding 1/2 grid sections too, if the drawer size doesn't fit complete grids. It will make the edges of the grid thicker to take up the gap to the edges of the measured space.

I haven't played with the Fusion gridifinity generator. Now I need to spend some time learning to use that!
 
  • Love
Reactions: Max
OP
R

rdoty

ALLIANCE MEMBER
Joined
Feb 7, 2018
Messages
646
Location
Massachusetts
For the base plates, I like this customizable generator. It will divide larger trays into pieces that fit the print area (for bambu at least), and adds little tabs to snap all the pieces together. It gives the option of adding 1/2 grid sections too, if the drawer size doesn't fit complete grids. It will make the edges of the grid thicker to take up the gap to the edges of the measured space.

I haven't played with the Fusion gridifinity generator. Now I need to spend some time learning to use that!
Nice! Thanks for providing the link.

There is an entire ecosystem around Gridfinity. It is one of the more dangerous rabbit holes I've encountered. Once you go down it it just keeps branching and getting deeper and deeper! But in a good way...
 
OP
R

rdoty

ALLIANCE MEMBER
Joined
Feb 7, 2018
Messages
646
Location
Massachusetts
While my random set of screwdrivers has served me well, it made sense to order a set of good screwdrivers. After exploring various options I ordered a 12 piece set of Tekton screwdrivers.

When they showed up l discovered they were bigger than expected. After playing with different layout options it was clear that this set would require an entire drawer. Further, the longer screwdrivers were too big to go in the drawer side to side, so the set had to go in front to back. Fortunately I now have enough tool chest space that I can dedicate a full drawer to this screwdriver set. Off to the CAD system!
The drawer is larger than my 3D printer, so this bin will have to be printed in four parts. Up until now this would mean creating four separate bins in the GridFinity Generator and then doing custom cutouts in each bin.

I’ve been taking an online course on Fusion and learned a new trick. I could create a single large bin the size of the full drawer, create all of the cutouts, and then use a cutting plane to cut it into pieces to print.

So I did exactly that – create a large bin and make all of the cutouts for the screwdrivers in this single bin. I also picked up another trick – creating a midplane between two parallel faces. Using the midplane command reduced this whole pricess to four clicks: select the midplane command, select a face on one end of the bin, select a face on the other end of the bin, and hit done. Bingo, a new plane exactly in the middle of the bin!

Select the Fusion split body command, select the bin, select the midplane we just created, and hit done. Result: two halves of the bin, ready to print.

Well, not quite ready – we need this particular bin cut into quarters. Repeat the process creating a midplane on the other two side of the bin, select the midplane and the body, and use the split body command again. Remember to select both halves of the body or you will just split one half of it…

Now we have four pieces that will fit on the printer. Print them out, drop them in the drawer, and add screwdrivers.

LargeScrewdriverBin.png
Drawer with screwdriver organizer bin

After using the organized screwdrivers I’m happy with the work. Knowing where each screwdriver is – and where it put it back – is easier than the old drawer piled full of screwdrivers. It does takes up more drawer space than the old pile approach. And is worth it!
 
OP
R

rdoty

ALLIANCE MEMBER
Joined
Feb 7, 2018
Messages
646
Location
Massachusetts
Another useful tool is a pick. I have a couple of them and use them fairly frequently. At times it would be helpful to have different sizes and shapes. Yup, time to hop on the Tekton web site and place another order.

This bin design went through a few iterations. While most of the picks had small heads, a couple had large heads that wouldn’t fit in a standard cutout. I really wanted to print this bin out as one piece, but there wasn’t enough space.

After trying several alternatives I ended up making the cutouts for the head of the picks over-sized on the first and last pick. I also put one of the picks horizontally across the top of the bin. With these changes I was able to fit all of the picks into a single bin that could be printed as one piece. The picks are packed together tightly, but you can still get them out.

GridFinityPickBin.png
Pick bin
 
OP
R

rdoty

ALLIANCE MEMBER
Joined
Feb 7, 2018
Messages
646
Location
Massachusetts
I don't know if y'all have come across this. It offers gridfinity boxes from snapshots of tools.
Kay, that is a great link - thanks for posting!

I found a video from someone reviewing: it This FREE AI Tool Auto-Generates Gridfinity Bins! Looks like another good tool in the aresenal of organization. The company behind this also offers foam shadoboxes which is a great option for larger tools.
 

Model A Fan

Well-known member
Joined
Dec 1, 2011
Messages
1,223
Location
NW Washington
Can this be revitalized? I will post some of my printed pieces soon. I've done quite a few pieces now for my ratchets, non-socket ratchet tools (Torx, adapters, hex heads, etc).

I'd love to see what others have printed so far!
 

sansbury

Well-known member
Joined
Oct 7, 2023
Messages
105
Since posting to this thread six months ago I have probably printed 3-4kg worth of bins and baseplates, if you have an obsessive/detail-oriented personality I strongly advise you to STAY AWAY lol....

Probably 90% of what I've printed has either been various sizes of standard bins from either the Perplexinglabs or Fusion generators, or very custom stuff for really specific tools. I'll need to take some new pictures when I'm back, but here are some examples.

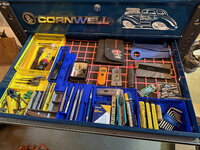
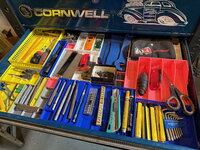
Where it all began - I've since completely reorganized this entire chest into three other chests, which demonstrates why I love Gridfinity (you're not stuck with fixed layouts like kaizen foam) and why I hate it (it's more addictive than smack). All of these organizers were downloaded from Printables and other sources though I did do some small tweaks like adding labels to the driver bins.

IMG_1347.jpg

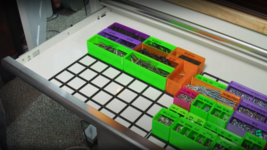
A lot of what I've done has been to add labels to standard bins to improve organization. I use the Fusion plugin to generate the standard bin shapes then add the labels on. One note, if you do this, make sure to "depress" the label tab by the height of your lettering if you want the bins to stack properly. I've found a 0.6-1mm label height works well with ~0.25-0.3mm layer heights.

IMG_1431.jpg

This is where I began my descent into madness. I have a number of drawer bin organizers full of all kinds of fasteners, nuts, electronic components, and so on, and decided to convert all of them to Gridfinity. Like I said, abandon all hope ye who enter here. I started experimenting with designing in features to sort the screws, and have probably four or five different patterns now. These were made in Fusion as well. I filled a small tool chest with several dozen of these and am almost done, which means that I am almost ready to take what I learned and start over so that they all match o_O

IMG_1678.jpg

My Biggest Lesson Learned So Far:

If I could send just one message in a bottle back to myself when I started this, it would be to lock down a color scheme before printing too much stuff. My drawers are kind of a unicorn puke of colors and I give myself a 90% chance of getting annoyed and going back and re-printing everything so they match. Here is how I would do it:

  1. Pick the type of filament you want to use, and stick to it. I have printed a mix of PLA and PETG and if I was going to do it again I would just do it all in PLA. If you have stuff in a truck or that gets a lot of oil or solvents you might want something higher performance but in general PLA is a much better material than people give it credit for, and it gives you massive range of choices in terms of color and finish.
  2. Pick one or two primary colors you like, and use them for everything. For instance, if I could start over, I would do everything in galaxy black or silver, which look great even when printed at draft quality. By sticking to a pair of good neutral colors you can always mix and match bins any way you want and it will look right.
  3. If you use two basic colors, you can color-code things by switching between the base and accent colors. For instance, metric bins can be black with silver accents, and imperial ones silver with black accents. This is a really easy and cost-effective way to go.
  4. If you want to be fancy, you can add additional accent colors like red/blue for imperial and metric, or whatever you want. Really your only limit here is how many spools of filament you feel like buying. The key is sticking to the base colors for the bin bodies which will avoid ending up with a mess.

After that, I have two more recommendations:

First, choose a default bin depth (height) early on, and use that for everything unless there's a really good reason to do otherwise. Consistency both looks nicer and also maximizes the ability to stack bins in different ways, which is a big part of the utility of this system. The tallest bin you can fit in your shallowest drawer (often 4-5 units) is often a good starting point.

Second, fill your drawers with generic bins before spending too much time searching for or designing custom bins. In other words, if you have a tool that would fit in a 2x3-size bin, just print one of those, stick it in there, and move on. I have found that custom bins designed by other people often work in some way I really dislike, so I end up spending a lot of time searching for what I want or trying to modify others' designs. Conversely, custom bins can be exactly what you want, but it is really easy to spend an entire afternoon designing the perfect bin for a $5 Harbor Freight wrench. Generic bins will always be reusable so there is little waste if you end up replacing one with a custom bin if and when you decide it's worthwhile.

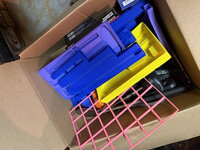
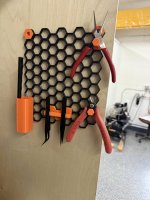
Last, as if one obsessive organization system wasn't enough, I also started printing Honeycomb Storage Wall. This one was a little less dangerous for me because I generally don't like or use pegboard-type storage very much, but I have a couple places where a little bit of it is the right solution.

IMG_1929.jpg
 
To avoid these ads, REGISTER NOW!
Top Bottom