To avoid these ads, REGISTER NOW!

Backyard Fab Shop Build in NE Ohio

OP
G

Graham08

Well-known member
Joined
Dec 10, 2007
Messages
713
Location
Iron Station, NC
Thanks for all the kind words!

Man, that is a great looking shop! I love the side porch. Get you a floor down, some chairs, a smoker, couple weather proof speakers under the roof, and you have a nice little hang out when the guys come over.

For sure. The plan is for a hog roast this coming summer, once it's done!
 
To avoid these ads, REGISTER NOW!

gricegear

Well-known member
Joined
Aug 15, 2012
Messages
170
Location
Illinois
That is one nice building! I'm jealous.. Looks like there is plenty of room to knock out projects. I like the overhang porch area also! Great job. The paint scheme turned out nice too. Keep up the great work!
 

JPorkins

Active member
Joined
Dec 28, 2011
Messages
37
You know you're getting old when the highlight of your Friday night is changing oil! :D

PICT0003Medium.jpg


Nice looking garage & Trailblazer too! Check out GMTNation.com sometime, it's a great resource site for the Chevy TB.
 

rinker1

Well-known member
Joined
Aug 30, 2008
Messages
289
Location
Ohio
Graham, I like your door setup for the stairway. Have you got it installed yet? I'd like to see photos if you have any, I have a stairway that needs blocked also.
 
OP
G

Graham08

Well-known member
Joined
Dec 10, 2007
Messages
713
Location
Iron Station, NC
Graham, I like your door setup for the stairway. Have you got it installed yet? I'd like to see photos if you have any, I have a stairway that needs blocked also.

I got a buddy to help me put it in Sunday. I'll try to get some pictures tonight...I have to run a light up into the attic to get enough light for photos. I was going to take pictures last night, but ended up insulating the door before it gets cold out again.
 
OP
G

Graham08

Well-known member
Joined
Dec 10, 2007
Messages
713
Location
Iron Station, NC
Attic door pictures...

First, what it looks like from downstairs:

PICT0007Medium.jpg

A closeup of the handle. I bent this up out of 3/4" tubing, and welded the mounting tabs to the end:

PICT0008Medium.jpg

Door open, looking into the attic:

PICT0010Medium.jpg

Door closed, from the top. I haven't trimmed the cable to length yet. I had foam left over from insulating down the center of the attic, so it got used here. The R-value is in the low 30's.

PICT0017Medium.jpg

Ballast:

PICT0014Medium.jpg

Closeup of the pulley bracket. I added Simpson connectors to the ends of the boards these are attached to, so I didn't pull anything out of the structure. I got the pulleys, cable, and cable thimbles (as well as the piano hinge at the other end of the door) from McMaster-Carr. You can build nearly anything out of the McMaster-Carr catalog!

PICT0016Medium.jpg

Ballast when the door is closed. It moves about 5 feet from open to closed.

PICT0018Medium.jpg

I got the geometry right on this, so there is a bit of rising rate for the ballast over the weight of the door. When the door is closed, it's weight overcomes the ballast and stays down. When it's open, the ballast gains leverage over the door, and holds it up without having to latch it. I guess that engineering degree was worth the effort! :D
 

rburke65

Well-known member
Joined
Nov 10, 2007
Messages
12,349
Location
Canfield, Ohio
Very nice Graham08! Years ago we had a similar attic door in a 4 car garage. Now, 43 years later, I'm needing the same set up only new shop. Thanks for all the photos.
 
OP
G

Graham08

Well-known member
Joined
Dec 10, 2007
Messages
713
Location
Iron Station, NC
Passed my electrical inspection today! Actually, passed two. It was intended to be a rough inspection, but the inspector said, "It's going to look the same with the fixtures in, there's no sense in me coming back, I'm going to pass the final as well."

More pictures later now that I'm going to have actual lights turned on...
 

Omphaloskeptic

Well-known member
Joined
Oct 11, 2008
Messages
2,346
Location
Ultima Ratio, Wa.
Passed my electrical inspection today! Actually, passed two. It was intended to be a rough inspection, but the inspector said, "It's going to look the same with the fixtures in, there's no sense in me coming back, I'm going to pass the final as well."

More pictures later now that I'm going to have actual lights turned on...


Now, that is one accommodating inspector; says something about the quality of the rough work.:thumbup:
 
OP
G

Graham08

Well-known member
Joined
Dec 10, 2007
Messages
713
Location
Iron Station, NC
Now, that is one accommodating inspector; says something about the quality of the rough work.:thumbup:

Everything is in conduit, and all the devices were wired and hanging there, so really not much is going to change from where I'm at now. I asked if he wanted to see the attic and he told me that he had seen enough...all my connections look good and everything is nice and neat, so he didn't need to go up there.

I have to say that everyone I've dealt with in the building department here has been great. Nothing like some of the other horror stories I've read here. It seems like they keep the intent of the building codes in sight and are not on a power trip.
 
OP
G

Graham08

Well-known member
Joined
Dec 10, 2007
Messages
713
Location
Iron Station, NC
My lovely wife helped me put in the rest of my bulbs last night. It is now lit up like daylight in the shop! 64 T8 bulbs put out some serious light. Also got my lights installed in the attic. I'm going to put in some porch lights, and get some pictures tonight.
 
OP
G

Graham08

Well-known member
Joined
Dec 10, 2007
Messages
713
Location
Iron Station, NC
Pictures!

Lights2_zps6d4bb268.jpg


Lights1_zps27641429.jpg


Electrical panel. I spent an extra few minutes with zip ties making everything nice & neat.

Panel_zps26d88cd6.jpg


A couple steps back from the panel. I really like Unistrut after doing this project. It's a great way to make everything secure and provide room for expansion later.

Panel2_zps2495cf8a.jpg


Won't have to walk far to find an outlet! Actually a bunch of my machines are going on this wall. A few of them are real outlet hogs when you start running power feeds and work lamps.

Receptacles_zpse05f74e1.jpg


Welder's ready to rock.

Welder_zpsf0c60d7f.jpg


I'm planning to hang my heater this weekend. Hopefully it will be warm in here 24-7 real soon.
 

1953mercury

Well-known member
Joined
Nov 25, 2012
Messages
701
Location
Steamboat Springs CO
Just found this. Great job on the building and the details. Really nice having the family helping out, Your a lucky man. Thinking you might want an extension cord for your welder, I know I end up rolling mine all over the shop depending what I'm working on, and it's nice to be able to work outside when the weather is nice. Cheers, Mike
 
OP
G

Graham08

Well-known member
Joined
Dec 10, 2007
Messages
713
Location
Iron Station, NC
Thanks for the compliments, Mike!

The reason for the liquid-tite conduit is to meet code without having to spend around $500 for a plug/receptacle combination rated for 100 amps. I started a thread in the electrical section about this.

As it sits, I can roll the welder away from the wall far enough to change the bottles and sweep under it. I may wind up going to a longer torch lead and hoses, and longer ground if it becomes an issue. I've had the machine for about 10 years, and rarely move it. It weighs about 1000 lbs with two cylinders on it, so it's not real easy to roll around.
 
To avoid these ads, REGISTER NOW!

HAY YOU

Well-known member
Joined
Nov 19, 2012
Messages
585
Attic door pictures...

PICT0018Medium.jpg


I got the geometry right on this, so there is a bit of rising rate for the ballast over the weight of the door. When the door is closed, it's weight overcomes the ballast and stays down. When it's open, the ballast gains leverage over the door, and holds it up without having to latch it. I guess that engineering degree was worth the effort! :D

Nice job on the attic door, I don’t have an engineering degree I’m just an old Ironworker & my eyes are not what they use to be. But I believe you put the cable clamps on wrong, the saddle part clamps the live end of the cable not the dead end. “Never saddle a dead horse” :)
 

Omphaloskeptic

Well-known member
Joined
Oct 11, 2008
Messages
2,346
Location
Ultima Ratio, Wa.
Graham08, congrats on getting the lighting completed.

I looked for a lighting thread by you and did not 'find' one; could you post some info about the conduit runs between the light fixtures? I've got about 10 or so CL freebie 8' dual FL fixtures to add to my meager shop lighting and I really like the way you've done yours. I would think it would really save me a lot of crawling around my trusses to run romex/j-boxes if I could employ (steal) your approach. Any details and close-up pics would be appreciated.
 
OP
G

Graham08

Well-known member
Joined
Dec 10, 2007
Messages
713
Location
Iron Station, NC
Nice job on the attic door, I don’t have an engineering degree I’m just an old Ironworker & my eyes are not what they use to be. But I believe you put the cable clamps on wrong, the saddle part clamps the live end of the cable not the dead end. “Never saddle a dead horse” :)

Thanks for the tip. I'll have to swap them when I get a few minutes. That's a good way to remember, too.

Do you know why the saddles go on the live end? I put them on the way I did because I figured it was better for the saddles to dig into the dead end than the live end.
 
OP
G

Graham08

Well-known member
Joined
Dec 10, 2007
Messages
713
Location
Iron Station, NC
Graham08, congrats on getting the lighting completed.

I looked for a lighting thread by you and did not 'find' one; could you post some info about the conduit runs between the light fixtures? I've got about 10 or so CL freebie 8' dual FL fixtures to add to my meager shop lighting and I really like the way you've done yours. I would think it would really save me a lot of crawling around my trusses to run romex/j-boxes if I could employ (steal) your approach. Any details and close-up pics would be appreciated.

I didn't do a separate thread. I'll get you some better pictures when I get home from work.

The logic behind what I did was to get an air gap between the lights and the ceiling. In my old shop I didn't do that, and when it got really hot out, I had a couple lights that would go out. That, and the ceiling wasn't perfectly flat, so the fixtures distorted when I screwed them to the ceiling.

I just have 1/2" EMT between the fixtures, and a short section of Liquatite flexible conduit between the box on the ceiling and the first fixture in each row.

A couple things I would probably do differently if I do this again:

1. If I had room, I would have let the fixtures hang a little lower. It was a real PITA to get the Liquatite exactly the right length, and the short lengths of Liquitite really aren't all that flexible. I have one fixture that goes over the lift that kept me from dropping them all down another 6".

2. I should have gone in the end of the first fixture in the row rather than the top. I was trying to minimize how far off the main run the boxes were, and made it harder to get the flexible stuff attached. Had I gone over one more truss, I could have used a 90 degree fitting in the end of the fixture, and it would have been easier to connect everything. Also, the knockouts I used were originally 3/8", which I didn't realize until I had the conduit run and the lights hung. So I ended up having to open them up to 1/2" to connect the flexible conduit.

If you do get Liquatite, make sure you get the stuff that has metal inside. It is a ton more flexible than the all plastic version.

I'll post some more pictures tonight.
 

PERFORMANCE-RED

Well-known member
Joined
Sep 18, 2008
Messages
62
Very very nice garage you have going!

One question, why didn't you run the electrical in the walls instead of all the exterior conduit?
 
OP
G

Graham08

Well-known member
Joined
Dec 10, 2007
Messages
713
Location
Iron Station, NC
Very very nice garage you have going!

One question, why didn't you run the electrical in the walls instead of all the exterior conduit?

Thanks. Machines have a habit of following me home, and it's much easier to add or modify the electrical to get power to them if it's in conduit rather than buried in the walls. Finishing the drywall was bad enough the first time!
 

HAY YOU

Well-known member
Joined
Nov 19, 2012
Messages
585
Thanks for the tip. I'll have to swap them when I get a few minutes. That's a good way to remember, too.

Do you know why the saddles go on the live end? I put them on the way I did because I figured it was better for the saddles to dig into the dead end than the live end.


The live end carries the load, the saddle is made to clamp (HOLD) that load in a straight pull. The u-bolts will distort the cable thus weakening it.
 

NUTTSGT

Super Moderator
Staff member
Joined
Sep 14, 2009
Messages
51,066
Location
Northern Central Ohio
It's looking good. I was wondering why you hung the lights off the ceiling instead flush on the ceiling surface. Question answered.

I will pose this question though, were the lights in your old shop high outputs?
 

rburke65

Well-known member
Joined
Nov 10, 2007
Messages
12,349
Location
Canfield, Ohio
Well, I stole your "trap door" idea and have it installed, but I just bought a Harbor Freight 2000# winch today that I plan on using to raise and lower the door. And it is remote controlled so Ill have no control wires to run. We will see how this goes. I'll just set a battery up in the attic with a trickle charger to feed it. I'll have to get two pulleys like you did. I'm getting there. Look for you at the swap meet here in Canfield. Thanks again.
 
OP
G

Graham08

Well-known member
Joined
Dec 10, 2007
Messages
713
Location
Iron Station, NC
Any details and close-up pics would be appreciated.

Here you go.

This is a pic of the Liquatite going from a box on the ceiling into one of the light fixtures. I have four of these drops. Like I said, this was a PITA to get right.

PICT0024Medium_zpse9fdf7de.jpg

I used single jack chain to hang the lights. I just screwed hooks through the drywall into the trusses, and used some of the existing holes in the fixtures to attach the chain with #8 screws and washers.

PICT0025Medium_zps88cc4666.jpg

One thing I learned with the chain is that in order to get the fixture to hang level, you either need to use two separate chains, or open up a link, and attach two links to it. Otherwise, the two sides are different lengths when you hang the chain on a hook.

Here's a closeup of the conduit. I used 1/2" EMT and connectors. I would hang two fixtures, then measure the exact distance between them before cutting the EMT, so it's not pushing the fixtures one way or the other.

PICT0026Medium_zpsd70a9441.jpg

I hope that helps you out!
 
OP
G

Graham08

Well-known member
Joined
Dec 10, 2007
Messages
713
Location
Iron Station, NC
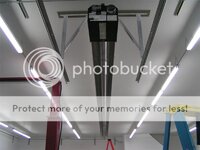
My dad came over and helped me hang my heating system today. This is an Enerco low intensity radiant tube system. It's a 100,000 BTU/Hr burner with a 30' long tube. I had one of these in my last shop, and was very happy with it.

PICT0023Medium_zpsd9d59903.jpg

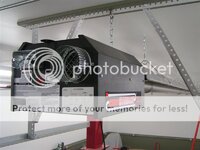
Here's the burner box. These things are pretty simple to install, the only trick to hanging it is to make sure there's some fall toward the vent to make sure any condensation runs away from the burner.

PICT0022Medium_zpsd16a0907.jpg

I'm still have to run the gas line, get the vent and air intake finished up, make up a power cord, and hook up the thermostat.

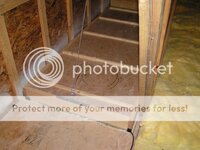
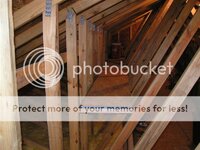
One other thing we did today was added some shelves in my attic. We put away all my electrical supplies, rather than just moving them to another spot downstairs. These make the attic seem a lot bigger!

PICT0029Medium_zps5db99188.jpg
 

NUTTSGT

Super Moderator
Staff member
Joined
Sep 14, 2009
Messages
51,066
Location
Northern Central Ohio
Yep, T12 HO's.

I bet that's why they got hot and shut off. We used to have the same thing in the apparatus bay at the FD. I'm almost positive they came with stand offs but they didn't get used when they were put up.

I currently have T8s mounted directly to the ceiling and no problems. :beer:
 
OP
G

Graham08

Well-known member
Joined
Dec 10, 2007
Messages
713
Location
Iron Station, NC
Finally finished up my heater install today. Maintaining a steady 60 degrees in there now! Much better than screwing around with kerosene heaters.

Here are a couple shots of the gas piping. I hired a contractor to get it into the building, but finished the run to the heater myself.
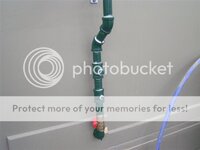
PICT0015Medium_zps4da2c160.jpg

I used Loctite 565 pipe sealant. This is some pretty good stuff...goes on as a liquid, and cures in the absence of air.

PICT0013Medium_zpsba702c89.jpg

I ordered all the fittings from McMaster-Carr, including the split ring clamps. This job was much easier thanks to having the right stuff. I borrowed a manual pipe threader from my father-in-law, which also was a big help in getting this job done.

Another shot of the heater and plumbing. Turns out the overhead door brackets were in the right place to pull double duty in supporting the heater and piping. The flexible gas line was included in the heater install kit. That's the thermostat wire that's zip tied to the conduit...the thermostat is mounted to the wall right next to the electrical panel.

PICT0012Medium_zps5e5bc7e5.jpg

Here is the vent pipe going through the wall. I got a little carried away with the bracket. I made this (and a few more that support the air intake) from 20 gauge steel. These are the first things that have been welded in the new shop. The pipe is secured to the bracket with a big hose clamp.

PICT0007Medium_zpsd25013d8.jpg

Here are a couple shots of the air intake. I'm pulling air from the attic, since it's a vented space.

PICT0008Medium_zps9b23eda2.jpg

The reason for the 90 degree bend and extra length is to clear the attic floor. Way easier to just poke a hole in drywall and cut a little fiberglass insulation than to go through the drywall, rigid foam insulation, and attic floor. The short section of flexible duct is to allow for the change of length that happens when the heater is hot. The manual says to allow for 2" of growth from cold to hot.

PICT0010Medium_zpscad999bc.jpg

PICT0011Medium_zpsffaea3db.jpg

One last pic of a bracket. This one supports the pipe from the wall, just before it turns into the attic.

PICT0009Medium_zpsc22bd4e8.jpg

I should be able to get my final inspection done soon, then move everything in!
 
OP
G

Graham08

Well-known member
Joined
Dec 10, 2007
Messages
713
Location
Iron Station, NC
Those supports look great!

But green? I thought you wuz a racer!

Thanks!

Yeah green...I used to believe that superstition, but I've seen too much bad luck happen to cars painted colors other than green. I'm actually entertaining the thought of painting the new sprint car green.

But, you can keep your peanut shells to yourself...:D
 
OP
G

Graham08

Well-known member
Joined
Dec 10, 2007
Messages
713
Location
Iron Station, NC
The heater install looks good, nice and warm out there now ?


Green cars/superstitions BAH !

Yes! Warmth is good. I've got it set for about 60 degrees right now, which is a pretty comfortable working temp for me.

You have to wonder about the origin of some racing superstitions...
 
To avoid these ads, REGISTER NOW!
Top Bottom