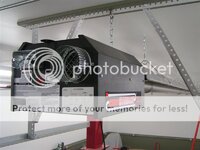
Finally finished up my heater install today. Maintaining a steady 60 degrees in there now! Much better than screwing around with kerosene heaters.
Here are a couple shots of the gas piping. I hired a contractor to get it into the building, but finished the run to the heater myself.
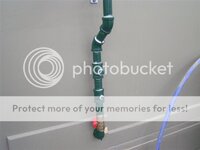
I used Loctite 565 pipe sealant. This is some pretty good stuff...goes on as a liquid, and cures in the absence of air.

I ordered all the fittings from McMaster-Carr, including the split ring clamps. This job was much easier thanks to having the right stuff. I borrowed a manual pipe threader from my father-in-law, which also was a big help in getting this job done.
Another shot of the heater and plumbing. Turns out the overhead door brackets were in the right place to pull double duty in supporting the heater and piping. The flexible gas line was included in the heater install kit. That's the thermostat wire that's zip tied to the conduit...the thermostat is mounted to the wall right next to the electrical panel.

Here is the vent pipe going through the wall. I got a little carried away with the bracket. I made this (and a few more that support the air intake) from 20 gauge steel. These are the first things that have been welded in the new shop. The pipe is secured to the bracket with a big hose clamp.

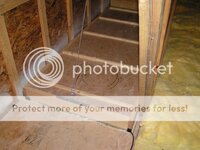
Here are a couple shots of the air intake. I'm pulling air from the attic, since it's a vented space.

The reason for the 90 degree bend and extra length is to clear the attic floor. Way easier to just poke a hole in drywall and cut a little fiberglass insulation than to go through the drywall, rigid foam insulation, and attic floor. The short section of flexible duct is to allow for the change of length that happens when the heater is hot. The manual says to allow for 2" of growth from cold to hot.


One last pic of a bracket. This one supports the pipe from the wall, just before it turns into the attic.

I should be able to get my final inspection done soon, then move everything in!