To avoid these ads, REGISTER NOW!

Reorganization, it's like a renovation.

Status
Not open for further replies.

dsquire

Well-known member
Joined
Jun 18, 2011
Messages
50
Location
Kitchener, Ontario
Just finish reading from the beginning subscribing awesome

truckin23

Wow. You must be some kind of speed reading fool. You made the exact same post on 47 different threads in the last 2 days. Some of the threads are small but some are so large that it would take several days at a minimum to partially read. Apparently you have fooled yourself but the Garage Journal Members are not that easily fooled. I think an apology is in order. :)

Cheers :beer:

Don
 
To avoid these ads, REGISTER NOW!
OP
G

GirlnAgarage

Well-known member
Joined
Jan 21, 2011
Messages
4,669
Location
Texas
A little bit of poking around at parts today.

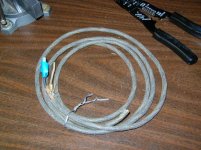
The wire gauge for the motor and cord is 14ga.

While there I had the bright idea to strip the old power cord. Oh, before I did I measured it to double check length - 8'. Glad I did, I was planning on a 6' replacement. That would have been too short at my own doing!

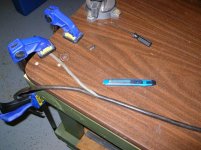
I did it like I was skinning a snake. Easy job with the narrow Exacto. The trick when running a cut line is you don't cut through on the first pass, use multiple passes. Same for cutting out leather. Saves the material from screw ups, your fingers from being cut and the blades from being broken or dulled out.

Stripped/measured an end real quick to verify size - 14ga.

Now I have 8' of tinned copper wire in each color, black and white. If I used it to rewire the motor would it be considered taking a shortcut? Or would it be acceptable? No idea where I got the idea, I just started cutting it apart.


I pulled the bearing caps off the ends. The pulley end is in hand tight. The O/L end will need a little more umph of the arbor or something. Waiting for the new bearings to get here before pulling them out.

I thought the bearings were in good shape the way the pulley spun. When I ran them with my finger it was gritty and they caught in a few places. If it was from tear down or that's where they got to from use I am glad to be replacing them.


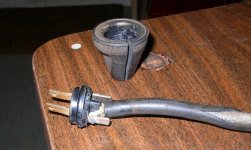
For shiggles I hack sawed the plug to have a look at the construction on the inside. The wires were soldered to the prongs. Pretty stout.
 

Attachments

  • powercord1.jpg
    powercord1.jpg
    70.1 KB · Views: 75
  • powercord2.jpg
    powercord2.jpg
    79.1 KB · Views: 72
  • oldplug1.jpg
    oldplug1.jpg
    67.4 KB · Views: 73
  • oldplug2.jpg
    oldplug2.jpg
    62.3 KB · Views: 78

Outlawmws

Well-known member
Joined
Aug 9, 2011
Messages
39,305
Location
The Badlands
truckin23

Wow. You must be some kind of speed reading fool. You made the exact same post on 47 different threads in the last 2 days. Some of the threads are small but some are so large that it would take several days at a minimum to partially read. Apparently you have fooled yourself but the Garage Journal Members are not that easily fooled. I think an apology is in order. :)

Cheers :beer:

Don

Yeah, and as soon as he got to 100, he posted in the classifieds. and guess what? He got banned.. I wonder why? :confused:

:evil:
 

onething

Well-known member
Joined
Jan 23, 2011
Messages
438
Location
TEXAS
She knows how to skin a snake. Why am I not surprised?
Good to see you're back.
 
Last edited:
OP
G

GirlnAgarage

Well-known member
Joined
Jan 21, 2011
Messages
4,669
Location
Texas
truckin23

Wow. You must be some kind of speed reading fool. You made the exact same post on 47 different threads in the last 2 days. Some of the threads are small but some are so large that it would take several days at a minimum to partially read. Apparently you have fooled yourself but the Garage Journal Members are not that easily fooled. I think an apology is in order. :)

Cheers :beer:

Don

Yeah, and as soon as he got to 100, he posted in the classifieds. and guess what? He got banned.. I wonder why? :confused:

:evil:

Aw, I feel so used. What a turd.


She knows how to skin a snake. Why am I not surprised?
Good to see you're back.

lol Never skinned one, just seen it on TV.

Thanks :)
 

Wingnut65

Well-known member
Joined
Apr 21, 2010
Messages
3,170
Location
Tampa Bay, FL
I am planning on a replacement cord. Not sure which direction - a prebuild power cord or making my own. Since I've got this machine inside I am leaning towards the standard 6' cord w/molded on plug.

I just replaced my cord on my 1963 Craftsman Radial Arm Saw and just bought a 12' extension cord and cut off the 3' at the outlet end so I could keep a 9' cord with the molded plug.

But it sounds like this idea may be a little late...
 
OP
G

GirlnAgarage

Well-known member
Joined
Jan 21, 2011
Messages
4,669
Location
Texas
I just replaced my cord on my 1963 Craftsman Radial Arm Saw and just bought a 12' extension cord and cut off the 3' at the outlet end so I could keep a 9' cord with the molded plug.

But it sounds like this idea may be a little late...


Not a bad idea. I still need a power cord. Good tip!
 

akdiesel

Well-known member
Joined
Aug 8, 2008
Messages
2,617
Location
Wasilla, AK
GirlnAgarage

I have missed this thread entirely. Great work on all you've done. It took me the whole day to get through your pages of projects, but it was worth it.
Looking forward to more of your projects.
 

Shoottx

Well-known member
Joined
Jan 30, 2011
Messages
314
Location
Plano Tx
I just replaced my cord on my 1963 Craftsman Radial Arm Saw and just bought a 12' extension cord and cut off the 3' at the outlet end so I could keep a 9' cord with the molded plug.

But it sounds like this idea may be a little late...

Yup

When you price the parts, wire and plug it is mor expensive than cutting off a cord. So.... what I do is buy a long cord an one extra plug and get two.

Of course I also have a cardboard box full of 4 outlet metal boxes with different length of cord for extension cords.:willy_nil
 

xtremek

Well-known member
Joined
Apr 13, 2012
Messages
11,603
Location
St. Johns, Mi
Lady, do you ever stop? I'm trying to play catch up by reading one or two pages a day, but I think you add that to the end every day. Very nice work. :bowdown: Reminders me of CorvetteSander over on the Hamb.
 
OP
G

GirlnAgarage

Well-known member
Joined
Jan 21, 2011
Messages
4,669
Location
Texas
Any problem using the wires I stripped out from the power cord to rewire the motor? They look in good shape, still flexible and best of all, tinned copper for free. Should I go for it? :dunno:


GirlnAgarage

I have missed this thread entirely. Great work on all you've done. It took me the whole day to get through your pages of projects, but it was worth it.
Looking forward to more of your projects.

Thanks AK :)


Girl, If you would have waited, I'd have been saying "She's from TEXAS; What's to be surprised about?" :dunno:

:lol:

:D

Lady, do you ever stop? I'm trying to play catch up by reading one or two pages a day, but I think you add that to the end every day. Very nice work. :bowdown: Reminders me of CorvetteSander over on the Hamb.

lol
Sometimes, when I'm sleepy or hungry. I appreciate your time :thumbup:
Around here it seems like one project runs into another or one project depends on getting another done first. It never ends.


Yup

When you price the parts, wire and plug it is mor expensive than cutting off a cord. So.... what I do is buy a long cord an one extra plug and get two.

Of course I also have a cardboard box full of 4 outlet metal boxes with different length of cord for extension cords.:willy_nil

Ahhh, good call on an extra plug. No need to waste the other end of the cord.
 

Wingnut65

Well-known member
Joined
Apr 21, 2010
Messages
3,170
Location
Tampa Bay, FL
Yup

When you price the parts, wire and plug it is mor expensive than cutting off a cord. So.... what I do is buy a long cord an one extra plug and get two.

Of course I also have a cardboard box full of 4 outlet metal boxes with different length of cord for extension cords.:willy_nil


Ahhh, good call on an extra plug. No need to waste the other end of the cord.

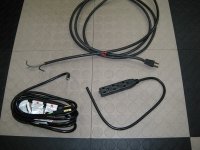
That's exactly what I did. And I bought a cord with three sockets to make it more useful when shortened. But I didn't think far enough ahead and still do need that extra plug end!

DSCN5119.JPG

And now back to the regularly scheduled adventure...
 
OP
G

GirlnAgarage

Well-known member
Joined
Jan 21, 2011
Messages
4,669
Location
Texas
A change of pace...

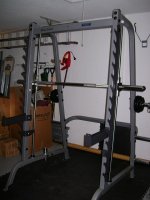
Last couple of days I've worked on turning pic1 into pic4. If anyone is interested in living Ground Hog day, do this. Assembly wasn't hard, just slow and long keeping the process.

There are several major components and each component has it's own set of instructions, hardware and accessories. The biggest headache is inventorying before putting nuts to bolts.

First component was the frame & smith bar. Then the Lat attachment with pulleys, weight stack and cables. Next was the bench that includes the leg developer attach and the leg stabilizer attach. Last thing I need to put together s the preacher curl attach, but since I don't use it (DH does) I'm in no hurry.

I made certain to use good assembly procedures throughout. I wiped down any parts that got stickers. I greased all allens, bushings and bolts that were a critical assembly/dis connection. I polished up all the chrome so the plates slide. I oiled the vertical bars of the smith and the weight stack so there's smooth glide. I wiped down the cables with an oiled sock.

Anyway, thought yall would want to see what else is going on in the garage. I've been chasing a smith/home gym for a while. Now I have a ton of cardboard and a disassembled pallet that needs to be picked up on bulk trash day.
 

Attachments

  • smith2.jpg
    smith2.jpg
    144.1 KB · Views: 102
  • smith4.jpg
    smith4.jpg
    121.1 KB · Views: 93
  • smith3.jpg
    smith3.jpg
    96.5 KB · Views: 96
  • smith1.jpg
    smith1.jpg
    116.8 KB · Views: 90

Wingnut65

Well-known member
Joined
Apr 21, 2010
Messages
3,170
Location
Tampa Bay, FL
Recycle the cardboard !!! The pallet could go in a fire pit...

Nice work on the clothes rack! At least that's what it would end up as in our house. Took our new treadmill a whole week before it got buried, but now she uses it regularly.

Good luck with this next adventure!
 
OP
G

GirlnAgarage

Well-known member
Joined
Jan 21, 2011
Messages
4,669
Location
Texas
Oh it will be a very expensive clothes rack! lol
Nahh, it will get used quite a bit. DH and I both workout as a matter of routine. I'm very excited to finally have some big leg weight capability in the house. This machine is versatile and we ought to get great workouts in.


Well I got the pallet broken down. Only stepped on one nail with my flip flop and the nail luckily went through between my toes :scared: Now I need new flip flops :rolleyes: That cleared up the suffocating clutter a bit. Geez, I'm a pill. I am even organizing the trash. Bulk trash around here only comes once a month, so until then, we have to store/hold all the big **** inside which takes up valuable walk/work space. Stupid small garage with only one outlet :wtf:

:eek:
 
To avoid these ads, REGISTER NOW!
OP
G

GirlnAgarage

Well-known member
Joined
Jan 21, 2011
Messages
4,669
Location
Texas
I hate electrical I hate electrical I Hate Electrical work!! :shocking:

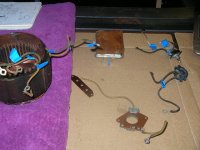
Anyone wanna rewire my Cman motor? I swear I'm on the verge of a panic attack and brain overload. I Hate this SHHHHHHHHtuff!!!! One hand, soldering iron, desolder, resolder, trying to hold **** together, which ends goes where which ends need a ring connector, this is end is too short-, I hate it I hate it I hate it!

Why in the h-e-double hockey sticks did I do this? :eyecrazy:
 

Attachments

  • i hate electrical.jpg
    i hate electrical.jpg
    134.8 KB · Views: 87

cbacres

Well-known member
Joined
May 28, 2010
Messages
5,998
Location
SW Florida
Because it gives you an excuse to drink more beer!

After that elaborate, custom, precision engineered pulley backer upper you built, this wiring can't whip you.:D.

I feel for you, just about get it where you need it, and spring, there goes that wire out of place.

I have a set of alligator clamps mounted on a base with adjustable arms, designed to hold wires in place. Maybe get a couple do clamps attached to stiff wire to form however you need around the motor while you solder?

I've found it easier to use a longer than need wire to get in he tight spots to,solder and then trim to length after soldering the first end.

Hang in there, you'll get it.
 

Outlawmws

Well-known member
Joined
Aug 9, 2011
Messages
39,305
Location
The Badlands
Girl,

Would one of these help? (with or without the magnifier) Available at most any place that sells electronics components and tools, and many hobby shops.


attachment.php
 

Attachments

  • hands.jpg
    hands.jpg
    56.2 KB · Views: 1,484

metalhead140

Well-known member
Joined
Jan 15, 2013
Messages
1,456
Location
NSW, Australia
Been reading through this thread off and on for a while, just made it to the end. Love the home built brake, drawers, shelves and benches. I've been thinking about building myself a brake for some time now, and now I want to build one so I can make myself some metal drawers! Nice work on the drill press too.
 
OP
G

GirlnAgarage

Well-known member
Joined
Jan 21, 2011
Messages
4,669
Location
Texas
Hey thanks fellers.

cb, I think my brain overloads. Mechanical? You bet. Electrical? Short circuit!

Outlaw one of those would definitely help.

Metalhead, thanks a bunch. I get a lot of comments on the press brake. It's a simple tool but does such a specialized task. If I were to change anything about my original design, I'd set it up on a free standing stand. That way the mounted piece of angle iron could sit on metal surface (like an Ibeam or Sqtube) instead of the laminate wood top. That would solve the small deflection issue that creeped up over time on that bottom piece. I'm sure it could use some user friendly modifications, but for the "one time use" of those drawers, it did exactly what I needed too. If I needed it for the pan brake config on a regular basis I'd want a stronger solution than my wood block setup, at least for 16ga work.


Cman progress:

I finished up the soldering and reinstalled the parts to the O/L end. That means hooking up the O/L switch, centrifugal switch, terminal bar and the stator coil. It was a bit tough getting the wires back into place. The trouble spot was the wires coming out of the coil to the terminal bar. The bending may have cracked a wire right where it comes out. And that is infuriating. Can't fix. Can't protect. They just have to be and fingers crossed hope the motor works.

So next for reassembly is installing the rotor assembly. But before that can be done I had to address the missing spring: Motor rotor assembly missing gov spring
I sourced them from Century Springs from a link provided by Davefr. There were two options and not knowing which would be best, I ordered three of both. And there was a $40 minimum order, so... They came in Friday, finally.

I opted to install the music spring (80169) instead of the stainless spring (80169 S). The stainless spring retains some magnetic properties because of the stainless coat. Since this is going on a motor I'm not sure of that magnetism would be an issue or not. Reviewing a pdf on spring types, the music spring is tough, durable and able to withstand cyclic applications. I decided on the music spring (80169).

Going to work on it today. Hope for some good progress!
 

Attachments

  • springs2.jpg
    springs2.jpg
    51.1 KB · Views: 93
  • springs1.jpg
    springs1.jpg
    61.8 KB · Views: 85
OP
G

GirlnAgarage

Well-known member
Joined
Jan 21, 2011
Messages
4,669
Location
Texas
I'm surprised I am the only one who's had to replace one of those springs. I got nothing from the guys on OWWM. I sure hope I picked the right one. lol

Got the motor closed up tonight. New bearings went in nice and easy. I still have to hook up everything in the base. But should be flipping the switch soon.
 
OP
G

GirlnAgarage

Well-known member
Joined
Jan 21, 2011
Messages
4,669
Location
Texas
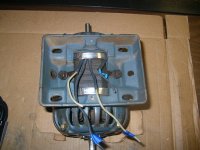
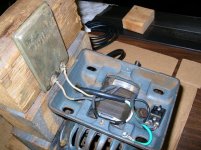
Got the rest of the wires hooked up and no spare parts left over. So I plugged it in, put on my leather gloves & goggles, said a quick prayer and flipped the switch - it runs! :rocker:

Boy, this thing hums. New bearings are smooth and when I flip the motor off, it spins for a good bit after power down before it actually stops. Sanded and polished both shafts while I ran the motor. Those are ready to go, hopefully no more drama with stuck pulleys. Glad to have new springs on the governor assembly too. Not sure what that part does, but it's symmetrical now.

The pulley is the last part I need to clean up. There's a burr in the center hole I need to smooth out before reinstalling. Then I can mount the motor plate and get back on the DP.

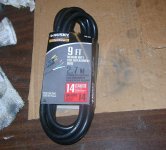
For the power cord I just picked up a 9' Husky brand 14/3. The day I went to the store they had a lame selection of extension cords and the three employees at the cord reels couldn't be bothered with me. So, I saw the Husky cord and said good enough. Not really top brand but figured for what I'm using it for it ought to last long enough.

I did drill and tap the base for the ground. It was an 8-32 but had a problem. The problem was his was my first time drilling & tapping. So I went up to a 10-32 to get on with it.

I had a tough time heating the original connections to unsolder. It wouldn't give. So, I used diagonal snips to get rid of the wire and then drilled a new hole. Did the same on the condenser. Inserted the wires, then soldered it secure.

Very glad to have this done. It drove me nuts. :eek:
I'm sure the next guy who gets into this motor to give it the GJ/OWWM treatment will curse me. Eh, who cares. I'll be long gone.
 

Attachments

  • final wires1.jpg
    final wires1.jpg
    127.4 KB · Views: 78
  • final wires2.jpg
    final wires2.jpg
    60.7 KB · Views: 78
  • huskycord.jpg
    huskycord.jpg
    141.1 KB · Views: 75
  • old solder.jpg
    old solder.jpg
    141.5 KB · Views: 79

Wingnut65

Well-known member
Joined
Apr 21, 2010
Messages
3,170
Location
Tampa Bay, FL
Awesome! :thumbup: :bubbrubb:

You have added another 60 years to the life of it before it needs to be rebuit again. :bowdown:

:beer2: Now, on with the reassembly! :drink:
 
OP
G

GirlnAgarage

Well-known member
Joined
Jan 21, 2011
Messages
4,669
Location
Texas
:D Thanks Outlaw

I'm happy that the PO already upgraded the motor wiring on the Delta and I just have to work on mechanical parts. On that one I'm building another shop stand then cutting it down to bench height. I found a Delta base from the OWWM classified that I'm going to repaint. So the Delta will get a fresh coat of paint too I think.

As I get DPs arranged, I kind of want the Cman back in the garage. The huge RPM range it has now made the darn thing versatile to easily handle wood or metal. The Delta still runs a little fast for metal.

DH would kill me if I said "Hey, lets switch the DPs places" :yikes:

Awesome! :thumbup: :bubbrubb:

You have added another 60 years to the life of it before it needs to be rebuit again. :bowdown:

:beer2: Now, on with the reassembly! :drink:

You know, when you put it into words it is hard to imagine, but thinking about the parts, it is true!
 

Outlawmws

Well-known member
Joined
Aug 9, 2011
Messages
39,305
Location
The Badlands
Girl, If you really want to make it a bench DP, check around for a swap with someone that want's their bench to be a floor stander. Most people are trying to go the other way. (you know we (GJ) probably need a "DP parts swap" thread similar to the "Vise parts swap" thread...)

I'm curious; what makes you want it as a bench top? I hate losing bench top space to any tool except a vise.
 
OP
G

GirlnAgarage

Well-known member
Joined
Jan 21, 2011
Messages
4,669
Location
Texas
Girl, If you really want to make it a bench DP, check around for a swap with someone that want's their bench to be a floor stander. Most people are trying to go the other way. (you know we (GJ) probably need a "DP parts swap" thread similar to the "Vise parts swap" thread...)

Thought about that but with my location, I don't really trust dealing with folks around here. The DP is an 11-120 which is originally the bench model. I think the PO was the one that welded the original column to a bigger pole and stuck it in a round cast base. But I don't actually get the utility of floor model because the table can't go any lower than the weld bead on the column (because of the bead and then the fatter pole). I'm going to cut the column at the weld and drop it in the base I sourced.

I'm curious; what makes you want it as a bench top? I hate losing bench top space to any tool except a vise.

Well, several reasons. But I won't be losing bench top space :pimpflash

- The base compared to the head unit is disproportionate and makes it difficult to move. I figured to convert it to bench top config and build a stand like the one I just built for the Cman. The DP will still stay in the same floor space foot print.

- It'll be easier to move around than in the current config. (I might put rear wheels on the stand). From dragging the Cman on it's stand, the Delta being lighter ought to be really easy.

- The shop stand will also allow me some storage for DP accessories like drill bits, clamps and a vise I'm shopping for. The space above the round base is currently wasted. I always liked the little two drawer cabinet setups under DPs. I thought it looked neat. So, going for that kind of concept but with easy 2x4 construction (no actual real woodworking) :lol_hitti

- Setting the DP on the stand will put it at a better working height for me. I noticed that when I put the Cman on it's stand it was much more comfortable. Especially reaching the quill stop with my left elbow (the non-working one)to lock in position while lining up my workpiece and setting drill depth. (Remember, one hand so I can't work the crank and the workpiece at the same time). I have to clamp my workpiece to table, no matter what it is. Takes forever.


I guess ultimately I'm sizing the DP for my height. Sounds funny but if the machine is sized better - better for my reach and for my arm movements or I'm able to use my body (hips, belly etc to assist lifting the table or whatever) it is less frustrating and I'm more skilled at doing the actual work on the project vs fighting with fumbling pieces trying to set up.
 

Outlawmws

Well-known member
Joined
Aug 9, 2011
Messages
39,305
Location
The Badlands
All good reasons, especially there ergonomic ones. I'm in the process of looking for a pole a foot taller for my monster DP, for similar reasons. These industrial DPs have extended quills and it puts the workpiece uncomfortably low for me, and I'm not exactly a really tall person. Someone 6 foot and up would be bent over double, even though the overall height of the DP is about 6 ft. The size of the head and its vertical depth push everything lower...

The fact that it's been welded and you lose some of the post anyway, sure, no loss to cut it back down.
 
OP
G

GirlnAgarage

Well-known member
Joined
Jan 21, 2011
Messages
4,669
Location
Texas
I hear taller folk have problems too. (But secretly this shorty doesn't believe it) :lol_hitti

Really though, glad you are fixing yours up too.
Ergos are often overlooked in the work environment. They can be overcome for a time but eventually become a glaring inefficiency.


Better ergos = less fatigue, less frustration = better work
 
Status
Not open for further replies.
To avoid these ads, REGISTER NOW!
Top Bottom