BNZ Automotive
Member
- Joined
- Sep 9, 2014
- Messages
- 22
Started a V12 oil cooler today. Ugh 


I've done the sand/compound/polish thing. Mcguire's works pretty good, but after talking to an aircraft maintenance tech friend and a fiew body shop owners, I've learned you're best off not sanding or using any abrasive on a headlight lense. Once you remove the "hardcoat", you've killed the lense. It will require sanding/polishing for the rest of it's life. Pittman ALR is what you need. Wipe on, wipe off. Done. Not cheap, but it has worked on acrylic aircraft windows and landing lights for a darn long time.
http://www.ibc34.com/Onestep.html
Tommy
Not inside the garage today, can't get a car in there, **** !
I tried to clean my daughter's 03 Grand Am headlight assembly's.
They're getting funky as most of these assembly's are. Only had about 1/2 hour to do it,
Used a most popular toothpaste, with whithening, starts with Cre and a generic window cleaner.
Had to really rub and work it in and rinse. It will need a couple of more sessions, but it will be a big improvement!!!
Started with a small area and went for it!
The test area was the right headlight, in the corner, then I went to the left lense not too bad for a first try !! It will come around!
Started a V12 oil cooler today. Ugh
Test fitted all the stereo to ensure it can all fit in place..( just a bit more adjustment ) This is going on my new wall of cabinets. Will be sanding and painting it to match Craftsman metal cabinets along the wall on the left and right.

Had the electrian over. Orginally it was to add a 220 and some lighting to the garage. Turned into rewiring half my house because 2 general light circuits were overloaded. 15amp breakers showing 19amps. Come to find out EVERY outlet and light was on 1 15amp circuit. That included the garage door opener.
Nice unexpected $400 out of my pocket and 5 hours of work.


Stripped paint off of some aluminum Porsche lug nuts so I can refinish them.

This is why I coated the lens with exterior polyurethane. The UV inhibitors protect the newly exposed plastic from further oxidation. It's been a little over 2 years since I did that retrofit and the lenses still look the same as they do in the pictures. I did my Audi even before the Subaru and it still looks like the day I did it.
no nuts or bolt left over.
Just outside it, I pulled all the wheels off the wifes Nissan X-Trail and power washed about 3lbs of mud out of the back of the rims. Driving to the airport this morning it was like the damn thing had square wheels it was vibrating so much at 70mph. Guess I need to do it more often, perils of living up a short dirt track out in the country I guess.
That is amazingly horrible! Glad you didn't have a house "melt down". The problem with so many builders... Utter and complete lack of professionalism, craftsmanship and adherence to building code.
Having moved around a bit, it never ceased to amaze me the incredibly stupid things people did and some of them by licensed professionals!
Re-wired my entire garage and made the house service a 125A sub-panel off my 380A main service! 230v 30A & 50A outlets every 10' with 115v 20A outlets every 5' and my main panel is only a little over half full!
I can plug a welder or the plasma cutter into an outlet without having to take more than 3 or 4 steps. Of course, everything else is just gravy!
- thirty!Stared at the empty space that used to be occupied by my cars. Lost my 64 Plymouth, 64 Olds 98 convertible(in the family for 46 yrs) and my camper in a fire at the winter storage facility.
loosing that Plymouth *****. Loosing the delta 98. That hits home man. I am so sorry Pulled the rear end from my Chevelle. I'm replacing all the rubber bushings, springs and shocks. Finally was above freezing here in chicago, been waiting all winter to get to it. Need heat in this garage!


We had fun. Oooh boy.
I noticed a few months ago the roof beam along one wall - the one that still has the original frame and sheet construction - was sagging bad, and one of the roof joists had cracked. Decided that when $$ came available, I'd get a friend to work on it.
HE came over Sunday, looked at it, and said "I'll be there Tuesday". Nothing like advanced warning. So Sunday was spent clearing out the "cubby shelves" that have been there since the barn was built, or thereabouts... been parts storage since I moved in...

Finally got the cubby and workbench next to it out... realized the original beam was sagged, someone put a 4x6 header in to hold it up, and tacked it in with a couple stubs - and 3 16d nails per side. Safety third?? You can see the gap on one side (the left side was 2x worse!), and the window (under the shotgun) is level and square - unlike the beam above it.


Anyway... we got the wall jacked up (millimeter at a time), still caught a flying 2x4 when the jack slipped, but all in all, the basic framing is in - and look, mom, no more sag!

Just hung new boxes for outlets (Yay!), and tomorrow comes wiring, shear sheeting (I'll miss the old wood, tho), and probably get most of the roof rebracing (heavier roof beams & new purlins) done.
By Friday... My wallet will be sufficiently lighter, I'll have a new workbench to build (and the cubbywall to rehang), but I won't sit there in a wind or rainstorm wondering if I'll be wearing my roof or not.
Pardon me, but now... it's O-
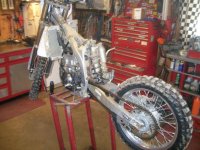
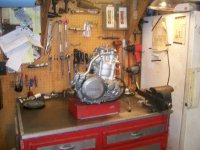
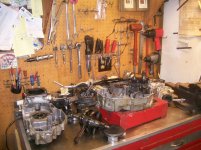


Lassen, none of your pics came out.