Fixed two spots on my step-dad's yard roller that I had welded after testing it for leaks.


You are using an out of date browser. It may not display this or other websites correctly.
You should upgrade or use an alternative browser.
You should upgrade or use an alternative browser.
What did you do "IN" your garage today?
- Thread starter mayhemman
- Start date
buzz4041
Well-known member
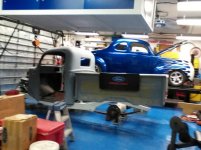
Got the bed set in place and cab aligned. Set the motor and ****** in place and will line it all up tomorrow and start the motor and ****** mount design.
Attachments


Last edited:
j p smith
Well-known member
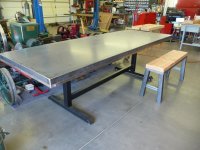
JP, do you put anything on the sheet metal table top? Raw sheet metal would never work here in Missouri!
We plan to paint the top, the table base and the bench frames will be black satin powder coat with the wood being stained to look like barn wood
j p smith
Well-known member
That is fantastically simple. I'm with VW, what surface finish do you have or will you use?
Thanks zking.
We will powder paint the base and the bench frames, paint the table top and stain the wood to look like barn wood
Removed my old (relative term, it is less than a year old) Klimaire 18,000 BTU heat pump/air con and replaced with a new Mitsubishi 18,000 BTU heat pump/air con. The Klimaire outdoor PCB fried, they wouldn't warranty it, hell I couldn't even buy a new one outright! Searched since February with no luck. At least the Mitsu has a 7 year warranty and local support....
Lippyp
Well-known member
We plan to paint the top, the table base and the bench frames will be black satin powder coat with the wood being stained to look like barn wood
My only advice would be to think about the colour as black is going to get hot enough to fry an egg on in the sun.
LS6 Tommy
Well-known member
Removed my old (relative term, it is less than a year old) Klimaire 18,000 BTU heat pump/air con and replaced with a new Mitsubishi 18,000 BTU heat pump/air con. The Klimaire outdoor PCB fried, they wouldn't warranty it, hell I couldn't even buy a new one outright! Searched since February with no luck. At least the Mitsu has a 7 year warranty and local support....
Kilmaire has always been a ***** for parts. We just installed some Mitsubishi heat pumps at work. The warranty is actually 5 years on parts, 7 on compressor to the original owner, 10 years on the parts and compressor in a single family residential home if the owner lives there and 12 years on parts and compressor in a single family residential home if the owner lives there and it was installed by a Mitsubishi Diamond Contractor.
Did you do the Mitsubishi yourself? Gotta be careful with that. They get picky about warranty on DIY. They can and sometimes will refuse it if it wasn't purchased from and installed by a licensed HVAC contractor.
Tommy
Last edited:
j p smith
Well-known member
My only advice would be to think about the colour as black is going to get hot enough to fry an egg on in the sun.
Thanks Phil.
This table will never see full sun, plenty of trees, patio where it will live is deep and goes all the way across the east side of their house. Table top will be a deep dark red, just the base and bench frames will be Satin Black.
Here are a couple more pictures.
Attachments


kaymccampbell
Well-known member
Finished up the pivoting rear wheels for the brush hog. Added some guide bars to direct the weeds into the blades and cut a cleaner edge on the trail. New blades, bolts, shims, stops, etc. Waved the rattle can over it for good luck. Took it out and mowed the nature trail for the first time this year.
Sooo nice not to be digging ruts and jolting through turns any more.
Sooo nice not to be digging ruts and jolting through turns any more.
kaymccampbell
Well-known member
Kid's PT Cruiser was not getting good AC. I figured 30 minutes tops to put a little R134a in it. Turns out if the engine fan is missing 1 of it's 2 speeds, and doesn't turn on with the AC, the AC goes over pressure and kicks the blowoff valve, venting refrigerant and making a nasty noise. A lot of cursing and a new fan later, I get to spend 10 minutes adding some more refrigerant to the system and making it blow cold.
Replaced a broken wheel stud on the Caravan.
Torqued all the wheel lugs to spec on a friend's Suzuki SX4 to fix a wicked steering shake.
Replaced a broken wheel stud on the Caravan.
Torqued all the wheel lugs to spec on a friend's Suzuki SX4 to fix a wicked steering shake.
Dusten
Well-known member

Put a little polish on her
nevercouldfigureitout
Well-known member
Very nice L, I've always wanted one, I've had a few Cobras an a Bullitt but always wanted a lightning
Olinrj
Well-known member
Cleaned out the garage yesterday to the point where my wife could park her car in her spot. This is the first time since we bought our first house 9 years ago that she could do that. Unfortunately it won't happen again soon, need to finish the bathroom and some drywall patching in the living room before i can fix the garage door opener and find the remotes.
This morning I cleaned the carb on my "new" string trimmer. Installed a new spark plug and primer bulb then spent twenty minutes trying to get it to start. Sorted out the startup sequence and tested it in the yard. Pretty happy. It an Echo SRM-266S. Got it for $60 from my wife's uncle.
This morning I cleaned the carb on my "new" string trimmer. Installed a new spark plug and primer bulb then spent twenty minutes trying to get it to start. Sorted out the startup sequence and tested it in the yard. Pretty happy. It an Echo SRM-266S. Got it for $60 from my wife's uncle.
Outlander
Well-known member
Cleaned the $2 flea market Proto Canada speed wrench. Ball loosened with PB Blaster.
View media item 51303
Measured the ATV trailer with the new truck and old ball mount. New truck deserves new draw bar I think.
View media item 51304
Tired of crappy dollar store paper towel holders, I decided after dinner to make one out some scrap wood and an old aluminum pool cleaning pool. Pictures tomorrow after it is painted and installed.
View media item 51303
Measured the ATV trailer with the new truck and old ball mount. New truck deserves new draw bar I think.
View media item 51304
Tired of crappy dollar store paper towel holders, I decided after dinner to make one out some scrap wood and an old aluminum pool cleaning pool. Pictures tomorrow after it is painted and installed.
buzz4041
Well-known member
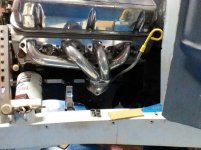
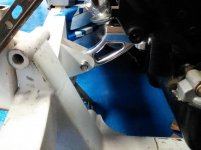
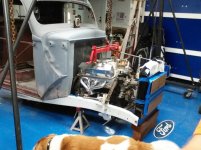
Today I got the alignment of motor and ****** done. Installed the headers and starter to make sure of clearances and mocked up the radiator position to check fan clearance also. Made the templates for the motor mounts. Installed the leaf springs and rear end. Set the gas tank in and marked out where the side of the bed needs cut for the filler neck. Summer is officially here it was hot one today.
Attachments
CudaChick1968
Member Emeritus
I dig those motor mounts buzz4041! Coming along nicely sir. 


Kevkx125
Well-known member
Worked on my mountain bike.
Dennis Leigh Henry
Well-known member
Got the wheels ($20 w/ shipping).. Back like new and ready to roll...
Shout out to Volcrew who gave me the lead to OhioTravelBag.com, who expeditiously sent the replacement wheels so I could get the luggage repaired prior to an upcoming trip overseas.. (excellent customer service and they handle a large line of leather working and related tools).
In the second week of field testing, and all is going well with the wheel repair. Planes, trains, and automobiles..

Outlander
Well-known member
Nice job zyx5432 !
Today I changed the wheels on my ATV - put the summer tires on. Finished the paper towel holder made from recycled wood & pool pole. Painted the old ugly draw bar.
Today I changed the wheels on my ATV - put the summer tires on. Finished the paper towel holder made from recycled wood & pool pole. Painted the old ugly draw bar.
kaymccampbell
Well-known member
Got a set of high school wood shop bench base lockers in trade for a homemade shelf. Dragged it inside so I can butcher them into wall cabinets and scrap.
buzz4041
Well-known member
Today I got the gas tank flange drilled and mounted after cutting the opening for the filler neck. Marked up some openings in the motor mount templates for the brake,fuel and transmission cooler lines to pass through. Layed out the rear cross member for the shocks.
Attachments


bodyguy16
Well-known member
Wow, that's quite the progress these last couple days!!!Today I got the gas tank flange drilled and mounted after cutting the opening for the filler neck. Marked up some openings in the motor mount templates for the brake,fuel and transmission cooler lines to pass through. Layed out the rear cross member for the shocks.


spent21
Well-known member
Leveled up the storage shed & got the 5.3l off the floor & on the engine stand.
dcmus
Well-known member
Before

And after. Still need to mask for the stripe

And after. Still need to mask for the stripe
OCD
Well-known member
dfiler2
Well-known member
gearjammer3545
New member
- Joined
- Jun 15, 2015
- Messages
- 4
trying to make new drawer slides work on my coleman garage base cabinet . I may just make all new wood drawers .
danfromsyr
Well-known member
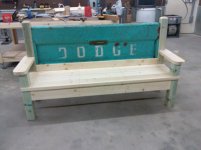
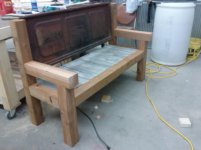
I'm going to have to do that with my Volkswagen tailgate. 
Made two benches for 2 of my SIL's. I like the Ford one.
Swept and mopped the floor. You could tell I had done a bunch of grinding/welding.

Dusten
Well-known member
Thanks. It's fitting since I have 3 currently and have owned another 4Beauty!! I like that SVT banner too!!
Mpower5266
Well-known member
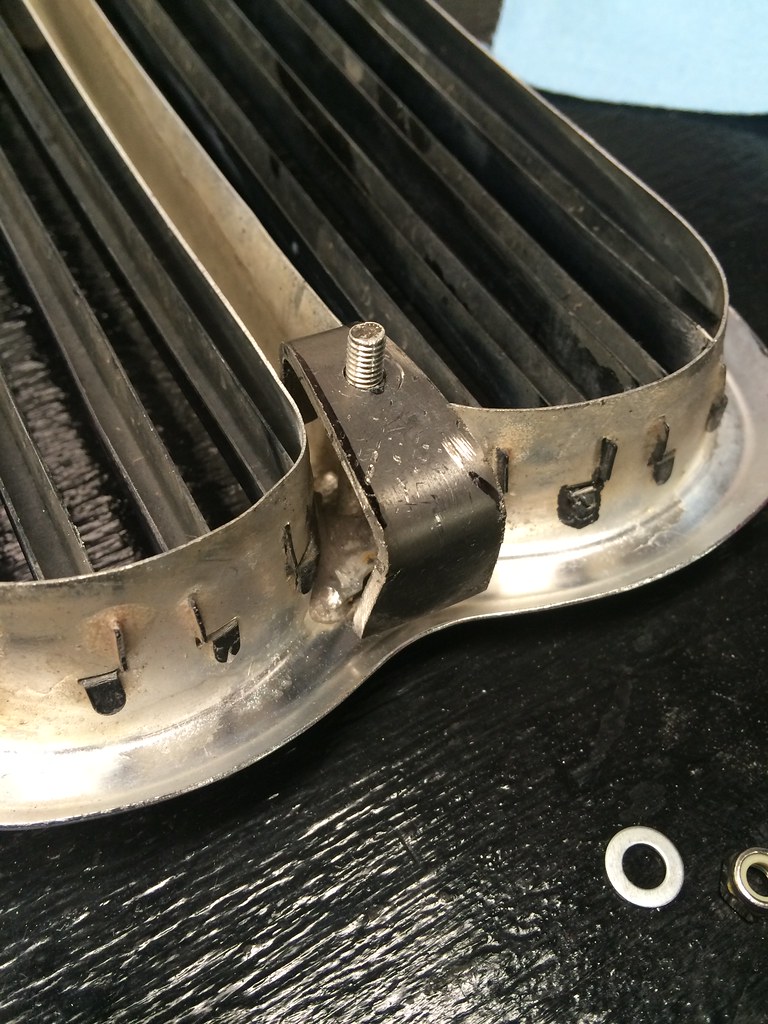
Made a mount for the 2002 grill.

Took the wheels off so I can drop them off at the tire shop on the way to work tomorrow.

Took the wheels off so I can drop them off at the tire shop on the way to work tomorrow.
Steevo
Well-known member
I fabricated a hybrid shaft for the P/S control valve I am using in my current garden tractor project.
I had this valve, which comes with a shaft that is meant to accept a u-joint yoke on the spline:

I need to mount a steering wheel on that shaft.
So, I acquired a steering wheel shaft from another tractor, and I cut the shafts of both:

I turned both ends in the lathe to face them off and bevel the outsides of the ends, and center-drilled them:

Pressed them together:

Welded the bevel all around, then turned and polished in the lathe:

Re-assembled, installed in dash tower of tractor to test-fit with the steering wheel:


Then I took it all back apart for painting of the pieces.
I had this valve, which comes with a shaft that is meant to accept a u-joint yoke on the spline:
I need to mount a steering wheel on that shaft.
So, I acquired a steering wheel shaft from another tractor, and I cut the shafts of both:
I turned both ends in the lathe to face them off and bevel the outsides of the ends, and center-drilled them:
Pressed them together:
Welded the bevel all around, then turned and polished in the lathe:
Re-assembled, installed in dash tower of tractor to test-fit with the steering wheel:
Then I took it all back apart for painting of the pieces.
I fabricated a hybrid shaft for the P/S control valve I am using in my current garden tractor project.
I had this valve, which comes with a shaft that is meant to accept a u-joint yoke on the spline:
I need to mount a steering wheel on that shaft.
So, I acquired a steering wheel shaft from another tractor, and I cut the shafts of both:
I turned both ends in the lathe to face them off and bevel the outsides of the ends, and center-drilled them:
Pressed them together:
Welded the bevel all around, then turned and polished in the lathe:
Re-assembled, installed in dash tower of tractor to test-fit with the steering wheel:
Then I took it all back apart for painting of the pieces.
awesome work!!
Jarhead0408
Well-known member
Agreed. Nice work Steevo.
As for me, I just piddled around. Finished mounting new tires on the Civic. Gare her an oil change and two new Moog tie-rod ends. The Civic has 298,824 miles as of today. It won't take me more than a week and a half to hit the big 300,000! I'm looking forward to it. I'm really loving my HF scissor lift. Makes working on my 6 vehicles much easier.
As for me, I just piddled around. Finished mounting new tires on the Civic. Gare her an oil change and two new Moog tie-rod ends. The Civic has 298,824 miles as of today. It won't take me more than a week and a half to hit the big 300,000! I'm looking forward to it. I'm really loving my HF scissor lift. Makes working on my 6 vehicles much easier.
polexican23
Banned
Wow steevo, sweet work. I want to send you my old steering shaft and my 71 super beetle shaft to do the same. Ones too short, ones too long.