To avoid these ads, REGISTER NOW!

Finally getting to build a detached garage/shop!!!

OP
C

CarCrazyRDM

Well-known member
Joined
Oct 24, 2015
Messages
298
Location
Raleigh, NC
Interesting, I have never heard of that. I'm familiar with wraps for automobiles, which is vinyl, but didn't know they did that out of aluminum for structures. With that said, I can only imagine it's pretty expensive. Between the cost and the fact that I'm not overly worried about if this building stays super insulated or not it's probably not for me on this project though. I won't be living out there (at least not until the wife kicks me out, lol) and as long as it stays 20 degrees above or below the outside temp or so inside I'll be plenty happy. Thanks for making me aware of this option though possibly for future uses.
 
To avoid these ads, REGISTER NOW!

92nsx

Well-known member
Joined
Mar 26, 2015
Messages
80
Location
Minnesota
Nice garage man. Always interesting seeing different construction methods. First time for me seeing the header at the top of the wall for the windows.
 

James-W

Well-known member
Joined
Feb 3, 2013
Messages
12,432
Location
Southeastern Wisconsin
Interesting, I have never heard of that. I'm familiar with wraps for automobiles, which is vinyl, but didn't know they did that out of aluminum for structures. With that said, I can only imagine it's pretty expensive. Between the cost and the fact that I'm not overly worried about if this building stays super insulated or not it's probably not for me on this project though. I won't be living out there (at least not until the wife kicks me out, lol) and as long as it stays 20 degrees above or below the outside temp or so inside I'll be plenty happy. Thanks for making me aware of this option though possibly for future uses.
There is a cost involved, but it isn't terrible because you are only wrapping the wood trim. Also, you eventually gain the money back because you don't have spend time and money to re-paint the trim. Around here a lot of people have it done, especially people with two story homes where scraping and painting would involve quite a bit of "high up" work on a tall ladder. Personally, I like it because your trim never peels and it always looks good without the need for additional work.
 

Gerald O

Well-known member
Joined
Mar 5, 2013
Messages
1,884
Location
NC
They used the metal wrap on my house and the new garage for the roof fascia trim and the garage door opening outside trim.
 

ChevyIINova

Well-known member
Joined
May 26, 2011
Messages
88
Location
Catoosa Oklahoma
Based on my personal experience with having a thicker area under my two post lift, be cautious about the transition from thick to thin areas. The two thicknesses will dry/shrink at different rates and cause cracks. I have numerous hairline cracks at the ends of my 15' wide, 3 ' deep, 12 inch thick lift section and my 4 inch thick slab. My concrete guy transitioned the different thicknesses in only 12 - 18 inches so its is kind of a sharp angel. I have been told by two other concrete guys that it should have been a longer tapper/transition to prevent or lessen the cracks....
 
OP
C

CarCrazyRDM

Well-known member
Joined
Oct 24, 2015
Messages
298
Location
Raleigh, NC
There is a cost involved, but it isn't terrible because you are only wrapping the wood trim. Also, you eventually gain the money back because you don't have spend time and money to re-paint the trim. Around here a lot of people have it done, especially people with two story homes where scraping and painting would involve quite a bit of "high up" work on a tall ladder. Personally, I like it because your trim never peels and it always looks good without the need for additional work.

Ah, only on the trim... that makes more sense. Probably not something I'll spend the money on for this but I'll keep it in the mind for the future.

Based on my personal experience with having a thicker area under my two post lift, be cautious about the transition from thick to thin areas. The two thicknesses will dry/shrink at different rates and cause cracks. I have numerous hairline cracks at the ends of my 15' wide, 3 ' deep, 12 inch thick lift section and my 4 inch thick slab. My concrete guy transitioned the different thicknesses in only 12 - 18 inches so its is kind of a sharp angel. I have been told by two other concrete guys that it should have been a longer tapper/transition to prevent or lessen the cracks....

Well I'm just going to have to keep my fingers crossed because obviously at this point it's already been poured and no one said anything to me about extending the transition. Mine transitioned in probably 6" or less so we'll see how it goes. I really won't be worried safety-wise because we have a lift at the office that we cut out the original floor and only poured 3'x3'x1' pads (completely separate from the existing slab floor) and they have worked fine. And that was done at the recommendation of the lift installer. So it should still be safe it may just look unsightly if it cracks all around. We'll see how it goes.
 

texasranger

Well-known member
Joined
Dec 29, 2011
Messages
223
Location
Maryland
Based on my personal experience with having a thicker area under my two post lift, be cautious about the transition from thick to thin areas. The two thicknesses will dry/shrink at different rates and cause cracks. I have numerous hairline cracks at the ends of my 15' wide, 3 ' deep, 12 inch thick lift section and my 4 inch thick slab. My concrete guy transitioned the different thicknesses in only 12 - 18 inches so its is kind of a sharp angel. I have been told by two other concrete guys that it should have been a longer tapper/transition to prevent or lessen the cracks....
Did you have any rebar, wire mesh, or fiber in your concrete where it cracked?
 
OP
C

CarCrazyRDM

Well-known member
Joined
Oct 24, 2015
Messages
298
Location
Raleigh, NC
I was not expecting to come home today to find the garage painted... it was a pleasant surprise to say the least! She looks fantastic and minus a couple shutters, half a window, and a brick step at the man-door the outside is pretty much complete! Hopefully the final framing inspection goes off without a hitch tomorrow morning and then I'll move on to electrical and plumbing along with a little extra grading. Super excited!


My son and I both enjoying the new garage this weekend. :)


doubleot

Well-known member
Joined
Jan 25, 2016
Messages
445
So awesome! Seeing you and your boy together really makes it for me, I hope to have that one day :)
 

bj383ss

Well-known member
Joined
Sep 29, 2011
Messages
3,166
Location
TX
What an awesome build. Look forward to how you finish out the inside.

Bret
 
OP
C

CarCrazyRDM

Well-known member
Joined
Oct 24, 2015
Messages
298
Location
Raleigh, NC
So I'm officially on my own now! Once my GC got around to replacing the window on the front of the building that the mason scratched and then hanging a pair of shutters we settled up and I cut them loose. It's kind of a double edged sword... I'm glad to have the structure be complete and know that anything else is left on me but I've since discovered things go much slower when it's all up to me, lol. Not really a surprise but it sure was nice coming home from work each day and being able to usually see progress. Now I've basically just been waiting for the weekend to roll around so I can actually make a dent in things. The only other thing I've had done since then is I did pay a gutter guy to come out and install some gutters on both sides and along the lean to roof out back.

So nearly the entirety of my last two weekends have been spent messing with grading. Around back was my biggest concern where along the left side it dropped off roughly 18" and then directly out back it sloped from around a foot to probably a 6" drop off. Basically on the side where I would want to bring my lawnmower and possibly trailer up and down it was un-useable so I had to do something about it.

I thought I was going to knock it all out in one weekend but realized half way through the first Sat. that I wasn't going to have enough dirt. Which sucked because no one is open or delivers on Sunday and I had the rented Bobcat through the weekend. Which meant I was going to have to rent it again for another $200 the following weekend. :( But it needed to be done. I ended up having a total of around 26 yards of fill dirt brought in and then another 6 yards of 50/50 (top soil and compost). It took a fair amount of both Bobcat time and manual labor but I'm pleased with how it turned out. Now I'm just hoping I can get some grass to grow back. It's a little late in the season but it has rained the last two days since putting seed down and it's suppose to do the same again tomorrow. So it'll definitely be good and watered in.

Anyway, below are a few "before" pics. They aren't the greatest but I think you'll get the idea.


So I started things off with renting a Bobcat from Hertz... couldn't have done it without it. It's the smallest skid steer they make (S70) and it worked perfect for getting around between my house and the garage and on the backside where I have trees etc. It also worked out great because it fit in and wasn't too heavy for my utility trailer so I didn't have to borrow or rent something bigger. And my van was capable of pulling it, which it's rated for more but it's only the inline 6 motor and she's got more than a quarter million miles on the original motor and trans (my biggest concern). But she pulled it without a hickup. A little slower than normal, which is already pretty damn slow, but it got the job done. I was also happy to have gone with my 8 ft tall garage door and although it was more just coincidence it has worked out great that I can leave my trailer attached to my van and fit it all inside the garage with the doors closed.


This was the second round of dirt. My son was getting a head start on me. :)


He even rode along for a few passes. To spite the look on his face he loved it. I asked him a few times if he was OK and he just looked at me and smiled and gave me the thumbs up. :)


The end results...


All but a little cleanup...


And again my little helper "assisting" with spreading some seed.


Next up is to apply for my electrical permit, rent a trencher and run power from the house over to the garage. Then will come the fun part of wiring it all up. Can't wait to get some lights in there!
 

texasranger

Well-known member
Joined
Dec 29, 2011
Messages
223
Location
Maryland
Assuming a 302 in your van...those things are tanks. Nice to see you had some help...I've got a 16 month old that is just to the point of being "helpful" ;). That should look great once the grass catches up!
 

HRJoe

Well-known member
Joined
Mar 31, 2016
Messages
95
Location
Georgetown, Ky
Nice work again, man!

I'm on the opposite end of my project...I currently have a borrowed bobcat prepping the site before the builder shows up.
 
OP
C

CarCrazyRDM

Well-known member
Joined
Oct 24, 2015
Messages
298
Location
Raleigh, NC
Assuming a 302 in your van...those things are tanks. Nice to see you had some help...I've got a 16 month old that is just to the point of being "helpful" ;). That should look great once the grass catches up!

Nope, it's the 4.9L I6. But I really wasn't too worried about the motor, that I6 is one of Ford's best and most reliable motors ever. The trans is what worries me when I pull something that really starts to stress it because it has more than 250k miles on it. But it held together and seemed to do fine.

And yeah, I know how it is when a toddler wants to "help"... the job tends to take twice as long, lol. But that's all part of the fun of teaching them.

Nice work again, man!

I'm on the opposite end of my project...I currently have a borrowed bobcat prepping the site before the builder shows up.

Thanks and best of luck with your build.

Looking good keep up the good work!

Preciate it doubleot.
 
OP
C

CarCrazyRDM

Well-known member
Joined
Oct 24, 2015
Messages
298
Location
Raleigh, NC
Sadly this is how the yard looked this morning after some really heavy rains we had last night. :( Looks like I'll be busting out the rake this weekend and likely going to get some more top soil mix.

 
To avoid these ads, REGISTER NOW!
OP
C

CarCrazyRDM

Well-known member
Joined
Oct 24, 2015
Messages
298
Location
Raleigh, NC
Looks like you and your son had fun on the bobcat! Thats what its all about!

Yup! He stayed inside most of the time while I was hauling dirt back and forth just because I didn't want the chance of me not seeing him. But just about any time I was doing manual labor he was around with his boots on and a shovel "helping." :)
 

carotene

Well-known member
Joined
May 12, 2015
Messages
107
Location
Washington, DC
Looking great! what an awesome space. When I built my garage this past fall, I felt like a kid at Christmas. Enjoy. Looking forward to seeing the electrical build out. :thumbup:
 
OP
C

CarCrazyRDM

Well-known member
Joined
Oct 24, 2015
Messages
298
Location
Raleigh, NC
Well sadly things have not been moving along as quickly as I had hoped here lately... mostly in the electrical department. Partly because work has been busy (not necessarily a bad thing, I need the extra money to pay for this freak'n garage, lol) but mostly because the route I had planned to take in order to supply the garage with power isn't going to work, or at least as not as easily as I had hoped.

The short version is that the electrical panel in my house is apparently a relatively rare bird (a Square D Trilliant model... plastic casing with a different style breaker, see pic below) and one that is no longer manufactured including replacement breakers. And per my research and some input from a couple electricians, it's not that it is a bad or unsafe design it's just that it never caught on and so is now not supported making it difficult to make changes to. My electrician said in the 20 years he' been doing this work he'd only ever come across one other Trilliant panel. He also thought it was out in my area of the city and in a home built in a similar time frame (early 90's). So my guess is a builder got a good deal on them and used them up out this way. But who knows, maybe he thought it was the wave of the future and was trying to be pro-active. Yeah, that's what I'll tell myself, lol.

So my plan to add a sub-panel and only need a little bit of professional help is now likely going to require me to sub out most or all of the power supply work. The research to discover all of this is what has delayed my progress. The only benefit is once the electrician and I decide on a plan of action things will likely move along a little faster than if I were doing it. I still plan on wiring the garage itself I just need more assistance than originally planned on in order to get power TO the garage. Which is also likely going to cost more money now. :( At least $1200 more if I end up having to replace my entire house panel and that wouldn't include the new wiring and sub-panel!

Anyway, hoping to get a quote from the electrician early next week and we'll go from there. Outside of that nothing overly exciting happening in, on, or around the garage other than a little bit of additional landscaping to fix the wash-out of top soil I had put down and having my brother come up in his Excursion a couple of weekends ago... of which having the garage allowed me to give him a covered place to park. It was nice to see my full sized van with trailer attached and his Excursion all tucked in the garage without issue and space to spare. Now admittedly when I get some cabinets and work benches it there it won't be as "roomy" but hey it'll all still fit and that makes me a happy camper!

Hopefully I'll have more exciting updates come my next post.


bonecrrusher

Well-known member
Joined
Aug 18, 2011
Messages
578
Location
Charlotte, NC
RDM - what kind of topsoil are you using?

We built our house/shop last year - and this orange clay wont grow anything in it.

Its been seeded 3x in our back yard - and nothing is taking. I've got few clumps here and there.

The sod in our front yard took for the most part - its just the back that looks terrible!
 
OP
C

CarCrazyRDM

Well-known member
Joined
Oct 24, 2015
Messages
298
Location
Raleigh, NC
RDM - what kind of topsoil are you using?

We built our house/shop last year - and this orange clay wont grow anything in it.

Its been seeded 3x in our back yard - and nothing is taking. I've got few clumps here and there.

The sod in our front yard took for the most part - its just the back that looks terrible!

I've been using what a local landscape supply company sells as "50/50"... a mix of top soil and compost. They said they recommend at least 2" - 3" of it on top of clay in order to get grass to germinate. I don't know if it's going to work yet on mine or not. There is definitely grass coming up but like you said, currently it still looks a little spotty. But I went back over a section of mine a couple of weekends ago with another 1" or so of 50/50, of which I put seed down before I spread the soil. So I am hopeful the rain didn't wash my seed away this time and also hopeful that will keep the seed nice and moist. The next week or two will tell. If I can't get anything to grow now I may do sod in the Fall or next Spring. Good luck with yours.
 

texasranger

Well-known member
Joined
Dec 29, 2011
Messages
223
Location
Maryland
You have some amazing self control not filling your garage with **** all these months! Mines not even past drawings and I have enough **** to fill it!

Floor looks great!
 
OP
C

CarCrazyRDM

Well-known member
Joined
Oct 24, 2015
Messages
298
Location
Raleigh, NC
You have some amazing self control not filling your garage with **** all these months! Mines not even past drawings and I have enough **** to fill it!

Floor looks great!

Well I had moved some things into the garage but nothing "permanent" or anything that was super difficult to remove before doing the floor. But I knew I was going to be doing this floor sooner rather than later so I purposely haven't put too much stuff in there.

And thanks!
 

HemiRamOn22s

Well-known member
Joined
Feb 10, 2015
Messages
565
Location
Delaware
Eaton Cutler Hammer is the panel you want to go with. Looks like a 200A service and you could run a 90A breaker into a 100A subpanel in the garage. Just be grateful you're not building a new house. The electrical code in my area required ARC FAULT breakers at the tune of $40 a piece for 20A. If i need an ARC FAULT/GFI combo those are $50. And i have 4 panels in my house and 2 in my shop. The codes these days are getting crazy.
 
OP
C

CarCrazyRDM

Well-known member
Joined
Oct 24, 2015
Messages
298
Location
Raleigh, NC
Hemi,

The electrical has actually already been taken care of, I just didn't get around to posting about it yet. But it turns out the Eaton panel is what we went with on both the house and in the garage. All I'm waiting on now is the final inspection on the panels... they came out last week and approved the ground work.
 
OP
C

CarCrazyRDM

Well-known member
Joined
Oct 24, 2015
Messages
298
Location
Raleigh, NC
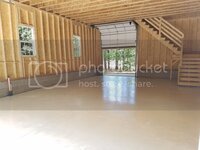
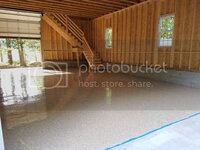
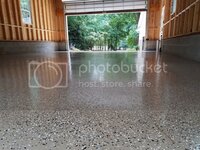
I meant to go back and add these to this post a while ago but life has just been busy (part of which is working on this garage) and so I just never got around to it. You can read my entire dedicated floor post HERE but I figured most are just interested in the pics (see below). I've also nearing completion of the electrical work inside but I don't have any great pics of that just yet. But I'll post up after I do. And I finally hope to be knocking plumbing out as well in a couple of weeks with the help of a buddy. Anyway, on with the pics...


Everything I ordered-
10153652554803873_450653356496813759_n_zpsduwqqfsl.jpg

After cleaning and acid etching-
20160618_174258_zpsd0cm7shp.jpg

I separated my flakes out into bags and quantities to help me evenly distribute them over the 8 sections of concrete. Turns out you'd have to very heavily cover the floor to use up all the flakes that come with these kits. I don't think I even used half of what was provided.
20160619_151252_zpseqvrskfj.jpg

After primer-
20160619_112525_zpsaj4ioivm.jpg

The next three photos are after epoxy only-
20160619_175406_zpssn17luto.jpg
20160619_175449_zpspuwi4esx.jpg
20160619_175613_zpsjafvptbp.jpg

And these pics are after the topcoat with friction additive application-
20160621_110132_zpsayq8ivir.jpg
20160621_110125_zpssfj3oe4s.jpg
20160621_110140_zps07nliptn.jpg

Here are a few pics after the second top coat application. It's probably hard to tell any difference from these pics but the more even distribution of the friction additive was definitely noticeable in person.

20160625_100831_zpscpevro50.jpg
20160625_100752_zpsp2m8b8jo.jpg

Our dog is even enjoying the new floor. :)
20160626_145233_zpsumwwyeal.jpg
 

texasranger

Well-known member
Joined
Dec 29, 2011
Messages
223
Location
Maryland
I'm not sure if I want my floor to look that good. I'd be afraid to pull a floor jack across it or use the plasma cutter for fear of scratching it or burning it. In either case nice work!
 
OP
C

CarCrazyRDM

Well-known member
Joined
Oct 24, 2015
Messages
298
Location
Raleigh, NC
I'm not sure if I want my floor to look that good. I'd be afraid to pull a floor jack across it or use the plasma cutter for fear of scratching it or burning it. In either case nice work!

I am hopeful this floor holds up as well, if not better, than my previous garage floor did (see below pic). But after 8 years my previous garage floor still looked nearly as good as the day I put it down. And I removed a couple engines with cherry pickers, dropped axles, did lots of general maintenance, and slid many a jack across it.

That is one reason I went with the upgraded "military" topcoat this go around and I even ended up putting down a second layer of it (this was more for aesthetic reasons... see dedicated floor post for explanation). It will certainly still "scratch" but most marring wipes away. It would take a lot to hit or scratch it so bad that you went through the clear and into the epoxy or concrete I think. We'll see... this is my first experience with Armorpoxy/ArmorClad but they came highly recommended via this site so I am hopeful that was for good reason.

The nice thing about adding the flakes is it makes imperfections (be that scratches, burn marks, or even chips) hard to see because they kind of "blend" in. I went with a little darker base coat color this time, compared to my last floor, and more flakes so I'm hoping that may help a little too.


NUTTSGT

Super Moderator
Staff member
Joined
Sep 14, 2009
Messages
51,097
Location
Northern Central Ohio
DSC_5494_zpspim0drk9.jpg
[/URL]


Thanks for reading my novel above,
Ryan

I was going to ask what the brick were in the door opening. Once I saw the finished floor, I'm guessing the mason ran out of 4" block and just used brick.

A very nice place.
 

texasranger

Well-known member
Joined
Dec 29, 2011
Messages
223
Location
Maryland
I was going to ask what the brick were in the door opening. Once I saw the finished floor, I'm guessing the mason ran out of 4" block and just used brick.

A very nice place.
If you look closer it appears the whole opening is done in brick, just different orientation and covered in mortar to fill the holes. I assume those ones got turned the other way to avoid cutting.
 

NUTTSGT

Super Moderator
Staff member
Joined
Sep 14, 2009
Messages
51,097
Location
Northern Central Ohio
If you look closer it appears the whole opening is done in brick, just different orientation and covered in mortar to fill the holes. I assume those ones got turned the other way to avoid cutting.

Looking at the first post, you can see they are block. It appears they are 4x 8x16.
 
To avoid these ads, REGISTER NOW!
Top Bottom