To avoid these ads, REGISTER NOW!

Between 705 & 1200 SQ/FT The Time Machine Garage - 32x24 with loft

Workspaces between 705 and 1200 squarefeet.
To avoid these ads, REGISTER NOW!
OP
G

Gerald O

Well-known member
Joined
Mar 5, 2013
Messages
1,884
Location
NC
Re: The Time Machine Garage

Very Nice! First time I have noticed this thread.

I love the bathroom tile scheme. I did something similar in my former house. All black and white, mixed subway and 9 x 6 tile for the shower, and smaller for the floor.
Thanks iceman. The black and white tile scheme is sure a timeless style. Fits in with modern or retro decors. I wanted something that looks vintage and all business -- not frilly, but even the ladies seem to like it.

Love the ms/efi conversion!
Thanks Paul. It literally transforms the way that old B engine runs. Real smooth throughout the RPM range and never skips a beat. Makes cold starting so much easier too. Runs much more like a modern car rather than a cantankerous relic.

Video of a top down mountain run after the EFI conversion:
Taking it kind of easy since wifey was along holding the camera.
 
Last edited:
OP
G

Gerald O

Well-known member
Joined
Mar 5, 2013
Messages
1,884
Location
NC
After about 6000 crown staples, all the floor underlayment is down now. The old Harbor Freight pneumatic stapler got a workout and didn't let me down. I've got to sand a few of the joints slightly, but for the most part all the seams lined up very flush. Just waiting now for my VCT tile order to arrive.

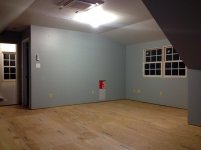
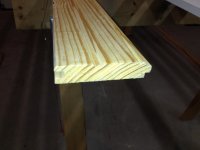
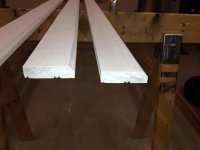
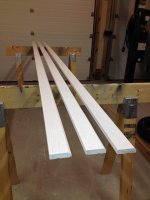
In the meantime I got started on the trim work. I couldn't find a molding profile like I wanted, sort of a modified 'craftsman' style. So I had to make my own. The cheapest/easiest to modify stock I found was this beaded tongue and groove. For the window and door casing trim I cut it down to 2-1/2" and beveled one corner. For the baseboard I'll rip it to 3" and no bevel -- just square edges. Baseboards will go on after the tile is down. But I can do the windows now. This is just in primer right now. It's going to be painted a darker gray color.
 

Attachments

  • FullSizeRender.jpg
    FullSizeRender.jpg
    147.3 KB · Views: 315
  • IMG_3471.jpg
    IMG_3471.jpg
    136.4 KB · Views: 259
  • IMG_3464.jpg
    IMG_3464.jpg
    136.7 KB · Views: 250
  • IMG_3467.jpg
    IMG_3467.jpg
    130.4 KB · Views: 223
Last edited:
OP
G

Gerald O

Well-known member
Joined
Mar 5, 2013
Messages
1,884
Location
NC
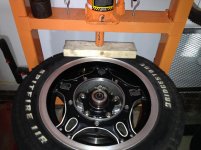
Had to interrupt work on the garage to get my bike ready for the riding season. I've had it out a couple of times already, but the back tire was badly worn. This tire only lasted for maybe 4000 miles over two seasons. I knew it was bald but the last ride was pushing it.

Didn't feel like taking it to the motorcycle shop and waiting for them to change the tire so I did it myself. After pulling the wheel I discovered it worn through to the cord in one spot!

No tire changer, so the shop press serves as a bead breaker.

Despite the short life I still like these Bridgestone Spitfires, and the raised white letters look perfect on this vintage Gold Wing. So I ordered another. They stopped making my correct size 140/90-16 so I had to drop down a size to 130/90-16. I'm thinking that this may be the last year of availability for this tire because Bridgestone no longer lists them in their lineup.
 

Attachments

  • IMG_3461.jpg
    IMG_3461.jpg
    141.3 KB · Views: 663
  • IMG_3459.jpg
    IMG_3459.jpg
    143.7 KB · Views: 174
  • IMG_3447.jpg
    IMG_3447.jpg
    138.6 KB · Views: 176
  • IMG_3443.jpg
    IMG_3443.jpg
    145.3 KB · Views: 170
  • IMG_3437.jpg
    IMG_3437.jpg
    141.7 KB · Views: 163
OP
G

Gerald O

Well-known member
Joined
Mar 5, 2013
Messages
1,884
Location
NC
While I was waiting for my VCT tile order to come I got a little bit distracted by this old boat-anchor shortwave radio that I picked up on ebay.

I set it up in the unfinished attic over the garage, and began listening to strange signals from around the world.

This led me down the rabbit-hole of getting a ham operator's license :willy_nil
That's KW4UO to all you hams out there... :cool:

Could end up being a major time ****!
 

Attachments

  • IMG_3562.jpg
    IMG_3562.jpg
    146.6 KB · Views: 142
  • IMG_3551.jpg
    IMG_3551.jpg
    134.1 KB · Views: 153
OP
G

Gerald O

Well-known member
Joined
Mar 5, 2013
Messages
1,884
Location
NC
Had to have an antenna for the ham rig. These things need huge antennas for most of the frequency bands the operate on! I settled on an antenna for the 20Meter band, because I could fit it on the roof of the garage.

It's about 70' of THHN 12g wire suspended from a couple 10' lengths of PVC conduit attached to the end gables. The PVC is a bit too bendy though. Can't get good tension on the top wire. I'll have to figure out some way to support it better. It does work though. I was able to contact Europe to the east and California to the west from here in NC with it.
 

Attachments

  • IMG_3572.jpg
    IMG_3572.jpg
    141.1 KB · Views: 261
OP
G

Gerald O

Well-known member
Joined
Mar 5, 2013
Messages
1,884
Location
NC
Ok, back to building.

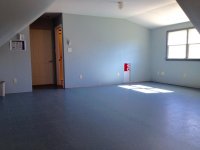
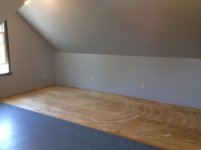
My special order of VCT tile never came in. The manufacturer kept pushing the ship date out further and further. After missing 4 promised dates and waiting over 2 months I cancelled the order. So I had to find a substitute tile. I settled on a similar gray-blue pattern from Armstrong. I don't like the pattern and color as well, but it will have to do.

This was my first experience working with VCT tile so I read up on it thoroughly. Fortunately all went well with no big problems other than a sore back and legs from squatting for 2 days.

The first step was to lay out the center lines and vacuum. You start laying the tile from the center of the room on these lines. Then you spread the glue and wait for it to dry to a tacky state. The glue dries clear, so you can see your chalk lines right through it.

I decided to do 1/2 of the room at a time. This glue is super sticky -- once a tile touches it it's a struggle to get it back off. I tried to remove a couple of tiles that I accidentally laid in the wrong direction and destroyed them in the process.

Tiling proceeds from the center, following the chalk lines in a stair-stepped sequence. 1/2 of the room was done on the first day then the other half on the next day. When I did the second half I had to apply glue to the entryway. This had the effect of stranding me in the room waiting for the glue to dry!

Both halves done now. I'll give it a few days for the glue to cure more fully, then I'll scrub it and apply a sealer coat for gloss.
 

Attachments

  • tiled_07.jpg
    tiled_07.jpg
    148.7 KB · Views: 342
  • tiled_06.jpg
    tiled_06.jpg
    151.8 KB · Views: 379
  • IMG_3626.jpg
    IMG_3626.jpg
    147.1 KB · Views: 327
  • IMG_3625.jpg
    IMG_3625.jpg
    135.3 KB · Views: 367
  • IMG_3618.jpg
    IMG_3618.jpg
    148.5 KB · Views: 416
  • IMG_3617.jpg
    IMG_3617.jpg
    142.3 KB · Views: 407
Last edited:
OP
G

Gerald O

Well-known member
Joined
Mar 5, 2013
Messages
1,884
Location
NC
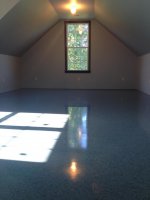
Done with the VCT tile!

After 2 coats of ZEP Stain Resistant Floor Sealer and 4 coats of ZEP Wet-Look Floor Polish I'm done. I'm pretty satisfied with the results, though there are some bumps and boogers embedded in the finish from dust particles and mop lint. Those could be buffed out with a high-speed floor burnisher but I'm not going to bother.

attachment.php


attachment.php


Just a little more trim work and this level will be ready to move in.
 

Attachments

  • IMG_3653.jpg
    IMG_3653.jpg
    150.3 KB · Views: 109
  • vct_09.jpg
    vct_09.jpg
    51.2 KB · Views: 1,834
  • IMG_3650.jpg
    IMG_3650.jpg
    102.5 KB · Views: 1,822
Last edited:

texasranger

Well-known member
Joined
Dec 29, 2011
Messages
223
Location
Maryland
Re: The Time Machine Garage

Looks awesome! Is there a reason you went with white switch covers and almond outlet covers? My OCD is showing ;)
 
OP
G

Gerald O

Well-known member
Joined
Mar 5, 2013
Messages
1,884
Location
NC
Thanks! At least I know you're paying attention, haha! I believe the outlets color is ivory, but close. I had the light switches live early on in the project before I had the walls sheetrocked and just wanted something to cover them. Those will get changed to ivory as soon as I can find a double gang switch and blank cover in that color. Might have to special order them. There is a double gang with only one switch right now for future expansion as I may add a ceiling fan.
 
OP
G

Gerald O

Well-known member
Joined
Mar 5, 2013
Messages
1,884
Location
NC
Isn't it about time to get back to that brick wall you started on the back wall of the garage, or did I miss that somehow? Lovely work, by the way.

Yeah, I do need to get back to that brickwork. I've been putting it off, but now the upstairs is practically done, and those cases of brick are still taking up floor space in the garage. Probably won't update that with pictures until it's done though... nobody wants to see "another brick in the wall."

Ultimately I plan to paint some kind of vintage looking sign work on the brick and then fade it to make it look like old 'ghost signs'.
 

M-technik-3

Well-known member
Joined
Feb 16, 2008
Messages
1,787
Location
Western Mass
Glad to see the direction you went with the advantech and then an under layment. Your place should never squeak. I did similar with my house remodel. It was 1897 construction so old growth planks that I glued and screwed the advantech down and then did a under layment then hardwood floors. I made a huge difference now there are no more squeaks or groans.
 

bimmer1980

Well-known member
Joined
Feb 5, 2009
Messages
2,104
Location
York, PA
Nice build! I enjoyed reading through your thread.

Regarding the interior brick work. I know you are free handing the brick onto the wall.

I recently did a couple of thin brick dormers on my garage. I used the Glen Gery Elite panels. Basically the elite panel is a punch metal panel that get's screwed to the wall. Then it has little punch supports for the brick. Then you use a construction adhesive to glue the bricks to the metal. Then the mortar it piped into the joints and tooled after all the brick are on.

This does make it easier to install the bricks and have nice straight lines horizontally.

The biggest hassle is piping the mortar into the joints. I bought a mortar gun on craigslist and that did help....

The biggest thing is to clean the brick before the mortar completely sets up. A sponge and scrub brush and water would wonders. Do this a few hours after the mortar is piped in and tooled. The main mortar should be fairly firm.

Your project will be a little easier since you will not be outside in the sun and up on scaffolding. The sun tends to dry the mortar out really fast and then it is tough to get off the brick.

Let me know if you have questions or need more pictures.
 

Attachments

  • SAM_4719.jpg
    SAM_4719.jpg
    141.7 KB · Views: 199
  • SAM_4726.jpg
    SAM_4726.jpg
    147.6 KB · Views: 238
  • SAM_4748.jpg
    SAM_4748.jpg
    145.1 KB · Views: 222
OP
G

Gerald O

Well-known member
Joined
Mar 5, 2013
Messages
1,884
Location
NC
Glad to see the direction you went with the advantech and then an under layment. Your place should never squeak. I did similar with my house remodel. It was 1897 construction so old growth planks that I glued and screwed the advantech down and then did a under layment then hardwood floors. I made a huge difference now there are no more squeaks or groans.
That Advantech seems to be pretty good. Not your grandfather's OSB... Besides being highly water resistant it seems to hold fasteners very well. When I was stapling down the underlayment I had a couple misfires and needed to pull the staples. The Advantech held them so tight that they broke off before I could pull them out with vise grips.

At first I was worried about squeaking of the underlayment because the manufacturer advised not to glue it down to the subfloor, just use the ring nails or staples. So far though my experience tracks yours -- no squeaking or creaking.
 
OP
G

Gerald O

Well-known member
Joined
Mar 5, 2013
Messages
1,884
Location
NC
Nice build! I enjoyed reading through your thread.

Regarding the interior brick work. I know you are free handing the brick onto the wall.

I recently did a couple of thin brick dormers on my garage. I used the Glen Gery Elite panels. Basically the elite panel is a punch metal panel that get's screwed to the wall. Then it has little punch supports for the brick. Then you use a construction adhesive to glue the bricks to the metal. Then the mortar it piped into the joints and tooled after all the brick are on.

This does make it easier to install the bricks and have nice straight lines horizontally.

The biggest hassle is piping the mortar into the joints. I bought a mortar gun on craigslist and that did help....

The biggest thing is to clean the brick before the mortar completely sets up. A sponge and scrub brush and water would wonders. Do this a few hours after the mortar is piped in and tooled. The main mortar should be fairly firm.

Your project will be a little easier since you will not be outside in the sun and up on scaffolding. The sun tends to dry the mortar out really fast and then it is tough to get off the brick.

Let me know if you have questions or need more pictures.

Glad you liked it bimmer! I'm seriously considering your idea of getting a mortar gun to do the joints. Did you use some kind of a pointing tool to shape the mortar?
 

bimmer1980

Well-known member
Joined
Feb 5, 2009
Messages
2,104
Location
York, PA
Basically, the gun is just used to get the mortar into the joints. Of course, you can use a trowel or hawk with a tuck pointing trowel, but that get's old in a hurry.

The key is to have a nice wider joint to be able to have room for the tip of the gun to fit into the joint. Then you pipe the mortar in to the joint. Once the mortar is into the joint, it will start setting up as the brick pulls the water out of the mortar.

Once it firms up, you can use the tuck pointer to push the mortar firmly in to the joint. The gun has a tendency of not necessarily getting the mortar all the way to the back of the joint, altho my thin bricks were 1" thick.

As you ensure the joints are fully packed, then you can tool the front of the joint to your preference. I use a raker tool to have a recessed, flat mortar joint. Then I brushed the wall.

After the mortar had set up some more, I used a stiff bristle brush and a sponge to clean the wall.

Key point--don't get too far ahead or you have a lot of brick to tool and clean. Altho, it will help that you are inside.

Link to check out: http://www.masonrymagazine.com/tuckpointing-and-repointing-tools/
 
Last edited:

bimmer1980

Well-known member
Joined
Feb 5, 2009
Messages
2,104
Location
York, PA
Yes, the Elite panels were purchased at Glen Gery in York, PA. There are other similar products out there..... I used full bricks and cut them down to thin bricks--lots of time cutting, especially to make the corners.

Sorry for the hijack Gerald O, hopefully the info is helpful.
 
To avoid these ads, REGISTER NOW!

Trey T

Well-known member
Joined
Aug 3, 2011
Messages
3,749
Location
Houston, TX
That's a very interesting approach, bimmer1980, w/ the thin brick conversion. I thought about it also after some research because I want to convert my Hardie siding to brick veneer but the thin brick is expensive.

What tool(s) did you use to convert to thin brick? got a build page w/ detail on your project?

like this guy?
 
Last edited:

bimmer1980

Well-known member
Joined
Feb 5, 2009
Messages
2,104
Location
York, PA
Trey T -- I don't have a build thread, I probably need to make one....

Yes, I did cut full size brick down to make the thin brick. I think Gerald O bought his already cut, which is also a convenient way to do it.

I had the brick saw, so just set up a small fence on it and spend time cutting. My saw actually was cutting a bit faster than the YouTube video.

I then laid all the cut bricks out on pallets and washed them to get the cutting residue off and have good adhesion. Then let them dry thoroughly in the sun before gluing on with Titebond construction adhesive (recommended by GlenGery).
 
OP
G

Gerald O

Well-known member
Joined
Mar 5, 2013
Messages
1,884
Location
NC
...
Yes, I did cut full size brick down to make the thin brick. I think Gerald O bought his already cut, which is also a convenient way to do it.
...
They are 1/2" thick, molded and fired that size, not cut. Cant tell them from regular brick though. I found them on craigslist for about $3.50 per square foot so i bought everything the guy had, about 400sqft and a case of corners. I'll probably have about 100 sqft left over so could do another project or sell them.
:Violent:
 
Last edited:
OP
G

Gerald O

Well-known member
Joined
Mar 5, 2013
Messages
1,884
Location
NC
Got the upstairs all trimmed out now. Trim is just simple rectangular profile I ripped on the table saw.

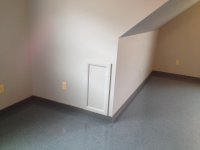
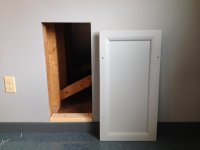
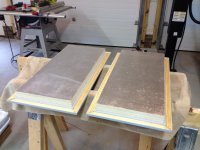
Had to make a couple of covers to close the access openings into the roof areas behind the kneewalls. These have to be insulated with minimum of R10. I had some 1/2 polyiso foam board left over so I used three layers of that laminated with some of the leftover VCT tile glue.
 

Attachments

  • FullSizeRender.jpg
    FullSizeRender.jpg
    153.5 KB · Views: 218
  • IMG_3741.jpg
    IMG_3741.jpg
    154.3 KB · Views: 225
  • IMG_3737.jpg
    IMG_3737.jpg
    152.4 KB · Views: 230
  • IMG_3734.jpg
    IMG_3734.jpg
    139 KB · Views: 253
OP
G

Gerald O

Well-known member
Joined
Mar 5, 2013
Messages
1,884
Location
NC
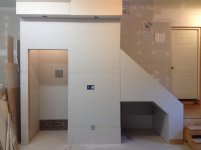
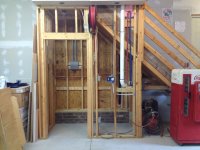
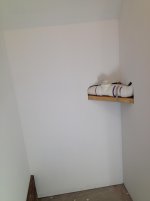
Got the last of the drywall hung this weekend. The area under the stairs has been a catch-all for storing construction scrap, tools, and remaining building materials. I got all that cleared out to take a look at this last remaining unfinished construction.

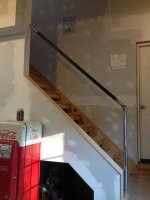
The existing stair railing was always just a temporary setup. That got all pulled down. I'll be constructing a welded iron pipe railing to replace it.

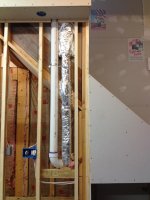
I had to fur out the wall framing on one side by 1/2" to clear the drain stack from upstairs. Then some additional framing was needed to flush out the stair wall. Nailers were added here and there for attaching drywall.

Inspector said I had to insulate the water supply piping.

Added another outlet on the outside of the wall since I didn't have any on that side of the garage.

The closet area will eventually be home for my Saylor Beall 705 60gal compressor.
 

Attachments

  • FullSizeRender6.jpg
    FullSizeRender6.jpg
    131.7 KB · Views: 261
  • IMG_3761.jpg
    IMG_3761.jpg
    136.2 KB · Views: 214
  • IMG_3759.jpg
    IMG_3759.jpg
    136.5 KB · Views: 207
  • IMG_3755.jpg
    IMG_3755.jpg
    131.7 KB · Views: 217
  • IMG_3752.jpg
    IMG_3752.jpg
    138.7 KB · Views: 223
Last edited:

texasranger

Well-known member
Joined
Dec 29, 2011
Messages
223
Location
Maryland
Re: The Time Machine Garage

My hat is off to you if you finish and paint the little dog house under the steps! I'd probably leave it unfinished and put some sort of door over it and call it good.

Do you have a picture or something planned on the wall above the light switches below the recessed lights? Perfect spot for one!
 

y'sguy

Well-known member
Joined
May 1, 2010
Messages
1,331
Location
Tulsa, Oklahoma
very nice setup. I particularly like the bath and tile you chose. Our first home had a similar pattern and color. original from the 40's Always liked it and miss it a lot. Years later went back and saw the house for sale again and they had modernized the whole bath!!!!! Idiots.
We plan to do a new downsized home and garage and this has inspired me greatly!
 
Last edited:
OP
G

Gerald O

Well-known member
Joined
Mar 5, 2013
Messages
1,884
Location
NC
Re: The Time Machine Garage

My hat is off to you if you finish and paint the little dog house under the steps! I'd probably leave it unfinished and put some sort of door over it and call it good.

Do you have a picture or something planned on the wall above the light switches below the recessed lights? Perfect spot for one!
The doghouse leads to my house crawlspace. It has a door at the back and is the only access. I'm afraid if I put a door on the front I'd end up using the space for storage and fill it with junk.
So yeah, guilty. I'll be finishing it and painting. Who doesn't enjoy mudding and painting while lying on their back? :lol_hitti
You're right on about that wall needing some kind of pictures or garage art. Possibilities...!
 
Last edited:
OP
G

Gerald O

Well-known member
Joined
Mar 5, 2013
Messages
1,884
Location
NC
very nice setup. I particularly like the bath and tile you chose. Our first home had a similar pattern and color. original from the 40's Always liked it and miss it a lot. Years later went back and saw the house for sale again and they had modernized the whole bath!!!!! Idiots.
We plan to do a new downsized home and garage and this has inspired me greatly!

Thanks, that tile style just seems to have a classic functional feel. Most modern looks feel superficial and trendy. Good luck with your new home and garage journey!
 

texasranger

Well-known member
Joined
Dec 29, 2011
Messages
223
Location
Maryland
Re: The Time Machine Garage

The doghouse leads to my house crawlspace. It has a door at the back and is the only access. I'm afraid if I put a door on the front I'd end up using the space for storage and fill it with junk.
So yeah, guilty. I'll be finishing it and painting. Who doesn't enjoy mudding and painting while lying on their back? :lol_hitti
You're right on about that wall needing some kind of pictures or garage art. Possibilities...!
Ahh I see. I thought it was just storage. You'll look like frosty after sanding that!
 
OP
G

Gerald O

Well-known member
Joined
Mar 5, 2013
Messages
1,884
Location
NC
Re: The Time Machine Garage

Ahh I see. I thought it was just storage. You'll look like frosty after sanding that!

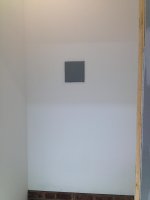
No to the sanding. :willy_nil I hate sanding drywall because of the mess. Made a little progress on finishing. The closet is done and primed inside. I was able to get by with 2-3 coats of mud with no sanding needed. I think it came out good enough for a closet.

The electrical box in the closet is an empty junction box with 2 runs of 1-1/4" conduit going back to the main panel. With all the walls closed up that gives me access for future electrical expansion using surface mounted conduit. Eventually that will be where I tie in additional 240V circuits for the air compressor and welder.

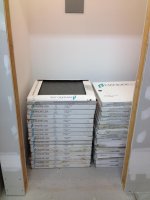
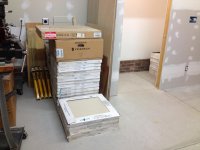
Having got this finished I wasted no time in filling it up. I've had to move this two tons of tile out of the way too many times. The next time I move it will be for installation.

Next I'll get the rest of the drywall finishing done, get the stairs handrail done, and I should be ready for final inspection on the permits.
 

Attachments

  • IMG_3779.jpg
    IMG_3779.jpg
    139.8 KB · Views: 183
  • IMG_3777.jpg
    IMG_3777.jpg
    133.5 KB · Views: 179
  • IMG_3775.jpg
    IMG_3775.jpg
    213.6 KB · Views: 171
  • IMG_3774.jpg
    IMG_3774.jpg
    147.1 KB · Views: 177
  • IMG_3772.jpg
    IMG_3772.jpg
    218.3 KB · Views: 201
  • FullSizeRender.jpg
    FullSizeRender.jpg
    148.7 KB · Views: 185
OP
G

Gerald O

Well-known member
Joined
Mar 5, 2013
Messages
1,884
Location
NC
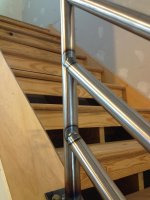
Got started on the handrail/guardrail for the stairs. This is being built from 1-1/4" black iron pipe for the handrail (1-5/8" od), and 1" pipe (1-1/4"od) for the 'horizontal' guard railings.

First step was to cut and fit the handrail portion. I used an adjustable angle 'square' to get the angle of the stairs. Applying a bit of geometry means that this angle is the same as the angle the handrail meets the wall. Calculations from that gave me the halfway angle at the joint between the vertical post and the handrail. Cuts were made with a 'saws all' with a carbide toothed blade.

Then I tacked the corner joint and the post mounting plate so I could test fit. It was pretty close but I did need to trim the handrail upper end just a bit.
The angle between the post and the handrail was correct so I went ahead and finished that weld.

Next will be cutting and tacking the mounting plate that goes on the wall at the upper end. All the cross guards and the handrail will attach to that plate, and the cross guards will attach to the vertical post at the lower end.
 

Attachments

  • IMG_3805.jpg
    IMG_3805.jpg
    130.5 KB · Views: 216
  • IMG_3802.jpg
    IMG_3802.jpg
    139.7 KB · Views: 189
  • IMG_3798.jpg
    IMG_3798.jpg
    140.9 KB · Views: 205
  • IMG_3797.jpg
    IMG_3797.jpg
    146 KB · Views: 174
  • IMG_3795.jpg
    IMG_3795.jpg
    135.9 KB · Views: 176
  • IMG_3794.jpg
    IMG_3794.jpg
    136.1 KB · Views: 185
Last edited:
OP
G

Gerald O

Well-known member
Joined
Mar 5, 2013
Messages
1,884
Location
NC
Made a little more progress on the railing. Cutting and fitting the tubing is incredibly difficult and tedious with the tools I have to work with. I started out trying to cut the 'fish mouths' at the ends with a cheapie HF tubing notcher. The notcher itself was OK, but the problem is with the hole saws. First I tried a generic bi-metal saw and the teeth shattered quickly. Too few teeth per inch causes it to grab. Then I tried a carbide cutter (with even fewer teeth) but I had to make an adapter for it to couple to the notcher shaft. Well, the carbide cutter grabs so badly, and my hand drill is such high torque, that it just about twisted my arm off. I can't seem to find a hole saw that is actually designed for cutting metal with a higher TPI count.

I got about half of them notched this way, but after nearly breaking my hand, and the fact that I have to dress all the cuts with a grinder or sander anyway, I've given up on the notcher. I got enough of them notched that I now know how to rough out the profile with the sawzall, and then finish them with the belt sander.

So this is where it stands today. Each piece is fitted individually and tacked with the railing in situ. Once I've got them all tacked I'll pull the assembly and finish the welds. Apart from my ugly amateur welding, I'm pleased with the way it's turning out.

attachment.php
 

Attachments

  • railing3.jpg
    railing3.jpg
    132.8 KB · Views: 1,294
  • railing2.jpg
    railing2.jpg
    136.3 KB · Views: 147
  • railing1.jpg
    railing1.jpg
    138 KB · Views: 177
Last edited:

texasranger

Well-known member
Joined
Dec 29, 2011
Messages
223
Location
Maryland
Re: The Time Machine Garage

Wow that is a serious railing. It will look awesome when you're done.

As far as notching, in an earlier episode of Finnegan's garage (YouTube) he shows some tricks for making header pipes using a cheap wood band saw with a metal blade. I've never tried it but it looked like it worked alright but he was cutting 12" pieces rather than 4 or 5 feet like you are so might have to get creative getting the angle you need.
 
OP
G

Gerald O

Well-known member
Joined
Mar 5, 2013
Messages
1,884
Location
NC
Wow that is a serious railing. It will look awesome when you're done.

As far as notching, in an earlier episode of Finnegan's garage (YouTube) he shows some tricks for making header pipes using a cheap wood band saw with a metal blade. I've never tried it but it looked like it worked alright but he was cutting 12" pieces rather than 4 or 5 feet like you are so might have to get creative getting the angle you need.

Thanks Tex. I only have two more pieces to notch, so I should have those done this evening.

Now that is nice, no wait very nice :thumbup:
Thanks! After cleaning the steel up with a belt sander it kind of resembles how good it could look done in stainless. But this is plain old steel and will get painted when done. Haven't decided on what color yet though.
 
To avoid these ads, REGISTER NOW!
Top Bottom