Paul_VR6
Well-known member
Re: The Time Machine Garage
Love the ms/efi conversion!
Love the ms/efi conversion!

Thanks iceman. The black and white tile scheme is sure a timeless style. Fits in with modern or retro decors. I wanted something that looks vintage and all business -- not frilly, but even the ladies seem to like it.Very Nice! First time I have noticed this thread.
I love the bathroom tile scheme. I did something similar in my former house. All black and white, mixed subway and 9 x 6 tile for the shower, and smaller for the floor.
Thanks Paul. It literally transforms the way that old B engine runs. Real smooth throughout the RPM range and never skips a beat. Makes cold starting so much easier too. Runs much more like a modern car rather than a cantankerous relic.Love the ms/efi conversion!


Isn't it about time to get back to that brick wall you started on the back wall of the garage, or did I miss that somehow? Lovely work, by the way.
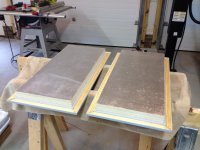
That Advantech seems to be pretty good. Not your grandfather's OSB... Besides being highly water resistant it seems to hold fasteners very well. When I was stapling down the underlayment I had a couple misfires and needed to pull the staples. The Advantech held them so tight that they broke off before I could pull them out with vise grips.Glad to see the direction you went with the advantech and then an under layment. Your place should never squeak. I did similar with my house remodel. It was 1897 construction so old growth planks that I glued and screwed the advantech down and then did a under layment then hardwood floors. I made a huge difference now there are no more squeaks or groans.
Nice build! I enjoyed reading through your thread.
Regarding the interior brick work. I know you are free handing the brick onto the wall.
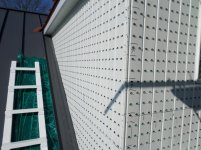
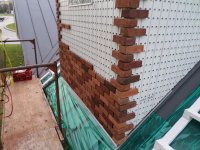
I recently did a couple of thin brick dormers on my garage. I used the Glen Gery Elite panels. Basically the elite panel is a punch metal panel that get's screwed to the wall. Then it has little punch supports for the brick. Then you use a construction adhesive to glue the bricks to the metal. Then the mortar it piped into the joints and tooled after all the brick are on.
This does make it easier to install the bricks and have nice straight lines horizontally.
The biggest hassle is piping the mortar into the joints. I bought a mortar gun on craigslist and that did help....
The biggest thing is to clean the brick before the mortar completely sets up. A sponge and scrub brush and water would wonders. Do this a few hours after the mortar is piped in and tooled. The main mortar should be fairly firm.
Your project will be a little easier since you will not be outside in the sun and up on scaffolding. The sun tends to dry the mortar out really fast and then it is tough to get off the brick.
Let me know if you have questions or need more pictures.
They are 1/2" thick, molded and fired that size, not cut. Cant tell them from regular brick though. I found them on craigslist for about $3.50 per square foot so i bought everything the guy had, about 400sqft and a case of corners. I'll probably have about 100 sqft left over so could do another project or sell them....
Yes, I did cut full size brick down to make the thin brick. I think Gerald O bought his already cut, which is also a convenient way to do it.
...

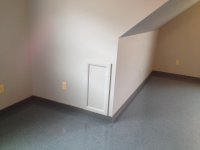
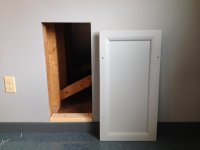
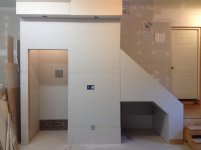
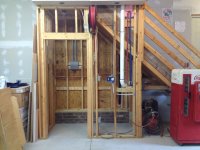
The doghouse leads to my house crawlspace. It has a door at the back and is the only access. I'm afraid if I put a door on the front I'd end up using the space for storage and fill it with junk.My hat is off to you if you finish and paint the little dog house under the steps! I'd probably leave it unfinished and put some sort of door over it and call it good.
Do you have a picture or something planned on the wall above the light switches below the recessed lights? Perfect spot for one!

very nice setup. I particularly like the bath and tile you chose. Our first home had a similar pattern and color. original from the 40's Always liked it and miss it a lot. Years later went back and saw the house for sale again and they had modernized the whole bath!!!!! Idiots.
We plan to do a new downsized home and garage and this has inspired me greatly!
Ahh I see. I thought it was just storage. You'll look like frosty after sanding that!The doghouse leads to my house crawlspace. It has a door at the back and is the only access. I'm afraid if I put a door on the front I'd end up using the space for storage and fill it with junk.
So yeah, guilty. I'll be finishing it and painting. Who doesn't enjoy mudding and painting while lying on their back?
You're right on about that wall needing some kind of pictures or garage art. Possibilities...!
Ahh I see. I thought it was just storage. You'll look like frosty after sanding that!
I hate sanding drywall because of the mess. Made a little progress on finishing. The closet is done and primed inside. I was able to get by with 2-3 coats of mud with no sanding needed. I think it came out good enough for a closet.
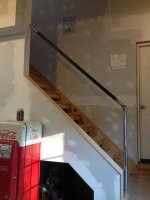
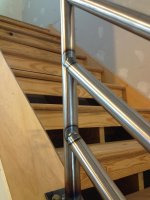
Wow that is a serious railing. It will look awesome when you're done.
As far as notching, in an earlier episode of Finnegan's garage (YouTube) he shows some tricks for making header pipes using a cheap wood band saw with a metal blade. I've never tried it but it looked like it worked alright but he was cutting 12" pieces rather than 4 or 5 feet like you are so might have to get creative getting the angle you need.
Thanks! After cleaning the steel up with a belt sander it kind of resembles how good it could look done in stainless. But this is plain old steel and will get painted when done. Haven't decided on what color yet though.Now that is nice, no wait very nice