To avoid these ads, REGISTER NOW!

Above 1200 Sq/FT The Lone Beech Garage (60x46x16)

Wokspaces above 1200 squarefeet.
OP
S

sbosecker

Well-known member
Joined
Sep 25, 2012
Messages
3,539
Location
Peachtree City, GA
Re: The Lone Beech Garage Build Thread (60x46)

Friday - November 17, 2017


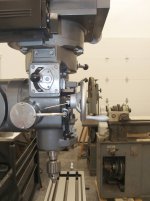
My son and I spent the a bit of time this morning moving stuff out of the way to make a clear path for the JET Mill to be moved. As we were moving things I was thinking about the ideas I had read on the internet about the placement of a vertical mill in a room. More than a few people had mentioned being very happy with their mill backed up to a supporting column. I had disregarded that as an option because I didn't have any columns in the Lone Beech Garage.

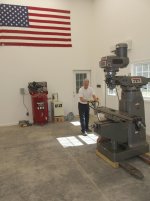
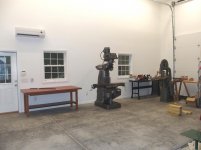
Then it dawned on my that the posts of the 2-post lift were "columns". I mentioned the above to my son and we pondered the idea of positioning the JET Mill near one of the 2-post lift columns. After some thought that idea was abandoned and we returned to Plan A: Moving the JET Mill to a position between two windows on the southern wall.


20171117-01.jpg

The Mill-Drill had been living in the location I had chosen for the JET Mill so it needed to be moved as well as a few other things.
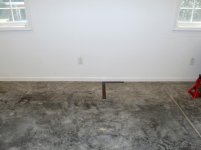


20171117-02.jpg 20171117-03.jpg

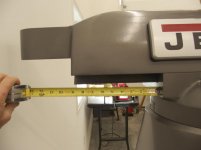
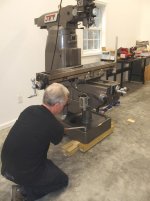
When the path was clear to our destination, we marked the midpoint between the windows on the floor and measured out 50-1/2 inches. This would be the aiming point for the front of the JET Mill's footprint. A piece of masking tape was placed on the JET Mill and a mark was made indicating the center of the mill.

It was time.


20171117-04.jpg 20171117-05.jpg 20171117-06.jpg

Raising the forks on the Pallet Jack just enough for the 4x4's to clear the floor, I started pulling the JET Mill across the floor. I made a turn into the Metal Working Bay and then made a 180 degree turn past the landing point. A bit of back and forth followed to get the JET Mill lined up on the mark we had made on the floor.
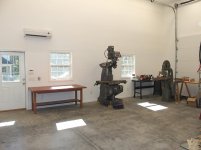


20171117-07.jpg

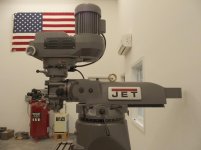
I think the JET Mill is in the location I want but I do need to confirm that I have placed it far enough from the wall. When I placed the mark on the floor locating the location of the mill I was figuring the Ram would not go any farther to the rear than where the dovetail enters the column. That may have been a mistaken assumption and I need to verify that before I bring the mill off the 4x4's and onto the floor.

If the JET Mill is not at its final location it is within inches of being so.

A really good day in the LBG!


Scott

Key Words: Pallet Jack Vertical Mill Milling Machine Knee Mill Bridgeport Moving
 
Last edited:
To avoid these ads, REGISTER NOW!

250

Well-known member
Joined
Oct 16, 2014
Messages
537
Location
West of the Sierras
Re: The Lone Beech Garage Build Thread (60x46)

All tucked in for the weekend!

Some good posts lately, especially about the mill tooling. I'll have to remember this in the future.
 
Last edited:
OP
S

sbosecker

Well-known member
Joined
Sep 25, 2012
Messages
3,539
Location
Peachtree City, GA
Re: The Lone Beech Garage Build Thread (60x46)

All tucked in for the weekend!

Some good posts lately, especially about the mill tooling. I'll have to remember this in the future.

250,

Yes - getting the JET Mill moved made for a good day. I'm still trying to track down specifics on the Mill's Ram travel.

Apparently my question is intuitively obvious to even the dullest of humans and no other idiot has asked it. That seems to be the case as I have been unable to locate the answer via an Internet search.

Best regards,

Scott
 
Last edited:
OP
S

sbosecker

Well-known member
Joined
Sep 25, 2012
Messages
3,539
Location
Peachtree City, GA
Re: The Lone Beech Garage Build Thread (60x46)

Saturday - November 18, 2017 - Morning

I have been told that there are no stupid questions ...but as we have all experienced, there are a lot of inquisitive idiots.

This morning I once again join their ranks.


20171118-01.jpg 20171118-02.jpg

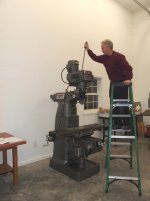
I assumed when I positioned the JET Mill off the wall yesterday that the limit of the Mill Ram's travel was when the end of the Ram's dovetail met the column. This would amount to just under 9-inches of travel.

Yesterday, after the Mill's move, I noticed in the manual that specification for the "Ram Travel, maximum" was 13-3/8 inches.

I went out and ran the Ram forward and backward a bit but I didn't encounter any stops. I will admit I may not have gone far enough forward (I was limited by the wall to the rear) but I didn't want to prove that this machine wasn't "Scott Proof" by running the Ram off the front of machine.

Anyone with experience operating a machine like this care to offer their thoughts on how the manual's "maximum ram travel" number should be interpreted.


Scott
 
Last edited:

larry_g

Well-known member
Joined
Apr 28, 2007
Messages
16,893
Location
oregon
Re: The Lone Beech Garage Build Thread (60x46)

I don't have a hard number for you, but a couple of suggestions. You have a gear shaft sticking out the side that you turn to move the ram, use that as a guide to limit the ends of the travel. You also have a couple of clamping bolts to tighten the ram down. Make sure that both are on the dovetail clamping. This will keep you out of trouble. In the picture where you are holding the ruler, look up under the ram and see where the end of the rack gear is, make a mark on the side of the ram to tell you not to go beyond that point then run it the other way and mark the end of the rack. Keep the end of the rack gear from passing the pinion.

lg
no neat sig line
 
OP
S

sbosecker

Well-known member
Joined
Sep 25, 2012
Messages
3,539
Location
Peachtree City, GA
Re: The Lone Beech Garage Build Thread (60x46)

I don't have a hard number for you, but a couple of suggestions. You have a gear shaft sticking out the side that you turn to move the ram, use that as a guide to limit the ends of the travel. You also have a couple of clamping bolts to tighten the ram down. Make sure that both are on the dovetail clamping. This will keep you out of trouble. In the picture where you are holding the ruler, look up under the ram and see where the end of the rack gear is, make a mark on the side of the ram to tell you not to go beyond that point then run it the other way and mark the end of the rack. Keep the end of the rack gear from passing the pinion.

lg


lg,

Thanks for the suggestions!

Best regards,

Scott
 
OP
S

sbosecker

Well-known member
Joined
Sep 25, 2012
Messages
3,539
Location
Peachtree City, GA
Re: The Lone Beech Garage Build Thread (60x46)

Saturday - November 18, 2017 - Afternoon


20171118-11.jpg

I decided to move the JET Mill an additional 3 inches from the wall. After my son & I did that I ran the Ram towards the wall and hit a mechanical stop about 1-1/2 inches from the wall. Perfect.


20171118-12.jpg 20171118-13.jpg

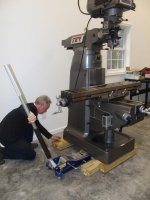
A Floor Jack was used to lift the Mill up high enough to put in shims and then the 4x4 skids were removed.


20171118-14.jpg

After I ran out of room for the Floor Jack to be used, I used a 2x4 lever with my son helping remove the 1/2-inch shims. We slowly brought the Mill closer to the floor.


20171118-15.jpg

When we ran out of room for wooden levers, we used a crow bar for the final couple of shims.


20171118-16.jpg

After quite a bit of cautious work, the JET Mill was firmly on the floor of the Lone Beech Garage.


Scott
 
Last edited:
OP
S

sbosecker

Well-known member
Joined
Sep 25, 2012
Messages
3,539
Location
Peachtree City, GA
Re: The Lone Beech Garage Build Thread (60x46)

Sunday - November 19, 2017


After getting the JET Mill moved yesterday afternoon, I returned to the LBG and started going through the Owner's Manual. There are a few things that need to be done to get the mill ready for operation.


20171118-21.jpg

Pretty much the first thing to be done was to drop the Drawbar in from the top of the machine.


20171118-22.jpg 20171118-23.jpg

The manual called for the installation of the Flat & Pleated Way Covers without any instructions. I had to leaf around the manual a bit to find a picture of the machine to see which went where. Then an examination of the machine and comparing holes in the Way Covers to fasteners on the machine allowed me to install these items.


20171118-24.jpg

I installed the Course Feed Lever without issue but the Fine Feed Hand-Wheel would not seat properly on its hub. I think the locating pin is too long. It measures 11/16" and I think it is probably about a quarter inch too long. I considered tapping on it with a hammer to see if I could drive it into the Hand-Wheel but I think I'll make a phone call to Jet Tools tomorrow and confirm my suspicions prior to whacking on it.


Another item in the manual that is giving me fits is the lubrication specifications:

Spindle bearing oil cup: Mobil DTE Oil Light, or equivalent.
One-shot lube system: Mobil Vactra Oil #2, or equivalent.
Knee leadscrew grease ******: Mobilith AW2, or equivalent.
Back gear grease ******: Mobilith AW1, or equivalent.

Searching the Interweb would seem to indicated that the Moblith greases may not have been produced in the 21st century. The Mobile DTE Oil Light only seems to come in 5 gallon pails or larger.

I already had a gallon of the Mobil Vactra Oil #2 so I'm good there.

This will be another set of questions for Jet Tool Customer Support.


Scott
 
Last edited:

matt_i

Well-known member
Joined
Mar 14, 2008
Messages
10,744
Location
SE Michigan
Re: The Lone Beech Garage Build Thread (60x46)

Looks like things are going very well!

I recall using the AW-2 about 15 years ago in bulk. But it seems like the grease I use now is XHP-222 which is probably a better product. There is also the XHP-222 PLUS which has the molybdenum disulfide in it for high contact pressures.

I am reasonably sure the AW-1 is a NLGI #1 rating (viscosity more or less...most of the greases that come in tubes are NLGI #2).

When I look at McMaster Carr I see DTE24 and DTE25 oils which are primary hydraulic anti-wear oils, which I believe will be similar to DTE-Light. Just have to match up the viscosity. Those are available in 1 gallon jugs. Also good to check MSC.

Edit: ExxonMobil used to have a reasonably good customer service line, either email or phone support where you could ask lubrication questions, like the succession of product lines or even get recommendations for an application. They might be a better resource than Jet to identify the newest products equivalent to the legacy listings...
 
Last edited:
OP
S

sbosecker

Well-known member
Joined
Sep 25, 2012
Messages
3,539
Location
Peachtree City, GA
Re: The Lone Beech Garage Build Thread (60x46)

Looks like things are going very well!

I recall using the AW-2 about 15 years ago in bulk. But it seems like the grease I use now is XHP-222 which is probably a better product. There is also the XHP-222 PLUS which has the molybdenum disulfide in it for high contact pressures.

I am reasonably sure the AW-1 is a NLGI #1 rating (viscosity more or less...most of the greases that come in tubes are NLGI #2).

When I look at McMaster Carr I see DTE24 and DTE25 oils which are primary hydraulic anti-wear oils, which I believe will be similar to DTE-Light. Just have to match up the viscosity. Those are available in 1 gallon jugs. Also good to check MSC.

Edit: ExxonMobil used to have a reasonably good customer service line, either email or phone support where you could ask lubrication questions, like the succession of product lines or even get recommendations for an application. They might be a better resource than Jet to identify the newest products equivalent to the legacy listings...


matt_i,

Thanks for all the good information!

Best regards,

Scott
 
OP
S

sbosecker

Well-known member
Joined
Sep 25, 2012
Messages
3,539
Location
Peachtree City, GA
Re: The Lone Beech Garage Build Thread (60x46)

Monday - November 20, 2017


Called JET Tools Technical Support today to see if the Fine Feed Handwheel's locating pin was the correct length.

I talked to Gale and we discussed my problem. He checked and he had a chrome hand wheel in stock. He took my phone number and said he'd call me back after he measured the pin on the hand wheel he had.

About 10 minutes later Gale called back and let me know that my suspicions were correct. The pin on the handwheel in the warehouse was 1/2-inch long; mine was 11/16-inch.

Gale thought I could probably tap the pin into my hand wheel with a hammer. I thanked him and walked out to the LBG. A small ball peen hammer was used to tap on the pin with negative results.

I returned to my house and called Gale back. I decided to make this a warranty issue. Gale told me he didn't have the brushed chrome handwheel in stock. They had a chrome one but that wouldn't match the finish of the rest of my handles. He suggested I grind off a quarter inch of the pin or he could have a technician from a service center drive 40 miles to grind the pin down.

I told Gale that I had bought this machine new at considerable expense and the hand wheel was obviously manufactured incorrectly. I noted that it was a small part and surely a new one could be obtained to replace the defective one that came with my machine. Gale said it certainly could be replaced but it might take 3 weeks to do so. I said that would be fine.

He asked me to send him an email with the pertinent information to obtain a warranty replacement. I did this as soon I got off the phone with him. I will follow up tomorrow by phone as I did not get a "read receipt" for my email.


This afternoon I spent some time out in the shop tinkering with the Rockwell 25-100 Metal Lathe while a CD by The Cars echoed off the walls.


20171120-01.jpg

I spent some time cleaning up the rusty Collet Draw Tube. I think it's ready for prime time but I'm missing a 5C Collet Sleeve & the Spindle Nose Cap.


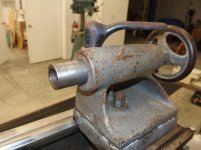
20171120-02.jpg

The Tail Stock's Ram was rusty (about an inch) where it had been left proud of the Tail Stock. I cleaned that up. I also discovered, to my dismay, that the Ram couldn't be locked. Removing the handle and peering into the Tail Stock revealed that the Clamp Sleeve was missing. That's not good. Maybe something that can be made but I'd have to find one to make a copy.


20171120-03.jpg

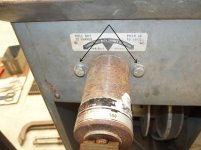
The Variable Speed Control was missing the bolts, washers & nuts (arrows) that would fasten it to the cabinet and allow it to work. The Yahoo Rockwell Metal Lathe Group has copies of manuals in their file section and these detail the original hardware. I happened to have all of the required stuff on hand in the Equipto Cabinet I keep my supply of hardware in.


20171120-04.jpg 20171120-05.jpg

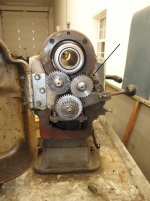
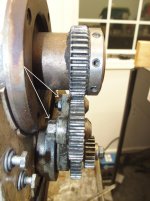
I opened the Headstock's Gear Cover and cleaned the gears with some solvent. The reversing gear that the arrow points to is "wobbly". The stud that the gear rides on is held to a bracket with a nut. The arrows in the second picture point to the nuts that hold these identical gears in place.

The far nut in the second picture is associated with the "wobbly" gear. That nut is visibly loose but I can't figure out how to tighten it. The stud rotates when I put a wrench on the nut. There's probably some way to engage the hole on the stud with some sort of tool to keep it from turning but I am unfamiliar with what that would be.

A good day in the shop!


Scott
 
Last edited:
OP
S

sbosecker

Well-known member
Joined
Sep 25, 2012
Messages
3,539
Location
Peachtree City, GA
Re: The Lone Beech Garage Build Thread (60x46)

Tuesday - November 21, 2017


This morning I received a read receipt from my email to JET Tools requesting a warranty replacement for my Milling Machine's Fine Feed Handwheel. However, there was something odd about it:

Your message

To: Gale Murry
Subject: Model JTM-4VS-1 Serial # 17030379 Warranty
Sent: Monday, November 20, 2017 2:58:58 PM (UTC+00:00) Monrovia, Reykjavik was read on Tuesday, November 21, 2017 2:00:41 PM (UTC+00:00) Monrovia, Reykjavik.


Monrovia, Reykjavik? If the times were UTC times then that looked about right. Still... I wasn't sure where Monrovia was (I thought Africa) but I knew there was a city in Iceland named Reykjavik. Odd.

I called JET Tools to make sure that my email hadn't gone to the wrong recipient. They said they had the email.

I did a little internet searching and found the following regarding Monrovia, Reykjavik.

A typical Microsoft "It's not a bug, it's a feature" situation. Ha!

With that bit of housekeeping out of the way - I REALLY wanted to get the JET warranty process started prior to Thanksgiving - I could do a little more work on the Rockwell Metal Lathe.


20171121-01.jpg

Last night I had posted a query on the Yahoo Rockwell Metal Lathe Group regarding the Reverse Gear Stud tightening problem. I didn't get a response so I decided to try just sticking a Harbor Freight Pick into the hole and putting a wrench on the nut. Despite my concern that the torque required to tighten the nut would overwhelm my crude restraint - that seemed to work fine and the gear is now spinning without the wobble I noted previously.


20171121-02.jpg

I took the Lathe's Quick Change Gearbox to the Parts Washer and spent quite a bit of time brushing and washing.


20171121-03.jpg

I got an incredible amount of solid grease out of the Gearbox and a bit more cleaning is still needed. I would like to have worked more on this but I must make preparations for the Thanksgiving holiday.


Scott
 
Last edited:

shortykorte

Well-known member
Joined
Sep 1, 2014
Messages
8,039
Location
Tallahassee, Fl
Re: The Lone Beech Garage Build Thread (60x46)

I surprised Gale didn’t ask you if you had a blast cabinet so you could knock the chrome of the replacement handle. lol. Best of luck on both machines and happy thanksgiving.


Sent from my iPhone using Tapatalk
 
OP
S

sbosecker

Well-known member
Joined
Sep 25, 2012
Messages
3,539
Location
Peachtree City, GA
Re: The Lone Beech Garage Build Thread (60x46)

I surprised Gale didn’t ask you if you had a blast cabinet so you could knock the chrome of the replacement handle. lol. Best of luck on both machines and happy thanksgiving.


shortykorte,

I hope you had a great Thanksgiving as well!

Regarding Gale... Ha!

Gale seemed like a really nice guy and I know your remark was tongue in cheek. I think Gale was just trying to get my Mill operational as soon as possible since I suspect (and Gale does as well) that most of these machines have been purchased to create a (monetary) return on investment. For me it's not as big of a deal ...especially during the holiday season.

Speaking of which... while visiting the Lone Beech Melon Farm during Thanksgiving I finally got to see pictures of the limb the Lone Beech shed last July.


Lone Beech Limb 01.jpg Lone Beech Limb 02.jpg

Dad must be the last guy in the world using film. Ha! The limb was as big as most mature trees.


Best regards & happy holidays,

Scott
 
OP
S

sbosecker

Well-known member
Joined
Sep 25, 2012
Messages
3,539
Location
Peachtree City, GA
Re: The Lone Beech Garage Build Thread (60x46)

Sunday - November 26, 2017


With the JET Milling Machine in place it was time to attempt to sell the small round-column Mill-Drill that I've had for the past 4 years.

Last evening I posted an ad on Craigslist. Within a couple of hours I was getting emails & texts expressing interest in the machine. One fellow was close and asked if he could come today and examine the machine. He arrived on time, examined the machine and said he wanted to buy it.


20171126-01.jpg 20171126-02.jpg 20171126-03.jpg

A little work with the Electric Chain Hoist - Yellow Beam and the Mill-Drill was in the bed of his pickup truck. Most of the job was coming up with some 2x4 blocking that would protect the belt guard sheet metal during the lift.


20171126-04.jpg

He secured the machine to the bed of his truck and then he drove down the circle ramp with his new purchase.


I will use money from the sale to work on the "shopping list" matt_i gave me a few posts ago. Ha!


Scott
 
Last edited:
shortykorte

Well-known member
Joined
Sep 1, 2014
Messages
8,039
Location
Tallahassee, Fl
Re: The Lone Beech Garage Build Thread (60x46)

Ah man, I’d easily had given half what he paid. Lol. After you mentioned yours some time back, I did some research on the mill drill.


Sent from my iPhone using Tapatalk
 
OP
S

sbosecker

Well-known member
Joined
Sep 25, 2012
Messages
3,539
Location
Peachtree City, GA
Re: The Lone Beech Garage Build Thread (60x46)

Ah man, I’d easily had given half what he paid. Lol. After you mentioned yours some time back, I did some research on the mill drill.

shortykorte,

It sold easier than I thought it would.

Since the old Mill-Drill and the JET Mill both use the R8 system I kept all the tooling that I had plus the 4-inch machinist vise. I thought the lack of accessories might dampen interest but that wasn't the case.

Best regards,

Scott
 
OP
S

sbosecker

Well-known member
Joined
Sep 25, 2012
Messages
3,539
Location
Peachtree City, GA
Re: The Lone Beech Garage Build Thread (60x46)

Monday - November 27, 2017


Sunday - November 19, 2017
...Another item in the manual that is giving me fits is the lubrication specifications:

Spindle bearing oil cup: Mobil DTE Oil Light, or equivalent.
One-shot lube system: Mobil Vactra Oil #2, or equivalent.
Knee leadscrew grease ******: Mobilith AW2, or equivalent.
Back gear grease ******: Mobilith AW1, or equivalent...


It took a while to locate the correct web page with contact information but today I called Mobil Industrial Lubricant's Talk To An Expert phone number (800-662-4525).

As one would expect, there was a phone tree and I don't recall exactly which choices I made. I do remember that I got lucky and got the correct person on my first attempt.

I requested information on the greases first. The lady on the phone indicated that Mobilith AW1 & AW2 were no longer in production. The correct replacements are:

Mobilith AW1 --- Mobilgrease XHP221


Mobilith AW2 --- Mobilgrease HXP222


As I noted in a previous post, I had a gallon of Mobil Vactra Oil #2 on hand so we moved on to the Mobil DTE Oil Light.

I had seen Mobil DTE Oil Light on the Internet but only in pails or larger. The expert on the phone confirmed that this product was available but only in quantities much larger than a gallon.

matt_i had suggested a reasonable substitution (a Mobil DTE24 or DTE25 oil that matched the viscosity of the Mobil DTE Oil Light). When I researched these items the Mobil DTE 24 seemed like a match and it was available in gallon containers; I asked the expert if that product could be used in place of Mobil DTE Oil Light.

The expert asked what the application of the product would be (she already was aware that I was asking about lubrication for a new Milling Machine) and I replied it was for the Spindle Bearing. She indicated that the Mobile DTE24 would work fine for that application.

I thanked her for her time and the call ended.

I was motivated to get answers to these questions today as Zoro.com was having a Cyber Monday 25% off sale and they had the Mobil DTE 24 and the Mobilgrease XHP 222 available on their site.

I placed an order for those products (and others) on Zoro and sourced the Mobilgrease XHP 221 from another vendor.

Scott

Key Words: Bridgeport JET Milling Machine lubrication oil grease substitution replacement
 
Last edited:

drivesitfar

Well-known member
Joined
Oct 23, 2013
Messages
36,062
Location
Pacific Northwest
Re: The Lone Beech Garage Build Thread (60x46)

SB: it looks like you've been very busy moving things around and that crane you built sure looks like it's working nicely.

i don't have a clue about using a mill or lathe yet, but i'm enjoying the detailed posts and i'll try to learn what i can while you are getting yours set up.

good luck and happy to hear you moving all this heavy stuff hasn't cause you any injuries or damaged machines.

other than maybe a few sleepless nights i bet you are happy so far?

cheers
 
OP
S

sbosecker

Well-known member
Joined
Sep 25, 2012
Messages
3,539
Location
Peachtree City, GA
Re: The Lone Beech Garage Build Thread (60x46)

SB: it looks like you've been very busy moving things around and that crane you built sure looks like it's working nicely.

i don't have a clue about using a mill or lathe yet, but i'm enjoying the detailed posts and i'll try to learn what i can while you are getting yours set up.

good luck and happy to hear you moving all this heavy stuff hasn't cause you any injuries or damaged machines.

other than maybe a few sleepless nights i bet you are happy so far?

cheers


DrivesItFar,

Thanks!

So far - so good. We shall learn together!


Best regards,

Scott
 
To avoid these ads, REGISTER NOW!
OP
S

sbosecker

Well-known member
Joined
Sep 25, 2012
Messages
3,539
Location
Peachtree City, GA
Re: The Lone Beech Garage Build Thread (60x46)

Tuesday - November 28, 2017


Once I get the Rockwell Metal Lathe's position in the shop established I'll get the Electrician to come over and set up power for both the lathe and the JET Mill.

In the meantime I've been wanting to see how the JET Mill operates. While the manual attempts to describe the operation of the Mill, there's nothing like turning a machine on and playing with it a bit to learn what makes it tick.

So now I'm going to ask that the women, children ...and electricians leave the room or at least cover their eyes.


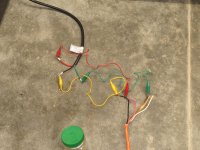
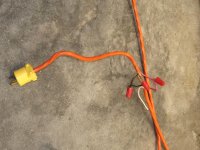
20171128-01.jpg 20171128-02.jpg 20171128-03.jpg

This evening I cobbled up some wiring to the JET Mill and plugged it into a 220 Volt outlet in the Woodshop. I looked over the Mill to make sure I hadn't done something obviously stupid, then I selected the Power Switch to FORWARD.

She runs!

So I ran through all the various controls... tried out the variable speed and selected the back-gears and ran her slow.

After 10 minutes or so of playing around I shut her down and unplugged the power.

OK... let the kids back in the room.

I got an email from Gale at JET Tech Support today. My replacement Fine Feed Handle shipped today.


Scott
 

drivesitfar

Well-known member
Joined
Oct 23, 2013
Messages
36,062
Location
Pacific Northwest
Re: The Lone Beech Garage Build Thread (60x46)

SB: looks like maybe you need to wire in a 220 plug or hire an electrician to do it?

with all that fancy wiring on the floor i'd say you are fully capable. :bounce:

I'm happy to hear that you and the machine are in good shape after that first test run. :thumbup:

i'll have to read back a few posts and see how you put the mill on the floor after moving it around on blocks. is that the final resting spot for it I'm guessing?

cheers and thanks for taking the time to post up these pictures and all your methods and thoughts!!
 

matt_i

Well-known member
Joined
Mar 14, 2008
Messages
10,744
Location
SE Michigan
Re: The Lone Beech Garage Build Thread (60x46)

Those jumper cables aren't that bad as long as they have the wire size to handle the current. Very common setup at used machine tool dealers when they are usually always unsure of the phasing/rotation of a machine and just jump the clips on 3 phase to reverse rotation.

I'm happy to see things are going well. I have a few more suggestions for edge tools :D

- 120 deg solid carbide "spot drill" of 1/4" dia is an excellent tool to have to make sure your hole is going as close as possible to the intended location. Will not wander even on a tilted surface. It cuts a conical pocket to receive a 118deg drill bit. Eventually you are going to want the 115pc set of drill bits, I've always had luck with the black oxide jobber length twist drills in a metal case.

- there are a zillion endmills out there. I would recommend getting some double-ended HSS 3/8" or 1/4" endmills, no coating is fine. The 3/8" will do a ton of different jobs unless you need a specific size for a spotface or a counterbore. I'd stay away from solid carbide endmills, the manual machine just is not rigid enough to take advantage of their capability.

- Taps - you can now use "spiral point" or "gun" taps for thru holes. Just chuck them in the drill chuck, put the head-gear in "neutral" and spin them in with arm strength and a light downpressure on the quill feed handle to get the thread started. I like Tap Magic or other lubes, also good luck with Cool Tool 2, are recommended for clean bright threads. These same taps work extremely well in cordless drills on thinner stuff.

- Speeds - I always try to run in "open belt" which is slowest speed in the top gear. Typically 500-600 rpms. Up to about 3/8" dia cutter this is good enough. When you jump up to a 1/2" cutter or drill bit, then I drop into back gear around 300 rpms. In general you will find that running slower preserves the lifespan of your edge tooling, which is important when you are paying from your own pocket!
 
Last edited:
OP
S

sbosecker

Well-known member
Joined
Sep 25, 2012
Messages
3,539
Location
Peachtree City, GA
Re: The Lone Beech Garage Build Thread (60x46)

SB: looks like maybe you need to wire in a 220 plug or hire an electrician to do it?

with all that fancy wiring on the floor i'd say you are fully capable. :bounce:

I'm happy to hear that you and the machine are in good shape after that first test run. :thumbup:

i'll have to read back a few posts and see how you put the mill on the floor after moving it around on blocks. is that the final resting spot for it I'm guessing?

cheers and thanks for taking the time to post up these pictures and all your methods and thoughts!!


DrivesItFar,

As far as electricity goes - or anything else for that matter - a little knowledge can be a very dangerous thing. Ha!

I'll be calling an electrician early next week (I hope) to start the process of getting power to the two recently acquired metal-working machines.

I believe the JET Mill is where it is going to be living as long as I'm living.

Thanks for the kind words!


Best regards,

Scott
 
OP
S

sbosecker

Well-known member
Joined
Sep 25, 2012
Messages
3,539
Location
Peachtree City, GA
Re: The Lone Beech Garage Build Thread (60x46)

Those jumper cables aren't that bad as long as they have the wire size to handle the current. Very common setup at used machine tool dealers when they are usually always unsure of the phasing/rotation of a machine and just jump the clips on 3 phase to reverse rotation.

I'm happy to see things are going well. I have a few more suggestions for edge tools :D

- 120 deg solid carbide "spot drill" of 1/4" dia is an excellent tool to have to make sure your hole is going as close as possible to the intended location. Will not wander even on a tilted surface. It cuts a conical pocket to receive a 118deg drill bit. Eventually you are going to want the 115pc set of drill bits, I've always had luck with the black oxide jobber length twist drills in a metal case.

- there are a zillion endmills out there. I would recommend getting some double-ended HSS 3/8" or 1/4" endmills, no coating is fine. The 3/8" will do a ton of different jobs unless you need a specific size for a spotface or a counterbore. I'd stay away from solid carbide endmills, the manual machine just is not rigid enough to take advantage of their capability.

- Taps - you can now use "spiral point" or "gun" taps for thru holes. Just chuck them in the drill chuck, put the head-gear in "neutral" and spin them in with arm strength and a light downpressure on the quill feed handle to get the thread started. I like Tap Magic or other lubes, also good luck with Cool Tool 2, are recommended for clean bright threads. These same taps work extremely well in cordless drills on thinner stuff.

- Speeds - I always try to run in "open belt" which is slowest speed in the top gear. Typically 500-600 rpms. Up to about 3/8" dia cutter this is good enough. When you jump up to a 1/2" cutter or drill bit, then I drop into back gear around 300 rpms. In general you will find that running slower preserves the lifespan of your edge tooling, which is important when you are paying from your own pocket!


matt_i,

Another thoughtful & useful post; thank you.

I'll probably post an inventory & images of what I have for the JET Mill in the next few days. I have some of the stuff you have mentioned - if not the exact items, something that I think will suffice to get started.

Best regards,

Scott
 
OP
S

sbosecker

Well-known member
Joined
Sep 25, 2012
Messages
3,539
Location
Peachtree City, GA
Re: The Lone Beech Garage Build Thread (60x46)

Thursday - November 30, 2017


20171130-01.jpg

The last of the oils & greases specified for the JET Mill arrived today. I have enough here for several lifetimes I suppose but what do you do? I have to take care of the machine.

A couple of Grease Guns have been ordered.


20171130-02.jpg

Today the warranty replacement for the JET Mill's Fine Feed Handwheel arrived.


20171130-03.jpg

This image shows the new handwheel on the machine. The white arrow shows where the gap used to be between the handwheel and the machine. The old locating pin was about 3/16-inch too long.
I will send my JET contact an email to see what they want me to do with the defective handwheel. I suspect they will say they don't want me to return it but we shall see.


20171130-04.jpg

Today I broke down a large - and very heavy - home-made rolling cabinet. Some time ago an acquaintance was downsizing and asked if I wanted some of the "stuff" from his garage for free. The cabinet was one of the items.

It appeared to be some laminated medical cabinets that had been modified [more than once] to suit the owner. Two cabinets had been attached to each other and mounted on casters to make a large bench with storage. With my Miter Saw Station almost completed, this thing was too large and in the way.

I planned to removed the casters, European-style hinges & drawer rails and haul the rest off to the landfill. However, after I got it broken down, I realized that it might yet serve a purpose. I placed the two cabinets on top each other next to the air compressor. This will provide some needed shelving until I acquire something better.


20171130-05.jpg

I also managed to get the Fort Sackville sign up on the wall this evening. I've been trying to decide where to put it and this was the place I came up with.

As I mentioned in a previous post, this sign was above a bowling lane and signaled, via lighting not present now, how many pins were remaining and if one got a strike.

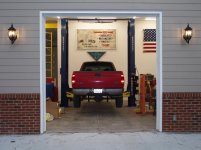
I've placed the sign dead center on the center bay and the 2-post lift. I have visions of some sort of sensors and lighting that will light up the Fort Sackville sign when I have positioned a vehicle correctly to use the 2-post lift.

I'm an Idea Guy so someone else will have to work out the details for that.

Ha!


Scott
 
Last edited:
OP
S

sbosecker

Well-known member
Joined
Sep 25, 2012
Messages
3,539
Location
Peachtree City, GA
Re: The Lone Beech Garage Build Thread (60x46)

December 1, 2017


A bit of time spent doing some organizational work in the shop followed by some routine vehicle maintenance.


20171201-01.jpg

The Highlander needed to have its tires rotated so I knocked that out.


matt_i has been suggesting some things that I need to allow the JET Mill to be a useful machine. I have some of the items ...or at least some reasonable substitutions - some of which might be upgraded in the future.


20171201-02.jpg

Of course one of the fundamental items needed is a vise. When I bought the Mill-Drill that I just sold, this Homge HAV-4 4-inch machinist vise came with it. A 6-inch vise would be a nice upgrade.


20171201-03.jpg

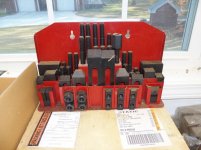
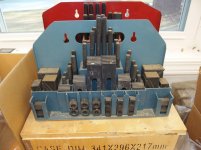
1/2-inch Hold Down Clamp Set for the JET Mill table. This set came with the Mill-Drill.


20171201-04.jpg

3/8-inch Hold Down Clamp Set for the following item.


20171201-05.jpg

10-inch Rotary Table. Acquired via a Craigslist ad several years ago. No name on this rascal but it really looks like a Phase II table to me.


20171201-06.jpg

Rotary Table Tail Stock. Enco used to have sales with alarming frequency. A lot of the stuff I squirreled away in preparation for eventual Milling Machine acquisition came from Enco. This is a Phase II Tail Stock.


20171201-07.jpg

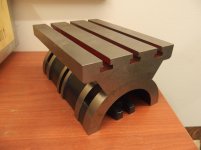
Tilting Table. Another Enco acquisition. The 3/8-inch clamp set would also be used on this table.


Continued in next post...
 
Last edited:
OP
S

sbosecker

Well-known member
Joined
Sep 25, 2012
Messages
3,539
Location
Peachtree City, GA
Re: The Lone Beech Garage Build Thread (60x46)

Continued...

20171201-21.jpg

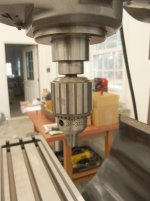
Another item that came with the Mill-Drill was this Jacobs 33-34 chuck mounted on a R8 arbor.


20171201-22.jpg 20171201-23.jpg

20171201-24.jpg 20171201-25.jpg

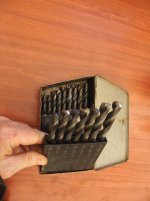
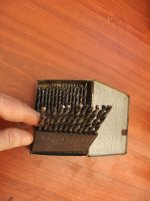
I found these two Drill Bit Indexes at an Estate Sale.


20171201-26.jpg 20171201-27.jpg

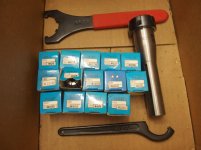
I've got a R8 Taper ER-25 Collet Chuck and a set of ER-25 Collets. This was the largest size my Mill-Drill would handle.

There are some other items: 1-2-3 blocks, parallels, etc. but that's the bulk of the stuff that is concerned with the JET Mill.


Scott
 
Last edited:

petemarkey

Member
Joined
Sep 17, 2009
Messages
11
Re: The Lone Beech Garage Build Thread (60x46)

paste wax.... yes
box joint jig.... yes

Been subscribed to this thread for a while and just deleting the emails (like months).... a lot a need to go back through....need to schedule some time.

Greetings from *******, GA.
 
OP
S

sbosecker

Well-known member
Joined
Sep 25, 2012
Messages
3,539
Location
Peachtree City, GA
Re: The Lone Beech Garage Build Thread (60x46)

paste wax.... yes
box joint jig.... yes

Been subscribed to this thread for a while and just deleting the emails (like months).... a lot a need to go back through....need to schedule some time.

Greetings from *******, GA.


petemarkey,

Likewise from PTCGA. Ha!

Well we've got a couple of woodworking yeses ...how about an Oh No!


20171202-01.jpg 20171202-02.jpg

Note the stain on this project.

It is a blanket chest I'm making for my daughter. The walnut lumber that went into it came from trees harvested form the Lone Beech Melon Farm's woods and air dried in the barn there.

It has been a ridiculously long project. The Lone Beech Garage planning and building causing a major interruption to the progress. During the time of the building of the LBG I had wrapped the chest's lid in a sheet that I had in the house's basement. This was an attempt to protect the lid from harm.

A month or so ago, I moved the blanket chest carcass & the lid (still wrapped in the sheet) from the basement to the LBG woodshop. A few days ago I unwrapped the sheet from the lid to show a neighbor what I was building.

That's when I found the stain.

I think this is probably hydraulic jack oil that had gotten on the sheet without me being aware of it. I have a Harbor Freight Hydraulic Lift Cart that has a leaking cylinder. The sheet had been in the vicinity of the Cart before I wrapped the lid in the sheet.

That's my best theory anyway.

I was pretty upset when I discovered the stain. I'm going to take some scrap pieces of walnut and put some hydraulic jack oil on it - then experiment with those pieces to see if anything can remove the oil.

I am not optimistic.

Best regards,

Scott
 
Last edited:
OP
S

sbosecker

Well-known member
Joined
Sep 25, 2012
Messages
3,539
Location
Peachtree City, GA
Re: The Lone Beech Garage Build Thread (60x46)

Saturday - December 2, 2017


A couple of packages arrived in today's mail.


20171202-11.jpg

One contained a pair of Stabilizer Bar Bushings for my 2000 Ford F150 pickup. I noticed a rubbed area on the Stabilizer Bar near the left bushing when I changed the oil in the truck a week ago. I guess after 18 years and 150,000 miles maybe it's time to change out the originals.


20171202-12.jpg 20171202-13.jpg

The other package was the first of two grease guns that I've ordered off of eBay. These grease guns will be loaded with the two different grease cartridges recently received to service the JET Mill.


Scott
 
OP
S

sbosecker

Well-known member
Joined
Sep 25, 2012
Messages
3,539
Location
Peachtree City, GA
Re: The Lone Beech Garage Build Thread (60x46)

Sunday - December 3, 2017


20171203-01.jpg

This evening it was time to rotate the tires on my 2000 Ford F150. A Eurythmics CD was inserted into the music box and the work began.


20171203-02.jpg

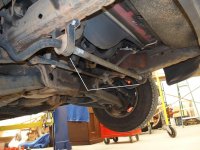
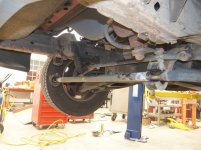
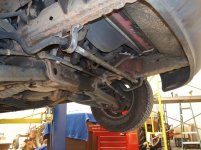
After the tire maintenance was completed I addressed the Stabilizer Bar Bushings. Here's the rubbed area (white arrow) that caused me to order the new bushings.


20171203-03.jpg

On this vehicle the two bushings are very accessible. I believe this procedure could be accomplished with the wheels firmly on the ground. Obviously a lift or jack stands - even a tornado shelter (HA!) - would provide easier access.


20171203-04.jpg 20171203-05.jpg

A 13mm socket removed the 2 bolts on each bracket without a fuss. One thing I thought was interesting was the original bushings were installed with their seams each pointing in different directions.


20171203-06.jpg 20171203-07.jpg

It probably makes no difference but I installed the bushings with their seams pointing the exact same way as the originals. The torque specification for the bracket bolts is 19-26 Ft-lbs; I used 22-1/2 Ft-lbs.

The old bushings actually looked pretty good. There was a bit of elongation from a perfectly round form but it wasn't horrible. I've had some vibration occasionally at around 40 mph for a very long time. It will be interesting to see if my efforts affect that situation.

This is one of the easiest repairs I've done to a vehicle.

Scott


Key Words: 2000 F150 F-150 Stabilizer Bushings Replacement
 
Last edited:

drivesitfar

Well-known member
Joined
Oct 23, 2013
Messages
36,062
Location
Pacific Northwest
Re: The Lone Beech Garage Build Thread (60x46)

SB: let us know if that might help with the wobbling cause my CRV used to wobble a bit and my mechanic changed out the front axles (twice) with after market ones cause Honda's were 3 times as much.

just curious if you might be interested in putting some weatherproofing under your truck and cars now that you have your lift? one of the members (DENWOOD) Woody found a solution to his winter cold and salt issues with heated wax type product that he put under his Audi last winter and he lives in Ontario. if you can't find it in his thread just post and ask him and i bet he'd be happy to help. here's the link:

https://www.garagejournal.com/forum/showthread.php?p=6870805#post6870805

also he's currently finishing up a low ceiling basement fantastic media room that you might want to put in your now unfinished basement if you don't have any other plans for it.

cheers and good luck with the mill/lathe and cars
 

Deezler

Well-known member
Joined
Nov 1, 2011
Messages
240
Location
Southeast MI
Re: The Lone Beech Garage Build Thread (60x46)

I was pretty upset when I discovered the stain. I'm going to take some scrap pieces of walnut and put some hydraulic jack oil on it - then experiment with those pieces to see if anything can remove the oil.

I am not optimistic.

Don't be so upset, the oil stain color tone looks great! Just find out what caused it.... then oil the whole chest! haha. Sorry to joke about your calamity. But seriously maybe you can can just mostly match it with a stain, to hide it.
 

drivesitfar

Well-known member
Joined
Oct 23, 2013
Messages
36,062
Location
Pacific Northwest
Re: The Lone Beech Garage Build Thread (60x46)

SB: or can you sand the old stain off? or restain a darker stain after a light sanding and i bet problem will be solved.

good luck
 

dchance

Well-known member
Joined
Oct 3, 2016
Messages
614
Location
OKC
Re: The Lone Beech Garage Build Thread (60x46)

Scott, the chest looks great but hate to see the oil stain. Hopefully you can remove it.

Along with lacquer thinner I wonder about acetone. Good that you can try it on sample wood.

Dwight
 
OP
S

sbosecker

Well-known member
Joined
Sep 25, 2012
Messages
3,539
Location
Peachtree City, GA
Re: The Lone Beech Garage Build Thread (60x46)

SB: let us know if that might help with the wobbling cause my CRV used to wobble a bit and my mechanic changed out the front axles (twice) with after market ones cause Honda's were 3 times as much.

just curious if you might be interested in putting some weatherproofing under your truck and cars now that you have your lift? one of the members (DENWOOD) Woody found a solution to his winter cold and salt issues with heated wax type product that he put under his Audi last winter and he lives in Ontario. if you can't find it in his thread just post and ask him and i bet he'd be happy to help. here's the link:

https://www.garagejournal.com/forum/showthread.php?p=6870805#post6870805

also he's currently finishing up a low ceiling basement fantastic media room that you might want to put in your now unfinished basement if you don't have any other plans for it.

cheers and good luck with the mill/lathe and cars


DrivesItFar,

Drove the F150 around today a bit and the vibration is still there. It is the oddest thing - very speed specific; 40-42 mph. It doesn't do it all the time but when it does vibrate it can be quite noticeable. I would compare the sensation to an out of balance wheel. It has been doing this for a LONG time ...maybe 12 years (the truck is 18 years old).

I've had mechanics look at it and they had no real ideas. I'm not sure it did it when they were test driving it.

I don't think I'll do any weatherproofing under my vehicles. The need for it I'm my neck of the woods is quite low.

I'll check out Woody's Media Room stuff for ideas - thanks!

Best regards,

Scott
 
OP
S

sbosecker

Well-known member
Joined
Sep 25, 2012
Messages
3,539
Location
Peachtree City, GA
Re: The Lone Beech Garage Build Thread (60x46)

Don't be so upset, the oil stain color tone looks great! Just find out what caused it.... then oil the whole chest! haha. Sorry to joke about your calamity. But seriously maybe you can can just mostly match it with a stain, to hide it.

SB: or can you sand the old stain off? or restain a darker stain after a light sanding and i bet problem will be solved.

good luck


Scott, the chest looks great but hate to see the oil stain. Hopefully you can remove it.

Along with lacquer thinner I wonder about acetone. Good that you can try it on sample wood.

Dwight


Thanks for all the suggestions guys!

We'll see if we can find a solution beyond dipping the whole lid in Hydraulic Jack Oil. Ha!

Best regards,

Scott
 
OP
S

sbosecker

Well-known member
Joined
Sep 25, 2012
Messages
3,539
Location
Peachtree City, GA
Re: The Lone Beech Garage Build Thread (60x46)

Monday - December 4, 2017


20171204-01.jpg 20171204-02.jpg

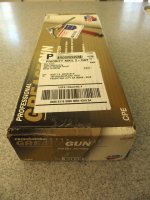
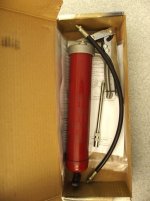
The postman brought my second grease gun today. It is another Alemite 555E but it was sold by CarQuest (CarQuest 30298). I think CarQuest has been bought by Advance Auto Parts. Perhaps some of CarQuest's inventory is being surplused as this item was on eBay for a very reasonable price compared to the best price I could find for a straight Alemite 555E.

This product contained both the straight and flexible tubes. I think I'll use the straight tube for the JET Mill's Knee Screw and I'll use the second gun's flexible tube for the zerk located higher on the Mill's Head.


20171204-03.jpg 20171204-04.jpg PC040038.jpg

The real prize... hmmm... prizes arrived via FedEx Ground late this afternoon.

When I bought the JET Mill from Zoro.com using the 25% off promotion, my plan was to buy the Powerfeeds from Zoro.com the next time they had another promotion. Zoro.com has a maximum amount of "savings" with their promotions and I actually only got about 23% off Zoro's advertised price for the JET Mill. Had I bought the Y & Z axis powerfeeds (only what they had available at the time of the Mill purchase) from Zoro at the same time as the JET Mill I would have gotten no discount on the powerfeeds.

When Zoro had their Black Friday - Cyber Monday deals they no longer were carrying any of the JET Powerfeeds. On the day before Thanksgiving, ToolUp gave a 5% discount on purchases on their site. I pushed the button.

Zoro has them in stock again but they have jacked their prices up considerably for the powerfeeds. Zoro charges me sales tax so my deal with ToolUp beats Zoro's higher price even with a 25% discount.

I'm looking forward to installing these powerfeeds on the JET Mill. Now I'm watching for deals for a 3-axis DRO for it.


Scott
 
Last edited:
To avoid these ads, REGISTER NOW!
Top Bottom