
You are using an out of date browser. It may not display this or other websites correctly.
You should upgrade or use an alternative browser.
You should upgrade or use an alternative browser.
Above 1200 Sq/FT Craig's Colorado Car Condo
- Thread starter Craig Balzer
- Start date
Wokspaces above 1200 squarefeet.
C_F
ALLIANCE MEMBER
I just found your thread today & read it cover to cover. 
It's looking great, thanks for bringing us all along with your good looking build!
It's looking great, thanks for bringing us all along with your good looking build!
OP
Craig Balzer
Well-known member
I just found your thread today & read it cover to cover.
It's looking great, thanks for bringing us all along with your good looking build!
C_F -- Thanx for dropping in and for the compliments. I'm nearing completion -- GC expects to be done by late April.
Next up:
1 - Plumb items in bathroom - later pour 8' x 8' concrete pad and hook up last in-floor pex line for bath room floor
2 - Apply sheeting to walls
3 - Install black pipe to run propane to boiler from 500 gal propane tank
4 - Paint walls/ceiling
Gettin' close . . .
Last edited:
OP
Craig Balzer
Well-known member
The last week of February saw some progress. Not much to see but significant strides forward:
Pictures show details
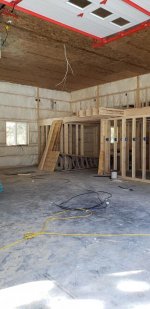
- Put sheeting on ceilings
- Insulated walls (R19) & ceiling (R49)
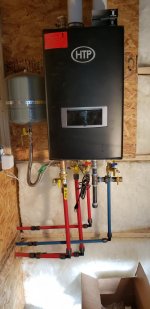
- Installed boiler for in-floor heating. Boiler also heats domestic water and includes the pumps to circulate the glycol.
Pictures show details
Attachments


Last edited:
SWR_Jonathan
Member
This is coming out awesome! Congrats on the build.
OP
Craig Balzer
Well-known member
This is coming out awesome! Congrats on the build.
Jon - thanx for the comments. Stop on by again in a few weeks; I'll keep the lights on for ya.
After walls are painted, the home stretch includes man art, I-love-me wall and epoxy floor. -- Craig
Last edited:
shortykorte
Well-known member
Looks like it will be a nice place to hang out on a cold winter’s night.
Shorty Korte
Always remember quality in QST
Sent from my iPhone using Garage Journal
Shorty Korte
Always remember quality in QST
Sent from my iPhone using Garage Journal
OP
Craig Balzer
Well-known member
Shorty - just spent the last hour reading/scanning the first 1/5 of your build thread. Got up to the point you are cutting up the floor to thicken the concrete pour for your lift pads. What a story!! (your leg should surely be healed by now; looking for the update on your mangled thumb).
Sure makes me glad I poured a 6.5' by 11' "pit" of 10-12" concrete as a mounting target for my yet-to-be-purchased asymmetric lift. I didn't place any pex lines through that area -- not even any closed cell insulation. -- Craig
Sure makes me glad I poured a 6.5' by 11' "pit" of 10-12" concrete as a mounting target for my yet-to-be-purchased asymmetric lift. I didn't place any pex lines through that area -- not even any closed cell insulation. -- Craig
Last edited:
OP
Craig Balzer
Well-known member
I had a short gap in any work while my work crew did some work on another garage/barn they are putting up. The weather was too mild to miss the opportunity to work outside.
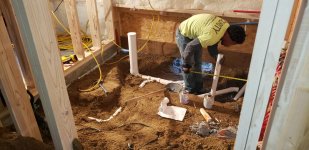
The first few days of March saw the rough-in of the bathroom and installation of the boiler.
The second photo of the bathroom shows placement of the features:
left-rear = toilet
right-rear = shower
left-front = sink
off camera to the left = outside of bathroom will be a janitor's sink
The first few days of March saw the rough-in of the bathroom and installation of the boiler.
The second photo of the bathroom shows placement of the features:
left-rear = toilet
right-rear = shower
left-front = sink
off camera to the left = outside of bathroom will be a janitor's sink
Attachments

OP
Craig Balzer
Well-known member
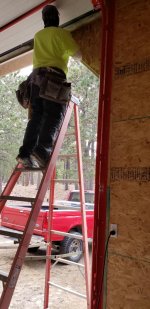
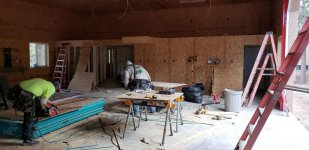
A week later (10-11MAR20) the work crew returned and installed the sheeting in the high bay and loft. On 12MAR20, they started sheeting the the smaller room and trenching for the propane line.
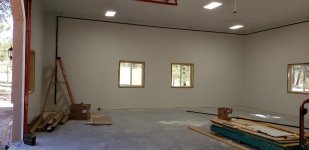
The next focus is plumbing the propane line from the tank to the boiler and getting the in-floor heating fired up. Once the building is warmed up, the wall seams can be sealed and the walls painted, and then the ceiling lights can be re-installed.
The next focus is plumbing the propane line from the tank to the boiler and getting the in-floor heating fired up. Once the building is warmed up, the wall seams can be sealed and the walls painted, and then the ceiling lights can be re-installed.
Attachments




shortykorte
Well-known member
The ride has been interesting. Thumb is doing okay.
Plumbing and lights, won’t be long.
Shorty Korte
Always remember quality in QST
Sent from my iPhone using Garage Journal
Plumbing and lights, won’t be long.
Shorty Korte
Always remember quality in QST
Sent from my iPhone using Garage Journal
OP
Craig Balzer
Well-known member
Hey guys -- looking for some input on the paint scheme for my walls.
I am pretty set on the colors:
The attached photo shows the location of key features on the 14-foot walls:
As I see it, there are three options for positioning the yellow stripe (see attached PDF)
A) Locate the top of the yellow stripe along the window sill
B) Locate the bottom of the yellow stripe along the window sill
C) Locate the center of the yellow stripe centered on the outlets.
Also -- the walls are OSB with the smooth side being mounted facing out. They will get 1 or 2 coats of Kilz oil-based primer covered with 1 or 2 coats of semi-gloss paint. Will a vinyl tape stick to that or am I better off painting the stripe? (and a source for such tape would be useful as well?).
Thanks guys and gals
Craig
I am pretty set on the colors:
- Main color will be off-white or light grey
- Lower ~2 feet will be green
- Horizontal stripe of 3-4" will be yellow
The attached photo shows the location of key features on the 14-foot walls:
- The windows (there are 8 of them) are 4'x4' with the sill just short of 4 feet above the floor
- The outlets (lots and lots of them) are a few inches more than 4 feet above the floor.
As I see it, there are three options for positioning the yellow stripe (see attached PDF)
A) Locate the top of the yellow stripe along the window sill
B) Locate the bottom of the yellow stripe along the window sill
C) Locate the center of the yellow stripe centered on the outlets.
Also -- the walls are OSB with the smooth side being mounted facing out. They will get 1 or 2 coats of Kilz oil-based primer covered with 1 or 2 coats of semi-gloss paint. Will a vinyl tape stick to that or am I better off painting the stripe? (and a source for such tape would be useful as well?).
Thanks guys and gals
Craig
Attachments

OP
Craig Balzer
Well-known member
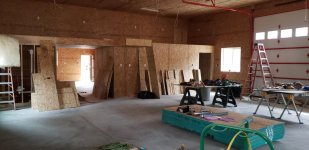
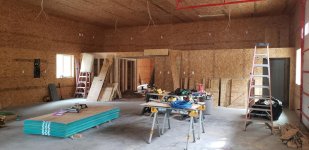
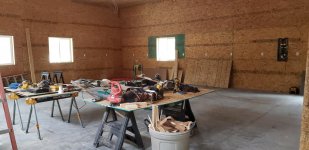
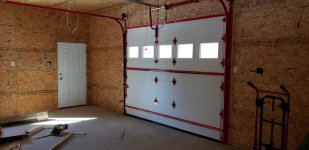
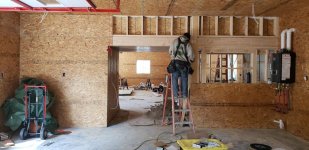
Right on schedule, the crew worked the last few days and on 16MAR20 they had sheeted all interior walls except for the bathroom (it still needs some plumbing stuff before walls are closed in)
Attachments
Last edited:
78SC4X4
Well-known member
Hey guys -- looking for some input on the paint scheme for my walls.
I'm sorry you lost me at packers fan...............
I would choose option B with a blue bottom and electric green strip.
GO HAWKS!!
dantecl
Active member
Absolutely fantastic work! Loving the "in progress" documentation, can't wait to see the finished product!
Just got through the whole thread, great project!!
As for paint, I like the idea of picking up outlets and switches in the stripe so, C, then A last for me, B. I think B makes the color section a little short in scale and looks a bit off to me.
As for paint, I like the idea of picking up outlets and switches in the stripe so, C, then A last for me, B. I think B makes the color section a little short in scale and looks a bit off to me.
OP
Craig Balzer
Well-known member
78Sc4x4 - thanks for stopping in. I would reply to your comment but I haven't spoken to a Hawk's fan since the Inaccurate Reception on 24SEP15.
Dan - Thanks for stopping by and I appreciate to supportive comments. The built ought to be complete by April -- unless the CoronaVirus slows things down. It's looking good -- my GC just picked up the 2x interior doors, all the lumber for trimming the windows and doors and, over the weekend, he dropped off 30 gal of Kilz primer and 25 gals of off-white paint. They appear to have supplies enough to say busy for several days.
Riley -- I was leaning toward that solution as well. Thanx for the input.
Craig
Dan - Thanks for stopping by and I appreciate to supportive comments. The built ought to be complete by April -- unless the CoronaVirus slows things down. It's looking good -- my GC just picked up the 2x interior doors, all the lumber for trimming the windows and doors and, over the weekend, he dropped off 30 gal of Kilz primer and 25 gals of off-white paint. They appear to have supplies enough to say busy for several days.
Riley -- I was leaning toward that solution as well. Thanx for the input.
Craig
Jayman17
Well-known member
The place is coming along nicely and looks great. I like the 3rd option for wall color as well.  You are really going to enjoy this shop. I'll be watching.
Is there a big Amish population in Colorado?
Jay
You are really going to enjoy this shop. I'll be watching. Is there a big Amish population in Colorado?
Jay
OP
Craig Balzer
Well-known member
Jayman -- thanx for casting your vote; it's shaping up to be a landslide.
I hadda look it up -- there are far fewer than 1000 Amish in Colorado. He hails from Indiana which has the third largest Amish populations in the States after Ohio and Pennsylvania. He moved here 12-15 years ago and moved his family and construction and fencing companies with him. I feel very lucky to have found him.
Glad you like the digs -- I am looking forward to getting it set up. Stay tuned. I have some man art and I-love-me stuff to hang when the interior is done.
Craig
I hadda look it up -- there are far fewer than 1000 Amish in Colorado. He hails from Indiana which has the third largest Amish populations in the States after Ohio and Pennsylvania. He moved here 12-15 years ago and moved his family and construction and fencing companies with him. I feel very lucky to have found him.
Glad you like the digs -- I am looking forward to getting it set up. Stay tuned. I have some man art and I-love-me stuff to hang when the interior is done.
Craig
Last edited:
Jayman17
Well-known member
Craig, I have seen a few threads from people living in Colorado. It sure looks like a great place to live. I have an uncle, aunt and cousin that live in the Ft Collins area although I have never been there.
Jay
Jay
OP
Craig Balzer
Well-known member
It's been a while but now have some updates.
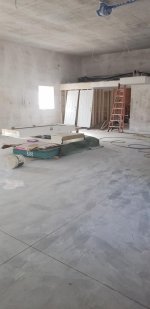
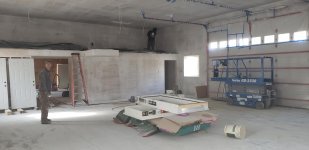
I struggled with myself over dry wall vs OSB wall sheeting. Dry wall looks better but this is gonna be a working garage and I didn't wanna worry about hanging a shelf or something on the wall -- OSB is strong enough to handle most anything. It's drawback is that is soaks up paint like a sponge -- and even with the smooth side out, it is a bit rough.
Priming occurred on 27MAR20
I struggled with myself over dry wall vs OSB wall sheeting. Dry wall looks better but this is gonna be a working garage and I didn't wanna worry about hanging a shelf or something on the wall -- OSB is strong enough to handle most anything. It's drawback is that is soaks up paint like a sponge -- and even with the smooth side out, it is a bit rough.
Priming occurred on 27MAR20
Attachments

OP
Craig Balzer
Well-known member


OP
Craig Balzer
Well-known member


OP
Craig Balzer
Well-known member
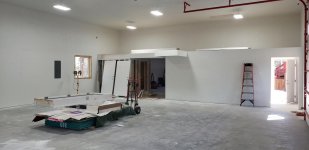
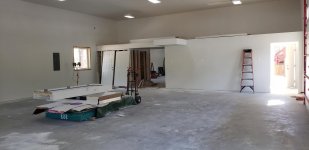
and then the electrician came through and finalized the installation of ceiling lights and the last of the hook-ups to the circuit breaker box.
I've been looking forward to testing the dimmer on those LEDs in the High Bay. I think I have enough light. And then an example of my OCD: the circuit plan re-done in PowerPoint (the .pdf).
I've been looking forward to testing the dimmer on those LEDs in the High Bay. I think I have enough light. And then an example of my OCD: the circuit plan re-done in PowerPoint (the .pdf).
Attachments

Last edited:
OP
Craig Balzer
Well-known member
I have seen a few threads from people living in Colorado. It sure looks like a great place to live. I have family in the Ft Collins area although I have never been there.
Jay
Jay -- I hadn't noticed the number of Colorado-based posters but I certainly agree that Colorado is a great place to live. Thanx for stopping by . . .
Craig
OP
Craig Balzer
Well-known member
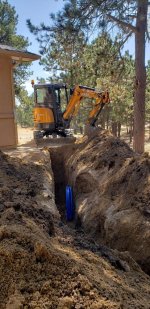
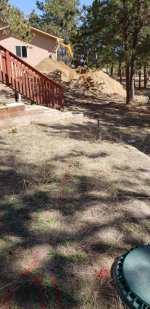
The past coupla days saw lots of work that resulted in really very little: I now have water flowing into and out of my bathroom. No sink, toilet or shower in there yet -- that happens next week.
One day for each line to be dug in and connected.
Water In on TH 09APR20: dig down to level of water line from well and tap into it. Oh yeah -- then ya gotta put the dirt back
One day for each line to be dug in and connected.
Water In on TH 09APR20: dig down to level of water line from well and tap into it. Oh yeah -- then ya gotta put the dirt back
Attachments


OP
Craig Balzer
Well-known member
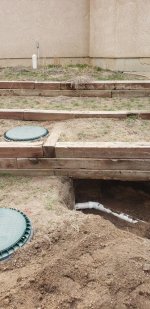
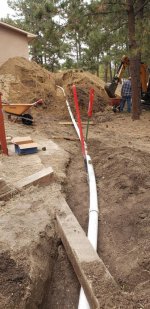
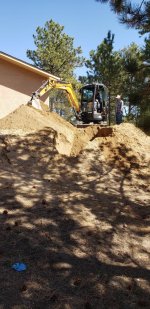
Then on FRI 10APR20, the same crew assembled to tie into the septic tanks and ultimately to the leach field.
Same process: dig a hole, put pipe in and replace the dirt. The process was a bit more time consuming to get the proper drop over the run for the gravity feed. The red spray painted marked both the path to dig along and marked existing under ground obstacles
Same process: dig a hole, put pipe in and replace the dirt. The process was a bit more time consuming to get the proper drop over the run for the gravity feed. The red spray painted marked both the path to dig along and marked existing under ground obstacles
Attachments


shortykorte
Well-known member
Wow looking like a nice space. Plenty of room...for now. Lol.
Do you have a close up of the high bay lights and the specs?
Shorty Korte
Always remember quality in QST
Sent from my iPhone using Garage Journal
Do you have a close up of the high bay lights and the specs?
Shorty Korte
Always remember quality in QST
Sent from my iPhone using Garage Journal
OP
Craig Balzer
Well-known member
Shorty
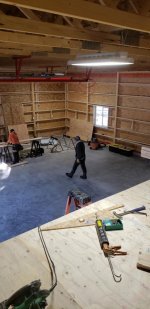
I don't have a close up photo of the lamp fixtures -- did find a photo from in the loft with the Hi-Bay lamp in foreground.
But here are the specs on the three different types of lights I installed
MAIN SHOP – 14’ Ceiling
• 7x HB 150001 50
• LED: 18” x 30” 150 Watt (Dimmable)
• 18,500 Lumens
• 5,000° K
• $150 each
STORAGE – 10’ ceiling
• 4x TCPGPS8UZDA840K
• LED: 8’ Strip
• 8,500 Lumens
• 4,000° K
• $75 each
DIRTY ROOM & BATHROOM
• 3x LVT 5600140
• LED Vapor Tight
• 7,300 Lumens
• 4100°°K
• $85 each
I don't have a close up photo of the lamp fixtures -- did find a photo from in the loft with the Hi-Bay lamp in foreground.
But here are the specs on the three different types of lights I installed
MAIN SHOP – 14’ Ceiling
• 7x HB 150001 50
• LED: 18” x 30” 150 Watt (Dimmable)
• 18,500 Lumens
• 5,000° K
• $150 each
STORAGE – 10’ ceiling
• 4x TCPGPS8UZDA840K
• LED: 8’ Strip
• 8,500 Lumens
• 4,000° K
• $75 each
DIRTY ROOM & BATHROOM
• 3x LVT 5600140
• LED Vapor Tight
• 7,300 Lumens
• 4100°°K
• $85 each
Attachments
Last edited:
Shovelhead
Well-known member
Very nice!
How far was the run for the septic solid line? From the shop to the existing tanks.
How far was the run for the septic solid line? From the shop to the existing tanks.
OP
Craig Balzer
Well-known member
Shovelhead
Thanx -- I appreciate it.
I didn't measure it nor do I have a tape measure long enough to cover it, but I would guesstimate 115' - 120'.
Odd question -- -- -- why?
Craig
Thanx -- I appreciate it.
I didn't measure it nor do I have a tape measure long enough to cover it, but I would guesstimate 115' - 120'.
Odd question -- -- -- why?
Craig
Shovelhead
Well-known member
Shovelhead
Thanx -- I appreciate it.
I didn't measure it nor do I have a tape measure long enough to cover it, but I would guesstimate 115' - 120'.
Odd question -- -- -- why?
Craig
odd question because I'm an odd feller.......
Because if ya ain't got the right drop in that distance, yer **** gonna be coming back at ya.
Actually I'm going to be building a shop before the house, on our retirement property. Trying to gain as much info as I can, considering sharing the same septic.
I know I can go with a grinder / macerator pump to move the goods to the tank but would rather not.
There's a "standard" drop per foot for a solid septic line to the tank but I can't remember it right now. Country boy plumber would know.
Just curious how far yours was.
OP
Craig Balzer
Well-known member
Shovelhead
I used a 35' tape measure along the terrain, so this may not be exactly accurate, but figure 140-145 feet. The tightest corner was right at the exterior wall -- two 45° angles about 3-4' apart formed a right-hand turn. It was a fairly straight, slightly curving run to the septic tank. The line had a 45° angle as it passed through the wall of the tank.
While my GC was able to get the proper drop along the run for a simple gravity feed, I may ultimately end up with a grinder pump. The last 30-40 feet is a close thing.
My research showed there are 2 sizes pump -- prolly more but these would have worked:
A 1/2 HP pump was $700.
A 1 HP pump was $1,300.
Add in a hole for the pump and power for the pump motor / alarm and I was expecting $2000 all in.
The 1 HP pump dimensions: 24" tall cylinder that was 24" in diameter. I didn't get the dimensions for the smaller pump but figure it was about the same.
I can't speak for your neck of the woods, but Colorado Code says a septic line needs a 2% drop. The plastic line I used came in 10' sections. 10 feet = 120 inches. 2% of 120" = 2.4" sooo 2 1/2 inch drop every ten feet was an easy measure check.
Shovelhead - I have been planning this build since 2006/07 timeframe pretty much a full time effort. Please ask any questions -- I likely have wrestled with most issues by now.
Craig
PS - if you have water into/outside your shop, check out https://www.webstaurantstore.com/43759/utility-sinks.html for some great prices on stainless steel sinks
I used a 35' tape measure along the terrain, so this may not be exactly accurate, but figure 140-145 feet. The tightest corner was right at the exterior wall -- two 45° angles about 3-4' apart formed a right-hand turn. It was a fairly straight, slightly curving run to the septic tank. The line had a 45° angle as it passed through the wall of the tank.
While my GC was able to get the proper drop along the run for a simple gravity feed, I may ultimately end up with a grinder pump. The last 30-40 feet is a close thing.
My research showed there are 2 sizes pump -- prolly more but these would have worked:
A 1/2 HP pump was $700.
A 1 HP pump was $1,300.
Add in a hole for the pump and power for the pump motor / alarm and I was expecting $2000 all in.
The 1 HP pump dimensions: 24" tall cylinder that was 24" in diameter. I didn't get the dimensions for the smaller pump but figure it was about the same.
I can't speak for your neck of the woods, but Colorado Code says a septic line needs a 2% drop. The plastic line I used came in 10' sections. 10 feet = 120 inches. 2% of 120" = 2.4" sooo 2 1/2 inch drop every ten feet was an easy measure check.
Shovelhead - I have been planning this build since 2006/07 timeframe pretty much a full time effort. Please ask any questions -- I likely have wrestled with most issues by now.
Craig
PS - if you have water into/outside your shop, check out https://www.webstaurantstore.com/43759/utility-sinks.html for some great prices on stainless steel sinks
OP
Craig Balzer
Well-known member
Duplicate entry -- not sure how that happened.
Deleted
Deleted
Last edited:
Shovelhead
Well-known member
Appreciate it.
OP
Craig Balzer
Well-known member
Not much happenin’ in my garage build. Things were put on hold while I got on the calendar for the outfit to move forward on the bathroom. They should be here tomorrow (27APR20) to fix some errors on the rough-in and install insulation and pex lix line to heat bathroom floor.
This weekend, I went to a all-sales-are-final closing of a garage specializing in restoring 60’s-70’s Mustangs. I was looking at their Challenger 2-poster. Three weeks ago they were asking $3,000 for a used 9000 lb asymmetric lift. I figured the price would reflect the end-of-the-month move out schedule. NOT. The asking price was .. .. .. $4,000
So I looked around. I heard one guy buy a very nice condition STOP sign for $5. They want $4,000 for a used lift and are giving away the little stuff. So I looked around, found some wall art.
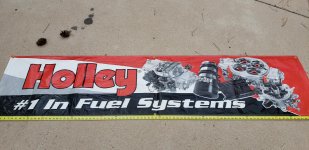
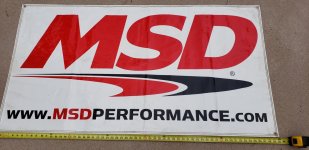
Picked up 4 wall banners for $5 a piece:
This weekend, I went to a all-sales-are-final closing of a garage specializing in restoring 60’s-70’s Mustangs. I was looking at their Challenger 2-poster. Three weeks ago they were asking $3,000 for a used 9000 lb asymmetric lift. I figured the price would reflect the end-of-the-month move out schedule. NOT. The asking price was .. .. .. $4,000
So I looked around. I heard one guy buy a very nice condition STOP sign for $5. They want $4,000 for a used lift and are giving away the little stuff. So I looked around, found some wall art.
Picked up 4 wall banners for $5 a piece:
- MSD - 5 feet wide
- Flow Master - 7 feet wide
- Holley - 7.5+ feet wide
- Snap On - 7.5+ feet wide
Attachments


Last edited:
OP
Craig Balzer
Well-known member
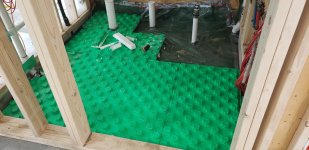
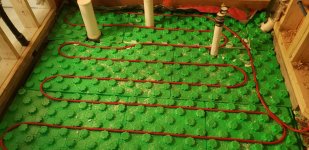
Took the next step in completing the bathroom in my garage. The contractor worked (28-29APR20) on
NEXT UP -- pouring 4" concrete pad in 7.5' x 7.5' bathroom floor.
Craig
- Correcting errors made during initial rough-in
- Replacing and taping down 10-MIL vapor barrier
- Installing Crete-Heat insulation
- Running Pex Lines in bathroom floor
NEXT UP -- pouring 4" concrete pad in 7.5' x 7.5' bathroom floor.
Craig
Attachments

shortykorte
Well-known member
Cool grass in the bathroom. Lol. Going to be nice on those cold days.
Shorty Korte
Always remember quality in QST
Sent from my iPhone using Garage Journal
Shorty Korte
Always remember quality in QST
Sent from my iPhone using Garage Journal
OP
Craig Balzer
Well-known member
Baby steps now as I move toward completion.
Not much to look at but just sorta connecting things
On 01MAY20, the downspurts were buried and the drains extended away from the building
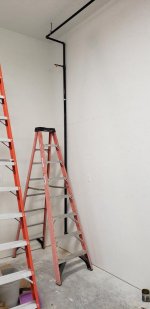
On 05MAY20, the black pipe was hung from the NW corner of the building to the boiler (that is mounted 2/3 of the way down the east wall). I also had the guy install a small extendion off the verticle pipe for a future, if-needed feed to a Reznor (or similar) propane heater.
The punch list is getting pretty short:
Not much to look at but just sorta connecting things
On 01MAY20, the downspurts were buried and the drains extended away from the building
On 05MAY20, the black pipe was hung from the NW corner of the building to the boiler (that is mounted 2/3 of the way down the east wall). I also had the guy install a small extendion off the verticle pipe for a future, if-needed feed to a Reznor (or similar) propane heater.
The punch list is getting pretty short:
- Pour concrete in bathroom and driveway
- Trim around windows and doorways
- Epoxy floor
- Mount staircase to loft
- Install fixtures in bathroom
- Mount sheeting on bathroom walls
- Move In
Attachments


OP
Craig Balzer
Well-known member
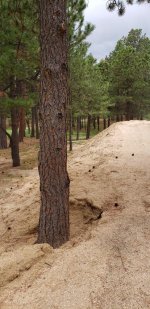
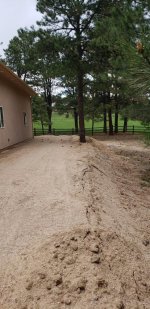
Haven't had much to post in nearly a month. Got side-tracked while working an issue with all the fill I needed to bring to level the site pad. I trucked in 1,147 tons of fill (or was 1,153 tons?); that resulted in one corner (the SE) of the site having 7.5 feet of fill.
The next step was to pour the concrete apron and a patio on the south side of garage. My GC really felt a retaining wall was needed before bringing in all that additional weight.
That slowed me down a month+ while I got bids from retaining wall contractors, made my selection, and then got on his calendar.
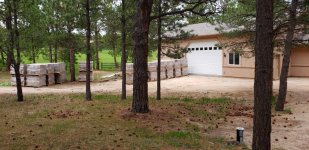
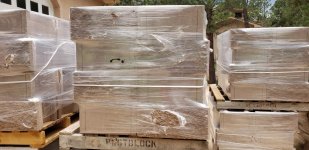
The build of the wall will begin on Monday 08JUN20. I'm not sure if these pallets represent all the blocks for the retaining wall or if more are coming. The contractor said he would need 888 linear feet of wall. The retaining walls (there'll be two of them) will be 4 feet high; the double wall ought to begin near that large tree at the back of the garage and wrap around the corner likely near that other large tree.
Craig
The next step was to pour the concrete apron and a patio on the south side of garage. My GC really felt a retaining wall was needed before bringing in all that additional weight.
That slowed me down a month+ while I got bids from retaining wall contractors, made my selection, and then got on his calendar.
The build of the wall will begin on Monday 08JUN20. I'm not sure if these pallets represent all the blocks for the retaining wall or if more are coming. The contractor said he would need 888 linear feet of wall. The retaining walls (there'll be two of them) will be 4 feet high; the double wall ought to begin near that large tree at the back of the garage and wrap around the corner likely near that other large tree.
Craig
Attachments
-
 Looking south along rear of garage.jpg134.6 KB · Views: 180
 -
 Looking north along rear of garage.jpg128.2 KB · Views: 175
 -
 Looking west along south edge of garage.jpg131.8 KB · Views: 177
 -
 Pallets of bricks in front of garage.jpg150.6 KB · Views: 184
 -
 Pallets of bricks - close up.jpg148 KB · Views: 176
 -
 Pallets of bricks - detail of face.jpg146.8 KB · Views: 187