To avoid these ads, REGISTER NOW!

CBacres ex horse barn shop

shopnut

Well-known member
Joined
Feb 22, 2006
Messages
4,237
Location
Florida
Beams look great with their coat of primer!

You probably thought about this, and if not, I know you are handy and can work through any issue that comes up. But, maybe just as a heads-up.... Since that lift looks like it elevates mast sections in a synchronized fashion like my man-lift and a lot of forklifts, be aware that the yellow carriage may not be very high on the adjacent mast section when the top of the mast reaches its clearance limit under the ceiling. Perhaps you will need a box or something to space the beam up high off the yellow forks so its the highest thing being lifted when you reach desired height.
 
To avoid these ads, REGISTER NOW!

shopnut

Well-known member
Joined
Feb 22, 2006
Messages
4,237
Location
Florida
Beams look great with their coat of primer!

You probably thought about this, and if not, I know you are handy and can work through any issue that comes up. But, maybe just as a heads-up.... Since that lift looks like it elevates mast sections in a synchronized fashion like my man-lift and a lot of forklifts, be aware that the yellow carriage may not be very high on the adjacent mast section when the top of the mast reaches its clearance limit under the ceiling. Perhaps you will need a box or something to space the beam up high off the yellow forks so its the highest thing being lifted when you reach desired height.
... or maybe pop a roof panel off to let the mast extend as high as needed?
 
OP
C

cbacres

Well-known member
Joined
May 28, 2010
Messages
5,998
Location
SW Florida
Beams look great with their coat of primer!

You probably thought about this, and if not, I know you are handy and can work through any issue that comes up. But, maybe just as a heads-up.... Since that lift looks like it elevates mast sections in a synchronized fashion like my man-lift and a lot of forklifts, be aware that the yellow carriage may not be very high on the adjacent mast section when the top of the mast reaches its clearance limit under the ceiling. Perhaps you will need a box or something to space the beam up high off the yellow forks so its the highest thing being lifted when you reach desired height.
Thanks,
Good point Mark. When I looked at this, I’m pretty sure the yellow part would be the highest, if not, I have a couple stands I can use as spacers.
The cross beam will be fine, have a little clearance above it, the trolley is sucked up damn close to sheet metal roof, i Was half planning on making a extension to add on to or just replace the one on rental.
I doubt they’d ( home depot) notice if I welded on a 4’ extension . With the treatment I received from them earlier this week, got a good mind to weld the sections together when I’m done.😈
 
OP
C

cbacres

Well-known member
Joined
May 28, 2010
Messages
5,998
Location
SW Florida
Top coat done!
About fell out at one point, couldn’t get enough air through respirator, and I was bending over and climbing around under beams to paint, I didn’t have a dry stitch anywhere.
I modified my layout to separate the columns and beams, worked much better. I should of paid better attention to how the columns ended up, the part that I was crawling around to paint was the side that would be the most exposed and in the shadows it’s hard to see the gloss puddle.
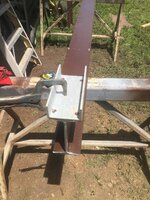
Here’s how I supported the columns.B3C094AA-7DB7-4A18-A001-37B8C1AA3CB4.jpegD50DAF48-1DF6-453C-A66D-F3B2D7196EF4.jpeg
Set the beams on angle iron, will just have a small line to touch up.
F31E155E-0B0D-49F1-BF62-7A7C5A70A7AF.jpeg
On to paint.
0E31B153-94F2-4D2D-9233-834DB777602E.jpegFBC511F0-0EC7-4430-BCD3-CFAA45B603BA.jpeg
Glad to have this part done.
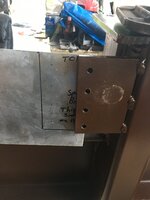
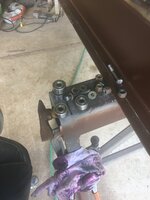
making a template of the threaded holes on the column for the electric reel bracket. I’m finally getting smarter with stuff like this instead of messing with when up in the air.
These threaded transfer points make this pretty easy.
27B33BDA-9437-4AF7-9712-D21A4E6C2230.jpeg
62023841-AB66-4875-9643-D2FF93AC3E40.jpeg
Need to work on a spacer for the trolley, make a bracket that will bolt on top of the hoist housing for a electric cable strain relief.

Aiming to get up Monday/Tuesday, son coming down to help.
 

Chrisb62

Well-known member
Joined
Jul 30, 2019
Messages
1,093
Location
southwest fl
Beams look great with their coat of primer!

You probably thought about this, and if not, I know you are handy and can work through any issue that comes up. But, maybe just as a heads-up.... Since that lift looks like it elevates mast sections in a synchronized fashion like my man-lift and a lot of forklifts, be aware that the yellow carriage may not be very high on the adjacent mast section when the top of the mast reaches its clearance limit under the ceiling. Perhaps you will need a box or something to space the beam up high off the yellow forks so its the highest thing being lifted when you reach desired height.
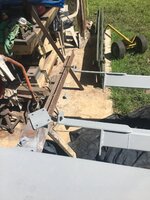
Not sure about that one but we had one at work that you turned the forks over 180 degrees and remounted them and it would be the highest point.....again not sure about Homedepot special.
 

Chrisb62

Well-known member
Joined
Jul 30, 2019
Messages
1,093
Location
southwest fl
I may have a problem......1 beer small fridge on back porch and another full sized in the detached garage, not counting the 2 in the house.
 
OP
C

cbacres

Well-known member
Joined
May 28, 2010
Messages
5,998
Location
SW Florida
So, something simple as a basic 28” wide fridge, some places out of stock, other is two week delivery. We’re limited to that size for the laundry room to keep everything fitting, especially since we moved the A/c air handler in there.
No worries though, I have a mini fridge in the shop that houses the beer!

On to lesser important stuff.
Made a transfer template for when I make the cord reel mount.
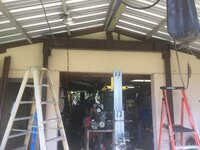
2B4725D2-C857-42FB-9CF0-2A426CCB91D7.jpeg
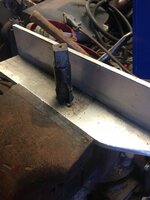
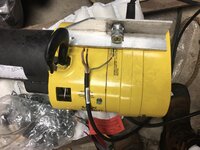
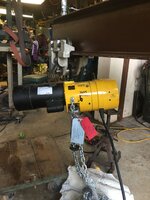
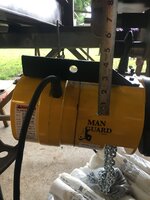
Made up a bracket that will mount on top of hoist to attach the electric cord to. The cord will terminate in the retractable reel on the beam.
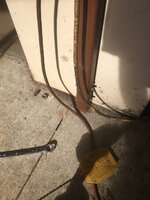
I tapped 1/2” pipe threads for a cable strain relief that will grip the reel cable. I’ll fit up both cable ends with twist lock cord caps. If I use regular plugs, I know a load will end up on me and the damn plug will come out rendering the lift unoperable, cell phone out of reach and no one around!
42F2B829-7042-44DF-A790-A807FC24E928.jpeg7EEE3064-2869-479C-8F59-35E262788DF6.jpeg
On to make spacers for trolley.
 
OP
C

cbacres

Well-known member
Joined
May 28, 2010
Messages
5,998
Location
SW Florida
Hoist is hanging!
E86E9CD6-0CF8-4978-9FA3-1C1434B77C0D.jpeg
Just need to get beam up! I hung on trolley to try out the spacer I made.

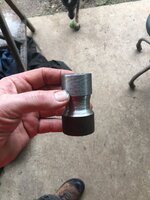
Here’s the space, I reduced the center for the hook to settle in. I turned the OD on one side so it will slide through the hook.
2045581A-9320-4AF3-AD7D-127987F9746F.jpeg
A0F5BC06-F55A-40C6-A30A-08E033D558DD.jpeg
It works as intended, I really need to brush up on my machine skills.
AE30C013-F079-410B-BC80-544DA37F04A7.jpeg
This shot I’m doing some figuring on the cable bracket.
BB348BB3-749F-4FC5-895E-09994F565877.jpeg
Almost there, going to clean and lube the trolley.
 
To avoid these ads, REGISTER NOW!

shopnut

Well-known member
Joined
Feb 22, 2006
Messages
4,237
Location
Florida
That spacer will do the trick. Looking forward to seeing it all come together soon.

Its a shame to see the trolley rub your fresh paint off, but that's what trolleys do! I have a feeling you will be using it enough to keep the rust at bay, however.
 
OP
C

cbacres

Well-known member
Joined
May 28, 2010
Messages
5,998
Location
SW Florida
That spacer will do the trick. Looking forward to seeing it all come together soon.

Its a shame to see the trolley rub your fresh paint off, but that's what trolleys do! I have a feeling you will be using it enough to keep the rust at bay, however.
i was thinking the same about the paint, watching the rollers mar the paint, further thinking that’s just the way it is until I remembered the beam was upside down.......... first touch up area!

Mark, I called the trolley manufacture again to ask what the safety factor was, while looking up the files, he just mentioned I’d pull the roof down first.
Yep, 17,000 lbs tensile strength, i don’t remember the other weight, but waaaay above 2,000 lbs!

Tomorrow its prep, last minute details. Tuesday I pick up lift, my son will be down to help.
Im also trying to get a mount built that will hold the 24“ fan for the shed while I have help.
 
OP
C

cbacres

Well-known member
Joined
May 28, 2010
Messages
5,998
Location
SW Florida
Please don't test the pull down the roof limit.
This is the CBACRES shop, not Shortys shed.😜😜🤣🤣.

I was checking as the trolley is a 1/2 ton rated, hoist is 1 ton.
The majority of my lifts will be 500 lbs or less, I just want to know that the occasional 1 ton lift is OK.
The beams are good for more.
 
OP
C

cbacres

Well-known member
Joined
May 28, 2010
Messages
5,998
Location
SW Florida
We’ll look what I came across going to get the porta band.
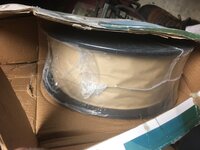
7000D64A-CEEE-4415-B0ED-53AF976DC93F.jpeg4905C475-6DA0-48CC-B203-AEB8DF0A8A99.jpegYep, brand new roll of mig wire.
Only thing worse than running out of wire is running out of wire and not finding the spare roll that I put up so it’s be safely out of the way.
See, the getting older mind was pretty sure I’d bought one, the older part of the getting older mind just didn’t remember where!🤔🤦‍♂️🤪🤪🤣🤣🤣
 
Last edited:
OP
C

cbacres

Well-known member
Joined
May 28, 2010
Messages
5,998
Location
SW Florida
You kept is safe didn't you? Job well done.......:thumbup:
For so many years I’d leave stuff out and it’s end up broke/bent whatever.
I must of bought last year when I swapped a tank, the drawer where the other rolls were was too full, so I set this roll under the wood bench.
At least I have my spare!

It was a good trip anyway, got to hook up with the sales guy I’ve know for a while and the wife and I went to the farmers market for breakfast. Best bacon around!!
 

Chrisb62

Well-known member
Joined
Jul 30, 2019
Messages
1,093
Location
southwest fl
For so many years I’d leave stuff out and it’s end up broke/bent whatever.
I must of bought last year when I swapped a tank, the drawer where the other rolls were was too full, so I set this roll under the wood bench.
At least I have my spare!

It was a good trip anyway, got to hook up with the sales guy I’ve know for a while and the wife and I went to the farmers market for breakfast. Best bacon around!!
IF only you had a few Listas or maybe a Stanley Vidmar or two.........:evil:
 
OP
C

cbacres

Well-known member
Joined
May 28, 2010
Messages
5,998
Location
SW Florida
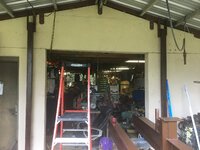
Here’s my porch view now. The 2” sq. tubes on each side of door 4897A0B9-281A-4450-AB20-76DCB3AD9849.jpeg

will be cut out.

The 2” was put in when I added the porch roof as wind tie down as I wanted to take wind load off the wood post in shop walls.
I welded 3/4” stainless bolts to a piece of plate, the plate is on the sub grade before I poured the concrete. I welded two nuts in a smaller sq tube, threaded on the bolt, slid the 2” over the small tube and bolted.3760DA79-23CC-4D6D-8614-4881EAAE6351.jpeg
Columns are in.F2596841-884F-4643-A8D3-1F53D13588AA.jpeg
D6D15D83-A3E7-4658-A112-A41B36321593.jpeg
Cleaned and lubed trolley.
86C038F6-C877-4103-BFA6-50711D9277AA.jpeg1CF209AC-2D9A-4C12-8115-841AA4CFB205.jpeg
Shorty said the trolley was GM, based on the great seepage, I agree.🤣🤣
 

Attachments

  • 2AA7F0B6-33F2-4D82-9A91-E7C047EC0823.jpeg
    2AA7F0B6-33F2-4D82-9A91-E7C047EC0823.jpeg
    466.9 KB · Views: 6
  • 1766F2E8-AC5A-4019-8034-A3B24B898CA7.jpeg
    1766F2E8-AC5A-4019-8034-A3B24B898CA7.jpeg
    457.7 KB · Views: 6

shopnut

Well-known member
Joined
Feb 22, 2006
Messages
4,237
Location
Florida
That was some nice engineering on the old 2x2 roof ties.

The new set-up is starting to become clearer now, but hopefully by the end of the day (or at least whenever you can pictures posted from today), all will be crystal clear as to how all pieces fit.
 
OP
C

cbacres

Well-known member
Joined
May 28, 2010
Messages
5,998
Location
SW Florida
So it’s clear as mud Mark?🤣🤣
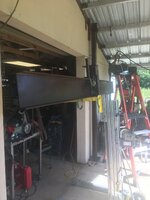
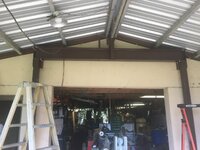
Ok, here we go. Started off picking up lift at HD, first one didn’t roll that great. Get the second one. Was checking it out, noticed the cable was wound up backwards on the hand winch, cable hitting part of the frame and was wearing a groove in it and it would not reverse. The employee was clueless on how to remedy, so go get the other one. Works great, at least part of it.
Get lift in shop, crank up the lift and notice it leans forward, we’re looking it over making sure everything is set correctly. Proceed to lift cross beam, it’s kinda hmm, lets throw a ******** it to be safe.
We shook, pushed, pulled on it and it was stable, plus the beam was close to the columns, so really couldn’t go anywhere.
58614102-3176-4E1F-939E-12CFCAF779F8.jpeg
Got it in the mounts, all the holes lined up, bolts all in and was tweaking the columns before tightening everything up when I noticed it.......
4E49476F-4C9A-4130-9DD0-8BA5C8C71E00.jpeg
See that brace in the middle of the beam? It’s spose to be in the back against the wall, yep, I put the freaking beam in backwards 🤦‍♂️🤦‍♂️. I went over with my son before we started so he had a idea how everything was going together, we got caught up watching and wondering about the lift and didn’t catch it. My layout for the bolts holes was spot on as it fit either side. We had it corrected in 30 mins.
05DF07EE-0597-4088-ABC8-E8C5134B7DCA.jpeg49B03D6B-6966-4D3B-AC34-19E79AA47B8C.jpeg
All in and happy how it came together, need to finish anchors on base plate and shoot some grout under them.
 
OP
C

cbacres

Well-known member
Joined
May 28, 2010
Messages
5,998
Location
SW Florida
I had expected the trolley beam to take a little maneuvering to get in as I had a 10’6” long beam and only about 9’ 4” of clearance and the beam mounts were in between purlins for the roof, requiring a straight up lift to get in place. Nothing a few chains and a father/son team couldn’t handle.
But first a final trim and the last set of holes once I could get a firm measurement.
1BD85527-EDA2-4434-93C2-3C3DA59D46DD.jpeg
The only real way to get trolley beam in was at a angle, we took the ridge cap off for extra room when beam was and at a angle.
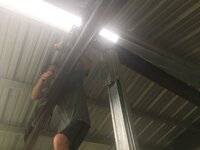
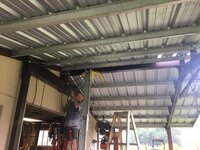
Raised beam on lift partway, rigged up shop end on chains and a little chain fall temporarily suspended the other end of the beam so we could reposition the crank lift.
4E379147-3116-4CDD-870D-F1A7A489C02E.jpegB445312D-F084-47F7-B1BA-240ACD1CE251.jpegEDD41D93-0A1D-4280-B5F8-6A8B2434672A.jpeg
Their hard to see, I place shackles in the bolt holes for a place to hook the chains to ensure no beam launches into the shop. As we inched the beam up onto the a frame mount, we had a chain that we kept taking up the slack to eliminate any slippage.
013880BF-9CDB-4B58-B2FB-65AE7C017016.jpeg
Me rigging a chain on lift so I can pry end of beam away from as wall as we’re lifting. The beam didn’t slide well on forks and the whole lift kept moving with beam. It was a little humid out today.
B1215E64-0E4F-4C54-AFFB-90CF7237119A.jpeg


The ***** is in.

8BEBBA94-D876-40D2-8539-1CEE7488E8AC.jpeg
Hoist being lifted In place.

04C3B5DD-26A7-411E-9FEC-F7BD1B82DCAD.jpeg
In place! Hung the heavy *** hose reel too.B3668731-2A5D-420E-B869-CAB7E808DB73.jpeg7BF5E5C0-332D-4FD6-9986-D925D9311C13.jpeg
I’ll set a temp electrical plug on hoist so I can use until I get the reel done.

Glad to get this just about wrapped up.
 
To avoid these ads, REGISTER NOW!
Top Bottom