jakemac
Well-known member
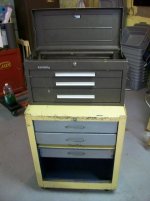
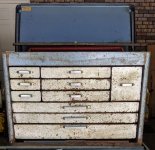
So, about a month ago, I got into a discussion in another thread about how to remove the drawers on Huot boxes. During which, I posted some pictures and discussed the steps I went through to by-pass the stops on the sliders in order to remove the drawers on one of the new(ish)(possibly 70's) bottom boxes I had.
During the discussion another member was having trouble removing his sliders because his Hout box used a different system. Since then, I have acquired another bottom box (older, possible 60's) that uses that same system. It took me a little while to figure out the trick and I thought I'd start a new thread that contains both methods. They are essentially the same, use a shim to let the stops ride past each other to remove the drawers and slides. It's the method of construction that is different.
I'll start by re-posting my original post as found in this thread, post #52. The discussion begins earlier than that post.
I hope this thread can help others with their boxes. The method should work with other brands using similar slides.
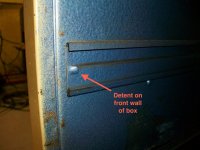
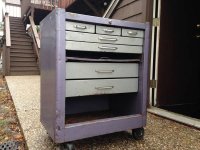
As inferred, the detent is on the ends of the slide and the tab is on the wall of the box and on the side of the drawer the way this box was constructed. The tabs face towards the back of the box on the wall and towards the front on the drawers.
In the older boxes, the detent is on the wall of the box and back of the drawer, with the tabs on the slider facing the detents on both sides.
I'll discuss the method I used for the older box in the next post.
During the discussion another member was having trouble removing his sliders because his Hout box used a different system. Since then, I have acquired another bottom box (older, possible 60's) that uses that same system. It took me a little while to figure out the trick and I thought I'd start a new thread that contains both methods. They are essentially the same, use a shim to let the stops ride past each other to remove the drawers and slides. It's the method of construction that is different.
I'll start by re-posting my original post as found in this thread, post #52. The discussion begins earlier than that post.
I hope this thread can help others with their boxes. The method should work with other brands using similar slides.
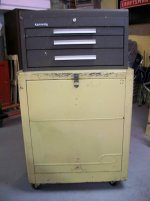
......... the hacksaw blade should work. My bottom box is apart for degreasing and relubing, so I took a few pics.
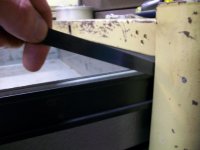
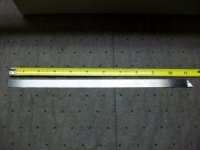
Pic 1 - the "tool" I used. 1/2"x11" piece of spring strapping with a slight bend at the tapered end. The tapper and the bend help it slide past the stops.
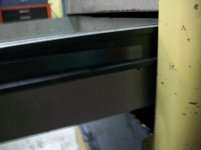
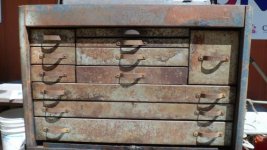
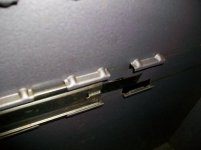
Pic 2 - A side view of the drawer and slide, showing the stop bar on the drawer.
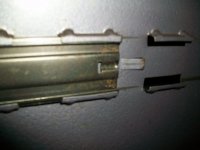
Pic 3 - the tool over the stop, and under the slide detent.
Pic 4 - The inside of the box, the circles show the bent metal tabs that are used as stops.
Pic 5 - With the slide.
Pic 6 - The tool through the slide and over the stop.
You need to pass the tool all the way through the slide so that the detent on the slide rides over the tool and passes over the stops. It's important to keep the tool centered so that it doesn't slip off the stops while moving the slides.
Start by pulling the drawer all the way out. Position your tool in the slide and push the slide back into the box past the stop. Then do the other side of the drawer. Now you can remove the drawer and work on removing the slides from the box side.
As inferred, the detent is on the ends of the slide and the tab is on the wall of the box and on the side of the drawer the way this box was constructed. The tabs face towards the back of the box on the wall and towards the front on the drawers.
In the older boxes, the detent is on the wall of the box and back of the drawer, with the tabs on the slider facing the detents on both sides.
I'll discuss the method I used for the older box in the next post.
Attachments


Last edited:
 ).
).