To avoid these ads, REGISTER NOW!

2 Sluggo's Garage

OP
R

rmalkow2

Well-known member
Joined
Jun 26, 2009
Messages
4,087
Location
Brighton, MI
Worked on wiring today in and on the hot rod. I'm taking it slow and methodical, double checking connections and making sure everything is secure with connections covered with heat shrink tubing and trying to plan out the routing path different circuits will take.

Most of the interior stuff is connected except for gauges. Today I spent a lot of time on the engine compartment. Still have the headlights and horn wiring to connect. but the engine related connections are made. I've generally routed the main bundle and branches that go on the engine itself. For now I'm leaving it all uncovered until it gets tested. If I made any mistakes it will be easier to trace wire color. Once everything tests ok I have lots of automotive wiring loom to cover the harness itself for a more finished look.

attachment.php

attachment.php

attachment.php
 

Attachments

  • IMG_2043.jpg
    IMG_2043.jpg
    54.7 KB · Views: 560
  • IMG_2044.jpg
    IMG_2044.jpg
    16.4 KB · Views: 560
  • IMG_2045.jpg
    IMG_2045.jpg
    21.7 KB · Views: 551
To avoid these ads, REGISTER NOW!

xtremek

Well-known member
Joined
Apr 13, 2012
Messages
11,603
Location
St. Johns, Mi
:( DUDE!!!!! If I'd known you were throwing a wiring party, I'd have dropped by to join the fun. It's my absolutely favorite thing to do on a ride. Give me cheese cubes, cashews, Diet Coke, dikes, wire strippers, heat shrink connectors, a heat source, and I'm a happy camper. I've actually wired a few show cars/trucks> I guess that's what I get for not keeping up on my GJ threads.
 
Last edited:
OP
R

rmalkow2

Well-known member
Joined
Jun 26, 2009
Messages
4,087
Location
Brighton, MI
rmalkow, there is a fair bit of work in redoing a harness, firstly to make it work then to make it look good.

It looks like you are going well so far...:thumbup:

Regards

Yup, as 1/2 Cup said. Good progress and looking good!

Thanks guys, I'm getting there slow and steady. Hoping to have it completed as far as wiring goes by end of this week.
 
OP
R

rmalkow2

Well-known member
Joined
Jun 26, 2009
Messages
4,087
Location
Brighton, MI
:( DUDE!!!!! If I'd known you were throwing a wiring party, I'd have dropped by to join the fun. It's my absolutely favorite thing to do on a ride. Give me cheese cubes, cashews, Diet Coke, dikes, wire strippers, heat shrink connectors, a heat source, and I'm a happy camper. I've actually wired a few show cars/trucks> I guess that's what I get for not keeping up on my GJ threads.

Now that made me laugh. Maybe I should have announced this long ago so I could have scheduled you. Cheese, cashews and diet coke would have been more than fair trade from my view. I can't say I enjoy wiring quite that much but it has been satisfying to get each new wire terminated and in its place.
Almost done now but thanks for the enthusiasm.
 
OP
R

rmalkow2

Well-known member
Joined
Jun 26, 2009
Messages
4,087
Location
Brighton, MI
Independence Day Side Project

I tackled an extra little side project yesterday that will hopefully yield good tasting benefits for weeks to come.

I had this older Char Broil stainless steel grill that I bought off CL a couple years ago with the intention of fixing back up with new burners, cooking grates etc. Well on Monday I thought to fix it finally for a cookout on the 4th and started shopping around town for the parts. None to be found locally so then I figured the cookout will be delayed and I'll order everything online. And yes all the parts are available for this older model but when I priced them out it was rather expensive. It would be well over $100 for all the parts in addition to the $25 I paint for the grill originally.
Then I looked on Amazon at portable grills as I don't really need the large cook space anyway. They had this nice stainless model from Smoke Hollow that is well rated and was on sale for $100. It is all stainless and runs off either small tanks if you go portable or with an extension hose hooks to a large tank which I already had left over. So I also purchased the $12 extension hose.

At first I thought the old grill was junk but hated the idea of throwing away $25 so I hatched a plan to strip it of old parts and the old cover and re-purpose it to be the rolling cart for the new grill and to also hold the large tank out of sight.

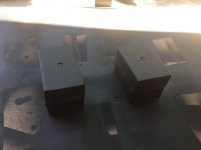
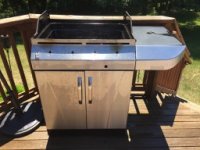
I stripped out all the inside parts, burners, grates, valves, and the side burner pieces along with the original top cover.
attachment.php


Then gave the remaining carcass a good scrub with simple green and brush. Also scrubbed the stainless pieces with a soapy Brillo steel wool pad to get off some of the old stains and the various old operating instructions that were screened on the surface with black paint. After it dried in the days sun I also touched up some of the black metal trim with some left over matte black oil base paint.
attachment.php


Next I needed a new top work surface to sit the new grill when it arrived. I first though about buying a piece of diamond plate aluminum until I priced a sheet from the local Home Depot. Well I'm too cheap for that so in keeping with the theme of re-purposing on this project I started to look around my own scrap for something big enough to make a flat cover over the old grill pan.
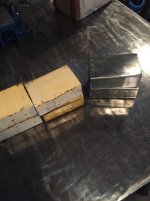
You know how some of us keep junk using the excuse "It might be useful for something someday!" Well I finally made that come true by finding a piece of old formica counter top in a butcher block pattern that I've had for years and never used.
See that old saying is true! :rocker:
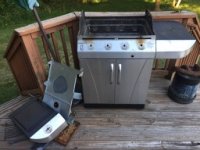
Cut that to fit the space and sealed the back side and edges with a good coat of the black oil based paint. It may not last forever but should hold up for a couple seasons before needing replacement. And I think the surface looks good as well.
attachment.php


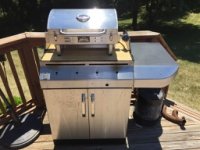
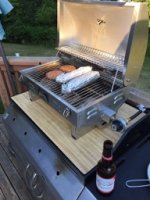
The new grill just arrived today and after some assembly it now sits proudly on its new grill cart. The longer hose easily routes down to the inside cabinet and to the larger tank.
attachment.php


The new grill just fits the new top surface and looks good as well.
attachment.php


A few clicks of the igniter button and it fired right up and started heating up per the integrated temp gauge.
attachment.php


Tonights menu will be grilled burgers and corn on the cob!
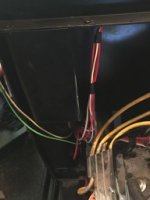
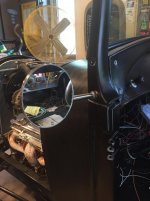
 :rocker:
 

Attachments

  • IMG_2059.jpg
    IMG_2059.jpg
    46.1 KB · Views: 501
  • IMG_2057.jpg
    IMG_2057.jpg
    23.6 KB · Views: 503
  • IMG_2056.jpg
    IMG_2056.jpg
    21.1 KB · Views: 497
  • IMG_2053.jpg
    IMG_2053.jpg
    19.4 KB · Views: 501
  • IMG_2052.jpg
    IMG_2052.jpg
    23.5 KB · Views: 493
  • IMG_2051.jpg
    IMG_2051.jpg
    23.5 KB · Views: 493
OP
R

rmalkow2

Well-known member
Joined
Jun 26, 2009
Messages
4,087
Location
Brighton, MI
Grilling Success!

Many completed projects are satisfying but none have tasted this good. :D

attachment.php
 

Attachments

  • IMG_2060.jpg
    IMG_2060.jpg
    24.9 KB · Views: 496
OP
R

rmalkow2

Well-known member
Joined
Jun 26, 2009
Messages
4,087
Location
Brighton, MI
Wiring update……..

I spent a lot of time Friday and Saturday working on wiring and behold, let there be lights! Got headlights, tail lights, turn signals and brake lights working now. Also got gauges wired up as far as I can for the moment and back lighted. I got stalled for awhile in the turn signals until some web searching revealed I had the incorrect wiring diagram for the model of T/S switch I was using. It's good to have made progress to this point.

attachment.php


attachment.php
 

Attachments

  • IMG_2069.jpg
    IMG_2069.jpg
    120.8 KB · Views: 450
  • IMG_2068.jpg
    IMG_2068.jpg
    76.2 KB · Views: 447
OP
R

rmalkow2

Well-known member
Joined
Jun 26, 2009
Messages
4,087
Location
Brighton, MI
This afternoon I took time from the hot rod build to do another small project that has been nagging at me in the garage. Awhile back I picked up a very new grinder stand at auction that was heavier duty than the one I was using. I also have buffing outfit that included a nice Dayton motor with buffing pad spindles that needed a stand. I've been wanting to swap things around so today was the day.

Here's what I started with…..
attachment.php


After transferring the grinder from the old stand to the new one and giving it a good wipe down. I made an adapter plate to mount the buffer motor to the original grinder stand, gave it a new quick paint job with some rustoleum gray and now have both tools set up and on good stands so they can be used as needed. Instead of shuffling these items around every time they were in the way I now have two useful tools ready for work.

attachment.php


Hmmmmmm…..now wondering if I should put them on casters?
 

Attachments

  • IMG_2077.jpg
    IMG_2077.jpg
    127.8 KB · Views: 451
  • IMG_2079.jpg
    IMG_2079.jpg
    139.9 KB · Views: 452
OP
R

rmalkow2

Well-known member
Joined
Jun 26, 2009
Messages
4,087
Location
Brighton, MI
rmalkow2,
I haven't posted on your thread for a long time, but I've been keeping up with it.
Keep up the good work.

Thanks for checking in Jon. Much appreciated.

rmalkow, although I like things mobile, grinders are the only I don't like them bolted down nice and firm if only from a safety perspective..:thumbup:

Admittedly it was a fleeting thought as I really like to be able to move things around in my tight space. But, stability for things with spinning wheels like that give me second thought. Unfortunately I don't have the space to bolt it to the ground but it's more stable this way and really not too hard to move when needed.
 

taumac

Well-known member
Joined
Aug 30, 2011
Messages
8,104
Location
Brooksville, Fl
Lights looking great and one more step for that road trip to Florida for winter storage of that hot rod.

The grinders on casters? I don't think so. Well maybe a caster when you tip it and can roll it like hand truck would work.
 
OP
R

rmalkow2

Well-known member
Joined
Jun 26, 2009
Messages
4,087
Location
Brighton, MI
Lights looking great and one more step for that road trip to Florida for winter storage of that hot rod.

The grinders on casters? I don't think so. Well maybe a caster when you tip it and can roll it like hand truck would work.

Ok you just jogged my old and feeble memory. I had this random thought about seeing casters on a grinder before but could not picture it clearly. Now I remember the idea of only using two and mounting them so they are off the floor during normal use of the grinder but to help move it they would touch the floor when you tip the grinder stand back a bit.That makes more sense and maybe I'll look at engineering something in the future.

And, don't get rid of any green totes just yet to make room for storing my hot rod. The first goal is to just get it done and on the street this summer and try and be ready for the Woodward Dream Cruise in August. If I make it to that I'll consider this year a success.
 

xtremek

Well-known member
Joined
Apr 13, 2012
Messages
11,603
Location
St. Johns, Mi
Do you do Woodward on Saturday or during the week? And have you tried Flint the same week? Some nice rides there as well.
 
To avoid these ads, REGISTER NOW!
OP
R

rmalkow2

Well-known member
Joined
Jun 26, 2009
Messages
4,087
Location
Brighton, MI
Do you do Woodward on Saturday or during the week? And have you tried Flint the same week? Some nice rides there as well.

I only do Woodward during the week like on Wednesday or maybe Thursday. After that it's too crowded and the weekend has become a corporate circus that I don't care for.
Last year was my first time in many years to go because it has become such an over promoted event. I used to cruise and race on Woodward and Gratiot back in the day so the marketing of this event does not really excite me much but I have a good friend who never went before so I took him last year on Wednesday night and even then it was full of very cool cars and you could actually drive on Woodward. Hoping to do the same thing this year.

I've never cruised Flint area. So much going on nearer to me I've just never ventured up there. I'll have to watch for some opportunities.
 
OP
R

rmalkow2

Well-known member
Joined
Jun 26, 2009
Messages
4,087
Location
Brighton, MI
New Garage Build!

I've had this in the planning phase for a few years now and put off spending the money till now. But it's time to get this project going because I ain't getting any younger and every year that passes the construction costs just go up.
I've been getting quotes and starting the permit process but wanted to wait till I was committed before announcing here. Well I have 2 out of 3 permits secured and I ordered the building kit tonight so I figure I'm either committed to the build or will someday be committed to the asylum if this drives me crazy.

But here goes the new adventure. The building will be a 24' x 32' pole barn. The basic plans and kit are coming from Menards and this week was the time to buy to get their 11% rebate deal. Nuthin fancy, just a nice basic building to allow me to work on projects, store vehicles in the winter and not have to cram everything into my 2 car attached garage. Might even park cars in the original garage. What a novel idea.

Here's a stock photo below but I've chosen different colors than basic white.
attachment.php
 

Attachments

  • Pole Barn Stock Photo.jpg
    Pole Barn Stock Photo.jpg
    21.7 KB · Views: 598
OP
R

rmalkow2

Well-known member
Joined
Jun 26, 2009
Messages
4,087
Location
Brighton, MI
rmalkow, nice one, you won't know yourself... :thumbup:

Looking forward to following the build..:thumbup:

Regards

Excellent!
That much room will be nice.

It will be a great garage! :thumbup:

Awesome! We all need more garage/shed space I think!

Thanks to one and all. I'm very much looking forward to having a second garage and this being a bigger work space for projects.
Status is that I'm still anxiously checking my email every day hoping for the actual building permit to be ready so I can then schedule the builder crew. Some of my materials are starting to arrive at Menards so when they get a big enough load they will make a delivery. Hoping that can happen end of this week or early next week.

Worked more on the hotrod after work today and got the engine wiring completed and fired the engine back up. It was satisfying to hear it fire back up as expected. Found out I had missed one ground wire to allow the engine cooling fan relay to close and connected that. I also got the horn hooked back up and half of the gauges bolted down in the dash. I'm slowly working my way through to the back of the vehicle now doing final wire routing and covering wire bundles with convoluted tubing. Every little bit of progress is satisfying.
 
OP
R

rmalkow2

Well-known member
Joined
Jun 26, 2009
Messages
4,087
Location
Brighton, MI
I just spent the whole day in the garage slowly accomplishing tasks on the hot rod.
1. Installed new voltmeter.
2. Tie wrapped the wiring bundle under the dash and wrapped in black vinyl tape.
3. Added some wire clamps to hold the main harness up under the dash.
4. Drilled a new hole in the dash and installed the horn push button.
5. Charged the battery.
6. Fabricated a bracket to mount the brake light switch to the firewall and next to the brake pedal but tucked up and out of the way of my foot travel. this took awhile to do and required multiple pieces. Paint is drying overnight on the bracket and I still need to weld an actuator pin onto the brake pedal arm tomorrow to finally have that job complete.

I had ordered a side view mirror that arrived yesterday so that got installed.

attachment.php


And added another item that just arrived today. A bit of bling and a treat for me more to satisfy the look I wanted than a functional improvement. This Hilborn style carb scoop to me completes to top of the engine.

(Yep those headers definitely need attention. Trying to decide if I want to remove and re-paint or just replace them with some ceramic coated new.)

attachment.php
 

Attachments

  • IMG_2086.jpg
    IMG_2086.jpg
    143.7 KB · Views: 511
  • IMG_2085.jpg
    IMG_2085.jpg
    121.5 KB · Views: 507

jon72vega

Well-known member
Joined
Apr 17, 2013
Messages
3,442
Location
Niles Michigan
I just spent the whole day in the garage slowly accomplishing tasks on the hot rod.

And added another item that just arrived today. A bit of bling and a treat for me more to satisfy the look I wanted than a functional improvement. This Hilborn style carb scoop to me completes to top of the engine.

(Yep those headers definitely need attention. Trying to decide if I want to remove and re-paint or just replace them with some ceramic coated new.)

attachment.php

rmalkow2,
I like the carb scoop!:thumbup:
 
OP
R

rmalkow2

Well-known member
Joined
Jun 26, 2009
Messages
4,087
Location
Brighton, MI
Now that you have all that extra room, do you mind if I store a few things in your new barn?:lol: 
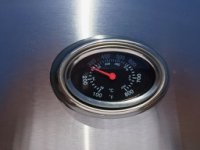
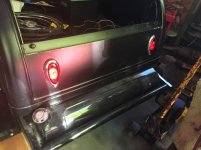
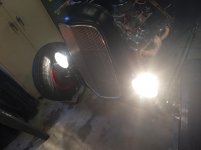
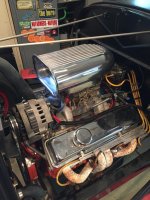
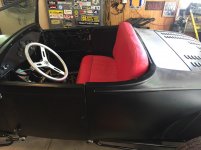
And hot rod seems to be moving along well.

Haha, And there would be even more room if I accepted Taumac's offer to store the hot rod in Florida!
Well, the building project is still awaiting an approved permit from the county so no actual extra room yet. And when it does get built you will laugh at me when you see all the stuff I've already accumulated to cram in there.

But thanks, and yes the hot rod is finally making progress. It's slow but satisfying when I can actually complete one task. It's getting closer to being on the road every day.
 
OP
R

rmalkow2

Well-known member
Joined
Jun 26, 2009
Messages
4,087
Location
Brighton, MI
Sunday afternoon progress made on the hot rod……..

Fabbed up a bracket for the brake light switch.

attachment.php


Then welded on a short piece of steel rod to the pedal arm that actuates the brake switch lever and mounted everything up to the firewall with wiring and covering.

attachment.php


Next up was finishing up the trunk wiring after bolting in the taillights for the last time. Even after making wire bundles and adding some plastic covering I still had a snake pit. For now it's all neatly tucked under the trunk carpet but I think I'll eventually make a false floor under the carpet to not only cover and protect the wiring but help take the lumps out of the carpet.

attachment.php

attachment.php
 

Attachments

  • IMG_2087.jpg
    IMG_2087.jpg
    142.1 KB · Views: 454
  • IMG_2089.jpg
    IMG_2089.jpg
    134.6 KB · Views: 455
  • IMG_2090.jpg
    IMG_2090.jpg
    143.2 KB · Views: 451
  • IMG_2091.jpg
    IMG_2091.jpg
    116.8 KB · Views: 450
OP
R

rmalkow2

Well-known member
Joined
Jun 26, 2009
Messages
4,087
Location
Brighton, MI
The chalkboard status now says I've crossed of five critical tasks. Making progress and feels good.

attachment.php
 

Attachments

  • IMG_2092.jpg
    IMG_2092.jpg
    104.6 KB · Views: 442
OP
R

rmalkow2

Well-known member
Joined
Jun 26, 2009
Messages
4,087
Location
Brighton, MI
Garage Build Update

The building permit got approved yesterday so I now have that in hand and I scheduled a first delivery of most materials for this Friday. Now just to set a final start date with the builder. I hope to see construction start next week if everything lines up.

Hot Rod Update

One more item checked off the list this evening. Between yesterday and today I was able to fab up the license plate bracket and test fit my original 1929 plate. Michigan lets you re-register an antique plate so this is the one I plan to use.
I will finish wiring up the license plate light yet but at least the plate bracket is done.

attachment.php
 

Attachments

  • IMG_2093.jpg
    IMG_2093.jpg
    139.5 KB · Views: 432
OP
R

rmalkow2

Well-known member
Joined
Jun 26, 2009
Messages
4,087
Location
Brighton, MI
First delivery of garage build materials arrived today and of course it was not complete and had some items not expected on this load. Why should I expect good quality control? :dunno: I'm just dumb like that expecting people to do what they say they will. So it will take another trip back to the store today to fix this for the second delivery. Phone calls are useless too because they are always so busy.
But its forward progress so I will be happy for that much.

attachment.php
 

Attachments

  • IMG_2097.jpg
    IMG_2097.jpg
    146.7 KB · Views: 405

jon72vega

Well-known member
Joined
Apr 17, 2013
Messages
3,442
Location
Niles Michigan
Hot Rod Update

One more item checked off the list this evening. Between yesterday and today I was able to fab up the license plate bracket and test fit my original 1929 plate. Michigan lets you re-register an antique plate so this is the one I plan to use.
I will finish wiring up the license plate light yet but at least the plate bracket is done.

attachment.php

Bob,
Looks great with the 1929 plate on it!
I like the louvers on the trunk lid.
 
OP
R

rmalkow2

Well-known member
Joined
Jun 26, 2009
Messages
4,087
Location
Brighton, MI
Bob,
Looks great with the 1929 plate on it!
I like the louvers on the trunk lid.

Thanks. Was at an auction and tried to by the 1929 plate set in a box of many others but it went way above my limit so I chased down the buyer and thankfully he sold me the pair of matching plates for a reasonable cost. Been saving them ever since.
I like the louvers too. They were done by someone else but that is a very traditional treatment for the trunk lid on a post war hot rod.

Bob
 
OP
R

rmalkow2

Well-known member
Joined
Jun 26, 2009
Messages
4,087
Location
Brighton, MI
After a good long Saturday work day on the hot rod I was able to get quite a bit done. Starting with getting seat riser blocks made and the seat back in the car.

Flipping the seat over and removing the seat tracks reveals the original build shop made some plate brackets that were pretty crude. Strong enough but basically hacked out of steel with a cut off wheel and nothing else. If you ever put your hand under the seat it would come back out cut to shreds as these things had razor sharp corners and edges. So I at least rounded off and smoothed all edges on the grinder.

attachment.php


The gave them a lick of black paint and bolted them back on.

attachment.php


The seat riser blocks were made from some re-purposed steel in the form of some old Lakewood ******* traction bars that gave their lives for my needs. The square tubing doubled up and welded together made for just right 3" high blocks.

attachment.php


Paint sanded off, edges rounded off, welded together and painted black even though no one will see them. I'll know they are not bare steel rusting under the seat.

attachment.php

attachment.php

attachment.php


Admittedly my welding technique still needs practice and refinement but I didn't burn through anywhere and they are strong enough if not pretty.

Finally got the seat back in the car and it puts the top of the seat back just slightly above the body line edge which is perfect as it used to sit low enough to allow the body steel to cut right into your upper back. Not comfortable.

attachment.php


Also note that the doors are back on. Sunday afternoon and evening I was able to remove the Mickey Mouse door latches that were installed and replace with new original style door latches and strikers. I still have some striker adjustment to do in the passenger side and then make some door handles to open and close as needed.

Another important step last week was to get car insurance and I also got that finalized on Saturday after some time on the phone. I decided to go with Hagerty after getting their quote and hearing a pretty good reputation about them for classic car insurance. And they are a Michigan company so I feel good about supporting a local company.

A couple more items crossed off that work list.
 

Attachments

  • IMG_2094.jpg
    IMG_2094.jpg
    119.4 KB · Views: 352
  • IMG_2100.jpg
    IMG_2100.jpg
    120.8 KB · Views: 353
  • IMG_2101.jpg
    IMG_2101.jpg
    118.7 KB · Views: 355
  • IMG_2102.jpg
    IMG_2102.jpg
    114.3 KB · Views: 357
  • IMG_2103.jpg
    IMG_2103.jpg
    102.3 KB · Views: 355
  • IMG_2104.jpg
    IMG_2104.jpg
    65.1 KB · Views: 354
  • IMG_2108.jpg
    IMG_2108.jpg
    115.1 KB · Views: 357
To avoid these ads, REGISTER NOW!
Top Bottom