To avoid these ads, REGISTER NOW!

30x40 Attached Hot Rod Shop

el Pedro

Well-known member
Joined
Apr 17, 2012
Messages
325
Location
South East FL
Thanks, awesome job getting a PR at Daytona! It is an awesome course and a lot of fun despite the crash. I almost went back to do Miami too but it was in the cards as far as time off to go and train. There is a very good chance I will be there again this year too. I have to make a decision on Williamsburg when I get back since I have a deferral from 2020. That race is in June and I have to get back in the swing of training if I plan to be in shape for it. Right now I have a lot of other stuff going on on top of cool car stuff I plan to do this year. I started lifting again with my daughter who is really getting into working out and looking at trying out this cross fit gym.

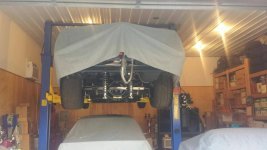
The tri bike is a wall hanger at the moment. I had to source new brake components for it which wasn't easy to do since I have the Magura RT6 hydraulic brakes and the parts are unobtanium. I threw a wanted ad on Slowtwitch and found what I needed to fix the bike just have to get it down and look it over. I checked the frame out which is fine but other than that I just put it away. Not sure the base bar and one aero bar are not going to need replaced.

FYI I also PR'ed at Daytona even with the bike crash lol. Not saying much for my HIM PR to begin with for some reason that distance has been a real bear for me to finish well. I have done 6 or 7 of them at this point and everyone seems to be a disaster for some reason or another. LMK what bike you get did you order something new I thought you had a QR? We will have to meet up if I make Daytona this year.

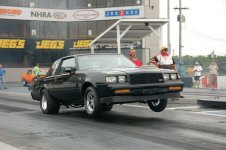
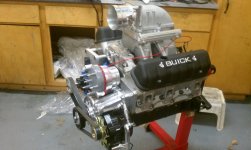
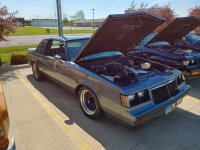
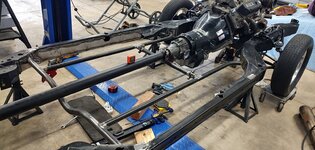
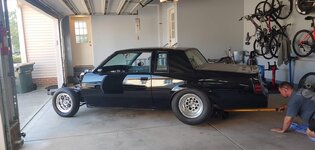
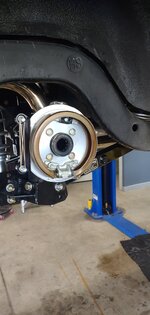
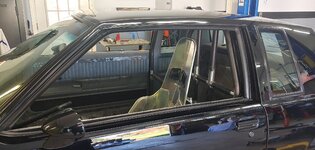
Finding time is the hardest part, I don't know how you manage with all the projects you're working on. I've been building my car for the last 3 years and it's only now close to being complete!

I had a 2011 QR, I wanted to upgrade to the canyon speedmax but they keep pushing the release date back. I was offered Matt Hansons PR6 disc from his 2019 season for a bargain price. Came with Sram red etap, zipp nsw 454, quarq powermeter, and a ton of spares.

Let me know if you do daytona, would be great to meet up. I'm also doing Augusta 70.3 in September and the wife is doing NC in October so I'll be there spectating. I love the half distance, did a full last year in Panama city and it was horrible, olympic is over before I get warmed up on the bike.

Good luck with the training, I've started using a coach now, less hours but more intensive so I'm hoping more time for kids and cars.
Also I've seen a bit of Magura stuff on ebay, mostly NOS. Bike tech is moving too fast these days to keep up with!!
 
To avoid these ads, REGISTER NOW!
OP
M

mlyonsdc

Well-known member
Joined
Nov 23, 2018
Messages
238
Location
USA
Man I have a soft spot for those Canyons! Matt Hanson's PR6 has to be a super cool bike plus it was Matt Hanson's! His race at Daytona was something to watch! I am 95% on Daytona this year, right now my daughter has taken an interest in lifting and crossfit which is keeping me busy plus I keep filling up my garage with new hot rods and projects so swim bike run has low on the list of activities. I will PM you when we get closer to Dec 5.
 
OP
M

mlyonsdc

Well-known member
Joined
Nov 23, 2018
Messages
238
Location
USA
I went to Detroit yesterday to pick up my old Grand National race car. I sold it back in 2010 to build a more dedicated car that was more capable of using the power we were making at the time. The gentleman who bought the car never raced it, hell he barely even drove it! It was like picking up a time capsule. The car is EXACTLY the way I sold it to him and last saw it he literally stored in on a lift in a climate controlled garage!

I had the car on the track last was 2009 and at the time we were one of the fastest stock style suspension GNs out there and the fastest with a production style head Buick V6 head. Most fast turbobuicks are running the Buick motorsport Stage 2 symmetrical port heads which were never used on a production car. We ran an aftermarket alum wedge head based on production heads. Meaning it was a true Buick GN motor

Here is the fastest ET we ran at 8.14@170+. The car highest MPH was at Atco and 174mph.


Here is another video at Edgewater. BTW the Olds 442 that ran after me is my best friend Ray who had the brakes lock up at the end of that run and was completely sideways going through the traps at 160mph! He was able to keep it shiny side up but took a small off road ride that made a mess of his car with some minor damage. I was on the return road looking at the passenger door of his car thinking its going to flip over! He was incredibly lucky that was the cars maiden voyage!


I sold the car only to build a dedicated 25.3 chassis to race we were very limited with that chassis with the power the motor was capable of. I ended up bailing on the 25.3 build in 2016 and sold it to another friend of mine Tommy who finished the car. The motor he was running was almost a twin to the combo I was running in 2009. That car was really fast but it was a dedicated race car the car I just got back is definitely still a street car and a true 34k GN.


So now it is home again and I have to go through it and bring some stuff up to date. I am going to race the car like it is for now but plan to make some changes to use the car in Drag week and make it a little more street friendly. The car needs gone over but does appear ready to go to the track other than all the certs are expired.

I was originally going to use the Mustang for Drag week but now I have a garage with two cars in it with parachutes hanging off the back and one has to go!
 

Attachments

  • 0417211536_HDR.jpg
    0417211536_HDR.jpg
    150.6 KB · Views: 131
  • 14077.jpg
    14077.jpg
    111.9 KB · Views: 104
  • 16367.jpg
    16367.jpg
    149.3 KB · Views: 78
  • 16371.jpg
    16371.jpg
    154.3 KB · Views: 80
  • 16370.jpg
    16370.jpg
    148.1 KB · Views: 78
  • DSC_0354.JPG
    DSC_0354.JPG
    87 KB · Views: 75
  • IMAG0793.jpg
    IMAG0793.jpg
    132 KB · Views: 68
OP
M

mlyonsdc

Well-known member
Joined
Nov 23, 2018
Messages
238
Location
USA
I think I am finally ready for the Buick Nats on May 13th. The T-type has really been fighting me with oil leaks but I think they are all finally fixed. I made some final tweaks to the tune yesterday and had the car out all day with the tops out which was a lot of fun.

I took it to a Cars and Coffee show at a local OReillys parts store. We rolled in with 4 of them it was quite a sight. Two of the of three cars are the ones I got in that deal I made back in February I posted about. All of the cars ended up with friends with the two GNs staying local which is really cool. The fourth car is a 8k mile 100% original 86 GN I got from the one gentleman who bought the 60k mile GN I had that is also in the picture. I am helping him sell it and plan to list on on BAT within the next week. It is a pretty incredible car and I just did a walk around video.


We started out with 5 GNs to take to the show but the race car is still pissed at me for selling it and decided to die 2 blocks from my house. I had to tow it home and still haven't figured out why it won't start. I am not messing with it anytime soon and plan to tear the whole car apart to go through it. I have to finish the Mustang once I get back from Bowling Green so it wont be until after that one is done.

The 86 GN is obviously stock but the other three are highly modified. All three will make 700hp or more at the tire and have killer paint and are relatively low mileage cars. It's going to be a really fun summer this year!
 

Attachments

  • 0502211005a_HDR.jpg
    0502211005a_HDR.jpg
    152.6 KB · Views: 60
  • 0502211005b_HDR.jpg
    0502211005b_HDR.jpg
    155 KB · Views: 47
  • 0502211005.jpg
    0502211005.jpg
    152.8 KB · Views: 43
  • 0502211005c_HDR.jpg
    0502211005c_HDR.jpg
    155.5 KB · Views: 40
  • 0502211005_HDR.jpg
    0502211005_HDR.jpg
    151.2 KB · Views: 53
OP
M

mlyonsdc

Well-known member
Joined
Nov 23, 2018
Messages
238
Location
USA
Still keeping busy in the shop this summer and having fun with the hot rods. We made it to BG with the 86 Ttype and the 86 GN with 8k miles on it. Started making a few shake down runs on the T-type and had a mis-hap with the wastegate that wasn't good and ended up hurting a cylinder head so the motor is back out and getting fixed. I decided to change a few things in the motor while I had it apart again are went with a stroker rotating assembly. I am hoping to have everything back Wed this week to start putting the car back together. I will also be upgrading the fans and radiator along with a few other items I had on the list.

I had more bad news for the 87 GN race car. It appears the car had froze at some point while in storage and now has a crack in the block that is leaking coolant. I sourced a really nice replacement block already but I am not dealing with that car until this winter and after I clear out a few other projects.

The 86 GN was shown in the Survivor class in BG and scored 399/400 getting a gold honors. The car FINALLY made it on BAT but the auction ended on July 3 and I got very little action on it the last day and it did not meet the reserve which was actually pretty reasonable. I decided while it is cool the car and has its factory bumper fillers still hanging on they really look like ****. I decided to replace them and when I pulled them in one piece set them on the ground and came out the next day they literally fell apart under their own weight . I used the Goodmarks which look and fit fantastic, really an exact re-pop of the originals unlike the ****** fiberglass ones we have had to use over the last few years. I also cleaned up a few other items on the car and really it is absolutely pristine now. I am planning to relist it but it if doesn't sell I am just going to keep it. I just found out my landlord on my one office has climate controlled storage he will give me for $75 a month so that makes keeping it a little easier. Plus I really like the car.
 

Attachments

  • 0516211407_HDR.jpg
    0516211407_HDR.jpg
    297.9 KB · Views: 40
  • 0514211444_HDR.jpg
    0514211444_HDR.jpg
    514.4 KB · Views: 53
  • 0518210851_HDR.jpg
    0518210851_HDR.jpg
    383.8 KB · Views: 53
  • 0514211559_HDR.jpg
    0514211559_HDR.jpg
    606.9 KB · Views: 52
  • 0514211559a_HDR.jpg
    0514211559a_HDR.jpg
    501 KB · Views: 39
  • 0722211948_HDR.jpg
    0722211948_HDR.jpg
    195.5 KB · Views: 42
OP
M

mlyonsdc

Well-known member
Joined
Nov 23, 2018
Messages
238
Location
USA
In the meantime while the T-type is down I decided to tackle the wiring on the Mustang since it is back from the body shop. It was an absolute nightmare. I started trying to figure out what went were and ended up pulling out any and all non-factory wiring and re-doing the entire car. It was a lot of work but worth it in the end. I took 10 relays out of the car and 3 10g power wires that were not needed and one was hot without a fuse that went no where! The battery cutoff did not work and the fuel pump was wired direct to the battery, it was a complete nightmare. I have all the aftermarket wiring separate from the factory and everything works and the car is once again running. I also added a bump box, a Grant removable steering wheel with T-brake button and a MMR dump valve on the trans. I put all the aftermarket wiring in the glove box and it is all nice and accessible now. I still have some stuff to clean up along with a list of other stuff but it is getting close. As soon as the T-type is back together I plan to tackle the rest and finally get this car to the track for some fun.
 

Attachments

  • 0705211342_HDR.jpg
    0705211342_HDR.jpg
    333.7 KB · Views: 41
  • 0705211342a_HDR.jpg
    0705211342a_HDR.jpg
    284.6 KB · Views: 41
  • 0529211946_HDR.jpg
    0529211946_HDR.jpg
    411.1 KB · Views: 38
  • 0531211210.jpg
    0531211210.jpg
    226.5 KB · Views: 40
  • 20920.jpeg
    20920.jpeg
    400.9 KB · Views: 36
  • 0624211252a_HDR.jpg
    0624211252a_HDR.jpg
    287.8 KB · Views: 34
  • 20761.jpeg
    20761.jpeg
    251.4 KB · Views: 33
  • 0711211940a_HDR.jpg
    0711211940a_HDR.jpg
    198.6 KB · Views: 43
OP
M

mlyonsdc

Well-known member
Joined
Nov 23, 2018
Messages
238
Location
USA
I decided to upgrade the Audi! I sold the B5S4 which I will miss but the replacement is just awesome. I have had my eye on a RS3 since 2018 when I first came across one at the track running 10.40s I could believe it as the car was mostly stock. I then met another gentleman at the Buick Nats of all places who had a full Iroz IMS850 car and then decided I had to have one. I found a nice 2019 Mythos Black one in NJ with 2000 miles and some basic mods. It came with midpipes, unitronic S1 ECU and S2 TCU tunes upgraded Conti tires and a few other nice upgrades. I flew out to NJ drove it home and turned around went back to the airport to pick up the guy who bought my S4 all in the same day lol. The car has been a blast to drive with the basic S1 tune and midpipes the car ran 11.58 on the street with draggy and 11.60 at Quakercity dragway last Friday. Plans are to upgrade the intake and intercooler and swap it over to E85. I have new wheels on the way along with two-piece rotors, carbo brake pads, new brake fluid, Ground Control CO springs and camber plates. Hoping to get it all on and to an open track night soon.
 

Attachments

  • 0706211910_HDR.jpg
    0706211910_HDR.jpg
    353.2 KB · Views: 43
  • 0725210735_HDR.jpg
    0725210735_HDR.jpg
    105.1 KB · Views: 45
  • 0720210856_HDR.jpg
    0720210856_HDR.jpg
    404 KB · Views: 70
OP
M

mlyonsdc

Well-known member
Joined
Nov 23, 2018
Messages
238
Location
USA
It has been awhile on an update.

I have been up to my eyeballs in a promised house remodel since Oct of last year and living in my basement since Nov 16th when I tore out my kitchen. I literally just got the water running in the new kitchen this Sunday and we are starting to slowly move back upstairs.

I got the new garage/shop in 2018/19 and the wife is now getting her new kitchen staircase flooring fireplace etc. We began planning in Aug of 2020 after a plumbing issue left a huge hole in our family room ceiling which we stared at for over a year. After ordering all the cabinets and countertops and flooring at the end of September my buddy who was doing the work put me off again on starting for another 6 weeks. So I decided to tackle it myself and did some framing a lot of demo and even tore out the main support wall in the house and put in a new laminated beam to open up the dining room for a more open concept.

While I am well versed in engine building and hot rods not so much wood and drywall! Nothing is straight with wood and my OCD can't stand it! I tore out a coat closet to build a new closet/entrance to the house and it was my first framing job and I had to rip it apart at least 3 times. Fortunately by the time I was ready to tear out the main support wall in the house. I demoed the pantry which used to be across from the entrance from the garage which was completely stupid along with the rest of the layout. My Buddy did show up at the beginning of December and by then I had all the electrical and drywall done too and he was able to start on the finish work which I do not trust myself to do.

I will post some before and after pics when its done we are just finishing it up now.

In the meantime I did not do much with hot rods over most of the winter but tore into the GN the last few weeks and lets just say I am WAY down that rabbit hole and will be posting a lot on that build. Post #83 above has some details on the car and what we ran in the past with it.

The Audi has been tucked away for the winter. I did get it tuned on E85 and it ran a blistering 10.88@128 on the streets of Mexico. The T-type is all back together with the new stroker motor and also on corn but I have not done anything with it. I do have plans to road race it this year finally. I have a short list of stuff that still needs done for that but hope to knock it out in early spring when I get it out of storage. I am signed up for the NE Musclecar Challenge in September. It is a road course event at Pitt-Race for 1987 and earlier cars with V8s but they are making an exception my lil V6 lol!
 

Attachments

  • 32010.jpeg
    32010.jpeg
    257.4 KB · Views: 58
  • 32012.jpeg
    32012.jpeg
    212.6 KB · Views: 47
  • 1031211353.jpg
    1031211353.jpg
    183 KB · Views: 50
  • 1128211033_HDR(1).jpg
    1128211033_HDR(1).jpg
    164 KB · Views: 48
  • 31420.jpeg
    31420.jpeg
    205.2 KB · Views: 47
  • 32287.jpeg
    32287.jpeg
    157.2 KB · Views: 55
  • 2021 SCCA TNiA Pitt Sept 9 Nov Freebee-12.jpg
    2021 SCCA TNiA Pitt Sept 9 Nov Freebee-12.jpg
    401.4 KB · Views: 54
  • 0910211828a_HDR.jpg
    0910211828a_HDR.jpg
    307.4 KB · Views: 63
OP
M

mlyonsdc

Well-known member
Joined
Nov 23, 2018
Messages
238
Location
USA
I have been struggling with what to do with the GN ever since I got it back and most of it is the same issues I had back in 2010 when I sold it. I've been saying its kinda like dating an old girlfriend it cool and exciting at first then you start to remember all the reasons you broke up with her in the first place lol!

The car was in need of a serious update in 2010. To go forward and actually push the car into the 7s it really needed more suspension and an updated chassis cert. updated wiring and ECU list goes on. Updating the chassis and going from a standard 8 or 10 point 8.50 cage to a 7.50 cage with floor bars and a funny car cage for the driver is a pretty extensive modification that requires a lot more cutting and modifying of the car. On top of that the difference between a 25.3 6.50 chassis cert and a 25.5 7.50 cert is minimal just a few more bars and a few that are a larger diameter so the decision was made to build a new car completely from scratch with a 25.3 cert and sell the current one.

Well life happened and struggles with the chassis shop then the body shop and by 2016 I was done with the with the project and bailed on it entirely. At this point I was pretty much got out of hot rods and racing althogther and focused on triathlon completing a full ironman in 2015. After I sold the 25.3 spec drag radial project is when I got my T-type back which eventually lead to the garage build which brought me here and has now come full circle with buying back the GN!

When I sold the car it had a completely new motor built for it. In 2008 I had a bunch of problems with Diamond pistons and them not building a piston with enough material in the top ring land. After tearing up two motors because of this I went in a different direction. I had a spare 4.1 on-center S2 short block with a really nice LA billet crankshaft and billet Oliver rods I decided to build while I was waiting on parts to put the "good" motor back together. This is the motor I ended up running for all of 2009 and ended up going really fast with and bending the rods at the end of 2009 season. By spring of 2010 I had put the "good" motor back together with the 3rd set of Diamond pistons a new Crower billet crank and rods along with a set of custom raised runner Champion GN1 heads. I was ready for the 7s at this point so I sold it lol! THe motor never made a pass on the track. I did break it in on the chassis dyno and it made 1000rwhp at a relatively low boost of 24 psi which was a far cry from the 38-40 we ran on the track!

Sitting on a lift for 10 years did not do the car any favors. It is kind of like a barn find at this point the guy who bought it put it away and never touched the car. While you would think that preserves the car not so much a car that was heavily raced. Everything needed replaced or updated at this point. All the fuel and oil lines which were caked with a gooey mess. Chassis seat belts fire suspression trans shield certs were all way expired and need updates, The tires all have 12 year old date codes plus technology has changed since then. While we did some cutting edge stuff back then some of the things we did were now common place with better products out on the market. Like turbos, shocks, trans converter dumps to spool the turbo, Tq converter tech and obviously ECU engine mgt and datalogging are all far better today. So I preceded to tear the car down to update it.

After getting the car apart I started to realize it was never going backwards. I raced this car pretty heavily for 6 years and it came with some battle scars, like in 2007 when a shock broke and I tagged the wall at Norwalk. Or again in Norwalk when a piston (Diamond!) let go at the 1000' mark pressurizing the crankcase sending oil out on to the red hot headers causing a flash fire and sending me through the traps at 160mph in a ball of flames! Can't say the car was never raced, wrecked or on fire that's for sure. Even though it is a really clean 34k mile 87 GN it has spent most of its life tearing up the quarter mile. Plus when I bought the car in 2004 it already had the cage 9" Ford rear and S2 motor etc. I am not the one who cut up a clean low mileage GN lol!

So the plans for the car? Drag-n-drive events. I still have no desire to go back to drag racing, drag radial, no prep arguing about rules who is cheating etc. I seriously want no part of it today. I just want a really cool hot rod that is ridiculously fast and can do drag week drive a 1000 mile and run 7s. That just seems like a whole lot more fun to me. I will still go to the Buick Nats once a year with it or the Ttype. I would also like to get the record back for the fastest Stage 1 production head Buick V6 which I should be able to do.

Here is another video I found online from 2008 in the finals at BG and I wheelied the car pretty bad, lost the race but made a cool video

So as the home remodel winds down I tore into the GN. We cut out the cage removed the body and took the chassis to a friends shop to put on his chassis table to straigthen and put in the new Merillat rear torque boxes and upper crossmember.
 

Attachments

  • 0325221851a.jpg
    0325221851a.jpg
    212.4 KB · Views: 52
  • 0325221915a.jpg
    0325221915a.jpg
    235 KB · Views: 45
  • 0325222006.jpg
    0325222006.jpg
    194.7 KB · Views: 45
  • 0325222123a.jpg
    0325222123a.jpg
    263.5 KB · Views: 47
  • 0327221848a.jpg
    0327221848a.jpg
    320.2 KB · Views: 50
  • 31550.jpeg
    31550.jpeg
    300.4 KB · Views: 46
  • 0325222045.jpg
    0325222045.jpg
    226.1 KB · Views: 45
  • 1123211314a.jpg
    1123211314a.jpg
    207.1 KB · Views: 47
  • DSC_0474.JPG
    DSC_0474.JPG
    75.6 KB · Views: 47
  • 1126212130_HDR.jpg
    1126212130_HDR.jpg
    278.2 KB · Views: 59
OP
M

mlyonsdc

Well-known member
Joined
Nov 23, 2018
Messages
238
Location
USA
The GN project has been slowly moving along but is about to start making ground soon. I got the frame back from my chassis guy with the rear x-member installed and I also got all the parts for the drivetrain and suspension from Trick Chassis. I had the frame sandblasted and its at another friend shop getting a coat of epoxy primer and I plan to start cutting boxing welding on it this week.

I have been collecting a lot of parts and at this point have just about everything I need to finish the car including all the cage material. I will post pics as it progresses and the parts as they get used in the build. I did get a new turbo a Bullseye dual BB NLX88, it is pretty cool piece can can't wait to try it out.
 

Attachments

  • 42603.jpeg
    42603.jpeg
    318.1 KB · Views: 46
  • 0531221835.jpg
    0531221835.jpg
    273.5 KB · Views: 43
  • 0531221836.jpg
    0531221836.jpg
    233.5 KB · Views: 44
  • 0531221853a_HDR.jpg
    0531221853a_HDR.jpg
    209.3 KB · Views: 40
  • 0511221941_HDR.jpg
    0511221941_HDR.jpg
    195.1 KB · Views: 39
  • 0511221941a_HDR.jpg
    0511221941a_HDR.jpg
    174.3 KB · Views: 37
  • 0511221942_HDR.jpg
    0511221942_HDR.jpg
    262.6 KB · Views: 52
Last edited:
OP
M

mlyonsdc

Well-known member
Joined
Nov 23, 2018
Messages
238
Location
USA
I finally got all the equipment I need to start bending tubing well sort of I am still waiting on a air hyd ram from HF but plan to just use it manually for now. My 1.5" die showed up last week and I have a 1.625 die already which should be all I need for this project.

I got the swag offroad air hyd ram conversion kit that uses HF ram #56215 which is now made of unobtanium. At one point I was able to order it online and they shipped me one that FedEx lost and the replacement is on BO. The swag kit will use other makes but it needs to be a certain size so only a few will fit. I was given a list of them but they are all at least twice the price as the HF unit and probably from the same Chinese factory.

I was all set to build my own custom stand for the bender but found this one from TrickTools and really like it so far. As usual I can't buy the material to build it for what it cost and it didnt even take 10 minutes to assemble.
 

Attachments

  • 0622220841_HDR.jpg
    0622220841_HDR.jpg
    247.8 KB · Views: 59
OP
M

mlyonsdc

Well-known member
Joined
Nov 23, 2018
Messages
238
Location
USA
I did get the T-type to the Buick Nationals this year along with my best friend Ray who was able to take his own car to BG for the very first time in 20+ years of going to the Nats and racing with me. He did a total frame off on the car and the motor makes 750hp to the tire. He did make one trip down the track running 11.00@132! It is probably the furthest the car had been drivin since he finished putting it back together which was the night before we left lol. Car is stunning though paint and body damn near perfect 9 sec street car all day too.
 

Attachments

  • 0513221054a.jpg
    0513221054a.jpg
    360.6 KB · Views: 54
  • 0513221054.jpg
    0513221054.jpg
    348.4 KB · Views: 40
  • 0513221516_HDR.jpg
    0513221516_HDR.jpg
    295.7 KB · Views: 38
  • 0513220943.jpg
    0513220943.jpg
    405.7 KB · Views: 40
  • 0513220942_HDR.jpg
    0513220942_HDR.jpg
    471.9 KB · Views: 65

82355

Well-known member
Joined
Jul 13, 2013
Messages
689
Location
Bradish Nebraska
Jut read through this thread off and on today. Very nice garage, and very cool toys. The GTA wheels really dressed up that T-Type.

Martin
 
OP
M

mlyonsdc

Well-known member
Joined
Nov 23, 2018
Messages
238
Location
USA
Jut read through this thread off and on today. Very nice garage, and very cool toys. The GTA wheels really dressed up that T-Type.

Martin
Thanks, I did those before repops were available from gbodyparts.com and have stupid money in them. I had them all refinished and turned to take clear coat off etc. I also cut the centers out of the rears and changed the BS to 4" from 5.5" Problem I have now is no one makes good 16" tires in sizes I need to go on them! I am also afraid to change anything since the clearances on everything are so tight with as low as it is, the frame is 5.5" off the ground!
 

zmotorsports

ALLIANCE MEMBER
Joined
Oct 20, 2009
Messages
21,427
Location
Northern Utah
Looking good.

You will like that JD2 tube bender. I have had mine for nearly 20 years now and it has bend a lot of tubing very successfully. I started with it manually and had it bolted to my shop floor when I was bending .5"-1" 4130 chromoly building ATV sand drag chassis but when I started building sand rails using 1.25"-1.75" tubing I built a mobile cart and converted it over to air over hydraulic. I much prefer the hydraulic method on the heavier tubing.
 
OP
M

mlyonsdc

Well-known member
Joined
Nov 23, 2018
Messages
238
Location
USA
Well the GN project is moving along slowly but moving. I have most of the floor bars in and plan to drop the body back on this weekend to final fit everything and then it will be time to finish welding them. Motor is at machine shop and pistons FINALLY showed up so I will probably have that back soon and have a lot of fab work to do there with accessories and new turbo.
 

Attachments

  • 0702222016.jpg
    0702222016.jpg
    235.9 KB · Views: 44
  • 0804220734.jpg
    0804220734.jpg
    212.5 KB · Views: 44
  • 0823222142_HDR.jpg
    0823222142_HDR.jpg
    277.1 KB · Views: 40
  • 0823222143a.jpg
    0823222143a.jpg
    218.4 KB · Views: 41
  • 0821221834_HDR.jpg
    0821221834_HDR.jpg
    312.7 KB · Views: 40
  • 0821221834a_HDR.jpg
    0821221834a_HDR.jpg
    304.6 KB · Views: 42
  • 0821221833_HDR.jpg
    0821221833_HDR.jpg
    327 KB · Views: 50
OP
M

mlyonsdc

Well-known member
Joined
Nov 23, 2018
Messages
238
Location
USA
Got some more work done on the GN. Plan was to channel the inner frame rail into the rear floor pan and drop the body back on to test fit all the new bars before final weld. We also had to check the rear tire clearance as I have it set to ride ht and narrowed the rearend a little. What should of been a 2-3 hour job turned into an entire day where we had the body up and down so many times I thought I was going to wear out the lift lol! Ended up having to re-do the trans crossmember entirely along with a bunch of other tweaking and massaging, but the body is back on now and fits nice. We loaded the car to take it to my buddies shop to finish the floor bar welding and once again remove the body and re-install it. Once that is done we will be able to start on the main roll cage.
 

Attachments

  • 0828220959.jpg
    0828220959.jpg
    204.7 KB · Views: 37
  • 0827222034a_HDR.jpg
    0827222034a_HDR.jpg
    209.6 KB · Views: 35
  • 0828221020.jpg
    0828221020.jpg
    237.9 KB · Views: 37
  • 0827222034_HDR.jpg
    0827222034_HDR.jpg
    174.7 KB · Views: 36
OP
M

mlyonsdc

Well-known member
Joined
Nov 23, 2018
Messages
238
Location
USA
I've also been busy with the pro-touring T-type and it is starting to come around. I dove it to Quaker City Dragway last Wednesday, got in the lanes adjusted the tire pressure, ran a 10.75 and drove home on the same tires and gas I used to get there! I had been tuning it mostly on the streets of "Mexico" with just short runs and needed some data on an actual track as I was playing with a closed loop boost control set up in the MS3pro. Plus the car is getting fast which makes tuning on the street a little more challenging. The Toyo drag 275/45/16 drag radials I run on the back at 19psi will dead hook the car on the track and even on the street which is impressive IMO as the car is well over 600rwp at this weight.

At the track I discovered the intercooler on the car is whoafully inadequate and I still had a really bad boost spike with the controller that needs attention. Since I am planing to mostly road race and auto x this car I have a stock location IC that is way undersized for this combo. Normally I would use a big frount mount behind the grille that also block air to the radiator which isnt ideal for road racing. I knew the inlet temps would be hot because of this but it is hitting 205 degrees at only moderate boost levels at 27psi and I am planning to finish the tune at somewhere around 32psi. The result of the increased IAT's is it is pulling almost 4 degrees of timing out by the end of the track and the car is literally nosing over after the 1/8mile I can scale the IATs vs timing table to not take the timing out but nervous to do so, even though I am running E85 at 82% and still very conservative on timing. To fix it I am going to make a methanol injection set up and use the MS3pro to control it. I have parts on order already. I also have some ignition upgrades to make along with setting up launch control on the car before heading back to the dragstrip.

So that was last week. This weekend I was able to finally get the car out on the road course at Pitt-Race for a SCCA TNIA what a blast it was to finally get the Ttype out on the road course. I had been waiting on new tires for the road course since DRs on the rear and old Rikens on the front were not ideal. The Toyo R888r's I had on order had been on BO for 3 months! I got them mounted, adjusted the CO's and camber the wheels in some and put fresh Castrol SBF brake fluid in and off to the track. The car did remarkably well too. I had been drag racing Turbo Buicks for over 30 years with drag tires no front sway bar and drag shocks on them it took a few laps for me to gain enough confidence to start actually pushing the car some lol!. It did well I was able to keep up with most on the track and outside of a GT-3 RS Porsche with an exp driver and another guy in a S5 Audi I kept ahead or was passing most in the Novice run group ( I am typically in intermediate exp with w new car). I even managed to pass a guy in a Porchse Turbo S but in all fairness I am probably more experienced and it was raining lol! Here are a few pics of the me at the track I will post more once I get the ones TNIA. THis was the only time that car has been driven in the rain since it was restored or I have owned it, I was amazed the wipers actually worked lol!
 

Attachments

  • 0810222244.jpg
    0810222244.jpg
    129 KB · Views: 36
  • 289641645_497558275504185_8719244956417487186_n.jpg
    289641645_497558275504185_8719244956417487186_n.jpg
    371.1 KB · Views: 33
  • 0826221815a.jpg
    0826221815a.jpg
    249.8 KB · Views: 32
  • 50311.jpeg
    50311.jpeg
    124.9 KB · Views: 29
  • 50315.jpeg
    50315.jpeg
    124.4 KB · Views: 30
To avoid these ads, REGISTER NOW!
OP
M

mlyonsdc

Well-known member
Joined
Nov 23, 2018
Messages
238
Location
USA
Went to work on some of the issues with the T-type starting with the brakes

Talked to Hawk today and got DTC-30 an 60 pads on the way. My Baer brakes came with Hawk HPS street pads. He said the DTC-30 pad will be significantly better and better for auto-x but not great for road if heat gets over 1200. Very helpful company actually answered the phone too.

I got the new rear brakes on and now have 12" rear rotors with 11" front. I dont see how I cant get a 12" rotor up front to fit with my 16" wheels and plan to research it this winter. Baer said they used to make it but dropped it when going to 13" front and the 13s will require me to change wheels. The 1LE camaro and 89 TurboTrans Am came with 12" rotors and 16" wheels so I am sure there is something out there I can make work. I also ended up with an extra pair of 245/50 R888r's on the cheap since the company I ordered from screwed up and sent me an extra set by accident. They are going to discount them pretty steep to not have to retrieve them. So I am sticking with my 16" rims for awhile lol!

The brake install wasn't without issues and directions eehh but it was straight forward and I am really impressed with the quality and design. I had to drill 4 3/8 holes in 1/4 steel axle flange it is amazing how nice a brand new cobalt drill bit works over a worn out one. Had a few snags with bango fittings and e-brake cable and Baer is taking care of it and I bought this kit in 2017! Great product and service IMO.

I also scaled the car. With 180# driver and full tank of gas it was 3685# which is what I guessed. I played with rear CO settings and got left to right at 3% which was over 4% when I started. I am going to raise the left front some and re-scale it I think I can get it down to 2%. I can bring left front up .25" to match right side ride ht with driver in the car which might do the trick.

If all my parts show up this week there is another open track day at Nelson Ledges on the 7th I am going to try and make. There is also an auto-x meet on Sept 11 I am going to try and make since I have not done an auto-x course in 20 years and wasn't all that good to begin with lol!
 

Attachments

  • 0828221742_HDR.jpg
    0828221742_HDR.jpg
    224.7 KB · Views: 25
  • 0829222024.jpg
    0829222024.jpg
    179 KB · Views: 19
  • 0829222011_HDR.jpg
    0829222011_HDR.jpg
    209.6 KB · Views: 19
  • 0828221734.jpg
    0828221734.jpg
    193.7 KB · Views: 19
  • 0828221522_HDR.jpg
    0828221522_HDR.jpg
    198.8 KB · Views: 20
  • 0828221522.jpg
    0828221522.jpg
    276.2 KB · Views: 39
OP
M

mlyonsdc

Well-known member
Joined
Nov 23, 2018
Messages
238
Location
USA
I've been pretty busy in the shop since my last post. The NE Musclecar Challenge didn't exactly go as planned. The event started with road racing and in the second run for the day the transmission had a total melt down literally. It ended up venting most of the fluid out on the exhaust and I ended going down the front straight at 120+mph on fire, no fun. I was able to get the car off the track safely and get out and as soon as I did I saw the safety crew already coming down the hill. They had to see it and where on the way before I even got out of the car. Good thing too as I was sitting there with a sick feeling in my stomach watching smoke billow out and waiting for the paint to start melting. When they got there I got the hood open to a huge fireball and they quickly extinguished the fire. As I watched it had dawned on me I am out here road racing with no safety gear on the car which is stupid. I did have fire suit helmet and fortunately gloves as I was the only one able to open the hood to put the flames out. Needless to say there will be some significant changes to the car before I try that again.

I was unbelievably lucky. The fire was mostly on the hood blanket the nylon braided -10 lines I ran to the vent tank. The track used a Halon based fire suppressant I think he said was FR500 which makes an oily mess but doesn't damage anything. I actually got the car cleaned up fixed or replaced all the small parts that were burnt which was mostly conduit. Between my two track outings with the car I have a ton of changes to make before I go road racing with it again.

I did Auto X the car too and really the 1st time I did an Auto X event. Not the best car in an Auto X and found even more stuff to update/change etc. Plus the driver is really bad, lol I made 12 runs through the course and I dont think I made it through the course without getting lost till run 4 or 5 lol! After that I did start knocking time off with every run with last run being fastest but still very bad compared to the group I was running with which TBH had way more seasoned racers in high end pro-touring cars than newbs like me.

In all I had a lot of fun and was blown away by the craftsmanship and level of engineering that went into some of these cars which were all pre-1987 cars. I really learned a lot and will be back next year with a bunch of changes and upgrades.
 

Attachments

  • _part-2000000000117773_.jpg
    _part-2000000000117773_.jpg
    240.5 KB · Views: 36
  • _part-2000000000117777_.jpg
    _part-2000000000117777_.jpg
    366.7 KB · Views: 38
  • image16748.jpg
    image16748.jpg
    654.1 KB · Views: 38
  • image16787.jpg
    image16787.jpg
    835.3 KB · Views: 38
  • image16835.jpg
    image16835.jpg
    500 KB · Views: 37
  • image16865.jpg
    image16865.jpg
    621 KB · Views: 47
OP
M

mlyonsdc

Well-known member
Joined
Nov 23, 2018
Messages
238
Location
USA
Like I said I have been busy and have made a lot of progress on the GN too. I am trying to do more stuff that is fun and less like competitive racing and I am building my GN like I would like to do and not fit some class rules etc. My goal is to do drag-n-drive events which is more like an endurance event for drag racing. So I decided to fill out the "interested" in Sick Week registration. Well I was sent a per-registration invitation to the event and went ahead and registered. I now have a deadline for finishing this car which is 12 weeks and is insane. On top of that I have to have all certs and my NHRA license up to date which expired more than a few years ago/ This means I need to figure how I can make licensing passes with an unfinished car before February 12th when I live in Ohio and am just a few weeks away from snow flying!!!

SO I am on full throttle to finish the GN. Not only am I working to finish the car I need to track test it road drive it before the event. The event will be over 5 tracks in 5 days with over 1000 miles of driving.

I need to have the chassis and roll cage done by the beginning of November. If I can get the cage done by then I should be able to get the car running by December and will take it down South in January to test. My buddy in Cincinnati is going to let me make license runs in his 8 sec GN which I am planning to do with in the next two weeks. The good news? I have everything to finish the car I wont be waiting on parts, machinist chassis guy body guy etc, it is all entirely in my hands to get the car done at this point.

Bad news is I am new at this and certainly no pro! I'm still watching youtube videos on roll cage fab and tig welding!!. My buddy Ray who is helping and picking up Tig welding pretty fast is way more skilled than I am even though we are both learning how to do it at the same time.

As of today, we got the frame completely welded and final paint done. Also got the firewall repainted and the body dropped back on the frame and started roll cage with main hoop done and start of FC cage.
 

Attachments

  • 1009221836.jpg
    1009221836.jpg
    478.1 KB · Views: 44
  • 1009221307_HDR.jpg
    1009221307_HDR.jpg
    479.3 KB · Views: 41
  • 1009221248a.jpg
    1009221248a.jpg
    506 KB · Views: 39
  • 1009221130a.jpg
    1009221130a.jpg
    471.6 KB · Views: 43
  • 52029.jpeg
    52029.jpeg
    943.5 KB · Views: 40
  • 1001221516.jpg
    1001221516.jpg
    599.1 KB · Views: 37
  • 1001221515a.jpg
    1001221515a.jpg
    539.1 KB · Views: 45

zmotorsports

ALLIANCE MEMBER
Joined
Oct 20, 2009
Messages
21,427
Location
Northern Utah
Good luck on meeting the deadline. Hope you're able to get it completed, licensing and can enjoy the event as well as the build. Sure is looking good so far. :thumbup:
 
OP
M

mlyonsdc

Well-known member
Joined
Nov 23, 2018
Messages
238
Location
USA
While I have been making progress on the GN things have stalled and at this point I am behind the deadline for making it to Sick Week at least with this car. We were close up to the beginning of November. We took a break to take the T-type down to South Carolina for a drag-n-drive event so I have a lot of updates to post. I will start with where I left off on the GN and that was bending the A-pillar bars and getting the main cage in the car.

The A-pillar bars which I new would need three bends and need to be 7.5" in length. This was going to be the most difficult tube I needed to make and not a cheap one either considering an 8' stick of 1.625 .083 CM is $105!

The issue with the Gbody is the angle of the windshield and getting it tight to the Apillar is difficult you have to put a third bend in the bar to get. I used PVC pipe as a template which didnt work so well but it did give me a rough idea.
53384.jpeg

The first attempt I didn't bend the offset into the roof A-pillar bar and since you need both to match I bent two 8' pieces at the same time. We did get the one to fit pretty decent but it took a lot of tweaking and was not exactly how I wanted it but it worked. Problem was there was no way to match it on the drivers side bar.
1015221450.jpg
This was the main issue with no offset bend at the top we just kept tweaking it on the other end. Where it would have come out on the dash would be to low and making it the same on the other side with a dash bar would have been impossible.
1015221453.jpg
After wasting an entire day trying to fit the drivers side bar like the passenger one we made I gave up and tore it out.
1027222208.jpg

It took me two tries and an extra 16' of 1.625 .083 wall CM tubing but I finally figured out how to do a 3 bend tube with an offset and it worked out really well.It. I pretty much had to figure it out on my own too, I had even asked a bunch or people and most said they just bend them to fit or used a halo design which I didn't want to use. I did the drivers first starting with bottom 80 degree bend then 14 degree a-piller bend then 32 degree roof bend with 14 degree offset. It literally fell right in the car!
1027221709_HDR.jpg

1026221949_HDR.jpg

I was able to bend both bars exactly the same and got the fit nice and tight to the body and about as high as you can with the dash to windshield and the dash bar to intersect both A-pillar bars at the same point
1027222200_HDR.jpg
1027222159_HDR.jpg
Next we finished the dash and windshield bars and actually managed to weasel the entire front cage out of the car to finish welding it on a bench.
1029222009.jpg
1029221801.jpg
 

zmotorsports

ALLIANCE MEMBER
Joined
Oct 20, 2009
Messages
21,427
Location
Northern Utah
Nice job figuring out the bends to get the desired fitment. I have a question however. I thought most sanctioned regulations stated the bar from frame upward to the A-pillar must be perpendicular to the frame for strength.

I thought the bar had to be like this inked version.
1027222159_HDR.jpg

The reasoning being in a rollover event, the forces will push directly onto the lower frame rail for greatest strength. Please correct me if I'm wrong but just at first glimpse the curved bar would be a weak bend and possible first point of failure as it continued bending when forces were applied to it.

Thanks.
 
OP
M

mlyonsdc

Well-known member
Joined
Nov 23, 2018
Messages
238
Location
USA
Nice job figuring out the bends to get the desired fitment. I have a question however. I thought most sanctioned regulations stated the bar from frame upward to the A-pillar must be perpendicular to the frame for strength.

I thought the bar had to be like this inked version.
1027222159_HDR.jpg

The reasoning being in a rollover event, the forces will push directly onto the lower frame rail for greatest strength. Please correct me if I'm wrong but just at first glimpse the curved bar would be a weak bend and possible first point of failure as it continued bending when forces were applied to it.

Thanks.
Its not in the 25.3 or 25.5 spec for NHRA which I have both SFI books. Plus you pretty much have to bend it like that if you going behind the dash on a Gbody. Wild rides cages who sells pre-bent 8.50 cages does them like this too. I am in touch with NHRA tech inspector who has given me a thumbs up on everything to this point too. He is mostly concerned with everything being TIG welded 360 degrees so I sent him the pics of the A-pillar dash and windshield bars both in car and welded up on the bench.

That's not to say other sanctioning bodies don't have a rule like that.
 
OP
M

mlyonsdc

Well-known member
Joined
Nov 23, 2018
Messages
238
Location
USA
After getting the front cage back in the car and tacked up to the main hoop and floor the next step is to make the Funny car cage and finish the roof bars, then the fun will start when we have to lift the body in order to weld everything 360 degrees.

First up is the main hoop for the Funny car cage and in order to do that we needed to fit the driver. So i decided to start fitting the dash and drivers seat.

1031222115a.jpgOnce the dash was in I got the seat mounted and started figuring out where I am going to be and where everything would end up. First thing we noticed was the drivers seat had to move more inboard and the sheer brackets I bought to mount the Kirkey seat would not allow any side to side adjustment with the factory floor mounts which they were made. We noticed they had enough room on the inboard side but none on the outboard so we cut the feet off and reversed them and re-welded which put the seat exactly where I needed it and also gave me a lot more room for door diagonal bars and window net which is always tight.

I also decided for getting in and out of the car it would be A LOT easier if I moved the seat back as far as possible. Being 5'7" would make reaching the factory pedals difficult so I mocked them up too and sure enough there was no way to get the gas pedal so I went with one from SW which will mount off the dash bar. It looks like I will be able to modify the factory brake pedal bracket and will still be able to keep the firewall mounted master cylinder. I also test fit the steering wheel and with moving the seat back the steering wheel will end up to high so it looks like I will be making a new mounting bracket for it or modifying the existing one.
1128221801_HDR.jpg
1128221802.jpg
Now that I know where I am going to be in the car I can actually start figuring out where the forward funny car cage bar will go and how it will mount. This is another 3 bend 4.5 bar with bends in different planes and I wanted to make a template first. The PVC pipe I used for 1.625 to make a template for just didn't bend right and had something like 25 degrees of spring back so it was difficult to get it right. I never came up with a steel pipe/tueb with an 1.625 OD cheap enough to use as a test piece but I did find 1.25 electrical conduit made of .070 wall steel with an OD of 1.51 to work with 1.50 CM. While it was a tight in the die it still worked really pretty well and 10' of it at Lowes was only $25. I was able to bend up two FC bars with a 10' stick and good thing because the first didn't work and the second was just about perfect and I was able to duplicate and bend on in CM with only a small tweak.
_part-2000000000130529_.jpg_part-2000000000130324_.jpg

I did bend the CM version of the FC bar but still haven't installed it. I also bent fit the rear down bars and some of the roof x-brace and once I finish fitting those bars it will be time to lift the body again and learn how to tig weld while inside a car which we are not looking forward to. I did pick up a few new items to make that process go smoother, one of them being a finger trigger that you press on like a pedal to increase amperage which I plan to install this weekend and try out for the first time.

_part-2000000000132710_.jpg


The other is bendable tungsten which I didn't know even existed till my buddy sent the pic of how he tig welded his cage to the frame.
_part-2000000000130216_.jpg

_part-2000000000131087_.jpg


The other was a switch to Furek #8 glass cups which really improved sight along with a #9 CK troch head vs the larger #17 that came with the welder.
_part-2000000000131518_.jpg
Hopefully this will make the next stage go easier. My buddy Ray has done all the TIG welding at this point and has gotten really good at it. He was an ironworker for 20+ and has a lot of welding experience, while my day job has nothing to do with this stuff and everything I know I learned from youtube lol!
 
Last edited:
OP
M

mlyonsdc

Well-known member
Joined
Nov 23, 2018
Messages
238
Location
USA
So we took a break from the GN build in November and decided to take the T-type down south for the SE Street-N-Yeet drag and drive event. I figured it would be a good dry run for what we need for one of these events and we could really get a handle on the trailer and tools and parts we might need to bring along. I found a killer deal on a nice trailer for these events fabbed up a trailer hitch to fit a Buick.
47317.jpeg
1106221502_HDR.jpg1106221947.jpg

The weather forecast did not look really good with hurricance Nicole coming up from Florida. We figured we would get the first day in at Shadyside and Friday would be a wash out with nice weather on Sat and Sunday to finish the event. They started racing at noon on Thurs and it started raining at 12:30 and didnt stop till Saturday.1110220951_HDR.jpg

Shortly after it started raining my wipers made 3 passes and the motor quit! So we were off the the parts store and to our first parking lot repair in the rain!
1110221436.jpg
The replacement motor made it 4 passes before it failed and we ended up making the 120 mile trip on rainx!
1110221723_HDR.jpg

Friday we knew was going to be a wash out so they planned an open house at a local shop and made a day of it. The Chevy II next to me in the pic actually won the event. 427Lsx with twin 76s averaged 4.80's in the 1/8 with vintage air and AC with defrosters which on this trip was a real issue for a lot of guys. I have a new found respect for the guys doing this with a really fast car, two days in a hurricane 700+ miles busting off 4.80s is not easy!
1111221055_HDR.jpgWe drove to Aiken SC next making the required stops and the next day we were scheduled to race to the Carolina House of Hook. They canceled that night due to the amount of rain we recieved. They were able to reschedule us for Union so we had to drive back up the next morning. We went out to dinner that night with another crew and the brake switch in the stupid powermaster brake system on my Ttype failed. It was hanging up at the end of the day that day but by the evening it was not working at all and while I had brakes I had zero power assist so I essentially had no brakes. We decided to deal with it in the morning but at 2am I woke realizing we were 180 miles from the truck and the one part to brake on the car happened to be one that you can't buy in a parts store and was going to impossible to find.

The next morning Ray figured out how to jump the switch and cycle the powermaster brake system which put pressure into the accumulator and we had power assist for at least a little while. Well it work so well we made it all 120 miles back to Union County raceway without incident and was able to make the two passes on the car we needed. The first pass was scrubbed as the car was sputtering due to the plugs being fouled from all the street driving. A fresh set of plugs and the car spun but managed a a best of 7.42 which is a good bit off from the 6.80s it ran earlier in the year but it was good enough for now we still had another 100+ miles to drive and figured we would try to run it hard once we got back to Shadyside.

314960776_211717284546540_1557023633550172415_n.jpg
316420297_212119591172976_432189345641050603_n.jpg
 
Last edited:
OP
M

mlyonsdc

Well-known member
Joined
Nov 23, 2018
Messages
238
Location
USA
We had to jump the brake switch a few more times but it kept working. The switch is going bad but it seemed once we jumped it, it would run fine until we powered off the car again. Only had one required check point on the last day due to the change in schedule
1112221730_HDR.jpg
The last day at Shadyside was a really nice day and the track was really working well. But it was Sunday and we had a 9 hour tow home and we both needed to be at work the next day. So we made two quick passes and turned in the slips. I think the first was a 7.21. I put a little more in it as the track was working really well and figured if I could get a decent 60 I would at least get one 6 sec pass. Well it went 1.69 on this pass but then spun about 80 feet out which would have just been a shock change but we had to go so loaded up and came home. Had a blast either way and I have a new turbo and a bunch of changes I plan to make to the car for next year, or should I say after the GN is back together and running.
316240005_212117424506526_3235259817773445446_n.jpg
315717713_501629892018600_2059518087247665195_n.jpg
316235936_212116501173285_9139661488793881369_n.jpg
 
OP
M

mlyonsdc

Well-known member
Joined
Nov 23, 2018
Messages
238
Location
USA
Well I think I started talking about building my weld/fab table on page 1 of this thread in 2019! Well here it is my offical GJ shop table build lol! While Ray and I drove hundreds of miles around SC we discussed the GN build quite a bit and one thing that came up is I needed a good fab table in my shop. Problem is the material is stupid expensive and hard to find locally. Ray offered up a bunch of scrap angle iron he had from his ironwork days and he said just go buy a top. So this was my first project when I got back.

I have obviously thought about this project a lot and came up I wanted 3x5 table that was mobile. Ray had a bunch of 4x4 .500" shipping angle and 3x3 .125". I decided to build the frame out the 3x3 and make the legs out of the heavy 4x4. While a lot of weld/fab table builds on here are extensive I just needed something simple and sturdy. I wanted to be able to weld on it, clamp stuff to it, mount a vise on and have a solid surface to work on.
_part-2000000000137017_.jpg
I had been digging this Evolution saw but after seeing how easily it cut 1/2 thick angle iron I was impressed.
56552.jpeg
I made the legs 32" figure 4" for the leveling casters I was planning to use for a 36" tall table. I boxed the lower 7" of the legs to use as a support for the shelf and to plate the bottoms to mount the casters. We started out Mig welding it with .030 wire and a Vulcan MigMax 215 while it worked fine for the 3x3 stuff the 1/2" legs could use a little more heat. So, Ray being a former Ironworker decided to try out the stick welder function that came with my Alpha 201xd Tig welder. So I ran to HF and got some 7018 electrodes and Ray went to town and I learned how to stick weld.
1127221522.jpg
The angle iron had been outside for a long time and was rusty. I cleaned it and painted it with Rustoleum rust converter which is a perfect flat black for a work table!

_part-2000000000137651_.jpg

I got the casters on Amazon and they are pretty nice. They are leveling and roll nice and are supposed to hold 3300# so when the GN is done I should be able to park it on this table lol!
_part-2000000000137648_.jpg
I ended up going with a .125 thick top as I could easily source it locally and they were willing to cut it to whatever size I wanted. I initially wanted 3x5 but then made the frame 57x33 and decided I needed more over hang for clamping stuff so ended up with a 66x42 top. I was initially going to make the shelf out of expanded metal but that idea was short lived. I ended up getting a piece of 3/16 plate for the shelf and built the frame out of 3x3 I had left over.
image18763.jpg

_part-2000000000137866_.jpg
And now that it is done I don't know how I lived without it!!
0418031524a.jpg
 
OP
M

mlyonsdc

Well-known member
Joined
Nov 23, 2018
Messages
238
Location
USA
.125 or .25 for the top? turned out nice.
Duh, yeah its a .250 1/4" top, thanks I am pretty happy with it. The local place I get steel from will cut it to size with a giant sheer which .250 is the thickest they can cut. The 3/16 shelf ended up being a goofy size like 55 1/2x33 which they were happy to cut. Thought the price was reasonable too, $317 for the top and $174 for the shelf.
 
OP
M

mlyonsdc

Well-known member
Joined
Nov 23, 2018
Messages
238
Location
USA
Well after Thanksgiving we got back on the GN project with the most difficult part coming up which is the roof structure and all the bars needed for the main roll cage. When I started this project I did a lot of searching and found very little out there on 25.5 or 25.3 builds they didn't remove the body and floor pans and now I know why. It is completely absurd trying to fit and Tig weld all these bars inside car! As I mentioned earlier this is my second go around with trying to build a 25.3 car. The 25.3 project I tackled before I was paying a shop to build and we had completely removed the body and the cage was welded. Here is a pick of the original 25.3 build I started, we cut entire inside of the body out firewall to tailight panel and I bought a Goodmark floor pan to install in the frame/cage and later lowered the body down on the cage after the roof structure was done. Here are some pics of that build from back in 2012-14 or so.

IMAG0476_zpsrhgrympg.JPG
20150316_192742_zpspnw5uxpa.JPG
20150316_185050_zpskuyr6npm.JPG

Its funny looking back on these pictures there were so many little things I didn't like about this car that unless you build it yourself it is tough to pay someone to build it the exactly how you want it. As Ray and I get better at this even this project we are looking back at the stuff we first did and wishing we would have done this or that a little different and how we could do it better now.

This car did get get a 25.3 chassis cert but I finished it or raced it. I sold it to a good friend who did finish and race it successfully then sold it to another gentleman in Florida a few years ago. Some pics of it recently surfaced and I think I'll see it again this year as the new owner got it running again.

Picking up were I left off with this build. I had the Funny car bar bent before we left for South Carolina but we needed to fit it, cope it and weld it in which is a pretty big task. It is also a very important bar to get right since a lot of other bars and the driver and built off that bar. On one end we needed to tuck it up high and attach to the Apillar bar at a bend and angle and finish at the other end where it will be coped and welded to two other bars.
1202221910a.jpg
1202221910.jpg
1218221342_HDR.jpg
 
OP
M

mlyonsdc

Well-known member
Joined
Nov 23, 2018
Messages
238
Location
USA
The differences between a 25.5 and 25.3 cert on a car that retains most of the stock frame, floor, firewall, and body are pretty minimal so building a 25.3 spec which will cert the car to 3600# and 6.50 et makes more sense. While I am only planning to run mid 7s with this combo I know how this hot rodding stuff goes and if I ever decide I want to go faster it is almost impossible to upgrade a 25.5 to a 25.3 once the car is finished. Most of the differences are bar diameters being larger with the main difference in the roof structure. The 25.5 only requires one cross bar in the roof and 3 gussets while the 25.3 requires a full x-brace with 6 gussets all of which are also larger diameter tubing. How much more work can 2 bars and 3 extra gusset be lol!

My first go around with the x-brace was all wrong and I had to tear it back out. Good thing I ahve been in contact with the chassis inspector because I would have never known unless he called me after I sent pics and told me. While it was wrong I actually wasn't wrong but the book was!! In the 25.3 SFI book states the x-brace must terminate within 3 inches of the corners and on the FC side it can terminate on the front horizontal portion of the 41B FC bar which is the main FC bar we just installed. But the diagram which shows different roof configurations the leg of the X that would be in the drivers side could terminate on the main hoop before the FC no where near the 3" from the corner. The book also doesn't tell you that it dosen't have to be an X at all unlike other X bracing in the spec which has a lot of specifics about their construction. With all the goofy roof lines the roof X can be many different configurations. SO my first attempt was wrong and good thing because I wasn't crazy about it and it hung low while we had everything else tucked up high in the roof.
1203221331_HDR.jpg

This was how I planned to run the back leg but actually would have had to go through the FC to the back corner which wasn't going to work.
image18853.jpg

At this point we are getting close to the point where the fun will start and we need to lift the body and finish the welding and roof structure. Since my job has been all the tubing cutting fitting and coping while Ray has done all the welding we decided to move the car back to his shop since most of what we need to do is welding. Once there we we were able to raise the body and I finished making the rood bars and gussets and even got the thumbs up from the Chassis Inspector before finish welding.
1210221211.jpg

1217221155a.jpg
With the body raised Ray was able to get some nice welds on the roll cage feet. We plated the frame at cage attachment points to give a nice clean metal and strong attachment points
1217221211_HDR.jpg1217221210_HDR.jpg
Whoever said if you want to learn how to TIG weld on a race car practice welding under your kitchen sink wasn't kidding!
1210221046a.jpg
1217221224_HDR.jpg
 
OP
M

mlyonsdc

Well-known member
Joined
Nov 23, 2018
Messages
238
Location
USA
Once we got the body in the air we also found some issues we went aware of the biggest was some of the gaps on back side of the bars we installed. While we couldn't actually see the gaps we could feel them and we thought they would be ok but once we got the body up two of them were pretty bad. The one for the FC which while it was bad it also easy to see and get to. The other one was on the back side of the A pillar bar where it meets the main hoop. The problem with this one is it isn't easy t see or get to and we were really concerned with how to fix this one. We think the FC one ended up being bad as a result of welding the rest of the bar before it was fully tacked on both sides. The one on the back of the Apillar was probably from welding the front part of the cage out of the car and when we put it back in the bar left a larger gap than when we first fit the bar.

Ray was able to fill the one on the FC by building the weld up. 4340 steel is very hard and you have to watch over heating it so it takes awhile to do this since you fill it, let it cool then make another pass. You can see the large gap in this pic after we raised the body
1210221211_HDR.jpg

Here it is welded up, along with the finished roof bars and gussets.
1217221402_HDR.jpg

The gap on the back of the Apillar bar was worse and we had to get a little more creative to fix. I made a really small wedge and was able to fit almost perfectly into the gap. Ray was able to lay two welds down to fill it in after that.

20221212_142022.jpg
The repair
1218221349_HDR.jpg

So in my previous post I showed a bunch of tools I bought to try and make this job easier and we ended up using some of them. The Furick #8 glass cup wiht stubby gas lens was a sure winner, the glass brightens everything up so you can see better, the gas coverage is excellent even when you have to stick the tungsten way out there.

Ray didn't use the trigger, mostly because he is just so used to the foot pedal at this point the finger trigger just has a steeper learning curve to get used to. I like it a lot though and plan to use it more often. We haven't tried the flexible tungsten yet as we were able to get the body plenty high enough to get to the cage feet. There are a few dash bars we may need it for though.

The clear winner in tools for the job was actually a pair of welding goggles I bought on Amazon from Yeswelder. I spent a bunch of $$ on the Optrel welding helmet but when in the car there simply isn't enough room for it and you to be able to see. They come with a face shield which got chucked for the same reason the helmet did. They work pretty well over all though and price was right
51UhTp-RC0L._AC_SL1200_.jpg

When I took the car down to Ray's we discussed getting it back to my place and done after the holiday's. But when Ray gets rolling on a project he will work on it either till its done or he drops literally. The guy wont even stop to eat. I left him Saturday at 4pm after we finished fitting and tacking up all the roof bars and the only thing remaining to do was welding. He told me he was going to clean up and probably grad dinner with his wife and he was going to take a break on Sunday. He calls me at noon on Sunday and says he needs help with the car. I run down to his shop and he almost all the welding done he is still in the same close he had on Saturday and his face is totally sun-burnt with goggle eyes from all the welding with out a face shield or sunscreen! So on Sunday we wrapped it up and put the rear down bars in from the main hoop through the rear speaker deck to the coil over x-member on the frame and we set the body back down on the frame for which will probably be the last time.

1217221403_HDR.jpg
1218221348_HDR.jpg
It was a nice feeling, the hard work is done! We have a few welds up top to finish that can be done with the body back down. It will be moving back to my house for the the door diagonals, outside FC bar, kidney bar and dash bar gussets and the 25.3 roll cage will be ready for inspection. The remaining bars are pretty straight forward and going to be WAY easier to weld. I am also adding some additional bars in the back for the parachute mount and to strengthen the rear structure. We decided to not add the forward clip bars in the engine compartment. Mostly since this is going to be a drag-n-drive street car and I want to retain the windshield wipers which the one bar would run right through the wiper motor mount.
1218221532.jpg

1218221712.jpg1218221818_HDR.jpg
 

zmotorsports

ALLIANCE MEMBER
Joined
Oct 20, 2009
Messages
21,427
Location
Northern Utah
Those welding goggles have their place. I have one of the Miller welding masks with the goggles and they definitely have an advantage in some situations as far as getting into tight places where a helmet just simply won't fit or turning of the head doesn't keep the helmet on one's head.
 
To avoid these ads, REGISTER NOW!
Top Bottom