How did you do your batt insulation installation in the open shop area? Did you put some framing in there every 24" or so? ... or just **** the batts up to each other without extra framing, vapor barrier and then tin over top?
I'm about to start insulating my shed, so I'm curious. I have a lot of area to cover 60x68x16.
Great question....I kicked around the insulation question for a very long time. I was considering spray foam (too expensive), blowing in like you would do in the ceiling after I had the walls up (got talked out of that by insulation people for some reason), framing it out completely on 16" centers and insulating like you would a house....etc, etc,...
I had a buddy frame out his building on 16" centers and we insulated it....and I knew there had to be a better way....I hated the idea of having to frame out a pole structure.....takes the whole idea of post frame construction and sets it back 50 years.
So I started looking at ways that I could "hang" insulation and then grit the interior walls, exactly like they do the exterior walls....
I'm on 9' centers....and wanted to buy 9' wide insulation. Guess what?? Nobody sells it....except Morton. And they aren't too excited to sell it to someone who didn't put up a Morton building....and it's expensive.
Local insulation places could get me 4' or 5' wide rolls.....again...very damn expensive!!!
So I walked into Menards when insulation was on sale, and looked for the widest roll I could get, and started buying.
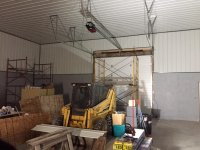
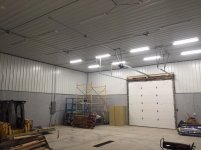
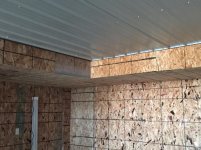
Was worried about hanging it and having the weight of 16' lengths pulling it down. Fabbed up a system of hanging a 2x4 at the top, and at 8' off the ground. Then ripped 1/4 plywood, and screwed the plywood to the 2x4's to "pinch" the insulation. Gave me good "bite" to hold the insulation.
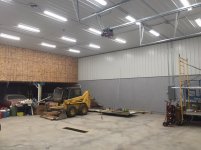
After that...simply gritted the walls every 2 ft from floor to ceiling. Easy, cheap, and I wouldn't do it any other way. Probably did it in a 1/4 of the time that we did my friends building.
Only fear is hanging heavy stuff on the grits. Going to have to be strategic on that, and shoot for the 9' centers when hanging the real heavy stuff.
I did, however, go with 3/4 OSB to provide more support to the walls for hanging purposes.
After having them up....I have no more fears. Love it.
We shall see once some items start getting hung!

")