To avoid these ads, REGISTER NOW!

Anyone good with fiberglass?

To avoid these ads, REGISTER NOW!
OP
T

tegguy

Well-known member
Joined
Jan 10, 2012
Messages
326
Looks pretty good. Before you go smoothing it out, trim the edges and test fit the box.

Yeah once it's cured I plan to test fit and then trim off the sides and everything. I am really happy with the shape
 
OP
T

tegguy

Well-known member
Joined
Jan 10, 2012
Messages
326
It wasn't too bad it was nice having 3-4 people the whole time it helped for stretching the fleece and also had a nice little process. I ran out of resin and had to buy more I ended up using over a gallon and a half (I dunno if thats too much or not). I had a few tough spots that took some work and I'm going to have to figure out how to clean up the sides but that shouldn't be too bad. I just checked on the box and and it's still a little tacky but it's really solid.

Fyi I dislike the 3M resin it didn't work as well as the other stuff I had.

Any advice for what tool to use for cutting out the fiber glass from the subwoofer area?
 

Tribalvision

Well-known member
Joined
Jan 2, 2012
Messages
610
Location
Bensalem Pa
Drill a hole where the ring was cut out and use a router and flush cut bit with the bearing and run it right around the circle

Sent from my <~ Galaxy SII ~€
 
OP
T

tegguy

Well-known member
Joined
Jan 10, 2012
Messages
326
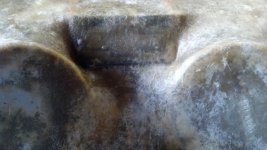
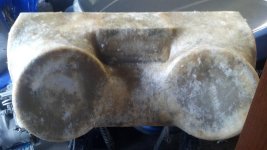
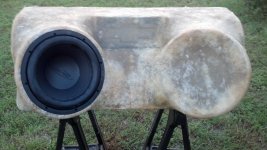
Well I checked on the box today and the resin cured. I think it came out pretty good with only a couple small bubbles. Now I just need to figure out how to cut off the extra on the side and bottom without damaging the box (I'm thinking sanding will work) I also need to figure out how to cut out my logo area since the flush cut bit bearing is too thick. Here are a couple pics of the box as of today.
 

Attachments

  • 2012-10-08_16-05-24_285.jpg
    2012-10-08_16-05-24_285.jpg
    140.9 KB · Views: 43
  • 2012-10-08_16-05-17_914.jpg
    2012-10-08_16-05-17_914.jpg
    144.1 KB · Views: 34
  • 2012-10-08_16-05-11_55.jpg
    2012-10-08_16-05-11_55.jpg
    146 KB · Views: 31
  • 2012-10-08_16-05-07_4.jpg
    2012-10-08_16-05-07_4.jpg
    137.4 KB · Views: 28
  • 2012-10-08_16-05-00_647.jpg
    2012-10-08_16-05-00_647.jpg
    141 KB · Views: 38
  • 2012-10-08_16-04-58_643.jpg
    2012-10-08_16-04-58_643.jpg
    144.4 KB · Views: 33
  • 2012-10-08_16-04-57_592.jpg
    2012-10-08_16-04-57_592.jpg
    140.8 KB · Views: 30
Last edited:

Tribalvision

Well-known member
Joined
Jan 2, 2012
Messages
610
Location
Bensalem Pa
the extra on the sides and bottom I usually sand off with a 36 grit beltsander. for the logo, you can use a jig saw and get close, then sand. or use a dremel or rotozip and take your time.
 
OP
T

tegguy

Well-known member
Joined
Jan 10, 2012
Messages
326
The jigsaw is too deep and might damage the bottom panel. I am thinking I am going to have to use a cut off wheel and be careful. I have about 1/8 to 1/4 inch between the fiberglass and the bottom panel

Also I fixed the above pics
 

03protege

Well-known member
Joined
Sep 13, 2012
Messages
3,104
Location
Louisiana
I think I would give it at least one more medium coat of resin.

Are you thinking it doesn't look saturated enough? Between the two speaker rings it looks kind of light to me.

Also before sanding I found it helpful to spread on a thin layer of resin that has been dyed (I use black) and after you sand it makes it really easy for you to tell your low spots than need to be built up.
 

Tribalvision

Well-known member
Joined
Jan 2, 2012
Messages
610
Location
Bensalem Pa
If you just coat it with resin it may cure but will feel sticky. Mat and cloth are treated with wax which well allow the resin to cure hard/smooth. They sell a wax additive you can add so it cures without being sticky

Sent from my <~ Galaxy SII ~€
 
OP
T

tegguy

Well-known member
Joined
Jan 10, 2012
Messages
326
If you just coat it with resin it may cure but will feel sticky. Mat and cloth are treated with wax which well allow the resin to cure hard/smooth. They sell a wax additive you can add so it cures without being sticky

Sent from my <~ Galaxy SII ~€

Do you think there is a need to coat it?
 

Tribalvision

Well-known member
Joined
Jan 2, 2012
Messages
610
Location
Bensalem Pa
Its hard to tell from the photos. It looks like the Mat is dry just inside the speaker on the right. At this point coating will not change anything because the resin is cured. If it feels sloppy in that area, just grind it out some and add another later or 2 to the area.
Feel for air pockets.if present, grind and repair. You want a solid box.

Sent from my <~ Galaxy SII ~€
 
OP
T

tegguy

Well-known member
Joined
Jan 10, 2012
Messages
326
Its hard to tell from the photos. It looks like the Mat is dry just inside the speaker on the right. At this point coating will not change anything because the resin is cured. If it feels sloppy in that area, just grind it out some and add another later or 2 to the area.
Feel for air pockets.if present, grind and repair. You want a solid box.

Sent from my <~ Galaxy SII ~€

The I wasn't worried about inside the speaker area since it will be cut out anyways. I have a couple small pockets but they were is non structural areas. I'm going to attempt to cut off the extra on the edges today and start some preliminary sanding after checking the subs fitment.
 

Tribalvision

Well-known member
Joined
Jan 2, 2012
Messages
610
Location
Bensalem Pa
Not where the speaker is, just to the left of it where it slopes down towards the center. If is loose it will vibrate and crack

Sent from my <~ Galaxy SII ~€
 
OP
T

tegguy

Well-known member
Joined
Jan 10, 2012
Messages
326
Not where the speaker is, just to the left of it where it slopes down towards the center. If is loose it will vibrate and crack

Sent from my <~ Galaxy SII ~€

Oh ya I saw that I'm debating if I want to sand it down a little to get a look at it and add a couple more layers on it or not.

I guess here is a good question. I was worried about leaving my box outside due to condensation and rain but I wanted the fiberglass to cure good and the fumes were a little much for keeping it inside. What would you recommend for a place to let it dry?
 

Tribalvision

Well-known member
Joined
Jan 2, 2012
Messages
610
Location
Bensalem Pa
Leave it anywhere it won't get wet. I'm not worried about the fiberglass.I'm worried about the MDF. If that gets wet it will be junk.

Sent from my <~ Galaxy SII ~€
 
OP
T

tegguy

Well-known member
Joined
Jan 10, 2012
Messages
326
I suppose if I add more I can leave it off the ground under a tarp or something in case it rains. In your honest opinion do you think I need to add more fiberglass and resin?
 
To avoid these ads, REGISTER NOW!
OP
T

tegguy

Well-known member
Joined
Jan 10, 2012
Messages
326
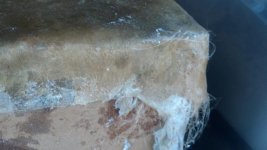
Well I started cleaning it up a little bit. Everything looks good but I'm not 100% sure on the adhesion at the top of the box. The edge looks good but where it wraps around when it goes down I'm not sure of the adhesion. It's adhered but I'm not sure how far down whats the best way to deal with this?

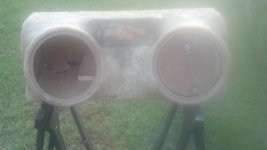
I cut one speaker out to check my fitment of the subs and took a look at the inside. I have a couple minor spots where the fleece didn't get 100% saturated but saturated by 99.5%. Here is a picture with a sub installed looks pretty good.
 

Attachments

  • 2012-10-11_18-46-58_840.jpg
    2012-10-11_18-46-58_840.jpg
    148.2 KB · Views: 95

Tribalvision

Well-known member
Joined
Jan 2, 2012
Messages
610
Location
Bensalem Pa
First off I'll say that you've selected some very nice subs... I've heard them before and in the correct box, they sound very good. I used to run 3 Arc Audio amps on my front stage in my previous install in my Tahoe. a 2050 CXL on my horns, a 2100CXL on my 5.25's and a 2100CXL on my 6.5" midbass drivers. They were so nice, I kept them after removing my install. I will use them in something else..

Anyhow, can you take a few photos of the lack of adhesion at the top of the box so we can get an idea of what is going on there??
 
OP
T

tegguy

Well-known member
Joined
Jan 10, 2012
Messages
326
I'll take some photos tomorrow and show you what I'm talking about.

Also thanks I've never heard any parts of my system before I wanted to try something different and new it's components are below
Alpine CDA-9886 Head Unit
Audison BitONE
Arc Audio Black 12 subs
Arc Audio KS1200.1
Arc Audio KS300.4
Hybrid Audio Technologies (HAT) fronts and rears
 

Tribalvision

Well-known member
Joined
Jan 2, 2012
Messages
610
Location
Bensalem Pa
Arc Audio were the amplifiers used by Matt Borghart from Image Dynamics when he won a couple World Championships in sound quality.. Very good equipment. It should sound great. The only downfall is the subs will be in the trunk. If I were you, I'd totally remove the rear speakers and let the bass come thru the rear deck into the cabin. It will improve the output. You dont need a rear stage anyway... but that's just my opinion
 
OP
T

tegguy

Well-known member
Joined
Jan 10, 2012
Messages
326
I'm not looking for award wining. I am looking for something that sounds good/decent and can overpower the exhaust if I wish to. This is going into my 1972 Chevelle
 
OP
T

tegguy

Well-known member
Joined
Jan 10, 2012
Messages
326
I'll have to double check the alternator but everything is brand new. I bought the car of a restoration shop owner who was building it for himself.
 

Tribalvision

Well-known member
Joined
Jan 2, 2012
Messages
610
Location
Bensalem Pa
you need a larger alternator designed for higher output. With 3 amplifiers, it's only a matter of time until the stock one smokes. I recommend a 180-220 amp alternator and upgrade the Big 3...
 
OP
T

tegguy

Well-known member
Joined
Jan 10, 2012
Messages
326
you need a larger alternator designed for higher output. With 3 amplifiers, it's only a matter of time until the stock one smokes. I recommend a 180-220 amp alternator and upgrade the Big 3...

It's only 2 amps but ya I know what your saying. By Big 3 do you mean battery, alternator and wiring?
 

Tribalvision

Well-known member
Joined
Jan 2, 2012
Messages
610
Location
Bensalem Pa
yes, the big 3 is the underhood wiring. positive to starter, positive to alternator, alternator to ground. I used 1/0, but I'm drawing alot of current. You can probably use 4gauge and be fine. You can get it in nice colors to compliment your engine compartment. I also upgrade the engine and battery to chassis grounds too
 
OP
T

tegguy

Well-known member
Joined
Jan 10, 2012
Messages
326
yes, the big 3 is the underhood wiring. positive to starter, positive to alternator, alternator to ground. I used 1/0, but I'm drawing alot of current. You can probably use 4gauge and be fine. You can get it in nice colors to compliment your engine compartment. I also upgrade the engine and battery to chassis grounds too

My battery is in the trunk actually. I have 4 gauge for everything to include the amp wiring, alternator, and starter.
 
OP
T

tegguy

Well-known member
Joined
Jan 10, 2012
Messages
326
As promised here are the photos of the back (top) looking at it today I think it's good I just need to do some more cleanup work on it. Let me know what you guys think.
 

Attachments

  • 2012-10-12_16-53-15_771.jpg
    2012-10-12_16-53-15_771.jpg
    149.4 KB · Views: 49
  • 2012-10-12_16-52-57_669.jpg
    2012-10-12_16-52-57_669.jpg
    140.7 KB · Views: 39
  • 2012-10-12_16-52-50_861.jpg
    2012-10-12_16-52-50_861.jpg
    143.6 KB · Views: 37
  • 2012-10-12_16-52-39_945.jpg
    2012-10-12_16-52-39_945.jpg
    147.6 KB · Views: 34

Tribalvision

Well-known member
Joined
Jan 2, 2012
Messages
610
Location
Bensalem Pa
since this part of the box will not be visible, I would just trim it up with a dremel, Just cut off the loose stuff. Then glue down some black felt and use a straight edge and a good razor/knife and trim the felt in a nice clean line..
 
OP
T

tegguy

Well-known member
Joined
Jan 10, 2012
Messages
326
OK that's what I was planning to do cut the excess with my cutoff wheel and cover the sides and back with carpet
 

03protege

Well-known member
Joined
Sep 13, 2012
Messages
3,104
Location
Louisiana
If you are really worried about the seal/strength of that top back edge you can add a layer of mat to the inside.
 
OP
T

tegguy

Well-known member
Joined
Jan 10, 2012
Messages
326
Little more progress today sorry for the horrible pics but basically I cut out the logo area.
 

Attachments

  • 2012-10-15_18-06-37_826.jpg
    2012-10-15_18-06-37_826.jpg
    144.4 KB · Views: 51
  • 2012-10-15_18-06-43_570.jpg
    2012-10-15_18-06-43_570.jpg
    142.7 KB · Views: 43
To avoid these ads, REGISTER NOW!
Top Bottom