OP
JMLangford
Well-known member
I've been doing all this other tool polishing that I've been neglecting my table saw's top....
The left hand side is looking a bit rough from it being "touched" whenever I pass by since it's in the pathway to my workbench, etc.....so it's time to polish it
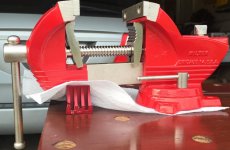
The BEFORE pics....


Broke out the ole Porter Cable 333 random orbiter sander and started with a 80 grit pad.....

Sanding up to the edge of the laminated top to the right.....I don't have to worry about the outfeed table because it's mounted about a 32nd to a 1/16" below the saw top....

Used the 3M pad") to clean up the front bevel of the table (and a few of the rougher spots on the top).....
to clean up the front bevel of the table (and a few of the rougher spots on the top).....

.
The left hand side is looking a bit rough from it being "touched" whenever I pass by since it's in the pathway to my workbench, etc.....so it's time to polish it
The BEFORE pics....
Broke out the ole Porter Cable 333 random orbiter sander and started with a 80 grit pad.....
Sanding up to the edge of the laminated top to the right.....I don't have to worry about the outfeed table because it's mounted about a 32nd to a 1/16" below the saw top....
Used the 3M pad
to clean up the front bevel of the table (and a few of the rougher spots on the top)......
Last edited:


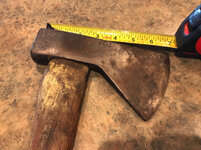


 Nice job on the axe!!!


 ) and came out to the shop to check on me....
 she found me on the floor in the corner.....shaking uncontrollably.....sweating profusely.....tightly clutching the little 4" adjustable wrench.....mumbling "must make shiney"..."must make shiney"....