Old Bill
Well-known member
I am simply amazed at the large number of very talented people that are on this Forum. I am learning a lot. Thank you.


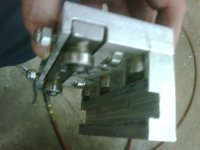
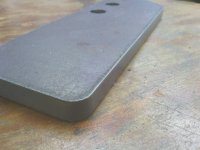
There is times when its easier to hold small parts for finish grinding by hand.....yeah I know...buy pedestal grinder, but im a cheap *******
Some Gantrys I built to lift bodies off the frame and put on a rotisserie.
Work great and come apart for storing.
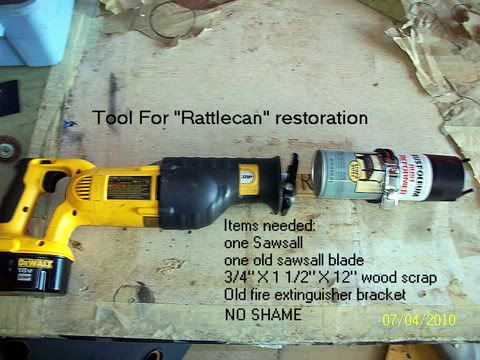
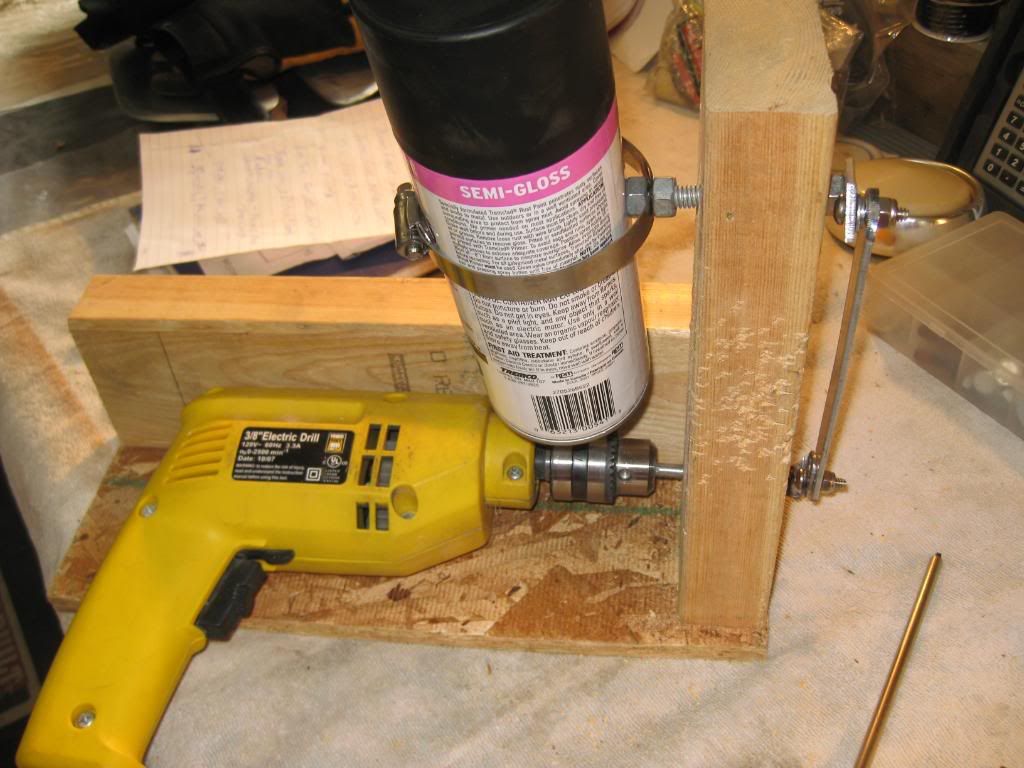
my version of the paint shaker theme
Anyone get tired of shaking a rattle can.......?
")


For those that saw this on the HAMB, sorry for the repost.
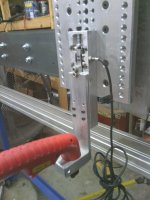
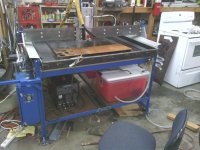
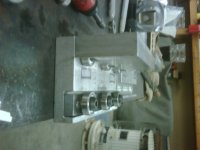
I had been planning a homemade belt grinder and found many cool things all over the interwebs.
I had wanted a belt grinder for a while, but didn't want to spend $500 right now, so I built this one for about $35 which was mostly in the electrical. The contact is an old industrial caster bushed to a 3/4" shaft and cut true in place on the machine OD is about 5 1/2". The motor is 1.5 HP, 3600rpm and could stand to be bigger. It is overdriven at about 4000rpm giving slightly less than 5000fpm belt speed. It will eat metal as fast as you want and cuts cool without belt loading.
I don't know why I didn't build one sooner, I only had about a day in building it. Currently I am building another 2X48 that will direct mount to a C-face motor and a 3X79 7000fpm machine for heavy stock removal and weld prep.
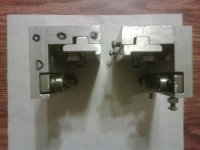
I got the contact wheel from a friend's junk stash. It was a rubber caster wheel in its former life. It had a light duty roller bearing pressed in the aluminium hub; I removed the bearing and turned a set of steel bushing to a light press into the hub. It is fixed on the shaft by a 3/4-10 thread I cut and a large nut faced square. The sholder is a piece of DOM tube bored for a tight fit on the shaft and secured with two grub screws run into divits. The rubber on the wheel is vitrified on as the wheel was made, it is about 70-80 durometer rubber, just right for direct grinding. It is holding up just fine and I see no signs of rubber seperation or face damage.
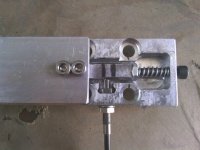
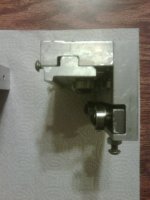
The lower portion of the frame is from a scientific positioning two axis stage I disassembled. It is nice and heavy and was blanchard ground all over. It is an assembly of three pieces, just a junk bin find. The tracking parts came from other pieces of the stage as well with a little modification.
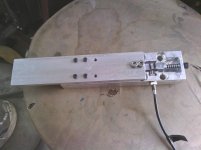
The upper wheel was turned from 3" solid aluminium and bored for two double row ball bearings. The face is cut to a crown of about 2.5 degrees on each side with a 1/4" land in the center. Belt tracking looks off in the picture, but the belt had just been put on, not run, it tracks great.
The tensioner arm in bar stock pivoting on a 3/4" shoulder bolt. The bolt goes through a bored piece of DOM tube welded in the upright. There is a brass grub srew in the nut so the tightness can be fine tuned and locked down.
I built this whole thing without a milling machine, as my Bridgeport is not currently set up. The only machines I used were my South Bend 9" lathe, a drill press, and a metal cutting bandsaw.
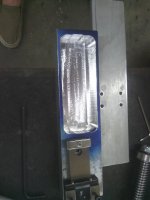
And how it sits now, all painted up.
Sorry for long post, but I just wanted to condense all the information I gleaned before doing this project, so as to maybe help someone else along.
Greyson
Nice Job, I'd love to throw together a 1-2" belt sander, but I don't know if I'd use it enough to justify the time spend on building one. What do you use it for other than what a could be done with a 4" belt?
This thing is NOT a belt sander. It goes way faster than what you'd think if you've never used a belt grinder. Wood instantly burns when touched to the belt. It is a metal removal tool!
Anything you would have ground on your bench grinder, this will do faster, cleaner, and cooler. Belt change is only 2 seconds to change to whatever grit you want. High quality belts are only $2-4 each.
I am building a 3 X 79 grinder for big jobs. The 2 X 48 is a really nice size for average use, especially when compared to the average 1/2 - 3/4" wide grinding wheel.
Greyson
 Might have to put it on my to do list.......
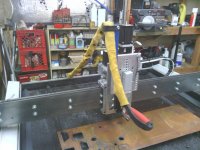
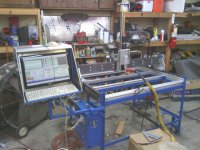
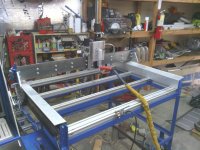

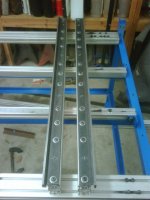
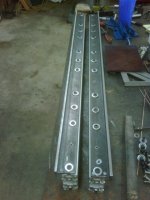
various shots of my 49x36 cnc plasma table designed and built by myself..
What operating software are you using?
I have been looking at doing a 4' x 8' table as a project and was looking at Mach 3 to controll it.
Greyson
various shots of my 49x36 cnc plasma table completely designed and built myself..
The some pics are of a 1/4" bracket I cut, square within .002 and holes were within .007
last picture is latest I have of the table..
I do have a video of its very first test cut.. since then I've added water table, thc and upgraded the plasma cutter.
Some Gantrys I built to lift bodies off the frame and put on a rotisserie.
Work great and come apart for storing.
various shots of my 49x36 cnc plasma table completely designed and built myself..
The some pics are of a 1/4" bracket I cut, square within .002 and holes were within .007
last picture is latest I have of the table..
I do have a video of its very first test cut.. since then I've added water table, thc and upgraded the plasma cutter.
<iframe src="//www.youtube.com/embed/oRtVtRYnUig" allowfullscreen="" frameborder="0" height="315" width="420"></iframe>
Mach3. I used Mach3 because I wanted to use windows as all the drawing software I have is windows based.. I use one computer for both drawing and controlling the machine in the garage..
If i were going to use two computers, one computer for machine control and a separate computer for drawing I would use Linux Ubuntu/emc2 and have a separate computer for drawing and file storage, just because emc2 is free, if your not worried about the $175 for mach3 get mach3 as they have great support..
brucer
I really like that, just a question or two, what source did you use for parts, as in rails, step motors, and torch holder.
Well done


Oh to have an engineering degree. Very impressive


My 6x48 belt sander/ Pnumatic drum sander.
View media item 35092
I have been recycling scrap for many years, In the old days we would just fill a drum with insulated copper wire add diesel fuel and throw in a match to remove the insulation.
Our local yard won't take burned wire anymore (actually for quite a few years) So stripping wire and cable has become a chore and at times just not worth the effort.
This is an issue that I have been thinking about for awhile and now I have a solution. Started with a scrap of alum and came up with this.


The blade pins are guide pins from old DVD/CD drives ground to shape and finished on my triple stone.
I have to make a few more so the kids can help me as we have several hundred pounds of wire/cable to strip. very easy to do while watching the tube.
If you are wondering if it is worth it, Hells yeah, insulated #2 copper $0.90 stripped $2.65


That is one of the best tool designs I have ever seen created entirely (or mostly) out of wood. Very nice job!
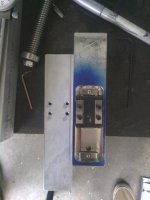
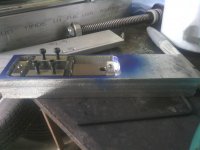
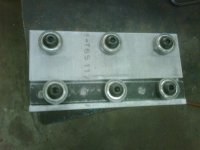
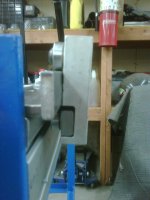
any info on this benderMy flat steel roller.
View media item 34831
any info on this bender
You should make a build tutorial. I look for projos just like this to keep me busy. Nice job 1/2 Cup.
I am impressed. Is there a build thread or do you care to share more photos of how you made it?
That is one of the best tool designs I have ever seen created entirely (or mostly) out of wood. Very nice job!