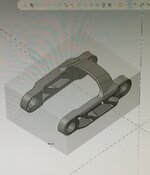
First shot at the custom linkage didn't go well. First op went good then second op went horribly
Ended up crashing my brand new sandvik body and tip into the vise and both are shot. So pissed at myself
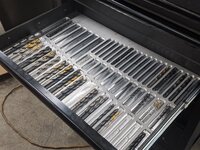
The one good news is I got some really good deals on some new sandvik tools off eBay. Will be on this week. Got a a couple thousand bucks worth of stuff for a couple hundred so very stoked on that.
The linkage is going thru a new makeover as we realized we needed to make some changes anyways


Sent from my Pixel 3 XL using Tapatalk

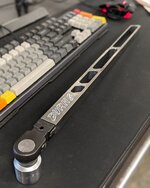
Nice work for sure. If you don't mind a little bit of criticism.....instead of going from front to back on the bridge and going up and over, reprogram the bridge and go from one side over top to the other side using a 1/4" ball nose at .010 passes at high speed and feed. It will leave you with a way smoother surface. And on some of your other parts where your end mill is leaving surface marks, you can use flycutters. Get a set of three, small, medium, and large. Take a stone and put a slight radius on the tip of the cutter. Never use a 0.000 radius cutter, but just break the tip with the stone. Set the diameter of the tool you need on a comparator to cut the most surface you can. On your part leave about .005-.010 surface area to clean up. It will make a primo looking part, guaranteed. I've been a tool & die maker for over 30 years. One thing I found out is that the better a part looks, the more satisfied a customer will be. Again, I'm not busting your balls. You do great work, just refine it a little bit. It will make you stand out among others.

One other thing.....always tru to do your machining where you don't have to vise up something that can spring and move. I see that you have an adjustable screw jack between your side bars in the vise, but not on the other side. Even the short side that you think won't flex, will flex. Of everyone that I have ever trained, I have always told them to become one with the metal. Learn what it will do when it heats up, when it cools down.....understand it. Even a 1" carbide endmill will flex and pull metal. Always leave a .005-.010 finish cut. And if your aluminum is warm, let it cool before the finish cut. Always keep in your mind that you have to work in tenths instead of thousands and you will turn out great parts every time. Practice things that way, and after a few parts, it won't take any longer than the way you're doing it now, and most times will take a shorter cycle time. Learn the metal, learn the cutter characteristics in your mind, and learn the speeds and feeds. With aluminum, instead of hogging a lot of your features, you can speed up the cutter, take smaller bites, and jump up your feed to balance out.