
You are using an out of date browser. It may not display this or other websites correctly.
You should upgrade or use an alternative browser.
You should upgrade or use an alternative browser.
CBacres ex horse barn shop
- Thread starter cbacres
- Start date
Here’s what I’ve been up to.
A friend informed me of a shop closing and this bridge crane needed to go.
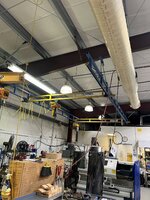
No way to use in my current shop but with the near future expansion, it’ll be a perfect fit. I’ll need to fabricate columns and cross beams to convert to a floor mount.
My son helped with taking down.
The yellow bridges are 14’ wide, the main runners (blue) are 30’ long.
We just slid the bridges off the runners onto the forks .
We placed forklift at center of runners, c clamped to forks and also used ratchet straps to secure.
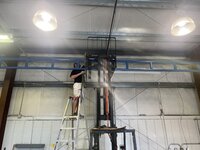
Raised forks to put a little tension on the runner, I stayed on lift, Son unbolted each end.
With supports removed, lowered runner to make sure it was balanced on lift, it rode perfectly down.
Safely on the floor!

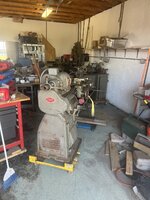
A less cluttered view after shop machines removed.

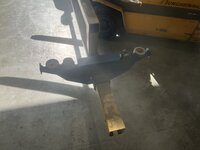
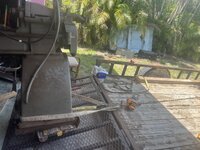
These are the carriers the bridges ride on in the runners.
All loaded up.
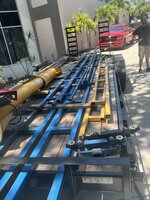
Never thought I’d have a bridge crane setup, now to just get the building up.
It’s only 500 lb capacity, but it’ll cover the majority of stuff I’m messing with. I desperately need to give my back relief after 45 years of abuse. Ironically, I’m writing this sitting on the couch nursing a bad back sprain from yesterday, I really need to quit while I’m somewhat ahead!
The electric hoists that came with it are three phase, was planning on selling and get a single phase. But I discovered one of the hoists is variable speed, and when I was playing with while still hooked up, it is a sweet little lift. After some discussion with Chris and Mac, I’m going to use a VFD inverter to run.
A friend informed me of a shop closing and this bridge crane needed to go.
No way to use in my current shop but with the near future expansion, it’ll be a perfect fit. I’ll need to fabricate columns and cross beams to convert to a floor mount.
My son helped with taking down.
The yellow bridges are 14’ wide, the main runners (blue) are 30’ long.
We just slid the bridges off the runners onto the forks .
We placed forklift at center of runners, c clamped to forks and also used ratchet straps to secure.
Raised forks to put a little tension on the runner, I stayed on lift, Son unbolted each end.
With supports removed, lowered runner to make sure it was balanced on lift, it rode perfectly down.
Safely on the floor!
A less cluttered view after shop machines removed.
These are the carriers the bridges ride on in the runners.
All loaded up.
Never thought I’d have a bridge crane setup, now to just get the building up.
It’s only 500 lb capacity, but it’ll cover the majority of stuff I’m messing with. I desperately need to give my back relief after 45 years of abuse. Ironically, I’m writing this sitting on the couch nursing a bad back sprain from yesterday, I really need to quit while I’m somewhat ahead!
The electric hoists that came with it are three phase, was planning on selling and get a single phase. But I discovered one of the hoists is variable speed, and when I was playing with while still hooked up, it is a sweet little lift. After some discussion with Chris and Mac, I’m going to use a VFD inverter to run.
Wow, can’t believe this much time since I updated.
I’m going back to May, showing a new lathe for the shop. Came across a 13” South Bend lathe for a great price. I suspected the motor was toast as the lower part of the lathe had signs of being submerged. Everything moved nicely and didn’t seem to be much play if any. And there was oil dripping from all the top parts, so that gave my a lot of confidence on the condition.
I went to look over, made my deal and paid for it. Went back with the trailer and rigging to get it loaded.
So I loaded by myself, done this a few times, except I didn’t take into account this lathe was an easy 500 lbs heavier than the others I loaded. I had my floor jack to raise lathe so I could get the caster dolly under, at least I did the heavy end first as my floor jack gave out, it’s OK had the chain hoist and the garage had open trusses.
I have a strap winch on the trailer, rigged it up and started cranking, got half way up ramp and strap breaks. Rig up the chain hoist and carry on, the the caster dolly is bending pretty good, but still sound enough to keep going even though lathe just goes where it wants to. The reason I brought the 6’ Johnson bar is to convince lathe to go where I want it, and it did.
It took a bit, but finally got it up on trailer. Took a couple breaks, lady doing the sale brought me water a few times, I must of looked rough.
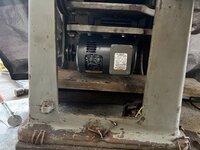
So the motors was beyond toast, sourced a new Baldor 3 phase off EBay.
I got caught up looking at different motors and lost track of making sure I bought the proper frame size, I didn’t , so it took a little additional layout, drilling and tapping on the motor base plate.
Got everything together, hooked up an inverter for the 3 past and it runs pretty nice. I had to put any other lathe work on the back burner as my other list was yelling at me.
Going to build caster mounts to make it easy to move around.
Ill update as more happens there.
I did sell off two other lathes I had, so shop floor is improving!
I’m going back to May, showing a new lathe for the shop. Came across a 13” South Bend lathe for a great price. I suspected the motor was toast as the lower part of the lathe had signs of being submerged. Everything moved nicely and didn’t seem to be much play if any. And there was oil dripping from all the top parts, so that gave my a lot of confidence on the condition.
I went to look over, made my deal and paid for it. Went back with the trailer and rigging to get it loaded.
So I loaded by myself, done this a few times, except I didn’t take into account this lathe was an easy 500 lbs heavier than the others I loaded. I had my floor jack to raise lathe so I could get the caster dolly under, at least I did the heavy end first as my floor jack gave out, it’s OK had the chain hoist and the garage had open trusses.
I have a strap winch on the trailer, rigged it up and started cranking, got half way up ramp and strap breaks. Rig up the chain hoist and carry on, the the caster dolly is bending pretty good, but still sound enough to keep going even though lathe just goes where it wants to. The reason I brought the 6’ Johnson bar is to convince lathe to go where I want it, and it did.
It took a bit, but finally got it up on trailer. Took a couple breaks, lady doing the sale brought me water a few times, I must of looked rough.
So the motors was beyond toast, sourced a new Baldor 3 phase off EBay.
I got caught up looking at different motors and lost track of making sure I bought the proper frame size, I didn’t , so it took a little additional layout, drilling and tapping on the motor base plate.
Got everything together, hooked up an inverter for the 3 past and it runs pretty nice. I had to put any other lathe work on the back burner as my other list was yelling at me.
Going to build caster mounts to make it easy to move around.
Ill update as more happens there.
I did sell off two other lathes I had, so shop floor is improving!
Attachments
-
 F8E9517D-D024-47CA-AC11-1D3C51BE9EDA.jpeg786.3 KB · Views: 26
 -
 C118D13F-2E9D-47E0-98E9-D637817EEB35.jpeg966.2 KB · Views: 23
 -
 62D626E2-9181-4365-8D3B-D1D4CF512CE0.jpeg804 KB · Views: 24
 -
 2D7564E7-5D9C-4D5A-8233-2D64721DF6B7.jpeg777.2 KB · Views: 24
 -
 3110C098-C250-4060-AAEF-8505CE717505.jpeg865.2 KB · Views: 25
 -
 361FFD6C-C25E-40B1-8069-587203921378.jpeg1 MB · Views: 29
 -
 5E73FE87-7B32-4D0F-B1F3-F5CE051B6DC3.jpeg651.7 KB · Views: 35
Another project I finally got around to is a wall mounted material rack. I had some galvanized heavy c channel and angle iron, the channels made good uprights and the angles were used for shelves.
I put the mag drill to work drilling a series of bolt holes in the channels. The angles I trimmed to size and drilled holes to match the channels.
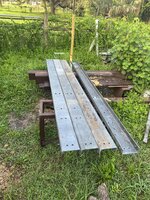

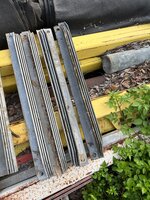
Drill, drill and drill some more!
In place, there is one bolt though the wall. The bases support all the weight, the through bolt just steadies each upright.
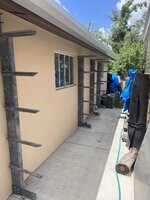
Just need to finish moving my steel boneyard to the rack.
I put the mag drill to work drilling a series of bolt holes in the channels. The angles I trimmed to size and drilled holes to match the channels.
Drill, drill and drill some more!
In place, there is one bolt though the wall. The bases support all the weight, the through bolt just steadies each upright.
Just need to finish moving my steel boneyard to the rack.
shortykorte
Well-known member
Welcome back. I thought you left the country 
Strouty
Well-known member
Nice looking rack, should be working at hooters.
The bridge crane will be a nice asset, I have one stacked in the bushes at my shop, same brand.
The bridge crane will be a nice asset, I have one stacked in the bushes at my shop, same brand.
rmack898
Well-known member
Funny how just posting next to a Shorty post and Hooters comes up. Hmmmmmm?Nice looking rack, should be working at hooters.
shortykorte
Well-known member

casmurbax
Well-known member
At first I thought was looking at this thread https://www.garagejournal.com/forum/threads/the-salvage-garage.362624/page-538 hard to keep up with everyone's storage racks and bridge cranes purchases.
it's like the north vs the south in what can I buy next.
it's like the north vs the south in what can I buy next.
shortykorte
Well-known member
Except for the vehicles, might just be the Southern Salvage Garage, a lot of good stuff.At first I thought was looking at this thread https://www.garagejournal.com/forum/threads/the-salvage-garage.362624/page-538 hard to keep up with everyone's storage racks and bridge cranes purchases.
it's like the north vs the south in what can I buy next.
Sold stickers seem to be a thing with me lately.
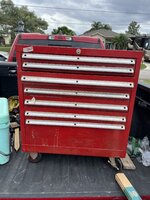
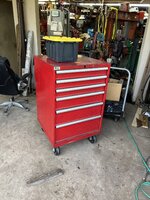

Picked up two Listas for the shop.
The first one was at an estate sale across the state, but for $50, why not?
The second one I came across while at Flywheelers, first time loading a Lista in the cart. Just left it in cart and loaded up on trailer to get it home.
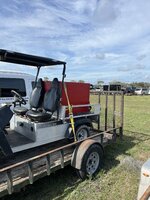
The first one had a good amount of the parts trays.

And thanks to Chris for stretching his back with me to get loaded into cart. Three old guys loading a 500lb plus cab in the cart, no injuries .
.
I’m sure these will find a spot in the shop expansion thats going to happen in the coming months.
Picked up two Listas for the shop.
The first one was at an estate sale across the state, but for $50, why not?
The second one I came across while at Flywheelers, first time loading a Lista in the cart. Just left it in cart and loaded up on trailer to get it home.
The first one had a good amount of the parts trays.
And thanks to Chris for stretching his back with me to get loaded into cart. Three old guys loading a 500lb plus cab in the cart, no injuries
.I’m sure these will find a spot in the shop expansion thats going to happen in the coming months.
Last edited:
rmack898
Well-known member
I'm about 3 weeks late in making this post but later is better than never.
After attending Flywheelers in February, I went further south and spent the night and next day at the ex horse barn shop.
I'm not sure where to start but let me say that I did what most of the Florida crew does when they visit another guy's shop........
I went through Craig's drawers, all of them and that's a lot of drawers. Just in the the ex horse barn shop, there are enough Vidmars (I'm going to just generically say Vidmars as for every Vidmar there is an equal number of Listas) to rival what Stroudy has stock piled away in Maine, I lost count. Next to the ex horse barn is a garage looking structure that I'm just going to call the CB annex.
The annex contains another large number of Vidmars and tool boxes, I went through about half the drawers in the annex and I just ran out of steam and had to rest and re-hydrate. Behind the ex horse barn shop are the stakes in the ground that mark out the new addition to the ex horse barn shop. I can only imagine what Craig will do with more space but I'm sure he has a plan for more Vidmars.
While going through Craig's drawers I saw a cool combination monkey/pipe wrench unlike anything I had ever seen before and told Craig how cool I thought it was and he didn't remember where or when he acquired it. Later in the day we actually got to make some chips with Craig's South Bend 13.
It was great to visit the ex horse barn shop and do a full inspection. A week after I got home, Craig called me to see if I found a rag in the back of my van that he may have left. When I got home I looked on the back of the van and found a rag that was wrapped around the cool pipe/monkey wrench that I fondled in Craig's drawers.
I so appreciate the hospitality, friendships, and generosity that GJ members are always so eager to share.
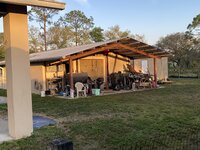
The ex horse barn and annex

The coolest wrench I've ever seen, thanks Craig.
After attending Flywheelers in February, I went further south and spent the night and next day at the ex horse barn shop.
I'm not sure where to start but let me say that I did what most of the Florida crew does when they visit another guy's shop........
I went through Craig's drawers, all of them and that's a lot of drawers. Just in the the ex horse barn shop, there are enough Vidmars (I'm going to just generically say Vidmars as for every Vidmar there is an equal number of Listas) to rival what Stroudy has stock piled away in Maine, I lost count. Next to the ex horse barn is a garage looking structure that I'm just going to call the CB annex.
The annex contains another large number of Vidmars and tool boxes, I went through about half the drawers in the annex and I just ran out of steam and had to rest and re-hydrate. Behind the ex horse barn shop are the stakes in the ground that mark out the new addition to the ex horse barn shop. I can only imagine what Craig will do with more space but I'm sure he has a plan for more Vidmars.
While going through Craig's drawers I saw a cool combination monkey/pipe wrench unlike anything I had ever seen before and told Craig how cool I thought it was and he didn't remember where or when he acquired it. Later in the day we actually got to make some chips with Craig's South Bend 13.
It was great to visit the ex horse barn shop and do a full inspection. A week after I got home, Craig called me to see if I found a rag in the back of my van that he may have left. When I got home I looked on the back of the van and found a rag that was wrapped around the cool pipe/monkey wrench that I fondled in Craig's drawers.
I so appreciate the hospitality, friendships, and generosity that GJ members are always so eager to share.
The ex horse barn and annex
The coolest wrench I've ever seen, thanks Craig.
Craptain
Well-known member
It really is a cool place and a cool guy. How many other people would let you dig through their drawers. 
I'm not sure about the rest of the hospitality though. It looks like he removed some of the beer drinking chairs. Hopefully just inside out of the weather. I've been there a couple or more times and every time I was welcomed.
I'm not sure about the rest of the hospitality though. It looks like he removed some of the beer drinking chairs. Hopefully just inside out of the weather. I've been there a couple or more times and every time I was welcomed.
Mac, glad you could make it by and thanks for the help on the lathe.I'm about 3 weeks late in making this post but later is better than never.
After attending Flywheelers in February, I went further south and spent the night and next day at the ex horse barn shop.
I'm not sure where to start but let me say that I did what most of the Florida crew does when they visit another guy's shop........
I went through Craig's drawers, all of them and that's a lot of drawers. Just in the the ex horse barn shop, there are enough Vidmars (I'm going to just generically say Vidmars as for every Vidmar there is an equal number of Listas) to rival what Stroudy has stock piled away in Maine, I lost count. Next to the ex horse barn is a garage looking structure that I'm just going to call the CB annex.
The annex contains another large number of Vidmars and tool boxes, I went through about half the drawers in the annex and I just ran out of steam and had to rest and re-hydrate. Behind the ex horse barn shop are the stakes in the ground that mark out the new addition to the ex horse barn shop. I can only imagine what Craig will do with more space but I'm sure he has a plan for more Vidmars.
While going through Craig's drawers I saw a cool combination monkey/pipe wrench unlike anything I had ever seen before and told Craig how cool I thought it was and he didn't remember where or when he acquired it. Later in the day we actually got to make some chips with Craig's South Bend 13.
It was great to visit the ex horse barn shop and do a full inspection. A week after I got home, Craig called me to see if I found a rag in the back of my van that he may have left. When I got home I looked on the back of the van and found a rag that was wrapped around the cool pipe/monkey wrench that I fondled in Craig's drawers.
I so appreciate the hospitality, friendships, and generosity that GJ members are always so eager to share.
The ex horse barn and annex
The coolest wrench I've ever seen, thanks Craig.
As to the cabinets: 11 Vidmars in shop 2 in annex, plus 2 shelf cabs
3 Listas in shop, 2 in annex
1 Lyons cab in shop, 2 in annex
Not counting the 2 4 drawer cabs in shop as I don’t know if they’ll stay, right now there just top collectors.
This is just off the top of my head
It’ll be more spread out next time, there’s a 26’x40’ addition going up and no additional items to fill it, just re-arrangement of what I have. The only new addition will be a bridge crane.
Thanks again for stopping by, enjoyed the visit.
Andrew, the repurposed office chairs are still there, I did retire one last week, but still plenty of stools and other chairs.It really is a cool place and a cool guy. How many other people would let you dig through their drawers.
I'm not sure about the rest of the hospitality though. It looks like he removed some of the beer drinking chairs. Hopefully just inside out of the weather. I've been there a couple or more times and every time I was welcomed.
Thanks for the kind words, look forward to the next time we can get to get together.
I haven’t been keeping up with posting my shop purchases and don’t want to loose my status on caster *****.
Shorty sent me a listing for casters up by him and asked if I wanted him to pick up some for me (Shorty should be in some sort time out for asking me something like that), no Shorty, I don’t want some, I’ll take whatever you don’t buy.

Back in August I was looking for some HD casters to set the lathe on. They didn’t have a matching set, but I didn’t leave empty handed.

I may of bought more, just don’t remember
Shorty sent me a listing for casters up by him and asked if I wanted him to pick up some for me (Shorty should be in some sort time out for asking me something like that), no Shorty, I don’t want some, I’ll take whatever you don’t buy
.Back in August I was looking for some HD casters to set the lathe on. They didn’t have a matching set, but I didn’t leave empty handed.
I may of bought more, just don’t remember
I’ll finally ordered the26’x40’ shop addition. It’ll have 12’ high walls witch will give me the room for the bridge crane set up I posted on earlier.
The addition will have two 12’ wide roll up doors across from each other, these should give me plenty of flowing air when open. My original idea was a covered area to do welding and general work and as typical GJ th king and planning, it grew a little!.
Heres the planned layout.

The blue line is the bridge crane frame, the yellow is the moving bridge that the hoist will hang off, yes, there is two moving bridges and hoist!
The addition slab will be 7” higher than the existing shop floor, this decision was made after standing water in the shop a couple hurricanes ago. The slab will ramp down mostly in the new slab and I’ll remove about 2’ of the existing slab and will ramp it up to meet the new slope.
This area will be my main work area, welding, place to park trucks, trailers, etc and finally have a place under cover and that can be closed up with work still in place.
The existing shop area will house the lathe and mill in a machining area, a area for woodworking and a general purpose bench work area.
This pretty much doubles my shop area, but the best part is the much higher roof that allows room for the bridge crane. Nothing will be bought for this area except maybe some pallet racking. The center area will be wide open except for welding table and it’ll be on casters. This will also open up the existing shop.
Other benefits will be a place to park two of our trucks inside during hurricanes.
Building is ordered, permit submitted, I will get started on preparing build area soon.
The addition will have two 12’ wide roll up doors across from each other, these should give me plenty of flowing air when open. My original idea was a covered area to do welding and general work and as typical GJ th king and planning, it grew a little!.
Heres the planned layout.
The blue line is the bridge crane frame, the yellow is the moving bridge that the hoist will hang off, yes, there is two moving bridges and hoist!
The addition slab will be 7” higher than the existing shop floor, this decision was made after standing water in the shop a couple hurricanes ago. The slab will ramp down mostly in the new slab and I’ll remove about 2’ of the existing slab and will ramp it up to meet the new slope.
This area will be my main work area, welding, place to park trucks, trailers, etc and finally have a place under cover and that can be closed up with work still in place.
The existing shop area will house the lathe and mill in a machining area, a area for woodworking and a general purpose bench work area.
This pretty much doubles my shop area, but the best part is the much higher roof that allows room for the bridge crane. Nothing will be bought for this area except maybe some pallet racking. The center area will be wide open except for welding table and it’ll be on casters. This will also open up the existing shop.
Other benefits will be a place to park two of our trucks inside during hurricanes.
Building is ordered, permit submitted, I will get started on preparing build area soon.
shortykorte
Well-known member
But where will the casters, hammers and pliers be?
Should give you some needed elbow room. Wait didn’t you buy another Lista or two?
Should give you some needed elbow room. Wait didn’t you buy another Lista or two?
They’ll be out of your sight for safe keepingBut where will the casters, hammers and pliers be?
Should give you some needed elbow room. Wait didn’t you buy another Lista or two?
.It’ll be agonizing but I’ll have to decide which to put where in the newly set up ares of the shop. For those of you that know me, I probably have enough of most types of hammers to have a set in each section of the shop. The overall length of the shop will be about 78’ long, so don’t want to spend valuable shop time walking back and forth to grab a hammer, or pliers, or a c-clamp.
Casters will be on a cabinet full of casters!
Yes I bought another Lista or two, it was just a few posts above this one, you forgot already!
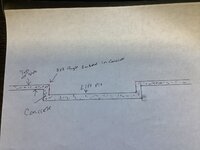
In the addition part of the shop I’m going to form up a 4’x8’ recess in the slab for a scissor lift. This will be for working on the mower, cart and whatever I can dragon top of it so I can get most anything at bench height and not have to wallow around on the floor to work on stuff.
I was keeping an eye out for some steel to build a frame that could be set before pouring the slab, having the steel for at least the top corner of the opening. Then I can weld stops on this frame for the deck of the lift to rest on.
Heres a sketch of what I’m talking about.
I was able to get this from my job site as it was temporary supports and became scrap when the were done with it. It had angle bracing welded to them, so I had to cut all of these off, but hey, the 3”x3”x 3/8” angle was free!
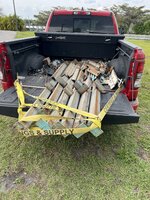
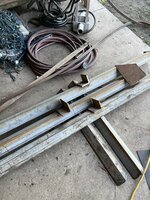
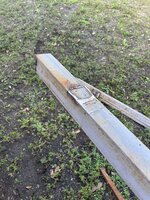

It was tedious work removing the angles, the 6” cut off wheels win again. Torch really wasn’t the way to go on this project.
The pit will be 9”-10” deep, haven’t decided how to form the bottom part of the recess, probably will bolt 3/4 plywood to angle, beveling the bottom edge of plywood to allow finishing of the bottom edge of slab.
Ill run a couple of conduits for the control wiring on the lift.
I was keeping an eye out for some steel to build a frame that could be set before pouring the slab, having the steel for at least the top corner of the opening. Then I can weld stops on this frame for the deck of the lift to rest on.
Heres a sketch of what I’m talking about.
I was able to get this from my job site as it was temporary supports and became scrap when the were done with it. It had angle bracing welded to them, so I had to cut all of these off, but hey, the 3”x3”x 3/8” angle was free!
It was tedious work removing the angles, the 6” cut off wheels win again. Torch really wasn’t the way to go on this project.
The pit will be 9”-10” deep, haven’t decided how to form the bottom part of the recess, probably will bolt 3/4 plywood to angle, beveling the bottom edge of plywood to allow finishing of the bottom edge of slab.
Ill run a couple of conduits for the control wiring on the lift.
A little project for the addition, a 36” exhaust fan that’ll be mounted up high on the gable end of the shop.

Took it apart and had sandblasted/ painted.


The first picture is at the place I bought it from, a picker type sale. Paid a whopping $25 for it. Spent more than that for lunch for the painters to blast and paint.
Dug out one of my in stock motors to power it.
In the new addition, I’m having a framed opening-built in when it’s erected, then I just need to mount the fan While I have the lift setting the bridge crane. Still need to tweak the blades so all in line and balanced. I’ll have other fans throughout, but hoping this one pulls through the whole shop to vent outside.
Took it apart and had sandblasted/ painted.
The first picture is at the place I bought it from, a picker type sale. Paid a whopping $25 for it. Spent more than that for lunch for the painters to blast and paint.
Dug out one of my in stock motors to power it.
In the new addition, I’m having a framed opening-built in when it’s erected, then I just need to mount the fan While I have the lift setting the bridge crane. Still need to tweak the blades so all in line and balanced. I’ll have other fans throughout, but hoping this one pulls through the whole shop to vent outside.
While I’m in the catch up mode and now that you’ve probably have fallen asleep from the lack of seeing some blood or boobies, heres another project.
We turned off the 1990 era DSL internet and bought Mr. Elons starlink. They send you a box with everything in it and just throw it on the roof and plug in. Sort of. To get it going and to see which direction the dish had to face, I mounted it on 4x4s sitting on the roof. Once it was proven to work, I built my typical Cbacres hurricane rated mount out of aluminum I’ve had laying around for god knows how many years.
Finished product receiving waves and god knows what else.

Build pics. Some 4” Alum channel, pipe and other pieces.


Used four 1/2” lags not the 4x8” roof beam. Should hold it.
They set you up with an app on your smart phone that you hold up and keep turning around until you get a strong signal lock. It actually shows you the satellites that it locking onto. It’s a pretty good setup to get it in the right place. We’re happy with the operation and speed.
We turned off the 1990 era DSL internet and bought Mr. Elons starlink. They send you a box with everything in it and just throw it on the roof and plug in. Sort of. To get it going and to see which direction the dish had to face, I mounted it on 4x4s sitting on the roof. Once it was proven to work, I built my typical Cbacres hurricane rated mount out of aluminum I’ve had laying around for god knows how many years.
Finished product receiving waves and god knows what else.
Build pics. Some 4” Alum channel, pipe and other pieces.
Used four 1/2” lags not the 4x8” roof beam. Should hold it.
They set you up with an app on your smart phone that you hold up and keep turning around until you get a strong signal lock. It actually shows you the satellites that it locking onto. It’s a pretty good setup to get it in the right place. We’re happy with the operation and speed.
Attachments

Here the addition building drawing.

The end marked open will **** up to the existing shop. The roll up doors will be 7’ off the end that butts up to old shop.
You can see the fan frame out on the solid end wall.
The walk door was a last minute add n, it pushed the total building price up into a higher discount that they had going on at the time. So I got a door and more $$ off! There will be a generator stored just inside this door and gives me the ability to open for running gen for a short time outage. In a major outage (hurricane), the gen gets moved to the covered porch where it can run continuously and I can see/hear it from the house.
Its a must have here with the hurricanes that we’ve had.
The end marked open will **** up to the existing shop. The roll up doors will be 7’ off the end that butts up to old shop.
You can see the fan frame out on the solid end wall.
The walk door was a last minute add n, it pushed the total building price up into a higher discount that they had going on at the time. So I got a door and more $$ off! There will be a generator stored just inside this door and gives me the ability to open for running gen for a short time outage. In a major outage (hurricane), the gen gets moved to the covered porch where it can run continuously and I can see/hear it from the house.
Its a must have here with the hurricanes that we’ve had.
Last edited:
Bob Heine
ALLIANCE MEMBER
Craig, my FEMA generator got used after Wilma (2005). Since then I've given it a few test runs to make sure it still works. It seems to be the best insurance I have.Its a must have here with the hurricanes that we’ve had.
Not a whole lot to report. Submitted building permit for the shop extension, submitted a revised site plan for said permit. The building department wouldn’t even give a time line of how long. The building going on around here is just crazy.
Bought a set of casters. Seem the FB posting, a fair price but didn’t really need. Then I seen seller lowered price, so I got me another set!

Probably one of the few I’ve bought that have been greased.
Got a couple of squirrel cages sandblasted, these will be painted for the addition.
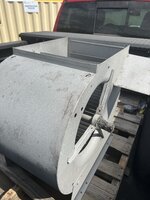
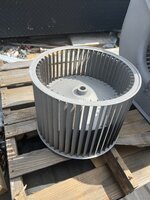
Bought a set of casters. Seem the FB posting, a fair price but didn’t really need. Then I seen seller lowered price, so I got me another set!
Probably one of the few I’ve bought that have been greased.
Got a couple of squirrel cages sandblasted, these will be painted for the addition.
Attachments
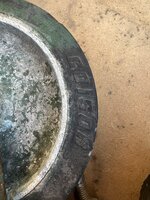
We installed a keep the grandson out of the pool fence. We bought the fence system off Amazon for $500. Companies wanted around $2,000 to supply and install .

I quickly figured out that the spacing on the posts were critical. The kit supplied a piece of flat bar for a template, but just marking inside the holes was not precise enough. I turned down a piece of round bar that would snuggly fit into the drilled hole in the concrete, just a tad larger OD so it’d fit the template snug.
I then made a bushing for the other hole (other post) that had a ID of a 5/16” masonry bit that was used to drill a pilot hole. This hole was enlarged to 5/8” for the post sleeve that’s inserted into slab.
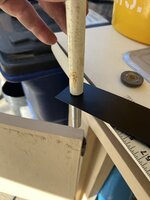
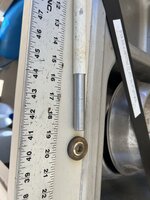
 It went pretty good after getting set up for it.
I quickly figured out that the spacing on the posts were critical. The kit supplied a piece of flat bar for a template, but just marking inside the holes was not precise enough. I turned down a piece of round bar that would snuggly fit into the drilled hole in the concrete, just a tad larger OD so it’d fit the template snug.
I then made a bushing for the other hole (other post) that had a ID of a 5/16” masonry bit that was used to drill a pilot hole. This hole was enlarged to 5/8” for the post sleeve that’s inserted into slab.
It went pretty good after getting set up for it.Finished up another project, ripped 1/2” PVC conduit to use as a cover the cable for our Starlink dish. I went this route as the end of the cable probably wouldn’t fit in the conduit, certainly would not made it around the bend in the 90 and I wanted to keep the conduit as small as I could.
Ran the conduit through table saw to create a cable cover.
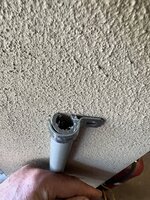

Custom fitting to transist to electrical box. Cable enters house at this point.


Conduit in place and clamped down.
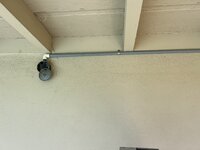
The other end of conduit is right under fascia, cable routes up to the dish mounted to roof mount. I left about 16” looped for future service of the dish.
The spilt conduit serves just as a cable cover to protect from being whipped around in the wind.
Ran the conduit through table saw to create a cable cover.
Custom fitting to transist to electrical box. Cable enters house at this point.
Conduit in place and clamped down.
The other end of conduit is right under fascia, cable routes up to the dish mounted to roof mount. I left about 16” looped for future service of the dish.
The spilt conduit serves just as a cable cover to protect from being whipped around in the wind.
shortykorte
Well-known member
Ok you and Strouty don’t run up the bid. 
Finallygotit
ALLIANCE MEMBER
$5?!?!?! We need to plaster that auction item everywhere to run up the bid. 


3baygarage
Well-known member
Umm, Gaylord of Casters?

Actually, Large Gaylord of Casters.
Actually, Large Gaylord of Casters.
3baygarage
Well-known member
No Florida safety shoes. That right there might be a caster disaster.Shorty, if I win, would you pick up for me?
rmack898
Well-known member
That looks like a good addition for CasterBoy acres
LutzTD
Well-known member
bridge crane..... hmmmm livin the dream. did anyone give you a "you ****"
Received notice that building permit is ready for the shop addition, but I need to jump through one last hoop and go to do a couple forms before I pick up. Figures it’s the week I can’t easily get away from work.
When I submitted the building department wouldn’t even give me a timeline of how long, at the time a few contractors I spoke to said it was running 90 days, it took a shade under 60 days.
Now to finish moving my steel stock boneyard and get my site guy in to grub and build a pad so I can start forming!
Stay tuned!
When I submitted the building department wouldn’t even give me a timeline of how long, at the time a few contractors I spoke to said it was running 90 days, it took a shade under 60 days.
Now to finish moving my steel stock boneyard and get my site guy in to grub and build a pad so I can start forming!
Stay tuned!
Last edited:
Chrisb62
Well-known member
Well that is not completely accurate, several people have told you that…….wait maybe the first time about the crane.You’re the first! Thanks.