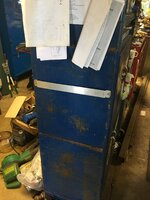
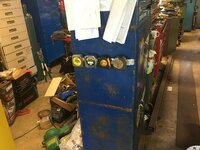
To avoid these ads, REGISTER NOW!

CBacres ex horse barn shop

Bob Heine

ALLIANCE MEMBER
Joined
Oct 24, 2009
Messages
10,708
Location
Boca Raton, Florida
Taking a truck load up and coming home empty.
Craig, are you saying for the first time this century you are not going to pick a single item at a hoard?
EDIT: Andrew, I see I'm not the only one who knows who he is. Next we'll hear Shorty say he's not going to bleed while at the party.
 
To avoid these ads, REGISTER NOW!
OP
C

cbacres

Well-known member
Joined
May 28, 2010
Messages
5,998
Location
SW Florida
Craig, are you saying for the first time this century you are not going to pick a single item at a hoard?
EDIT: Andrew, I see I'm not the only one who knows who he is. Next we'll hear Shorty say he's not going to bleed while at the party.
Wait a second now, I just said empty, as in not filling the back of the truck up. I’m sure there be a item or two, 3, whatever.
I’m trying to pawn off my over indulgences on some of the attendee, so they can experience the fun of a great pick!🤣🤣🤣

I‘m bringing the appropriate items for blood, hopefully Andrew has notified the local EMS of his exact shop location in case their called, cause it’s likely none of us will think to go out to the road to direct them in. We’ll be in the back squaring off on our wagers on the amount of blood that Shorty spills.o_O
 
OP
C

cbacres

Well-known member
Joined
May 28, 2010
Messages
5,998
Location
SW Florida
Back to the shop, I had bought some beams a couple of years ago, but they were a little lighter, so I bought some heavier beams earlier this year.

Decided to get rid of them and posted on FB MB, of course a guy wants to buy and pick up yesterday when I’m out doing a beer drinking in a buddies shop study with a bunch of guys from here.

Anyway, I pulled them out to get ready for pick up.

My steel pile is behind the shop, I wanted to get them up to the driveway.

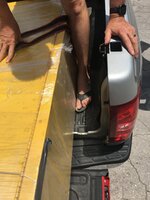
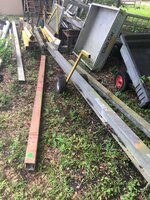
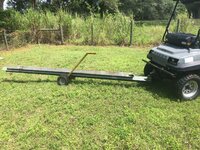
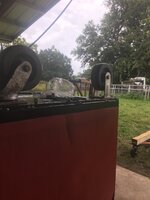
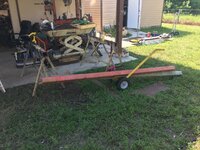
I got this handy dandy yellow thing on wheels out of a dumpster a while back and it’s proved it’s worth today.
Once balanced, I could wheel anywhere.15F09CDD-3013-49AD-9C64-733A06CF998D.jpeg
Its was so easy, I decided to stack the second one on top.
AD9984AC-CBCF-4DEF-AF6E-94F9481E75D9.jpeg
I could still wheel it around, but do you all really think I’m going to hand wheel it 600‘ up front?
AC9D9F84-929D-49C2-BC67-7F1DFCAAD1D8.jpeg

Another load rigged and hauled with the cart.
 
OP
C

cbacres

Well-known member
Joined
May 28, 2010
Messages
5,998
Location
SW Florida
Beer plenty good.
No lightweight here, just got to get up twice as much to get beer 🤪

I don’t care for the taste a whole lot on all these other beers.
Maybe some day I’ll find one
 
OP
C

cbacres

Well-known member
Joined
May 28, 2010
Messages
5,998
Location
SW Florida
In getting ready for the next shop project, I need this Vidmar out of the way.
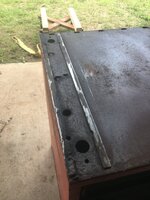
I already had the 3/8” flat bar cut, I finished drilling and tapping the bolt holes.

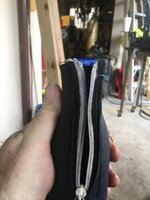
The PO had cut off the boxed rails off the bottom, I needed to finish cleaning parts of it off.
30AF0F77-BA6C-4C7D-A53C-0B23ECFBE04B.jpeg
33F794F9-ACAB-4AE2-AC11-919F20A64DD0.jpeg
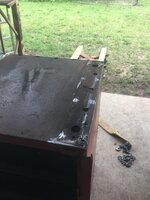
Caster plates welded.
4329EE18-E36D-4D48-B370-6C07F5B808D0.jpeg
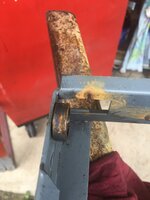
The bottom of the cab had a little bit of a bow, needed to use a clamp to pull down. The rectangle holes in the bottom was just big enough to weave a welding clamp in.
14131FAE-B747-4DD5-9DB6-FC0654071D95.jpeg
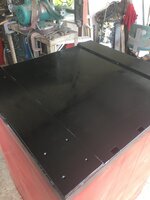
Painted up. I’ll never have it bottoms up again!
2B68DF73-E8FA-4B8B-8178-0F27A62C761C.jpeg
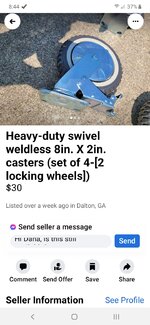
Casters being mounted. (procured from cbacres caster supply).
C0BD8074-1F76-4832-9A19-2B8654897179.jpeg
Another easy roller.
92C9FD82-7D66-4902-A180-FD3D5274D9A5.jpeg
With all of the 12 plus cabinets I’ve bought and put into service, I never came across a bad bearing, much less a missing one. Luckily I have a extra slide frame.
E7575BB4-C8C3-48AC-B7E2-0655879A054D.jpeg
Tomorrow finish lubing the bearings and then clear a spot out in the shed to park it.
 
OP
C

cbacres

Well-known member
Joined
May 28, 2010
Messages
5,998
Location
SW Florida
Going to leave it multi colored or full paint job, before filling to brim? Repair looks great and probably rolls smooth as silk.
This cab is going in the annex shed, so painting in there will be on the 2024 plan🤣. I do have a blue cab with black trim theme that I started a couple years ago, it’s somewhere in the shop!
Yes, rolls real nice on the set of wheels. Now I won’t have to walk behind it to use the bandsaw.
Chris, multicolored is his theme. 🤣
At least I paint.😜
Think theme, think Shopnut,
I had a theme once, I lost it.
Spot on about Shopnut!
 
OP
C

cbacres

Well-known member
Joined
May 28, 2010
Messages
5,998
Location
SW Florida
Finished the Vidmar, yes I said finished!

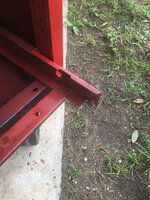
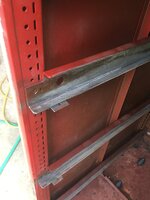
Ran a wire brush on a angle grinder over the rails that the bearings ride on, had a lot of gunk, grit and some rust. I discovered a few boxes ago that cleaning these up improves the smoothness quite a bit.
112F7D5A-F56E-4080-97E2-5208082A648A.jpeg
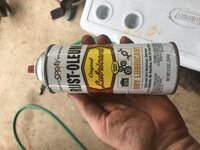
After cleaning and coating with a dry lube. I started using dry lube as a way to keep the freshly cleaned and bare metal from rusting, and the dry lube won’t attract dirt.
93CE4FA7-E5E9-4720-ABD6-EDDE620A5CBC.jpegFF77F78C-1A3A-48EA-8AA5-C52F6B3FA603.jpeg
I give the contact area on the bearings the same treatment.
AC9F0EE9-4E2F-4577-B29A-53091354AF38.jpegA45E188B-298A-4138-99A5-197580720276.jpeg
These cabs are the most worn ones yet that I’ve bought. But there smooth as can be, a little sloppy, but it’ll give me years of service.

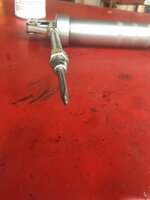
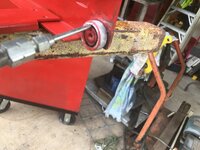
Heres my custom adjusted Vidmar/Lista bearing greasing tip.
C47DD0BF-E8AE-4167-9D4F-F95263B4A7E4.jpeg
BD42B6CE-AAB3-4C07-9186-B37C98EAC302.jpeg
I also cleaned/coated the rails on the drawers that the bearings ride on.
E89A11A0-5D22-468C-8FB5-552E0E78BB10.jpeg
Put it all back together and drawers sliding effortlessly and smooth, so much that when I moved cab to edge of concrete on the way to shed, when it stopped, the the drawers self opened before I could get on the other side and ver she went! I didn’t get a picture as I was rushing to get it upright, drawers back in and the contents back in the drawers before it got too wet from the rain, that and I was pissed,
 
To avoid these ads, REGISTER NOW!
OP
C

cbacres

Well-known member
Joined
May 28, 2010
Messages
5,998
Location
SW Florida
Back to the hoist beam project.
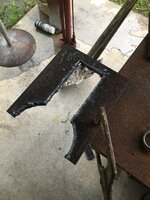
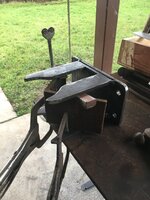
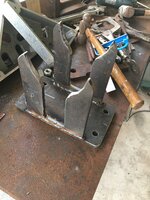
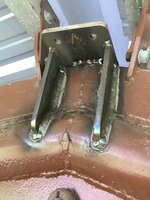
I’m setting the trolley beam on the existing A frame that I now use for lifting. A cross beam and posts will support the other end. I needed to make a flat mounting plate for the top of A frame.

The A frame is built out of a 2”x4” rectangle tube on top of 4” sch.40 pipe. I mage two saddles that are notched out for the tube and will sit on the top half of the pipe.
Layout ready to be torch cut.
6E4278CF-575B-4F2C-A819-EF3B8A5F02BE.jpeg
0396D572-8C4D-46BB-94D9-1EB8A35911FE.jpeg
After a few trips up and down the ladder, I finally have the saddles tweaked. Here it is tacked for a test fit.
330EC213-8EF8-4907-BED8-1E017B82FE95.jpeg
Clamped up for welding. Have I mentioned how much I like my Fireball angles?
A50670CF-FE20-4E01-8728-59B6E599DCF6.jpeg
I got carried away and welded beyond the angles, one side pulled in on me. Nothing a couple of wedges couldn’t fix.
9991E94F-D6DC-4FFC-9F6A-79E2DB379DAA.jpeg
Welded up and ready to be set on a frame. I didn’t take picture, I transferred the holes on the saddle to the underside of the I beam.
AEC38E87-26A0-4264-B4E1-34BC50A82C05.jpeg
Once this is welded to frame, it’ll be the reference point for the rest of the beams.
 
OP
C

cbacres

Well-known member
Joined
May 28, 2010
Messages
5,998
Location
SW Florida
OP
C

cbacres

Well-known member
Joined
May 28, 2010
Messages
5,998
Location
SW Florida
That look like it's going to work well Craig.
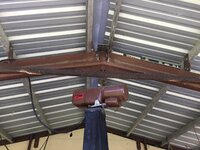
It was the best way I could figure a mount and not raise the height too much. The top of the 8” trolly beam is going to be close to the roof sheet metal. I’ll pick up about 10” of lifting height from where the electric hoist is hanging now, so that’s a bonus as I’ve run of of height in the past, but that was usually when unloading a 60” tall Vidma, shouldn’t be too many of those in the future.........:rolleyes::rolleyes:
 

Chrisb62

Well-known member
Joined
Jul 30, 2019
Messages
1,093
Location
southwest fl
It was the best way I could figure a mount and not raise the height too much. The top of the 8” trolly beam is going to be close to the roof sheet metal. I’ll pick up about 10” of lifting height from where the electric hoist is hanging now, so that’s a bonus as I’ve run of of height in the past, but that was usually when unloading a 60” tall Vidma, shouldn’t be too many of those in the future.........:rolleyes::rolleyes:
Gee that’s a shame I had one I was going to sell real cheap...........


Only kidding.........
 
OP
C

cbacres

Well-known member
Joined
May 28, 2010
Messages
5,998
Location
SW Florida
A hoist is so handy. I would like to put a jib Crane just inside of the overhead door so I could swing it out the door to pic things out of my truck.
I don’t know how I lived all this time without one. My current one is fixed, but seems like I use quite a bit.
79C00521-A88F-4C1E-A2A1-5E5AC29D2574.jpeg
A jib crane inside the door is the way to go.
If I get into a taller shop some day, I will definitely have a job set up like you said.

At my last job, I laid out three cranes, two by doors. I set them off the inside wall enough to get maximum reach outside the door, just barely clear the door jamb on the other side and had great coverage inside.
They take a big footer and lots of j-bolts, but it’s well worth it.
 
OP
C

cbacres

Well-known member
Joined
May 28, 2010
Messages
5,998
Location
SW Florida
A frame mounting plate in and welded.
FD9BD7A3-8FCE-4948-A3D3-B46C9C34B807.jpeg
Welding base plates and top brackets on posts is next.
The yellow carrier is coming in handy this week.
9CF18E2F-25CE-4614-81AB-29991A9D2339.jpeg
Using old hoist to pick up posts for new hoist.
9F85CBAE-B1DD-4CAA-A31B-D19EAA47158B.jpeg
Set on stands for fabbing.
F146729A-EB96-4985-A5D3-E5E3E5FA0AFD.jpeg
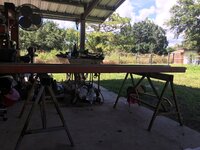
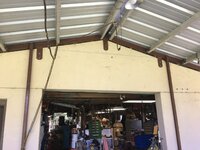
To help you guys see what I’m doing, here’s a couple pics of the porch area where trolley is going.
Front wall of shop, blue line will be the top of the cross support beam, posts will be approximately 12” on each side of door.
D8E5740D-FBBD-43C3-93FC-CD3F1968C6FA.jpeg
View from standing in shop just inside door looking at a frame. Trolly beam will run from front wall to a frame.
67471B5A-5A3D-4E22-809B-36D3014D862C.jpeg
That’s all for now.
 
OP
C

cbacres

Well-known member
Joined
May 28, 2010
Messages
5,998
Location
SW Florida
I got tired of misplacing my 8 tape measures so I decided to make a quick mount close to the front of shop.0AAA2E24-B4A1-478A-801D-ABCBCF6F8FEB.jpeg5A085186-1368-4966-9199-A37E2621C715.jpeg8074EF95-8EB2-47AE-A2C0-A83A93EEB5AA.jpeg
 
OP
C

cbacres

Well-known member
Joined
May 28, 2010
Messages
5,998
Location
SW Florida
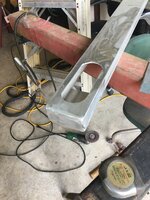
My next project should of been simple. Our son is having their baby shower this weekend and I’m cooking, which means I need to tote the grill up to his place. It needed new lights, so after pulling those off, the wood shelf should be replaced as it was broke the first time I put it in 10 years ago when some friends let the grill go over backwards. I decided to build a frame that extended out more to support the wood in case it goes backward again and add a support leg.

Still needed to come up with a way to mount tail lights. I had some oval LEDs and some 4” aluminum channel, now I have a plan, sorta.

Grill as it been for 10 plus years.
57A13B76-1B81-4747-BDFC-52B79C789D43.jpeg
Light mount that will also serve as a bumper.
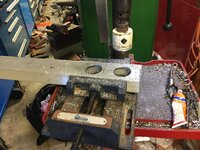
51EFB966-27EA-4941-A87F-43CA38932188.jpeg0A02A1D0-60A9-49D5-948C-615B525868FC.jpeg4BED2895-6306-482D-9B20-1A13F26D00D1.jpegA5670D62-5278-48D9-8655-4B7893A1EE28.jpeg
Now I need to extend some steel for bumper mounts. I built the grill in the 80s from all kinds of misc. scrap, modified once or twice with more misc scrap, so the frame work is made up of different shapes.
Here is a classic case of taking something super simple and turning it into a semi complicated process.

There was a 2“ angle across the back frame, yes was, I cut it out.
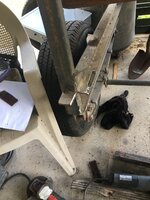
9935F390-4D82-49B9-B885-4310B5B0A09C.jpeg
Then I made this special cut out square tube to extend out for the bumper mount, but I wasn’t happy because it was conflicting with lights more than I anticipated.
9E14681E-81B5-4E64-9C61-1E41F6C8E9D2.jpeg
It fit just as I wanted.

Heres how it ended up.
F678CE2B-D2D1-4285-8A04-7147BBB7C22D.jpeg
Just simple stubs of square tube welded to the angle that I welded back in.😳😜
 
To avoid these ads, REGISTER NOW!
Top Bottom