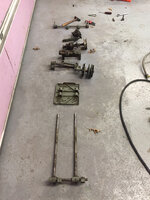
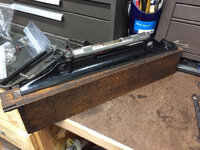
Started the evening off fixing my mistake. In case you missed it, I completely forgot to tighten the bolts that go from the bed to the cabinet during my test cuts. I used my Starrett level to get all of the twist out of the machine as I locked down the bed.

The level truly belongs to my father. He's been a machinist since he started his apprenticeship in high school. I think I'm getting this story right...... Dad had wanted to be an auto mechanic. When the time came to enroll in the JVS, my grandfather must have thought that the mechanic thing was a phase or something and he told my dad to go to their neighbors house and talk to him about what he did. I cant remember for sure but I think his name was ED, and he had been a toolmaker since his days in the service. Long story short, dad became interested in tool and die and decided to go to school for it.
Fast forward 30ish years. We were moving my grandmother a state away so she could be closer to the rest of the family. We were about to leave and here comes Ed (probably in his 80's) with a wooden box. I remember he handed it to dad and told him he wanted him to have it. They both got a bit choked up. I could tell my father really appreciated the gesture.
Fast forward another 8-10 years or so, and I've been lucky enough to use that level on all of the equipment I have set up.

Anyways enough rambling.
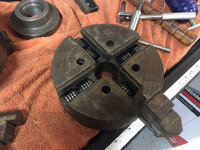
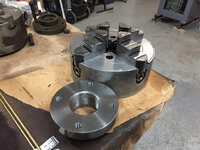
Next up was cleaning the four jaw I have lying around. It's been pretty beaten up, and had a varnish like substance along with a film of rust all over it.

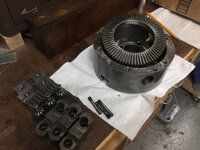
First I removed the retainers for the adjustment screws. You need to tap them out from the face side with a brass punch

Once they are removed, you can take out the screws. At this point everything needs to be scrubbed in the parts washer

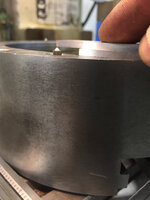
Like most machinists, I sometimes use the face of the chuck to help line up parts. In order for this to work, the face needs to be free of burrs and nicks. Unfortunatly this chuck looks like it rolled down a bowling alley and hit the pins....and then somebody beat it with a hammer. I first flat filed All of the nasty buggers, then went back with a stone. I finished with a touch of scotch brite.

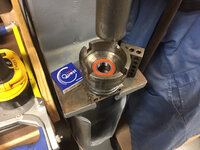
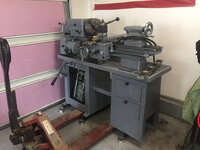
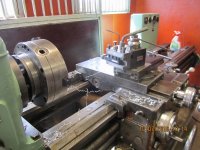
Next was to finish machining the mounting plate. I needed to finish the OD so it could register tightly inside the ID on the back of the chuck, and face the front so it would run true without wobble.

Next was to clamp the backplate to the chuck and transfer punch the holes. Yes, I could have plotted out the locations but sometimes you just need to keep it simple

Next I center drilled the ***** marks

Then I picked out a letter U drill so I could prepare for the 7/16-14 tapped holes. Keep in mind, the plate is not clamped, I'm using the mill as a drill press.

Last was to tap the holes. I'm pretty quick with an indicator so I decided to pick each one up and power tap it. You could tap them by hand also, that's just what I decided to do.

After everything was cleaned and oiled, I proceeded to re assemble the chuck. The retainers had a clip that sits in a groove in the bored hole. I decided to use a hose clamp as a ring compressor to make it easier to install them. It worked great.


Once everything was installed, it really turned out nice. It's not going to win any beauty contests, but all I care about is a properly functioning chuck. I may go back to trying to work out the rust staining at a later time, but for now I'm happy
I will probably work on my 3 jaw Wednesday.
Sent from my iPhone using Tapatalk