Username already in use
Well-known member
Threaded, yes. I have the 2 small slotted screws that come out.
I feel like this is an earlier model. Late 40's perhaps?
I feel like this is an earlier model. Late 40's perhaps?

Yes. Machine screws were replaced with panel screws in the 1951 model year. So that dates yours mid '40s to 1950.
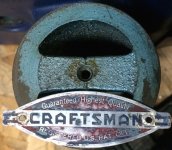
Good to know. The Craftsman tag was painted over, but I was able to get enough of the blue paint off to see that it's marked 'Guaranteed Highest Quality' and not 'by King-Seely Corp'. Do you know when they changed that tag over?
So it is a no-go on the parts machine. The listing expired, and I don't have the contact info. Will certainly keep an eye out for another one, the more people interested, the easier it will be to part it all out.
I know there were at least four different styles of the 3" wide heritage logo badges, but I never knew or researched which was used when on what machine. Perhaps someone knows.
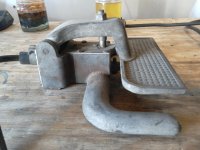
Honestly, if that were mine, missing the cover and spring it would be a part-out machine.
I know this is probably a long shot but would anyone be willing to post a picture of what the quill return spring looks like for the 103.0305? Just so I have some kind of reference to go by. Thank you.
I know I was told I should just part this machine out but I am stubborn and usually exhaust all options before I give up. I am determined. Also how do you measure what size clock spring style you need? Looking online I see them range from what is labeled as a 8" DP to 15" DP spring. Seen them in millimeters etc. I've never had to change one out in any DP that I've owned.
These posts are a compilation of MY experiences, techniques, opinions, observations, and conclusions.
I apologize that you interpreted my comment about what I would do as telling you what you should do. I am not an expert or professional. I rarely offer advise, recommendations, or suggestions; especially on machines like that which I have no first hand experience.
Anyway, this won't help at the moment, but here is a place that has a large variety of flat clock mainspring replacements. There may be something close that may work for drill press return feed springs of that style. http://www.clockworks.com/clock-parts/hole-end-mainsprings.html
Valspar Royal Blue. At least the inside of my 0303 is almost that exact color.
Sent from my VIVO IV using Tapatalk
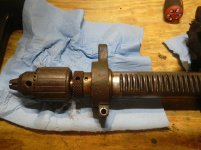
Iirc, my small pin spanner is 1-1/2". I don't recall what size pin it has. I believe your chuck is pre-safety collar, so you may want to measure.
Here is mine. Forgive my ignorance. This is my first time doing this. So is the take down the same as the one you showed us on here?
Yes, it should be. Unscrew the collar to force off the Chuck. In the past, I've had to use flat washers between the Chuck and collar because the collar was too near the end of the threads on the spindle collar.
You could also use Jacobs' wedges to remove that style of Chuck.
I've never used the wedges, but I don't think you'd need to move the collar.
I believe there are different size wedge sets.
Good deal..Thank you sir for putting up with and answering my questions.
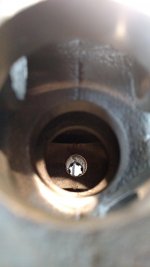
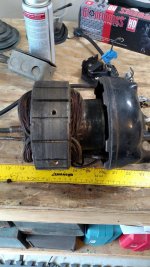
Also how do you remove the pulley spindles from the motor and main housing? I removed the three screws but the spindle would not come off the bearrings
No problem.
It's been a long time since I've had an Atlas craftsman drill press. I don't recall how that head frame pulley comes off. Someone should be able to help.
Removing the motor pulley depends on several factors. The size of the motor shaft, whether the shaft is keyed, whether the motor is double shafted. There is a relevant link in my first post.
The ones in question are the earliest King Seeley models, not Atlas. In case you know more, Frank.
Sent from my VIVO IV using Tapatalk
Looking good ndfan6464 !


Now lets not exaggerate, it's only about 80 years of crud!
And yes, Deoxit should be fine, if expensive. CRC electronics spray is a lot cheaper for that sort of thing.
Are you asking about windings? Nope, as it would depend on a lot of variables of design, voltage, power etc.