Craftsman Shaper 103.23920
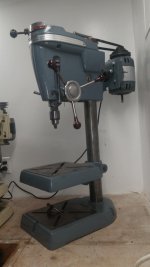
I picked up my next project yesterday... a Craftsman shaper, model
103.23920. It's in rough shape, but was well worth the $20 gamble.


That stand is very heavy, very dirty and destined for the scrapper.
The spindle was seized in the quill, but eventually broke loose. Despite it's condition, everything came apart with minimal effort using the correct tools.
9/4/2018
The refurb is going well.
The spindle/quill assembly is cleaned and partially reassembled. Like I said above, the bearings were seized, but freed-up after working it for a just a little while. I removed the seals from the bearings, cleaned the bearings and seals in my sonic cleaner, repacked and reinstalled the seals. The bearings are in excellent shape with no slop!


The cast iron parts cleaned up better than I expected. The table top has just a few small areas of very minor pitting.
9/5/2018
The belt guard is pressed steel and was particularly nasty. I cleaned it with Simple Green and a small scrub brush, but the finish was still very coarse. Cleaner wax didn't help much, so I wet sanded it with 1000 grit paper. That didn't replace the missing paint, but it did the most good. After a coat of wax, I think it looks pretty good!


The fence frame is cast aluminum, has very splotchy paint and had a lot of stuck-on wood resin. I also cleaned this part with Simple Green and had to let it soak in hot water to loosen the resin. This is as good as it's going to get.


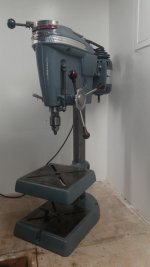
The table/base assembly is back together.


The motor. Ugh. Like the rest of this machine, the motor was in rough shape; lots of saw dust inside, rusty exterior, fubar switch and cracked base. I also think the capacitor is getting weak. This motor is a '52 model 115.7429, 1/2 hp, and 3540 rpm.

I didn't really want to crack it open, but I did... very reluctantly. It cleaned up ok, but when I reassembled, I pinched and severed both capacitor wires when I installed the end cap. So back apart to repair those wires. I rigged up a cord to test and it runs fine.

I have a replacement switch, but it's the newer threaded toggle switch instead of the square switch. I'll have to fab a plate to mount the new switch.

9/6/2018
The motor is complete. The new switch is installed, the center band was soaked in vinegar to remove the rust and a new grounded cord installed. It's not a looker, but it runs strong.

9/8/2018
Today, I finished and installed the fence.


The refurb is complete except for the motor. I had to order a new capacitor. When installed, the motor would not start under load without manual intervention. I believe that's why the previous owner had a second pulley installed on the lower motor shaft... so he could give it a turn to get the motor going.
Overall, it turned out very nice for sitting idle since 1991.
I'm missing just a handful of parts (numbers are from the
owners manual):
- the guide post #32
- the insert disk #33
- the holding finger #41
- a holding bar #42
- a holding bracket #44
- cutters


")


 </MARQUEE>