To avoid these ads, REGISTER NOW!

Above 1200 Sq/FT DFB's Garage

Wokspaces above 1200 squarefeet.
OP
D

D.F.B

Well-known member
Joined
Aug 2, 2023
Messages
1,575
Location
Australia
Meet the Jaaaaaaaag...................

IMG-3261.jpg

IMG-3257.jpg

IMG-7430.jpg

IMG-8633.jpg

ax9.jpg

This 2015 Jaguar XE is a family members car that I also care for, it replacing a 2011 Ford Mondeo Titanium. That Mondeo was one of the first fitted with the 200hp EcoBoost engine and teamed with the wet-clutch version of the Powershift, most sold in Australia were fitted with the diesel. Being of European descent, the highway manners, excellent brake response and overall road holding ability were the highlights. And while it looks like a sedan, it's actually a hatchback, you'd be surprised at what fitted in that car.

SMM-12-029.jpg

SMM-12-033.jpg

IMG-0005.jpg

But..............having driven the car a lot, the Mondeo never really did it for me. A lot of that centered around the front-wheel drive thing, but also the flat feeling and sounding engine. The Jaguar on the other hand is a surprisingly different expirience.

I say "surprising" because, in actual fact, the earlier versions of the XE were fitted with Ford EcoBoost engines. In fact, this 2.0t model is equipped with the exact same 200hp engine as the Mondeo......................just with Jaguar branding.

et4.jpg

IMG-1091.jpg

IMG-1092.jpg

In this case, the engine is paired to the far better ZF 8-speed auto rather than the Powershift, not that we had any issues with that gearbox. For the XE, the EcoBoost is powering the rear wheels, and the exhaust tuning Jaguar invested in turned a boring, flat sounding 4-cylinder into a growling and characterful powerplant. Amazing what a little exhaust work can do, it even has some pops and crackles, completely at odds with the grandpa color.


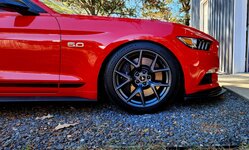
This car was already a year old when we took delivery of it brand new. Loaded with a bunch of expensive options, including a sunroof, head up display, 19-inch wheels and more. I'm fairly sure the rare color made it a hard sell, so there was a heavy discount on this car. That color is called Odyssey Red by the way, a beautifully captivating color that really rewards effort. Deep and rich in low light, sparkling in bright sunshine.

IMG_6905.jpg

IMG_9993.jpg

IMG_9998.jpg

IMG_9997.jpg

The interior bucks the usual trend of boring black on black, featuring Light Oyster two tone arrangement teamed with subtle timer accents. I also love the simple, real gauge cluster over the digital screen that came later.

IMG-0333.jpg

IMG-0330.jpg

IMG-4850.jpg

IMG-4841.jpg

IMG-4845.jpg

Despite only having 200hp, being constructed largely of Aluminum and with short gearing the car is surprisingly quick. The best bit is how agile it is, the steering is very light but I like that in a car. Of all the cars I drive regularly, the XE is the most accomplished in the dynamics department. When you look under the car, the aluminum suspension is a work of art. And the ultra low driving position makes you feel like the car is wrapped around you.

IMG-7426.jpg

IMG-7434.jpg

At this point, I will point out how much I love the styling of this car. There is no gimmicky styling tricks or tacky lines that will age quickly. The proportions are perfection, the loooong hood a delight to look over from the drivers seat, and it has the most **** booty as well. Many would call this car boring to look at, but I feel it has a timeless beauty to it, not something you could say about most modern sedans, the designers go crazy in an attempt to lure people out of their SUV's. This XE is just a ****** good looking sedan and turns more heads than my fire-engine-red Mustang.

jex.jpg

IMG-4827.jpg

And if you think that the rear looks familiar, you can see the Jaguar-Ford relationship going on here........................

IMG-0153.jpg

Sadly, the Jaguar XE has hardly been a success for the brand, being a very slow seller. In my opinion, the XE is by far the best driving car in the category, surpassing the 3-Series that just keeps getting bigger and fatter with every model. If you are the owner of E46 3-Series, the XE would make an excellent replacement.

More to come.
 

Attachments

  • IMG_9997.jpg
    IMG_9997.jpg
    315.1 KB · Views: 7
Last edited:
To avoid these ads, REGISTER NOW!
OP
D

D.F.B

Well-known member
Joined
Aug 2, 2023
Messages
1,575
Location
Australia
That cat is a very nice car. I had a BF XR6 in a very similar colour.
That would have been Seduce, a beautiful colour that ran from June 2006 on BF and BF MK II Falcon's as well as FG and FG MK II Falcon's up to February 2012, paint code SD. Seduce had such a lovely cherry hue to it in the sun that really popped.

BF-MK-II-FAIRMONT-GHIA-SHOWN-IN-SEDUCE-5.jpg

FG-FALCON-G6-E-IN-SEDUCE-3.jpg

FPV-FG-MK-II-GT-P-SEDUCE-GOLD.jpg

Seduce was then replaced with the slightly darker Emperor which has a gold flake through it. I originally preferred Seduce, having owned my Emperess for nearly 10 years now, I'm more than happy with the color.

Deep, glassiness in the shade................

IMG-0260.jpg

za4.jpg

hl1.jpg

Vibrant and sparkly in the sun with the aforementioned gold hue......................

IMG-0421-2.jpg

DSC-0110.jpg

***.jpg

Parked here next its older sister, an XT GT in Candy Apple Red.................

wm123-2.jpg

Sorry for the overload, color is one of my favorite things about cars. I may also have a database of Falcon/Fairlane/FPV colors.
 
OP
D

D.F.B

Well-known member
Joined
Aug 2, 2023
Messages
1,575
Location
Australia
While I have a somewhat set routine for protecting and detailing my own cars, I tend to experiment a little more with others peoples cars................within my own limits of course.

I have always maintained that ceramic coatings have their place, as does a more traditional wax or sealant. On a fleet of garage queens, a well applied coat of wax is more than sufficient, while also allowing you to mix and match with each application as they tend to last quite a bit less. A ceramic coating can last many years, effectively locking you into a look and feel unless polished off the vehicle. So, for a long time I resisted the need to go ceramic because wax's and sealants suited my needs. But..........................I was getting itchy feet and wanted to learn a new detailing skill.

My first foray into ceramic coatings was with Carpro DLUX, which I used to coat the unpainted black plastic trims on the Mustang, Ranger and XR8.

IMG-6860.jpg

A year later, I applied NV Wheel to protect my brand-new wheels on the Mustang...................

IMG-9645.jpg

IMG-9649.jpg

In both cases, these were an easy introduction to ceramic coatings without biting off more than I could chew. For wheels, a coating has a very real benefit, protecting and making one of the dirtiest parts of the car easier to clean. On trim, a coating will protect those surfaces for far longer than a simple water-based dressing could ever hope to achieve. But still, I resisted applying a coating to paint.

It wasn't until I was asked to detail a co-workers brand new car and have it protected from the get go did I decide it was time to go ceramic. Sort of....................

IMG-4261.jpg

Gyeon Can Coat EVO is sort of like the gateway drug to full-blown ceramic coatings. Many will dismiss it for not being a true coating, but the finished results and water hydrophobics would argue otherwise. In EVO form, Can Coat will last up to 12 months and beyond, all from a simple spray, wipe on, wipe off application. (Important to note, Can Coat should NOT be sprayed onto the vehicle, rather two or three sprays onto a towel, wiped across a single panel, then wiped with a dry towel. You must also move away from the car when spraying into your applicator towel. In my case, I preferred using a microfiber applicator instead of a folded towel.)

IMG-4263.jpg

IMG-4281.jpg

IMG-4294.jpg

While not a full-blown ceramic coating, Can Coat does still teach you about working in a methodical manner to prevent high-spots and achieve the desired result.

That particular car I actually had to reapply Can Coat after the owner parked it on the lawn, the sprinklers showering the car in iron-rich bore water. The resultant water-spots were not removed with appropriate chemicals, so it needed to be polished and recoated. I tried EVERTHING in my extensive arsenal in an attempt to avoid polishing, but the spots did not budge. Thankfully, a very light finishing polish easily removed the spots from the soft Mazda paint. Re-coated with Can Coat, the car went back to the owner with stern instructions to NOT park under sprinklers again. :see:

ccp101.jpg

IMG-8078.jpg

IMG-8101.jpg

After that ordeal, you would think I would have been scared from trying ceramic coatings again. However, it should be pointed out that any last-step-product (LSP) can be tainted by water-spots, and often they need to be polished off. Naturally, that takes the LSP with it. However, when a ceramic coating is expected to last anywhere between 1 and 5 years, to remove such a coating is so disappointing. On a wax, you just reapply it for minimal cost.

Even so, I felt it was time to learn how to apply a full-blown ceramic coating to paint. With the Jaguar next in line for a big detail, it became the gunnie pig.........................................
 
Last edited:

Geoff289

Well-known member
Joined
Nov 10, 2013
Messages
1,228
Location
Melbourne, Australia
Seduce! Yeah that's it. i was trying to remember what it was called when I made my earlier post.

That XT GT is nice but never mind that, what's the story with the '68 Shelby behind? The real deal or a replica?
 
OP
D

D.F.B

Well-known member
Joined
Aug 2, 2023
Messages
1,575
Location
Australia
Seduce! Yeah that's it. i was trying to remember what it was called when I made my earlier post.

That XT GT is nice but never mind that, what's the story with the '68 Shelby behind? The real deal or a replica?
I'm pretty sure it's the real deal. The car is owned by a local businessman who owns and directs the M.O.V.E motoring museum. It's been on display there on and off over the years, a complete contrast to his daily driver Tesla Model S.


Personally, I prefer the OG earlier Mustang's over that body style, especially in Hardtop rather than Fastback.

65102.jpg
 
Last edited:
OP
D

D.F.B

Well-known member
Joined
Aug 2, 2023
Messages
1,575
Location
Australia
As I have mentioned in the past, I really don't do vacations, as in sitting in a car or plane to go somewhere only to spend the whole ****** time wanting to return to the comfort of my own home. So, instead, I plan a project and spend the time in my garage. No airports, no toilet stops in messy public rest rooms, no uncomfortable hotel beds. Just pure, un-disturbed bliss. I spent most of my working life dealing with the general public, all I want to do on my holiday is to hide away from it all. Which is where the Jaguar comes into the equation.

This was a project I have been planning in my head for a couple of months, which I finally followed through with back in early February this year. The plan here was to use the Jag as the test subject for applying my first full ceramic coating. The following was my proceedure that I wrote about at the time -

First step was the decontamination process, starting with a wash with a high alkaline soap in the form of Carpro Lift. As you can see, this is an extremely good foaming product that offers considerably more cleaning power compared to regular maintenance soaps. Here, I'm using it with a TRC 10X wash pad.

IMG-6725.jpg

IMG-6722.jpg

IMG-6727.jpg

Once rinsed of the soap residue, it was time for the unpleasant step, iron removal.

IMG-6732.jpg

IMG-6734.jpg

I hate using these products, the smell lingers with me hours, even after a shower. In this case I'm using Carpro IronX in a Pressol bottle. After a decent dwell period, I was lucky enough to have cloud cover today, I thoroughly rinsed the vehicle. A dark red car tends to hide the iron reaction, but I could see the reaction had occurred by the colour of the runoff.

Next up, the clay process. I had this brand new Waxit Clay Mitt to try, used with Meguiar's Final Inspection as the lubricant. Note that I have not bothered to dry the car before this step. Also worth noting that it's important to break in your new clay block, pad or towel on the glass first.

IMG-6736.jpg

IMG-6742.jpg

These clay mitts are double sided, one side is the actual clay surface, the reverse side is microfiber.

IMG-6741.jpg

IMG-6740.jpg

The next step is probably unnecessary, you could simply rinse off the remaining clay lubricant, but after using an iron remover I always like to follow up with another foaming, in this case I had some left-over Shine Supply Shift ready to go.

IMG-6746.jpg

After another rinse, the decon process was complete. I then dried the car with the Big Boi, following up with a towel to get any remaining drips. I like to use my prep-spray here to kill two birds with one stone, getting the car fully dry and wiped down with a prep product in one step. Using the medium Gauntlet as normal here.

IMG-6750.jpg

The next step is one I detest, the masking process. It's like I'm so close to getting started on the polishing and this is the only thing standing in my way! Time spent doing this tedious step is always worth it though. I like the Carpro red tape for this task. The Jag is also pretty easy to tape up, having minimal exposed rubber and unpainted plastic trims.

IMG-6751.jpg

I also placed a couple of utility towels at the base of the windshield to prevent dust building up down there.

IMG-6757.jpg

All of the work so far had been in preparation for polishing, providing the cleanest possible surface to work with. Because I have chosen a Gyeon coating, I wanted to try their version of a primer polish, appropriately named Primer, a product that offers minor correction ability while also laying down a base layer of Si02 to help the coating bond as strongly as possible.

IMG-6761.jpg

You absolutely don't need to use a primer polish when applying a coating, in my case I only needed the mild polishing ability offered here by Primer. If I was chasing ultimate perfection or required more cut, then I would be looking towards a pure polish with the level of cut I needed. I used Primer on a Shine Mate blue pad and the Rupes yellow on the Nano.

I had all the machines out, including my new Rupes LHR75 pneumatic.

IMG-6769.jpg

This was my first use of that new polisher, and WOW, what a machine that LHR75 is! It so smooth and very intuitive to use, even with the air hose hanging over your shoulder. I actually kept picking this unit up more than the others. Overall, I used the bigger 5-inch Shine Mate for the hood and doors only. The rest of the car was dealt with a combination of the 3-inch Shine Mate, the LHR75 and the Nano. Being a smaller car, a 3-inch machine gets way more use than normal, including the stubby little trunk lid.

IMG-6768.jpg

For some areas, like the gloss window pillars, I needed to break out Sonax Perfect Finish to clean them up beyond what Primer could achieve. Overall, Primer is an extremely easy product to work with, the wipe off is perfection. The only slight drawback is some dusting, which I was later told was due to overworking it, a shorter cycle would limit that.

With the paint and gloss trims polished, I wanted to address the glass while I had the machines out. This was my first time using P&S Clarity Creme, a dedicated glass polish that is much more user friendly than something like Carpro CeriGlass (cerium oxide). In my case, I didn't need to remove anything nasty like water spots or scratches, so the Clarity Creme was all about deep cleaning the glass in preparation for coating. This was another job for the LHR75 and again, what a beast that thing is! Pad choice was a Lake Country SDO blue cutting pad.

IMG-6780.jpg

IMG-6782.jpg

IMG-6781.jpg

I went to the trouble of adding extra masking tape to protect the surrounding rubber seals, it would seem that step is not as important for Clarity Creme as it is for CeriGlass.

The next step was to remove the polish dust using compressed air and a damp towel. You can use a prep spray at this point too, as long as it's been at least 15 minutes after using Primer. Gyeon say that it's not entirely necessary, but I still think it's good practice.

Overall, I was happy with how it came up. It's not perfect, I wasn't aiming for that on this car, but it certainly met my standards.

IMG-6785.jpg

IMG-6786.jpg

IMG-6788.jpg

IMG-6790.jpg

I have a couple of microfiber blankets on hand for extended projects like this, covering the vehicle until the next day.

IMG-6793.jpg

The car was now ready for the application of the coating, including the glass.
 
OP
D

D.F.B

Well-known member
Joined
Aug 2, 2023
Messages
1,575
Location
Australia
It was up early the next morning, getting a start on the coating before it got too hot. With the bulk of the hard work done, all that I needed to do was to wipe the car down with Gyeon Prep before getting on with the whole point of this project.

In the past, I have been happy using waxes and sealants on my cars, the usage patterns and care they receive means that longevity is not an issue. But I had wanted to try a ceramic coating for a while, so this represents a change in direction for me. Not to mention the chance to learn a new skill.

So what coating? I looked at Carpro, Gtechniq and NV coating's before landing on the new EVO range from Gyeon. Because I'm a classic overthinker, the key requirement I wanted was something that was going to be forgiving to work with. For the EVO coatings, Gyeon seemed to have focused on that aspect in particular. I was tossing up between Mohs EVO or Pure EVO, the former getting the gong because of the "depth and pure candy gloss" qualities that Gyeon tout. Pure EVO also has a longer working time and more forgiving overall than Mohs.

IMG-6809.jpg

IMG-6813.jpg

Gyeon Pure EVO comes in two different bottle sizes, 30ml and 50ml, the 30ml will easily do a car like this. Pure EVO is also a single layer coating with up to 3 years longevity with correct care. The kit comes with the coating and an applicator, along with installation and care instructions. With the huge catalog of Youtube videos available to watch, the instructions are largely useless anyway.

Such was my concentration, I sort of got in the zone during this process and didn't focus on pics, so they won't be as prominent as usual.

The first step is to shake the bottle and then prime the applicator with a generous amount of product. It's good practice to put the cap back on the bottle between applications to prevent the carrier solvents from evaporating.

There are different methods of laying down a coating, I put down a "draw line" down the middle of the panel and then followed with the usual crisscross pattern. The draw line allows you to pick up the coating and distribute it more evenly as you work across the panel. Pure EVO is also a thick, sticky coating to work, I'm guessing this is to make it very obvious where it's been applied.

IMG-6816.jpg

IMG-6815.jpg

One of Pure EVO's drawcards is the super long working time, up to 10 minutes in the right conditions. The warm temps today sped that up a little for me, hence starting early. That said, Pure EVO will bond instantly to the paint and can be removed before the 10min.

Removal is via two low-pile towels, one for the initial wipe to level down the coating, followed by a second towel as a final buff. In my case, I had blue towels for the first wipes, green for the second to help me remember which was which. Using a diffused light will help pick up any high spots.

IMG-6820.jpg

IMG-6818.jpg

And that's where the pics stop on the coating process. I started on the trunk lid and adjoining rear quarter panels. I then did the roof, hood and front quarter panels, followed by the doors and mirrors, finishing with the bumpers, lights and lower sills. Overall, Pure EVO was very easy to work with.

I chose not to coat the glass with Pure EVO, opting for Gyeon Quick View Instead. In a technical sense, Pure EVO would be fine on glass and probably outlive Quick View, but I have found Quick View to very good, especially on garage queens. Having said that, it's been doing stellar work on my daily Ranger.

IMG-6828.jpg

What I love about Quick View is the simple installation. Having the glass back to the bare bones after claying and polishing, all that was needed was a quick wipe with Prep. The major drawcard for Quick View is the integrated felt applicator, except mine is welded shut by the cap! So, I just remove the secondary lid and squeeze the product onto a microfiber applicator pad. Quick View is applied to all the exterior glass in one shot, left to sit for 15 - 20 min and then buffed clean with a damp towel. I then follow up with glass cleaner and two towels to deliver a streak free finish. The glass cleaner doesn't remove the coating by the way.

After the exterior glass was in shape, I had to go through and clean the interior glass as it was letting the side down. If you think the back glass of a Mustang is hard to clean, a Jaguar XE sedan is not much easier..........hence it being a touch neglected.

Having removed the number plates, they needed some attention too. I cleaned the plate and plate protector in the sink with APC, dried and then, yes I know I know :rolleyes: , polished those too with the Nano in rotary mode and Rupes yellow compound.

IMG-6829.jpg

I then followed up by coating both pieces with Gyeon Cure. It's amazing what a difference this made to how they looked on the car. So, jokes aside, certainly worth doing. It's called "detailing" for a reason you know! ;)

IMG-6834.jpg

Next, the door sills. The XE has massive inset door sills that tend to get hacked up quite easily. The Nano in rotary mode again, this time with Sonax Perfect Finish. I then coated these areas in Cure as well. Again, a job worth doing due to the big difference this step brought to the table.

IMG-6838.jpg

IMG-6840.jpg

The next steps focused on the interior. After a vacuum, I decided to apply some 303 Fabric Guard to the floor mats.

IMG-6844.jpg

It was then onto the leather. Having such light colored leather requires diligent maintenance. Even so, it didn't need much so I settled on the Mild Leather Cleaner from ColourLock, teamed with their leather brush and an interior towel to wipe away the residue.

IMG-6851.jpg

Once all seats, door trims, center console and steering wheel were clean, I followed up with ColourLock Leather Protector, applied with one of their applicator sponges.

IMG-6855.jpg

The key reason why I like ColourLock leather products is the natural, matte sheen they leave behind, especially on a lighter colour like the Light Oyster seats shown here. No glossy, sticky finish here!

Final step on the interior was a wipe down with Auto Finesse Spritz.

IMG-6858.jpg

Returning to the exterior, I dressed the tires and then gave the engine bay a wipe over with ONR and followed up with Meguiar's Hyper Dressing.

IMG-6861.jpg

IMG-6865.jpg

IMG-6866.jpg

I ****** love this interior! In all black, these cars look a little plain in terms of interior presentation. But with the two-tone treatment, it looks a million dollars in my opinion!

IMG-6869.jpg

And that concludes this project.

IMG-6872.jpg

IMG-6877.jpg

IMG-6873.jpg

IMG-6876.jpg

IMG-6892.jpg

IMG-6883.jpg

IMG-6909.jpg

IMG-6905.jpg

IMG-6908.jpg

Overall, I'm happy with the result. Important to note that Pure EVO is not a "slick" coating, however it makes up for that with it's candy gloss appearance, chemical resistance and extreme water repellency.
 
OP
D

D.F.B

Well-known member
Joined
Aug 2, 2023
Messages
1,575
Location
Australia
The above ceramic coating was applied in early February 2023. Save for two rinse-less washes, because of limited use, I hadn't washed the Jag properly until last Friday.

IMG-9987.jpg

I now understand why ceramics surpass wax's and sealants, they make a car effortless to wash. Granted, the car wasn't all that dirty, but in general, most contamination is removed with the initial pre-rinse. What surprised me was how easily the soap rinsed off the car after the contact wash, then how easy it was to blow dry.

In this case, the tires scrubbed with P&S Brake Buster, wheels cleaned with some left-over DIY Incredible Suds in my foam cannon and Gyeon Wet Coat applied, rotors treated with Bilt Hamber Atom Mac to prevent surface rust. The rest of the car washed with Carpro Reset, drying aid Gyeon Ceramic Detailer. Tires dressed with OG Tire.

IMG-9988.jpg

I don't know, is it glossy enough?

IMG-9993.jpg

Finally, Odyssey Red at its finest! Makes me wonder why nearly every euro luxury car is painted white, black or grey.................

IMG-9998.jpg

IMG-9997.jpg

IMG-0005.jpg
 

littlebean

Well-known member
Joined
Mar 7, 2018
Messages
764
so you didn't just go for the 'chuck some washing up liquid in a bucket and grab the nearest sponge like thing' option then :ROFLMAO:
that looks brilliant
 
OP
D

D.F.B

Well-known member
Joined
Aug 2, 2023
Messages
1,575
Location
Australia
For some reason, ever since they became a thing, I have always wanted a car with paddle shifters. My first introduction to that was on my TS50, sort of........................

ess101.jpg

The Momo steering wheel featured thumb activated shift buttons, the large one for upshifting, the smaller one for down. When I bought the car, the owner told me he called them "*******"....................ok then. :oops:

ess102.jpg

When you consider that feature was introduced on the T-Series way back in 1999, they were the first Australian built cars with steering wheel mounted shifters, and surely one the first anywhere to get such a thing outside of a Ferrari or BMW. Were they perfect, not really, mainly because they were only controlling 4 gears, the response was slow, and you ended up losing steering wheel audio controls.

So, when the Jag turned up, having shift paddles was like some sort of luxury. The small plastic paddles gave manual control to the excellent 8-speed ZF gearbox, complete with rev-match downshifts.

IMG-5142.jpg

IMG-5140.jpg

Arguably a pointless addition to an old-man burgundy luxury car, but I decided to add a set of shifter extensions to improve the look and functionality of the standard setup.


IMG_5138.jpg

Paddle shifter extensions are available for most cars on the market, with several design and material choices to select from. With my desire to maintain the OEM look, I went with the above aluminum set, both in color and material.

These items are held in place with adhesive and are molded to fit around the standard paddles.

IMG_5148.jpg

First job was to clean both old and new with IPA to make sure the bonding surfaces were squeaky clean.

IMG_5144.jpg

Adhesion promoter was then added to both the new and old paddles.

IMG-5151.jpg

The 3M adhesive pad was then installed on the new paddles before being offered up to the OEM paddles with firm pressure.

IMG_5154.jpg

IMG_5155.jpg

The finished result, while obvious, blends in with the other metallic highlights within in the cabin, hence not choosing the red or blue anodized finish also available.

IMG_5158.jpg

IMG_5159.jpg

IMG_5168.jpg

IMG_6869.jpg

As mentioned, overkill on a 200hp luxury sedan. But in use they offer more positive feedback when tapped compared to the OE items, not to mention the extended reach when cornering at pace.

With a new car on the way, this is something I will definitely be doing............if it ever turns up. :rolleyes:
 

Blackbyrd

Well-known member
Joined
Nov 28, 2020
Messages
1,156
Location
TN
exceptional detail work as always! I also respect the stay cation though I dont get them often. My work shuts down through christmas past new years. I usually take the last of my vacation days leading up to this so I end up with 2.5 to 3 weeks off depending on the year. I get about 3 days with the house to my self and have my garage therapy. Its wonderful (dont tell my family).

Im interested in your gateway drug hahah, There is nothing like the view after you take the masking tape off, but ive always thought about going beyond basic wax's. I used griots spray on stuff on my GTO before I traded it for My ZL1 had a ceramic coating when I purchased it which I believe is nearing its end. It needs a full detail which is something I would save for those staycations. I was very happy with the hydrophobic properties, and seemd to have good life for a spray and wipe applicaiton... though it didnt create the depth that Best of Show provided.

Always enjoy seeing your detail work!
 
OP
D

D.F.B

Well-known member
Joined
Aug 2, 2023
Messages
1,575
Location
Australia
Wondering how you would clean and shine Jeep black plastic fenders? Nice detail work!
This is a subject that can be approached from a few different angles.

If they still look good, as in not faded, you just apply a water-based dressing once a month to help protect them without imparting a glossy look. But the key is regularity as these products wash of in short order. Of all the options, I like how 303 Protectant has a matte OEM look to it.

Again, if they are newish looking, I really like applying a Si02 type sealant to these trims. The end result won't be night and day different, rather subtly enhanced with a satin/matte look. Carpro Reload seems to do the best work here. Super easy to apply, spray on, wipe off.

IMG-4869-2.jpg

Previously, I would have recommended a plastic ceramic coating, but I have cooled on that idea in recent times. The main reason, you can't fully remove and reapply the coating when it ultimately fails like you can on paint.

So, if the trim is excessively faded, I highly recommend Solution Finish. This is a trim die that will last about 12 months if properly applied. You do need to clean the trim very well prior to application with an APC, then wipe the surface with IPA to remove any lingering residue.

IMG_9724.jpg
 
OP
D

D.F.B

Well-known member
Joined
Aug 2, 2023
Messages
1,575
Location
Australia
exceptional detail work as always! I also respect the stay cation though I dont get them often. My work shuts down through christmas past new years. I usually take the last of my vacation days leading up to this so I end up with 2.5 to 3 weeks off depending on the year. I get about 3 days with the house to my self and have my garage therapy. Its wonderful (dont tell my family).

Im interested in your gateway drug hahah, There is nothing like the view after you take the masking tape off, but ive always thought about going beyond basic wax's. I used griots spray on stuff on my GTO before I traded it for My ZL1 had a ceramic coating when I purchased it which I believe is nearing its end. It needs a full detail which is something I would save for those staycations. I was very happy with the hydrophobic properties, and seemd to have good life for a spray and wipe applicaiton... though it didnt create the depth that Best of Show provided.

Always enjoy seeing your detail work!
Can Coat EVO is very easy to use and lasts way beyond what it's simple spray-wipe application would suggest. However, I think if you are chasing the depth of gloss, it may be a disappointment.

It's been said, as longevity of an LSP goes up, the slickness and depth of gloss goes down.

That's why there is still a place for waxes and sealants, they have a slicker finish and a "warmer" level of gloss or "glow". It's an oldie, but Collinite 845 is superb and decently durable. I also love Wolfgang Deep Gloss Paint Sealant.

There are exceptions though, Gyeon Pure EVO offers that warmth, but lacks slickness. Gtechniq CSL topped with EXO is popular because it offers the slickness of a wax, but the performance of a ceramic coating. Both CSL and Pure EVO are very user friendly for a novice.

If you can find some (its just been discontinued), the Meguiars Hybrid Paint Coating was apparently very good for performance, look and ease of application.
 
To avoid these ads, REGISTER NOW!

losdudes

Well-known member
Joined
Mar 10, 2011
Messages
210
Location
Colorado
This is a subject that can be approached from a few different angles.

If they still look good, as in not faded, you just apply a water-based dressing once a month to help protect them without imparting a glossy look. But the key is regularity as these products wash of in short order. Of all the options, I like how 303 Protectant has a matte OEM look to it.

Again, if they are newish looking, I really like applying a Si02 type sealant to these trims. The end result won't be night and day different, rather subtly enhanced with a satin/matte look. Carpro Reload seems to do the best work here. Super easy to apply, spray on, wipe off.

IMG-4869-2.jpg

Previously, I would have recommended a plastic ceramic coating, but I have cooled on that idea in recent times. The main reason, you can't fully remove and reapply the coating when it ultimately fails like you can on paint.

So, if the trim is excessively faded, I highly recommend Solution Finish. This is a trim die that will last about 12 months if properly applied. You do need to clean the trim very well prior to application with an APC, then wipe the surface with IPA to remove any lingering residue.

IMG_9724.jpg
Thanks, I'll give that a try. My jeep is a 2016 and starting to fade between washings. I have been using Back to Black aerosal with limited luck.
 
OP
D

D.F.B

Well-known member
Joined
Aug 2, 2023
Messages
1,575
Location
Australia
Thanks, I'll give that a try. My jeep is a 2016 and starting to fade between washings. I have been using Back to Black aerosal with limited luck.
I use Back to Black on cars I want to quickly freshen up, but the effect is short lived.

I would be treating them with Solution finish. It's really easy to use, just be sure to clean the surfaces with APC and IPA prior to application.

The Rag Company have some excellent videos on Solution Finish -


losdudes

Well-known member
Joined
Mar 10, 2011
Messages
210
Location
Colorado
I use Back to Black on cars I want to quickly freshen up, but the effect is short lived.

I would be treating them with Solution finish. It's really easy to use, just be sure to clean the surfaces with APC and IPA prior to application.

The Rag Company have some excellent videos on Solution Finish -


I checked out the videos and will try it soon, btw, I also detail as a hobby on my own stuff, thanks again
 

Geoff289

Well-known member
Joined
Nov 10, 2013
Messages
1,228
Location
Melbourne, Australia
Well, it's going to be red, make loud noises and make me smile from ear to ear. If it ever gets built....................
Ford Australia brought one to the recent Mustang Owners Club Roundup, see my thread. It was yellow, loud and made some people smile from ear to ear but others, which might have included me, thought it looked too much like a Camaro.
 
OP
D

D.F.B

Well-known member
Joined
Aug 2, 2023
Messages
1,575
Location
Australia
It was up early for a Miami Monday, or to be precise, a Miami Monday Service.

Confession, I actually skipped last years' service on the XR8. Granted, the car would be lucky to have done 500 km in the last two years, but I felt guilty any way. In defense, I get super anxious handing this car over to someone else, so booking and taking the car in to the dealer is not something I look forward to. I really need to learn how to do oil changes myself, especially considering what it cost me.

Now, I'm not posting this cost break down to complain, rather to show what goes into owning one of these cars. And yes, it had the 135,000km service with only 7,208km on the clock. :lol:

135,000km/108mth Service Price Calculator Service - $215.07

Oil Filter - $16.35
Castrol Edge 5W-20 x 8.5lt - $203.15
Environmental Levy - $25.00

Total Labour - $215.07
Total Parts - $20.40
Total POL - $228.15
Total Misc - $0.02
Total Tax - $46.36

Total Invoice - $510.00 AUD.

Yes, $510 for an oil change, $200 of that for the oil alone. Castrol Edge 5W-20 was an FPV-only oil and was always expensive. I'm actually surprised it got that oil to be honest, it was discontinued quite a while ago. Included with the service is an emailed report of the car along with images of the car on the ramp, tire condition and battery life. And yes, still the factory Dunlop's from 2014!

or101.jpg

bc101.jpg

tc101.jpg

tc102.jpg

The car was serviced and ready to be picked up within three hours, which suited me just fine. Back in my care and mind at ease.
 
OP
D

D.F.B

Well-known member
Joined
Aug 2, 2023
Messages
1,575
Location
Australia
Today seemed to be Falcon day!

While the XR8 was being serviced, I did a rinse-less wash on the XR6. In this case, the freshly coated wheels needed nothing more than a rinse down............


I'm extremely pleased with this coating so far, the look, feel and water behavior are exactly what I was going for.

Rinse-less of choice on the blue car was yellow ONR teamed with NV Boost v2.

At the moment, I trying to find a small drying towel I like. In that I mean a square, 40x40cm towel that suits my style of drying. The FTW is ok, but grabby. The Creature, again ok but seems to lack softness over time. The Eagle 500 doesn't really suit drying. So, I ordered 3 different towels, two of which I already use elsewhere................

IMG-0041.jpg

Firstly, the purple Minx Royale, which on first acquaintance is butter smooth, but felt grabby on the paint. Scratch!

Second towel, the 30x30cm Gauntlet (grey towel above). I've used this towel for wheels for a while now, on paint this is more what I'm going for. I've loved Gauntlets from the very beginning, offering a smoothness that most traditional twist-loop towels lack. In the small size, this suits me more than the medium sized version. Hmmm, maybe. I just have to figure out how to denote these from my wheel towels.

Thirdly, the Platinum Pluffle (white towel), which has been my rinse-less towel. Out of curiosity, last week I grabbed one and tried it for drying and was pleasantly surprised. This towel has the softness I want, an even pile on each side (unlike the Creature), is butter smooth across the paint and perfectly sized. I think I have my winner.

With the XR8 now back, it was next in line. I washed the wheels with NV Snow, rinsed the rest of the car and then did an Absolute/Bead Maker rinse-less wash. In this case, I continued using the Platinum Pluffles to dry.

IMG-0048.jpg

Two clean Falcon's...................

IMG-0045.jpg

IMG-0053.jpg
 

littlebean

Well-known member
Joined
Mar 7, 2018
Messages
764
crikey, the finish you get is amazing (not worth me trying to achieve that since I live where no one cares if they scratch or bump your car) and impressive to see
 
OP
D

D.F.B

Well-known member
Joined
Aug 2, 2023
Messages
1,575
Location
Australia
crikey, the finish you get is amazing (not worth me trying to achieve that since I live where no one cares if they scratch or bump your car) and impressive to see
No joke, I had my Mustang for less than a week before someone dinged the rear quarter panel with their door. :confused:
 
OP
D

D.F.B

Well-known member
Joined
Aug 2, 2023
Messages
1,575
Location
Australia
All car dealerships engage in this sort of highway robbery. If you think that's a bit rich you want to see what a Benz dealer charges.
No doubt. The Jag included a service plan within the sale of the car, so I have no idea what they charge for each service at this point.
 
OP
D

D.F.B

Well-known member
Joined
Aug 2, 2023
Messages
1,575
Location
Australia
Earlier this week, the chain on the garage door opener jumped off the drive cog. What seemed an easy fix, as in reinstalling and tensioning the chain turned out to be a no go. Naturally, this just had to happen on a public holiday. :rolleyes:

Two days later, the whole motor unit and chain track were replaced with the latest Merlin Commander Elite.


merlin101.png

merlin102.png

I like this unit much better, mainly because the chain is hidden, and the track system is a much neater arrangement. It's also much quieter than the old version, which was installed when the house was built back in 2005 and has served a very long and hard life, we tend to enter/exit via the garage rather than the front door.

The only drawback (other than the cost) is all of the existing remotes won't talk to the new unit. I had one in each car, extravagant but worth doing, so I've order an extra two of the newer remotes to go with the three supplied.
 

Donnie O

Member
Joined
Jul 30, 2021
Messages
22
I never come over here and check and damn if I didn't and here you are. Hello dfb!
 

Attachments

  • 20231104_142428.jpg
    20231104_142428.jpg
    1 MB · Views: 10
OP
D

D.F.B

Well-known member
Joined
Aug 2, 2023
Messages
1,575
Location
Australia
Seven days in a row working. I staggered out of bed this morning but really had no motivation to do anything. But, I pressed on.

I had a last-minute request for the Wildtrak to be detailed, so I used that to try a couple of products I have been sitting on for a few weeks now.

First, Gtechniq Citrus Foam -

https://detailingshed.com.au/products/gtechniq-w4-citrus-foam?_pos=1&_sid=3fd386ce4&_ss=r

IMG-0065.jpg

This pre-wash soap is designed to strip away contaminants prior to a contact wash. Unlike a lot of these pre-wash foams, this product is pH neutral, meaning its gentle on waxes and sealants. From what I can gather, rather than using a high pH, the natural degreasing nature of the citrus element helps to strip away the grime. Despite excellent foaming, it didn't really wow me with its touchless cleaning ability.

The next product was Gtechniq Tri-Clean -

https://detailingshed.com.au/produc...ean-antibacterial?_pos=1&_sid=1322b5a81&_ss=r

IMG-0073.jpg

Despite the weird eucalyptus scent, I actually quite liked this. Compared to other interior cleaners, Tri-Clean has the ability to kill bacteria and neutralize odors. It's also pH neutral, making it multi-surface safe, and leaves a matte finish. My personal interiors won't require this product, but I can see this being a great option for professionals wanting to clean, sanitize and neutralize odors in one simple step.

I'll be completely honest here, I have not been wowed by Gtechniq in the past, a theme that seems to follow most, if not all, of the UK-based brands I have tried, including WoWo's, Autoglym, Auto Finesse and Stjarnagloss. Of the selection of Gtechniq products I have sampled, only Tri-Clean impressed, everything else has been meh. I have no idea why this trend plays out with the UK brands, it's not from a lack of investment or effort, so perhaps it's a philosophy difference between Aussie/US type detailing and what happens in the UK?

In any case, I think I'm now at a point where I have a collection of brands and products that I know work for me from a performance and user experience point of view. Have I reached peak detail?
 
OP
D

D.F.B

Well-known member
Joined
Aug 2, 2023
Messages
1,575
Location
Australia
After posting the musical sounds of the XR8 last week, I wanted to document how a different exhaust setup changes an otherwise similar engine architecture.

My 2017 Mustang was fitted with a Borla Touring cat-back within months of my ownership. I had never modified an exhaust to that point, but the thing was too dam quiet, even the grandpa burgundy XR8 was louder. For an American muscle car, it wasn't living up to its reputation of a loud and proud pony car.

I ended up looking at both Roush and Borla systems, mainly because they had an OE looking tip design. I wanted extra volume but didn't want to be "that guy" with the noisy car. I settled on the Borla Touring in EU spec, which includes a resonated H-Pipe to eliminate rasp and drone.

IMG-0488.jpg

IMG-1177.jpg

IMG-1175.jpg

Even with the resonator, this exhaust is not exactly legal in terms of noise emissions. However, below 3000rpm, the car is quite stealthy, just a natural V8 burble. However, clear 3000rpm and all hell breaks loose!

I still have the original exhaust taking up space in storage. That thing had very little time on the car, but look how manky it looks covered in the hideous black paint they spray export cars with.

n.jpg

nnnn.jpg

nnn.jpg

nn.jpg

Anyway, the reason for this post.

Cold Start (I love cold starts, so much noisier than a hot start) -


Hot Start & Revs -


The Borla Touring produces a much deeper and more traditional V8 tone. In hindsight, I think I would have preferred a little bit more snap-crackle-pop in the same vein of the XR8. In which case, I should have chosen the Borla S-Type with the X-Pipe.

But I do love how subtle the Touring can be when needed, while still being obvious unlike the OE exhaust. On the other hand, it properly howls when given a boot full, without drowning out the delicious induction note. Surely this is the best combination, allowing the engine itself to bark back through the firewall, while providing just the right amount of exhaust noise to permeate through the cabin.

I hear a lot of Mustang exhausts and while they are loud, they are just that, loud. In that I mean they lack any tonal tuning, so you get ALL of the noise, be that the good or bad noises. I think this is where choosing a brand like Corsa, Borla or Roush comes into the equation. I remember when I was asking the local shop about exhausts, they wanted to sell me some off the shelf mufflers and tips. To me, that would have been potluck and I didn't want to be messing around with different combinations at my expense. At least with choosing a system like this, there are plenty of online sound clips to gauge what it will sound like. Not to mention the simple, straightforward install.

As it stands, I'm not sure what I will do with the S650 when it arrives. Ford nailed the brief with the Active Exhaust on the later S550 and new S650. However, it looks like the S650 has been toned down to meet ADR laws. In which case, I may just swap out the resonator for an X or H pipe and leave the rest.
 

MadeByMiller

Well-known member
Joined
Dec 29, 2018
Messages
1,230
Location
Rapid City, SD
In any case, I think I'm now at a point where I have a collection of brands and products that I know work for me from a performance and user experience point of view. Have I reached peak detail?
Funny, when I read your detailing posts (which I thoroughly enjoy) I'm always asking myself how you're able to discern what must be quite small differences between the multitude of products you test that perform the same task. It's a testament to your experience and attention to, uh, detail - I'd say.
 
OP
D

D.F.B

Well-known member
Joined
Aug 2, 2023
Messages
1,575
Location
Australia
As a gardener, the single most used tool I use is a pair of secateurs. Made in Switzerland and coming with a lifetime guarantee, Felco are generally considered the industry standard. I know of people who are still using a pair after 30+ years! While Felco make a variety of secateurs and shears, the number 8 and 9 are the best of the bunch.

Felco 8 for right-handed -
https://felco.com/en_au/produits/pruning-shears/felco-8

Felco 9 for left-handed -
https://felco.com/en_au/produits/pruning-shears/felco-8

The 8 and 9 are best suited for extended use due to the more ergonomically designed handles. The angle of the handle allows for a more natural extension of your hand, reducing fatigue.

This pair of Felco 8 are about 12 years old and were given to me by my employer. At the time, I was delighted by this gesture as these are not a cheap item, retailing for about $110. Used extensively over the years, they had got to the point where they just weren't cutting well at all, even after disassembly and sharpened properly. The beauty of Felco though is the full parts backup, meaning an old pair can be made new again.

FELCO8100.png

The cost of a new blade and hook is less than half the price of a new pair.

https://www.forestrytools.com.au/col...-7-8-blade-7-3
https://www.forestrytools.com.au/pro...o-7-8-hook-7-4

IMG-0909.jpg

Each pair of secateurs comes with this adjustment key, although I used a small ratchet spanner.

IMG-0911.jpg

Disassembly is easy, remove the hook screw at the top, remove the locking tab screw then remove the central nut.

IMG-0913.jpg

IMG-0915.jpg

Push the central bolt out, lift the hook away then wiggle the blade from the two locating pins. Then clean and grease the mating surfaces ready for re-assembly.

IMG-0918.jpg

IMG-0920.jpg

IMG-0921.jpg

Now install the new hook, align and secure the bolt.

IMG-0923.jpg

Put the new blade onto the locating pins, install the central bolt and tighten the nut to an appropriate torque. Too tight and they won't re-open, too loose and they will be sloppy, cut poorly and increase wear. Re-install the locking tab and screw.

IMG-0925.jpg

I did not realise how worn the old blade was until offered up to the new one. Keep in mind, I sharpen secateurs quite often to maintain clean cutting. Twelve years on one blade is quite fair all things considered.

IMG-0931.jpg

Ready for use again and cutting much, much better.

IMG-0934.jpg

There is a certain satisfaction gained by giving something a new lease of life.
 
To avoid these ads, REGISTER NOW!
Top Bottom