To avoid these ads, REGISTER NOW!

Above 1200 Sq/FT DFB's Garage

Wokspaces above 1200 squarefeet.
OP
D

D.F.B

Well-known member
Joined
Aug 2, 2023
Messages
1,596
Location
Australia
XR6 Brake Upgrade

After having the wheels off the XR6 last month, it spurred me to act on something that has been on the maybe-one-day list.

IMG-9752.jpg

IMG-9783.jpg

IMG-9792.jpg

Falcon’s were never renowned for braking performance. These were fleet, rental, police and taxi cars first, and performance orientated cars a somewhat distant second. I don’t say that to insult the Falcon or its fans, rather it's a realistic assessment of a car that had to sell in both volume and at low cost.

That low cost covers several different viewpoints. Firstly, the car needed to be attractive to fleet buyers, as in the ones who kept the factory volume up. To do that, Ford needed to offer an attractive per vehicle price, at the same time keeping running and repair costs low. In other words, provide a lower total ownership cost than the competitors. This is why Ford gained ground in fleet sales by offering 15,000 km intervals compared to Holden at 10,000 km service intervals. If a fleet kept the cars for 80,000 km before turning them over, each car would need just over 5 services in that time, a Holden would need 8 over the same period.

What does this have to do with brakes? Well, smaller brakes are cheaper to make, and cheaper to service/replace in the field. And this is why a large, powerful RWD sedan weighing beyond 1700 kg (3750 lbs) was fitted with braking hardware smaller than some small hatchbacks.

The standard Falcon braking hardware from the 2002 BA, right through until the very last FGX Falcon made in October 2016, was the same throughout. Even the BA and BA MK II XR6 Turbo and XR8 got this system –

Front – 298 mm x 28 mm ventilated rotors and twin piston sliding calipers.
Rear – 303 mm x 16 mm solid rotors and single piston sliding calipers.

BA-FALCON-DISC-BRAKES.jpg

Ford did offer a much better Premium Brake system as a factory option on all BA and BA MK II XR sedans, the same fitted to the FPV GT, but uptake was low. The limited-edition BA MK II XR8 Devil R and XR8 Enforcer editions also featured those brakes as standard, as were a lot of early BA Falcon press cars. At the time of writing, even after raiding my image collection and scouring the internet, I could find little to no images of this system, be that the black Ford branded or the blue FPV branded examples.

pb101.jpg

Fun fact, if you paid the $2950 for Premium Brakes on a BA XR6/XR6T/XR8, your car went across the road to FPV for them to be fitted, and a matching alloy spare wheel was a mandatory option.

From BF onward, Ford deleted the Premium Brake option, and all XR6 Turbo and XR8 models came with an upgraded factory fit system (the NA XR6 missed out on this, nor was it an option) -

Front – 322 mm x 28 mm ventilated rotor and twin piston sliding calipers.
Rear – 328 mm x 26 mm ventilated rotor and single piston sliding calipers.

From what I can gather, at some point in the BF MK II run, and then onwards, those specs changed again with the rear reverting back to the standard 303 mm solid rotor and smaller caliper. Again, cost control in the lead up to the new model. For FG, this spec was also used on the G6E Turbo and FPV GS models as well.

Front – 322 mm x 28 mm ventilated rotor and twin piston sliding calipers.
Rear - 303 mm x 16 mm solid rotor and single piston sliding calipers.

I should point out that in normal driving conditions, the brakes on my XR6 are fine, but nothing more. The pedal feel is mushy, and the braking ability limited in performance orientated driving. My main gripe being a lack of stamina, you get one or two big hits and that’s it, the pedal gets longer, they start to shudder and become quite noisy. Which is where this upgrade comes in.

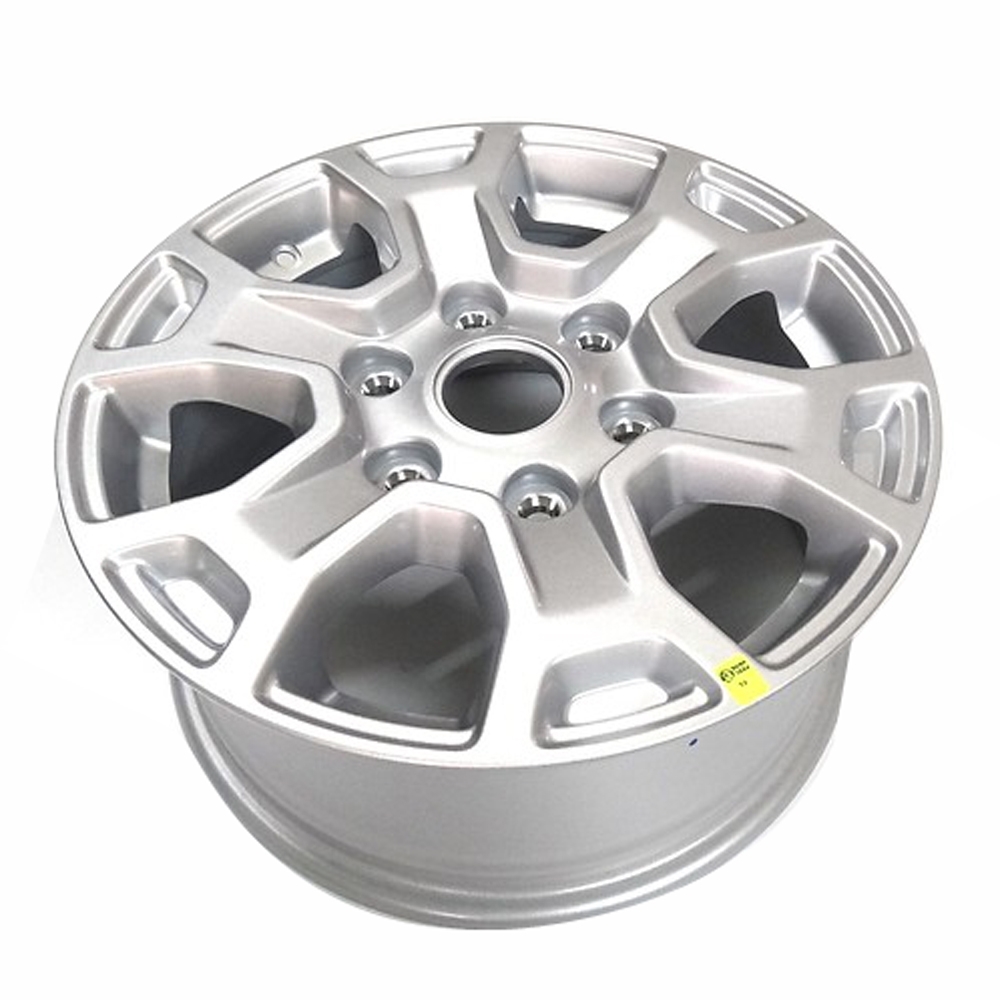
To be clear, I wanted Brembo’s, for the performance but also the looks. However, despite Brembo’s being a direct bolt on and fitting within an 18-inch diameter wheel, the front caliper won’t clear the back of the spokes on the XR Snowflakes. And I was not prepared to forego those beautiful wheels or pay for a new set of wheels and tires. A Brembo package with new wheels and tires would be near on half the value of the car itself. I like setting fire to cash, but not that much. :ROFLMAO:

BF-FPV-BREMBO-6-PISTON-BRAKES.jpg

FPV-FG-F6-WITH-STD-BREMBO-BRAKES.jpg

FPV-FG-MK-II-GT-P-ALLOYS.jpg

2016-Ford-Falcon-XR6-Turbo-Sprint-20-1.jpg

So, this is where I went looking for something that would scratch the braking itch, while being cost effective and without losing those wheels.

A few years ago, you could still buy a PBR upgrade kit, which in effect was a BA GT / BA Premium Brake system with larger/stiffer C5 calipers and larger grooved rotors. In this case, the calipers were painted red rather than blue or black. However, those kits are long gone.
https://www.fordforums.com.au/showthread.php?t=11357450
https://www.fordforums.com.au/showthread.php?t=11452132

PBR101.jpg

I also went looking for an after-market solution, which I found a couple of vendors selling aluminum mono-block 4, 6 or 8 piston calipers that would fit a variety of wheel styles rather than the set list of FPV-specific wheels. But………………I just didn’t love them, too “aftermarket” looking and questionable quality. Brakes aren’t something to take a gamble on in my opinion.

https://www.performancesuspension.com.au/ford-falcon-fg-2008-on-xyz-racing-6-pot-355mm-fixe~17089
https://www.vari.com.au/product/falcon-fg-fgx-gtp-kit/

xyz101.jpg

vari101.jpg

So with that, I settled on a tried-and-true Falcon upgrade, fitting the BF – FG XR6 Turbo brake setup. In this case, the calipers all round remain the same, but the front rotors are increased from 298 mm to 322 mm.

The first requirement for this upgrade is a larger caliper support bracket. This is for the front only, the rear setup stays as is. These are available from the aftermarket or by sourcing a set at a wrecking yard. In my case, I ordered a new set online.

https://www.planetparts.com.au/ford-ba-fg-falcon-front-brake-upgrade-caliper-supp
https://www.ebay.com.au/itm/292209993994

IMG_9918.jpg

IMG_9922.jpg

The above bracket allows for the fitment of the larger front rotors. But what rotors? Because Ford used the same brake systems from 2002 to 2016 on Falcon and Territory, the availability and choice of spare parts is a huge bonus of these cars. Ford OEM rotors are still available, but I decided to go a few steps beyond that and looked at DBA’s range of aftermarket options. It’s at this point I reached out to Matt from Race Brakes Sydney for some advice.

https://www.racebrakessydney.com.au/
https://www.fordforums.com.au/forumdisplay.php?f=174

In my case, I skipped the OE-replacement 3000-series and went straight to the 4000 series in T3 spec. While DBA offer cross drilled and slotted 4000 XD and 4000 XS designs, Matt suggested sticking with the 4000 T3 slotted rotor. For the fronts, 322 mm x 28 mm ventilated rotors were chosen, the rears remain the same OE size solid 303 mm x 16 mm rotors.

https://dba.com.au/product/front-4000-series-t3-brake-rotor-dba42107s/
https://dba.com.au/product/rear-4000-series-t3-brake-rotor-dba4505s/

dbat3.png

dbat32.jpg

For pads, Matt recommended Project Mu NS-EP on the front, catering to my low dust/low noise requirements. On the rear, DBA Street Performance pads.

https://www.project-mu.co.jp/en/products/pad_ns-ep.html
https://dba.com.au/product/rear-street-performance-brake-pads-db1376sp/

Initially, I was going to leave it at that, however I decided to change the original 15-year-old rubber brake lines for Goodridge braided stainless steel items made by Matt for the Falcon. This modification should reduce that mushy brake pedal feel.

A few days later, some very HEAVY boxes arrived from Sydney...............

IMG_9950.jpg

So, to recap –

- 24mm larger and upgraded front rotors
- Upgraded front pads
- Upgraded rear rotors
- Upgraded rear pads
- Braided stainless steel brake lines for each corner
- Penrite Super Dot 4 Brake Fluid (The fluid was last changed in 2019 :unsure:)

With the above, I was hoping incremental improvements in key areas would add up to a more capable whole.

And this is where I changed my direction……………………

Up until then, I had intended to install these new parts myself. The key aspect being everything was a simple bolt on. But messing with the brake fluid, as would be required when changing the brake lines, was not something I was confident doing. So………………….I chickened out and had a local mechanic do the job for me. While I have been getting more and more confident doing mechanical work, messing with such an important safety system on the car didn’t appeal to me. I guess I could have done the rotors and pads myself, then passed the lines onto the mechanic, but I just decided to let them do it all. (Notice the Galaxy Blue AU I XR8 in the background, which was sounding very healthy as I picked up the car. If you think the FG's brakes look and sound underwhelming, those things were even worse with 287mm rotors and single piston calipers all round. :rolleyes:)

IMG-0094.jpg

IMG-0098.jpg

IMG-0108.jpg

IMG-0102.jpg

The main visual giveaway is the green Project Mu pads, otherwise this is a subtle looking upgrade, which suits me just fine. I'm sure if I had the dust shields removed, they would be more noticeable......................

IMG-0106.jpg

IMG-0104.jpg

IMG-0103.jpg

While I haven't had a decent run with the new brakes, on the drive home from the mechanic, the first thing I noticed was the considerably smoother feel under foot and lower noise levels. I was expecting to have to bed them in, but they actually did that for me. I'm looking forward to giving them a decent hit in the future.

Cost BRAKE down -

I’m including this to give a better picture of what this modification costs.

XR6 Turbo Caliper Support Bracket - $69.00 (Normally $170)
4000-Series T3 Front Rotor - $265 each / $530 total
4000-Series T3 Rear Rotor - $200 each / $400 total
Project Mu NS-EP Front Pads - $198 set
DBA Street Performance Pads - $100 set
Goodridge Braided Brake Lines - $298 (set of 4)
Freight - $88.00 (Pickup is available for those in Sydney)
Penrite Super DOT 4 Brake Fluid 500ml – $19.00 each / $38.00 total
Fitment Labor - $385.00

Total Price - $2106

Yes, a lot of money. In terms of brake fluid, that is supposed to be replaced every two years anyway, and the rubber OE lines are now over 15 years old. One a maintenance item, the other preventative maintenance. The OE rotors and pads are virtually brand new, but most 15-year-old cars would have had at least one pad and rotor change in that time.

The side bonus of this upgrade is that I may have found a mechanic I can trust. For many, that is one of the biggest problems a car guy can face, finding someone who is knowledgeable and treats the car like their own. This is a smaller two-person operation, one that I had to wait several weeks to get an appointment. To me, that says a lot.
 
To avoid these ads, REGISTER NOW!
OP
D

D.F.B

Well-known member
Joined
Aug 2, 2023
Messages
1,596
Location
Australia
While the XR6 was getting its new brakes yesterday, it was the Ranger's turn for a wash.

Once clean, it was onto polishing the headlights...............again. :rolleyes:

IMG-0093.jpg

Observation, Rupes DA Coarse is brilliant!! In this case, I used it on a Rupes yellow wool in rotary mode, and it cleared the haze that appears on the horizontal surface of the headlights with ease. I followed with Rupes DA Fine on a Rupes yellow foam.

https://www.waxit.com.au/products/r...5&_sid=c6c220d15&_ss=r&variant=32113755291737
https://www.waxit.com.au/products/r...llow+wool&_ss=e&_v=1.0&variant=12194184626265

https://www.waxit.com.au/products/r...6&_sid=c6c220d15&_ss=r&variant=32113755422809
https://www.waxit.com.au/products/r...13&_sid=c6c220d15&_ss=r&variant=8958446338137

In most cases, I would say never polish your headlights unless absolutely necessary. Polishing degrades or removes the UV coating applied at the factory. However, once you start to notice UV damage, it’s too late anyway, so polish away.

There is/was actually a Field Service Campaign on these particular lights, they were showing signs of damage within a few years from new, rather than at least decade, however I never chased it up. Being the car is now over 7 years old, I doubt they would replace them now. So I don't know what to do with these lights. Keep polishing them out, have them covered with clear PPF, or replace them entirely at my cost? The PPF option is not easy because it seems like no one in this area is interested in applying PPF, an open opportunity it would seem. Replacement would require the removal of the bumper and upper grill. The other option I'm toying with is Optimum Opti-Lens Headlight Coating, but as usual for Optimum, there is not a lot of information provided about how long it lasts.

https://detailingshed.com.au/products/optimum-opti-lens-headlight-coating-5-6-sets-of-headlights

Onto one of Carpro’s latest products, ClarifyPhobic ceramic glass cleaner.

https://www.waxit.com.au/products/carpro-clarifyphobic?variant=40654591852633

IMG-0086.jpg

The concept here is to provide hydrophobic qualities to the glass, joining a small group of similar products from the likes of Gyeon, Stoner and Optimum. It can be used as a standalone, or in conjunction with an existing glass coating. Although slightly muted, this product has the same banana scent of the regular Clarify.

I probably should hold off judgement until I have tried it further, but I think I can tell very early on if a product is good or bad. But, well....................

While the bottle says “streak free glass cleaner”, you have to work for it! While at a glance, the glass looked fine, under closer inspection or in just the right light, I could see smudging and streaks in isolated sections. Normally, streaking occurs from using the wrong towel or if the glass is too hot. Neither was the case today. And that was on a best-case scenario in that it was used on glass with an existing glass sealant.

I have to say, it's sort of surprising Carpro put their name on this product. I would say that the glass was clearer after using my drying aid on the glass than using ClarifyPhobic. Bead Maker, OG Drying Aid or DIY Ceramic Gloss would do a better job at this.

Today, it was the XR6's turn for a wash.

IMG-0119.jpg

Now that I can actually see the rotors behind the wheel, I now feel inclined to use Atom Mac on this car.

For today, I used up the remainder of a bottle of the delightful GSF in my foam cannon, which was used to clean the wheels and the rest of the car.

IMG-0123.jpg

Bead Maker was the drying aid, for some reason this car really likes that product, it was also used on the door jambs, wheels and engine bay. For the glass, I used the tried and true Stoner's. Tires dressed with OG T/D.

Last job, cleaning the bin with my latest reject, Mirch Blue Candy. I used it once and instantly hated the scent, it's just smells too much like a public restroom cleaner. :sick:

IMG-0127.jpg
 
OP
D

D.F.B

Well-known member
Joined
Aug 2, 2023
Messages
1,596
Location
Australia
Black Friday Sale 2- Obsessed Garage

I have to say, I ordered this last Monday, 7 days later it arrived from Lady Lake Florida!

When OG launched their vacuum solution, think of it like the wall mounted vacuum version of their pressure washer system, the comment was that "no one makes or sells good vacuum accessories". I thought, well will see about that, and then proceeded to spend multiple hours discovering that in fact, no did sell a good accessory package for car detailing.

Sure, after trawling the internet, I found most of what I wanted spread across several vendors, all asking for varying amounts of shipping to piece it all together. In the end, I just waited until the OG package was in stock and on sale for Black Friday, then just splurged and got it all in one hit.

https://www.obsessedgarage.com/collections/vacuums/products/vacuum-accessory-kit

IMG-0150.jpg

I have to say, this is an underserved market in Australia. As mentioned, nothing like this exists in total, and even with my online shopping prowess, I was left unrewarded.

I would say vacuuming is my least favorite detailing task, so having the good attachments to make the job quicker and easier is a high priority. Of the above, I love how the round brush attachment has longer bristles than what I could find locally, and the white brush attachment looks like it would be very useful. As is the turbo attachment for cleaning floor mats and the extra-long and flexible crevice tool, ideal for dealing the narrow space between the center console and seats.

Not pictured, but I also splurged another four of the Griot's dispensing spouts, so so good.

https://www.obsessedgarage.com/prod...spensing-spout?_pos=1&_psq=spout&_ss=e&_v=1.0

And because I'm completely stupid, I think this may be the only two bottles of the special edition Koch Chemie GF-X in Australia. One bottle for use, one to keep.


IMG-0143.jpg

This limited edition version of GSF was launched specially for the US market only, Obsessed Garage getting the lions share of supply. It smells like cinnamon and pine, a heady aroma that is certainly unique among car wash soaps.

And I say all that as someone who positively hates Christmas. :mad:
 

cccoltsicehockey

Well-known member
Joined
Apr 3, 2014
Messages
1,414
Location
Charlotte, NC
Congrats on the splurges. I finally splurged on an Active 2.0 and full wall mount setup but pieced it together from Clean Garage instead as they had a better sale than Obsessed was having on the same stuff.

That said since I am in the building phase of my garage I am thinking of doing their hide-a-host kit for their vacuum setup while the walls are still open. So since you are doing all the research it seems I can't save any money piecing the tools for the vacuum together myself and I should just bit the bullet and order their kit while on sale. Thanks for the research to confirm.
 
OP
D

D.F.B

Well-known member
Joined
Aug 2, 2023
Messages
1,596
Location
Australia
The Mustang's turn this week, and chance to try some new products.

Wheels first as always, trying out the Carpro WheelsMitt that I have had in the cabinet for a while now.

https://www.waxit.com.au/products/c...5&_sid=b386b07c9&_ss=r&variant=39695474032729

IMG-0161.jpg

First of all, the quality of this mitt is amazing, the orange fluffy microfiber is super soft, the reverse side is a semi-abrasive material, similar to the Carpro InnerScrub mitt, which is for light cleaning of the tyres.

IMG-0169.jpg

IMG-0168.jpg

But it's just too big, especially compared to the already a touch too big TRC Wheels Mitt. This is compounded by my hatred of full wash mitts in general. On paint, a mitt is tolerable, but for wheels where you are swapping between other tools and the pressure washer gun, putting the mitt on and taking it off gets old. I also don't like the idea of scuffing up my wheels by making contact with the tyre side of the mitt.

IMG-0173.jpg

IMG-0176.jpg

IMG-0178.jpg

Onto a new product that was not intended for the Australian market, the Christmas edition Koch Chemie GFX.

https://www.obsessedgarage.com/collections/new-products/products/koch-chemie-gfx

IMG-0143.jpg

Launched for the US market only, GFX is based on the excellent GSF, but rather than sweet cherries, this is heavily scented with cinnamon and pine for a heady Christmas themed aroma when foamed. It's as slick as regular GSF, although the pH of 8.0 is slightly higher than the pH 7.5 of GSF. Having ordered two bottles, one to use and one to keep, this is about as festive as I get!

IMG-0157.jpg

IMG-0185.jpg

IMG-0183.jpg

Moving to the interior, I also had a chance to play with Carpro's new leather products, the SkinCare Kit, which contains a leather cleaner (Cleanse) and conditioner (Lotion), along with a brush, two towels and an applicator pad.

https://www.waxit.com.au/products/c..._psq=skin&_ss=e&_v=1.0&variant=40654447968345


As you can see with the above press image and my own below, the Cleanse was sent with a crappy sprayer and not the pump foam dispenser. As such, when applying the product into the brush, it doesn't spread very well. From experience, when a product like this is foamed, it improves coverage and working time. I also don't like the rather strange scent Carpro chose for this product. It did clean quite well though.

IMG-0200.jpg

IMG-0207.jpg

Next, with the leather clean, it was time to apply Lotion. Again, the scent is not winning me over. I harp on scent a lot because I have a sensitive sense of smell, meaning I can detect things others don't, but also associate scents with the user experience, be that good or bad.

Apart from the scent, the gel-like consistency of Lotion applies quite easily, a little going a long way. In this case, I used the supplied applicator, which is butter soft. Lotion goes on quite oily, but levels down to a satin/matte sheen. But it also creates a slippery and squeaky surface to sit on.

IMG-0217.jpg

IMG-0213.jpg

Sadly, both Cleanse and Lotion get a hard no from me. The lack of the foaming trigger on Cleanse, combined with the scent of both and the slipperiness of Lotion seal its fate. ColourLock and NV Cleanse/Nourish easily eclipse this duo, both free of tacky scents and the slippery finish.

Continuing the Carpro disappointments, I tried the new ClarifyPhobic glass cleaner again today, but again had to re-do the glass due to smudging and ghosting. Glass can be tricky, so I say keep it simple and stick with an IPA based glass cleaner for best results.

Finally, onto to something I have had my eye on for a while now..............

https://www.obsessedgarage.com/colle...-accessory-kit

Finally, I also had a play with the new vacuum attachments. The standouts being the turbo attachment, making short work of the floor mats, granted not all that dirty but it did fluff up the fibers quite nicely. The longer white brush attachment is fantastic for doing cloth trimmed seats, and the rectangular brush attachment great on the rubber floor mats in the Ranger. The floor attachment is not detailing related, but the head is better suited to Swisstrax compared to the Karcher item I had been using. The adjustable metal tube is fantastic as well.

IMG-0150.jpg

So, a few winners and a few losers today.
 
OP
D

D.F.B

Well-known member
Joined
Aug 2, 2023
Messages
1,596
Location
Australia
Congrats on the splurges. I finally splurged on an Active 2.0 and full wall mount setup but pieced it together from Clean Garage instead as they had a better sale than Obsessed was having on the same stuff.

That said since I am in the building phase of my garage I am thinking of doing their hide-a-host kit for their vacuum setup while the walls are still open. So since you are doing all the research it seems I can't save any money piecing the tools for the vacuum together myself and I should just bit the bullet and order their kit while on sale. Thanks for the research to confirm.
You would probably save money by ordering an assortment of vacuum attachments from Amazon or the like. However, are they any good? The only way to know is to buy and try for yourself. And I have done that on various fronts in the past, reordering and reordering until I found the right product. That adds up over time.

At least with OG solutions, each part and piece has been tested and vetted over an extended period and all available in one transaction. That also applies to the vacuum attachment solution. Whether that's worth a price premium is a personal decision, but from my what I found, I just didn't find what I wanted in one location. Being in Australia also limits what is available to you, be that a specific product or paying hefty premiums to have stuff shipped to this side of the world.

Something many don't realise or value, the content OG produces to support his products is certainly of value and helpful, in some ways countering the extra cost or shipping fees charged. He has the time and money to figure out the best of the best, puts it all together in one place, then produces videos on how to install and then use said product.

These video's show both the attachment package and the whole vacuum solution -


cccoltsicehockey

Well-known member
Joined
Apr 3, 2014
Messages
1,414
Location
Charlotte, NC
They definitely provide good packages and have tested out many of the solutions. I tried to build my own setup and only came out around $100 less than the sale price which wasn't enough to bother with ordering from 3 different places. After that I ended up ordering the in wall hide-a-hose vacuum setup before the sale ended. I just really like the idea of not needing to store the shop vac in the garage and can just leave it for wood shop use instead.
 

SamYoung

Well-known member
Joined
Jun 4, 2020
Messages
104
Location
Massillon, Ohio
While the XR6 was getting its new brakes yesterday, it was the Ranger's turn for a wash.

Once clean, it was onto polishing the headlights...............again. :rolleyes:

...

In most cases, I would say never polish your headlights unless absolutely necessary. Polishing degrades or removes the UV coating applied at the factory. However, once you start to notice UV damage, it’s too late anyway, so polish away.

There is/was actually a Field Service Campaign on these particular lights, they were showing signs of damage within a few years from new, rather than at least decade, however I never chased it up. Being the car is now over 7 years old, I doubt they would replace them now. So I don't know what to do with these lights. Keep polishing them out, have them covered with clear PPF, or replace them entirely at my cost? The PPF option is not easy because it seems like no one in this area is interested in applying PPF, an open opportunity it would seem. Replacement would require the removal of the bumper and upper grill. The other option I'm toying with is Optimum Opti-Lens Headlight Coating, but as usual for Optimum, there is not a lot of information provided about how long it lasts.

https://detailingshed.com.au/products/optimum-opti-lens-headlight-coating-5-6-sets-of-headlights
Not sure how available they are in your neck of the woods, but they make 2K clearcoats specifically for headlights that would restore some UV resistance and give you a clearcoat to polish vs the plastic directly.


ctandc72 has used it over on his thread and I've heard of others using even standard 2K clear to restore protection on plastics.
 
OP
D

D.F.B

Well-known member
Joined
Aug 2, 2023
Messages
1,596
Location
Australia
Not sure how available they are in your neck of the woods, but they make 2K clearcoats specifically for headlights that would restore some UV resistance and give you a clearcoat to polish vs the plastic directly.


ctandc72 has used it over on his thread and I've heard of others using even standard 2K clear to restore protection on plastics.
Excellent, thanks for the info, I'll look into that for sure.
 
OP
D

D.F.B

Well-known member
Joined
Aug 2, 2023
Messages
1,596
Location
Australia
Ranger Paint Correction & Coating

Unlike my other cars, the Ranger is an all-weather vehicle. Rain, hail, or shine, parked outdoors in the summer sun, driven across the muddy green waste tip, lugging around my gardening tools, and transporting landscape materials, a true workhorse and the perfect daily for me.

Photos for proof of the above! ;)

IMG-2155.jpg

IMG-6316.jpg

IMG-0409.jpg

IMG-0405.jpg

I invested my hard-earned money into this vehicle, which in turn helps me to earn a living and pay for the four-wheeled toys in my life, along with the stuff to wash those toys. The Ranger is the most expensive “tool” I have in my business, and despite the “daily driver” or “beater” designation, I try to look after it as best I can. Does a base model Ford Ranger designed for the working man need to be paint corrected and ceramic coated, probably not, but that’s how I roll.

Washed on a weekly or fortnightly basis and maintained with a drying aid, the paint is in ok condition. April 2022 was the last time the Ranger was polished, so it's time for a refresh and a change of direction.

Decontamination & Polish Prep

Although a full decontamination was probably overkill, I have the chemicals and tools for this task for a reason, so it's only natural to follow the process for thoroughness. For a change, I’m going to format this step by step style.

1- Apply iron remover to the whole vehicle from dry. In this case I’m trying out Bilt Hamber Korrosol. Leave to dwell for 5 minutes.

IMG-0232.jpg

IMG-0233.jpg

2- Using a foam cannon, apply the alkaline Obsessed Garage Decon Soap over the top of the iron remover. Again, allowed to dwell for 5 minutes.

IMG-0236.jpg

IMG-0240.jpg

3- Thorough rinse.

4- Apply the acidic Carpro Descale with the foam cannon, then proceed with the contact wash.

IMG-0242.jpg

5- Rinse

6- Optional, this would be where you clay the car. I thought I would get away without claying, but I could feel some mild roughness to the paint.

Today, I used the new Ultra Clay Scrubber from The Rag Company and Gyeon Clay Lube, both new additions for me. Traditionally, I had used Meguiar's M34 as clay lubricant, but the Gyeon stuff seemed way less grabby and smelt nice too. The bottle seen below is a concentrate, the product is then diluted to suit. And the Ultra Clay Scrubber is brilliant too, perfect for mild to moderate contamination like this.

IMG-0246.jpg

IMG-0249.jpg

IMG-0253.jpg

7- Rinse again to remove the clay lubricant.

8- Dry thoroughly, using air and towels. I combine the towel drying step with my prep spray, in this case the brilliant Rupes Reveal Lite.

IMG-0257.jpg

IMG-0261.jpg

9- Taping. I hate this step, but it’s completely worth the bother. Applied to all black unpainted plastics, trim and rubber. I also lay a towel across the windscreen cowling to prevent dust accumulation.

IMG-0264.jpg

IMG-0266.jpg

With that, the car is now ready for polishing.

Products Used –

Bilt Hamber Korrosol Iron Remover
Obsessed Garage Decontamination Soap
Carpro Descale
Rupes Reveal Lite
Carpro Masking Tape
The Rag Company Ultra Clay Scrubber
Gyeon Clay Lube

Polishing

Continuing my exploration of the Rupes DA system, I decided to trial both DA Fine and DA Course using various pads. In the end, I settled on DA Fine with the fabulous Rupes Yellow Wool.

IMG-0275.jpg

IMG-0278.jpg

Machines were a combination of the 5-inch ShineMate EB351-5/15, the 3-inch Rupes LHR75 pneumatic, and the Rupes iBrid Nano Long Neck in rotary mode. I also used my new polishing cart for the first time, with handy rubberized cutouts to hold polishers upright.

IMG-0272.jpg

IMG-0269.jpg

With the polishers all laid out and ready to grab, I work sections at a time, swapping to the appropriate polisher as I work around the car. With a wool pad, you also need to keep on top of pad blow outs and brushing.

Products & Tools Used –

Rupes DA Fine
Rupes Yellow Wool (3.5-inch, 5.75-inch, 1.75-inch)
ShineMate EB351-5/15 (5-inch machine)
Rupes LHR75 (3-inch)
Rupes iBrid Nano Long Neck
Rupes Claw Tool
Tornador Basic
Economax Detailing Trolley

IMG-0281.jpg

IMG-0283.jpg

With the car polished and the tape removed, I did get some polish staining, that always happens here or there, which I followed up with Meguiar's M39. I then moved the car outside, foamed again with Decon Soap, rinsed, dried and wiped down with Gyeon Prep. I then covered the car with microfiber blankets, ready for coating in the morning.
 
OP
D

D.F.B

Well-known member
Joined
Aug 2, 2023
Messages
1,596
Location
Australia
Ranger Paint Correction & Coating - Part Two

Ceramic Coating


In the seven years of ownership, I have used a variety of waxes and spray sealants to protect this car. Back in April 2022, the chosen LSP was Collinite 845, which was then maintained with a huge variety of spray sealants used as drying aids. Who knows what is doing the protection element at this point.

So why transition to a ceramic coating on this car? Firstly, I want to further see how a ceramic coating performs on a daily, I want to continue honing my coating skills, and I have enough Gyeon Pure EVO remaining from the Jaguar detail earlier this year. So, no formal introductions to Pure EVO.

IMG-0296.jpg

IMG-0300.jpg

With a 37 degree (97 deg f) day forecasted, I started early to get the coating laid down before the heat arrived. First step, wipe the car down again with Gyeon Prep. While I have a bunch of similar products, I like to stay within the family and use the prep product designed side by side with the coating, in this case Gyeon Prep.

With the day already warm, the coating was flashing quite quickly, although Pure EVO does have a nice long working window. In this case, I was able to apply the coating to one section, then onto another, then the first was ready to be leveled, then the next. And so on and so on. In the end, the coating was applied to the paint and most of the black plastic trim, the glass I left for Gyeon Quick View.

Pure EVO needs 12 hours to cure before seeing water, and with rain predicted tomorrow, I went ahead and applied Gyeon Cure as a precaution. In any case, I probably would have done this anyway as it safeguards against water spotting in the first 14 days as the coating fully cures. Cure also adds some slickness, which is missing from Pure EVO.

IMG-0307.jpg

Products Used –

Gyeon Prep
Gyeon Pure EVO
Gtechniq AP5 Applicator
The Rag Company Edgeless 300 Towels
Scangrip Sunmatch Inspection Light with Scangrip Diffuser
Gyeon Cure
Gyeon Quick View

Conclusions

With the windows coated with Quick View and then cleaned, tyres dressed, and the interior cleaned up for the week ahead, I now have a ceramic coated daily driver..............

IMG-0313.jpg

White can be such an unrewarding colour to work with, it really does hide the effort put into it. A similar process and the same coating on the Jaguar's Odessey Red is completely different story.

IMG-6905.jpg

IMG-6908.jpg

IMG_0005.jpg

I've had two white daily drivers now, and this will be my last. Yes, white can hide a lot, but it's also incredibly boring and I wish I had gone for the blue or red offered at the time, or even silver. Yes, it's a work car, but considering I wash the car weekly anyway, having a colour wouldn't be any more work.

I've said this too many times, but I can't exactly replace this vehicle. Yes, Ford are (for now) still offering single cab models, but not with the low ride suspension, or at the price point I paid for this PX MK II. At this point, the car has just under 38,000 km on the clock. It's been reliable save for the glitchy Sync system that needs a hard reset every few months.

I would also like to replace the wheels; the cheap silver paint has been slowly disappearing for a while now. (Yes, as a lot of people have warned me, I wore the paint off the thing.) This particular spec was fitted with narrower wheels than the high-ride and 4x4 models, having 16 x 6.5-inch wheels rather than the 16 x 7.0-inch. So finding a new set in that spec has proven hard, plenty of the 16 x 7.0 though. I'm also considering the 16-inch wheels offered as an accessory or on the XLS. These are also in the 7.0-inch wide spec but will still fit the standard size 215/70/R17 tyres.

xls3.jpg

Do I need to do the above. Of course not. Am I thinking about it? Is the Pope Catholic?
 
OP
D

D.F.B

Well-known member
Joined
Aug 2, 2023
Messages
1,596
Location
Australia
Just as I finished the ceramic coating step on the Ranger, and while staging an image, I heard two very loud noises that sounded like something had fallen off the back of a truck, two very loud whacks. I wish that was the case.

I walked out to the footpath to discover a VY Commodore resting on the pavement in front of a power pole at the end of the street. It took me a few seconds to comprehend what was happening, but I took off towards the car, but was beaten by a neighbor around the corner who was reefing at the crushed driver door. The occupant was freaking out and was held in the car by the belt. I was asked for a knife, I ran back to my garage and got a pair of scissors to cut the lady free before she was dragged out of the car.

IMG-0295.jpg

The strange thing is, by the time I got to the car first time, there were two men approaching from a white Toyota Kluger. By the time I got back the second time, the two cars involved in the accident were surrounded by unmarked police cars and several plain-clothes detectives were on the scene. With sirens approaching, the fire brigade and then two ambulances arrived on the scene very quickly. From what I can gather talking to another neighbor, the person in the Commodore is a known drug addict and was clearly under the influence. I don’t think it’s a coincidence that detectives were on the scene within seconds of the incident. They were also extremely blasé about the situation, clearly more interested in searching the car.

Piecing it together, I gather the lady in the red car would not have looked when going straight ahead, the second car (an early Landrover Discovery) t-boned the driver’s side of the Commodore and landed in a front yard (the first whack). The Commodore owner then skidded into the power pole (the second whack). Both drivers looked unhurt, the older guy in the Discovery appeared ok, it was hard to know about the lady as she would have been so agitated by the smash, compounded by the apparent drug problem.

The sad thing is, the older guy had his car destroyed by an inconsiderate person who should not have been driving. I have to say, I'm pretty rattled by the situation too.
 
OP
D

D.F.B

Well-known member
Joined
Aug 2, 2023
Messages
1,596
Location
Australia
Back when I had power routed to the pressure washer, I asked about the possibility of fitting more lights to the garage, which I booked then and there. That was back in mid-July! Seems to be the thing with tradesmen, so much work in the cue that it's just a matter of waiting your turn. That's compounded by all of the flood damage repairs that continue to be a factor 12 months on.

Today, I finally had my lights installed!

IMG-0323.jpg

Because my garage is technically considered outdoors, I had to use weatherproof fixtures. These are colour and output selectable and have made a massive difference.

SL972640-TCDP.jpg

IMG-0325.jpg

IMG-0328.jpg

IMG-0334.jpg

And today marks the 9th anniversary of taking delivery of my XR8. With 7210 km (4480 miles) on the clock, that's 801 km's (502 miles) a year! :unsure:

fff.jpg

mar2173.jpg

hl.jpg

fgxm101.jpg
 
OP
D

D.F.B

Well-known member
Joined
Aug 2, 2023
Messages
1,596
Location
Australia
Have I mentioned that I hate summer, in particular, summer humidity. I swear it gets worse every year where I am in Northern Victoria. Hence the use of the EGO fan today...................

IMG-0349.jpg

The fleet spent yesterday afternoon in the street while the lights were installed. The XR8 hadn't been driven since the last wash and was merely dusty, so it got an Absolute rinse-less wash and put back to bed.

It did give me a chance to try out the Microfiber Madness Chipmunk Jr. driving towel. This towel is similar to the brilliant Gauntlet from TRC, a hybrid twist loop/plush microfiber towel, with the twist loop (shorter pile) providing the absorbency, the plush microfiber (taller pile) providing smoothness across the paint. I have mentioned in the past that I really don't care for 100% twist loop towels, they are just too grabby.

https://store.primefinish.com.au/co...ness-chipmunk-jr-drying-towel-40cm-x-40cm-new


While I absolutely love the TRC Gauntlet, the 30 x 30cm which I use for wheels is too small, the medium 38 x 60cm is just a touch too big for my style of drying. So, the Chipmunk Jr. is the proverbial Goldilocks at 40 x 40cm. I only used just the one of those to dry the whole car. I think I've found my primary drying towel!

Onto the Mustang, which was actually driven since the last wash. :lol

Starting with the wheels, it gave me a chance to try out The Detail Factory Wheel Brush Kit.

https://detailingshed.com.au/produc...changeable-covers?_pos=3&_sid=dfa9f6b50&_ss=r

IMG-0350.jpg

IMG-0352.jpg

IMG-0354.jpg

IMG-0355.jpg

I have been using the Microfiber Madness IncrediBrush Flat since I fitted these wheels to the Mustang. Shortly after that, The Detail Factory launched their version of a microfiber wheel brush. I mean, it's a miracle that I resisted this purchase for so long! :lol

The best part of The Detail Factory version is the ridged handle and stem, giving more control compared to the flexible Microfiber Madness equivalent. That was something I was never a fan of with the IncrediBrush as it didn't allow for consistent pressure to be applied.

IMG_9555.jpg

IMG_9558.jpg

IMG_9561.jpg

IMG-0199.jpg

That doesn't mean you should throw away your IncrediBrush because its very good, excellent even. I just micro analyze things, and overall, the quality of that brush is impressive.

Onto the wash, and I did that in garage today, too hot in the sun for both me and the car!

IMG-0358.jpg

Once again, another new item to try, the Microfiber Madness DeliPad.

https://store.primefinish.com.au/co...adness/products/microfiber-madness-delipad-xl

IMG-0359.jpg

IMG-0360.jpg

IMG-0361.jpg

The DeliPad was designed for ultra delicate and soft paint. I wouldn't say any of my cars have soft paint but I wanted to try it anyway. It does what it says on the pack, being ultra plush and soft to touch, gliding across the paint with the help of KCx GFX. It's a touch too thin for my liking, but overall I liked it and can see why this thing costs so much. If you have a car with soft Japanese paint, particularly black or darker colours, then this thing would be at the top of my shopping list.

And finally, onto something I don't normally do.........................

IMG-0366.jpg

Making my own concoctions by mixing two chemicals is not something I normally do or recommend, but when the chemical company in question goes ahead does it, then perhaps that makes it ok?

https://psdetailproducts.com/collections/new-arrivals/products/clean-maker-jamie-the-cleaner-pint


Clean Maker is the result of a Pro Detailer and Youtuber mixing P&S Bead Maker and Dream Maker to create a supercharged topper and gloss enhancer. Jamie The Cleaner has been involved with The Rag Company as an ambassador for a while now, he even hosted the half time slot at the most recent TRCMA Rag Company trade show earlier this year. As happens with social media influencers, his efforts mixing and promoting the concept of Clean Maker got him noticed by P&S, who have now teamed up to produce a limited run of the Bead Maker/Dream Maker blend.


With a run of about 1500 bottles for the US only, there was little chance of getting one in Australia. However, I do have both products in my cabinet. I have been vocal in my hatred of Dream Maker, it's supposed to be an any easy-to-use gloss enhancer, but I just never managed to get it to play nice. I couldn't even give away the bottle that has sat in my cabinet for a long time now. Bead Maker on the other hand I do thoroughly enjoy for its looks, smell and feel.

The suggested Bead Maker to Dream Maker ratio is 10:1, which I mixed and added to a Kwazar sprayer. At this mixture, the predominant scent is of Dream Maker, which is strange considering the heavy Bead Maker content. In this case, I loaded up the towel before applying two sprays per panel, and wow, yes I think I like this stuff!

IMG-0374.jpg

For whatever reason, this combination of polymer sealant (Bead M) and gloss enhancer (Dream M) works so nicely together. Don't expect this to be a durable paint sealant, it will likely be removed at the next wash, but that's not the point. The dopamine hit brought on by the slickness and gloss is all I care about.
 
OP
D

D.F.B

Well-known member
Joined
Aug 2, 2023
Messages
1,596
Location
Australia
With the XR6 out from under its cover and back on duty, I took it out for a run this afternoon. Initial light duty town driving, the brakes feel roughly the same, although certainly smoother under foot and quieter in operation.

IMG-0103.jpg

I have a set of rural roads that snake around fruit orchards and market gardens. Along with being out of the way, there are some really interesting corners and s-bends to contend with. It's a strange arrangement, almost like someone purposely designed these roads to have a little fun, because they are otherwise situated alongside boring, flat farmland. I guess the farmers need something to test out their tractors on?

Being mindful of the new rotors and pads all round, I did the loop at about 70 to 80% of what I would normally do. It's here I noticed a marked improvement. Where before with two applications of strong braking, they would start to shudder and become very noisy. The new setup is seems more resilient, offering a confident pedal, no shuddering and way less noise. Having said that, I wasn't laying into them as aggressively as I would normally, but the signs are promising.

Annoyingly, I discovered yesterday that apparently Race Brakes, who I bought the rotors and pads from, may be re-introducing the larger PBR-style caliper and rotor kit that was a popular upgrade this side of Brembo's. ******.

PBR101.jpg
 
OP
D

D.F.B

Well-known member
Joined
Aug 2, 2023
Messages
1,596
Location
Australia
So, I've made some changes to my microfiber lineup over recent weeks, culminating in a re-org of the cabinet. I have come to realise that towels are somewhat subjective, and it's taken me a long time to find the ones I like and work with my methods. The best advice I could give would be to take my list of recommended towels as a starting point. Then, rather than jumping in the deep end and buying a large quantity, buy one or two and see if you like them. Once you find what you like, stock up!

First of all, a purging of towels I didn't like, a change of direction or were no longer being used because of newer additions. Among those were two older Carpro Wash Mitts, a stack of red 300 gsm all-purpose towels, a handful of TRC Drago's, Spectrums and older Dry Me A River waffle weaves. This has freed up space to house more of the towels I like, and some new arrivals.

I'm now using the blue TRC Eagle Edgeless for rinse-less washing, replacing the Platinum Pluffle. Not that I didn't like the Pluffle, rather I have repurposed it. The Eagle's are a very popular towel, although I never liked them for polish/wax removal, nor did they work well as a drying towel. This ultra plush 500 gsm towel does however work very well for rinse-less washing, and being square allows for equal folding.
10B The Rag Company Eagle Edgeless 500 40cm X 40cm Microfiber Towel (detailingshed.com.au)
Eagle Edgeless 500 | The Rag Company

The Platinum Pluffle has become a secondary/small drying towel, replacing the FTW's which I found too grabby. The Pluffle is ultra soft and smooth across the paint and the square 40x40 / 16x16 size the ideal size for my style of drying, ie blow down and mop up any remaining water with a drying aid.
Platinum Pluffle Hybrid Weave Microfiber Wash Towel (detailingshed.com.au)
Platinum Pluffle Microfiber Detailing Towel | The Rag Company

Joining the Pluffle is the 40x40 / 16x16 Microfiber Madness Chipmunk Jr. As mentioned in a previous post, this is similar to the TRC Gauntlet, just in a more manageable size. I have though decided to keep the medium 38x60 / 15x24 Gauntlet for larger cars or to mop up after a rinse-less wash.
Microfiber Madness Chipmunk Jr. Drying Towel (40cm x 40cm) – Prime Finish Car Care
Microfiber Madness Chipmunk Edgeless Jr. (16" x 16") - Skys The Limit Car Care (carpro-us.com)

With those changes, I decided to remove my polishing pads from the microfiber cabinet to the detailing tool cabinet. That move allowed for 7 additional tubs in the microfiber cabinet. I then swapped out the green storage tubs for blue, meaning pads are in green tubs, microfiber in blue..........................I feel much better now. :like:

IMG-6582.jpg


img-0337-jpg.jpg


img-0340-jpg.jpg
 
OP
D

D.F.B

Well-known member
Joined
Aug 2, 2023
Messages
1,596
Location
Australia
My hero / bad influence drives a Barra!

If you don't want to listen to an hour of waffle, a quick spin of the Barra powered GT350 is at about the 1hr mark.


For those that don't know, this particular GT350 was originally Matt Morman's car that was heavily featured in a lot of his earlier videos. It was traded back to the Ford dealer and bought by Adam LZ. The car then caught fire on track with Collete Davis at the wheel, caused by the well know vibration issue with that engine rattling the oil filter lose and dumping oil all over the exhaust.

https://www.youtube.com/@ObsessedGar...ch?query=GT350
https://www.youtube.com/@AdamLZ/search?query=GT350


The resultant fire and loss of oil destroyed the engine, which Ford warrantied, but Adam then decided to fit a Barra instead. As mentioned in the video, he had wanted to do something with a Barra, but due to height and length of the engine, it didn't fit in anything, save for a huge hood Mustang.


I'm not really into LZ's videos, he needs to lose that terrible mustache!, but it's cool seeing a local Australian legend in the form of the Barra getting so much love and attention on the world stage. The relationship between LZ and Moreman is an interesting one too, almost father and son or big brother/little brother like.
 
To avoid these ads, REGISTER NOW!
OP
D

D.F.B

Well-known member
Joined
Aug 2, 2023
Messages
1,596
Location
Australia
First wash of the Ranger today after it was ceramic coated two weeks ago, with Gyeon recommend not washing with strong detergents within the first 14 days after application. In that time, it's been through two cycles of my mowing run, a tip run after a backyard cleanup, a trip up the highway to deliver bulky items for my father's rebuilt flood ruined holiday cabin, been rained on and driven on grotty wet roads. So it was good to cleanse the car and my mind of that.

I washed the whole car, wheels included, with Shine Supply Shift, a gentle pH neutral pure soap that easily dealt with situation after the initial rinse removed most of the dirt..............the coating doing its job then. Drying Aid was P&S Paint Gloss, interior wiped down with P&S Swift, tyres dressed with Perl. The tray, door jambs and engine bay wiped down with Carpro ECH20. Next on the to-do list for the Ranger is an engine bay detail, which is needing a little more than what I can achieve with a simple wipe down.

Strangely, while I was wiping the upper fan/radiator shroud, I found a random piece of plastic resting between the belt pulley and a radiator hose. It turned out to be the lower clip-in fan shroud. How this didn't destroy the fan itself or the accessory belts is a miracle. I have no idea how this happened or when, but after inspection nothing looked damaged, so I fed it past the hoses and clipped it back in place. Very strange.

The XR6 got rained sprinkled on it while dealing with the Ranger, so I washed the wheels with NV Snow, then rinsed it down before an Absolute rinse-less wash in the garage. As with the Mustang last week, I teamed Absolute with the Clean Maker concoction, again, an impressive combo.

IMG-0382.jpg
 
OP
D

D.F.B

Well-known member
Joined
Aug 2, 2023
Messages
1,596
Location
Australia
Well, it looks like I found my next project! :rolleyes:

IMG-0391.jpg

IMG-0389.jpg

These are used Ranger XLS wheels in 16x7 size. At the price paid for them, it would appear only it only me who wants povo 16-inch wheels, I'm happy to overlook the very small chip on one wheel, go find that missing center cap and splurge on a new set of tyres! I've been contemplating this for a while, so I already know what tyres to get, Michelin Agilis. In any case, the current tyres are the originals from 2016. I'll run the factory 215/70/R16 sizing for simplicity.

MICHELIN AGILIS - Car Tyre | MICHELIN Australia Official Website

The current plan is to get them properly cleaned up, iron decontamination, clay, remove the old wheel weights and adhesive, then polish them up. I'll have the new tyres fitted before applying ceramic coating, then fit them to the car.
 

Blackbyrd

Well-known member
Joined
Nov 28, 2020
Messages
1,167
Location
TN
I've been very interested in OG's vacation solution. I've got a hoover GUV that works great but the hose hanger is possibly the most annoying thing in my garage.....

You hit the nail onnthe head about him vetting full kits and thst experience being worth the price tag!
 
OP
D

D.F.B

Well-known member
Joined
Aug 2, 2023
Messages
1,596
Location
Australia
This is what has been bothering me on these steel wheels on the Ranger.

So, I'll admit this is the first and only wheel curb in my whole life! :confused:

IMG-0396.jpg

This has been of natural causes, its been getting slowly worse and now its starting to rust through. I've seen this on other Ranger's and vehicles with basic painted steel wheels.

IMG-0402.jpg

And I now have this strange chemical etching on all four wheels. I know exactly which product did this and it and the rest of their products are no longer in my cabinets. The surface has been compromised now and it didn't improve with an attempted polishing.

IMG-0397.jpg

For you guys in the US, it won't be an issue, but for Australian readers, DO NOT buy products from MIRCH. I will never buy products advertised on social media ever again. Sure, the bottles look nice, and the brand is well presented, but this is typical of the "Facebook Brands". In that I mean a company set up by an individual to sell catalog products from a local blender, then advertised on social media and most likely "warehoused" in some ones backyard shed. And because these companies don't make or have any clue what's in the products, they and you have no recourse.

IMG-8844.jpg

IMG-8920.jpg

I have not reached out to MIRCH, they would likely point to user error. In no way was the product used improperly on hot wheels or in hot direct sun. It was used in a spray, agitate and rinse fashion. And I've used various similar products without issue for many years.

Anyway, the short of it is I have new (ish) wheels to fix the issues.
 
OP
D

D.F.B

Well-known member
Joined
Aug 2, 2023
Messages
1,596
Location
Australia
We lost power at 8pm last night, seconds before a massive wind and thunderstorm hit. No power, no internet via both NBN or cellular...............I was in bed shortly after and slept for 13 hours! I could have slept longer, but I was expecting guests at 10.30am, so forced myself out of bed for a caffeine injection. It was raining and thundering as I went to bed, and it was still raining and thundering at 12pm today, just one continuous, 16 hour rolling thunderstorm.

Thankfully, the rain and clouds cleared shortly after lunch, meaning I suddenly felt better...................because that meant I could keep my Christmas tradition rolling.....................

IMG-0420.jpg

I had to skip last year as my sister was overseas, and this year the Mazda 3 made way for a Volvo XC60 T6. (My sister lives over two hours away in Melbourne, so I don't see her much. She also knows that no one is going to treat her car like I would, so she leaves it for me. I have no problem with that, I would rather it arrive dirty after a few months then have some ***** wash it with a dirty foam sponge and dry it with synthetic leather chamois.)

Wheels were first, sprayed with NV Purge as a pre-treat while I scrubbed the tyres with P&S Undressed. Rinsed, I applied Brake Buster via a foam cannon and took care of the wheels and wheel arches. I then applied Hydr02 to the wheels and Atom Mac to the rotors.

For the paint, I pre-treated with Carpro Lift. The Cquartz Professional has been on the car for more than 6 months now, so this would have been its first decon wash.

IMG-0422.jpg

Rinsed, I then re-foamed with KCx Gfx, I mean it would have been rude to have not used this Christmas themed soap today!

IMG-0157.jpg

After the wash, I then applied Carpro Reload 2.0 as a topper to the coating, again more than 6 months after it was applied. I want this coating to last for her, she paid more than a good sum of money for it to be applied, so keeping it fresh is top of mind.

I then applied Carpro Perl to the tyres, wiped the interior down with a damp towel, I have instructions to NOT use scented interior products because "it still smells like new", and who am I to argue with that. I have to say, the leather has a lovely soft feel and matte appearance to it, I didn't want to mess with that. I applied ColourLock Leather Shield at the last wash, which I will reapply next time. A quick vacuum, then the glass got cleaned with my go-to, Stoners Invisible Glass. I then filled up the windscreen washer bottle with McKee's N-914, then wiped the engine bay down and called it job done.

Interesting to note, these cars don't have a dip stick for the engine oil. You have to dig deep into the menu system to find the oil life and level, where it only states if the oil level is "normal", there is no visible level to inspect. As a car guy and someone with mechanical sympathy, I hate that feature. I have no problem having digital read out, but sometimes it's important to see the actual level with your own eyes. I do wonder how the service technician tells if he has added the correct amount of oil, you can't always rely on adding a set amount and calling it good. And what if the sensor fails, then doesn't report a low level? I guess Volvo would happily sell you another engine..........or car.

Anyway, the Volvo is back to spec! I had forgotten what a pain painted gloss black wheels were to maintain, they show every speck of dust and scratch easily.

IMG-0425.jpg
 
OP
D

D.F.B

Well-known member
Joined
Aug 2, 2023
Messages
1,596
Location
Australia
Woke up to pouring rain and thunder again today, so I aborted the plan to wash the Ranger and instead started on the new wheels.

I started with an iron remover, this time Opti-Coat Ferex. Probably one of the better iron removers I have used, even if it has no attempt at disguising the stink.

https://www.zas.com.au/product/909/opti-coat_ferrex_473ml.html

IMG-0428.jpg

IMG-0431.jpg

IMG-0434.jpg

Once left to dwell, I hit the wheels with Shine Supply Wise Guy, which is traditionally used as a tyre cleaner but is now able to be used on wheels. In this case, I selected Wise Guy for it's alkalinity and teamed it with a boars hair brush for extra cut.

https://www.waxit.com.au/products/s..._psq=wise&_ss=e&_v=1.0&variant=30236506226777

IMG-0440.jpg

IMG-0443.jpg

It's then I had to get aggressive in removing tar deposits, old wheel weight adhesive and baked on grime. I used a combination of a plastic razor, Carpro TarX, KCx Eulex AND Eulex M to remove the tar, rubber residue and adhesive. I then clayed the barrels using Bilt Hamber Medium Clay, which is very aggressive stuff that I would normally avoid, the wheel faces I did with a standard mild clay. I then went over the barrels with a magic eraser and more Wise Guy to remove what else I could. Be mindful that using a magic eraser is extremely abrasive, so always use as a last resort. In my case, because I'm polishing, it accepted the risk.

https://autobuff.com.au/products/ko...-glue-tar-remover?_pos=2&_sid=1174661d9&_ss=r
https://autobuff.com.au/products/ko...ubber-oil-remover?_pos=1&_sid=1174661d9&_ss=r
https://www.waxit.com.au/products/c...pos=1&_psq=tar&_ss=e&_v=1.0&variant=702352873
https://autobuff.com.au/products/bi...5&_sid=2e4a16cfb&_ss=r&variant=43042565128417
https://www.waxit.com.au/products/w..._pos=2&_sid=8b01f7668&_ss=r&variant=641815593
https://www.bunnings.com.au/mr-clean-eraser-pad-block_p0066425

The wheel faces came up fine, a nick or two but acceptable. Once polished, they will look quite nice. The barrels I'm not happy with. There are scratches down to the alloy where someone previously scraped off the wheel weights, only just visible through the spokes but I know they are there. I actually lightly scuffed, prep sprayed and then applied a light dusting of silver touchup paint to fill and disguise these areas. Once the barrels are polished, they should be acceptable.

IMG-0446.jpg

Because of the barrels, I almost chucked it in and gave up on these wheels. My other option is to buy brand new versions from Jefferson Ford, who have these same wheels listed at $990 each, which would be $3960 + delivery.


I would rather spend that sort of money on a brand-new set of 18-inch Y-Spoke wheels for my XR6. After the paint touch up, I'm about 70% willing to stay with the secondhand wheels, so I'm going to wait until I have polished them before making the decision. I really do need to rein in my need for perfection here because this vehicle is not a ****** show car, it's a workhorse!

I also need to make a move on the tyres while they still have a cashback program going on.
 
OP
D

D.F.B

Well-known member
Joined
Aug 2, 2023
Messages
1,596
Location
Australia
Having slept on it, and inspected my handiwork, I think I'm happy with them now.

The light dusting of paint I applied yesterday on the areas that were scratched has come up better than expected. The colour match is not identical, but it's virtually undetectable when viewed from front on, which what I was going for. At least now the scratches don't stand out.

Not sure if polishing the barrels will make the colour difference more detectable as the OE finish is quite marred, and the new paint has some gloss to it. As I said, the when looked head on, the paint I added yesterday does not stand out.

IMG-0448.jpg

IMG-0449.jpg

The replacement center cap arrived today, which now has the wheels complete. This morning, I ordered a set of Michelin Agilis 3 in 215/70/R16 sizing. Early next week I want to polish the wheels before having the tyres fitted and balanced. I'll then coat the wheels late January when I finally get some vacation time.
 
OP
D

D.F.B

Well-known member
Joined
Aug 2, 2023
Messages
1,596
Location
Australia
My birthday haul...................

IMG-0452.jpg

Taking advantage of a decent discount on this collection of Wera tools, this was all bought during the black Friday sales. Firstly, a ratcheting T-Handle driver along with a 1/4-inch socket magnetic socket rail.

https://www.amazon.com.au/dp/B0BFQRZXNP?tag=atomicindus08-20
https://www.amazon.com.au/dp/B09TL2TTXJ?tag=atomicindus08-20

I already have a 3/8 Zyklop combination ratchet, this kit contains the 1/4-inch version, along with sockets and drivers. One of the things I like about Wera tools, in particular the sockets, is the matte finish, no greasy fingerprints on shiny chrome here.

https://www.amazon.com.au/dp/B00IMF1CDO?tag=atomicindus08-20

IMG-0456.jpg

And.................I caved.....................

https://www.amazon.com.au/dp/B0BFQXWD4L?tag=atomicindus08-20

IMG-0459.jpg

IMG-0462.jpg

This is the foam insert set of Wera's screwdrivers. Did I need them, not at all. Did I want them, most certainly. These screwdrivers have a knurled tip for added purchase on the fastener, and the yellow handle versions are impact resistant so you can hammer on them like a chisel.

Now I have to figure out what to do with these?

IMG-9282.jpg

I actually like the Stanley's more, so I'll probably keep them and sell off the Kincrome items...........or give them to my Dad.
 

cccoltsicehockey

Well-known member
Joined
Apr 3, 2014
Messages
1,414
Location
Charlotte, NC
I love the Wera with the perfect cut inserts as my OCD says it is better.

I love your use of eggshell foam in the other drawer to hold them in place. Never thought of that. I think I am going to have to steal that idea.
 

Xti04

Well-known member
Joined
Nov 11, 2016
Messages
2,337
Cars look amazing great detail work. You were talking about mixing chemicals together and my go to chemical mix is carpro ech20 mixed with vinegar and distilled water to mimic a boat drying/ water spot removal agent called hot sauce. I used that all last year each time I pull my boat from the lake and it does a good job of keeping it clean and shiny with minimal water spots. Keep up the good work out there!
 
OP
D

D.F.B

Well-known member
Joined
Aug 2, 2023
Messages
1,596
Location
Australia
More work on the Ranger's new wheels, this time polishing.

IMG-0469.jpg

In this case, I'm using Sonax Perfect Finish on a Rupes Yellow Wool. I love this pad! Not pictured is the extension bar that was used for polishing the inner spokes. The barrels only got a very quick pass with my 3-inch ShineMate and Perfect Finish.

IMG-0475.jpg

Now ready for tyres tomorrow.

I've also decided to replace the jacketed wheel nuts that are a common failure point.
 
OP
D

D.F.B

Well-known member
Joined
Aug 2, 2023
Messages
1,596
Location
Australia
Dropped the wheels off at the local Bob Jane this at 8.30am this morning. I've been going to this place for a few years now, originally because they were the closest to where I was working to get a puncture fixed, which they dealt with on the spot. I kept going because of how they have looked after me, fixing flats for free and getting me the exact tyres I want without question. I pay full retail, they don't scratch my wheels, done deal!

By 11am they were done, so I collected them and went to prepping the tyres. One of the many benefits of a full sized tray................

IMG-0509.jpg

IMG-0510.jpg

..........which also makes for an excellent work bench. I actually made mention of how useful it is to have a full-size tray for stuff like this rather than those dual cab toys. I then remarked that I had probably shot myself in the foot as they probably have dual cabs too. To my surprise the answer was a stern NO, as they pointed to a lowered VZ Commodore Ute and VY Calais. "Wouldn't want to own one of those things". I guess they should be thankful that those dual cabs are keeping them employed putting massive, and very expensive, tyres on the dam things.

The first step is completely and utterly un-necessary, de-nibbing the tyres.

IMG-0513.jpg

IMG-0514.jpg

Now when I spotted Matt from OG doing this, I though wow, how stupid. Then when I actually went ahead and did the same thing on my Mustang's new tyres, I realized what a difference it makes. As I said, completely silly and super ****, but trust me, if care about what wheels and tyres look like, de-nibbing is well worth the 15 minutes to do this step.

Next, another trick I learned from OG.......................

IMG-0517.jpg

IMG-0522.jpg

I seem to make create a bit of fear using Stoner's Tarminator as an aggressive tyre cleaner, but there's no other way to put it, this stuff just works! Whatever is in this product works wonders at stripping away all the manufacturing grime, transport gunk and the fitment soap without drying out the rubber.

To do this, I don't suggest spraying Tarminator onto the tyres, but rather into a towel. Then go to town rubbing the sidewall, as the solvent flashes off, you are left with a completely clean, matte rubber surface. And two destroyed towels.................

IMG-0524.jpg

IMG-0526.jpg

I then gave each wheel and tyre a hose down to remove any lingering fitment soap from the wheel and dust off the treads so that each assembly is clean and ready to be coated in the coming weeks.

IMG-0530.jpg

IMG-0534.jpg

Am I the only person who loves the smell of new tyres? I also love how the Agilis 3 sidewall has some character to it, I just hope they don't shine up like the current Dunlop's do with each and every kind of dressing.
 
OP
D

D.F.B

Well-known member
Joined
Aug 2, 2023
Messages
1,596
Location
Australia
A slight tool reshuffle to fit my new Wera screwdriver set.

IMG-0543.jpg

The above replaces the space wasting presented below.........................

IMG-5670.jpg

I sort of copped a bit of flack about that drawer, and I agree, the space was not well utilized. In fairness, it was my first attempt at that sort of thing, we learn best from experience, so I know what not to do now!
 
OP
D

D.F.B

Well-known member
Joined
Aug 2, 2023
Messages
1,596
Location
Australia
This is not garage related, but its going in here anyway!

I watch and listen to music via YouTube, usually while writing or doing bookwork, which forms a large part of my daily de-stress. This was played through a Sony sound bar which I found underwhelming, then hooked up to a 20-year-old Panasonic hi-fi (similar to below) which gave much more headroom. But due to the analog connection, the sound quality from either system wasn't all that great.

pswhf.jpg

I got that Panasonic as a birthday gift in my early teens, so it's somewhat sad to pack it away. I do have a Bluetooth receiver for it, so I guess I could send it out to the garage.

As is typical for me, I tend to double down on topics that interest me. As a teen, I was actually obsessed with sound and audio setups, to the point where I was the sound assistant for the school theater productions. Since then, other interests took over, detailing/cars/wood working/mowers, so it's been a very long time since I played with this sort of thing.

As you can image, the audio rabbit hole is extremely deep, and extremely expensive. I was not looking for an ear bleeder home theater system, but rather something that was neat, easy to setup and offer a decent upgrade to what I had been using. And so, once again, I was influenced by what OG sell in their store for use in the garage and home alike.

I looked at both passive (speakers connected to an amplifier/DAC) or active speakers (combined powered speaker/amp).

https://www.obsessedgarage.com/collections/passive-speakers
https://www.obsessedgarage.com/collections/powered-monitors

Passive speakers certainly give you extra scope for future additions and/or headroom. But I liked the compact, simple format offered by the powered active speakers. As such, I was looking at PSB Alpha AM5 Powered Bookshelf Speakers, or the Dynaudio LYD Studio Monitors.

https://www.obsessedgarage.com/collections/powered-monitors/products/dynaudio-lyd-studio-monitors
https://www.obsessedgarage.com/coll.../psb-alpha-powered-bookshelf-speakers-am3-am5

The cost premium for the Dynaudio system was just a bit too much for me, so after watching a number of videos from both OG and others, the PSB AM5's punch well above their weight and became my speaker choice.


While I would have liked to order all this from OG, in fact the USD-AUD conversion for these units is lineball with what local retailers sell them for, but I would have had to pay import duties as well. I actually found them on sale at a local retailer, so I ordered the PSB AM5 set in white, along with a subwoofer to compliment the setup.

The sub-woofer is a SVS SB-1000 Pro, in this case wired rather than wireless.

IMG-0552.jpg


Adjustments to the sub output can be easily changed via Bluetooth in the SVS app.

The sub connects from the sub-out port on the back of the AM5 to the LFE port on the sub itself, you then select Sub on the on the AM5 remote. While the AM5's are labeled as "wireless" speakers, they do require wires (supplied, but I have swapped them for upgraded items) to connect the powered speaker to the slave speaker. I then have the TV connected via the optical plug, and music can be streamed via Bluetooth from a phone.


The first thing to note is the cleanliness of the system, a simple and uncluttered setup. The second thing to note, while they may be smaller than the two Panasonic speakers they replace, the output is brilliant. The listening modes can be changed to suit, with Stereo, Widesound, Dialog and Widesound Plus options. I have also paired the supplied PSB remote to the TV sound control buttons for a seamless installation.

IMG-0556.jpg

IMG-0562.jpg

Apparently, speakers have a break in period just like cars. But even now, the system sounds brilliant, offering a depth of clarity beyond what I am used to. I'm even picking up different sounds that I hadn't heard before.

And because I can.............................. ;)

IMG-0564.jpg

IMG-0571.jpg

I'm terming this a late birthday present to myself. 🎂
 

littlebean

Well-known member
Joined
Mar 7, 2018
Messages
775
the audio rabbit hole is deeeeeeeeeeeeeeeeeeeeeeeeeeeeeeeeepppppppppp and costly, when people start talking about spending £ks on mains power cables it gets really worrying
 

cccoltsicehockey

Well-known member
Joined
Apr 3, 2014
Messages
1,414
Location
Charlotte, NC
I have looked long and hard at those SVS subs over the years. When I finally build a setup I will be going with one of their options.

Agree the audio 'rabbit hole' is very deep. I have yet to move into the speaker category but the amount I have spent on headphones and headphone amps over the years is more than I care to share and I feel like I only have scratched the surface.

Moving into building a solid listening setup or two somewhat scares me.
 
To avoid these ads, REGISTER NOW!
Top Bottom