To avoid these ads, REGISTER NOW!

E-tek Restorations: PROJECT THREAD

OP
E

e-tek

Well-known member
Joined
Dec 19, 2007
Messages
10,690
Location
Saskatoon, SK
Arrgg!! Between wanting to change up some items about the dash, including some switch locations, spots that just weren't up to standards, as well as getting a couple marks in it during initial re-assembly, it was decided to just re-do the entire dash.

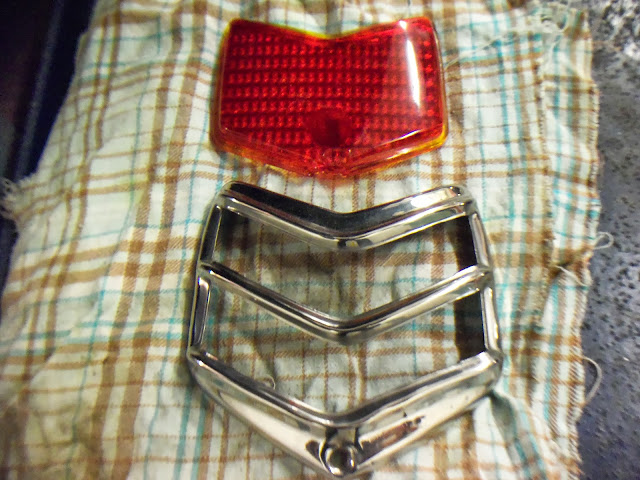
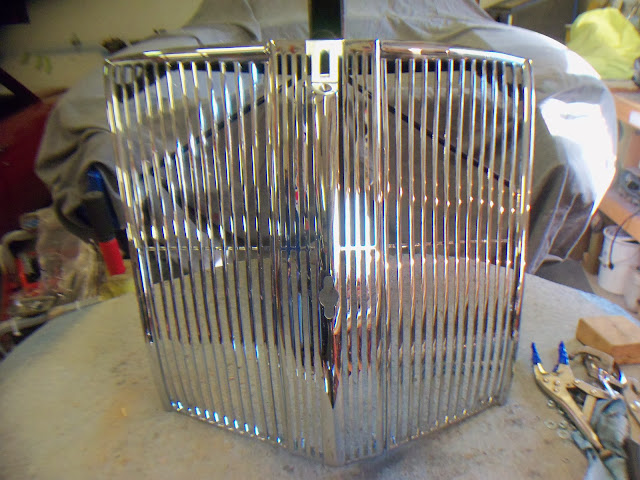
Initially, we had decided to fill the center speaker hole, so one would only see more purple behind the chrome grille, but we found that to get the center chrome piece to sit properly - even after trying to cut the grille down (shown above) that hole just needed to be there -

106_5455.JPG


106_5459.JPG


Out it comes and the grille sits flush.

106_5461.JPG


106_5463.JPGp:


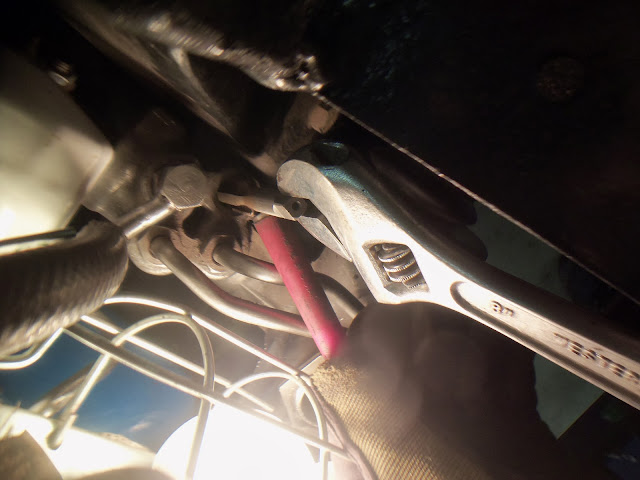
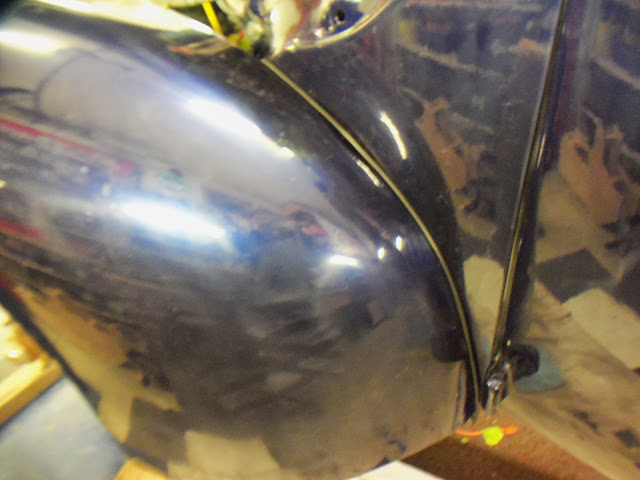
At first we thought the new light switch would go in this protrusion on the left side, but when the switch was attached, it didn't really sit flush. The spot was originally for a push button switch, which must have been canted to match.... so away it went!

106_5466.JPG


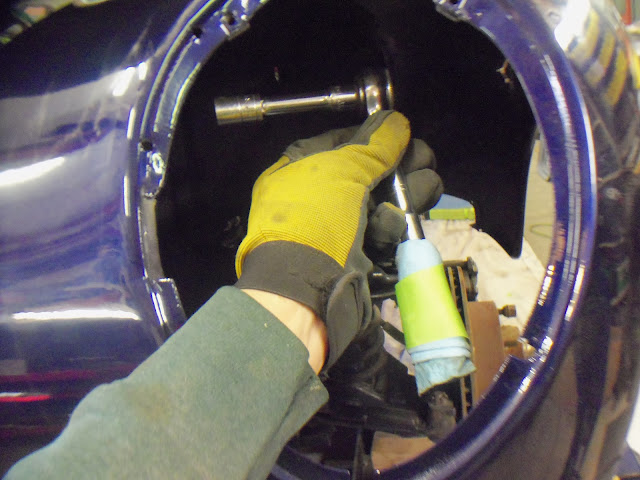
We had also designed it to have a total of 3 holes in the centre pods, but afyer doing away with the above, it went back to 4 holes, 2 in each indent -

106_5468.JPG


106_5472.JPG


106_5480.JPG


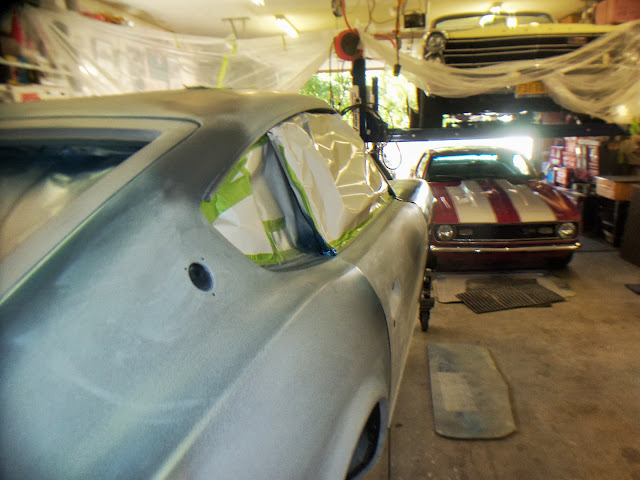
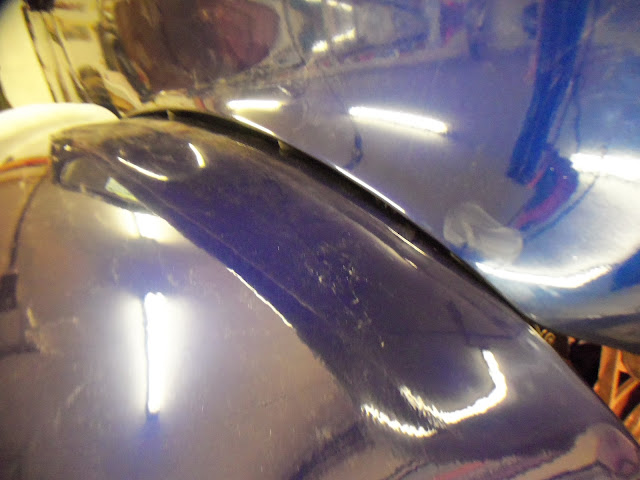
A little more hammer and dolly, then glaze and it was re-primed and ready to be painted again - this time in it's final form and just before install!

106_5475.JPG


106_5478.JPG


A couple other items needed to be painted anyways...and I didn't charge for much of the work above - so the owner isn't really out anything and it'll all go together again next week... :rocker:
 
Last edited:
To avoid these ads, REGISTER NOW!
OP
E

e-tek

Well-known member
Joined
Dec 19, 2007
Messages
10,690
Location
Saskatoon, SK
Remember the taillights that needed to be retrofitted for turn and brake signals? Turns out it was rather simple:

106_5483.JPG


106_5484.JPG


I was able to punch the old insert out, make the hole a touch tighter and then squeeze the new one in -

106_5497.JPG


106_5503.JPG


This chrome surround was not in great shape but was easily repaired with some light hammer work and the polisher -

106_5486.JPG


106_5501.JPG


106_5493.JPG


Next up will be the re-assembly of the front end...

106_5488.JPG
 
Last edited:
OP
E

e-tek

Well-known member
Joined
Dec 19, 2007
Messages
10,690
Location
Saskatoon, SK
Those light fittings are easy to deal with. Surprised you did not convert to LED.
Nice work on the lens surround as it looks very good.

Thanks Simon. Good point on the LED, but these are only a few dollars each and fit easily, so it was never even discussed....
 

mdkingsley

Well-known member
Joined
Nov 18, 2012
Messages
371
Location
Chickamauga Ga
Thanks for posting all your project updates and how too tips. Yours is one of my favorite threads. I am sure you are glad to be getting the 40 wrapped up and onto something new. The 40 looks great and you can be proud of the results as well the owner will be very happy to have such a fine car. What are the plans for the Camaro?
 
OP
E

e-tek

Well-known member
Joined
Dec 19, 2007
Messages
10,690
Location
Saskatoon, SK
Thanks md! The 40 has been a treat as I never thought much about this model of classic prior to it coming into my shop (life!). With the front-end on it next week (or 2) it'll really "look" finished too.

The Camaro is a "factory" resto. It's an older restoration that wasn't quite done right, plus it's showing it's age. With a kick-*** engine and drivetrain, the owner wants the body and interior to match. As well it had it's firewall shaved some time in the past, so there's no heat, air - or wipers! So those systems will return via a Vintage Air unit and aftermarket wiper motor.

Thanks for following along!
 
OP
E

e-tek

Well-known member
Joined
Dec 19, 2007
Messages
10,690
Location
Saskatoon, SK
The lights are so easy to restore so I can see why the LED's did not get considered.

Exactly. I took a peek at LEDs at the local auto parts store: $10 for an LED replacement for a 50 cent filament bulb! Ya, it's a $50,000+ build but why waste it, y'know?
 

Kevo

Well-known member
Joined
Mar 20, 2012
Messages
48
Location
Roseville, CA
113_5066.JPG


^^^^^^
This is what I dream to have once that lottery thing kicks in LOL.
I have just wasted nearly 2 days of the U.S. Government's time reading this entire thread, much of it for the second time. It inspired me enough yesterday to pick up the "starter kit" of POR15 to tackle the battery tray of my trusty ol' camaro.

True craftsmanship here. Thanks for taking all of the time to document and share with us.

Umm, I liked the silver mixed paint on the Z though.

Kevin
 
OP
E

e-tek

Well-known member
Joined
Dec 19, 2007
Messages
10,690
Location
Saskatoon, SK
I have just wasted nearly 2 days of the U.S. Government's time reading this entire thread, much of it for the second time. It inspired me enough yesterday to pick up the "starter kit" of POR15 to tackle the battery tray of my trusty ol' camaro.

Well I'm sure the US Gov wants "inspired" people working for them! :lol:

Umm, I liked the silver mixed paint on the Z though.

Kevin

It was a tough decision - the poll I put up ended in favour of the silver-blue too...but the real sway went to my son, Colton, who has claimed it as his own since he was about 5 years old (he's the younger one). He's almost 10 now and really wanted it to be dark blue.

Nov12009006.jpg
 
Last edited:

signcrafter

Well-known member
Joined
May 9, 2012
Messages
12,317
I see I'm not the only one that uses Styrofoam on the concrete! Works great for kneeling and rolling around under cars.
 
OP
E

e-tek

Well-known member
Joined
Dec 19, 2007
Messages
10,690
Location
Saskatoon, SK
After repairing the power steering hose steel line, which just involved opening up the kinked tube by pressing it out in the vice - a fairly easy operation - I was greeted with one of those frustrating scenarios when I went to re-install it... finding that the threads to accept the PS hose' threaded end were burred in the rack! Argh!!

So, after struggling to seat the threads for what seemed like forever, out came my NEW MasterCraft Titanium-coated tap and die set....purchased a few months back to replace my original set that was so well-used it was missing too many pieces and the ones that were still in it were definitely worse for wear...

106_5524.JPG


106_5516.JPG


To keep the shavings out of the rack, I kept a magnet attached to the tap at all times:

106_5517.JPG


106_5519.JPG


Before tackling any major work, I often do some online research (Thanks InterWeb!) to see if there are any tips or tricks that may help. Turns out guys have been sharing several older articles from StreetRodder Magazine, including the 2 below, that address several of the issues on the '40 Ford front end.

0


0


With all that taken care of, it was finally time to begin the front end re-assembly, but - as always - adding one more level of difficulty: doing it solo :thumbup:

First, the cowl to hood seal went on with the supplied screws, making sure to find the center point first -

106_5528.JPG


Then I built a foundation to place the hood on that would get it close to it's attachment points, using blocks, layers of hard-insulation and sheets to protect everything underneath.

106_5537.JPG


Then I attached the sheet to specific points, as well as the rubber backers for the hood hinge plates, with masking tape -

106_5544.JPG


106_5530.JPG


And now - for the Piece de Resistance!!

Installing hood - utilizing the entire staff of E-tek Restorations

After securing the hinges to the cowl and getting it lined up real good, I was about to continue on with the fenders, but this is what greeted me when I opened the bags of carriage bolts that are supposed to match the inner fenders:

106_5513.JPG


So while those where being painted I got everything ready to tackle the fenders tomorrow.

Fender washers - both steel and rubber are required and my stock of rubber washers was about done. Took me going to three stores before I found suitable rubber washers (at Bolt Warehouse) -

106_5533.JPG


Making up more welting -

106_5512.JPG


Apparently these panels came with captured nuts from some suppliers....but these ones didn't. And since it's already painted, I did the next best thing, which was taping nuts over the holes so I could insert bolts from the other side without too much trouble.

106_5532.JPG
 
Last edited:
OP
E

e-tek

Well-known member
Joined
Dec 19, 2007
Messages
10,690
Location
Saskatoon, SK
Hood and Fenders....

106_5546.JPG


These are the brackets I made waaay back... Rubber washers on everything.

106_5549.JPG


Inner fenders -

106_5551.JPG


106_5553.JPG


A ton of work just to get the hood half-way aligned...

106_5554.JPG


106_5555.JPG


Starting to look like something now ~ Check out that shine!

106_5556.JPG


The welting is killing me....lol!

106_5561.JPG


Check out my new JUMBO step drill bit!

106_5563.JPG


Arrrrrr!

106_5564.JPG


How NOT to bump fresh paint....

106_5566.JPG


Putting together the BLING! :pimpflash

106_5567.JPG
 
To avoid these ads, REGISTER NOW!

54FordPanel

Well-known member
Joined
Aug 7, 2009
Messages
5,711
Location
Fort 54, Littleton, Co
Nice work, Ed. Your projects seem to go faster than mine. Since I discovered stepped bit, I don't know how I did without.

Cool trick on the tap with the magnet. How much did the tap & die set set you back?
 
OP
E

e-tek

Well-known member
Joined
Dec 19, 2007
Messages
10,690
Location
Saskatoon, SK
Nice work, Ed. Your projects seem to go faster than mine. Since I discovered stepped bit, I don't know how I did without.

Cool trick on the tap with the magnet. How much did the tap & die set set you back?

Thanks!
That tap was part of an 86 piece set that I got on-sale at Canadian Tire for about $60 - pretty incredible price and I they have a lifetime warranty, so even if they are not SO quality, I'll never be left wanting!
 
OP
E

e-tek

Well-known member
Joined
Dec 19, 2007
Messages
10,690
Location
Saskatoon, SK
In 30+ years doing of performing body work, I've learned that most front end structures have their hidden idiosyncrasies - but the 40 Ford is one of those cars infamous for being out of whack, right from the factory. It certainly doesn't help having a support structure that bucks your efforts at every turn, a front frame and suspension that are swapped out for an IFS system, fenders that were bent and then re-shaped, originals, a grille well-known for fitment issues and a hood that rides on giant rubber stoppers....So follow along as I continue with the rebuild of the iconic 40 Ford.

In the reading I did, one of the tips was to completely asssemble the grille in order to get the front opening into the correct shape.

106_5568.JPG


This didn't look like that when I assembled it the first time!

106_5572.JPG


106_5577.JPG


106_5576.JPG


106_5578.JPG


Taped the welting to the body so it'd be in place and to protect the paint -

106_5579.JPG


106_5580.JPG


Check the paint on that mo-fo fender!!

106_5582.JPG


My Dad taught me to always use protection!!

106_5584.JPG


Here is one of several major WTF's due entirely to the supplied hood seals and bumpers...why would the hood to fender bumpers be of different sizes? I know this is the case from several posts and an email from other builders that said how they shaved the bumpers to even them out....

Here's another WTF - the hood to cowl gap was PERFECT in the pre-build! With the seal, the left side is WAY out. I've read others have used vaseline to get it to slide easily into position whenever it is closed...

106_5586.JPG


Which of course Fucks up the entire gap...on this side...

106_5587.JPG


The other side is still perfect.....luckily?

106_5590.JPG


106_5592.JPG
 
Last edited:

MP&C

Well-known member
Joined
Oct 21, 2009
Messages
4,396
Location
Leonardtown, MD
Ed, when I did some cleanup work on the 36 GMC truck, I found that the guy who did the work originally had the core support and thus the fenders off center. We pulled some cross-check dimensions from the hinge pins on the doors to get things centered up, which helps those gaps from one side to the other. This process may help you out with the 40..
 
Last edited:

ambenz

Well-known member
Joined
Dec 12, 2010
Messages
4,236
Location
NW Chicago Suburbs
I just love this thread...learn so much, and am in wonder at your energy!
Now, if you could be just as good at raking in the dough, you'd have a garage big enough to store all your toys in! LOL!
Do what you do best brother...and keep on postin!
That Ford is way cool!
 
OP
E

e-tek

Well-known member
Joined
Dec 19, 2007
Messages
10,690
Location
Saskatoon, SK
Ed, when I did some cleanup work on the 36 GMC truck, I found that the guy who did the work originally had the core support and thus the fenders off center. We pulled some cross-check dimensions from the hinge pins on the doors to get things centered up, which helps those gaps from one side to the other. This process may help you out with the 40..

It's a great point Robert and one that everyone should know to check - early on. We did so way back in the mock up stage, as well as ground up measurements, because the frame looked like it had been tweaked at one time. However, it was very close to square - but even so - guys that have written up these builds say they open up the mounting holes on the fenders to give themselves even more wiggle-room than stock allowed. After some pondering, I decided not to do so - and now I can only hope it doesn't bite me in the ***!

I should have studied your 36 GMC postings more closely Robert! I got caught out by a similar disc whereby the abrasive surface was on the side with the grit numbers and logo's! I had the car's owner over helping with the initial wet-sanding and I gave him a 1500 disc to use, wrapped around a rubber block. After he completed a fender I took a look at his work and found it hadn't done much! A closer look at the new (to me) product and I found the problem! It was definitely a Homer Simpson "D''Oh" moment!

Picture077.jpg


I just love this thread...learn so much, and am in wonder at your energy!
Now, if you could be just as good at raking in the dough, you'd have a garage big enough to store all your toys in! LOL!
Do what you do best brother...and keep on postin!
That Ford is way cool!

Thanks! I've always had a LOT of energy, which I used to burn up doing triathlons, marathons, bike races and such, but now that I'm old and decrepit I had to look for another outlet!

As for a bigger shop, that'd be great, but it's already maxed out for our property size, so we put some of our 'dough' into rental properties - with garages - to store the rest of my toys:

photo.JPG


:beer:
 
Last edited:

Kevin54

MEMBER EMERITUS
Joined
Jan 12, 2005
Messages
29,341
Location
Urbana, Ohio
102_5444.JPG


[QUOTESuch as attempting to fit a vent glass in it's frame (note the fender he had just completed in 3000 grit)][/QUOTE]

E-tek......Just out of curiosity, did your friend not use a block when sanding?/ On my computer that looks like a lot of finger sanding instead of block sanding. And steppin up in grits, it should have more of a uniform dull look to it. The edges would be all final polished by hand as even a foam waffle pad can cut in.

I see when buffing with the wool pad, which can be aggressive, if it catches it will put a burn mark in paint like non other. Is it the type of paint (Duplicolor) that calls for the need of a wool pad vs. a foam pad :dunno:
 
Last edited:

Kevin54

MEMBER EMERITUS
Joined
Jan 12, 2005
Messages
29,341
Location
Urbana, Ohio
This is what my '93 Silverado looked like with just the clear on the bed, then blocking it with 1000 for the first go around. By the time things are hit with 3000 grit it should look like a piece of satin cloth and takes very little buffing. I'd be afraid of using a wool pad and compound if the compound was the least bit abrasive. When I buffed mine I used 3M Perfect-It III compound and a non filling glaze and used a gray waffle foam pad and a white waffle foam pad and it came out like glass as you can see in the reflection.

In the last pic, you can see my chubby *** in the pic. I think it took just as long or maybe longer to wash the truck afterwards than it did to buff it. :lol:

BTW....This was back in '06 and was the first paintjob I had done since '89. I did do all of the body work on my purple truck but I did not paint it. I wasn't really set up to do it, had gotten rid of all of my guns except for a Devilbiss that I used for a primer gun. My buddy had his garage set up as a paint booth on one side, so I paid him to shoot it. I'll have to see if I can find a pic of it to show you. Each truck I had, both were in accidents. My purple truck was slammed into the front driver side corner which resulted in it almost being totaled by the insurance company because of the paint job that I didn't have codes for. That's why it ended up being painted overall. My '93 Prowler Orange truck shown was only on the road for 1 week, when a girl that is relation by marriage rolled through a stop sign and clipped me in the front corner and I slid around and hit a tree. Neither one of us was moving more that 10 mph maybe. They wanted to total it also because of the age. I had maybe $500 in parts, but almost $2000 in paint and materials. It was stripped to the bare bones and redone in the Prowler Orange color you see. It used to be Teal and Silver. BTW....the reason it was only on the road for 1 week was that we had rebuilt the engine and it had a .060 over 350 in it. I had to trade it in to get my parents a vehicle :(

Found a pic of the purple truck :thumbup:

BTW.....when I sold them, both ended up in town where I live. The purple truck now looks like a POS with the running boards ripped up, dents all over it, and cab corners totally gone. My '93, which I traded in to get my parent a vehicle was traded in on a lot for an '02 Blazer XTreme. It set for one day and a guy bought it for his 16 year old son that totally trashed it :mad::(:(:
 

Attachments

  • 005.jpg
    005.jpg
    129.3 KB · Views: 77
  • 001.jpg
    001.jpg
    92.3 KB · Views: 62
  • 002.jpg
    002.jpg
    141.8 KB · Views: 65
  • 003.jpg
    003.jpg
    124.4 KB · Views: 61
  • 3326DSCF1823-large.JPG
    3326DSCF1823-large.JPG
    111.5 KB · Views: 77
  • Sep03007.JPG
    Sep03007.JPG
    81.6 KB · Views: 86
Last edited:

MP&C

Well-known member
Joined
Oct 21, 2009
Messages
4,396
Location
Leonardtown, MD
Kevin, looks like a lot of sanding. I found that the extra you pay for the 3M Trizact more than makes up for the extra labor in sanding by hand. It also virtually eliminates any sanding scratches that I was getting from hand sanding, and once done at the 3000 stage, you can already see the shine coming through. As you said, makes an easier job of buffing as well.
 
Last edited:

Kevin54

MEMBER EMERITUS
Joined
Jan 12, 2005
Messages
29,341
Location
Urbana, Ohio
Kevin, looks like a lot of sanding. I found that the extra you pay for the 3M Trizact more than makes up for the extra labor in sanding by hand. It also virtually eliminates any sanding scratches that I was getting from hand sanding, and once done at the 3000 stage, you can already see the shine coming through. As you said, makes and easier job of buffing as well.

It was a lot of sanding, but it paid off in the long run. If I would have been doing something like that all of the time, I would have invested some money into like what you show. I also have saw some sanding outfits for a DA that you hook up a water hose and a small line goes up to the DA and keeps things constantly wet. But me, I went old school. A rubber block, a little soap, and a bucket of water.

Oh and by the time I was done, I probably could have robbed a bank and got away with it as my fingerprints were all but gone :lol_hitti

I'll have to get with you though so this thread doesn't get hijacked, but I have a good DA for regular sanding....is all I have to do is buy a new pad and then the disk for it? And I need to go back through your other thread about the '36, but was everything sanded dry, or was it "spritzed" with water from a bottle?

I would like to get back into painting some, so whatever makes things easier the better:thumbup::thumbup:
 
OP
E

e-tek

Well-known member
Joined
Dec 19, 2007
Messages
10,690
Location
Saskatoon, SK
Good discussion gents! I thought he was using a block, but may have used his hand on some of those areas. None-the-less he only used 1500 then 3000 so it buffed out fairly easily. The 40 Ford was painted with production-quality paint and clear (Proform) (as opposed to the Datsun which I did in Duplicolor), so I always use a wool pad first, just as I learned "on the bench" ;). Foam pads will definitely come in later, but since I can't see enough detail under my (******) shop lights, we'll have to wait until closer to completion to do the final-buffing.

As for the Dupli-color Datsun, you're right to recommend I don't start with the wool pad, as lacquer is a much softer substrate. I'll start with a wool pad and see how it goes before deciding whether to do it all like that or switch to the wool.

As for what you need to use these 1500/3000 discs they are mostly hook-and-loop (Velcro) based, so you'll need to buy a new pad ($15) for your DA. I found that the paint on the 40 was still soft enough that - although I had purchased a new Palm-DA for it - I decided it could be done by hand just as quickly. Perhaps next spring, when the clear has fully hardened, I may need the DA to knock the clear down at a reasonable rate!

Cheers!
 
Last edited:
OP
E

e-tek

Well-known member
Joined
Dec 19, 2007
Messages
10,690
Location
Saskatoon, SK
The dash - back for it's re-paint! A great decision for sure.....

106_5597.JPG


Check this tri-pearl paint out in the sun!! The car will be STUNNING!

106_5594.JPG


I was so excited by how the dash turned out I decided to put it together instead of working on the front end....

And since we were just discussing these sanding discs.....I also used them to sand out some minor scratched before buffing it out -

106_5601.JPG


106_5602.JPG


OK, these are staged, but illustrative none-the less!

106_5603.JPG


106_5604.JPG


After using the red, then white bars on the buffer I used this TurtleWax plish to get the gunk off - works great!

106_5605.JPG


106_5606.JPG


Many tiny pieces -

106_5611.JPG


Re-assembling the gauge package -

106_5613.JPG


Sweet!

106_5614.JPG


106_5617.JPG


Bling!

106_5609.JPG


The vents that came with the Vintage Air set-up are kinda cheap....owner can swap them out for billet down the road.

106_5610.JPG


106_5619.JPG


106_5620.JPG


I didn't have any rubber bumpers for the glove box, but I didn't want it bouncing against the fresh paint, so I made these up -

106_5624.JPG


106_5623.JPG


This photo didn't turn out, so we'll just call it a teaser....tomorrow I'll throw the new wheel on and take some nicer photo's - so check back!

106_5628.JPG


With that mostly done, I turned my (limited) attention back to the front end and cut the welting for the grille - which I'll install tomorrow...

106_5634.JPG


106_5637.JPG
 
Last edited:
OP
E

e-tek

Well-known member
Joined
Dec 19, 2007
Messages
10,690
Location
Saskatoon, SK
The grille and front end is coming together - despite some struggles to get things lined up! It's to be expected of course, as a ton of change has occurred to this ride, including new cowl sides welded in a dozen years ago and an IFS front frame clip and suspension. As well, a lot of body work was done on the fenders after I had mocked up the front end - just due to the way things happened. Regardless, it's gotta be done and it's gotta be done right!

106_5652.JPG


106_5646.JPG


As good as it looks here, it was quite a task! There's still some more work to do, but at least I got it in the ball park....

106_5639.JPG


106_5647.JPG


I put the steering wheel on to see how it looked together before starting/re-doing all the wiring...what do you think?

106_5656.JPG


106_5659.JPG


I always use protection!

106_5666.JPG


Still a long way to go on the re-assembly - including wiring up the dash, lights and the engine, installation of the rear side windows, door trim, scuff plates and running boards - as well as continuing to gap the front end.

:beer:
 
Last edited:
To avoid these ads, REGISTER NOW!
Top Bottom