To avoid these ads, REGISTER NOW!

E-tek Restorations: PROJECT THREAD

HOTFR8

Banned
Joined
Mar 2, 2007
Messages
24,498
Location
Castlemaine, Victoria. The Hot Rod Centre of Austr
Re: E-tek Resto's 56 Chevy Truck

:headscrat

Oh ya - sand is still very legal. It's a natural substance - why wouldn't it be?:lol_hitti All the industrial blasting is done outside too - with wind blowing the sand and dust for miles around! So - being a natural substance, that makes up most of Australia - why would it be illegal there?:wtf::headscrat

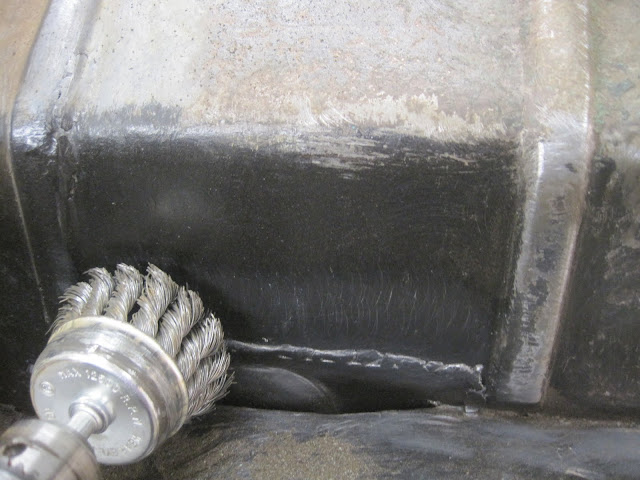
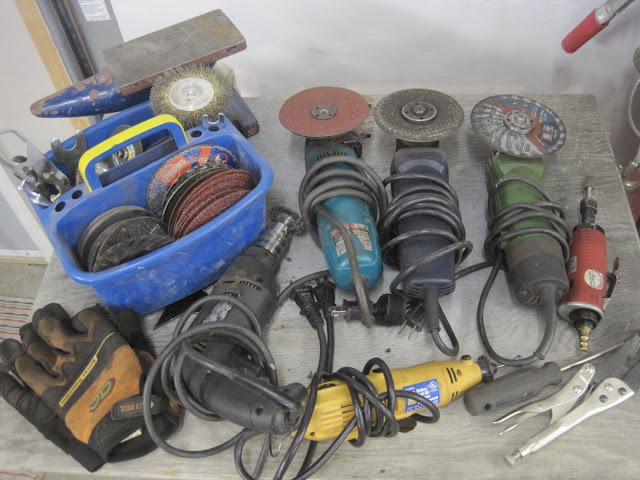
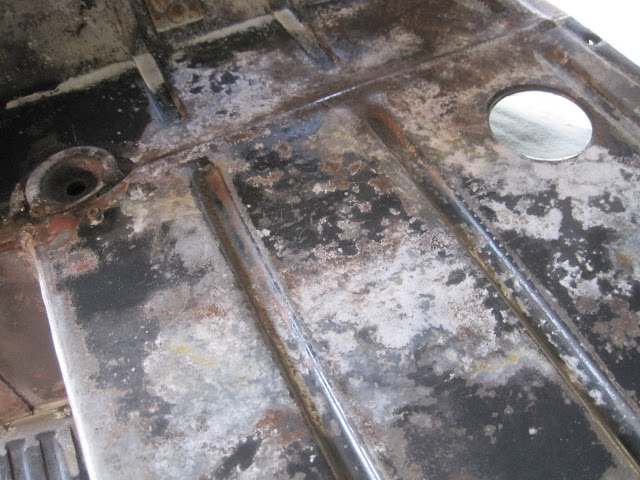
Garnet has to be used here. EPA and Work Safe have stopped a lot of it.

Mind you I still have a small gun I can use to sand blast but often it is cheaper to send it away to the proffesionals.

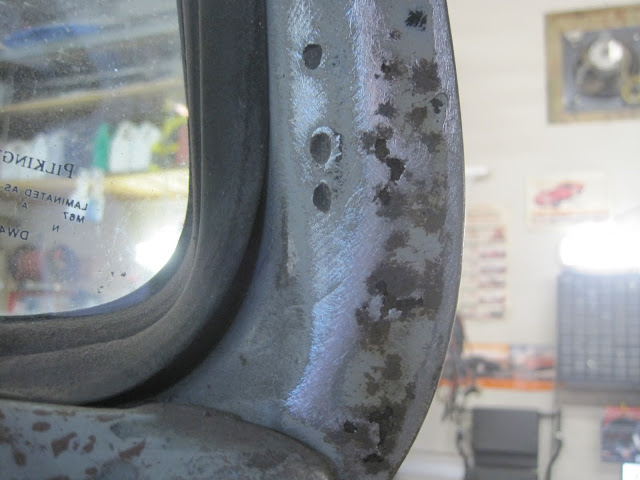
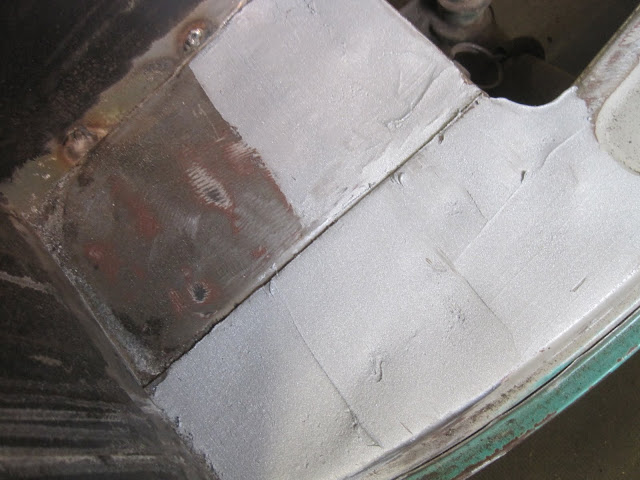
Have fun cleaning out all that sand before you paint.
 
To avoid these ads, REGISTER NOW!

rwhite692

Well-known member
Joined
Mar 4, 2008
Messages
1,850
Location
Central Valley, CA
Re: E-tek Resto's 56 Chevy Truck

Truck is looking great.

Yes many places no longer allow blasting with sand (breaks down to Silica)...Aluminum oxide works better, anyways.

Get some etching primer on that thing quickly...I'd recommend a two-component system to get a nice matte black on that frame...No reason to use POR15 for that...
 
OP
E

e-tek

Well-known member
Joined
Dec 19, 2007
Messages
10,690
Location
Saskatoon, SK
Re: E-tek Resto's 56 Chevy Truck

Truck is looking great.

Yes many places no longer allow blasting with sand (breaks down to Silica)...Aluminum oxide works better, anyways.

Get some etching primer on that thing quickly...I'd recommend a two-component system to get a nice matte black on that frame...No reason to use POR15 for that...

Thanks! That blasting really does a nice job - even the rubber mounts look new! Of course - and as HOTFR8 said - gotta spend some time to get the sound outta everything, meaning each suspension corner and wheel has to be rebuilt (which would happen anyways I guess..)

As for the frame, I've done quite a few frames over the years and have discussed this process ad-nauseum on other boards. While there's nothing "wrong" with the etch then 2-part epoxy process, I have found POR15is the better and easier way to go. Reasons? the texture left by the sand is perfect for POR to adhere to, it's much easier to brush POR into all the nooks, crannies and undersides than it is to spray, there's no overspray or fumes, no issues requiring breathing apparratus or filtered exhaust, etc. As well, the POR, being self-levelling, reallig looks good on a frame, is tougher than Etch and paint (better chip resistance) and can be re-applied if there ever is an issue. Once you do frames with each method - you'll be a convert too!

I'll post lots of photos after I apply it.
 

HOTFR8

Banned
Joined
Mar 2, 2007
Messages
24,498
Location
Castlemaine, Victoria. The Hot Rod Centre of Austr
Re: E-tek Resto's 56 Chevy Truck

A good Dust mask and a blower on the compressor will clean out the excess sand. I know when I got the F4 Chassis back from the blasters I went over it a few times before I could prime it for paint. Also had the same problems with the wheels on the International as the abrasive stuck to them.
 
OP
E

e-tek

Well-known member
Joined
Dec 19, 2007
Messages
10,690
Location
Saskatoon, SK
Re: E-tek Resto's 56 Chevy Truck

Talked to my paint shop today. I ued to paint in my shop, but it's too messy, too dangerous and the neighbours don't love it..... We where booking some times, but then he reminded me how picky I was about blocking out the primer on my last project - so we added a month!

Picking up all the parts from the blaster tomorrow. This week I'll get POR15 on the frame and support pieces and etch primer/2K on the panel pieces. Then I can start re-assembling for trial fittings and bodywork.
 

MP&C

Well-known member
Joined
Oct 21, 2009
Messages
4,396
Location
Leonardtown, MD
Re: E-tek Resto's 56 Chevy Truck

So this is what you've been working on....here I was expecting a Datsun thread....

Sure is a nice truck to start with, minimal rust and straight. Lucked out with that.... :thumbup:
 
Last edited:
OP
E

e-tek

Well-known member
Joined
Dec 19, 2007
Messages
10,690
Location
Saskatoon, SK
Re: E-tek Resto's 56 Chevy Truck

Got all the parts back form the sandblaster now. Looks great! Will need a few spots of metal repalcement, but not bad for the age of truck!

IMG_2785.JPG


IMG_2782.JPG


IMG_2786.JPG


IMG_2790.JPG


IMG_2791.JPG


So, I was going to apply the POR15 to all these parts, then spray the top sides with an Epoxy Primer, but I had a few issues....

First issue - one of the cans of POR15 I had must have been opened at one point and re-closed. A tiny amount got onto the lip of the can, effectively welding the can shut. I ruined the lid and can getting it open, necessitating a transfer into glass sealer jars. Although handling this stuff can be a pain, this is why I use it! You show me another product that can weld a can shut!!:bowdown:

IMG_2795.JPG


IMG_2797.JPG


The other issue was that it was the wrong color - gray. I had never seen anything but black POR15. When I initially removed the lid on the first can it was black, but upon mixing, turned gray. It freaked me out at first, 'cause I looked all over the can and couldn't see where it said it was gray....until I saw the little stamp on the back. I thought about applying gray for a while, but there was really nowhere that should be gray (save for the OEM gray INSIDE the cab) and it would be a waste to coat once with gray then to go over it with black POR, or black epoxy, or whatever else I could think of. Not wanting to waste time going to buy more today, I left it until tomorrow and went on to more metalwork....

Back to the bottom of the A-pillar, I first removed and replaced the lower-inner portion...

IMG_2799.JPG


IMG_2800.JPG


IMG_2802.JPG


I like to back up my welds with copper. They make copper tools (like this vice-grip), but a flattened section of copper pipe works great too. You can clamp peices of copper in with the vice grips that are holding the pieces together. It disipates the heat and weld doesn't stick to it.

IMG_2804.JPG


IMG_2806.JPG


That's it for today. Hopefully I'll get the corner done tomorrow, plus all the parts POR's in black!
 

bgott

Well-known member
Joined
Oct 31, 2005
Messages
3,512
Location
Houston, TX.
Re: E-tek Resto's 56 Chevy Truck

You can use the gray to paint inside of the doors, inside of channels where it won't be visible, etc.
 
OP
E

e-tek

Well-known member
Joined
Dec 19, 2007
Messages
10,690
Location
Saskatoon, SK
Re: E-tek Resto's 56 Chevy Truck

Got the semi-gloss black POR today and painted the frame and other parts - with a brush of course. The self-levelling feature means it lays out perfectly and the semi-gloss is the best OEM match of anything I've ever used - including epoxy primers or paints.

IMG_2815.JPG


IMG_2822.JPG


IMG_2817.JPG


IMG_2818.JPG


IMG_2823.JPG


IMG_2824.JPG


Filled the pitting over the POR15. If you do so within the re-coat window you get excellent adhesion.

IMG_2819.JPG


Finished up the A-pillar as well. Dressed the welds and applied a little kitty-hair.

IMG_2813.JPG


IMG_2821.JPG


As usual, thanks for looking!
 

djjsr

Well-known member
Joined
Sep 4, 2006
Messages
4,796
Location
In the cornfields
Re: E-tek Resto's 56 Chevy Truck

Looks really good! Some of those parts look brand new after you put the por-15 on them. Very nice.
 

Motown 454

Well-known member
Joined
Sep 25, 2008
Messages
1,359
Re: E-tek Resto's 56 Chevy Truck

Nice job on the parts they look great. Thats the first time I've seen the semi gloss POR it looks really good.
 
OP
E

e-tek

Well-known member
Joined
Dec 19, 2007
Messages
10,690
Location
Saskatoon, SK
Re: E-tek Resto's 56 Chevy Truck

Looks really good! Some of those parts look brand new after you put the por-15 on them. Very nice.

People don`t realize just how nice this stuff lays down. Between that and its toughness, it unlike anything else out there. It dries faster in the rain, or if you wet the floor down. It`ll survive hammering, bending, rock spray and any gas or oil spills.
 

PurdueSD

Well-known member
Joined
Mar 25, 2006
Messages
1,577
Location
Indiana
Re: E-tek Resto's 56 Chevy Truck

E-

I used POR on my wagoneers floorboards when i redid them a year or two ago. I experiences some adhesion issues between the silver coating and the black. The black peeled off with some blue painters tape in a couple small areas where i taped off for an application of herculiner to the cargo area.

I followed the instructions to a T. It was only in a few spots and its now covered up with carpet anyhow. I just wondered if you had ever seen anything like this.

I found the POR kind of a PITA to work with myself. Seemed to me like for the work required i might as well just use epoxy etching primmer and paint.
 
OP
E

e-tek

Well-known member
Joined
Dec 19, 2007
Messages
10,690
Location
Saskatoon, SK
Re: E-tek Resto's 56 Chevy Truck

I`ll be the first to say POR needs some very specific surface prep and application. I wouldn`t put it over any other paint - or too smooth a surface. I`ve found excellent adhesion on sandblasted and rusty metals, but I`ve also seen it come off when I`ve inadvertently spread it over new clean metal or other paint.
 
Last edited:

4StarCstms

Well-known member
Joined
Mar 14, 2008
Messages
938
Location
Kentucky
Re: E-tek Resto's 56 Chevy Truck

I like eastwoods version better, its not as choosy about its prep but IMO works just as good.

Doin a top shelf job as we knew you would - nice progress bud!
 
OP
E

e-tek

Well-known member
Joined
Dec 19, 2007
Messages
10,690
Location
Saskatoon, SK
Re: E-tek Resto's 56 Chevy Truck

Today I spent a few hours stripping and cleaning the underside of the cab (because my helper didn't show up!:lol:
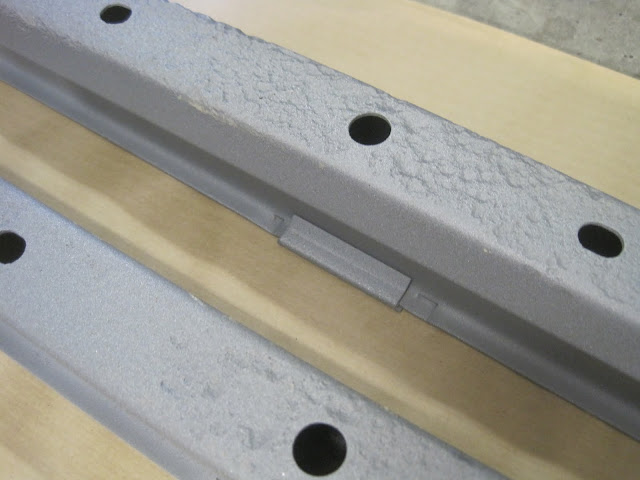
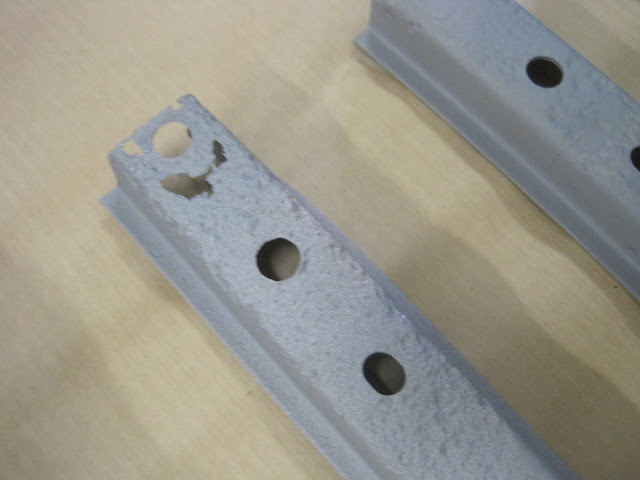
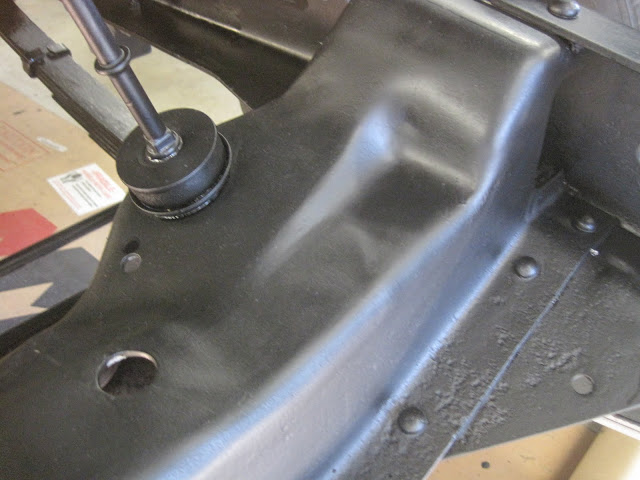
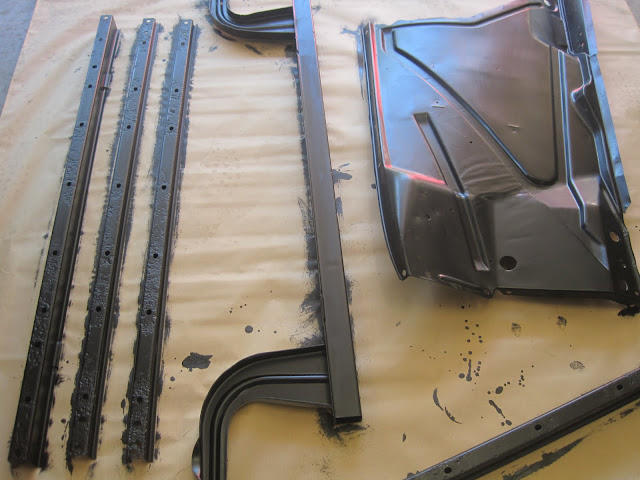
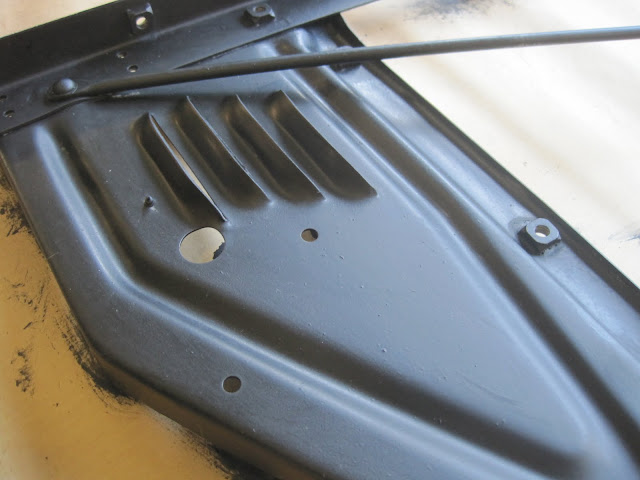
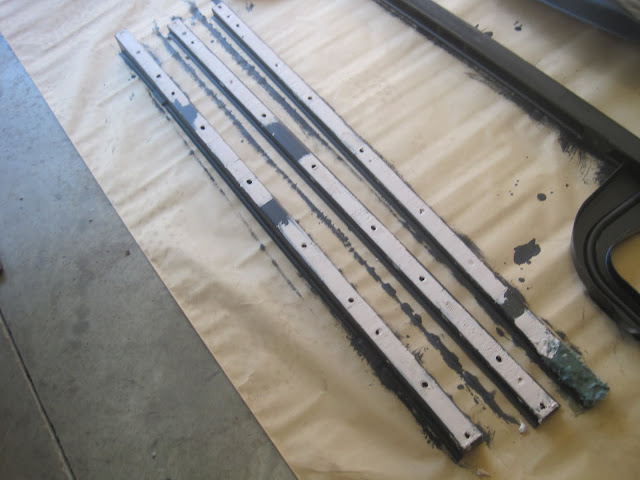
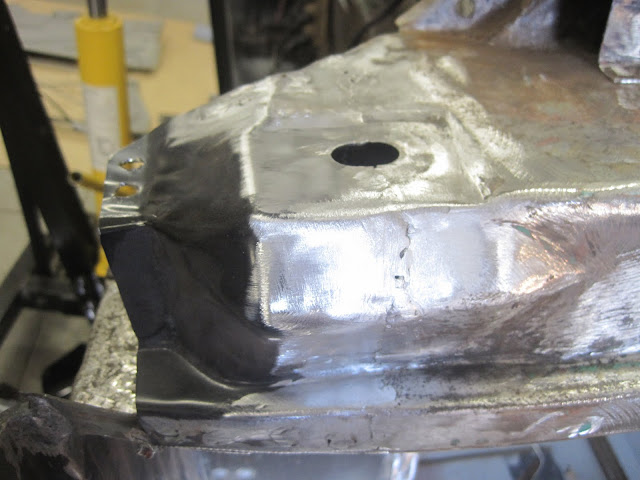
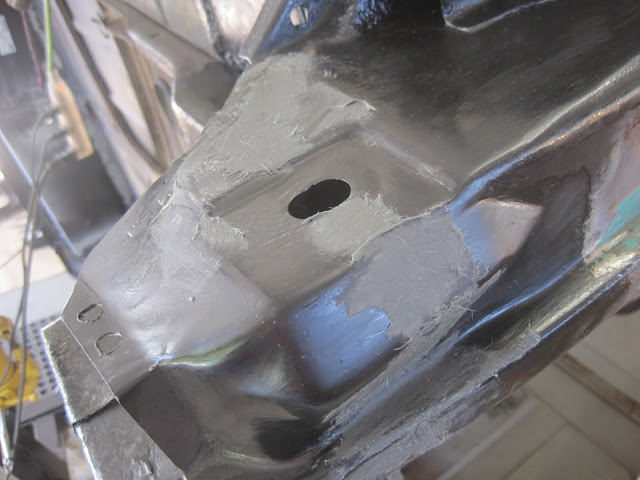
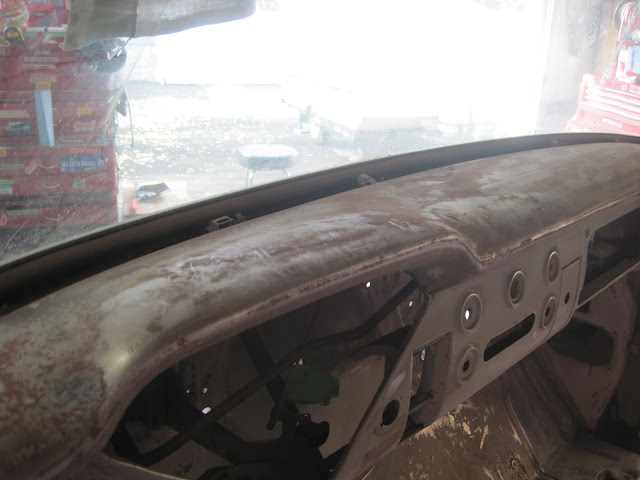
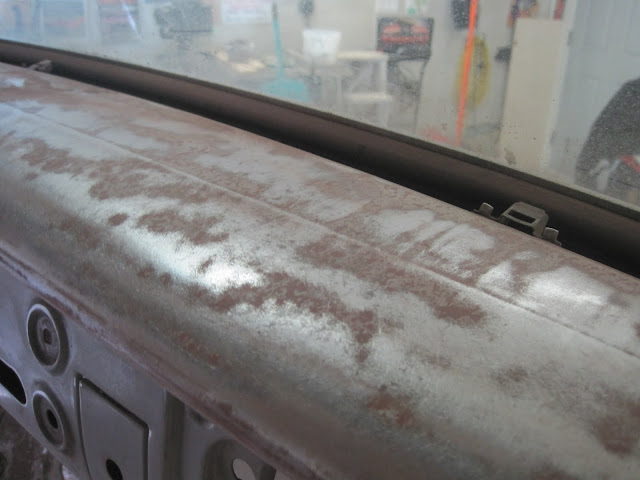
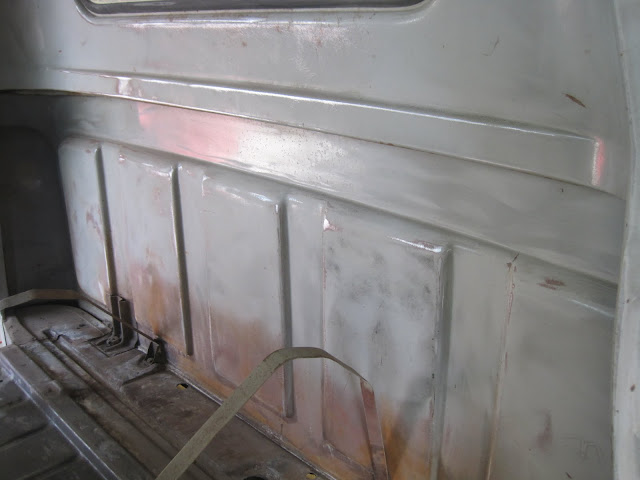
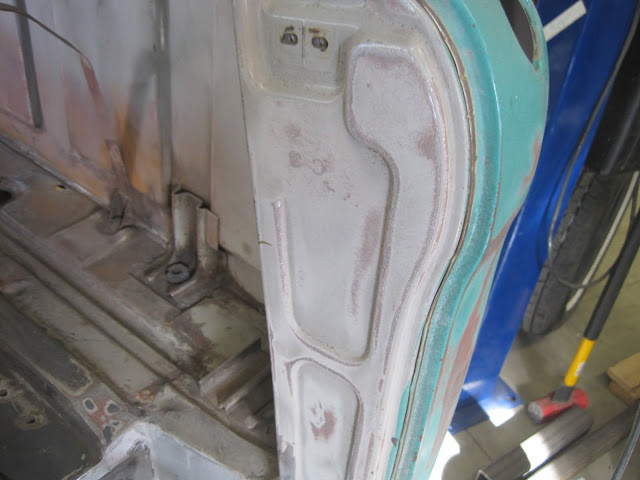
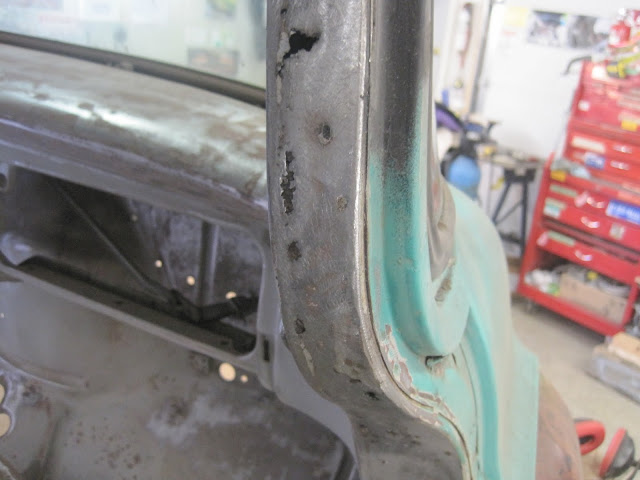
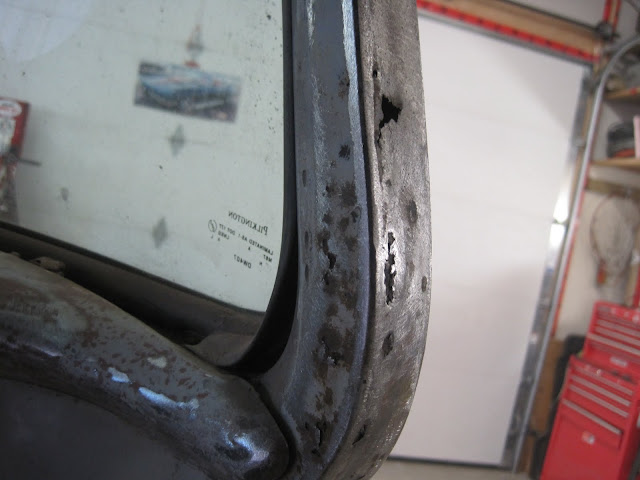
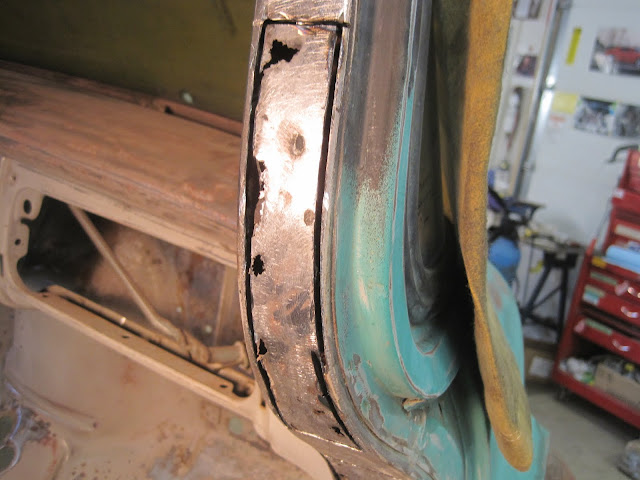
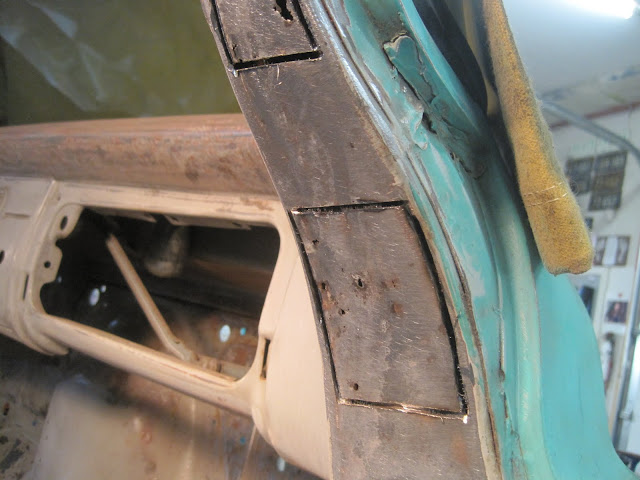
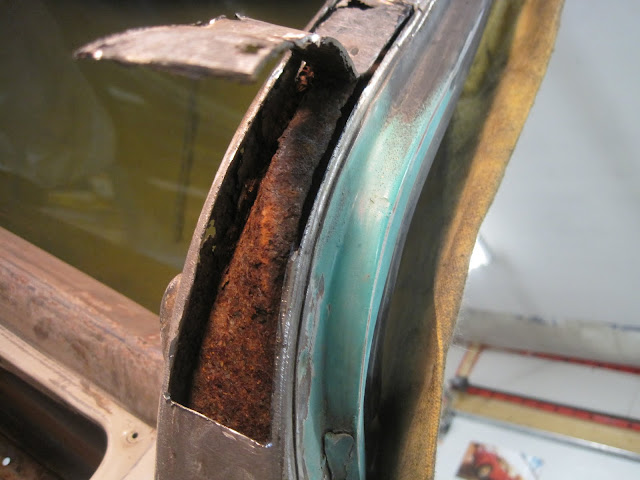
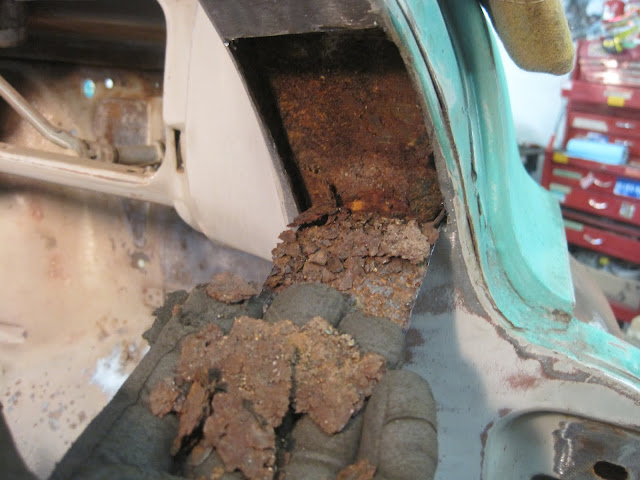
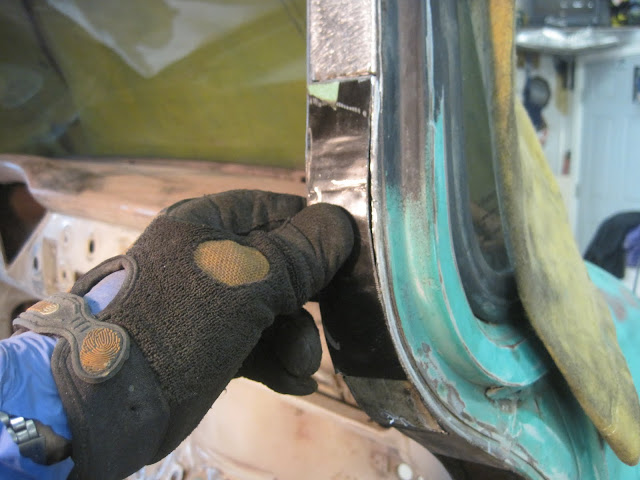
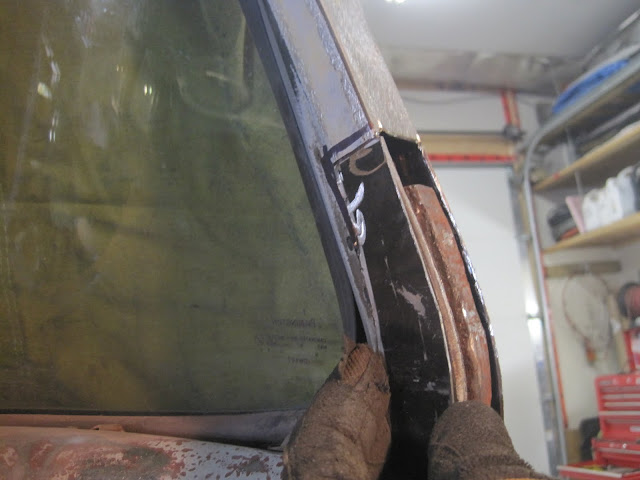
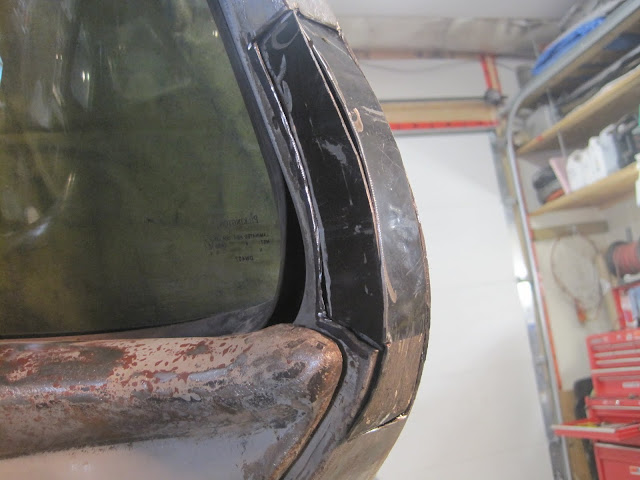
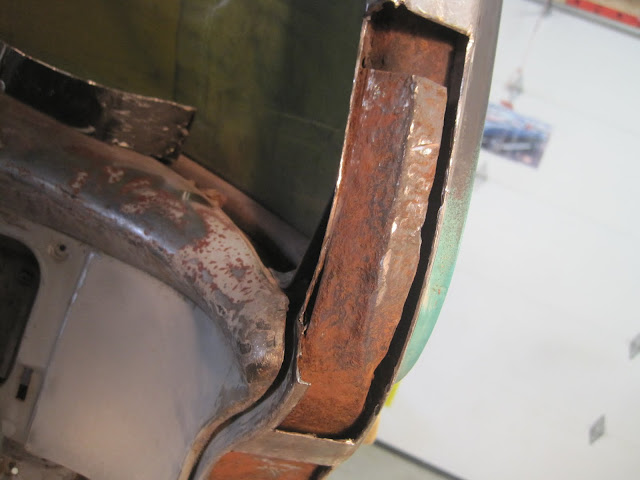
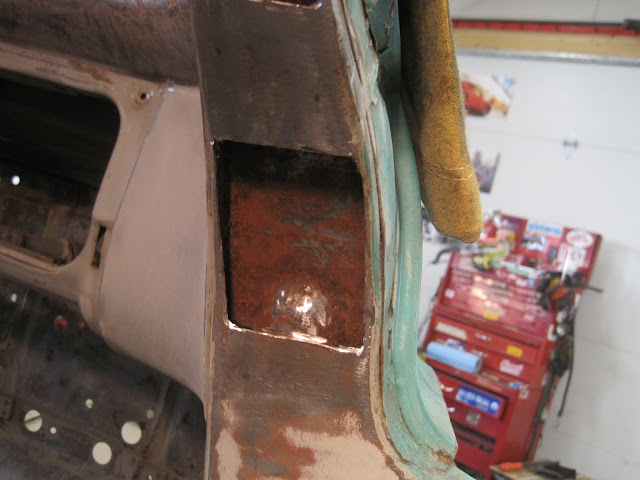
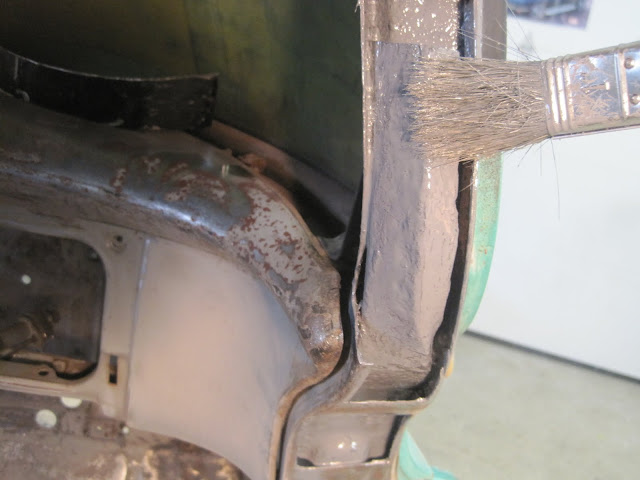
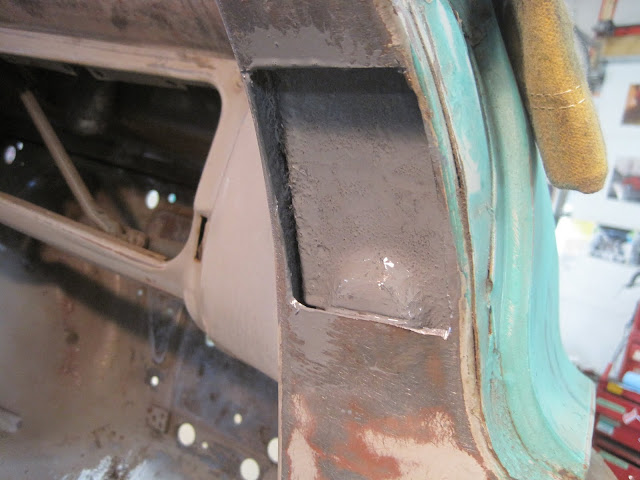
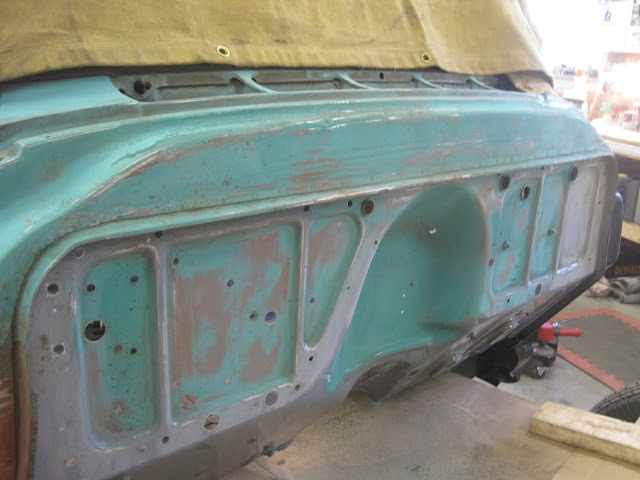
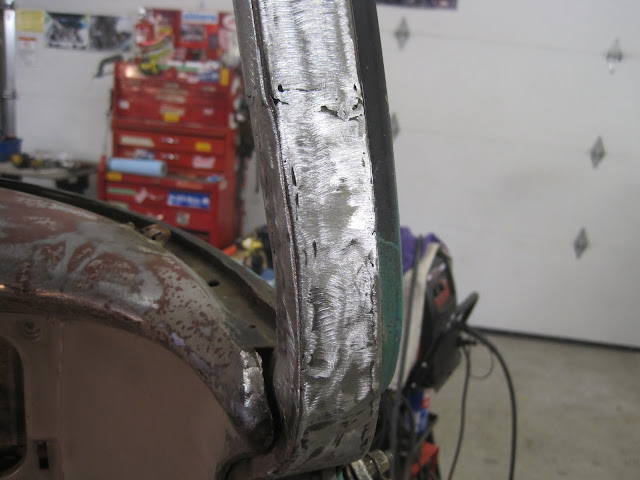
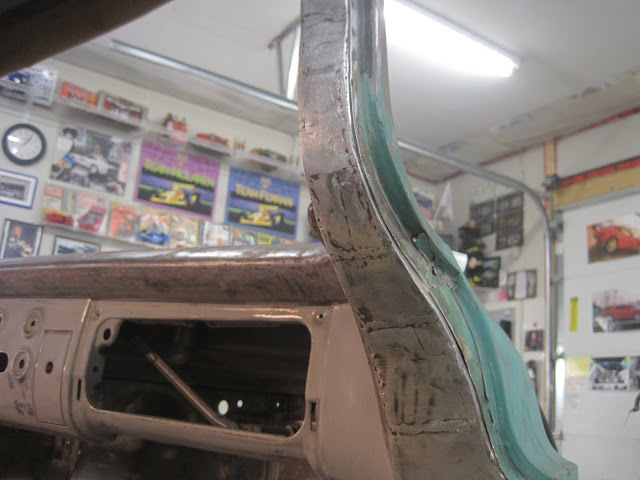
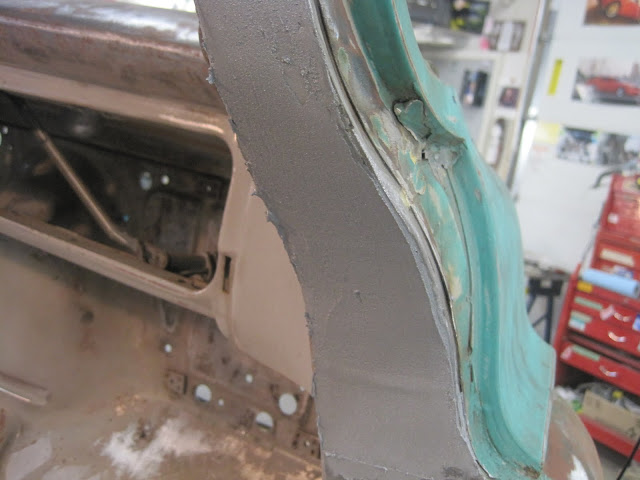
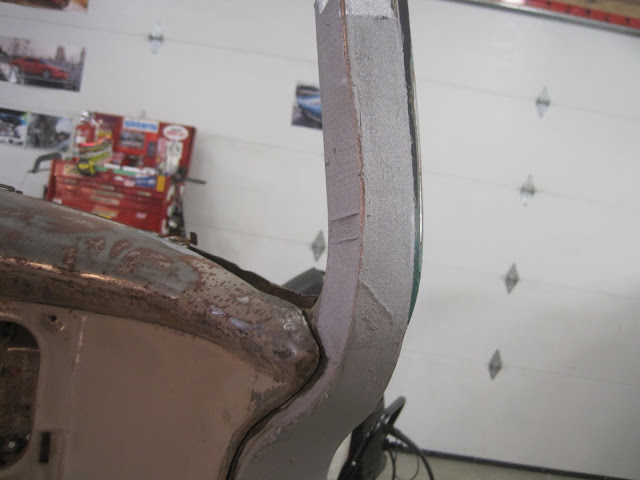
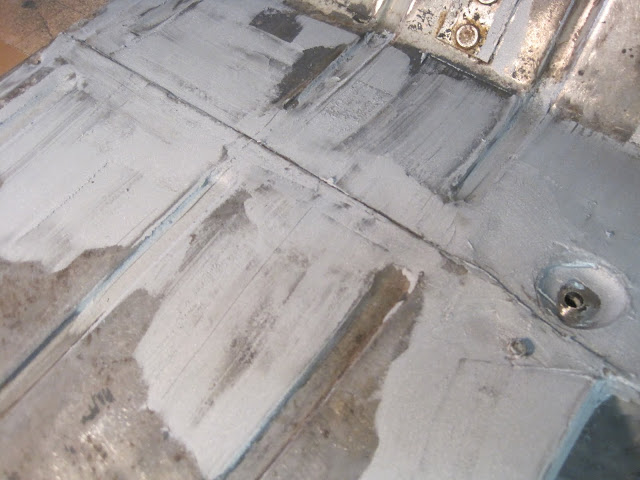
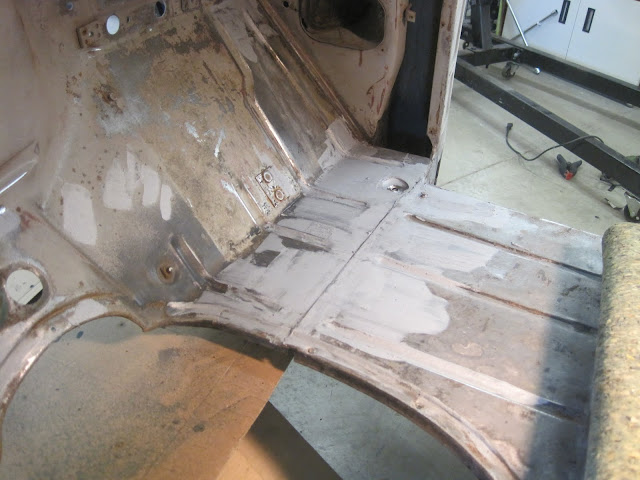
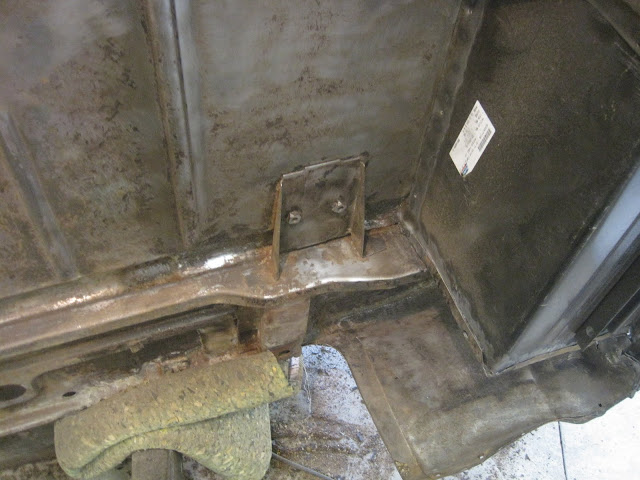
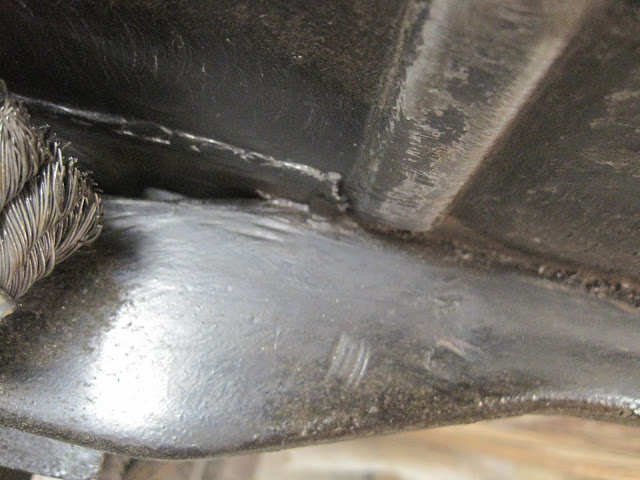
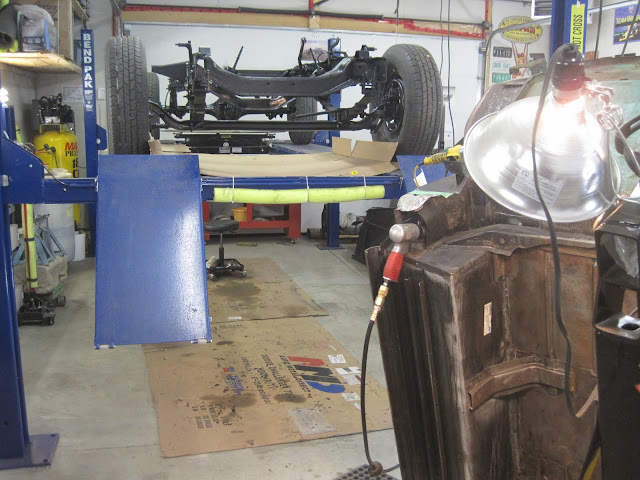
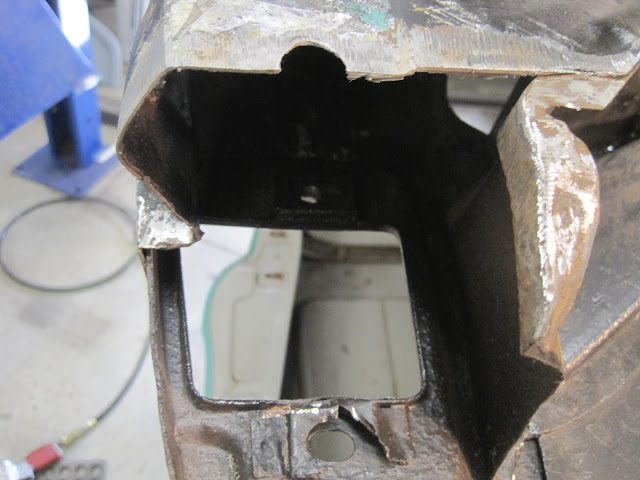
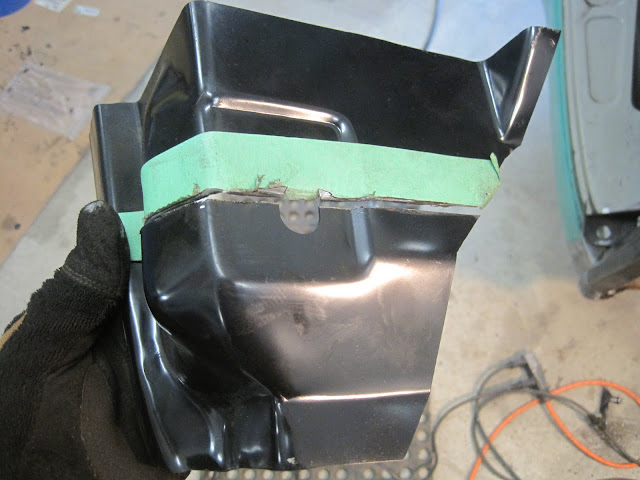
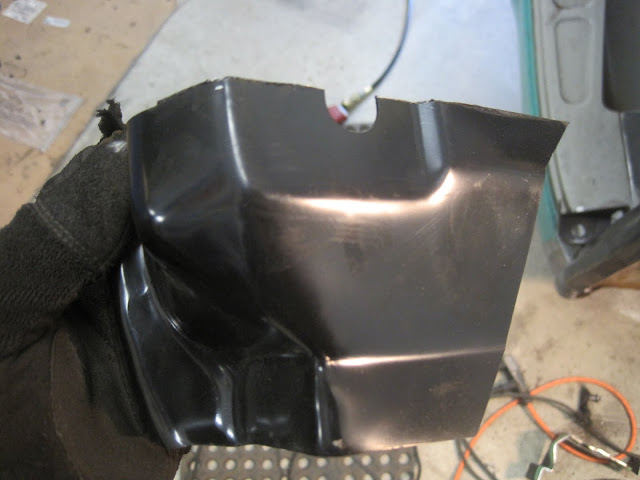
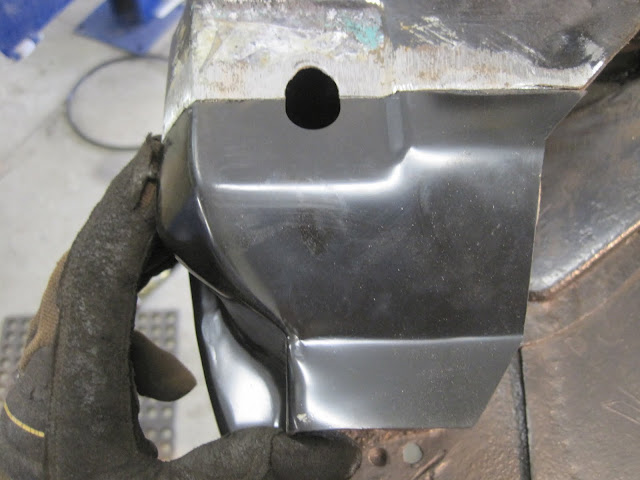
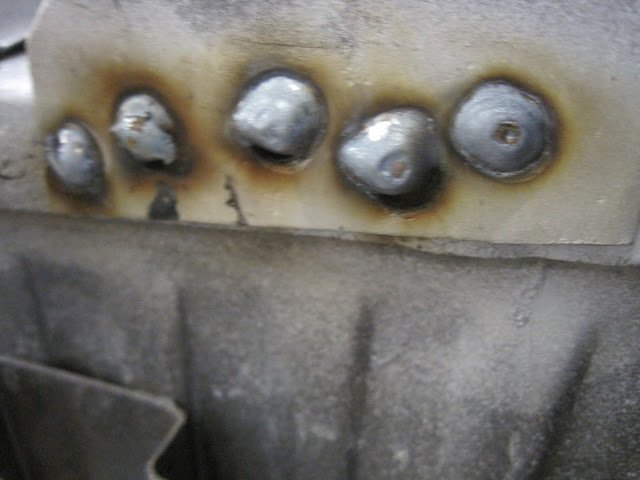
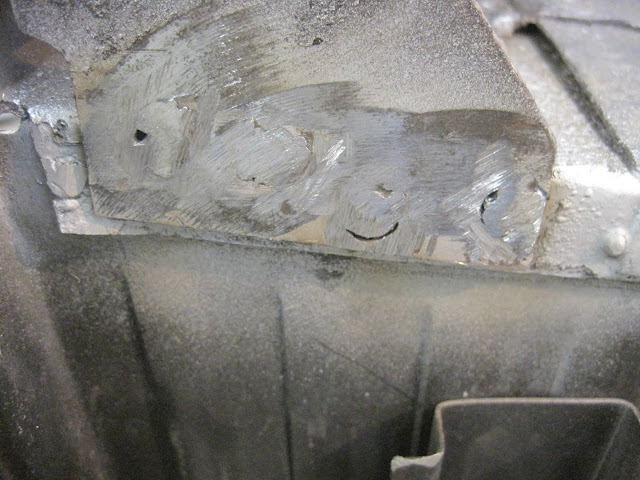
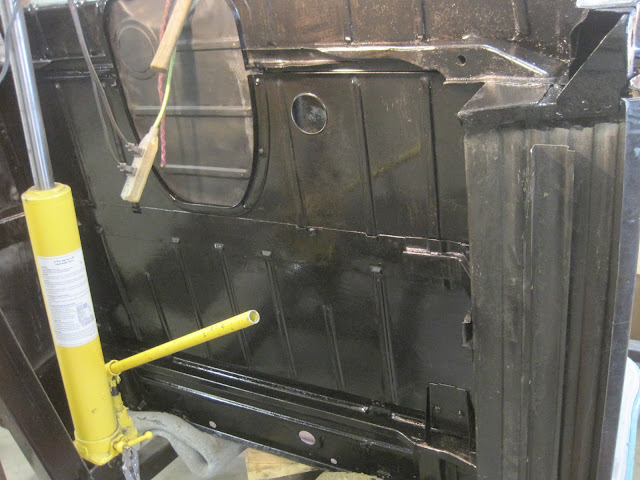
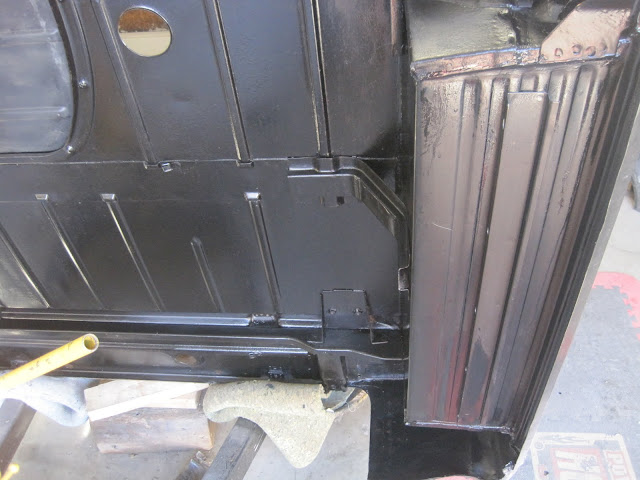
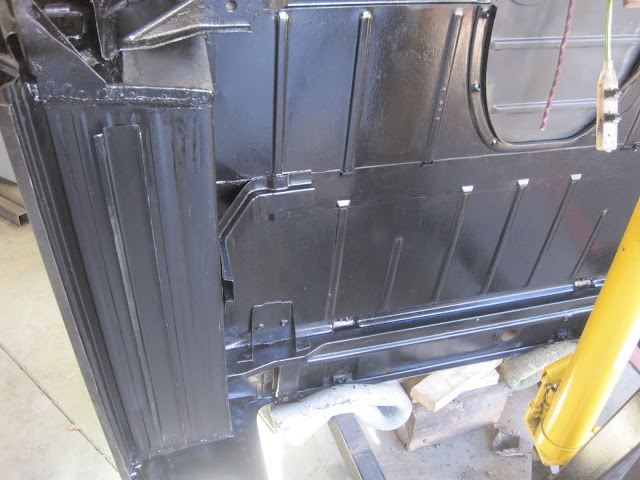
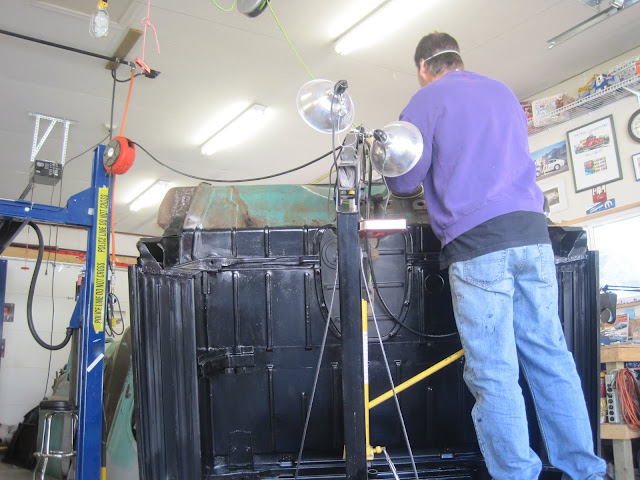
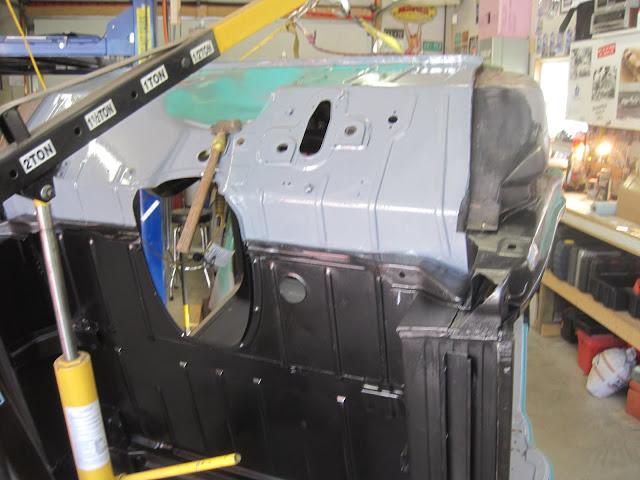
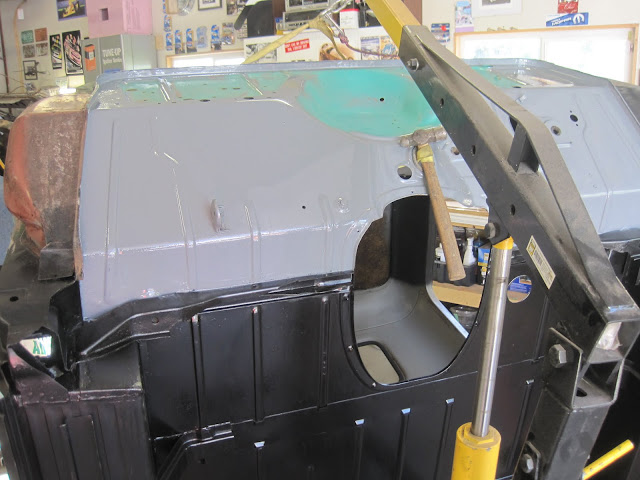
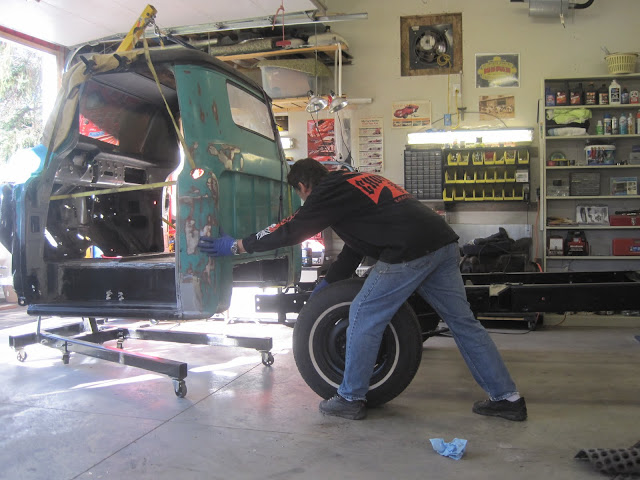
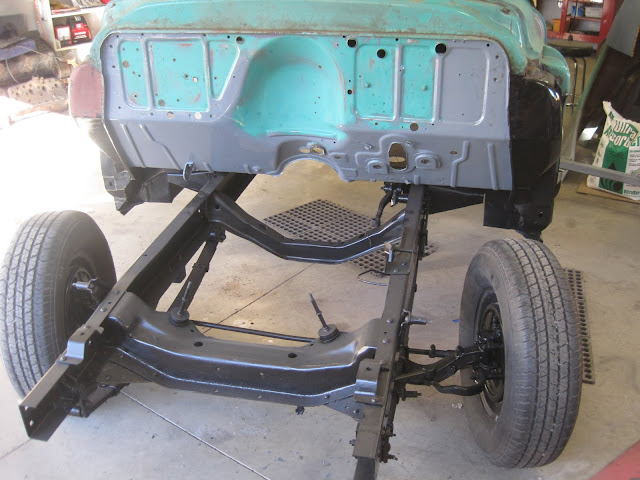
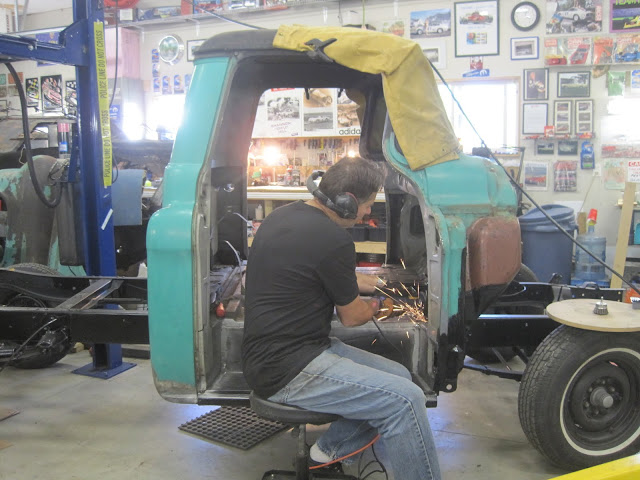
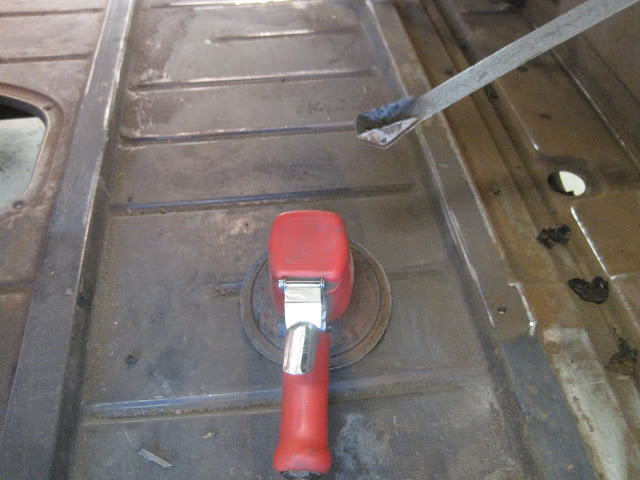
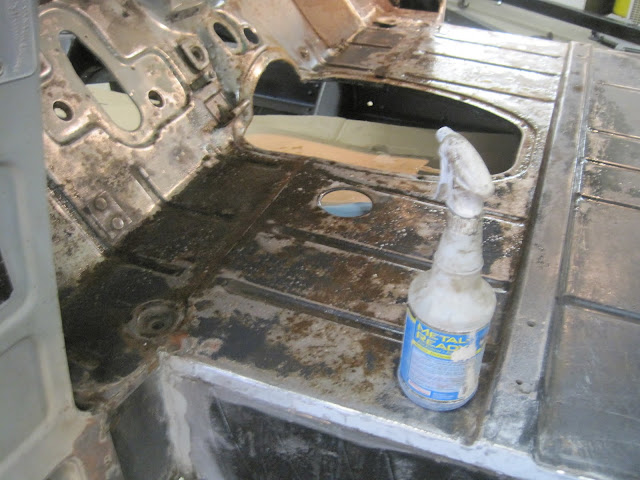
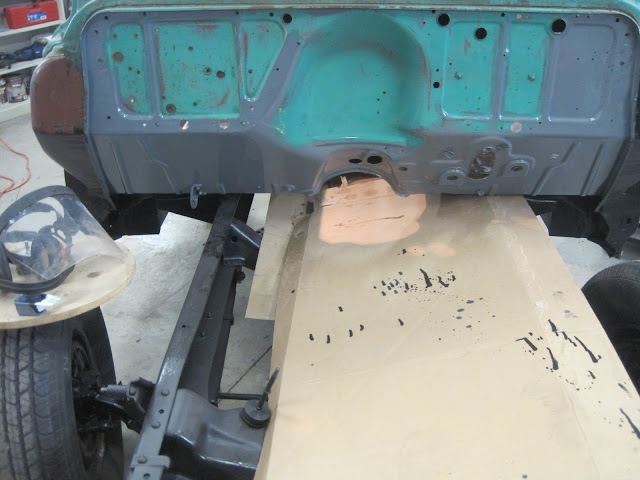
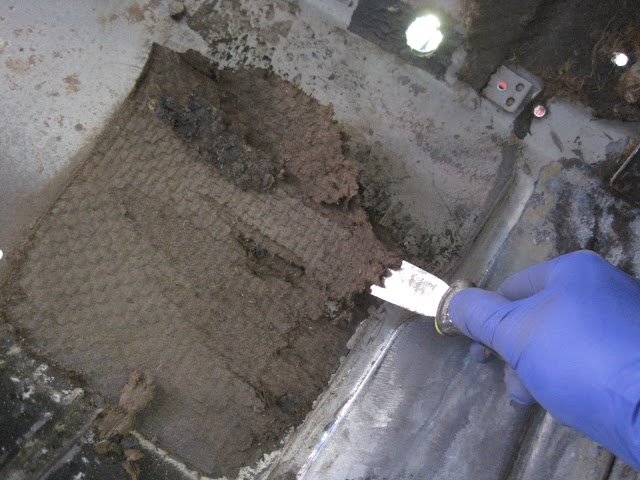
). This is in preparation to application of POR15 so I can then remount the cab to the frame. Once there, I can trial-fit the front end to set the gaps and do the body work and blocking.
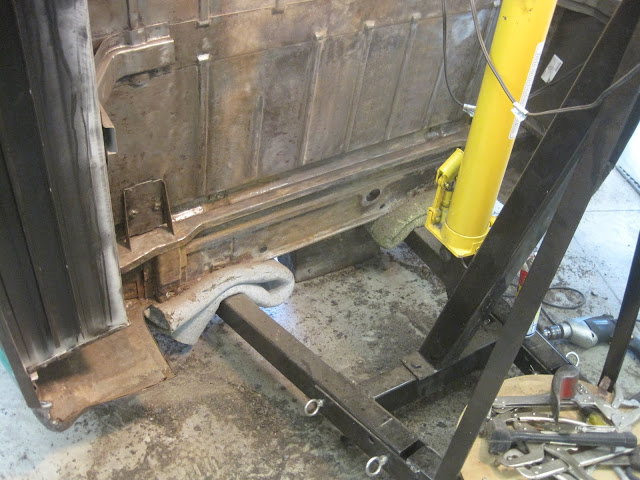
IMG_2845.JPG


IMG_2839.JPG


A lot of the metal is in very good shape, save for a light coating of surface rust - perfect for POR15 adhesion!

IMG_2844.JPG


And speaking of POR15....i had applied it on one of the repairs I did previously, so I wanted to rough it up for the full coat. Even with a wire cup it was hard to scratch it up, much less remove it!

IMG_2840.JPG


IMG_2842.JPG


Thanks for looking - stay tuned!
 
Last edited:

kool55

Well-known member
Joined
Aug 25, 2007
Messages
382
Location
South Central VA.
Re: E-tek Resto's 56 Chevy Truck

I have to agree with E-tek. Back around 03 I sand blasted my c2 vette frame at the shop. Power washed it off and brought it home. The next day I brushed Por-15 on the frame and was amazed how it self leveled with no brush marks. When I started I thought this is a dumb way of painting a frame, since I could have sprayed it at work. Turned out great.
E-tek, nice work on the 56.:thumbup:
 
OP
E

e-tek

Well-known member
Joined
Dec 19, 2007
Messages
10,690
Location
Saskatoon, SK
Re: E-tek Resto's 56 Chevy Truck

Got the other (R) A-pillar bottom changed out today. Here's an "ultimate" step-by-step....

IMG_2850.JPG


IMG_2851.JPG


IMG_2853.JPG


IMG_2855.JPG


IMG_2856.JPG


IMG_2857.JPG


IMG_2858.JPG


IMG_2859.JPG


IMG_2861.JPG


IMG_2862.JPG


A THIN skif of kittyhair and she'll be good as new. Can't wait to get the POR15 on the cab floor so I can remount it, but I still have a couple things I want to clean up while it's off and up like this....
:beer::beer:
 
To avoid these ads, REGISTER NOW!
OP
E

e-tek

Well-known member
Joined
Dec 19, 2007
Messages
10,690
Location
Saskatoon, SK
Re: E-tek Resto's 56 Chevy Truck

I'm not familiar with this Kitty hair. I am impressed with your work. Thanks

Dave.

Its basiclly a body filler w/ shredded fiberglass.:beer:

Asked and answered!

I think I already said this here, but I'll just add that I use it in these applications for it's waterproof properties. Applied over welds here it covers and seals any tiny voids. Regular filler is not waterproof.
 
OP
E

e-tek

Well-known member
Joined
Dec 19, 2007
Messages
10,690
Location
Saskatoon, SK
Re: E-tek Resto's 56 Chevy Truck

Got the lower A-pillar brackets welded back on and applied POR 15 to the cab bottom. Once the POR15 dries, I'll apply a Black Seam Sealer to any seams and gaps on the underside.

IMG_2904.JPG


IMG_2903.JPG


IMG_2908.JPG


I take it that the bottom of the cab is ganna be black ?
:beer:

IMG_2915.JPG


Some of the tools I used....

IMG_2911.JPG


As well, I put a little AllMetal on some areas to be smoothed (inside of door sill/step).

IMG_2917.JPG
 

49stude2r6

Well-known member
Joined
May 1, 2008
Messages
78
Location
Bremerton, WA
Re: E-tek Resto's 56 Chevy Truck

Your work looks fantastic. I have a couple of quick questions I was hoping you wouldn't mind clarifying upon. Filling the pitting over POR 15, are you using regular filler for that? The Kitty Hair on the welds is that before or after POR 15? Thank you for sharing your work, it is a big help in understanding the process for my own projects.
 
OP
E

e-tek

Well-known member
Joined
Dec 19, 2007
Messages
10,690
Location
Saskatoon, SK
Re: E-tek Resto's 56 Chevy Truck

Thanks and I don't mind at all! As a rule, fillers should be applied over clean ground metal only. That's what it says on the can/MDS sheets and that's the way I've done it for 30+years.....HOWEVER, I don't see a reason not to put it over POR15 where there's rust, as the POR adheres so well to the metal and seals off any rust and the filler adheres extremely well to the POR15 (applied within the 24 hour recoat window is likely a best practice). I use kitty hair (short-strand re-enforced filler) or AllMetal wherever there may be exposure to water and over welds.
 
OP
E

e-tek

Well-known member
Joined
Dec 19, 2007
Messages
10,690
Location
Saskatoon, SK
Re: E-tek Resto's 56 Chevy Truck

Thanks Scott. I aim to please and really enjoy the process. It took me 3.5 years (weekends and holidays) to complete the Challenger and now it's for sale. Of course this project won't take me that long as I don't work full-time for 'Da Man' anymore!

Today I sealed up the new panels and some areas that should have been sealed from the factory. Then I applied a second coat of POR15 to finish off the bottom. Tomorrow I'll sand and primer the firewall then it'll be ready to bolt back onto the frame.
 
OP
E

e-tek

Well-known member
Joined
Dec 19, 2007
Messages
10,690
Location
Saskatoon, SK
Re: E-tek Resto's 56 Chevy Truck

Got a decent day in today (wifey took the kids to the out-laws for the weekend - yahoo!).

IMG_2930.JPG


POR15 - perfect for chassis, frames and floorboards.

IMG_2931.JPG


Sealed up the steps that we weled in, as well as some factory seams that should have been sealed long ago!

IMG_2933.JPG


Got the firewall sanded and primed.

IMG_2934.JPG


IMG_2937.JPG


IMG_2938.JPG


Once it dried to the touch, I hooked it up to the cherry-picker and rolled the frame back under it.

IMG_2939.JPG


IMG_2941.JPG


It's a One-man-operation over here at E-tek Restorations!!

IMG_2942.JPG


IMG_2943.JPG


IMG_2945.JPG


Once on it's mounts, I got back to work on the floor...

IMG_2947.JPG


Worked a little more on the R. cab mount that I welded in earlier. Dressed the welds and sandblasted the heavy-duty concave washer that sits in the mount:

IMG_2954.JPG


Scraped out all of the remaining factory seam sealer in preperation for sanding and more POR15 on the floor...

IMG_2948.JPG


I used 40 grit on the DA to remove the loose rust, loose paint and rough up the metal so the POR15 will bite properly.

IMG_2949.JPG


Then I applied MetalReady (Phosphoric Acid) to any rust prior to POR15. This is the best 2-steps I've found for really nuetralizing rust. I'd be suprised if it ever came back.

IMG_2950.JPG


Firewall looks good! Tomorrow I'll contiue on the floor then start bolting up the front end for a gap-check.

IMG_2953.JPG
 

MP&C

Well-known member
Joined
Oct 21, 2009
Messages
4,396
Location
Leonardtown, MD
Re: E-tek Resto's 56 Chevy Truck

e-tek; said:
It's a One-man-operation over here at E-tek Restorations!!

IMG_2942.JPG


So a timer on the camera? :bounce:


You'll be done with that real soon at the rate you're going!
 
OP
E

e-tek

Well-known member
Joined
Dec 19, 2007
Messages
10,690
Location
Saskatoon, SK
Re: E-tek Resto's 56 Chevy Truck

So a timer on the camera? :bounce:

You'll be done with that real soon at the rate you're going!

Yes - I'm even the cameraman! I want to get it done so they can have it back for next summer (the original owner is in his 80's!) and also so I can get to some of my projects!

Here's the phosphate that's left after the MetalReady evaporates. Turns the rust from Ferric Oxide to Ferric Phosphate.

IMG_2955.JPG


IMG_2956.JPG


Owners son (one day it's to be his truck) was supposed to come and help with some of the dirty work (like scraping)....so far I'm the only one getting dirty! :wtf::bounce:

IMG_2958.JPG


Factory paint runs - should we re-create them? ;)

IMG_2960.JPG


IMG_2972.JPG


Sanded down the entire interior in a bid to ready it for primer and paint. The dash is welded to the interior. Check out the seam on the two-piece dash:

IMG_2977.JPG


IMG_2962.JPG


IMG_2975.JPG


IMG_2976.JPG


Right windsheild pillar was rusted through - more metal work (my favourite part!)

IMG_2963.JPG


IMG_2964.JPG


IMG_2965.JPG


IMG_2985.JPG


IMG_2986.JPG


IMG_2988.JPG


IMG_2989.JPG


Sometimes it's hard to know how things come apart. This was spot-welded to the inner.

IMG_2991.JPG


IMG_2992.JPG


IMG_2996.JPG


Check out how much metal is lost to rust over time:

IMG_2995.JPG


Trial-fitting replacement pieces:

IMG_2997.JPG


IMG_2999.JPG


IMG_3004.JPG


Before welding and hammer-shaping I cleaned up the rust and painted more (you guessed it!) POR15 on the inners:

IMG_3005.JPG


IMG_3006.JPG


IMG_3007.JPG


IMG_3008.JPG


On another note, I noticed some hand-done brass tack-welds from the factory - you wouldn't see that today!!

IMG_3009.JPG


Finally, The front end and the grey POR15 I brushed on from below needed to be sanded and feathered out. This is now ready for Epoxy primer.

IMG_3010.JPG


:beer:
 
OP
E

e-tek

Well-known member
Joined
Dec 19, 2007
Messages
10,690
Location
Saskatoon, SK
Re: E-tek Resto's 56 Chevy Truck

Not pulling the windshield?

You bet. I should have had it done already but had too many things going on last week. Of course I REALLY wanted it out today (dash, back panel) but now have to wait until next week. I'd do it myself, but I stopped after breaking one a couple years ago. Plus a lot of them are 2-man jobs, need hot-knives, urethane, clips....plus installing mouldings on new paint can be nerve wracking! So that and machining engine blocks are the only things I don't do myself!
 
Last edited:

4StarCstms

Well-known member
Joined
Mar 14, 2008
Messages
938
Location
Kentucky
Re: E-tek Resto's 56 Chevy Truck

Don't blame ya. I do the same thing - Having a good glassman is about as important as a good machine shop. One slip up can cause many moons of headaches!
 
OP
E

e-tek

Well-known member
Joined
Dec 19, 2007
Messages
10,690
Location
Saskatoon, SK
Re: E-tek Resto's 56 Chevy Truck

OK, so I was just going on about not liking to do glass work anymore and how it and block machining were the only things I farm out? Well I needed to protect the WS from grinding and welding on this pillar, so I was cleaning it to check it's condition when it just pushed out. Either someone didn't put it in right the last time, or it's been very loose for a long time! Anyways, it came out so now I don't have to worry about it. Sometimes you get lucky!

IMG_3015.JPG


Continuing the WS pillar repairs....fit, tack, grind, repeat.

IMG_3012.JPG


IMG_3014.JPG


IMG_3019.JPG


IMG_3020.JPG


IMG_3021.JPG


IMG_3025.JPG


Same with this bottom patch...

IMG_3026.JPG


All new metal, plus rust-proofed in behind now. The POR15 will provide a barrier on the inner metal and the e-coating on the replacement pieces will protect the new pieces. One last thing I'll do it spray or brush either a rust paint or a penetrant compound into all the areas that were welded. This will help protect any spots where the weld-through or other primers where burned off by the weld heat. One compound I've been wanting to try is from Eastwood - time for an online order!

IMG_3027.JPG


I used AllMetal filler here, as well as on the floor to fill the pitting. Waterproof and very strong, these are the perfect areas of application for this type of filler.

IMG_3033.JPG


IMG_3034.JPG


IMG_3035.JPG


IMG_3030.JPG


:metal:
 

Dan in Pasadena

Well-known member
Joined
Feb 18, 2009
Messages
13,105
Location
Pasadena, CA
Re: E-tek Resto's 56 Chevy Truck

Stupid questions I guess:

..Here's the phosphate that's left after the MetalReady evaporates. Turns the rust from Ferric Oxide to Ferric Phosphate.

IMG_2955.jpg

IMG_2956.jpg

You just leave this residue? It looks dusty in these photos, but maybe that's just how it looks?

IMG_2988.jpg
[/QUOTE]

This rust looks terminal and aggressive to me. Obviously you can't reach inside there and paint POR 15 up and down the length of the internals..so what can you do, nothing? Let it rust and get it when it comes through later?
 
Last edited:

Motown 454

Well-known member
Joined
Sep 25, 2008
Messages
1,359
Re: E-tek Resto's 56 Chevy Truck

e-tek You do really nice work. Its looking great.
 
OP
E

e-tek

Well-known member
Joined
Dec 19, 2007
Messages
10,690
Location
Saskatoon, SK
Re: E-tek Resto's 56 Chevy Truck

Stupid questions I guess:

You just leave this residue? It looks dusty in these photos, but maybe that's just how it looks?

I love a "stupid" question - I ask em all the time!

Sorry, I didn't show it, but no, you don't leave it and yes, it is a dust-like substrate that is left afterwards. I generally sand the area down again, then wash it with Pre-paint solvent (or reducer) prior to top coating with any filler or primer.

This rust looks terminal and aggressive to me. Obviously you can't reach inside there and paint POR 15 up and down the length of the internals..so what can you do, nothing? Let it rust and get it when it comes through later?

I do try and get the POR15 as far up and down as possible, but what I will also do is spray either a rust primer/paint or a wax-like rust penetrant which contain special corrosion resistant waxes and corrosion inhibitors dispersed in corrosion preventive oil.

Otherwise ya, you can only do so much. Even in a "TOTAL" restoration, unless you are going to cut open every area, including the frame, you can't get to everything on the insides. I restored my 67 Galaxie Convertible about 6 years ago now and can now see some rust on frame areas that I didn't see rusting then. Like the song says: Rust never sleeps!:(
 

djjsr

Well-known member
Joined
Sep 4, 2006
Messages
4,796
Location
In the cornfields
Re: E-tek Resto's 56 Chevy Truck

I think the POR-15 company should invent an expanding foam that you could shoot into an area like that.

(I sent them an e-mail about it)
 
Last edited:

Dan in Pasadena

Well-known member
Joined
Feb 18, 2009
Messages
13,105
Location
Pasadena, CA
Re: E-tek Resto's 56 Chevy Truck

I think the POR-15 company should invent an expanding foam that you could shoot into an area like that.

(I sent them an e-mail about it)

You beat me to it! I agree totally.

I also have thought of some kind of long (disposable) tube or snout with a kind of spray head like a Hudson garden sprayer. You could drill a small hole in a space like that windshield A pillar and put the snout in there to thoroughly drench it in POR-15 or other product. Sure, it would not be perfect but it would be an improvement.


E-Tek, I think you are bustin' azz on this truck and I highly doubt you could be getting paid a fair, representative wage for it. It's just time, time, time to do it right and very few will do it for themselves, much less for someone else.
 
To avoid these ads, REGISTER NOW!
Top Bottom