
You are using an out of date browser. It may not display this or other websites correctly.
You should upgrade or use an alternative browser.
You should upgrade or use an alternative browser.
E-tek Restorations: PROJECT THREAD
- Thread starter e-tek
- Start date
Re: E-tek Resto's 56 Chevy Truck
E-tek, Great job and very informative posts. Thank you so much for taking the time, really. This thread is helping me so much on my current project.
May I ask what gauge sheet metal you use for your patch panels?
E-tek, Great job and very informative posts. Thank you so much for taking the time, really. This thread is helping me so much on my current project.
May I ask what gauge sheet metal you use for your patch panels?
JC23
Well-known member
Re: E-tek Resto's 56 Chevy Truck
Great Stuff! Diggin' it by the ton!
Keep 'em coming, pleeze!
Great Stuff! Diggin' it by the ton!
Keep 'em coming, pleeze!
ambenz
Well-known member
Re: E-tek Resto's 56 Chevy Truck
Being a newbie to the site, I just read the whole thread and was disappointed because....I wanted to see the finished product!!!!
Very Cool write-up, reminds me of my Mustang II project I did when I was in my early 20's...boy I sure could have used this post to learn alot.
Back then, no internet...or personal computers, well, maybe the Atari64..LOL!
You are making a great contribution to the knowledge that can be learned through pictures and documentation... "Way to GO!"
Guess I will be watching to see the whole process because I do find it fascinating!!!!!!
Re: E-tek Resto's 56 Chevy Truck
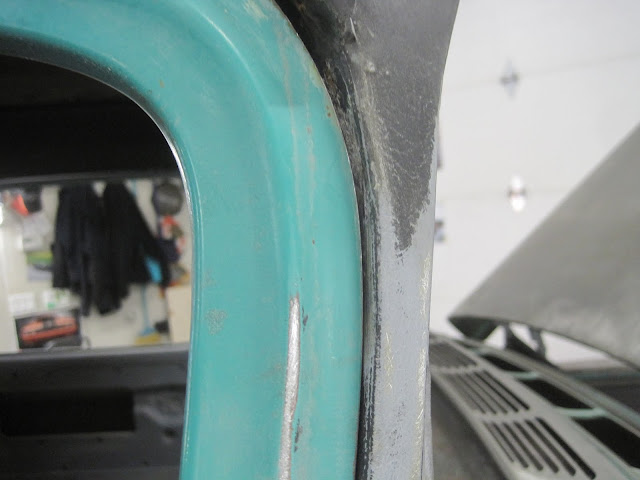
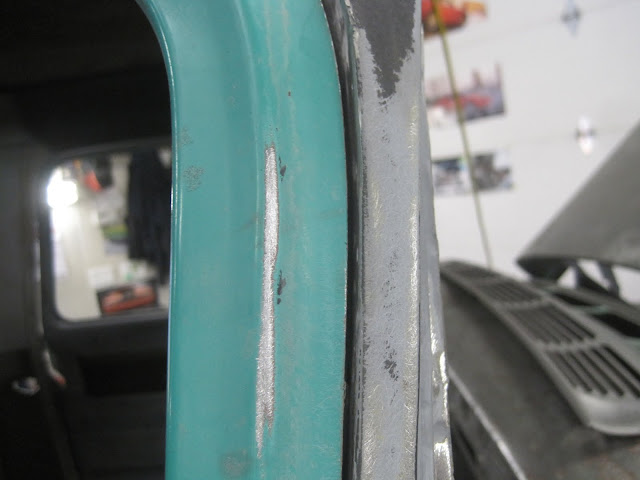
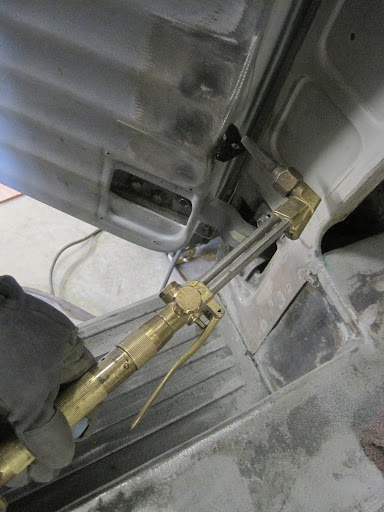
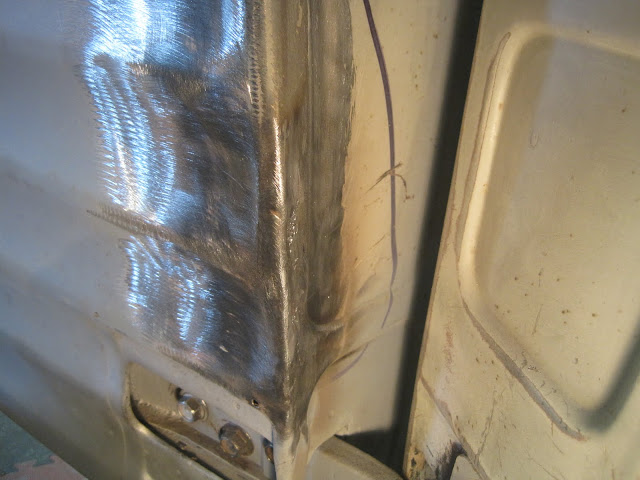
Recall our starting point on the passenger (Right) door gap:
Looking at the assembly manual measurements it shows that one side is "open" a 1/4 inch and the other "closed" the same amount. So I grabbed the Porta-Power (PP) again and rigged 'er up to give the left side a bit of a push...
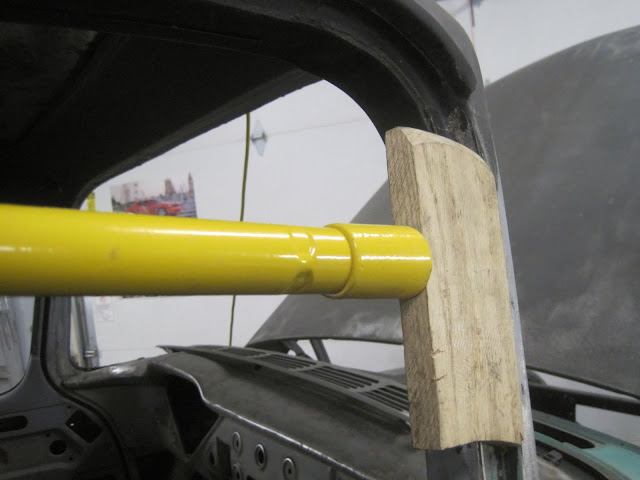
Normally, when you move metal you have to push it more than you want due to spring-back. Nearly every metal structure has built-in tension which wants to spring back a certain amount - unless you push too far, in whcih case you'll just F$&K it up worse than before!")
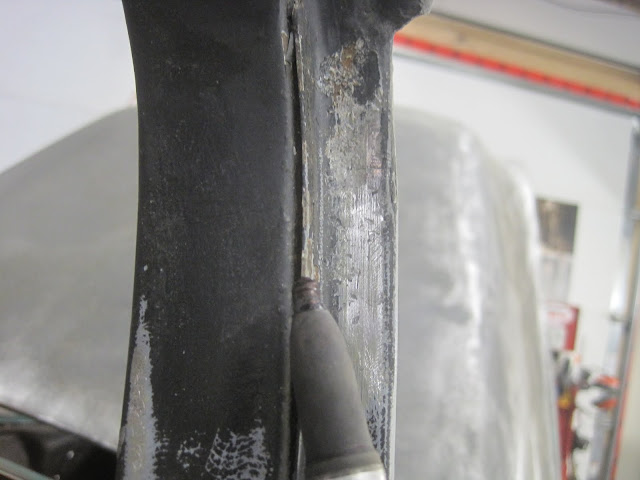
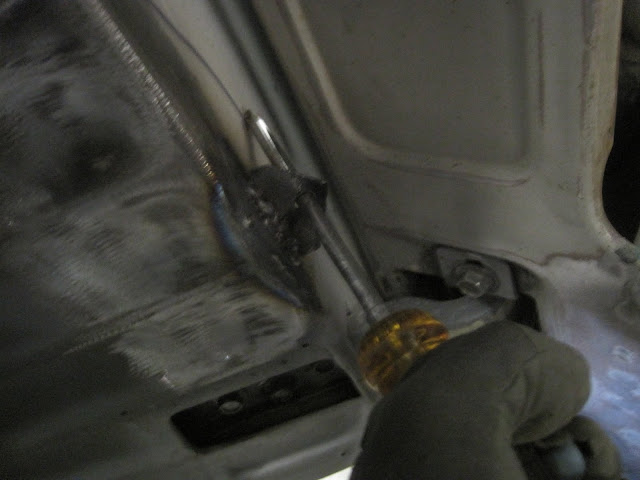
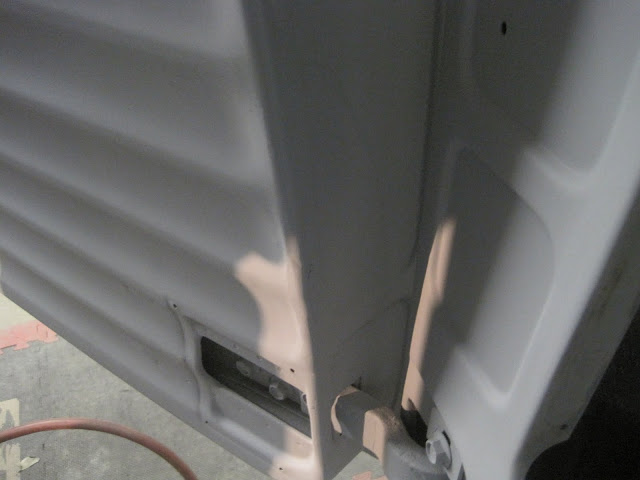
As well, when you move one thing, other things move around too. Sure enough, when I removed the PP I could also see that this seam was opening up:
Between the PP and a light light tapping on the edge, I did get it to move and stay moved...
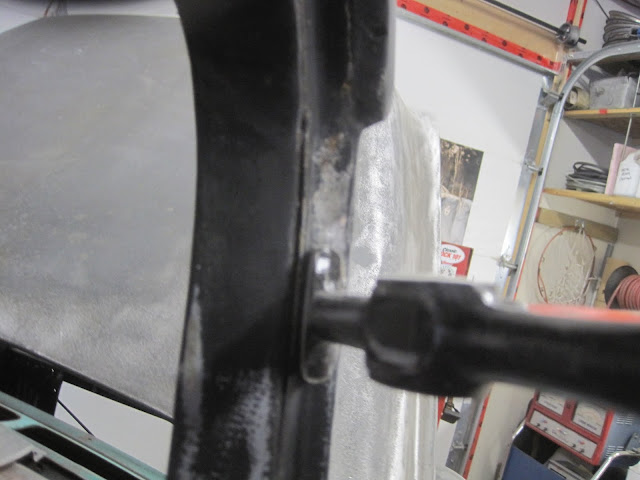
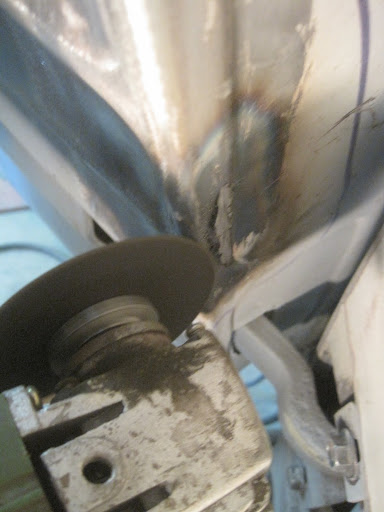
Which gave me this:
And even though it's not as wide as the other side, I think a happy medium is good here, because the other side was likely moved in the opposite ddirection. Of course no-one will see both sides at the same time like we are here, so me thinks it'll be just right.
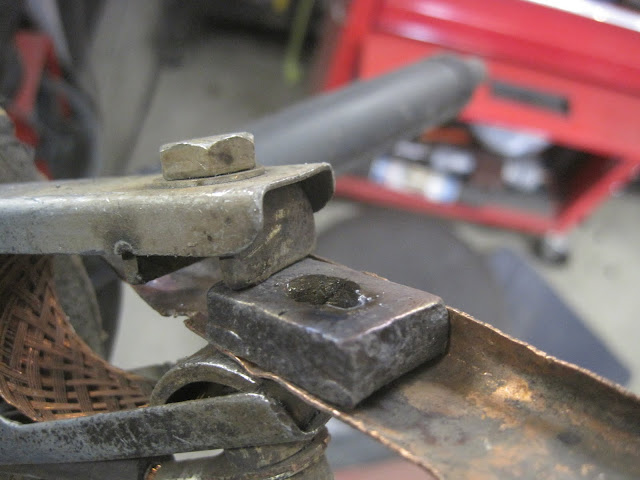
Then, I spent a few hours block-sanding panels, which isn't really exciting enough to photograph! However, one thing someone might get a kick out of is re-tapping a captured nut. Next time you strip one (which I'm finding is easy to do since FORD used NC - National Fine - threads on everything in those years!), don't fret, you're really only about 6 minutes from a perfect fix:
I used the MIG clamp to hold the nut onto a piece of copper, so the wled would be contained by something - but not stick to it:
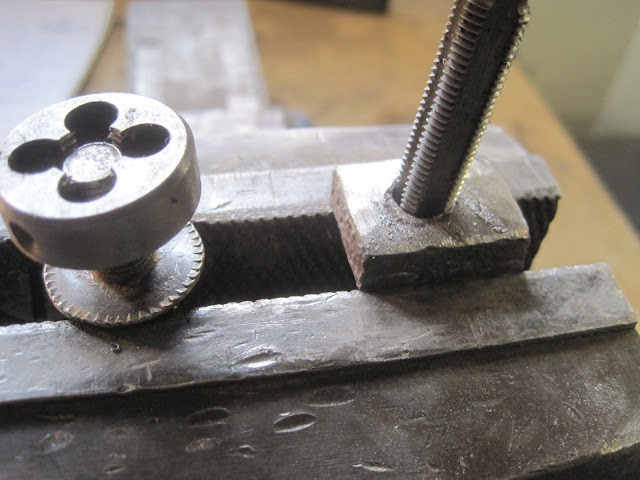
Once filled and ground flat I drilled it out with the nominal drill size for that tap-size:

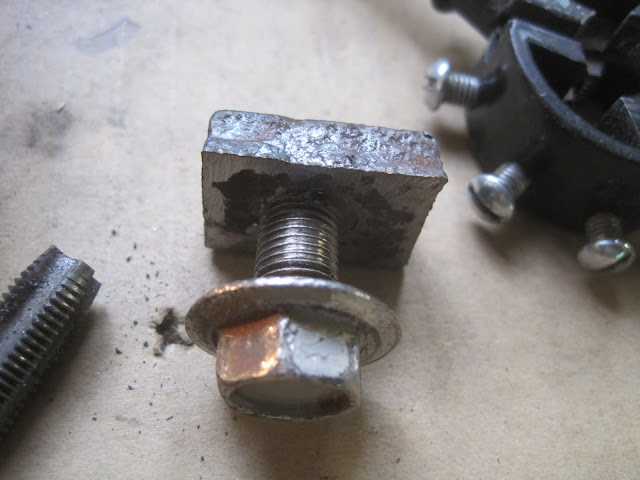
Then tapped it out as well as cleaned the bolt threads:
And WALA - as good as new!
Anyways, other than bolting up the box pieces, the next few days are going to be alll about the block (as in sanding)...so if the owners want to come out and get dirty, call me! Hopefully we'll have this thing in primer shortly!
Recall our starting point on the passenger (Right) door gap:
Looking at the assembly manual measurements it shows that one side is "open" a 1/4 inch and the other "closed" the same amount. So I grabbed the Porta-Power (PP) again and rigged 'er up to give the left side a bit of a push...
Normally, when you move metal you have to push it more than you want due to spring-back. Nearly every metal structure has built-in tension which wants to spring back a certain amount - unless you push too far, in whcih case you'll just F$&K it up worse than before!
As well, when you move one thing, other things move around too. Sure enough, when I removed the PP I could also see that this seam was opening up:
Between the PP and a light light tapping on the edge, I did get it to move and stay moved...
Which gave me this:
And even though it's not as wide as the other side, I think a happy medium is good here, because the other side was likely moved in the opposite ddirection. Of course no-one will see both sides at the same time like we are here, so me thinks it'll be just right.
Then, I spent a few hours block-sanding panels, which isn't really exciting enough to photograph! However, one thing someone might get a kick out of is re-tapping a captured nut. Next time you strip one (which I'm finding is easy to do since FORD used NC - National Fine - threads on everything in those years!), don't fret, you're really only about 6 minutes from a perfect fix:
I used the MIG clamp to hold the nut onto a piece of copper, so the wled would be contained by something - but not stick to it:
Once filled and ground flat I drilled it out with the nominal drill size for that tap-size:
Then tapped it out as well as cleaned the bolt threads:
And WALA - as good as new!
Anyways, other than bolting up the box pieces, the next few days are going to be alll about the block (as in sanding)...so if the owners want to come out and get dirty, call me! Hopefully we'll have this thing in primer shortly!
Re: E-tek Resto's 56 Chevy Truck
Thanks guys - nice to know someone's watching!
Sorry to dissapoint you - sometimes I wish it was done too! But this aint no magic show. It'll take MANY, MANY more hours to massage every inch of metal, every nut, bolt, screw and clip, every wire and terminal....before she's done!
No doubt - I could have used the 'net when I was in my 20's too! I learn something new EVERY time I open it (especially on GJ!!) and can only hope that my tenny-tiny contribution may help someone, somewhere with their project.
I also enjoy the thread e-tek...thanks for taking the time.
E-tek, Great job and very informative posts. Thank you so much for taking the time, really. This thread is helping me so much on my current project.
May I ask what gauge sheet metal you use for your patch panels?
Great Stuff! Diggin' it by the ton!
Keep 'em coming, pleeze!
Thanks guys - nice to know someone's watching!
Being a newbie to the site, I just read the whole thread and was disappointed because....I wanted to see the finished product!!!!
Sorry to dissapoint you - sometimes I wish it was done too!
But this aint no magic show. It'll take MANY, MANY more hours to massage every inch of metal, every nut, bolt, screw and clip, every wire and terminal....before she's done!Very Cool write-up, reminds me of my Mustang II project I did when I was in my early 20's...boy I sure could have used this post to learn alot.
Back then, no internet...or personal computers, well, maybe the Atari64..LOL!
You are making a great contribution to the knowledge that can be learned through pictures and documentation... "Way to GO!"
Guess I will be watching to see the whole process because I do find it fascinating!!!!!!
No doubt - I could have used the 'net when I was in my 20's too! I learn something new EVERY time I open it (especially on GJ!!) and can only hope that my tenny-tiny contribution may help someone, somewhere with their project.
kvom
Well-known member
Re: E-tek Resto's 56 Chevy Truck
Is there a reason you weld-filled the old nut rather than just using a fresh piece of steel?
I know squat about body work but this thread has captured my interest from day 1.
Is there a reason you weld-filled the old nut rather than just using a fresh piece of steel?
I know squat about body work but this thread has captured my interest from day 1.
Scooterfish
Well-known member
Re: E-tek Resto's 56 Chevy Truck
Always check this thread for updates. Thanks for posting.
Always check this thread for updates. Thanks for posting.
Re: E-tek Resto's 56 Chevy Truck
It was a pretty thick piece of steel, was the right size, was there....but you're right, could have used anything of similar size....I guess I was just making the point that you can repair anything using these techniques.
Is there a reason you weld-filled the old nut rather than just using a fresh piece of steel?
I know squat about body work but this thread has captured my interest from day 1.
It was a pretty thick piece of steel, was the right size, was there....but you're right, could have used anything of similar size....I guess I was just making the point that you can repair anything using these techniques.
Re: E-tek Resto's 56 Chevy Truck
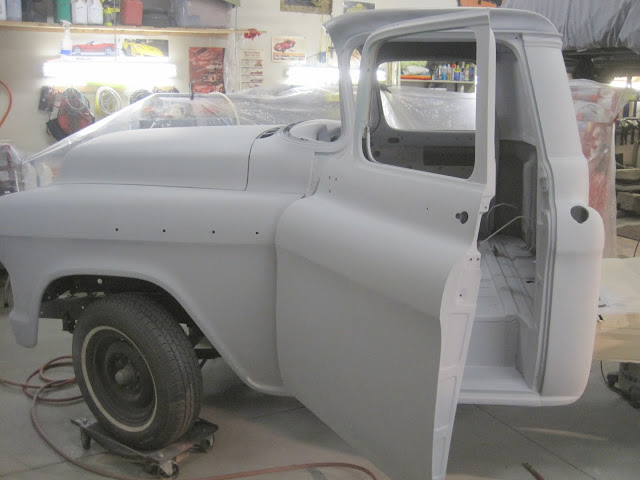
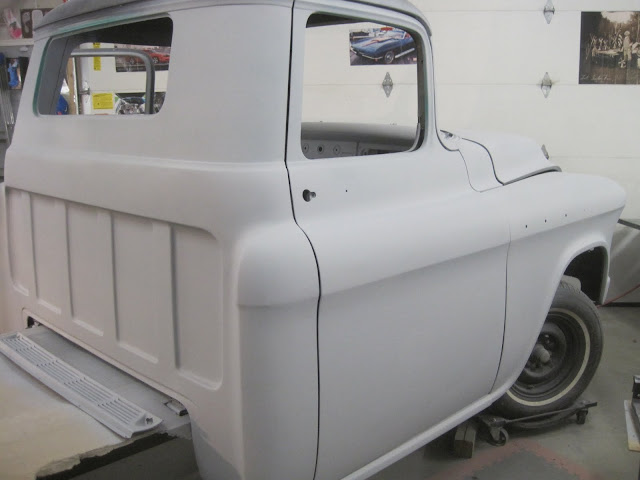
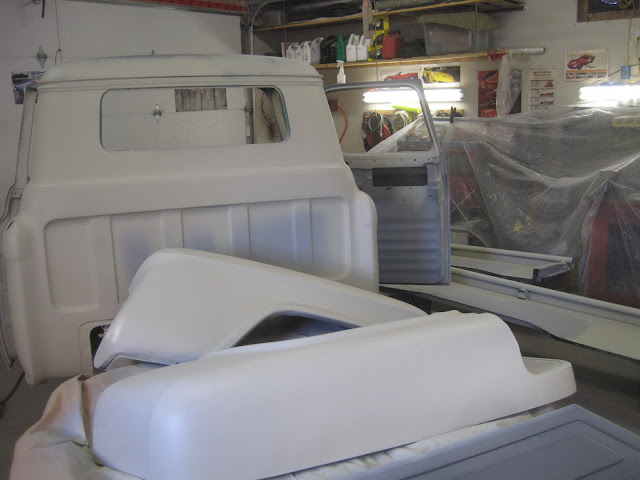
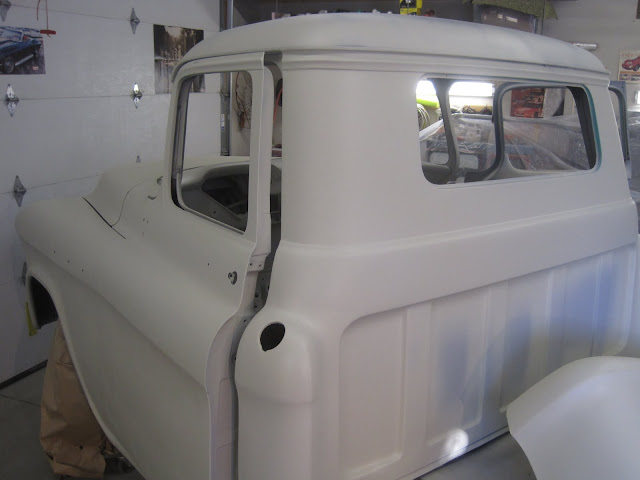
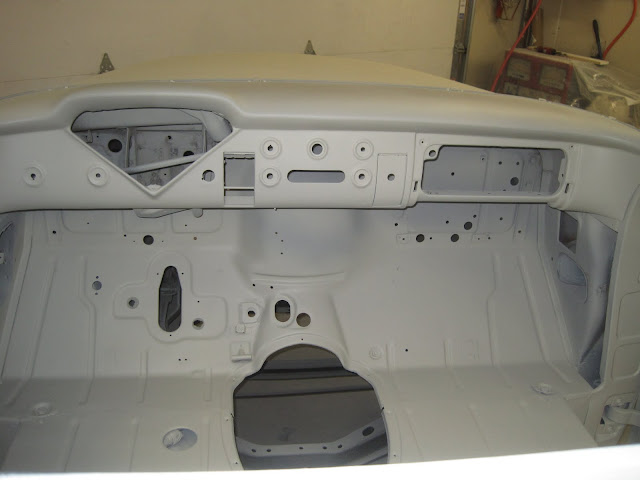
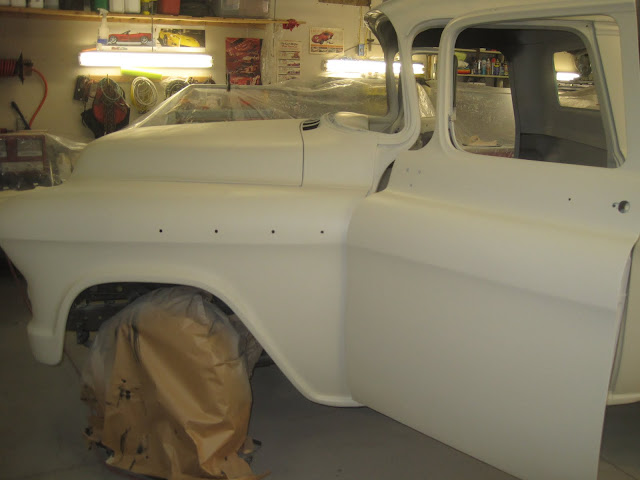
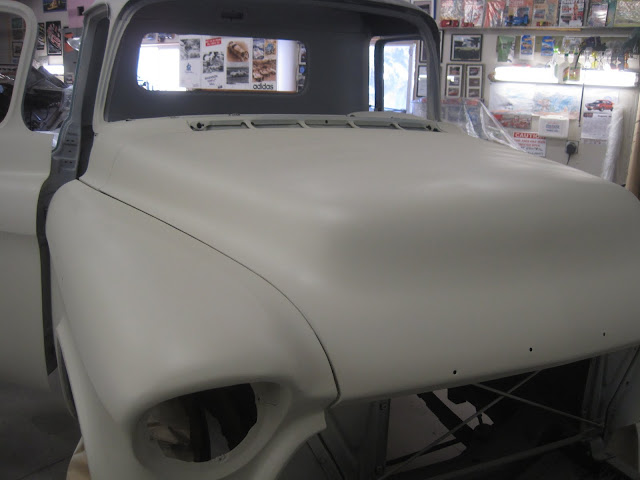
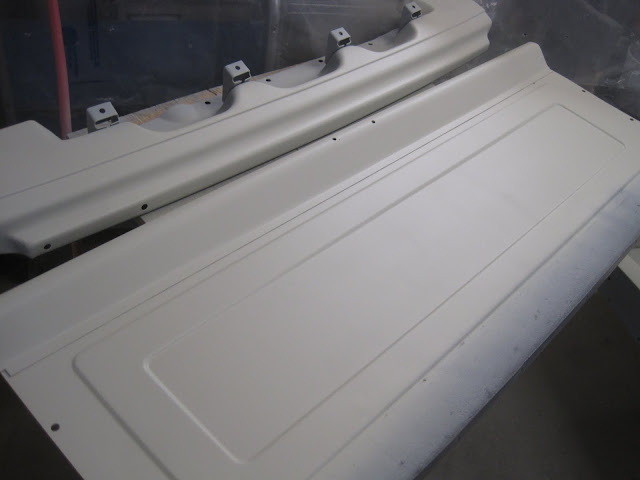
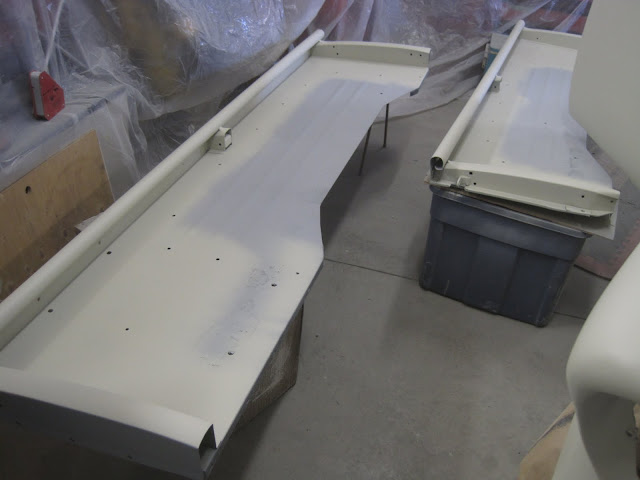
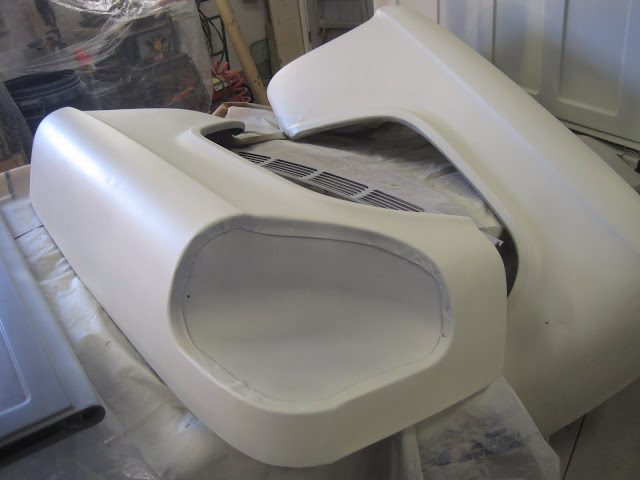
Todays episode: high-build primer on box inners...Please excuse the photo quality, I had to use my phone today
After a few more hours getting the metal (fairly) straight on the box sides and end, I got out my primer spray equipment. Since I only spray etch/block primer every few months, I clean up all my equipment and pack it away so it doesn't deteriorate. When I get close to the primer stage on a project, I find all my equipment and supplies and keep it out until I'm all done this stage. On a show-level resto like this one, I'll spray etch (once), high-build (2K) 2-5 times and maybe a coat of sealer to finish. Although the gun gets cleaned between every spray, there's no point putting it all away until I'm done the primer stage!
Once again - the BendPak lift gets in the act - this time as a make-shift spray booth!


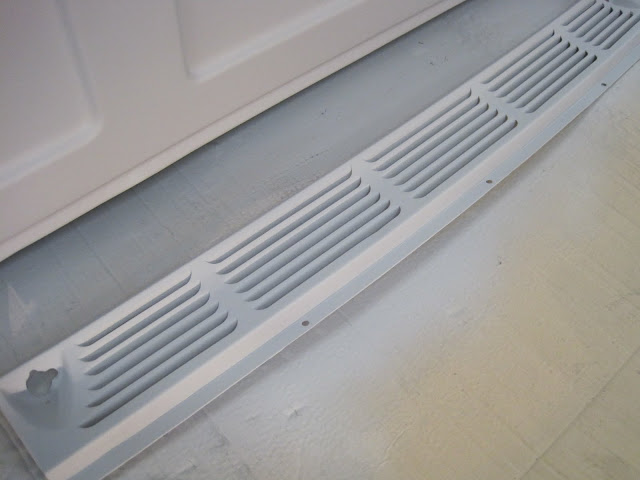
These parts got 3 coats of high-build, which should be enough to block them straight. I wanted to get these coated so I could assemble the box and check it for fit and alignment, plus do any metal work to these pieces. Once it - and the cab are all together, I'll spray the entire truck and start the long block-sanding process.


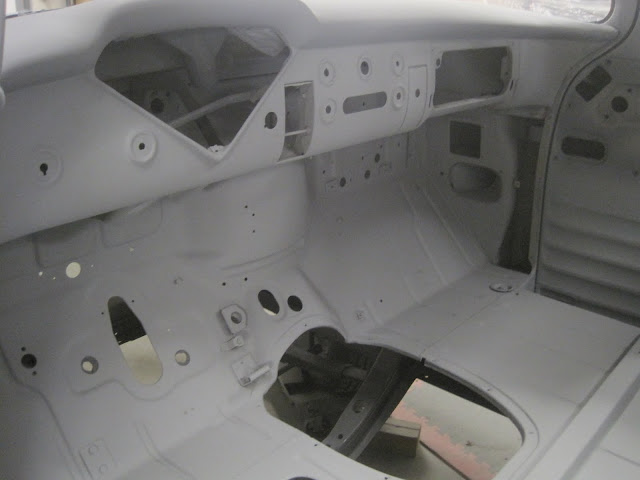
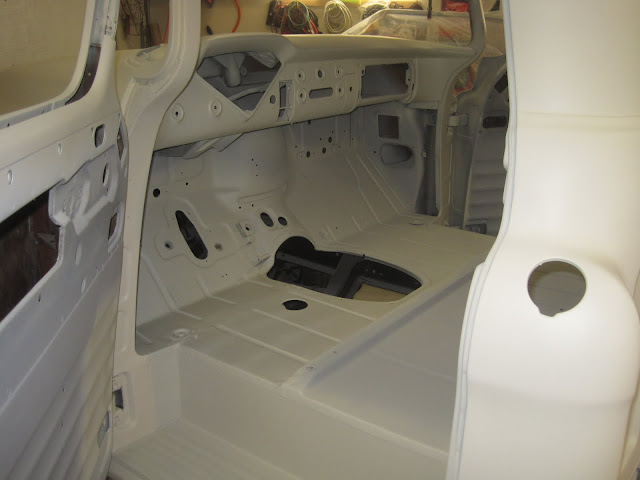
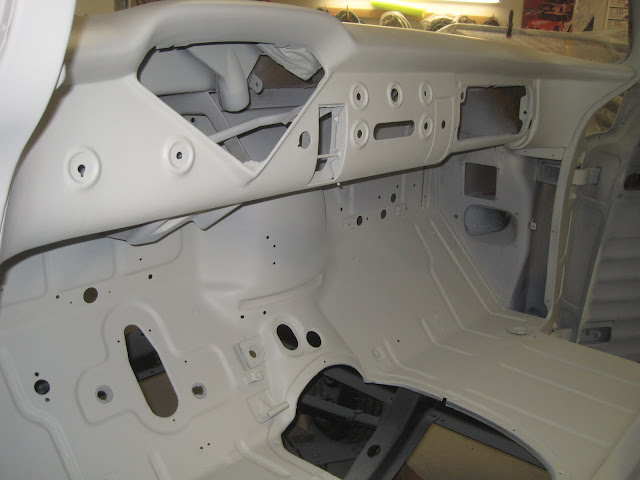
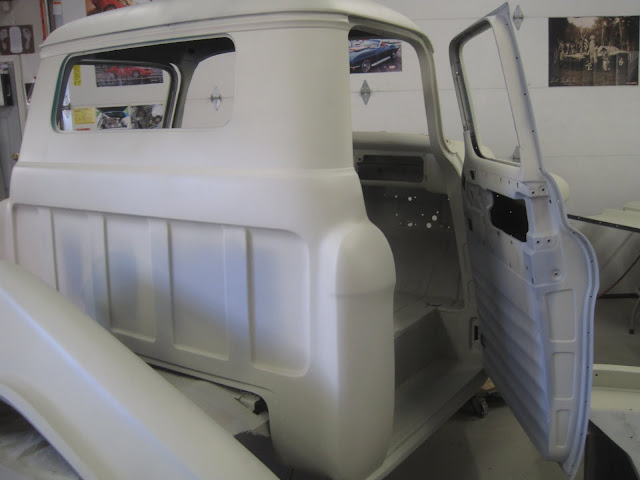
The cab is very close to being ready for primer...again, sorry for the phone-pics today...


Once it's all blocked, sealed, then wet-sanded in 600G, I'll dissassemble it all - VERY CAREFULLY - and transport it to the bodyshop for paint. While the body parts are there, I'll spray the entire frame and inner-panels with Tie-Coat primer, then spray it all in Chassis-Black. It'll be gorgeous.
Also at that time, I'll have to install all the brake lines, wiring and drivetrain and can do all the wheel.brake rebuilds and such...
Moving along - thanks for coming for the ride!
Todays episode: high-build primer on box inners...Please excuse the photo quality, I had to use my phone today
After a few more hours getting the metal (fairly) straight on the box sides and end, I got out my primer spray equipment. Since I only spray etch/block primer every few months, I clean up all my equipment and pack it away so it doesn't deteriorate. When I get close to the primer stage on a project, I find all my equipment and supplies and keep it out until I'm all done this stage. On a show-level resto like this one, I'll spray etch (once), high-build (2K) 2-5 times and maybe a coat of sealer to finish. Although the gun gets cleaned between every spray, there's no point putting it all away until I'm done the primer stage!
Once again - the BendPak lift gets in the act - this time as a make-shift spray booth!
These parts got 3 coats of high-build, which should be enough to block them straight. I wanted to get these coated so I could assemble the box and check it for fit and alignment, plus do any metal work to these pieces. Once it - and the cab are all together, I'll spray the entire truck and start the long block-sanding process.
The cab is very close to being ready for primer...again, sorry for the phone-pics today...
Once it's all blocked, sealed, then wet-sanded in 600G, I'll dissassemble it all - VERY CAREFULLY - and transport it to the bodyshop for paint. While the body parts are there, I'll spray the entire frame and inner-panels with Tie-Coat primer, then spray it all in Chassis-Black. It'll be gorgeous.
Also at that time, I'll have to install all the brake lines, wiring and drivetrain and can do all the wheel.brake rebuilds and such...
Moving along - thanks for coming for the ride!
Smoke-on420
Banned
Re: E-tek Resto's 56 Chevy Truck
Thats a sweet ride right there you do some good work.
Thats a sweet ride right there you do some good work.
bazzateer
Well-known member
Re: E-tek Resto's 56 Chevy Truck
Just keeps getting better!
Just keeps getting better!
caper150
Well-known member
Re: E-tek Resto's 56 Chevy Truck
E-tek in the resto-shop I work PT at we always etch and then epoxy, give the epoxy a scuff and then a coat of slick sand http://www.evercoat.com/productdetail.aspx?pid=28
we'll block that and then give it 3 good coats of high-build primer and block again, gives us super straight panels.
E-tek in the resto-shop I work PT at we always etch and then epoxy, give the epoxy a scuff and then a coat of slick sand http://www.evercoat.com/productdetail.aspx?pid=28
we'll block that and then give it 3 good coats of high-build primer and block again, gives us super straight panels.
lomonte
Well-known member
Re: E-tek Resto's 56 Chevy Truck
love me some Slick Sand. Get the mud close, 3 good coats, let cook overnight, block and paint. Works awesome.
love me some Slick Sand. Get the mud close, 3 good coats, let cook overnight, block and paint. Works awesome.
Flathead Red
Well-known member
Re: E-tek Resto's 56 Chevy Truck
This is an awesome thread. I have learned so much reading through this. I look forward to seeing it complete.
Red
This is an awesome thread. I have learned so much reading through this. I look forward to seeing it complete.
Red
z28snksknr
Well-known member
Re: E-tek Resto's 56 Chevy Truck
This thread is persuading me back into the garage to get my metal work done.
What's the ventilation in your "paint booth" composed of? I had a plan to do something similar in my garage when the time comes for me to screw up my paint.
This thread is persuading me back into the garage to get my metal work done.
What's the ventilation in your "paint booth" composed of? I had a plan to do something similar in my garage when the time comes for me to screw up my paint.
Re: E-tek Resto's 56 Chevy Truck
That's sounds like a great method - LOTS of build for sure! I normally spray Etch or Epoxy (based on how much bare metal there is) for a base, then 3 coats of 2k high build, rinse, repeat, then a sealer.
Good to hear I can motivate you!! Just takes time, time and more time!
I have a 1/3 hp wall fan that will **** the windows through their openings. I hang plastic sheeting from aircraft wire I have strung across the ceiling on one half of the shop. Works great for primering. I painted in there a couple times but won't do that anymore. The clear is dangerous (Isocyanates) and the overspray gets on everything. It's just cleaner, easier, safer and better to have them painted at a shop. This one will go to a pro I deal with in January (I hope!).
E-tek in the resto-shop I work PT at we always etch and then epoxy, give the epoxy a scuff and then a coat of slick sand http://www.evercoat.com/productdetail.aspx?pid=28
we'll block that and then give it 3 good coats of high-build primer and block again, gives us super straight panels.
That's sounds like a great method - LOTS of build for sure! I normally spray Etch or Epoxy (based on how much bare metal there is) for a base, then 3 coats of 2k high build, rinse, repeat, then a sealer.
This thread is persuading me back into the garage to get my metal work done.
What's the ventilation in your "paint booth" composed of? I had a plan to do something similar in my garage when the time comes for me to screw up my paint.
Good to hear I can motivate you!! Just takes time, time and more time!
I have a 1/3 hp wall fan that will **** the windows through their openings. I hang plastic sheeting from aircraft wire I have strung across the ceiling on one half of the shop. Works great for primering. I painted in there a couple times but won't do that anymore. The clear is dangerous (Isocyanates) and the overspray gets on everything. It's just cleaner, easier, safer and better to have them painted at a shop. This one will go to a pro I deal with in January (I hope!).
Last edited:
Re: E-tek Resto's 56 Chevy Truck
Got the Epoxy on today and will shoot the high build tomorrow morning.
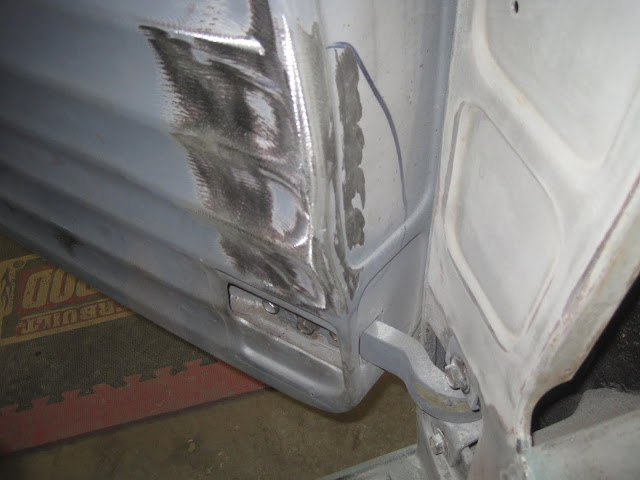
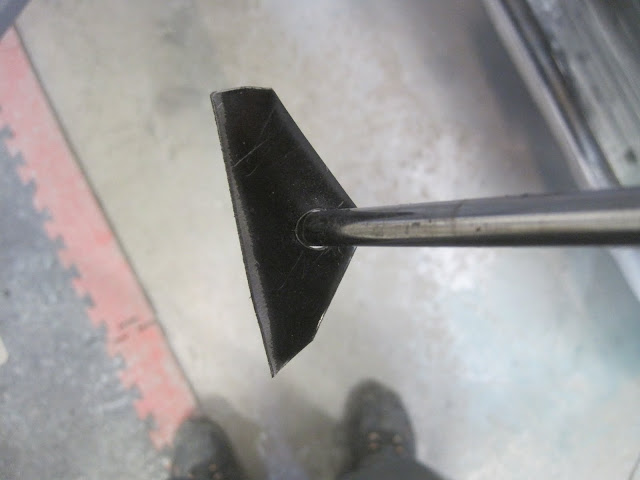
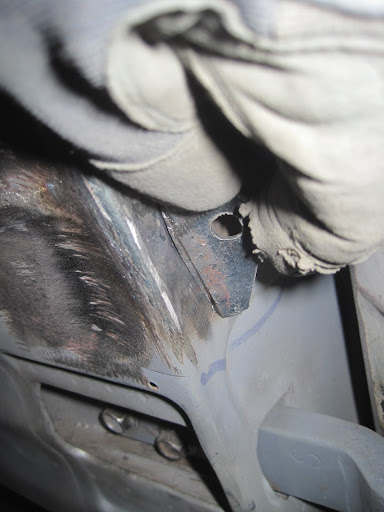
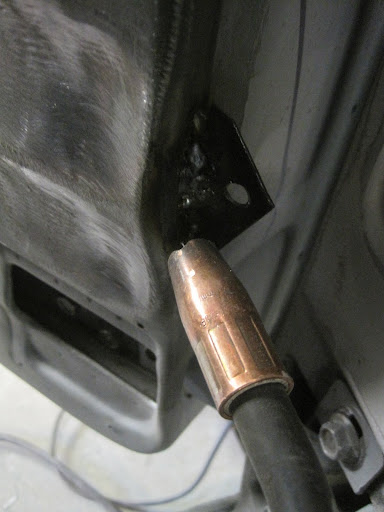
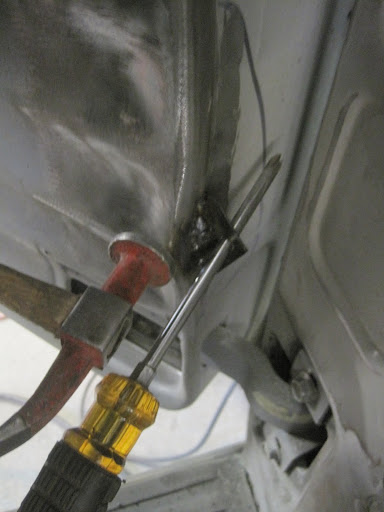
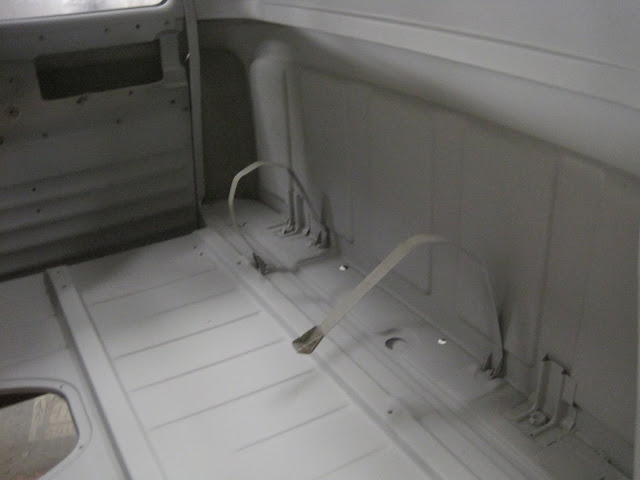
First off though, I had to repair this one last item - the inside of the door. Made a pulling tab with an edge that matched the indent, Mig welded it on, then heated the area I wanted to move. With a big screwdriver as prybar, I pried whilst tapping the high spot with my hammer. Took about an hour, no filler.
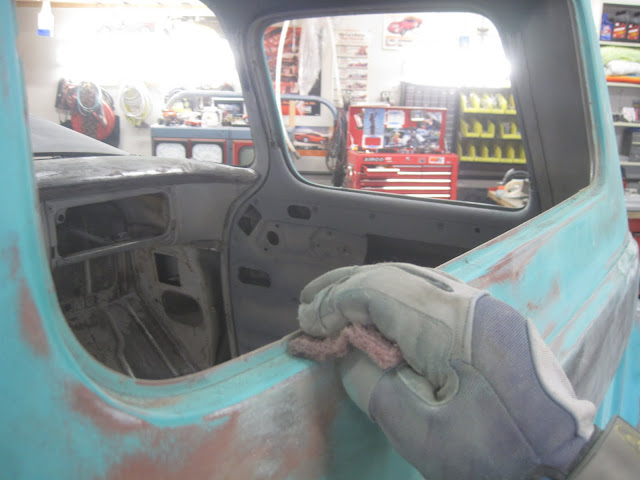
You really have to be sure every inch is sanded - unless you want stuff peeling down the road! After everything was gone over with the DA, then 220by hand, I used a red scotch pad to make sure there where no shiny areas and that everything was sanded...

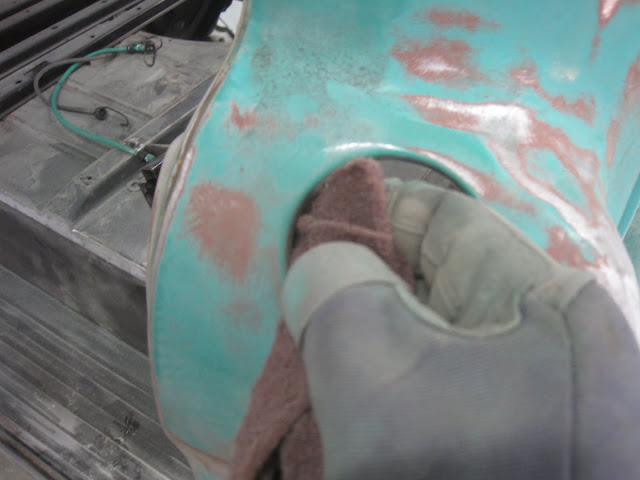
Then I wiped everything down - twice - with Wax&Grease remover before setting up to prime. That also meant cleaning the shop, vacuuming all the dust and covering what I didn't want primed!
Then I shot the epoxy....what a difference!

Got the Epoxy on today and will shoot the high build tomorrow morning.
First off though, I had to repair this one last item - the inside of the door. Made a pulling tab with an edge that matched the indent, Mig welded it on, then heated the area I wanted to move. With a big screwdriver as prybar, I pried whilst tapping the high spot with my hammer. Took about an hour, no filler.
You really have to be sure every inch is sanded - unless you want stuff peeling down the road! After everything was gone over with the DA, then 220by hand, I used a red scotch pad to make sure there where no shiny areas and that everything was sanded...
Then I wiped everything down - twice - with Wax&Grease remover before setting up to prime. That also meant cleaning the shop, vacuuming all the dust and covering what I didn't want primed!
Then I shot the epoxy....what a difference!
jerseywild
Well-known member
Re: E-tek Resto's 56 Chevy Truck
Looking good.
Looking good.
MN4x4
Well-known member
Re: E-tek Resto's 56 Chevy Truck
Loved the custom tools for this part of the project. Hey, is that screwdriver made in the USA or China? You do know you can't POSSIBLY do a good job with ANY non-USA tool, right?

Sorry - just couldn't resist! Does that make ME a USA tool?
Loved the custom tools for this part of the project. Hey, is that screwdriver made in the USA or China? You do know you can't POSSIBLY do a good job with ANY non-USA tool, right?
Sorry - just couldn't resist! Does that make ME a USA tool?
thomfr
Well-known member
Re: E-tek Resto's 56 Chevy Truck
Wow! Great job and what a speed (without loss of quality).
Thom
Wow! Great job and what a speed (without loss of quality).
Thom
Omphaloskeptic
Well-known member
Re: E-tek Resto's 56 Chevy Truck
E-tek,
Thanks for a terrific thread; I'd love to see a video of the hammer/dolly technique! Seeing this documentation of true craftsmanship and attention to detail, your customers should happily pay your fees.
P.S. - I didn't see a family portrait on your website (lets everyone know why you do the quality work you do!).
Re: E-tek Resto's 56 Chevy Truck
As for speed....What you've seen here has been about 150 hours of work!
Thank you!! and I'll try to oblige!
Wow! Great job and what a speed (without loss of quality).
Thom
As for speed....What you've seen here has been about 150 hours of work!
E-tek,
Thanks for a terrific thread; I'd love to see a video of the hammer/dolly technique! Seeing this documentation of true craftsmanship and attention to detail, your customers should happily pay your fees.
P.S. - I didn't see a family portrait on your website (lets everyone know why you do the quality work you do!).
Thank you!! and I'll try to oblige!

jktruck150
Well-known member
Re: E-tek Resto's 56 Chevy Truck
Lookin good!
Lookin good!
dodgepolara500
Well-known member
Re: E-tek Resto's 56 Chevy Truck
wow considering what you started with, this looks amazing! Do you have any idea how many hours you have into this so far?
wow considering what you started with, this looks amazing! Do you have any idea how many hours you have into this so far?
Re: E-tek Resto's 56 Chevy Truck
He mentioned 150.
Also, this project rules.
wow considering what you started with, this looks amazing! Do you have any idea how many hours you have into this so far?
He mentioned 150.
Also, this project rules.
MP&C
Well-known member
Re: E-tek Resto's 56 Chevy Truck
Paint sure makes a world of difference.....Back on the road before you know it....
Paint sure makes a world of difference.....Back on the road before you know it....
Last edited:
Re: E-tek Resto's 56 Chevy Truck
Thanks Bull!!!
Lots of dirty-work before the fun of putting it back together begins! As you know Robert, I'll put about 20 hours into blocking this out, re-spraying high build, then another 25 hours re-blocking, sealing and prepping for paint, then I'll transport it to one of our city's great painters, Corky at BridgeCity. He has a collision shop AND his own dedicated Hot Rod shop. I'll shoot some pics when I'm there as he has his own incredible collection!
After that (paint), it'll be just another 100 or so hours to finish it!!
He mentioned 150.
Also, this project rules.
Thanks Bull!!!
Paint sure makes a world of difference.....Back on the road before you know it....
Lots of dirty-work before the fun of putting it back together begins! As you know Robert, I'll put about 20 hours into blocking this out, re-spraying high build, then another 25 hours re-blocking, sealing and prepping for paint, then I'll transport it to one of our city's great painters, Corky at BridgeCity. He has a collision shop AND his own dedicated Hot Rod shop. I'll shoot some pics when I'm there as he has his own incredible collection!
After that (paint), it'll be just another 100 or so hours to finish it!!
Drdaves49
Well-known member
Re: E-tek Resto's 57 Chevy Truck
Ya! YA! that's the ticket
It's so much satisfaction bringing something back.
Just always do it right the first time.....it's hard enuff w/o doin it twice.
I feel so sorry for the younger guys missing out on the EASY to fix autos....or for that matter just about anything.
I'm glad I lived when I did .
Dave
Thanks guys - much appreciated. Each one that get's done makes me want to do the next that much better. Love the pet rock reference!
Ya! YA! that's the ticket
It's so much satisfaction bringing something back.
Just always do it right the first time.....it's hard enuff w/o doin it twice.
I feel so sorry for the younger guys missing out on the EASY to fix autos....or for that matter just about anything.
I'm glad I lived when I did .
Dave
Last edited:
Re: E-tek Resto's 56 Chevy Truck
Very nice work, I see a how to video in your future I just had a small comment, from an amuture. I notice you spend lots of time sand blasting small nuts and bolts, I was wanting to ask if you had consider using a viberotory pot that has abrasive media, just drop the bolts in and turn on and leave for a short time, makes it look like brand new, and alot easier than blasting. Just my .02 cents - usd.
Very nice work, I see a how to video in your future
I just had a small comment, from an amuture. I notice you spend lots of time sand blasting small nuts and bolts, I was wanting to ask if you had consider using a viberotory pot that has abrasive media, just drop the bolts in and turn on and leave for a short time, makes it look like brand new, and alot easier than blasting. Just my .02 cents - usd.Motown 454
Well-known member
- Joined
- Sep 25, 2008
- Messages
- 1,359
Re: E-tek Resto's 56 Chevy Truck
Nice job its coming out great. Its amazing how nice they look, even with only primer on them. It looks great.
Nice job its coming out great. Its amazing how nice they look, even with only primer on them. It looks great.
thinkracing
Well-known member
Re: E-tek Resto's 56 Chevy Truck
Great thread. I've enjoyed every bit of it. It's snowing here on Christmas eve, vacation day, fire roaring ... iPad in my lap. Thanks for posting your work. I'm now going over to your website.
Great thread. I've enjoyed every bit of it. It's snowing here on Christmas eve, vacation day, fire roaring ... iPad in my lap. Thanks for posting your work. I'm now going over to your website.
rustyrestorer
New member
Re: E-tek Resto's 56 Chevy Truck
Great work e-tec. Really enjoyed this thread. Just did a refresh on my 58 gmc and it also had a solid body . Did a lot of resto,s for customer,s here( SW Sask ) and couldn,t agree more with what you say about doin there vehicles. Only do the odd one now and mainly work on my own, some to resell and some to keep. Anyway , just my 2 cents, take care and good luck in the future.
Great work e-tec. Really enjoyed this thread. Just did a refresh on my 58 gmc and it also had a solid body . Did a lot of resto,s for customer,s here( SW Sask ) and couldn,t agree more with what you say about doin there vehicles. Only do the odd one now and mainly work on my own, some to resell and some to keep. Anyway , just my 2 cents, take care and good luck in the future.
shovel
Well-known member
Re: E-tek Resto's 56 Chevy Truck
Beautiful work e-tek! Thanks for taking the extra time to take pics and educating us wannabees. Like others have said, your builds are motivating. Now if I could just get some time off work to play in my garage...
Beautiful work e-tek! Thanks for taking the extra time to take pics and educating us wannabees. Like others have said, your builds are motivating. Now if I could just get some time off work to play in my garage...
4StarCstms
Well-known member
Re: E-tek Resto's 56 Chevy Truck
I've gotten away from GJ for awhile, Life got in the way ... so I've had to spend a bit catching up from page 8 ... haha
E-Tek great job man!! Cant wait for more updates!
As a side note, It looks like I scored my own side job, a 64.5 Mustang coupe.. buddy..its R O U G H but has a nice budget - should be interesting. I've got to go back and sit down with the owner and see what kinda time line, and what they are expecting, as well as go over the car - TOP to Bottom ...
Re: E-tek Resto's 56 Chevy Truck
Although I KNOW I should buy one of those tumblers, I kinda enjoy cleaning the stuff in the cabinet or with the wire wheel....it's the ZEN part of the whole build! I kinda thought Santa may have surprised me with one of those tumblers, but guess I'll have to check out the Eastwood site and get one myself!
Thanks! Primer really helps with the motivation, but there's a WHOLE LOTTA dirty work coming up!
Well I hope you're enjoying my hard work!
Good to see another SK-ite on GJ. There's a few of us! Thanks for your thoughts!
Believe me, I was a newbie myself and sure wished there were sites like this when I started! If I can help someone, with a tip, or some motivation, then it's worth posting it all!
------------------------ Thanks to all who comment on the thread. Your (kind!) comments are motivation for me! So back to it!
Very nice work, I see a how to video in your future
Although I KNOW I should buy one of those tumblers, I kinda enjoy cleaning the stuff in the cabinet or with the wire wheel....it's the ZEN part of the whole build! I kinda thought Santa may have surprised me with one of those tumblers, but guess I'll have to check out the Eastwood site and get one myself!
Nice job its coming out great. Its amazing how nice they look, even with only primer on them. It looks great.
Thanks! Primer really helps with the motivation, but there's a WHOLE LOTTA dirty work coming up!
Great thread. I've enjoyed every bit of it. It's snowing here on Christmas eve, vacation day, fire roaring ... iPad in my lap. Thanks for posting your work. I'm now going over to your website.
Well I hope you're enjoying my hard work!
Great work e-tec. Really enjoyed this thread. Just did a refresh on my 58 gmc and it also had a solid body . Did a lot of resto,s for customer,s here( SW Sask ) and couldn,t agree more with what you say about doin there vehicles. Only do the odd one now and mainly work on my own, some to resell and some to keep. Anyway , just my 2 cents, take care and good luck in the future.
Good to see another SK-ite on GJ. There's a few of us! Thanks for your thoughts!
Beautiful work e-tek! Thanks for taking the extra time to take pics and educating us wannabees. Like others have said, your builds are motivating. Now if I could just get some time off work to play in my garage...
Believe me, I was a newbie myself and sure wished there were sites like this when I started! If I can help someone, with a tip, or some motivation, then it's worth posting it all!
------------------------ Thanks to all who comment on the thread. Your (kind!) comments are motivation for me! So back to it!
Re: E-tek Resto's 56 Chevy Truck
On to the dirty work . This part of the bodywork, as important as it is - is also the WORST part. It's what I imagine it's like working in a salt mine. Repetitive, dusty, dirty. The sanded filler gets into your clothes, hair, eyes, mouth and nose - no matter what you do to protect yourself. So I suit up best I can, turn up the radio and just get into it, thinking of the finished product all the while.....
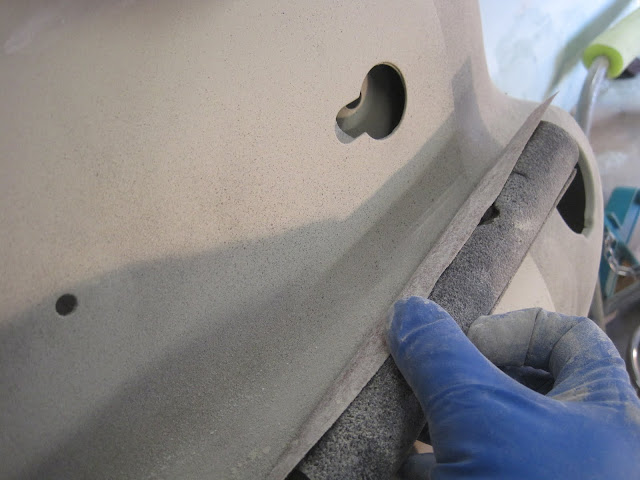
The most important part here is the use of a "guide coat". You can either spray (mist) a different color over top, or some guys will add a little paint to the last coat. There's also a powder available that you can brush over the surface. Whatever you choose, it allows you to see what and where you've sanded. Without it you can't really tell if you've gotten the area straight, or even if you've gotten enough of the rough surface off.
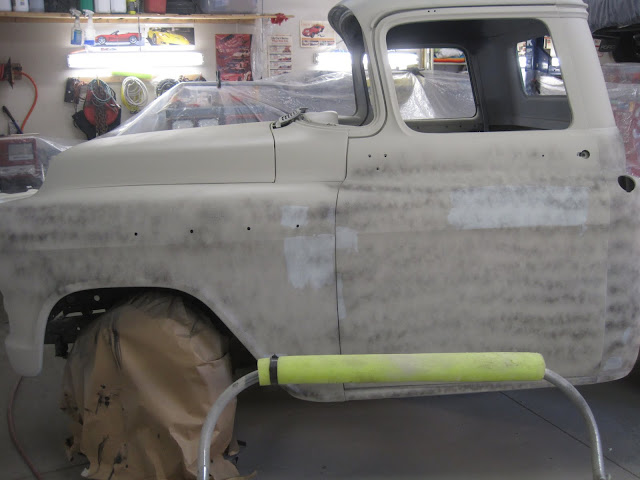
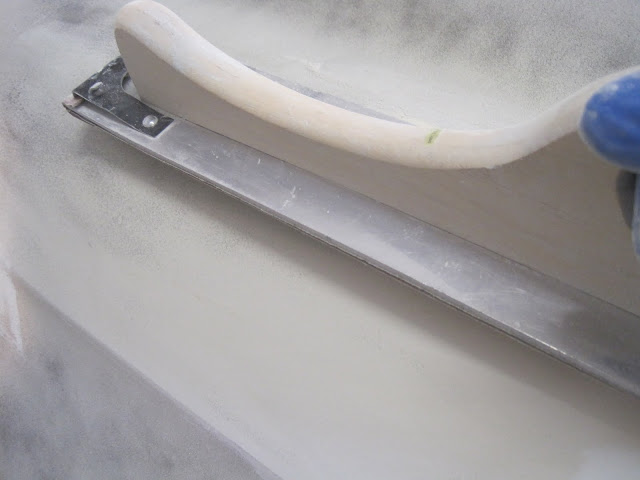
The key to getting it straight (or perfectly curved), is to use blocks and other items that retain their shape. Rarely will you use your hand or fingers (unless that's the perfect tool!), which can end up following the contours you're trying to eliminate. Like sanding any filler, as soon as you see metal - STOP!
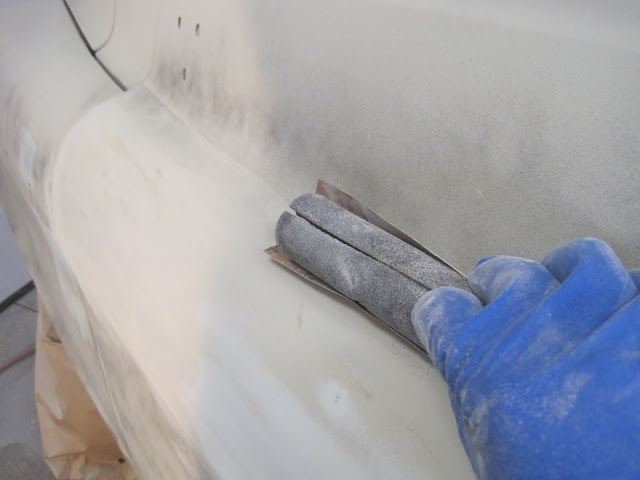
Regardless of the tools you use, most sanding is done in a "cross-hatch" pattern, ie. overlapping strokes along the longest axis of the panel, working from one side to another. Generally, the more times you can change direction, the better. BTW, I normally sand the initial coat with 220G (dry).

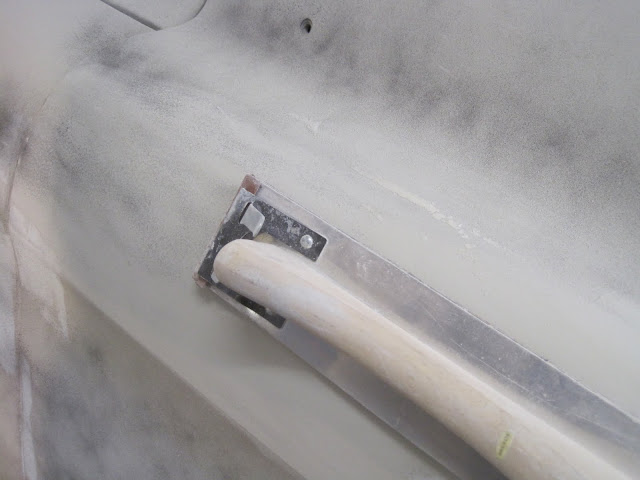
When sanding a large compound curve, like the tops of these dorrs, I'll tip the block on it's side in order to "cut" the filler off, but still retain use of the straight block.
Here's the nasty stuff that gets everywhere...I can still "taste" it!
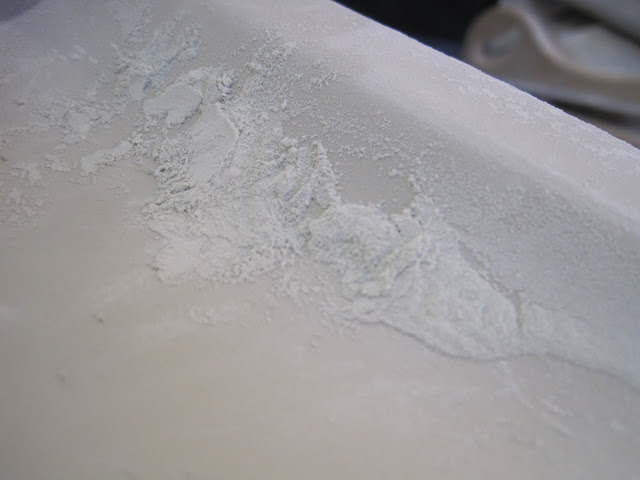
And this is what it looks like after the first layers are sanded off. Ya - I even do floors!!!
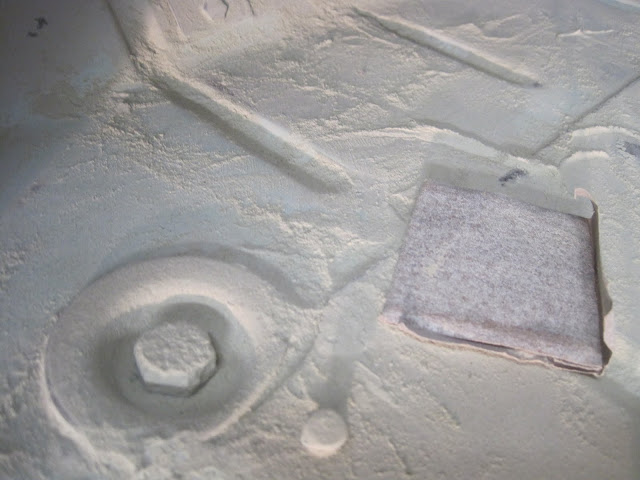
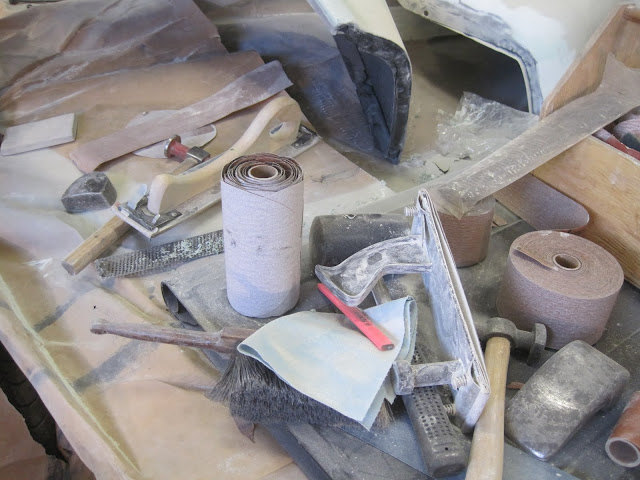
Tools of the trade:
And treats of the season!!!

I'll likely spend another 2 days sanding this coat and then spray a final coat, which will then get wet-sanded in 600 grit. If I'm lucky, it'll be largely done this week.....then I can put the box together and do more tweaking...
On to the dirty work
. This part of the bodywork, as important as it is - is also the WORST part. It's what I imagine it's like working in a salt mine. Repetitive, dusty, dirty. The sanded filler gets into your clothes, hair, eyes, mouth and nose - no matter what you do to protect yourself. So I suit up best I can, turn up the radio and just get into it, thinking of the finished product all the while.....The most important part here is the use of a "guide coat". You can either spray (mist) a different color over top, or some guys will add a little paint to the last coat. There's also a powder available that you can brush over the surface. Whatever you choose, it allows you to see what and where you've sanded. Without it you can't really tell if you've gotten the area straight, or even if you've gotten enough of the rough surface off.
The key to getting it straight (or perfectly curved), is to use blocks and other items that retain their shape. Rarely will you use your hand or fingers (unless that's the perfect tool!), which can end up following the contours you're trying to eliminate. Like sanding any filler, as soon as you see metal - STOP!
Regardless of the tools you use, most sanding is done in a "cross-hatch" pattern, ie. overlapping strokes along the longest axis of the panel, working from one side to another. Generally, the more times you can change direction, the better. BTW, I normally sand the initial coat with 220G (dry).
When sanding a large compound curve, like the tops of these dorrs, I'll tip the block on it's side in order to "cut" the filler off, but still retain use of the straight block.
Here's the nasty stuff that gets everywhere...I can still "taste" it!
And this is what it looks like after the first layers are sanded off. Ya - I even do floors!!!
Tools of the trade:
And treats of the season!!!
I'll likely spend another 2 days sanding this coat and then spray a final coat, which will then get wet-sanded in 600 grit. If I'm lucky, it'll be largely done this week.....then I can put the box together and do more tweaking...