To avoid these ads, REGISTER NOW!

Falcon's next shop - build thread

tdkkart

Well-known member
Joined
Jun 17, 2006
Messages
6,887
Location
Eastern Iowa
NewShop40_v5A_V16B_E.jpg


Either you're left handed, or your drill press is backwards??:dunno:
Never seen one with the quill handle on the left.
 
To avoid these ads, REGISTER NOW!

buzz4041

Well-known member
Joined
Sep 13, 2011
Messages
730
Location
South Texas
Chris I like the layout well thought out. Only one suggestion would be to stagger the receptacle circuits. It will be a bit more wire but It will give you more opportunities while working in one location if you have a few high consumption tools going at once you don't have to worry about circuit overloads and nuisance tripping.
 
OP
F

Falcon67

Well-known member
Joined
Jun 11, 2009
Messages
18,371
Location
Merkel, TX
The drill press is in time-out. I still don't really know where to put it, so it gets stuck in various places.

Staggering circuits is a good idea - the layout I've done staggers the circuits based on how I'll be using the space. All the real high buck power equipment gets it's own run. The lathe is only 3/4HP so it's not a big load anywhere. Same with the band saw, drill press, etc. I can only use one tool at a time. The mill is 1 HP 3 phase and the compressor is 3.2HP and those are the biggest motors. The two smaller motors that might be on when other tools are being used would be the well pump (unknown but likely 3/4 HP) and the big AC unit. Both have their own circuits.
 

jackylcrackyl

Active member
Joined
Dec 3, 2011
Messages
40
Location
Minnesota
Great DIY build. It's nice to see someone else juggling the other priorities with their build. I'll keep watching for inspiration.
 
OP
F

Falcon67

Well-known member
Joined
Jun 11, 2009
Messages
18,371
Location
Merkel, TX
Got to stay out of the stores - Merry Christmas to me, etc. From the left - $40 shop stool, $36 steel top 30" x 60" table bought at auction on Friday and new 10" sliding compound miter saw that was on sale. My other one has been a go-to tool for at least 10 years and was getting a little worn. I was also getting tired of flipping 8" and 12" boards for a cross cut. Craftsman sale + 5% in-store purchase discount - hard to say no.
Tools1.jpg


Saturday was grandson birthday so not much done, but almost all the initial outlet boxes are up. I was waiting to see if the weather would clear enough to at least paint the eves so I could mount/wire the security lights. Maybe Wednesday because it might be in the 60s. After that, rain and cold again. At least with both the propane and the electric running for about an hour I can get the temp up close to 70 in there. That helps. I'm thinking I'll have to at least put a ceiling and a little insulation before painting the floor unless we get a streak of warm days. Thanks everyone for watching and commenting - keep it coming.
 
Last edited:

frank1380

Well-known member
Joined
Dec 1, 2008
Messages
148
Those shop stools are great. I think I got the same sale price on them 2 years in a row.
 

tdkkart

Well-known member
Joined
Jun 17, 2006
Messages
6,887
Location
Eastern Iowa
The drill press is in time-out. I still don't really know where to put it, so it gets stuck in various places.


I've got a drill press like that too, ever since I got a milling machine it's become my "go-to" tool for drilling stuff so the drill press gets ignored.
 
OP
F

Falcon67

Well-known member
Joined
Jun 11, 2009
Messages
18,371
Location
Merkel, TX
I've got a drill press like that too, ever since I got a milling machine it's become my "go-to" tool for drilling stuff so the drill press gets ignored.

Exactly - my 1 HP 3 phase G0519 mill/drill made the DP a real red-headed step child. The speeds, R8 spindle, drawbar, table, etc blows the DP away. I am actually considering slicing down the DPs column and mounting it on a bench or small mobile cart. Could always get a replacement tube from Sears parts to put it back like it was.
 

rickairmedic

Well-known member
Joined
May 31, 2005
Messages
4,165
Location
louisville ,Ky
Those shop stools are great. I think I got the same sale price on them 2 years in a row.


I have 2 of those as well and also the flamed craftsman pub table . Only thing I will say on the stools which I also grabbed on the 50% off sales is keep SWMBO off of them. My stool works perfect just like the day I first sat on it . The one SWMBO uses she has trashed I actually had to use a long bolt and a couple of washers to pull one of the foot bolts in a leg back out . Wouldnt be a big deal but she weighs less than me how is she trashing the dang thing not like she is jumping on it from 10 feet away :eyecrazy:.


Rick
 
OP
F

Falcon67

Well-known member
Joined
Jun 11, 2009
Messages
18,371
Location
Merkel, TX
Not much done so far - lots of other things to take care of this time of year. I put a little insulation on the door to cut the cold a bit - some warm air would help too LOL.

BigDoor5.jpg


Got off the one temp plug and strung some more to use. Started building mounts and locating the lights so it might be brighter later in the week.
Power9.jpg


Power10.jpg
 
Last edited:

onething

Well-known member
Joined
Jan 23, 2011
Messages
438
Location
TEXAS
Is that foil backed foam on the door? I'm thinking about using that for the ceiling in my shop. Are you putting in a ceiling eventually?
 
OP
F

Falcon67

Well-known member
Joined
Jun 11, 2009
Messages
18,371
Location
Merkel, TX
Is that foil backed foam on the door? I'm thinking about using that for the ceiling in my shop. Are you putting in a ceiling eventually?

It's 1/2" polystyrene board. It was cheap and lighter than the 1" pink I used on the old shop door. I pulled 4 off the shelf at HD and never looked at the middle ones, so of course one was torn up.

After I locate all the light mounts and run the wiring, we'll get started on a ceiling. I keep going back and forth between drywall and OSB. The light mounts say "drywall" LOL. The budget says OSB. I should just start on the OSB and then I can mount lights whereever. I hope to get the floor painted before then, but I'm not sure the weather is going to let that happen for a while. We set three record highs in December last year - not this year! For insulation, I'm looking at AttiCat loose fill - cheapest by $100 for R-19 over 960 sq/ft.
 
OP
F

Falcon67

Well-known member
Joined
Jun 11, 2009
Messages
18,371
Location
Merkel, TX
Weather turns in our favor. Trim and siding - except big door trim and window trim - done, paint starts tomorrow. Waiting on the big door and window trim until we roll the wall paint.
Siding7.jpg
 

onething

Well-known member
Joined
Jan 23, 2011
Messages
438
Location
TEXAS
Is this Texas or what? Rainy drizzle on Christmas day and sun 'n' 60's all week.

Shop looks good.
 
OP
F

Falcon67

Well-known member
Joined
Jun 11, 2009
Messages
18,371
Location
Merkel, TX
Thanks! mid 60s tomorrow, 70s Saturday and 50s all next week. Was 72 today, really nice. Wall temp has to be 50F for the paint, so the west wall should get some tomorrow and as much as I can do on Saturday. We decided to do the gables in trim color so I have to run to the paint store in the morning for another gallon of trim color.
 

richtersrodz

Well-known member
Joined
May 16, 2011
Messages
983
Location
Waxahachie, TX
Going to enjoy some time with a chain saw this weekend myself. We are having a house
built, and the biggest hurdle to me so far has been letting go.. It's a full one-off custom
home, never built before, and it is killing me watching someone else do it. Putting lights
in the wrong place, putting plugs where I don't want them, and having to cut corners, to
stay under budget. My "after the house is built" list of modifications is getting longer and
longer. Not to mention, I can't be there everyday to over see it, due to work, so I
usually show up days later, after they installed something wrong. Then if I want it fixed,
it's $$$$ out of my pocket. I have to just walk away.. Most of the time, if you are
picky, or want it done right, you have to do it yourself..

Nice build Falcon.. Looks like you've been doing plenty of pre-planning. That's key..
I keep kicking myself because I forgot stuff..
 
Last edited:
OP
F

Falcon67

Well-known member
Joined
Jun 11, 2009
Messages
18,371
Location
Merkel, TX
7 day forcast is looking really good for Texas!

Well, we got two days - Friday and Saturday. Today was maybe mid 50s. Won't be warm again until Thursday and Friday and that's no good because we go back to work full time on Wednesday. The back (north side) of the building is a good 20F colder than the south side. Even with the 70s we hit on Saturday the dark side was barely warm enough to take paint.

But inspite of all that, after 12 hours with brush and roller we have a 3/4 painted building. 6 hours for two coats on the gables with a 4" brush LOL, 6 hours for front trim and three walls. Started with three gallons of wall and two of trim color. There is barely 1/2 gallon left of each so I need one more of each to finish. Trim color requires two coats to cover primed board. The wall color covers in one with a semi-rough surface roller. It puts down a lot of paint, which is fine with us. Should get the front window and big door trim cut, painted and installed over the next two days.

Depending on the angle, we got a pretty close match to the house.
WideShot1.jpg

WideShot2.jpg
 
Last edited:
To avoid these ads, REGISTER NOW!
OP
F

Falcon67

Well-known member
Joined
Jun 11, 2009
Messages
18,371
Location
Merkel, TX
Got the front window trim on, so the front is "done", such as it is.

Painted_front.jpg


Architect's rendering for the P&Z meeting so long ago:
Variance_front.jpg


Got tired of fetching the ladder to get into the attic, so I put in the attic stairs. We actually bought this (Werner AA10 model) for the old house and never used it. So it's finally found a hole..er, home. The install docs don't say that it won't work easily with anything thicker than a 2x10 joist, so I had to do a little carving on the 2x12 framing and build a small "landing" area for the ladder when it's in the full up position. Takes up very little space up and not much floor space either. Hole is 4' long to allow for bigger junk movement.
Inside1.jpg

Inside2.jpg

Inside3.jpg


The ladder comes with hardware for installing a trap door, and I'll get to that later. Next steps are to try and finish painting the back of the building and the rest of the electrical runs. Based on the 10 day forecast, it'll be electrical first. Then I think I'll put in a few more 8' lights and then just try to get on with etching the floor. The floor is really the next "tall pole". I may do the floor in two sections so I don't have to completely empty the space. Easier to manage the etching, rinse and dry.
 
Last edited:
OP
F

Falcon67

Well-known member
Joined
Jun 11, 2009
Messages
18,371
Location
Merkel, TX
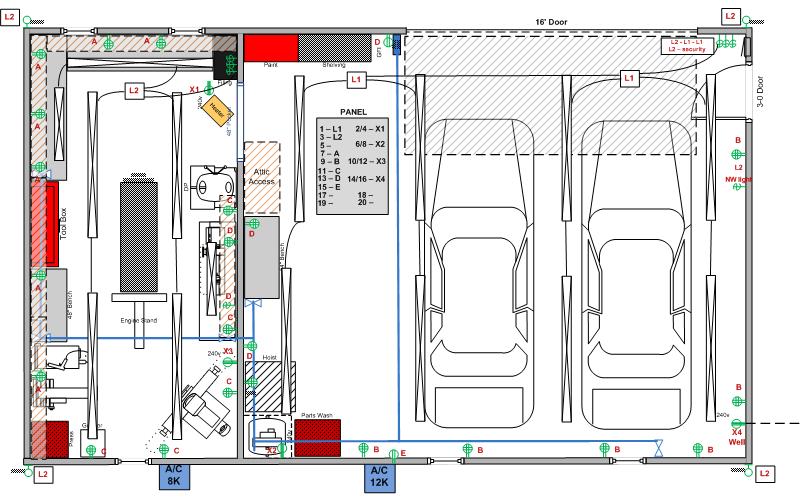
After messing around some, I pretty much came to the reality that the floor was a hold up. We got a nice break in the weather this weekend and it's supposed to be near 80 next Saturday, so I decided to attack the floor problem. Ow, my aching back. To start with, I had to empty the place. So Saturday I got started on the job. Cleaning out the barn took about 2 hours. Once that was done, I swept it up and started hosing it out to clean out the dirt, etc that accumulated while the building was open. There was a LOT of crud in there. After the third complete wash out and sweep, I did the first etch. Ya - first. I used some "low voc" acid I found at HD. I thought a gallon should be enough as the directions indicated 24 fl oz per gallon for etch. Second mistake - thinking the nylon push boom would be enough to move the etch solution around. The solution did fiz, but only for a short time. And the broom wasn't very much help. But I managed to do the whole slab. 10 gallons of mix and I just barely got to the end. I rinsed it twice more after that.

When I got the etch at HD, I bought a nice 24" squeegie. Do not do this without one, it's $18 very well spent! Brooms are BS, the rubber squeegie move water around and out quick and clean.

Today we had off, so I go inspect the floor. It's clearly not dry enough to paint. I'm just not satisfied with what I see, so I go down to the local hardware store and pick up two gallons of muratic acid 31%. I also picked up a new 9" roller frame and a 1" thick roller. What the last etch did do was show up a bunch of "puffs" - bits of concrete that looked like they would pop off if rubbed just so. I put a fresh 60 grit flap wheel in my 4" angle grinder and hit all those spots. Then I found several places were sap had dripped off the joists, so I cleaned those up too.

I mixed this new etch at one pint of acid per gallon of water. The math says thats one part acid in 8 parts water. I pre-wet the floor this time, worked in sections and slopped/moved the etch around with the big furry roller. Mucho better all around. This etch solution attacked the floor better and lasted longer. I "mopped" each section for about 5 minutes, then rinsed it well and moved it out with the squeegie. I worked door side to the back since part of the slab slopes in the general direction of the door. After 3 more hours and a couple more rinses I called time.
FloorPan1.jpg


Even after all that, there are still a couple of shiners that the angle grinder can touch up. Now if it'll just dry up by next Sunday, I'll be in business.
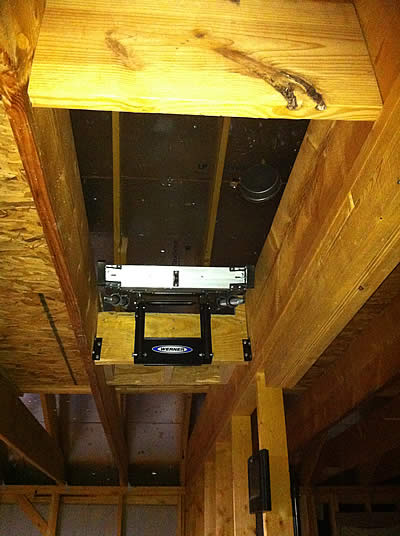
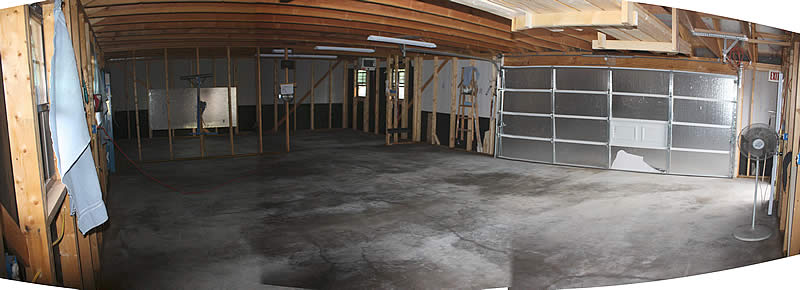
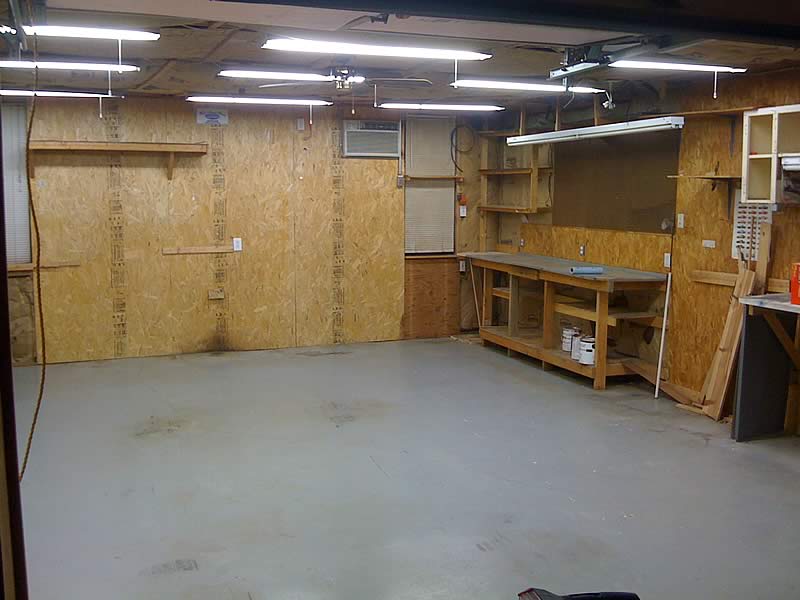
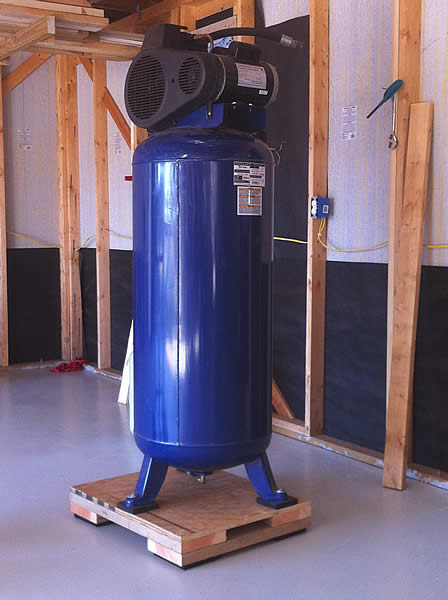
Floor2.jpg
 
Last edited:
OP
F

Falcon67

Well-known member
Joined
Jun 11, 2009
Messages
18,371
Location
Merkel, TX
Well - while I was making plans, the weather was making other plans. The forecast went out the window on Wednesday. Saturday went from being mild 70s to 35 in the AM and only 55 for a high. Sunday might be up some, but not much. Today we might set a record high - so I took a half day and just hammered it home. The air temp made mid 80s but when I started rolling it on the slab temp was barely 60F, even with the door open for an hour. Pot life mixed was 3 hours, done in 2 1/2. It's thin - I cut it close. The last 6-8 sq ft was done by licking the bottom of the bucket. I kept thinking it was maybe a good omen because that's how I ended the floor paint on the last shop. For that floor, I made 1 gallon plus the activator go 480 sq/ft. Thinned this 10% with MEK so I used right at 4 gallons.

Hopefully it'll start to set up in 3-4 more hours. Done at 4 pm, tack free maybe in 6-8 hours at 60F. We'll see for sure tomorrow. Nothing fancy here, just color. Material - KM15, Kelly Moore paints

Floor3.jpg


Old shop - nearly the same color. Makes the new one look big, huh.
ShopEmpty.jpg
 
Last edited:
OP
F

Falcon67

Well-known member
Joined
Jun 11, 2009
Messages
18,371
Location
Merkel, TX
So what's a boy to do while his floor cures? Well, I dug some post holes and set set fence poles in preparation of moving the fence from the side of the yard to the alley. Going out the side gate and around to the shop is getting old. Maybe we can move some fence tomorrow since it's supposed to be nice.

I walked the floor today about noon and it looks like it's setting up hard everywhere. I didn't find any tacky spots. I did find a few "flat" spots with no gloss which apparently are just places where I missed the second pass with the roller. I used a 1/2" nap roller supposedly for decks and concrete. I used two as the first one started to come apart about the 2 hr mark. I think that new roller caused me to nearly run short. Even thinned, the product seems to start setting pretty quick as you can see plenty of roller marks and texture. The texture is reminiscent of a 3/8" paint roller run over drywall. I figured with the floor so cold that it might lay out a little smoother. Not an issue for me, just noting it in the blog for reference. Hind sight being what it is, it probably would have been fine to thin it down 20%. Looking pretty good to me now for sure. I think the Falcon will have to endure one more rain date this week before moving indoors. I will probably let it set up till next weekend before moving much of anything back in other than ladders for running wire. The product can be second coated at these temps within 10 days, so I'm guessing thats a full cure marker.

Thanks very much for the comments!
 
OP
F

Falcon67

Well-known member
Joined
Jun 11, 2009
Messages
18,371
Location
Merkel, TX
Small update - been moving the fence between the house lot and the shop. Lots of post holes. Got that finished Saturday, as much as I'm going to do for fencing right now anyway. I'll try for a daytime pic. Forgot yesterday. Also, it was World of Wheels weekend here, so time out to go to the show and help with the car club booth.

The good news is the floor cured fine and we're now in the "if it lands in there, it stays in there" stage. I had a little more framing to do for the compressor closet, so the first big tool got wheeled in. To save space, I put the compressor in the wall between the work room and the shop. I built a platform for the compressor and used strips of stall blanket for vibration isolation. Also make it handy to pull the thing out with a two wheeler should it need service. The compressor is bolted to the pad, and the pad just sits on the floor. There is a small 1/4' lag bolt that goes through the platform into the wall floor plate to help keep it in place but experience in the old shop says it ought to stay in one place just fine.

On the pad:
Air1.jpg

Parked:
Air2.jpg

Back side frame up. I'll line the side and back with 1" foam insulation.
Air3.jpg


Eventually, the shop side will get a door with some insulation and venting. Wall looks bowed out at the top - that's an artifact from the iPhone camera LOL. It really is plumb.

I ran MC cable to the compressor and left a lot of slack for pulling it out - I hate it. It's crammed in there and doesn't fit the space well. Bad choice. I think I'm going to put in a twist lock socket/plug on a short whip for a service removal/quick disconnect.
 
Last edited:
OP
F

Falcon67

Well-known member
Joined
Jun 11, 2009
Messages
18,371
Location
Merkel, TX
I finally got enough wiring in place to at least get the hot rods out of the weather. I mean, that's one reason why it's there! It made the shop start to look like "home". There was threatening weather coming in too - which never materialized. But it got the cars washed anyway. I mowed (ya - had to cut grass!) on Saturday in a t-shirt and Sunday it didn't get to 50.
Inside4.jpg


Another hack panorama shot:
ShopPan1.jpg


I got started on the ceiling too. Not far, just half of the work room. I stopped because I forgot one thing in the plan - insulation starts at the tops of the walls.
Inside5.jpg


I put in a nice L6-20 plug and socket for the compressor and now I can't find a steel - or even plastic - cover plate that fits the socket.

I picked up two bundles of R13 23" faced batts today. The plan is to cut 16" pieces and position them where the joists meet the walls. 3" or so will sit on the top plates and the rest will act as a stop block or marker to keep the blow in stuff from clogging up the eve ventilation. I'll add a pic when I get some pieces up. The mini-blinds are up, I'll go pick out some curtains on the weekend. :lol:
 
Last edited:

onething

Well-known member
Joined
Jan 23, 2011
Messages
438
Location
TEXAS
. . . The mini-blinds are up, I'll go pick out some curtains on the weekend. :lol:
Are you using the calico material you showed me the other night? :spit:

The problem with visiting a shop for the first time after dark is not getting a real sense of the outside. That tree is cool, and the cars are too. I never really noticed them in the dark - I kept looking for the dogs you said you put up :D

The place looks great, and I want to publicly thank you for letting me invite myself into your garage the other night.
 

DesertRat64

Member
Joined
Jul 5, 2011
Messages
19
Location
The great Southwestern Desert
Looking good! I love the idea of the compressor closet for keeping the noise & vibration away, but will heat buildup be an issue? My compressor makes a lot of heat after it runs for a while, didn't know if that would cause a problem for you . . .
KD
 
OP
F

Falcon67

Well-known member
Joined
Jun 11, 2009
Messages
18,371
Location
Merkel, TX
Wise guy! It was a good visit, glad you dropped by. The dogs aren't dangerous - the big one will bark until you want to hit him with a rock and the little one just gets hair all over you if she gets close. You really would not have seen the cars - one was under a cover on a trailer and the other in the driveway. They got moved in officially a couple of days later.

I remembered that need to wire up a couple more lights and call for final - so I can get on with the ceiling. Have to cut some collar ties this weekend and put those up. I have plenty of used 2x6 for that, so might as well use it. It won't add anything to the structure but the inspector will want to see them.

The compressor will get venting when it gets a cover on the car side of the wall. Which might be a while as that side cover is pretty low priority LOL. It sat in the open for a long time at the old shop.

AirSystem_A.jpg

You could hang a piece of carpet in front of it as a test and cut the sound level by 30%. Strangely, moving the air intake into the attic had no effect on the noise level (about 70db running). I was primarily wanting to reduce the noise level in the work area. The mill and lathe will sit right next to the compressor enclosure.
 
Last edited:

Wingnut65

Well-known member
Joined
Apr 21, 2010
Messages
3,170
Location
Tampa Bay, FL

That is an Awesome shot. That says a lot to your perseverance on this build to get this far. Congrats! :beer:

The floor looks great. It's like icing on the cake and starts the finishing portion of the project.

On the compressor plug, if you can't find a cover plate, get a solid one and punch a hole in it the size you need.

And I'm not convinced OSB and 1" insulation board will give you the sound deadening you are looking for on the shop side. With the studs sideways, it will be hard to get much more. I'd suggest adding another thickness of studs there and fill it with your batt insulation. You will get better sound reduction with more mass in the wall. Fiberglass batt insulation does have an STC rating to help with noise reductions. STC of the 1" rigid would be much lower.

BTW, nice work on the ladder.
 
OP
F

Falcon67

Well-known member
Joined
Jun 11, 2009
Messages
18,371
Location
Merkel, TX
It is a nice lot - it was nearly flat making it easy to lay out. it starts to drop off a little on the NE corner, which matches all the drainage for the block. So no re sculpting was required to keep the runoff moving in the right direction. I really wanted to save that tree. It looks good when green. I did have to lop off an 8" branch from the big guy and pull up a double trunk 6" tree in the back. There were two small trees back there, and I saved one. It's behind the shop, right next to the window behind the white Falcon.

Thanks for the notes on the sound. What I will may do is put some foam board on the inside, then hang some R13 cuts around the compressor head. There really is just enough space to hang full batts on those sides past the tank. I have two bundles to start cutting up, so I'll see in a couple of days. It doesn't have to be "quiet", just muffled some will be good enough. If it turns out totally bogus, I can always take that bitty wall apart and re-do.

I found some cover plates for L6-20 sockets at Grangers, I just have to measure the socket to see if they are the correct size. The only ones I turn up are for 4" boxes - LOL. If it turns out to be a standard hole saw size, then making one is a good idea. I have plenty of blank covers. That might be my problem all along - I ignored the 4" covers when looking.
 
Last edited:
OP
F

Falcon67

Well-known member
Joined
Jun 11, 2009
Messages
18,371
Location
Merkel, TX
Update time! Finally got all the in-wall electrical run. I'm past 750' of 12-2. All the light runs are stubbed in and the plug runs are either all in or run to the jump out of the wall point.
Power11.jpg

Power12.jpg


The bracing running down both sides serves as a handy wiring channel:
Power13.jpg


Getting the ceiling started and the work room moving along. As soon as I can get that walled in and painted, I can move out of the house garage.

Inside6.jpg

Inside7.jpg

Might get the walls up by the end of the weekend. Ha.
 
Last edited:
To avoid these ads, REGISTER NOW!
Top Bottom