
You are using an out of date browser. It may not display this or other websites correctly.
You should upgrade or use an alternative browser.
You should upgrade or use an alternative browser.
Falcon's next shop - build thread
- Thread starter Falcon67
- Start date
Bob Heine
ALLIANCE MEMBER
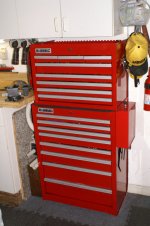
Chris, I have a Harbor Freight 26" box and it has been better than I expected. I removed the casters and top so it would fit the spot I have for it. I also like it because it doesn't scream "Steal Me!"Still looking for the right 26" tool box to park in the trailer.
Attachments
Last edited:
Here's what we ended up with - Seville UltraHD box from Sams. Working out well so far. The bar on the front allows me to strap it down and still have access to the drawers.

3 hours rain delay allowed us to use the trailer LEDs at Saturday's race. These are like 24" x 5 rows I think, Have to look. Lights the place up really good. Glad we upscaled to those vs the old halogen style.

3 hours rain delay allowed us to use the trailer LEDs at Saturday's race. These are like 24" x 5 rows I think, Have to look. Lights the place up really good. Glad we upscaled to those vs the old halogen style.
Last edited:
stereosteveo
Member
- Joined
- May 12, 2015
- Messages
- 8
Nice!
tfb
Well-known member
Too many things to like on your page! Thanks for sharing!
So next up is to tear up a prefectly good shop to make some overhead space at the lift. I need about 40ish more inches if I can get it.


Started by opening up the ceiling between the posts. That's a 8' wide area and I'll call it "Phase 1". There might not be a Phase 2, will explain in a minute.


The right most joist will be merged with the one next to the right hand post to form a beam/truss with the addition of some supports arms. The two in the middle of the space will come out and be cut into a 12' beam to support the ridge. One end of that will sit in the gable, the other on the double joist beam/truss. Looking at the weights and the small space, I could probably just remove and sheet the underside of the rafters and be done, but I'll have the spare lumber so might as well use it. Can't hurt to pick up the ridge load. Those are 2x12 doug fir, so they are pretty stout pieces of material.
Phase 2 - the left most joist is about 12" off the post. That leaves about 6" for the side of the car to clear the joist. A little tight. I'll get the space open and the beam up in place, then run the car up on the lift to identify the pinch points ( will run out of room on the back end of the car) and see how tight it really is. Moving that joist over 6" or so is going to be a real pain, and hard to insulate and sheet the opening. Maybe, depending on where the limits of the cab sit and place the ceiling.
First big issue was to move all the electrical. Most of the power ran down support channels on both sides of the shop. That got done this weekend and everything is tucked up where 3 1/2' of ceiling will be left by the overhead door.One set of runs had to be cut and spliced with another 19' of wire. The other set got done with a single splice, after fishing 5 runs out of the bitty hole in the studs on the far end. By laying on that bitty board and pulling back one at a time. Ouch.


Support for one end of the ridge beam started.

Other end will end up down here

Started by opening up the ceiling between the posts. That's a 8' wide area and I'll call it "Phase 1". There might not be a Phase 2, will explain in a minute.
The right most joist will be merged with the one next to the right hand post to form a beam/truss with the addition of some supports arms. The two in the middle of the space will come out and be cut into a 12' beam to support the ridge. One end of that will sit in the gable, the other on the double joist beam/truss. Looking at the weights and the small space, I could probably just remove and sheet the underside of the rafters and be done, but I'll have the spare lumber so might as well use it. Can't hurt to pick up the ridge load. Those are 2x12 doug fir, so they are pretty stout pieces of material.
Phase 2 - the left most joist is about 12" off the post. That leaves about 6" for the side of the car to clear the joist. A little tight. I'll get the space open and the beam up in place, then run the car up on the lift to identify the pinch points ( will run out of room on the back end of the car) and see how tight it really is. Moving that joist over 6" or so is going to be a real pain, and hard to insulate and sheet the opening. Maybe, depending on where the limits of the cab sit and place the ceiling.
First big issue was to move all the electrical. Most of the power ran down support channels on both sides of the shop. That got done this weekend and everything is tucked up where 3 1/2' of ceiling will be left by the overhead door.One set of runs had to be cut and spliced with another 19' of wire. The other set got done with a single splice, after fishing 5 runs out of the bitty hole in the studs on the far end. By laying on that bitty board and pulling back one at a time. Ouch.
Support for one end of the ridge beam started.
Other end will end up down here
Last edited:
zmotorsports
ALLIANCE MEMBER
WOW, looks like some major surgery going on there Chris. Good luck with the modification.
Thanks. Trying to get that "truss" setup sheeted over by the weekend, lots of cold air spilling out of that part of the attic!
Trick I thought of last night - will cut the ridge beam parts in place, set them up between the end supports and see if I can use a couple of 2x4s and the lift to gently place the beam. Hah, that'll make a goo picture if it works.
Trick I thought of last night - will cut the ridge beam parts in place, set them up between the end supports and see if I can use a couple of 2x4s and the lift to gently place the beam. Hah, that'll make a goo picture if it works.
Just worked my way through your build. Love the ingenuity of balancing space, budget, time etc. Building a pole building on a wide open lot so while I have I have different circumstances I hope to mirror the ethos you've put in. Great build and I will continue to follow along!
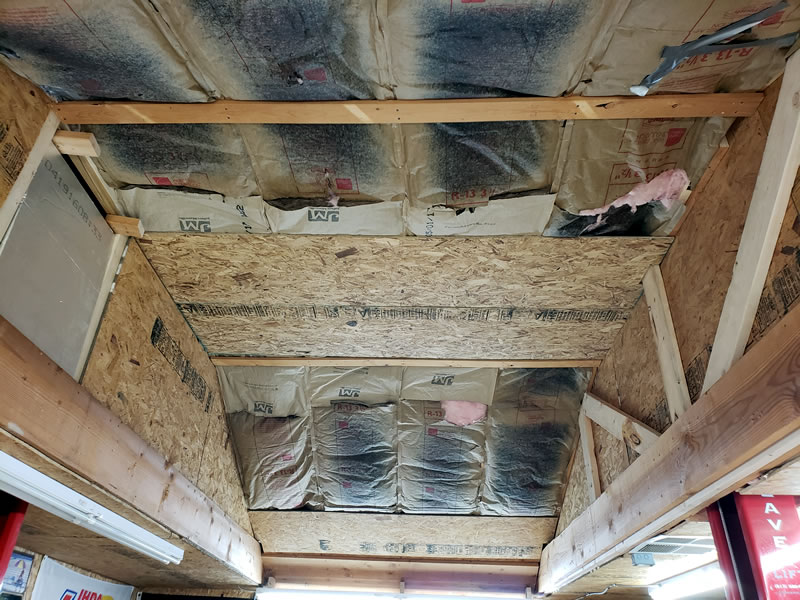
Progress made - bracing all up

Started sheeting the inside, then changed my mind - will just put foam insulation on the back side and sheet the front after the ceiling panels go in. Just think it'll look better.

Nice and open

Collar ties in place

Insulation going in. Trying to stop the heat loss or at least slow it down some. Have to go get another bundle today since I ran out of the batts that used to be in the flat ceiling. Another storm coming too.

Started sheeting the inside, then changed my mind - will just put foam insulation on the back side and sheet the front after the ceiling panels go in. Just think it'll look better.
Nice and open
Collar ties in place
Insulation going in. Trying to stop the heat loss or at least slow it down some. Have to go get another bundle today since I ran out of the batts that used to be in the flat ceiling. Another storm coming too.
RickP
Well-known member
Roof support looks good Chris - wow, you really know how to tackle a big project! I imagine it's a little easier if you break it down into smaller bits, but it sure looks impressive from afar. How hard was it to pull the old joists?
Have made some more progress - came down with a sinus thing last weekend which pretty much kept me out of the shop.
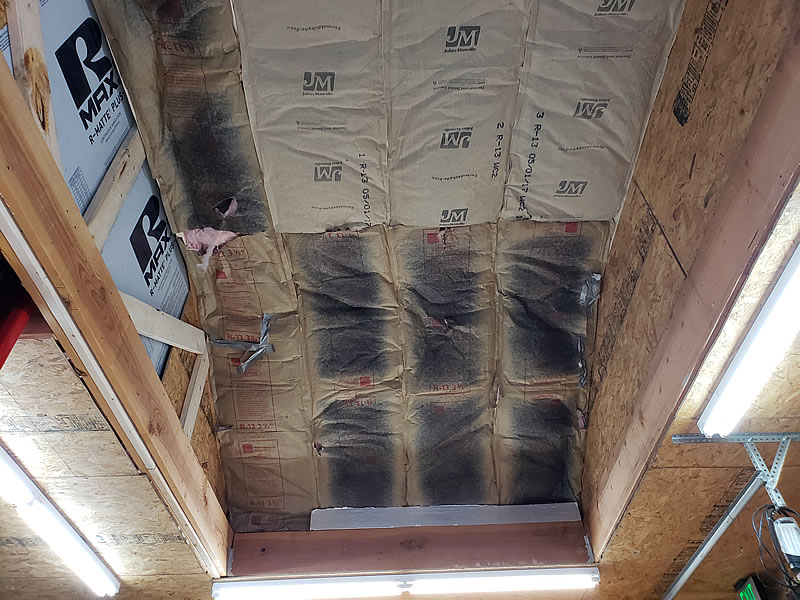
Before that I got the insulation in the open area up. Note the end near the door is boxed in, 30" from the door. That's the area where all the power runs were relocated.
Got the lights put back, had to make some angle brackets to mount the one in the rear. Used some of the left over joist material to stiffen the rafters where they meet the plate. Can't hurt and I had 38' of it.
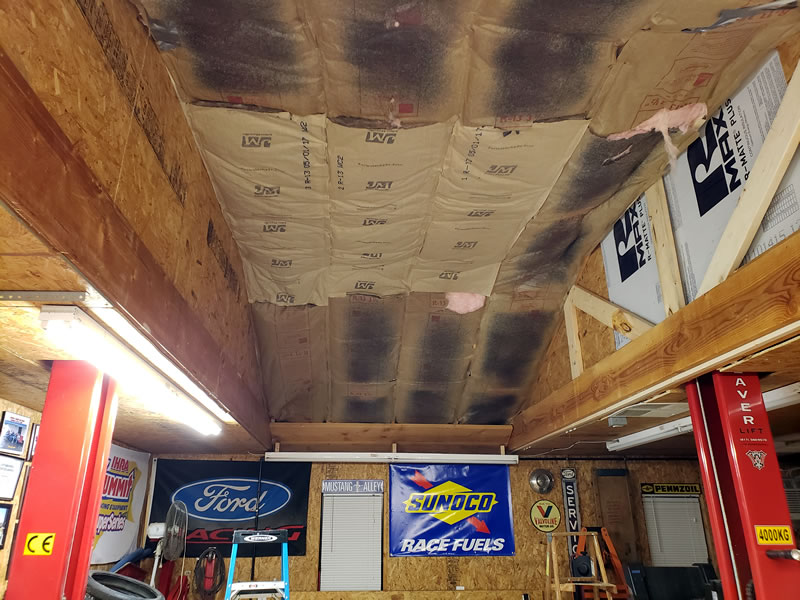
The east side all boxed in and insulated, still needs caulking. Started on the ceiling panels. Cut the OSB into 2' x 95" strips, way lighter but still fun to balance way up there. Got two done up top, one in the back and one in the front before catching a cold.
Before that I got the insulation in the open area up. Note the end near the door is boxed in, 30" from the door. That's the area where all the power runs were relocated.
Got the lights put back, had to make some angle brackets to mount the one in the rear. Used some of the left over joist material to stiffen the rafters where they meet the plate. Can't hurt and I had 38' of it.
The east side all boxed in and insulated, still needs caulking. Started on the ceiling panels. Cut the OSB into 2' x 95" strips, way lighter but still fun to balance way up there. Got two done up top, one in the back and one in the front before catching a cold.
53PontiacSD
Well-known member
Just a thought.....you were wearing a mask when you were putting up the insulation weren't you? Looks great so far!!!
Yes, AND when cutting the OSB. I'll do a quick cut on a piece of OSB for something, but a bunch of work like this calls for a mask. The sawdust and glue can't be good for you.Just a thought.....you were wearing a mask when you were putting up the insulation weren't you?
Cutting the OSB into 2' strips made it a lot easier to place the panels. Finally got all the panels up and caulked. Decorations are up too!

And the results are in -

No helmet required. This height (I'm right 6'~6' 1") leaves about 8" clearance above the rear trunk edge, which is the closest part of the car to the ceiling. There is a rubber bumper on the left post (my left in the pic) that just tags the joist at that height. So there's a built in limiter. Only downside - can't fully open the shop door with the car up. That's expected, shop just isn't deep enough. Going to get some padding for the door top because I WILL forget! [wham - #@!$%]

Last edited:
Also, it was 32F outside to day, frost on the roof - evenly - and still 62 in the shop, no heat running. So I think it's sealed up well.
[Product placement] I'll add - I bought a set of Dewalt 20V tools before starting this project. On Sale! At HD. I also bought two 4aH batterys to go with the two 2aH that came with the kit. My 19.2V Cman stuff is about wore out. Every bit of the kit - saws-all, 6.5" trim saw, drill, impact - kicked lumber ***. I only used my big corded 7 1/4" Cman circular for slicing the sheets of OSB with my big saw guide. The rest was all done with the hand held battery saw. Lots of cuts between charges on the 4 aH batteries. I never had to stop work because of power loss. The little circular saw cut through 1x12 doug fir like it was balsa. And it was much easier to handle up on a ladder if needed. First time I fired up the sawsall was to cut through some double 2x4 bracing. Took maybe 30 seconds and it set all the dogs in the neighborhood barking. So - worked well for me.
[Product placement] I'll add - I bought a set of Dewalt 20V tools before starting this project. On Sale! At HD. I also bought two 4aH batterys to go with the two 2aH that came with the kit. My 19.2V Cman stuff is about wore out. Every bit of the kit - saws-all, 6.5" trim saw, drill, impact - kicked lumber ***. I only used my big corded 7 1/4" Cman circular for slicing the sheets of OSB with my big saw guide. The rest was all done with the hand held battery saw. Lots of cuts between charges on the 4 aH batteries. I never had to stop work because of power loss. The little circular saw cut through 1x12 doug fir like it was balsa. And it was much easier to handle up on a ladder if needed. First time I fired up the sawsall was to cut through some double 2x4 bracing. Took maybe 30 seconds and it set all the dogs in the neighborhood barking. So - worked well for me.
Last edited:
Bob Heine
ALLIANCE MEMBER
Chris, that's the gift I'd love to have for Christmas -- a working full height lift. A set of Dewalt 20V tools isn't too bad either.
Wishing you and yours a Merry Christmas and Happy New Year.
Wishing you and yours a Merry Christmas and Happy New Year.
zmotorsports
ALLIANCE MEMBER
Nice job on the ceiling mod Chris. Did I read that right -32F? Holy **** that's cold. I thought it was cold here being around low 30's.
Merry Christmas and hope you can enjoy your new found space.
Merry Christmas and hope you can enjoy your new found space.
rixtrix1
Well-known member
Looks great, Chris. I love my 20V Dewalt tools, both at work and at home. Mine have outlasted the S and M brands costing 4 to 5 times as much!
Chris, I just re-read your thread from the beginning. Quick question about the rafters, did you not cut birds-mouths in your rafters? are they not required if you use hurricane ties? yeah I know, I'm taking you way back in time circa 2011? lol
Nice work on opening up the ceiling too!
Nice work on opening up the ceiling too!
Yes, the rafters have birds mouths cut. They just don't show up well in any of the pics. I put in hurricane ties without regard to requirements. I "just do it". No hurricanes here, but it might survive an F1 or a close call with an F2 should we be unlucky that way. We could live in the shop a while, because the house has none of that and the roof would lift off like a paper airplane.
Last edited:
Yes, the rafters have birds mouths cut. They just don't show up well in any of the pics. I put in hurricane ties without regard to requirements. I "just do it". No hurricanes here, but it might survive an F1 or a close call with an F2 should we be unlucky that way. We could live in the shop a while, because the house has none of that and the roof would lift off like a paper airplane.
Right on and good call on the hurricane ties. I believe in over-engineering!

QwikKotaTx
Well-known member
Glad I clicked on this build thread. From your sig pic it is very unassuming! How did you cut the joists, sawzall flush with the wall? I take it you can't use the lift with the garage door open? Still very impressive to shoehorn that thing in there and be able to stand under it. I recently replaced a ****** and don't think I could have done it sitting on a stool.
How about an update Chris. I see you haven't been around for a while.
zmotorsports
ALLIANCE MEMBER
How about an update Chris. I see you haven't been around for a while.
Agreed. Haven't seen Chris for quite some time and this thread was one I enjoyed following along on. He's always working on something cool.
middleclassmods
Active member
I just read this entire thread and I loved every minute of it. Im sad to reach the end. Hows everything going now Chris?