To avoid these ads, REGISTER NOW!

Fordkid's ADHD Fabrications

OP
F

fordkid88

Well-known member
Joined
Nov 10, 2013
Messages
680
Nice progress!
Thanks, it's coming along. It helps to work in a fab shop with a lot of talented people. We make automated food processing equipment, so I've got buddies that do all kinds of work that have given me input. One of our primary electricians just hit me up to do the wiring. One of our inspection team is finishing up with a mechanical engineering program and has built his own CNC router so he's had quite a bit of positive input. Our pumps head is a true jack of all trades and resident super genius that has been my sounding board for a ton of this.

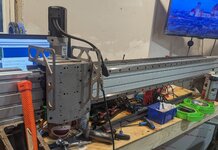
I spent last night looking it over and coming up with a todo list. After awhile it felt like it wasnt going to end, mainly little **** but it added up.

PXL-20220102-172550288-2.jpg
image upload
 
To avoid these ads, REGISTER NOW!
OP
F

fordkid88

Well-known member
Joined
Nov 10, 2013
Messages
680
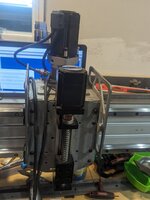
Tonight in screwing around in the shop-Making Stuff Move.


The Y axis also "works", I did a thru hole that is probably the same size as the ball screw so it binds and these motors don't have the balls to power through it. So I'm going to strip it down this weekend and drill it and start tweaking what ever I can. But for now I'm just happy to see it move.
 
OP
F

fordkid88

Well-known member
Joined
Nov 10, 2013
Messages
680
I know I have posted to this thread in over a year😂, and I know it's probably got one foot in the ground but I have been doing stuff. The little Honda got a handful of miles this summer and a few complements even though it's far from done. I also brought home another Japanese bike. I found an 81 450 Suzuki which I promptly swapped an 05 gsxr front end on. That was a huge pain in the *** and I still have one tweak to make and all new wheel spacers.
A bunch of new little modifications to the shop and a boatload more in the making.

The plasma table got a new gantry design along with a new a huge improvement to the electrical side.

All of this will get pictures in the next few days as threads are useless without picture.


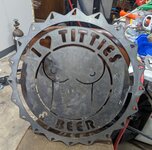
I don't know who cut those weiners out to stick in their coworkers tool box but I bet they have a great sense of humor.
 
Last edited:
OP
F

fordkid88

Well-known member
Joined
Nov 10, 2013
Messages
680
PXL_20230409_180112572~2.jpgPXL_20230403_164011611~2.jpgPXL_20230403_152113411~2.jpg
I've been busy at work, who would have guessed. I found a cheap machine torch and made that work. I've got the water tray going. I still have to finalize the cable chain mounts. The only real issue I have is I cannot get the limit switches working including the e stop. I'm gonna reach out to the Mach support team and the Ethernet smoothstepper guys and see what's up. I can't complain on the machine so far. It runs well at 78.75 inches/2000mm a minute. I can go a little faster but sometimes I randomly loose steps and then a part would be scrapped. All of these parts are 16 gauge with very minimal warping so I think its plenty fast running at 50 amps. I just need to figure out what is causing the beveled edges I'm getting but for now I'm happy.
 
OP
F

fordkid88

Well-known member
Joined
Nov 10, 2013
Messages
680
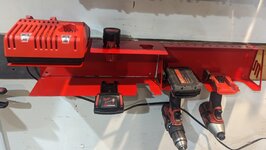
Well, I've made some money making Milwaukee themed storage. I must say, "Damn it feels good to be a gangsta".

I did run into some issues tonight that I knew I would run into sooner or later. My torch would drag in the material from warping and not cut and essentially skip that part. I'm not versed enough in Mach to restart from a certain portion of gcode and retry.

My cheap relays seem to be junk as twice tonight it didn't not stop cutting between actually cuts but I've got thousands of hours Tig welding and grinding and polishing for the food industry so I could recover on that.

Anybody use the prime cut 60 with cnc capability, I want to upgrade my cutter and do a torch height controller to get past the warping.
 

Attachments

  • PXL_20230425_015416268~2.jpg
    PXL_20230425_015416268~2.jpg
    1,004.1 KB · Views: 203

Meleon

Active member
Joined
May 25, 2013
Messages
32
I've had some issues with missed cuts also. what i did was went back to my model and removed features that where already cut and reprocessed the gcode. Works good as long as you haven't moved the material and you origin point.
There's likely a better way...
 
OP
F

fordkid88

Well-known member
Joined
Nov 10, 2013
Messages
680
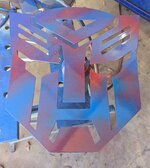
Whipped this bad boy up, almost scrapped it but Meleon's advice saved it. One of stars touched the materials so my cutter **** out and the very top star had a hidden line so sheet cam thought it was and outside profile versus inside. I recut a modified file that fixed both stars by making the top one larger and just recutting the one that didn't cut. A little zap with the Tig welder and she's all good to go.
 

Attachments

  • PXL_20230426_003422131~2.jpg
    PXL_20230426_003422131~2.jpg
    1.3 MB · Views: 123
OP
F

fordkid88

Well-known member
Joined
Nov 10, 2013
Messages
680
Messing around in the shop whenever I could get a few minutes. Got some paint sprayed. Made some new things for the shop. Can't wait to do secret Santa this year.

Added a cooler between my pump and tank on the air compressor with moisture trap. I love home when the pump kicks off and the pressure drops it automatically dumps the water in the trap. It's has 8 120mm pc case fans in a push pull config. I couldn't do the pump fan without butchering the shroud so I went this route. I wired a 12v power supply to pressure switch so when it kicks on it turns the fans on and off when the tank is full.

Doing this has dramatically dropped the air temp going into the tank. The tubing coming from the pump I can't touch but the tubing into the tank I can easily hold onto. In doing this my little hamster started sprinting on his wheel with a stupid idea. If I were to do a nested tubing of sorts that I could water cool, I could use a peltier cooler to pump water that is well below ambient temperature with spare parts from old pc build floating around. Not sure it's worth the effort. I'm still getting some moisture in the tank but it's much less than before.
 

Attachments

  • PXL_20230531_020937019~2.jpg
    PXL_20230531_020937019~2.jpg
    859 KB · Views: 71
  • PXL_20230531_020927173~2.jpg
    PXL_20230531_020927173~2.jpg
    699.2 KB · Views: 64
  • PXL_20230507_195242184~2.jpg
    PXL_20230507_195242184~2.jpg
    1.2 MB · Views: 60
  • PXL_20230507_192546116~2.jpg
    PXL_20230507_192546116~2.jpg
    1.1 MB · Views: 49
  • PXL_20230507_192537656~2.jpg
    PXL_20230507_192537656~2.jpg
    2 MB · Views: 85
OP
F

fordkid88

Well-known member
Joined
Nov 10, 2013
Messages
680
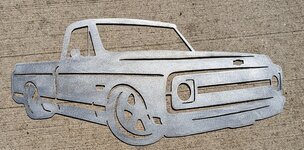
Request from a buddy at work. I regret not doing a double flange setup on it, forming and making it a cool light box. Maybe on the next one.
 

Attachments

  • PXL_20230610_050756575~2.jpg
    PXL_20230610_050756575~2.jpg
    1.1 MB · Views: 94
OP
F

fordkid88

Well-known member
Joined
Nov 10, 2013
Messages
680
I made one similar to this and sold it yesterday. The guy asked for a custom one so I made this and before he left tonight he was trying to pre pay for another. I been selling these dirt cheap only 30 bucks so I don't make much on them but it gives me something to do and put some money back into the table. Made enough to upgrade to a torch height controller and hopefully have a little less scrapped parts just have to research which one.
 

Attachments

  • PXL_20230611_182517524~2.jpg
    PXL_20230611_182517524~2.jpg
    693 KB · Views: 87
OP
F

fordkid88

Well-known member
Joined
Nov 10, 2013
Messages
680
Well not to let f150skidoo have all the fun although I will be blatantly ripping off part of his design, Ive started a 4 x 4 plasma table build with a rotary setup on the side which is actually yet to be fully planned out. Ive been taking my usual approach of design and build as I go and hope I don't overlook something, which has happened twice so far....I have the x axis pretty much done. The only issue I missed is that I made the mount modular for the x axis so if I decided to change gears I could change the mounting plate and not be limited. Well the front to bolt holes for the mount plate can't be accessed from the top as the gear rack is in the way. It still works though, you just have to set you gear mesh with the back 2 and then remove the whole carriage and put the other bolts in.

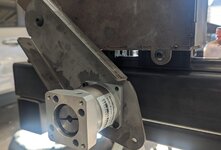
I'll be stealing the electrical, motors, and z axis from my small table. X and Y motors will be coupled with a 3 to 1 planetary gearbox, with y axis being another dual motor setup with the gearboxes being on a spring tensioned swing arm.

The only major issue I've really faced was sourcing 20 degree pressure angle gears with a metric bore. Luckily we have a really good machinist at work who has been boring and cutting the keyways into my gears so I didn't have to have custom gears made.

Well like most things I do expect pauses between updates as ill do it as I can afford it. Luckily I think I've only got $1000 for the majority of this build left.
 

Attachments

  • PXL_20231110_225053406~2.jpg
    PXL_20231110_225053406~2.jpg
    650.5 KB · Views: 61
OP
F

fordkid88

Well-known member
Joined
Nov 10, 2013
Messages
680
Well I got some work done on it yesterday that I wasn't planning on doing until next week. We have a rule that you can come into the work shop after hours as long as there are 2 people for safety reasons. I didn't really have anything to work on but the guy who asked me is a real good guy so I came in and putzed around for a few hours and got the swing arms formed and the spacers cut. I left the the thickness a little big because I forgot my laptop and wasn't sure on the final size. Then I ran out of stuff I could work on but I could see that my co worker was really trying to get this job done so I spent some time on our cobot trying to make it do grinding and polishing so we could utilize more than welding. Not how I wanted to spend the morning but its favor that'll be returned when I need to build the frame in the shop and I'm the only one in the shop who programs for the cobot so makes even more valuable at work.

I was really hesitant to use my old z axis as I thought it wasnt robust enough, so I added additional mounting holes that can be machined into the next z axis I'm looking at in a later date.
 

Attachments

  • PXL_20231112_154403981~2.jpg
    PXL_20231112_154403981~2.jpg
    683.1 KB · Views: 64
  • PXL_20231112_153845270~2.jpg
    PXL_20231112_153845270~2.jpg
    480.9 KB · Views: 45
Last edited:
To avoid these ads, REGISTER NOW!
OP
F

fordkid88

Well-known member
Joined
Nov 10, 2013
Messages
680
Well this was a fight against equipment last night and a fight against a lack of ambition this morning.

We have a large Marvel Cnc bandsaw at work that is a ******* child of the Amada take over. It has some issues even though it's only a few months old. The roller bed is leveled and the saw is leveled but they're on different planes, very minor but it's out the window with a square cut I guess. I've bitched as well as others but I guess it's a screw it you cant see the equipment we build from my house.

This morning there was not enough coffee in the world to do things properly. I've worked in a fab shop that is 99.9% stainless work for several years, I've grown to hate welding mild steel. Well my material is hot rolled carbon steel. Oil and mill scale. Well it was to cold to go out and grind and blast the weld areas and I wasnt going to do it in the shop. So I grabbed some 309l and burned it. Stainless has this cool way of not having porosity that mill scale might cause with er70s6 might. Are the welds the best looking, no but there good enough. Grinder and paint make me the welder I sometimes ain't.
 

Attachments

  • PXL_20231118_182318662~2.jpg
    PXL_20231118_182318662~2.jpg
    588.5 KB · Views: 56
  • PXL_20231118_183837747~2.jpg
    PXL_20231118_183837747~2.jpg
    346.2 KB · Views: 50
OP
F

fordkid88

Well-known member
Joined
Nov 10, 2013
Messages
680
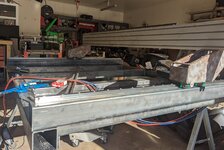
Making some progress, slowly but surely. I took the y rails into work last Saturday to drill and tap the rails. Broke one tap right towards the end. Cheap tap and high powered tapping arm don't always go together.

Spun a little alignment tool for my center punch on the mini lathe. Worked well enough to get the job done.

Y rails and racks are on and squared up. I'm waiting on the delivery for the x rails. I have to purchase the last piece of gear rack here in the next week or two and when our machining department catches up my buddy is gonna bore the gears and cut a keyway into them. I'm hoping I can start wiring and testing by the end of the month.

I still have to draw up the water bed and legs. I don't want to weld the legs on and introduce distortion so I'll form legs and have it all bolt together. But that'll be next month.
 

Attachments

  • PXL_20231119_165352186~2.jpg
    PXL_20231119_165352186~2.jpg
    765.4 KB · Views: 35
  • PXL_20231119_165803797~2.jpg
    PXL_20231119_165803797~2.jpg
    549.4 KB · Views: 22
  • PXL_20231119_175609654~2.jpg
    PXL_20231119_175609654~2.jpg
    399.7 KB · Views: 24
  • PXL_20231202_170427947~2.jpg
    PXL_20231202_170427947~2.jpg
    494.3 KB · Views: 30
OP
F

fordkid88

Well-known member
Joined
Nov 10, 2013
Messages
680
Sometimes the stars align and sometimes one star says pound sand to the others. Well tonight was a pound sand kinda night. I got my gears, rails and last piece of rack in, but the wifey had a doctor's appointment and the little guy threw a temper tantrum trying to put him to bed so I could work on the table until 7ish tonight. I couldn't find the two springs I bought 2 weeks ago, I grabbed 10-32 set screws instead of 10-24 which is what I tapped the gears for. Unnecessary run to the hardware store. Well I finished "machining" the tensioners tonight and got the y axis bolted up.

Tomorrow I hope to bolt up the x axis and possibly start testing. If all goes well, strip everything down and finish welding and reassemble and plan for the legs and waterbed.
 

Attachments

  • PXL_20231213_030542955.MP~2.jpg
    PXL_20231213_030542955.MP~2.jpg
    434.6 KB · Views: 25
  • PXL_20231213_030530893~2.jpg
    PXL_20231213_030530893~2.jpg
    546.4 KB · Views: 35
OP
F

fordkid88

Well-known member
Joined
Nov 10, 2013
Messages
680
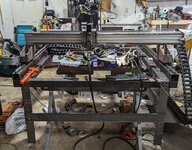
Messed around with tuning to the best of my abilities with the drivetrain combo that I have. From my understanding I would have needed something like 3.6:1 gearboxes instead of 3:1 to properly tune it, I'm was still able to get it dimensionally accurate to a tape measure. This thing is wicked fast compared to my old table. I backed the speeds way down as I was afraid of doing damage.

Anyway here's a test cut. 3 attempts as I still don't have a torch height controller and no water in the water table so there were 2 failed cuts do to warping.


Attachments

  • PXL_20231223_180407595~2.jpg
    PXL_20231223_180407595~2.jpg
    507.3 KB · Views: 36
OP
F

fordkid88

Well-known member
Joined
Nov 10, 2013
Messages
680
Aside from the growing mess I've made some actual progress. I ordered a 5 x 12 piece of 12g hot rolled and had our water jet department cut it. The water tray is sitting on my weld bench at work. It was compromise as I wanted a 60 x 60 but I couldn't do that in one piece so I did 52 x 60 with 4 small extra supports to be welded on. Our turd of press brake was really being a turd tonight. I know 4 FN 27 has decent results with his accupress but ours has been used, abused and put away wet. It requires an additional 20 degrees of angle correction and was under bending on half of the bed and over bending on the other half. I managed to piss off both the engineering and electrical departments with my dead blow persuasion.

Im thinking I might be able to sneak off into the garage Sunday to drill and tap all of these holes and get it onto its own legs and then start rearranging my whole shop. I've been drawing it out and trying to make it flow while down sizing on some things in the shop. Hopefully this summer I can really start making some cool stuff.
 

Attachments

  • PXL_20240131_012504255.MP~2.jpg
    PXL_20240131_012504255.MP~2.jpg
    973.4 KB · Views: 42
OP
F

fordkid88

Well-known member
Joined
Nov 10, 2013
Messages
680
It might almost be 11pm and I might be running on fumes and cold coffee and I might have to be to work early and work a 12 hr shift tomorrow but I made some good progress.
 

Attachments

  • PXL_20240202_040715072~2.jpg
    PXL_20240202_040715072~2.jpg
    759.5 KB · Views: 38
OP
F

fordkid88

Well-known member
Joined
Nov 10, 2013
Messages
680
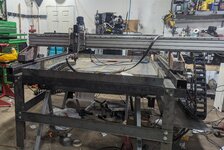
Well I was able to putz around on the table here and there recently. I bit the bullet and purchased the prime weld cut 60 for its cnc port. I did not order a machine torch as I would rather put that money into a torch height controller and worry about the torch later.

I welded up the xy and xz mounts, well 95% of them as after I painted them and started assembly I realized that I forgot to weld the small face in the front of the right hand xy mount...well at least it has 4 tacks and I'd be incredibly impressed if it broke off.

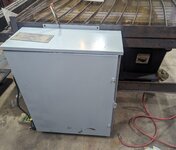
I found this massive outdoor electrical panel at restore for 100, it's got a slight scuff on the front and no interior board but it looked like it was never used and had the purchase receipt for $982. I need to make 4 stand offs and have waterjet department cut the interior board with all of the mounting holes and then add some holes for cable glands and some fans. I plan on keeping the computer in there and the plasma cutter close by so I can cover the cabinet and cutter and have a heater going for them in the winter.

Water table has slats, a fill port and drain port. I'm not 100% 0n my slat setup at the moment, has some wiggle to it which can cause the part to move when. It does the touch off.

I've already started collecting parts and planning a small cnc press brake build as I'm near done with this project. I'm currently using the small harbor freight sheet brake and I hate it so much.
 

Attachments

  • PXL_20240422_010551056.MP~3.jpg
    PXL_20240422_010551056.MP~3.jpg
    770.9 KB · Views: 22
  • PXL_20240422_010711988~2.jpg
    PXL_20240422_010711988~2.jpg
    631.6 KB · Views: 41

PugetDude

ALLIANCE MEMBER
Joined
Mar 13, 2013
Messages
22,464
Location
Superstition Mountains, AZ
That cabinet looks like a good solution. Great price, too. Consider a pull-up mixer shelf to mount the monitor and keyboard on, you can just drop it down out of harms way and close the door when you're not using it. Just a thought.
 
OP
F

fordkid88

Well-known member
Joined
Nov 10, 2013
Messages
680
That cabinet looks like a good solution. Great price, too. Consider a pull-up mixer shelf to mount the monitor and keyboard on, you can just drop it down out of harms way and close the door when you're not using it. Just a thought.
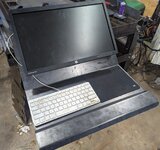
I have plans for a swinging monitor/keyboard tray. The mounting holes are already the front legs. Right now everything is on my 44" tool box. But I will be going that route eventually
 
OP
F

fordkid88

Well-known member
Joined
Nov 10, 2013
Messages
680
I got you covered now buddy! Ordered some 12g and got to cutting. This actually takes two, I did a sweeping arc that was an I beam style but I didn't care for it so I cut this one last night.
 

Attachments

  • PXL_20240504_004955503~2.jpg
    PXL_20240504_004955503~2.jpg
    831.9 KB · Views: 24
  • PXL_20240504_005017595~2.jpg
    PXL_20240504_005017595~2.jpg
    955.1 KB · Views: 24
To avoid these ads, REGISTER NOW!
Top Bottom