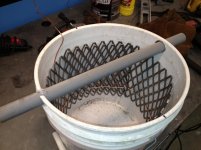
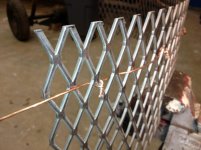
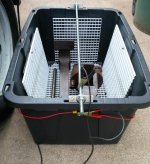
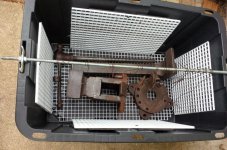
The basket was a home made jobbie, made out of a sheet of mesh I have here, due to the same problem you're having. Trying to find a basket worth it's salt ain't easy.

If you look at the photo's, the copper wire is what's holding it together. It was made from one rectangular piece, for the body, with a circular piece cut for the base then just pushed in, which is why there's the spiderweb of wire at the bottom of the basket.
I'd agree with ZK on the graphite/carbon rods btw. They do last longer and create less crud in the solution, but they aren't a necessity. One of those things where if you happen to drop on some use them, but I wouldn't go out of my way to try getting hold of some.
Otherwise for nut and bolt size items I just use a bench grinder wire wheel or a quick dip in an acid bath. On my little tank same principal, just smaller parts are suspended by thin wires instead of chain.
I'll agree that a basket has it's place. One thing I've generally stopped doing is small tools and tool bits, unless they're actually worth the hassle. It's the simple fact of time and effort as to whether they're actually worth doing though, not the electrolysis process per se. The same decision process would be applied whichever method they might be cleaned by. For a ten bob bit which is easily replaced, it really ain't worth derusting them, for example. For an original nut which would look silly with a new replacement, however, there's no choice to make. Restoration every time.
For nuts, studs and bolts, with the way I restore things, the basket is pretty much a necessity. Wire wheels would clean the parts to excess, (I don't do shiny. I like my restored equipment to look it's age, wherever possible, not to look like it's just stepped out of the factory. Plus, I detest using wire wheels), and any acid cleaning is something I try to avoid like the plague due to the dismal and inconsistent results dependant upon material. One antique test piece was somewhat ruined by crappy results from using acid. There won't be a second piece. Stringing small bits onto a wire is also something I'm sick to the back teeth of doing too, hence why they now go in the basket. For small parts, the basket really cannot be beaten. I truly would class a basket as an absolute must for anyone who does lots of small parts with electrolysis.
This is a line of sight process...
Just quoting your post here due to you being the only one who has mentioned it, not for any other reason.
The whole line of sight thing is a completely misleading notion. The process is not line of sight. It's simply path of least resistance, which in a fairly poor conduction solution means that there is no best path, hence all of the surface area will be affected by the process. Results are merely improved by providing as much anode area around the piece as possible.
Going back to the subject of the chrome, what exactly is it that's the problem with that? Still not able to discern exactly what the problem is which you're highlighting, from your posts. Just trying to make sure I'm upto speed on any possible problems here, not disagreeing, (as yet
), btw. Is it just the fragments being left in the solution which is the problem, or are you saying that some of the components of the chrome may actually dissolve into the solution? Any links to further info? Cheers.

 [
[


 Rise, brush, rise, brush repeat. The hose is for cleanup and checking progress.

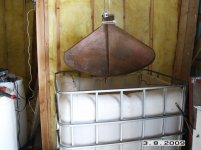
 I forgot to drain it this year.
 I like the way it looks very inconspicuous in a back yard compared to a large white barrel or the Rubbermaid container and a bunch of wires sticking out.
  One thing I've wondered, do you think there is a performance difference between a shallow long tank vs a narrow deep tank? Gas exchange surface area