To avoid these ads, REGISTER NOW!

Motorcycle Build

indisguise

Well-known member
Joined
Sep 15, 2019
Messages
103
Location
Rust Belt....
Hi Folks,

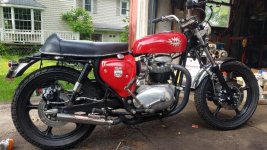
Some of you may have seen my "DIY motorcycle lift build". This was done rather rapidly to facilitate another end goal...to build a motorcycle.

https://www.garagejournal.com/forum/showthread.php?t=444457

This build will be very long...and will frequently stall(life). Much of the process will involve alot of learning. My welding needs to improve vastly, and no doubt this will prove to be my biggest challenge.

NOTE: I tend to use photos.google.com. The initial posts always include failed image links. This happens as google is constantly moving images behind the scenes.. and eventually this settles after 48-72 hours. Therefore I need to wait and update the Image endpoints appropriately. Apologies

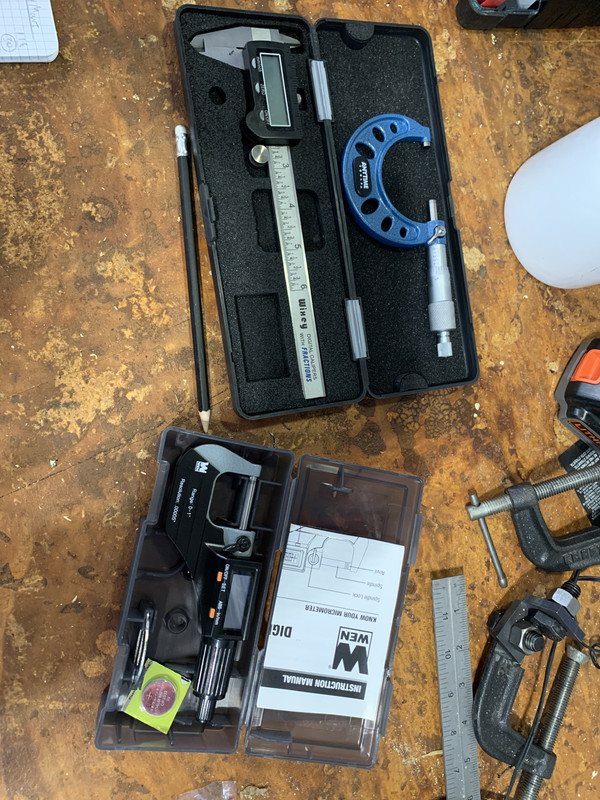
To start the build, I need two other tools.

  1. Engine stand set at the correct height
  2. Jig to allow me to build the frame.

This first initial post outlines the build process surrounding these tools.

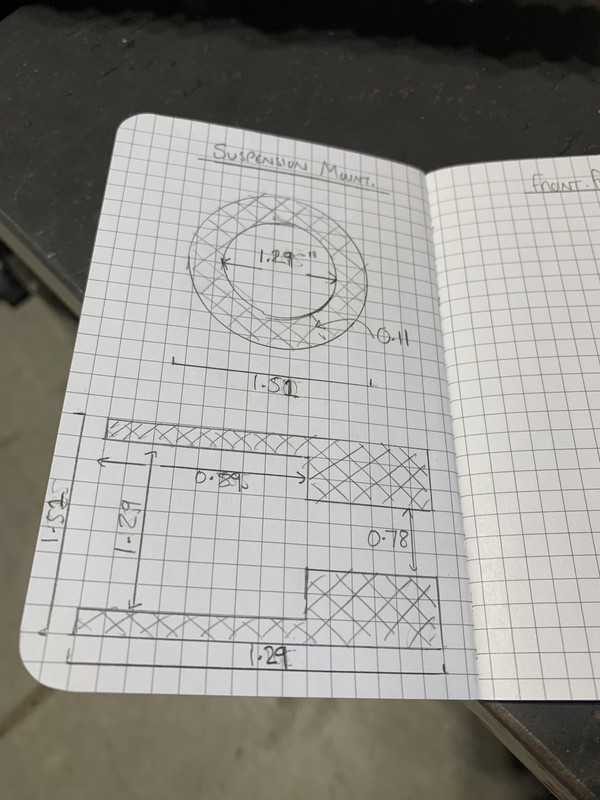
The stand was templated by hand using cardboard. I work 50+ hours a week in the computer industry and the analogue process is cathartic.

7151-B815-3-D8-C-4-A2-F-AD2-A-93-D4-DAE3-D754.jpg

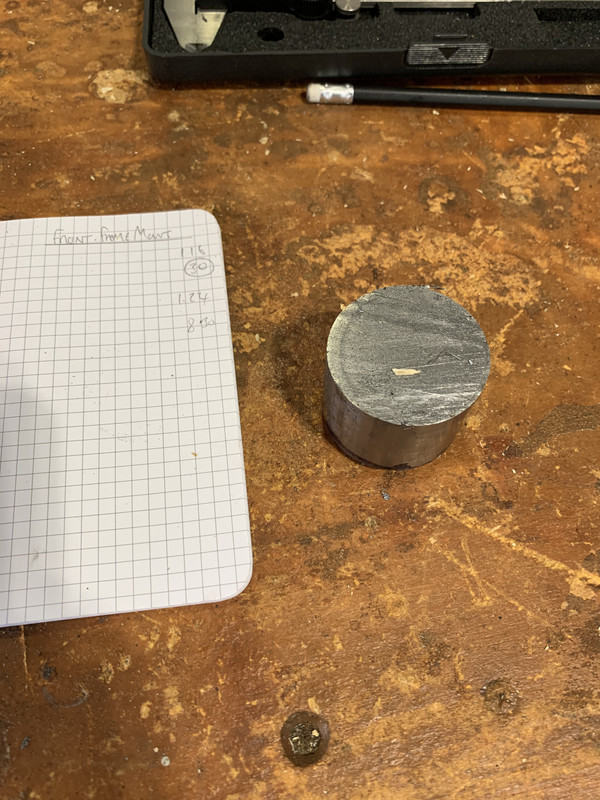
This was then transposed to 1/4" steel plate and modified to save material.

590-A8595-4-D4-F-4346-93-BC-689793520910.jpg

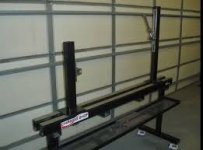
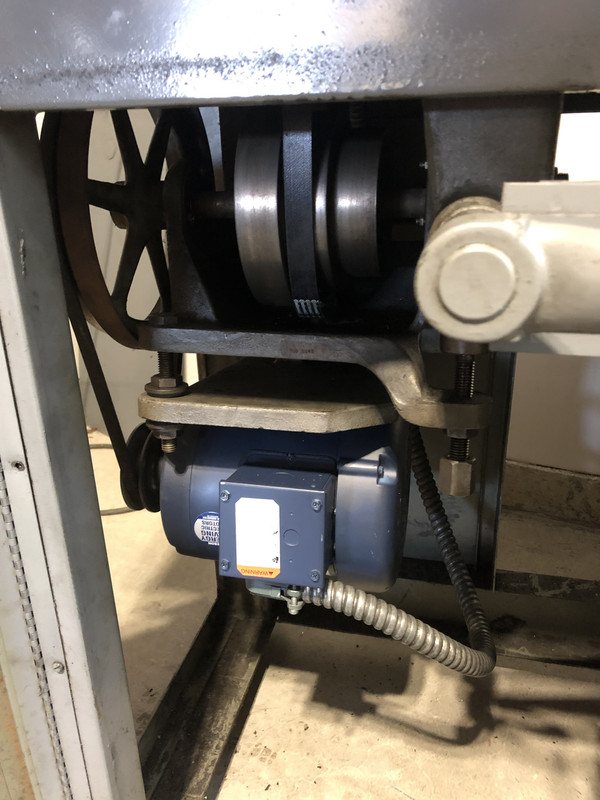
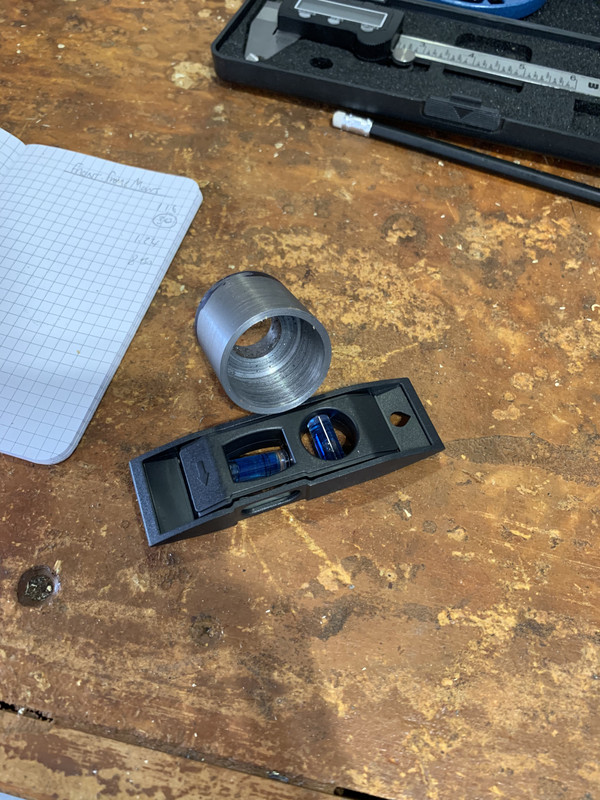
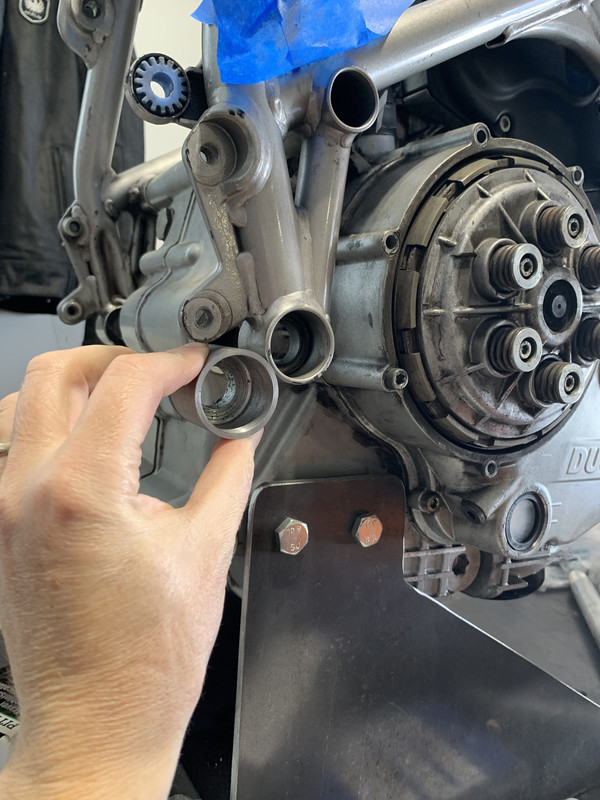
These mount to here:

1-A149523-DAA5-46-AB-BD50-27-B1-F250-F782.jpg

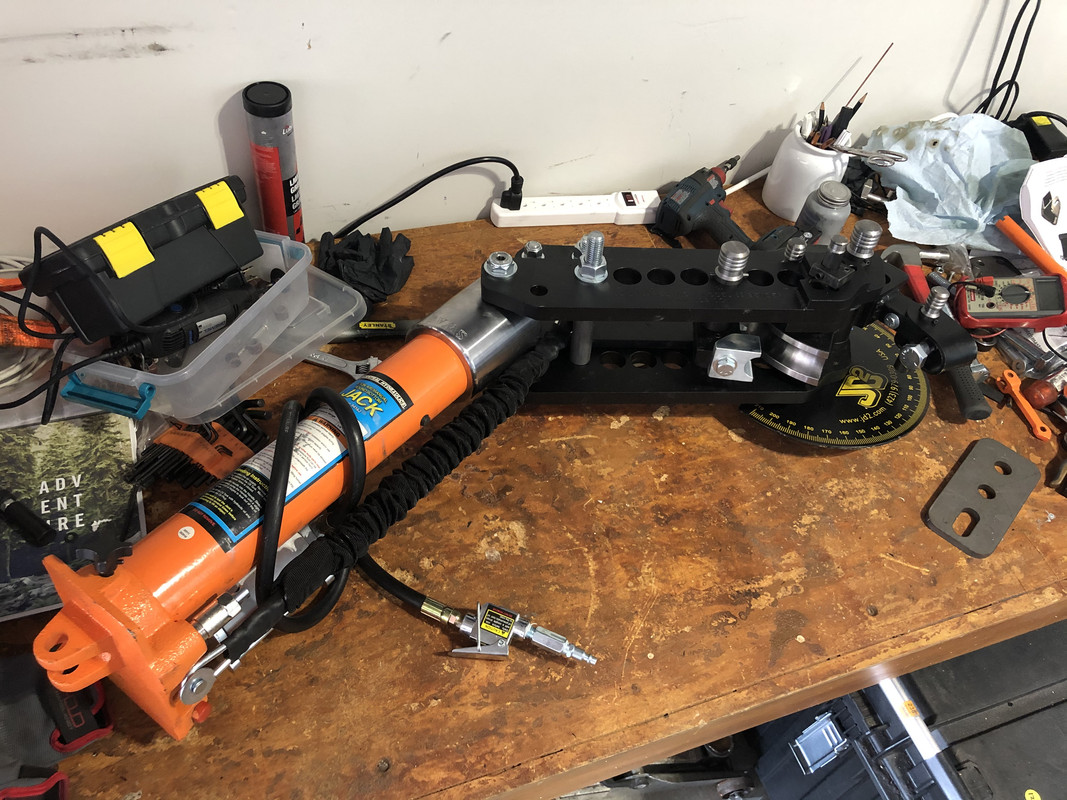
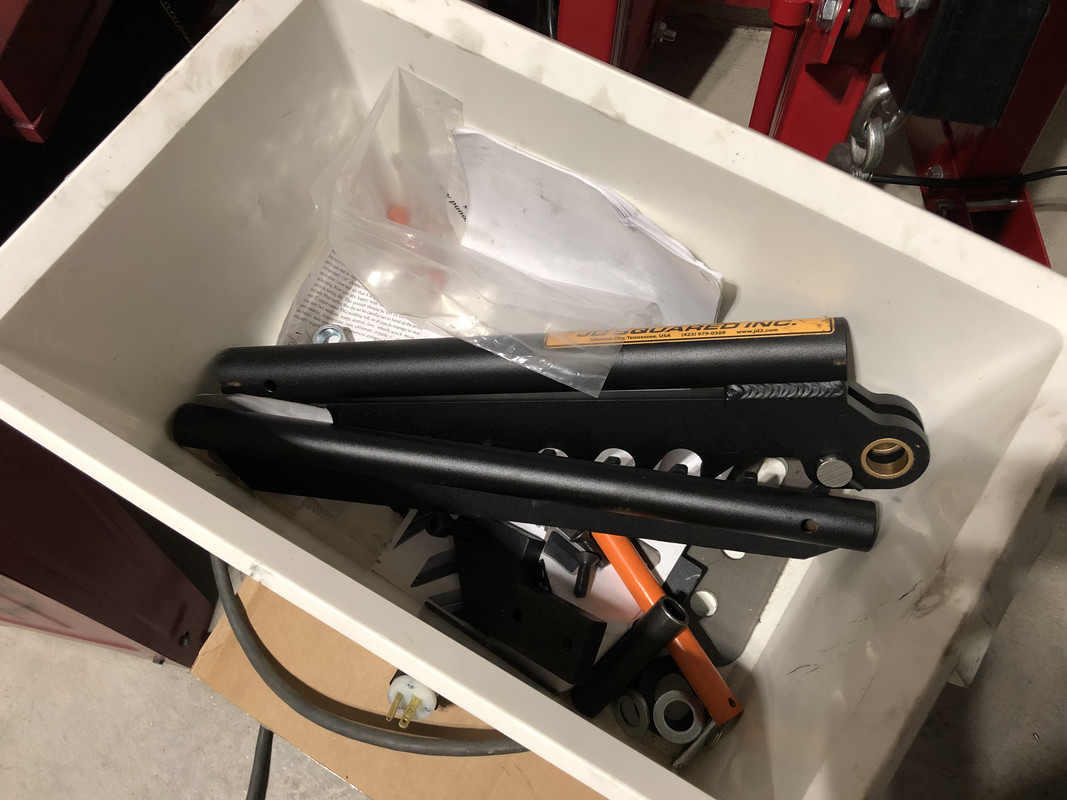
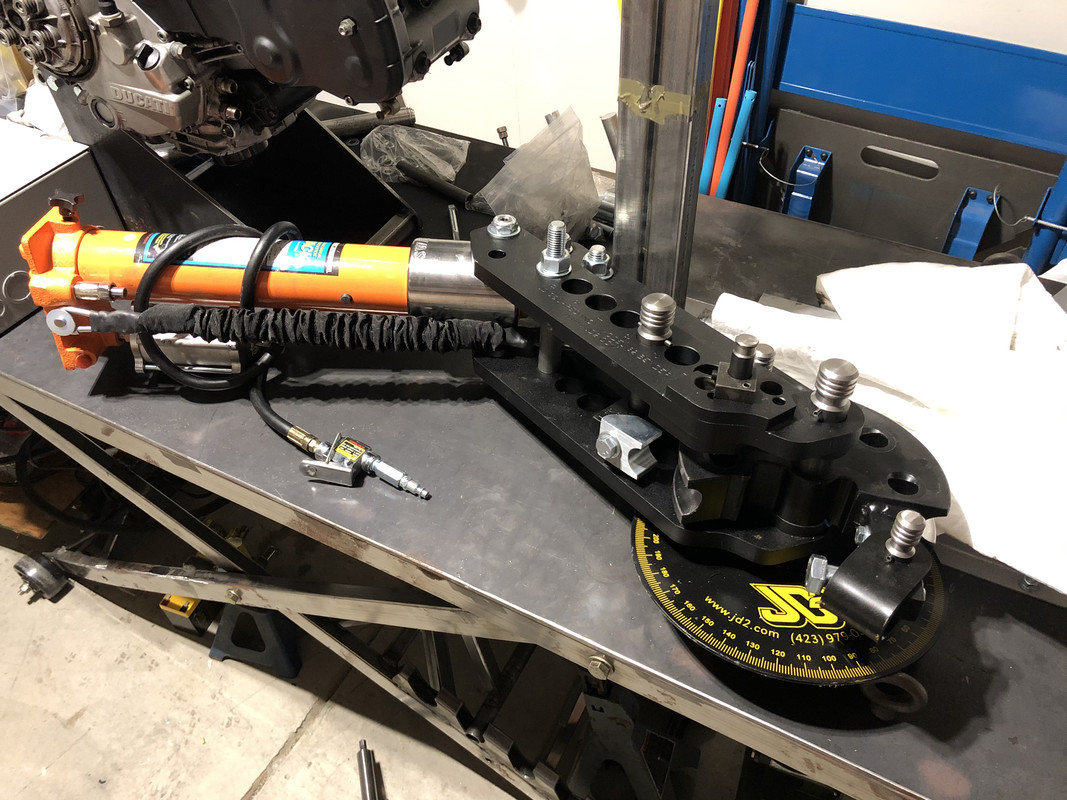
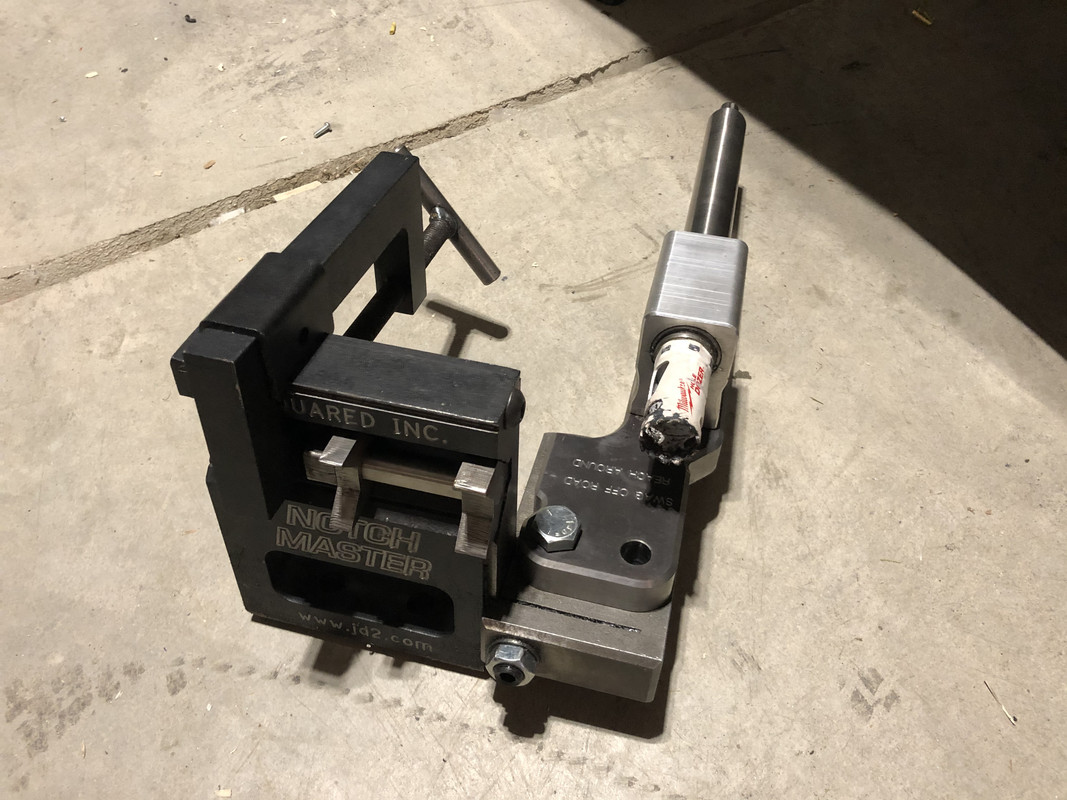
The Jig is rather simple and utilizes the Chop Source kit.

587160-EC-DAAF-4-BED-BC44-C5-F361-EBC36-B.jpg

All of these items are designed to bolt to the lift. This is why the top was so thick.

82-AFDB74-B55-E-4-C97-866-A-8-F99-B35-B0-A1-F.jpg

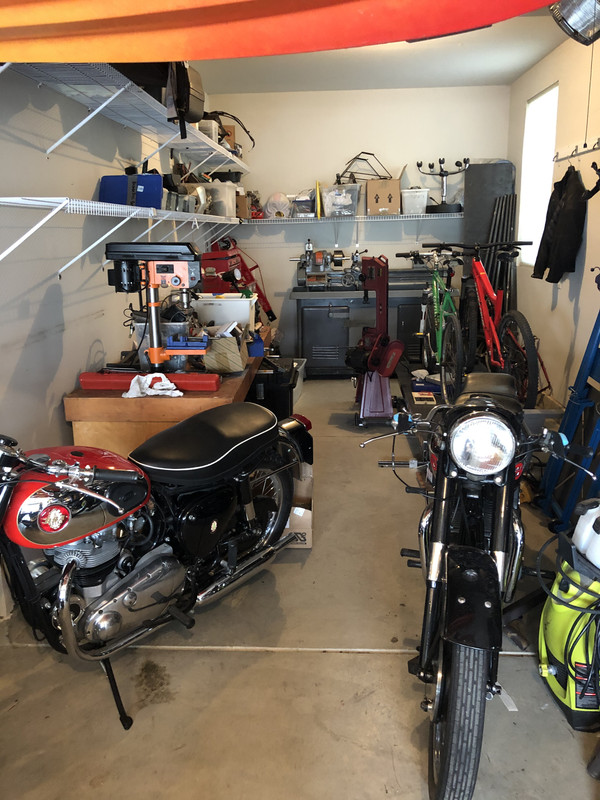
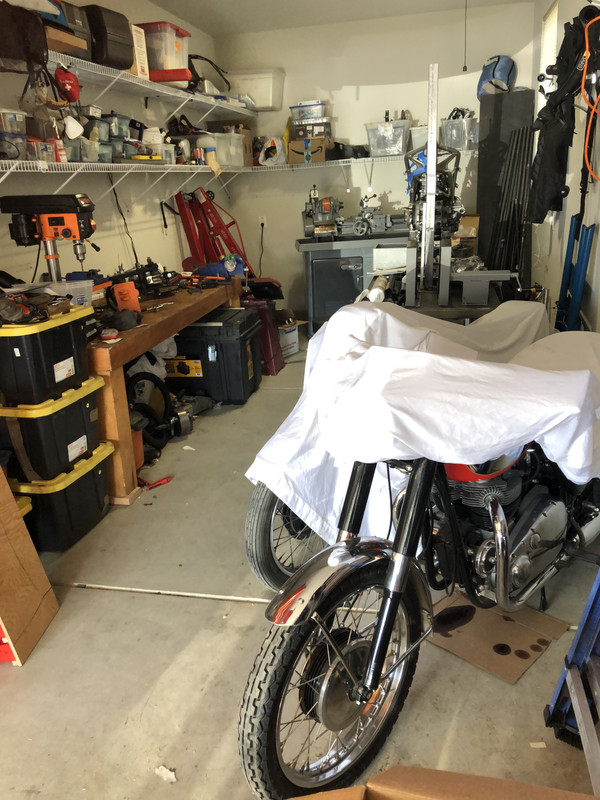
The observant will notice shelves packed with parts....and these seem to favor a specific Italian manufacturer :)

Enjoy
 
Last edited:
To avoid these ads, REGISTER NOW!
OP
I

indisguise

Well-known member
Joined
Sep 15, 2019
Messages
103
Location
Rust Belt....
The intention is to "attempt" to build a frame.

Quick update.

The engine stand turned out great....Level and at the correct height.

37-C8150-A-9632-4-B3-A-8820-812362-F75-B0-E.jpg

7-B472578-0-D97-48-BA-9-B8-C-72-AC3-E83-BB52.jpg

The reference frame was put in place. I need to attach the engine stand to the lift.

8-C2-A3-FA6-DE48-4-A89-8-D6-A-328-C09-CA62-B2.jpg

I need to align the frame as shown here.

159-AE08-A-E852-4-B24-9109-ED8-CCBC370-D6.jpg

Once everything is bolted down, I will remove the original frame and modify the head angle by 1/2 a degree.

F9-F6-BB3-F-4649-4-BFD-BBEA-959-D92-A5-D7-BB.jpg

The original frame had a crack in the paint.....which might be a crack in the frame!. I will dig deeper when it makes sense :)

5-D5-C7-B9-A-C933-4322-9308-637-C9-C94-BD02.jpg

Next step is to wire this. I need to use this to make the frame neck and the motor mounts for the frame.

IMG-0772-2.jpg
 
Last edited:

Honch

Well-known member
Joined
Jul 30, 2011
Messages
401
Location
Danville, IN
Im in too... No pics in last post, or is it me?

Google photos requires ?.JPG at the end of the photo URL for anyone not logged into google to have a chance of seeing the pictures. Even then it is hit and miss at best especially in browsers that are Microsoft produced.
 

zmotorsports

ALLIANCE MEMBER
Joined
Oct 20, 2009
Messages
21,312
Location
Northern Utah
I built a motorcycle chassis jig about 15 years ago much like the components you are using. Mine was an all-in-one or stand-alone jig vs. an addition to the motorcycle lift table.

I did build a fixture table that had adjustable feet and sat on my motorcycle lifting table for building ATV chassis' that worked well. It sat about 2" above the lift table and had holes drilled for additional fixtures that could be bolted to the fixture table at various stages of the chassis build. Much like what you are doing.

Subscribed.
 

Attachments

  • imagesEK1JH3GU.jpg
    imagesEK1JH3GU.jpg
    6.7 KB · Views: 192

joe49

Well-known member
Joined
Sep 25, 2009
Messages
1,883
Location
Tonica, Il
If the neck shown in the picture is your registered VIN reuse it so as to have no registration issues.
 
OP
I

indisguise

Well-known member
Joined
Sep 15, 2019
Messages
103
Location
Rust Belt....
Quick post.

I needed some bench clamps to hold down the engine stand. Still not sure about these.....

Used some old C-Clamps from Craftsmen. These are about 15 years old and the quality was terrible...

IMG-0844.jpg

You can see the abuse on the flat surfaces.....the metal is terrible. These surfaces were flattened.

IMG-0845.jpg

I then cut the bottoms off. FYI these cheap 6x4 metals saws are flimsy...but a change of blade make this a usable tool. Probably one of my better HF purchases....

IMG-0846.jpg

Then built some brackets and drilled some holes...Its easier to use 90" Angle iron...however I was out.

IMG-0847.jpg

And here is how they will work...when the bolts arrive. Still not entirely sure on this one....

IMG-0849.jpg
 
Last edited:
OP
I

indisguise

Well-known member
Joined
Sep 15, 2019
Messages
103
Location
Rust Belt....
Hi folks,

It's been a while however things have not been quiet! We needed to relocate from Washington State to Indiana to help family. This required us to
  • Sell our home
  • Pack
  • Find a camper
  • Drive across the country
  • Find a rental home in Indiana
  • Unpack
Obviously COVID-19 makes relocation difficult. Therefore we decided to self isolate while driving 2300 miles across the country.

61851729486-AF8055-FA-5352-4153-B5-C4-F98-BAE719-EEE.jpg


After we arrived it was more unpacking.

IMG-0975.jpg


The garage workshop is a lot smaller in the rental house, however its still extremely functional.

IMG-0997.jpg


Now to get the SB Heavy 10 functional.

Hmmm not so functional......that looks horrible...

IMG-0995.jpg


After some digging there were three very glaring issues.

  • The belt was seconds from breaking....
  • A lot of play in the spindle bearings. ~.045
  • Play in the Saddle and the crossfeed.
  • The motor was getting hotter than the sun!

To address the belt I used a temporary solution. Car V-Belt.

IMG-0875.jpg


To address the spindle bearings I purchased new shims and adjusted the tolerance to .001". Note, someone replaced the bearings here...there is no sleeve tensioner.. hmm...

IMG-0999.jpg


The play in the saddle was a simple fix and the compound and cross feed screws were replaced.

The motor had seen better days and therefore I chose to replace this with a new 230V 3Phase motor and VFD.

Old motor:

IMG-1016.jpg


Installing the new motor with my handy dandy scissor lift. I have done this in the past with ratchet straps, however this was super simple.

IMG-1027.jpg


Then finally installed.

IMG-1029.jpg


Now I just need to wire the VFD to the motor with all the appropriate "gubbins".

All for now.
 
OP
I

indisguise

Well-known member
Joined
Sep 15, 2019
Messages
103
Location
Rust Belt....
Still waiting on some VFD deliveries....so spent some time building a bender.

These things are freaking heavy....

IMG-1038.jpg


I think I might need to build the handy stand they suggest...

IMG-1039.jpg


And finally created just a little more room in this smaller space.

IMG-1041.jpg


Hopefully the VFD items arrive soon.
 
Last edited:
OP
I

indisguise

Well-known member
Joined
Sep 15, 2019
Messages
103
Location
Rust Belt....
I wonder how many people end up with a box shown below after visiting SwagOffroad :)

I like to call it the JD2 bone yard...

IMG-1048.jpg


The result of upgrades to:

Model 32 bender:

IMG-1046.jpg


And your basic NotchMaster to be more functional...The "Goat" is awesome and extremely cheap..

IMG-1047.jpg


These upgrades on the NotchMaster are fantastic. If you already have one of these...like I did, well worth the upgrade. If you are buying new.....move up to the $500-600 notchers...

Side note...not sure why I have a bulldozer hole saw in there....I usually run Starretts for a very good reason....hmm
 
To avoid these ads, REGISTER NOW!
OP
I

indisguise

Well-known member
Joined
Sep 15, 2019
Messages
103
Location
Rust Belt....
@GeddyT....I will need considerable luck to pull this off :)

Quick update....

The VFD is wired to the new motor. It uses the original tumbler controls, which is great. I decided to mount the entire thing in a Nema 1 enclosure. The cut out for the VFD is not great and I should have purchased one with a door.

IMG-0019.jpg

Here is the lathe ready to roll... and yes space is getting a little tight :)

IMG-0018.jpg

Tested my first attempt at a self ground tool. The finish is not great but its all part of learning. I'm very new to lathes!

IMG-0020.jpg

It's time to start building the frame lugs. My intention is to make a practice one with ALU. This should bootstrap my lathe knowledge......then onto the real stuff.

Happy Tuesday.
 

Richied

Member
Joined
Feb 22, 2013
Messages
5
So are you building a xx9? What are you going for as an end result? I’ve built a few around the xx9 frame. One deep sump s motor one shallow like the one in the pics and one with a ds 2 valve in it. Let me know what you are up to maybe I can help, ive got tons of parts
 
OP
I

indisguise

Well-known member
Joined
Sep 15, 2019
Messages
103
Location
Rust Belt....
Sorry to sidetrack, but what's the backstory on the lathe? Looks really clean.

@GeddyT, I previously lived in the PNW and finding a decent lathe was difficult. This one was shipped from machineinventory.us. The overall condition looked great from 10 feet, but was clearly a "quick" paint job as you got closer. The lathe was promptly torn down and everything was cleaned. The ACME screws on the cross-slide/compound were replaced. The bearings shimmed and the motor replaced. There is typical wear as you would find on an old lathe....but so far its working out. Bridgeport next.

So are you building a xx9? What are you going for as an end result? I’ve built a few around the xx9 frame. One deep sump s motor one shallow like the one in the pics and one with a ds 2 valve in it. Let me know what you are up to maybe I can help, ive got tons of parts

@Richied, The motor is from a Ducati 749 (the ugly one :)). I'm building a frame from scratch....yes this is somewhat foolish. The swing arm is being replaced with a unit from a 848 EVO (single sided) along with the wheels. The tank will also be custom.
 

casmurbax

Well-known member
Joined
Sep 25, 2012
Messages
2,756
Location
Wilton, NY
Hi, thanks for sharing your build.

How soon from the moment you decided to move, did you actually move? Hope all is ok with the family, nice that you moved to be closer to them.
 
OP
I

indisguise

Well-known member
Joined
Sep 15, 2019
Messages
103
Location
Rust Belt....
How soon from the moment you decided to move, did you actually move?

From decision to residing in Indiana was around 6 weeks. It was pretty hectic and included, selling a house, packing, shipping cars, finding a rental in IN, buying a camper to isolate while driving 2300 miles and then finally driving.
 

GeddyT

ALLIANCE MEMBER
Joined
Jun 17, 2015
Messages
1,239
Location
Bellingham, WA
@GeddyT, I previously lived in the PNW and finding a decent lathe was difficult.

Tell me about it. Every time I read on here about somebody picking up a Quincy QR for less than scrap or a $2000 Hardinge or Colchester, it's a definite "YOU ****!" moment for me. Sometimes there are deals in Portland, but that's pretty far away from me.

@Richied, The motor is from a Ducati 749 (the ugly one :)).

I've owned two Ducatis, and the first was a 749s. I'm one of the strange ones who thinks the design is actually quite beautiful and was ahead of its time, especially in race trim. That being said, the bike was a pile of **** to the point that it really tarnished the brand in my mind (not enough to avoid making a second Ducati mistake, but whatever...). Coming from Japanese bikes up to that point, I was shocked at some of the cheap details on such a premium bike. Manual choke in 2006? Axial brake calipers? The bike had the factory Termi exhaust, which looked cool and sounded mean, but it was a coin flip whether the bike would stall at any stop sign or traffic light. The worst, though? The bike developed a really bad chassis wobble at anything over an indicated 150 mph. Enough that it would scare me into backing off. Sixth gear, therefore, was decorative.

In retrospect, I started thinking that there's no way this was the normal character of the bike, as these things were raced in club and professional series all over the world with good results. I know the bike had been crashed at least once or twice. I started to think the frame or suspension were tweaked at the very least, so I've cut Ducati some slack.

A friend of mine bought a 1099 a few years later, and that thing was a dream in comparison, so I know Ducati can build a great bike. Just neither of the ones I've owned!
 
OP
I

indisguise

Well-known member
Joined
Sep 15, 2019
Messages
103
Location
Rust Belt....
@GeddyT the frame from this bike shows ominous signs of a crack at the headstock...Its a known issue and just reinforces the quality issues you brought up about these 749's.

OK back to the build. The first task is to work out how to run a lathe...Did I mention I'm clueless. The lathe is needed to build the frame/suspension and Neck components.

Starting with the suspension mount. First I started with a drawing:

IMG-0025.jpg


Then I had to find some metal stock (4130)

IMG-0030.jpg


The I collected an assortment of cheap measuring tools.... Accuracy optional. Many folks I follow have really nice tools....I'm not there yet.

IMG-0029.jpg


The voila....

IMG-0028.jpg


This part goes here:

IMG-0031.jpg


The surface finish is not great, but passable for my needs. Turning 4130 on the lathe with only 120V was a challenge :). Also my carbide tooling might need some love. I tried a bunch of feeds and speeds and nothing changes too much....Any tips would be greatly appreciated.
 

MikeF2316

Well-known member
Joined
Dec 29, 2012
Messages
9,605
Location
Thornhill, ON

GeddyT

ALLIANCE MEMBER
Joined
Jun 17, 2015
Messages
1,239
Location
Bellingham, WA
The surface finish is not great, but passable for my needs. Turning 4130 on the lathe with only 120V was a challenge :). Also my carbide tooling might need some love. I tried a bunch of feeds and speeds and nothing changes too much....Any tips would be greatly appreciated.

I'm not an expert machinist by ANY stretch, but everything I've seen/heard/read is that really sharp HSS tooling is better for a lathe that size, as carbide wants to be really pushed. That being said, I bought carbide insert tooling (because I didn't know any better) for my lathe that's way flimsier than yours, and I've managed to cut things and get decent surface finish. Never with any kind of steel, though!
 
OP
I

indisguise

Well-known member
Joined
Sep 15, 2019
Messages
103
Location
Rust Belt....
So the finish on the 4130 was bothering me....so I started digging. I must love pain.

There is play side to side on the spindle, but not up and down. This would make sense since the bearings don't have expanders!!... So on the phone to order new bearings and expanders (no messing). Lesson here, If you see a bodge, fix it immediately. I was dodging this since I thought bearings were $800....Turns out that was internet BS....Got them for $300 with expanders (new).

While I was waiting I stripped the spindle.

IMG-0060.jpg

The previous owners had no idea how to work on machines....it looks like some animal attacked it!

IMG-0052.jpg

IMG-0053.jpg

Luckily its not too serious....but folks....please step away from those pipe wrenches!

I also ordered some new tooling. Indexible inserts seem like IPA's...There are thousand's of variety's and everyone has an opinion. Long story short...got some Kennametal KT315's and KC9110's...lets see how these work out.

While I wait on parts, I took the two older bikes for a quick late autumn spin.

Unearthed them..

IMG-0057.jpg

First the 56.......

IMG-0058.jpg

Then the 58..

IMG-0056.jpg

Hopefully parts arrive soon....
 

mikegt4

Well-known member
Joined
Sep 12, 2005
Messages
3,263
Location
sw ohio
Is that an A10?
I have a 1966 BSA 650 Spitfire MK11, got it from a friend over 45 years ago. Some day, when I have time, I need to restore it.
 
OP
I

indisguise

Well-known member
Joined
Sep 15, 2019
Messages
103
Location
Rust Belt....
Is that an A10?

Both are A10's. The black bike is a 1956 Golden Flash and the red is a 1958 Super Rocket. The red one is pristine and was built by my father. The black one was rebuilt by yours truly (not restoration) ;).

Top tip....Never have just one british bike. They really should come in pairs. It increases the probability of having one ridable. Also get over oil leaks quickly....its gonna happen.
 

driftpin

Well-known member
Joined
Dec 22, 2016
Messages
11,180
Location
Miami-Dade/Broward Co. Florida
I enjoy the learning process, seems you are learning a lot here. Me too.

Here's pics of my friend's '66 BSA Hornet, run when new by his brother in NY flat track. It was sold, then bought back years later. It's a resto-mod, all the OEM parts are stored. The bike and its rider were in BSA ads in bike magazines of the day.

And for the British bike fans who are old-enough to recall these ads, here's one. Twiggy? Jean Shrimpton? Goldie Hawn? This bird reminds me of all of them.
 

Attachments

  • BSA Hornet left.jpg
    BSA Hornet left.jpg
    94 KB · Views: 146
  • Norton women.04.jpeg
    Norton women.04.jpeg
    12.1 KB · Views: 168
  • Norm -Tom BSA ad 1965.jpg
    Norm -Tom BSA ad 1965.jpg
    81.7 KB · Views: 130
  • BSA Hornet.jpg
    BSA Hornet.jpg
    144.5 KB · Views: 126
Last edited:

Bopbop

Well-known member
Joined
May 25, 2016
Messages
180
Location
Savannah,Ga
Just a quick question. How do you like the Swag hydraulic kit for your JD2 bender? I have a JD2 bender and have been thinking about doing the upgrade.
 

mikegt4

Well-known member
Joined
Sep 12, 2005
Messages
3,263
Location
sw ohio
British ads were great in the 60's. The Spitfire Mk11 ad was about the size of a business card, a friend blew it up and made a poster for me. Her brother was the one who "sold" the bike to me for the princely sum of one McDonald's cheese burger (35 cents at the time).
 

Attachments

  • 85.JPG
    85.JPG
    102.8 KB · Views: 155
  • 7a.JPG
    7a.JPG
    73.6 KB · Views: 175
  • BSA_H.A.M.B.1457139990.792485.jpg
    BSA_H.A.M.B.1457139990.792485.jpg
    97 KB · Views: 182
  • BSA_H.A.M.B.1457139976.144255.jpg
    BSA_H.A.M.B.1457139976.144255.jpg
    56.6 KB · Views: 172
  • IMG_2687.jpg
    IMG_2687.jpg
    134.6 KB · Views: 154

ZRX61

Well-known member
Joined
Aug 15, 2006
Messages
28,716
Location
Solar Blight Valley, SoCal
Had a few Beesa's over the years
'68 250 Starfire
'71 441 Victor
'62 A7 500SS, modded to CafeRacer

'72 650 Thunderbolt (with the white frame)


Should have kept the T-Bolt :(
 
To avoid these ads, REGISTER NOW!
Top Bottom