
You are using an out of date browser. It may not display this or other websites correctly.
You should upgrade or use an alternative browser.
You should upgrade or use an alternative browser.
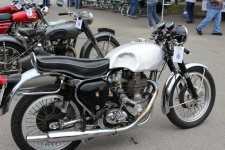
Motorcycle Build
- Thread starter indisguise
- Start date


OP
indisguise
Well-known member
Just a quick question. How do you like the Swag hydraulic kit for your JD2 bender? I have a JD2 bender and have been thinking about doing the upgrade.
Hi Bopbop, I have yet to use the bender in anger. Therefore I can't really say anything with regards to operation. However the quality of the kit was excellent. I will keep you posted.
Thanks all for the fantastic replies around BSA's...I seem to have unearthed a few British bike fans....just remember: If its not leaking oil Worry!
OP
indisguise
Well-known member
Good news...The parts arrived.

The bearings were installed onto the spindle following the great instructions outlined here:
http://www.lathes.co.uk/southbend/1954-south-bend-rebuild.pdf

Then many hours were "phaffed" away messing with spindle shims.... The spindle had some heavy wear which was causing it to bind . Anyway after a lot of "back and forth" I ended up with spindle play of .015 on the rear, which is great, but 0.3 on the front. Therefore the front is running about .001 over. Reducing this to .002 resulted in a binding spindle...
I'm not interested in replacing the spindle....I'm here to build bikes not lathes!
After "chucking" some 4130 the finish looks pretty decent.

OK now it's time to remake those frame mounts.
The bearings were installed onto the spindle following the great instructions outlined here:
http://www.lathes.co.uk/southbend/1954-south-bend-rebuild.pdf
Then many hours were "phaffed" away messing with spindle shims.... The spindle had some heavy wear which was causing it to bind
. Anyway after a lot of "back and forth" I ended up with spindle play of .015 on the rear, which is great, but 0.3 on the front. Therefore the front is running about .001 over. Reducing this to .002 resulted in a binding spindle...I'm not interested in replacing the spindle....I'm here to build bikes not lathes!
After "chucking" some 4130 the finish looks pretty decent.
OK now it's time to remake those frame mounts.
OP
indisguise
Well-known member
I previously mentioned it was time to start on the frame mounts...Well this dastardly old lathe decided otherwise...
I started on another frame mount and quickly noticed the quality of the external finish was still pretty dismal. However the internal boring was just fine.

I previously mentioned the front spindle bearing is at .003 (read too much) and this was clearly causing the finish issues. Damn it... At this point I thought about scraping the machine....however the financial investment in this huge paper weight is now well over 4K! So.....time to brush off the emotions and play Shim Bingo...

After some fine fettling, I managed to produce a spindle that:
Anyway lets get past this saga and see if its any better...I'm surprised anyone is still reading....
Two new mounts:

And started on the front mounts. The finish is still not perfect...but it's as close as this old lathe gets...or is it...as close as this grumpy old ******* gets !
Some designs changed..

and now onto the second set of mounts...

And time to read more on feeds and speeds...

For those still awake....I have found that the Kyocera Cement inserts are performing better than Kennemetal...
Onwards...
I started on another frame mount and quickly noticed the quality of the external finish was still pretty dismal. However the internal boring was just fine.
I previously mentioned the front spindle bearing is at .003 (read too much) and this was clearly causing the finish issues. Damn it... At this point I thought about scraping the machine....however the financial investment in this huge paper weight is now well over 4K! So.....time to brush off the emotions and play Shim Bingo...
After some fine fettling, I managed to produce a spindle that:
- Did not lock up.
- Had a clearance of .001"
Anyway lets get past this saga and see if its any better...I'm surprised anyone is still reading....
Two new mounts:
And started on the front mounts. The finish is still not perfect...but it's as close as this old lathe gets...or is it...as close as this grumpy old ******* gets !
Some designs changed..
and now onto the second set of mounts...
And time to read more on feeds and speeds...
For those still awake....I have found that the Kyocera Cement inserts are performing better than Kennemetal...
Onwards...
Last edited:
OP
indisguise
Well-known member
The machining continues... The lathe is constantly getting tuned and parts are slowly appearing.
These are the mounts for the frame + steering neck.

The steering neck is not complete.. I need to purchase a boring bar that allows some internal reach. I'm struggling to remove the internal metal when the bearing rest obstructs the tool. NOOB issues for sure..

You will notice that many of the parts have little "battle scars". These all stem from learning "on the job". I have found that many people hide these failures when posting online. Personally I think they show the acquisition of knowledge..and should be shared. Hopefully sharing imperfection results in more people trying things for themselves. Some of the highlights were:
Battle scars from a loose chuck...This one could have been dangerous...

The front mounts required hand filing to provide clearance for the left side engine cases. One day I will own a Mill...

The mounts were attached to the engine to ensure they worked.

And a little "mojo boost"....

Sadly I quickly found that the Ducati 848 EVO has a different rear spindle than a 1198. Hence the wheel is not attached.
These are the mounts for the frame + steering neck.
The steering neck is not complete.. I need to purchase a boring bar that allows some internal reach. I'm struggling to remove the internal metal when the bearing rest obstructs the tool. NOOB issues for sure..
You will notice that many of the parts have little "battle scars". These all stem from learning "on the job". I have found that many people hide these failures when posting online. Personally I think they show the acquisition of knowledge..and should be shared. Hopefully sharing imperfection results in more people trying things for themselves. Some of the highlights were:
- Scoring the outside of a mount when removing the carriage.
- Scoring the inside bore due to loose tooling...
- Having the neck come loose in the chuck causing dents in the finish when it flew out...
Battle scars from a loose chuck...This one could have been dangerous...
The front mounts required hand filing to provide clearance for the left side engine cases. One day I will own a Mill...
The mounts were attached to the engine to ensure they worked.
And a little "mojo boost"....
Sadly I quickly found that the Ducati 848 EVO has a different rear spindle than a 1198. Hence the wheel is not attached.
Last edited:
ez-duzit
Well-known member
...many of the parts have little "battle scars". These all stem from learning "on the job"...
Fine way to learn. That's how I am doing it--bought an ancient lathe and mill, and just started making chips.
OP
indisguise
Well-known member
Quick update prior to the holidays....
The rear swing arm mounts were bothering me. The scale looked wrong. Therefore I changed the dimensions a little....much better. FYI the lathe is working a lot better. Only parting is an issue currently....

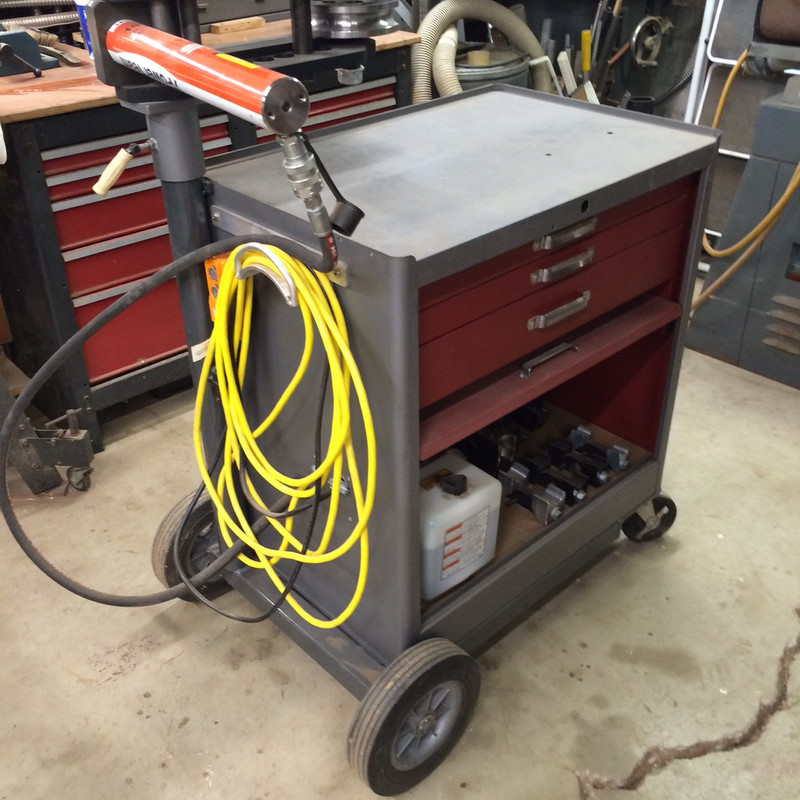
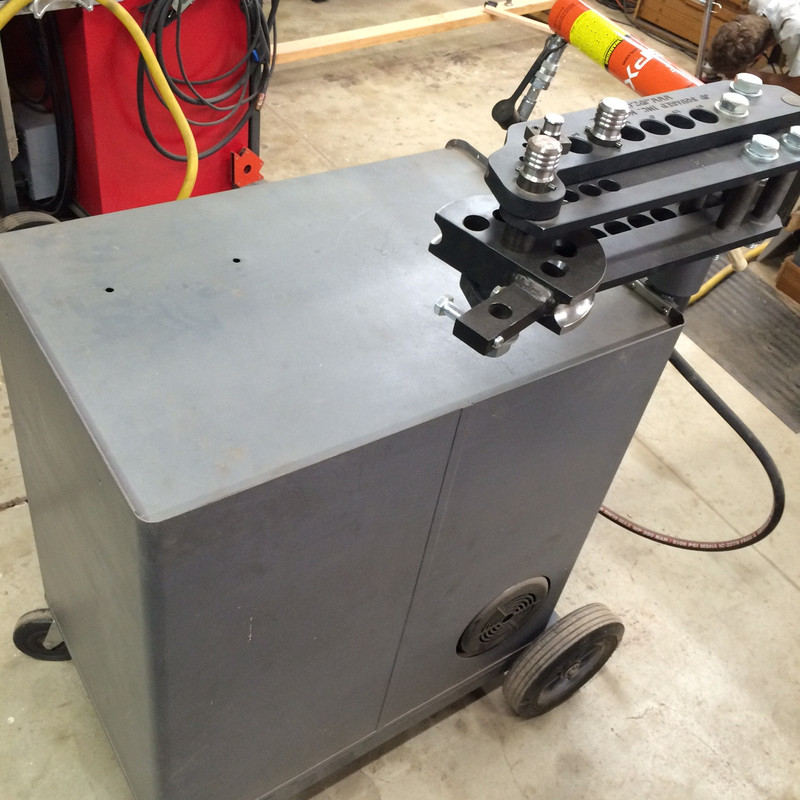
Now I need to bend some tubes....The addition of the hydraulic cylinder to the bender made it cumbersome. Therefore as mentioned previously, I need to make a stand!. Sadly I'm completely out of space...therefore every tool needs to be modular.

And yes it looks precarious at the end of the lift...but its extremely stable and the post was placed appropriately for the moving weight.

This was a quick one hour build.... Not the neatest welding as it just needs to work....and 120 Amps is about as much as 110V will handle...
The weight on the lift is slowly increasing... Engine...tons of tools...a metric S%$t ton of metal and now a bender. Its also used heavily for welding.....so its doing its job!. However I did place some jack stands underneath in case of any issues.

On another note... I will give another shameless mention to two very cheap tools. Now these are literally a last resort...buy better if you can...and I would much rather have better tools. However we all start somewhere...
The worlds most underpowered drill press. I have used and abused this one and it keeps on going. Its not really designed for metal, however that's what it does. I replaced the chuck and runout is now much much better..
The WEN...This was all of $69 5 years ago!

And then the almighty 4x6 from Harbor Freight. Change the blade and it cuts forever!!! $210 well spent over 5 years ago.

Anyway happy holidays all.
The rear swing arm mounts were bothering me. The scale looked wrong. Therefore I changed the dimensions a little....much better. FYI the lathe is working a lot better. Only parting is an issue currently....
Now I need to bend some tubes....The addition of the hydraulic cylinder to the bender made it cumbersome. Therefore as mentioned previously, I need to make a stand!. Sadly I'm completely out of space...therefore every tool needs to be modular.
And yes it looks precarious at the end of the lift...but its extremely stable and the post was placed appropriately for the moving weight.
This was a quick one hour build.... Not the neatest welding as it just needs to work....and 120 Amps is about as much as 110V will handle...
The weight on the lift is slowly increasing... Engine...tons of tools...a metric S%$t ton of metal and now a bender. Its also used heavily for welding.....so its doing its job!. However I did place some jack stands underneath in case of any issues.
On another note... I will give another shameless mention to two very cheap tools. Now these are literally a last resort...buy better if you can...and I would much rather have better tools. However we all start somewhere...
The worlds most underpowered drill press. I have used and abused this one and it keeps on going. Its not really designed for metal, however that's what it does. I replaced the chuck and runout is now much much better..
The WEN...This was all of $69 5 years ago!
And then the almighty 4x6 from Harbor Freight. Change the blade and it cuts forever!!! $210 well spent over 5 years ago.
Anyway happy holidays all.
OP
indisguise
Well-known member
Hi folks.
So one step forward and TWO giant steps back and I would love some advice.
Just for context, I'm still a beginner welder but I have a little "seat time". While a little hot its not the worst I have seen (4130).

I started bending tubes for the frame....

This included coping, which was not perfect, but passable:

Then I drilled some expansion holes..Looks odd...yes..

Then proceeded to tack weld in place and...it started going south at pace.
Nothing to see here...a tiny bit hot...but nothing serious.

This is where I failed to change the setting (change of mount thickness)...and proceeded to dump too much heat into the weld...arghhh. You can see the crater where I backed off too quickly when i realized...FAIL.

Thinking I could deal with that (completely incorrect) I moved to the underside with new settings.... sadly it went very wrong and some debris blew out the weld...
Therefore I cut out the the tube..and sanded everything back and threw out the tube. Here is the question. The mount below was the one that had too much heat. Is it OK to reuse?
Here is a picture of the cleanup and you can see a slight pin ***** where the weld was. This potentially could cause a brittle spot in 4130. Thoughts.....

So one step forward and TWO giant steps back and I would love some advice.
Just for context, I'm still a beginner welder but I have a little "seat time". While a little hot its not the worst I have seen (4130).
I started bending tubes for the frame....
This included coping, which was not perfect, but passable:
Then I drilled some expansion holes..Looks odd...yes..
Then proceeded to tack weld in place and...it started going south at pace.
Nothing to see here...a tiny bit hot...but nothing serious.
This is where I failed to change the setting (change of mount thickness)...and proceeded to dump too much heat into the weld...arghhh. You can see the crater where I backed off too quickly when i realized...FAIL.
Thinking I could deal with that (completely incorrect) I moved to the underside with new settings.... sadly it went very wrong and some debris blew out the weld...
Therefore I cut out the the tube..and sanded everything back and threw out the tube. Here is the question. The mount below was the one that had too much heat. Is it OK to reuse?
Here is a picture of the cleanup and you can see a slight pin ***** where the weld was. This potentially could cause a brittle spot in 4130. Thoughts.....
Last edited:
Im certainly not a metallurgist, and a novice welder. Take any my opinions with a fistful of salt.
In your place, these are the questions I’d be asking:
1. Will a brittle point break the rest of the weld / do I have ample welded surface elsewhere?
2. Is failure likely to be catastrophic? If the weld breaks, will the frame break apart at speed?
3. If I reuse the piece, will I still be able to sleep at night?
Opinions courtesy of your friendly internet armchair engineer,
Jake
ez-duzit
Well-known member
8--good post.
OP
indisguise
Well-known member
3. If I reuse the piece, will I still be able to sleep at night?
@Jake28 I like the way you think! Time to fire up the lathe...that’s the reason I own one...right?
OP
indisguise
Well-known member
The lathe was promptly placed into action..voila!

One of the huge issues with tube "mockups" is the inability to clamp and position the material. This is critical when measuring angles for notching. Therefore I came up with a simple solution:

It relies on tubing blocks from paragonmachineworks. This setup allows more accuracy.
The blocks themselves come in multiple sizes making this fairly easy.

In the last picture the tube is slightly over notched. While the angles were perfect, the cutting was not. Another valuable lesson here. Sneak up on the final fitment. Time to redo.
The "bone yard" of 4130 is growing and there is still not one tube in place...I guess its time to buy shares in steel. Either way all of this will become useful for practice welding.

The pile to the right is 065" test tubing, while the one of the left is .083. I have settled on .083 as its easier to weld.
I have great respect for the folks building these incredible hand built bicycles. The skills required to undertake this style of work is mind blowing......
One of the huge issues with tube "mockups" is the inability to clamp and position the material. This is critical when measuring angles for notching. Therefore I came up with a simple solution:
It relies on tubing blocks from paragonmachineworks. This setup allows more accuracy.
The blocks themselves come in multiple sizes making this fairly easy.
In the last picture the tube is slightly over notched. While the angles were perfect, the cutting was not. Another valuable lesson here. Sneak up on the final fitment. Time to redo.
The "bone yard" of 4130 is growing and there is still not one tube in place...I guess its time to buy shares in steel. Either way all of this will become useful for practice welding.
The pile to the right is 065" test tubing, while the one of the left is .083. I have settled on .083 as its easier to weld.
I have great respect for the folks building these incredible hand built bicycles. The skills required to undertake this style of work is mind blowing......
Last edited:
[mention]indisguise [/mention] kudos for putting in the extra effort and reaching your own conclusions to reach the level of comfort that you want.
For what it’s worth, the tolerances you’re trying to hit are likely higher than what went into decades of motorcycle mass production.
When I was building my first bicycle aiming to get my jig and frame to match my plans with millimeter precision, a friend reminded me that people used to build frames on chunks of old railroad track and scrap iron. When I pulled my jig out of the frame for the first time, I had to move the dropouts nearly half an inch into alignment. It rides fine.
I’m often a hack and impatient, and in your shoes I’d likely be throwing extra filler rod at the problem. Thanks for sharing the journey.
OP
indisguise
Well-known member
Finally a small amount of progress. The weather here is atrocious, as with the rest of the country, and working in the garage is hard when its this cold.
I now have both downtubes ready to tack weld. Getting the compound notches is hard...

The coped tubing is not perfect but should be fine.


Someone previously asked about the swag off-road addition to the JD2. Its been used in anger for a while now, and I would highly recommend this to anyone running a Model3 or Model32. Mine is running from a small compressor and works great. Repeatable bends every time!

On other news I'm slightly concerned about the quality of Starrett's hole saws recently. I have been using them for years with great success, but recently I have burnt through 3 in short succession. Below is a picture of a Bosch, Starrett and a Bulldozer...The Starett shown has been used roughly 7 times while the rest have been used 20+....I'm seriously thinking about moving brands as the Starretts are loosing teeth quickly (heavily oiled)

WRT to tools, I will give a huge shout out to Empire Abrasives....These drum sanders are really helping.

I now have both downtubes ready to tack weld. Getting the compound notches is hard...
The coped tubing is not perfect but should be fine.
Someone previously asked about the swag off-road addition to the JD2. Its been used in anger for a while now, and I would highly recommend this to anyone running a Model3 or Model32. Mine is running from a small compressor and works great. Repeatable bends every time!
On other news I'm slightly concerned about the quality of Starrett's hole saws recently. I have been using them for years with great success, but recently I have burnt through 3 in short succession. Below is a picture of a Bosch, Starrett and a Bulldozer...The Starett shown has been used roughly 7 times while the rest have been used 20+....I'm seriously thinking about moving brands as the Starretts are loosing teeth quickly (heavily oiled)
WRT to tools, I will give a huge shout out to Empire Abrasives....These drum sanders are really helping.
ez-duzit
Well-known member
...Someone previously asked about the swag off-road addition to the JD2. Its been used in anger for a while now, and I would highly recommend this to anyone running a Model3 or Model32. Mine is running from a small compressor and works great. Repeatable bends every time!...
Pretty hard to beat the hydraulic power pack that is supplied by JD2. Here it is shown with the motor and pump mounted inside my bending cart.
OP
indisguise
Well-known member
Pretty hard to beat the hydraulic power pack that is supplied by JD2. Here it is shown with the motor and pump mounted inside my bending cart.
I was so close to purchasing the one you have, as my lift uses a hydraulic pump. However I had a spare HF air over hydraulic ram. Therefore my total outlay was $600 as apposed to $800. I dare the say the extra $200 is well worth it......however this is working well so far.
OP
indisguise
Well-known member
Slow progress...but progress...
Hey folks,
Its been a while.... I had to concentrate on my new found talent!
Accumulating scrap metal!!!

The good news is there was success...

The miters are also fine....not Cycle builder perfect... but passable for a complete novice.


I'm slowly understanding the need for specialized tooling...Things became easier once these were purchased.

Onwards......
Hey folks,
Its been a while.... I had to concentrate on my new found talent!
Accumulating scrap metal!!!
The good news is there was success...
The miters are also fine....not Cycle builder perfect... but passable for a complete novice.
I'm slowly understanding the need for specialized tooling...Things became easier once these were purchased.
Onwards......
OP
indisguise
Well-known member
I warned you all it would get slow....that might be a huge understatement...its positively glacial on the progress front. Some of updates might possibly be a little "dry".....
The second upper frame rail is in place.

Sadly this highlights a potential issue in my design. As you can see below, the width of the frame near the seat is quite wide. Not ideal...but not a complete failure either....Only time will tell if this creates an uncomfortable seating position. If it does.....I will just build another frame

I had some issues with the next tube....I originally intended it to follow the curve of the upper tube. Unfortunately this would take more tooling...which I'm not prepared to splurge on at the moment. Therefore the design was modified.


Although this tube looks passable from afar.......closer inspection reveals otherwise...another one for the practice welding pile

Its not sitting high enough either...

The second upper frame rail is in place.
Sadly this highlights a potential issue in my design. As you can see below, the width of the frame near the seat is quite wide. Not ideal...but not a complete failure either....Only time will tell if this creates an uncomfortable seating position. If it does.....I will just build another frame
I had some issues with the next tube....I originally intended it to follow the curve of the upper tube. Unfortunately this would take more tooling...which I'm not prepared to splurge on at the moment. Therefore the design was modified.
Although this tube looks passable from afar.......closer inspection reveals otherwise...another one for the practice welding pile
Its not sitting high enough either...
OP
indisguise
Well-known member
Its amazing how time effects aesthetics....I came back to my modified frame design this morning and immediately my eye showed some flaws....

The front of the "hoop" is appealing and flows nicely. The rear is jarring, and the transition into the upper tube, near the mount, is painful.....
So guess what....I "splurged" and purchased a smaller die for the bender. The current die is 4.5" CLR the new one is 3.5" CLR. The tube is 1.25" so we should be close.....
Only time will tell... he who dies with the most tools wins!
mike528
Well-known member
as far as the bending mount goes I got swag's figure 8 mounting plate and have anchors in the floor to mount mine. with the length of tubes your bending it may not be an issue in your garage though. I still need to get some smaller dies and a hydraulic ram for it though.
That's a cool project! Are you going to get an aftermarket motorcycle exhaust
or build a custom one?
Looking forward to seeing more updates. Good luck, dude!
or build a custom one?
Looking forward to seeing more updates. Good luck, dude!
OP
indisguise
Well-known member
That's a cool project! Are you going to get an aftermarket motorcycle exhaust
or build a custom one?
Looking forward to seeing more updates. Good luck, dude!
Thanks warrens. The idea is to build as much as possible. The frame, tank, seat and exhaust will be custom. This is a huge endeavor and I have a lot to learn. However I find the knowledge acquisition a fun adventure.
The updates are going to be sparse for a while, as I'm moving again....luckily it's local this time. However the new space will allow a much needed addition....A Bridgeport mill!!! Keep you folks posted.
OP
indisguise
Well-known member
The move is now complete! I told you updates would be sparse
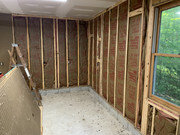
The new property has a main garage, for cars and family stuff and a separate shop! The shop needs some work though....
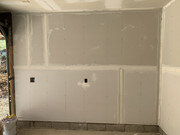
Here's the inside.


You will notice all the tools are in the center. This is due to the following:

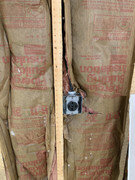
The walls are essentially just pegboard covering the insulation. This seems like a fire hazard waiting to happen. Therefore its time to rip down the pegboard and replace it with fire retardant sheetrock. The chances of a hot spark getting behind the peg board are high with the work being undertaken.....
Therefore progress will be halted for just a little longer.
The new property has a main garage, for cars and family stuff and a separate shop! The shop needs some work though....
Here's the inside.
You will notice all the tools are in the center. This is due to the following:
The walls are essentially just pegboard covering the insulation. This seems like a fire hazard waiting to happen. Therefore its time to rip down the pegboard and replace it with fire retardant sheetrock. The chances of a hot spark getting behind the peg board are high with the work being undertaken.....
Therefore progress will be halted for just a little longer.
Attachments


driftpin
Well-known member
A wise move, to use gypsum board to help prevent 'hot-work' from burning the shop down.
OP
indisguise
Well-known member
I started with .065 4130...but realized I'm no Walt Siegl. Then moved to .083 which will be heavier, but more forgiving when welding.What material and thickness is tubing you're using?
OP
indisguise
Well-known member
Hey folks,
The year is coming to and end and I thought I would update this thread.
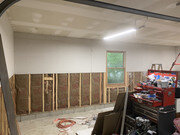
The project to update the garage has taken far longer than expected. The new house faced many issues and the lack of available contractors was an issue. I decided to tackle this project myself and contract the roofing job (which seemed easier), after several contractors cancelled on the drywall job. This is my first time attempting drywall...... Youtube again saved the day and watching several snippets from Vancouver Carpenter helped a lot. The 8ft sheets of 5/8 drywall proved challenging without help, however it is slowly moving along.
The roof was leaking internally, so I had it replaced. Wise decision:

Job done:

Next I had to remove the pegboard which was held in by hundreds of screws...tedious...


A 240V feed was added while I had easy access to the studs..

Then I started the painful job of hanging 70lb 5/8" drywall by myself.


The existing ceiling had cracks along the drywall seams. The sheets were held in place with nails that slipped.I removed the existing tape and placed screws alongside the nails..

I'm currently tackling taping. Its slow going due to other commitments and my lack of experience.


Hopefully I get this completed over the next month.
The year is coming to and end and I thought I would update this thread.
The project to update the garage has taken far longer than expected. The new house faced many issues and the lack of available contractors was an issue. I decided to tackle this project myself and contract the roofing job (which seemed easier), after several contractors cancelled on the drywall job. This is my first time attempting drywall...... Youtube again saved the day and watching several snippets from Vancouver Carpenter helped a lot. The 8ft sheets of 5/8 drywall proved challenging without help, however it is slowly moving along.
The roof was leaking internally, so I had it replaced. Wise decision:
Job done:
Next I had to remove the pegboard which was held in by hundreds of screws...tedious...
A 240V feed was added while I had easy access to the studs..
Then I started the painful job of hanging 70lb 5/8" drywall by myself.
The existing ceiling had cracks along the drywall seams. The sheets were held in place with nails that slipped.I removed the existing tape and placed screws alongside the nails..
I'm currently tackling taping. Its slow going due to other commitments and my lack of experience.
Hopefully I get this completed over the next month.
Attachments


Last edited:
Htscheg
Well-known member
Looks great so far!!
Boosted1
Well-known member
sheetrock looks good.
OP
indisguise
Well-known member
Wow the updates have got glacial again!
The good news... The garage is getting there. I had to learn this sheetrock "game" and the mudding part was tedious in the cold Indiana winter.... Anyway the garage space is close to getting done. The walls look good but the repairs to the ceiling could be better.
I chose the cheapest paint on the planet, Valspar 4000. I now know why its cheap...not great coverage.

however for a garage its good!

So what's next....
Well the list has grown and will delay this build a little but the order of operations will be:
The good news... The garage is getting there. I had to learn this sheetrock "game" and the mudding part was tedious in the cold Indiana winter.... Anyway the garage space is close to getting done. The walls look good but the repairs to the ceiling could be better.
I chose the cheapest paint on the planet, Valspar 4000. I now know why its cheap...not great coverage.
however for a garage its good!
So what's next....
Well the list has grown and will delay this build a little but the order of operations will be:
- Build some shelving to store things...
- Update my workbench to make it more rigid.
- Upgrade the motorcycle lift.
- Its been rusting in the humid conditions and needs sanding and painting.
- I want to replace the 2x1 material used for 3x1. This was the original plan.
- The lifting speed and motion is fantastic, however the lowering is jerky. I need to fix some binding and relocate the cylinder.
- Find a bridgeport mill and get the Lathe installed.
OP
indisguise
Well-known member
Update time...
I decided to purchase some shelving to speed up the process. This allowed my to spend time making the workbench more rigid. Heres some messy shots:

And the other angle...

However some of you might be wondering why the lift is upside down. Well this is why....

The moisture in the new garage is sky high...so time to add a dehumidifier and fix the lift.

This little machine fills completely in 10 hours. I need to run that drain pipe quickly.
I will continue on in the lift build thread for now.... DIY Motorcycle Lift
I decided to purchase some shelving to speed up the process. This allowed my to spend time making the workbench more rigid. Heres some messy shots:
And the other angle...
However some of you might be wondering why the lift is upside down. Well this is why....
The moisture in the new garage is sky high...so time to add a dehumidifier and fix the lift.
This little machine fills completely in 10 hours. I need to run that drain pipe quickly.
I will continue on in the lift build thread for now.... DIY Motorcycle Lift
OP
indisguise
Well-known member
Ok we are almost back to "regular programming"...almost....
The lift got overhauled, I just need to install the speed control (needle valve):
Lift overhaul
Before setting up the lift with the motor I needed to address the rusty frame mounts. A simple mount was built using a bolt and some spacers.

This was chucked in the drill press and then attacked with a pipe sander. Super quick and came out great. I would usually leverage the Lathe for this operation, however the observant will notice that wonderful piece of machinery is nowhere to be seen.....thats an adventure for another day.

And Voila all done in 10 minutes...

Next the engine was placed back on the lift and everything re-leveled. This takes time and is incredibly important. Now that this is done I feel like I'm back on track and ready to get going again. Just a brief 18 month pause I did warn you folks.

The lift got overhauled, I just need to install the speed control (needle valve):
Lift overhaul
Before setting up the lift with the motor I needed to address the rusty frame mounts. A simple mount was built using a bolt and some spacers.
This was chucked in the drill press and then attacked with a pipe sander. Super quick and came out great. I would usually leverage the Lathe for this operation, however the observant will notice that wonderful piece of machinery is nowhere to be seen.....thats an adventure for another day.
And Voila all done in 10 minutes...
Next the engine was placed back on the lift and everything re-leveled. This takes time and is incredibly important. Now that this is done I feel like I'm back on track and ready to get going again. Just a brief 18 month pause
I did warn you folks. RoninB4
Well-known member
As a long time toolmaker I applaud what you're doing, not an easy or simple project to undertake for your first (or 20th) build. For using crappy or worn machines where you're not satisfied with the finish I might suggest getting within .0015 of final size for the OD and then using emery cloth (carborundum or aluminum oxide) to improve the finish (320-600 grit) to your liking. Yes it takes a bit longer to do, you have to cool down the heated metal before measuring and care must be taken along with multiple measurements to ensure a constant cylinder size but it produces a good finish where required/desire.
The ID will be another matter. A length of round stock with a 1" long slit will hold the emery cloth wound around it, wind the cloth in the opposite direction of the lathe rotation so it stays put. Use this in the ID to remove that last .001 but be careful not to "bell mouth" the bore, I always take more time to polish the back end of the bore before working on the front/mouth.
I like that you're using hand drawn sketches for record keeping and documentation, do you have CAD software to assist your efforts? Often it helps where compound angles of tubing join. PM sent, not looking for money.
Attachments
OP
indisguise
Well-known member
I think this makes a lot of sense. It also helps "sneak up" on those final machining passes. As mentioned, this is all new territory for me and I really appreciate great feedback like this. Keep the tips coming.I might suggest getting within .0015 of final size for the OD and then using emery cloth (carborundum or aluminum oxide) to improve the finish (320-600 grit) to your liking.
OP
indisguise
Well-known member
Soooo...I got side tracked again. Side projects seem to be the new normal. If only mine were as fun as those undertaken in the YouTube channel called Inheritance Machinery ...
Project Number 1
My metal grinding station was pathetic. I reused a free table that was left in the garage when I purchase the house. Unfortunately the lack or "real estate" makes this almost useless. Not to mention the buckling shelf....I might have overloaded that

You can clearly see other tools just left on the floor...not ideal.
I decided to raid my "spare" wood pile .........and this was the result. Total cost $0. Nothing fancy but way way better than the above.

It also happens to work rather well.....

Project Number 2
Now the observant will notice that my lathe magically appeared in that photo above. This was no easy move, considering my garage is situated in a woods making access a pain. However I got some help and I now have access to my lathe again. WIN!
I changed the leveling feet to use cheap Vevor items mentioned by other folks. These are $35 for 4 and serve as leveling feet and wheels. While these don't really work for larger machinery, they seem todo the job very well for the Southbend. One of the main criticisms is that you can't adjust the leveling pad with load on the wheel. Honestly this is not a huge issue as the lathe is fairly light. The method shown below took seconds....

This little scissor platform has been amazing...I use it all the time.
After the lathe was in place I (again) re-adjusted the spindle bearings on the lathe. This has been plaguing me for quite some time and I finally found the issue. For some reason one of the bearing caps is damaged and another is on the way. I have no idea how a bearing cap gets damaged.....but it is.
Project Number 3
While building the motorcycle frame, I continually reach the point where I need a mill..or at least I think I do....I have been mentioning for a while that I have been wanting a Bridgeport and I finally pulled the trigger and got one...it was not cheap.......
Heres the mill being moved into place with the head inverted...and its incredibly heavy.....

The mill seems in fairly good condition. There is a little wear on the table ways but you still see most of the hand scrapping....The table seems to have very few "accidents" and overall it seems very decent. I paid $3700 for this, site unseen which was a huge risk, however I feel like this machine was worth every penny. Sadly the shipping was not cheap and then I had to contend with getting the mill into the garage...... This involved renting a 4x4 telehandler and driving the mill down a busy road, up my drive way, through the forest and into my garage.... I wish I captured more photos...We even passed the police while driving this on public roads...just my luck.

The next post will probably highlight:
Project Number 1
My metal grinding station was pathetic. I reused a free table that was left in the garage when I purchase the house. Unfortunately the lack or "real estate" makes this almost useless. Not to mention the buckling shelf....I might have overloaded that
You can clearly see other tools just left on the floor...not ideal.
I decided to raid my "spare" wood pile .........and this was the result. Total cost $0. Nothing fancy but way way better than the above.
It also happens to work rather well.....
Project Number 2
Now the observant will notice that my lathe magically appeared in that photo above. This was no easy move, considering my garage is situated in a woods making access a pain. However I got some help and I now have access to my lathe again. WIN!
I changed the leveling feet to use cheap Vevor items mentioned by other folks. These are $35 for 4 and serve as leveling feet and wheels. While these don't really work for larger machinery, they seem todo the job very well for the Southbend. One of the main criticisms is that you can't adjust the leveling pad with load on the wheel. Honestly this is not a huge issue as the lathe is fairly light. The method shown below took seconds....
This little scissor platform has been amazing...I use it all the time.
After the lathe was in place I (again) re-adjusted the spindle bearings on the lathe. This has been plaguing me for quite some time and I finally found the issue. For some reason one of the bearing caps is damaged and another is on the way. I have no idea how a bearing cap gets damaged.....but it is.
Project Number 3
While building the motorcycle frame, I continually reach the point where I need a mill..or at least I think I do....I have been mentioning for a while that I have been wanting a Bridgeport and I finally pulled the trigger and got one...it was not cheap.......
Heres the mill being moved into place with the head inverted...and its incredibly heavy.....
The mill seems in fairly good condition. There is a little wear on the table ways but you still see most of the hand scrapping....The table seems to have very few "accidents" and overall it seems very decent. I paid $3700 for this, site unseen which was a huge risk, however I feel like this machine was worth every penny. Sadly the shipping was not cheap and then I had to contend with getting the mill into the garage...... This involved renting a 4x4 telehandler and driving the mill down a busy road, up my drive way, through the forest and into my garage.... I wish I captured more photos...We even passed the police while driving this on public roads...just my luck.
The next post will probably highlight:
- Wiring the VFD and testing the Mill.
- Purchasing some tooling and a good machinist vice
- Fixing the lathe again...
Last edited:
OP
indisguise
Well-known member
The mill is now in its final resting place and the ways were oiled. It seems very smooth...

And now the first side project on the mill. There is a sliced wire on the power feed. This wire connects the limit switch to the main unit.

So out with the tools to remove the power feed.

Power feed in pieces so I can replace the wire:


So now I have the Lathe AND the Mill in pieces
Heres the lathe...


However I feel much happier seeing a garage with a nice selection of machines....

I might rename this section from Motorcycle Build to Side Projects
And now the first side project on the mill. There is a sliced wire on the power feed. This wire connects the limit switch to the main unit.
So out with the tools to remove the power feed.
Power feed in pieces so I can replace the wire:
So now I have the Lathe AND the Mill in pieces
Heres the lathe...
However I feel much happier seeing a garage with a nice selection of machines....
I might rename this section from Motorcycle Build to Side Projects
johno
Well-known member
Nice shop, even better you have the skills to use those machines.
johno
Well-known member
Its amazing how time effects aesthetics....I came back to my modified frame design this morning and immediately my eye showed some flaws....
The front of the "hoop" is appealing and flows nicely. The rear is jarring, and the transition into the upper tube, near the mount, is painful.....
So guess what....I "splurged" and purchased a smaller die for the bender. The current die is 4.5" CLR the new one is 3.5" CLR. The tube is 1.25" so we should be close.....
Only time will tell... he who dies with the most tools wins!

Does that serve much purpose when the engine is a stressed member of the frame?
OP
indisguise
Well-known member
Not really and I have removed this piece in the final design. As you mentioned, it felt like overkill.Does that serve much purpose when the engine is a stressed member of the frame?
johno
Well-known member
Not really and I have removed this piece in the final design. As you mentioned, it felt like overkill.
How about that, i got something right.
Thanks.