awdblazer
Well-known member
lets see the rims!!!

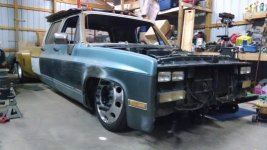
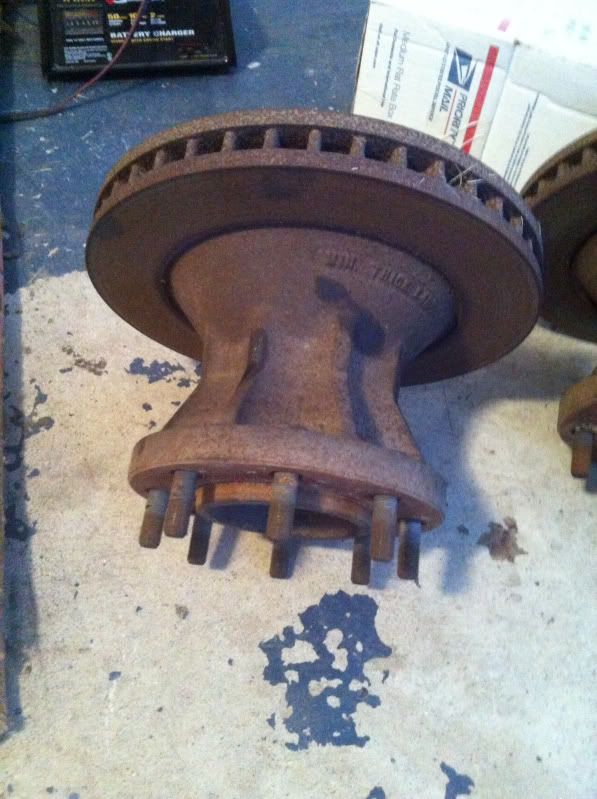
Holy ****!!! Those adapters look massive next to the rotors. And then they are cantalievered out so far fron the bearings. Are you sure this safe? Will you be adding larger rotors to comp for the wheels? And what about bearing fairure under heavy loads.
Chris
It is safe, the way those adapters are designed the wheel mounting surface is pretty close to being in line with the factory wheel mounting surface. If you look at the back the flange is recessed. While the mount is "cantilevered" out, simple physics will show you that with the deep offset dually wheels the load will still be placed very close to the same point on the bearings as the stock setup.
It is safe, the way those adapters are designed the wheel mounting surface is pretty close to being in line with the factory wheel mounting surface. If you look at the back the flange is recessed. While the mount is "cantilevered" out, simple physics will show you that with the deep offset dually wheels the load will still be placed very close to the same point on the bearings as the stock setup.
Wow. If you say so. Id still like to see the two side by side before Id fully believe it. And still will you be running larger rotor to comp for the large wheel mass. Pulling heavy loads is a real *** pucker with out awesome brakes.
Chris


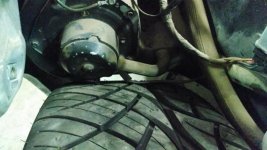
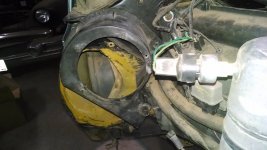
If your not already, find a forum for these trucks and search. Blower motor mods. I know s10's do them to tuck big wheels and they can keep 3/4 or more of the function after its cut down and reinstalled.
i dont know if you seen this
I owned a '78 GMC Dually and an '85 Chevy Dually...both 454's...
I personally paid for , at least, that six lane street, on the coast in Kuwait...
Mine were single cabs, are were real good at kidney relocation...
Like your Buick...

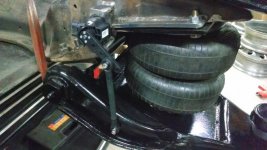
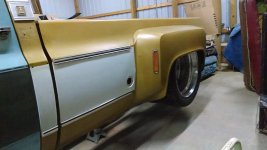
looks nice and clean. i like the mounts you built for the sensors. i keep forgetting that the whole cradle is out of the truck. i bet that makes things alot easier
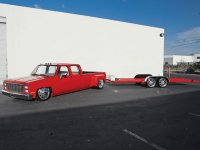
Very nice, I love the Townastys, I must have missed it, but what are you running for inners?

Your work is top notch but after seeing all of this I'm glad I decided on the 19.5s instead off 22.5s, keep up the good work, can't wait to see the finished article.