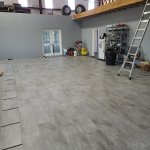
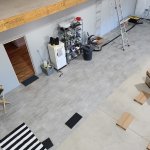
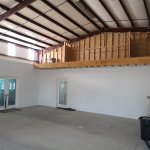
Before and After
The floor is fairly easy to install, by far the best locking floor system I have ever worked with. The sub floor needs to be level, make sure to level as best as possible first to keep the joints sealed from water. Make sure every tile is tight while pounding with the mallet to insure a good seal. You can see small gaps, check ever tile after pounding. Use a bar for laminate/vinyl flooring as needed. Pitch does not matter, level does.
It took 14 hours to lay about 700 sqft. This does not include prep time. I have 1 box of tiles left (7 tiles), factoring 10% over your footage was a perfect calculation for me.
Watch your mallet on the corners, it can crack the top coating. Hold the tile tight and wack it on the middle of the joint, the tile will do most of the work locking in. I thought of this late but there may be an effective way to shim or level the floor if you find yourself in areas that are not flat.
Tooth count didn't seem to matter much all cuts were very clean. Miter saw 84 tooth triple chip yet table 24 tooth stock blade and they looked identical.
Tools Used:
• Compound miter saw
• Table Saw
• Jig Saw
• Shop Vac, brooms
• Knee pads
• Mallet
• Locking floor bar
• Pre cut 3/8" spacers
• Chalk line
• Levels
• Marker
• Tape measure
• Caulk gun
• Utility knife
• Silicone
• Shims
• Expansion joint filler
• Self leveling compound
• Jack Daniels
Next up: Paint ceiling black, slatwall, cabinets, vertical racks lighting, finish work