To avoid these ads, REGISTER NOW!

Between 265 & 485 SQ/FT Nick's Two-Car Detached Vdub Garage

Workspaces sized between 265 and 485 squarefeet.
To avoid these ads, REGISTER NOW!

bj383ss

Well-known member
Joined
Sep 29, 2011
Messages
3,166
Location
TX
Thanks, guys! Yes, I am very lucky to have several fiber options (I do live in a metro area), but most of all lucky to have a locally-based ISP (not one of the huge corporations like Comcast). They have great customer service, local phone support, and reasonably-priced Gigabit speeds. I keep most things hardwired in my home, so real world speeds are usually 950 Mbps + for most devices.

My work is in video editing and I often have to transfer large bits of data to and from our office when I’m working from home, so the speed is important for that.

What I don’t have is good cell service. Despite having a major cell provider (Verizon) the radius around my neighborhood block is a complete dead zone, so I rely on WiFi calling. This previously made taking a call, looking something up on YouTube, etc very annoying in the garage. Now it should be much better!
Well I will go ahead and embrass myself.

This first speed is in my office which is about 40 ft away from router. The second speed is out in the garage in the 3rd bay.

53112992577_dba09aee0b_b.jpgScreenshot_20230812_161256_Speedtest by bjohnson388, on Flickr

Even though the garage speed and most likely the shed is the same is enough to run spotify.

53113785604_13f8877332_b.jpgScreenshot_20230813_071359_Speedtest by bjohnson388, on Flickr

Conversely my cell reception is excellent. I am about 1,000 ft away from a tower.

Bret
 
OP
N

nicholam77

Well-known member
Joined
Dec 18, 2016
Messages
2,673
Location
Minneapolis, MN
Nick, I upgraded to fiber last year (I think) and it's a big improvement. I ran a Cat 7 cable the 100 feet from the house to the shed/workshop because I didn't get a decent wifi signal anywhere in my yard. Just ran AT&T's speed test. Not sure it's accurate but it sure looks good.

Those are great numbers, Bob! Unless you have specific needs like my work situation, that's what I'd call overkill for the average home!

Well I will go ahead and embrass myself.

This first speed is in my office which is about 40 ft away from router. The second speed is out in the garage in the 3rd bay.

Bret, that's not embarrassing at all, and pretty normal. Before I got fiber, I had a 100/100 Mbps connection. It was plenty sufficient for everything except my big file transfers for work.

If you have a single router, I can say that the upgrade to a mesh WiFi system makes a big difference in coverage. All the better if the access points can be hardwired to one another. But as I'm sure you're well aware, even your current garage/shed speeds are enough to stream music, YouTube, browse the web, etc.


One idea I've had is to buy another cheap mini PC like the one I got for my Home Assistant installation to keep in the garage. I think I have an old monitor laying around, too. It would likely be a Windows machine... which is find for general web browsing and such, but I should be able to VNC into my Mac Mini, and pull up things like Sketchup, Fusion360, etc.

I don't think it will happen this summer, but I've been kicking around redoing / reconfiguring the upper back wall of the garage for awhile now. I've mentioned more upper cabinets and/or a SysPort (Systainer storage), and a French cleat system. But I think a computer, monitor, and or small TV might be in the cards, too. Especially now that I have reliable internet. 😁
 
OP
N

nicholam77

Well-known member
Joined
Dec 18, 2016
Messages
2,673
Location
Minneapolis, MN
Mazda Repairs

As mentioned a few posts back, our Mazda CX-5 started having some worsening noises at low speeds. Started out as a bumps and clunks, then progressed to a squeaking / groaning during low speed turns.

I took it in to a trusted shop for diagnosis on Saturday. Within 30min of shop time they called me back and said the ball joints were loose-fitting and those plus the lower control arms should be replaced. Makes sense. My original plan was to have them pin point the issue, and then potentially DIY the fix and save some money. But I caved and just had them do it. I'm not even going to share the price because it was too much, but after the fact I looked at some YouTube videos and saw how easy it was. I figured I'd need some sort of special tool to press the ball joint together, but didn't know you could buy them preassembled with the control arm.

Oh well, I've been working like crazy at my job, and on various house projects, been out of town with the family, and I just didn't feel the time or energy for another car project at the moment.

They got it done same-day, but shortly after getting it home we noticed a loud metal-on-metal scraping noise at low speeds. :mad:

They were already closed for the day, so I brought it back in Monday morning. I thought about taking off the front wheels and trying to figure it out myself, but I figured it was their error and they should fix it.

They told me one of the brake pad backing plates was "bent and rubbing on the rotor". I'm not sure how this is even possible. They did give me a service report measuring the pads and stuff — obviously not needed to take apart for the work I wanted done with the ball joints and control arms. They just took apart my brake job to tell me the pads were brand new :ROFLMAO:, and somehow bent or dropped or disassembled the pad shims.

This is turning into a rant, but it makes you wonder what else they screwed up. And doing the brake job myself at least I knew what I did... now I'm left wondering if they touched anything else they shouldn't have.

But... it's all back together and running great now. No squeaks, no clunks. It's at 116k miles, so I figure once I get the brake fluid flushed, and possibly spark plugs done, it should hopefully be refreshed for the next chunk of miles other than standard maintenance stuff!
 

isonic

Well-known member
Joined
Aug 1, 2018
Messages
213
Location
Ham Lake, MN
What I don’t have is good cell service. Despite having a major cell provider (Verizon) the radius around my neighborhood block is a complete dead zone, so I rely on WiFi calling. This previously made taking a call, looking something up on YouTube, etc very annoying in the garage. Now it should be much better!
My last house had very heavy tree coverage. Even living in a suburb just outside the freeway ring gave me basically zero cell coverage in that house. This was before Verizon finally incorporated Wifi Calling. At that time I picked up one of Verizon's ( Samsung unit) pico cell towers that you put in your home. It hard wired to my home internet and worked great. Now that wifi calling is a thing on verizon you probably don't need one of those units but you do have that as an option for your garage if you are finding your wifi isn't enough out there.
 

Trapps

ALLIANCE MEMBER
Joined
Feb 10, 2017
Messages
2,003
Location
The Detroit Zoo
Nick,

My shop is in a constant state of evolution; not at a constant pace though... more like slow and slower:ROFLMAO:. I think you'll be very happy if you do reorg the back wall. Also, having an old TV in the garage that I use as a second monitor for my computer has been great. It also allows me to also stream TV (or any source) to it. Having the game on while 'tinkering', or watching a 'how to' right there in the shop has also been great.

Re: Pros vs DIY: we all have priorities and we usually juggle those with time and money. There are a few things I'm capable of, but I hire out anyway. Money is a renewable resource. Time is not. No explanations needed.

:beer:
 

Mr. Roboto

Well-known member
Joined
Dec 11, 2012
Messages
2,161
Location
New Hampshire
Sometimes the best tool for the job, is a credit card. Been there, done that, it's OK!! Don't sweat it.

Also FYI, they measure your pad thickness without removing the pads. Usually using a tool like this:

https://www.amazon.com/dp/B00OJG327E/?tag=atomicindus08-20

Also also, if I had to guess, perhaps it was your rotor backing plate that was rubbing, and not necessarily the brake pad backing plate. I can see how they could accidentally bend that pretty easily while replacing the control arm. They're so thin, and right in the area where they would be working. One little tap is all it takes (been there done that :confused:)
 

jar944

Well-known member
Joined
Jul 26, 2010
Messages
5,943
Location
Northern VA
I never have a shop do any work, but I had the local shop replace the drivers side axle on my wife's car Monday. I've been ignoring the blown out cv boot for a year or more and it was already there for a wheel stud replacement (costco said they cross threaded it during the tire installation) I had no desire to crawl under the car to replace it.
 

fourmotioneer

Well-known member
Joined
Mar 19, 2015
Messages
224
Location
Ann Arbor, MI
Mazda Repairs
They told me one of the brake pad backing plates was "bent and rubbing on the rotor". I'm not sure how this is even possible. They did give me a service report measuring the pads and stuff — obviously not needed to take apart for the work I wanted done with the ball joints and control arms. They just took apart my brake job to tell me the pads were brand new :ROFLMAO:, and somehow bent or dropped or disassembled the pad shims.

This is turning into a rant, but it makes you wonder what else they screwed up. And doing the brake job myself at least I knew what I did... now I'm left wondering if they touched anything else they shouldn't have.

But... it's all back together and running great now. No squeaks, no clunks. It's at 116k miles, so I figure once I get the brake fluid flushed, and possibly spark plugs done, it should hopefully be refreshed for the next chunk of miles other than standard maintenance stuff!

That *****! Also, for me at least, the stress of mechanical problems on the family vehicle is real. Sometimes you have to leave it to the shop, and when you feel let down by shop, there’s a deep betrayal at play. I just made my first Facebook post in like 10 years to ask a VW owners group about a dealership experience I had this week, in fact.

I would wager that your pads and rotors were measured without disassembling anything - that’s the typical method, at least. And, as someone else stated, 99% certain that the shop was referring to the brake rotor heat shield, which is prone to be bent during control arm / ball joint work, and is 1) east to bend back and 2) not worth replacing if bent, since it’s just always sort of flimsy. I think you might have missed what was going on in both cases.

Your thread is great. I do cringe at some of the popular threads (I can think of 3 off hand) that have uncharitable views of workers. Interestingly, I see it across a range of suspected incomes, from the overextended suburbanite, to the tech millionaire, to the son of a billionaire cosplaying as a craftsman…). Personally not my style. I’d be just as frustrated as you are about the shop sending your car back with the noise - pretty ridiculous, if you ask me - but, I do enjoy life more when I afford even those who fail me some respect.

Worked for me this week :) turned a rejected warranty claim for one bearing into two new wheel bearings covered under warranty! Saved me 4 hours and like $300 in parts, or $1800 at the dealer
 
Last edited:
OP
N

nicholam77

Well-known member
Joined
Dec 18, 2016
Messages
2,673
Location
Minneapolis, MN
My last house had very heavy tree coverage. Even living in a suburb just outside the freeway ring gave me basically zero cell coverage in that house. This was before Verizon finally incorporated Wifi Calling. At that time I picked up one of Verizon's ( Samsung unit) pico cell towers that you put in your home. It hard wired to my home internet and worked great. Now that wifi calling is a thing on verizon you probably don't need one of those units but you do have that as an option for your garage if you are finding your wifi isn't enough out there.

That is good to know, but I'm covered with WiFi calling. Works reliably 95% of the time. The garage WiFi has been working GREAT so far. In fact, I've had an issue with some of the devices in our bedroom (Roku TV, Sonos Playbar, 4x TP-Link WiFi smart plugs) attaching themselves to the outdoor access point I just installed instead of the one downstairs in the living room! It doesn't really bother me as long as they are getting a good signal.

Speaking of heavy tree coverage, we are taking down our gigantic beautiful silver maple in a few weeks. So we'll see if that makes any difference with the LTE.

IMG-2473.jpg

It's hard to even capture the size of this tree in a picture. My wife has been wanting to take it down since we moved in. There are two larger limbs that go over our roof, limbs going across all the power lines and into the neighbors yards, and limbs that could strike the garage and shed. Every time there's high winds she freaks out and is worried we'll be crushed in our sleep.

It's not dead, but I do think it's a liability. I've seen other big trees come down without warning and do major damage. This one has a few vulnerabilities. After having about 7 companies come chat and do estimates, I finally agreed to have it done.

I am sorely going to miss the shade, the light-filtering and dappled shadows it gives inside, the privacy (it blocks our view to the alley somewhat, as well as our bedroom window), and the home it is to many animals. :( Our property is going to feel so empty without it. Not to mention the price to remove is hefty.

It's so close to the house, looking out our bedroom window it kind of feels like being in a tree house.

IMG-2476.jpg

What I am excited for:

Watching the crane do the work.

Not having to clean up eleventy-billion whirly birds.

The possibility to plant new trees, the opportunity for a deck or porch, the opportunity to build a proper privacy screening towards our neighbors.

My shop is in a constant state of evolution; not at a constant pace though... more like slow and slower:ROFLMAO:. I think you'll be very happy if you do reorg the back wall. Also, having an old TV in the garage that I use as a second monitor for my computer has been great. It also allows me to also stream TV (or any source) to it. Having the game on while 'tinkering', or watching a 'how to' right there in the shop has also been great.

I'm in agreement on all fronts, but I've been struggling on exactly how to do this and what layout would benefit me most. I know I just need to do something, but I don't really want to do any major projects (like cabinets) twice, so I get stuck in the planning phase.

Re: Pros vs DIY: we all have priorities and we usually juggle those with time and money. There are a few things I'm capable of, but I hire out anyway. Money is a renewable resource. Time is not. No explanations needed.

Thanks, Mark. With the recent encouragement to get more automotive experience I think I just wished I had the time and opportunity, not to mention being inspired by all of the handy, talented, hardworking DIYers on this site. But you are 100% right. And thanks for making me feel better about taking the easy route.

Sometimes the best tool for the job, is a credit card. Been there, done that, it's OK!! Don't sweat it.

Also FYI, they measure your pad thickness without removing the pads. Usually using a tool like this:

https://www.amazon.com/dp/B00OJG327E/?tag=atomicindus08-20

Also also, if I had to guess, perhaps it was your rotor backing plate that was rubbing, and not necessarily the brake pad backing plate. I can see how they could accidentally bend that pretty easily while replacing the control arm. They're so thin, and right in the area where they would be working. One little tap is all it takes (been there done that :confused:)

You are so right. That makes all the sense. I think they did a poor job communicating that to me, but surely it was the rotor backing plate. And I doubt they took the pads apart, then. All of that makes me feel better. So I guess they didn't do anything out of the ordinary. I have been burned before by a shop, but this one has been pretty good to me overall.

I never have a shop do any work, but I had the local shop replace the drivers side axle on my wife's car Monday. I've been ignoring the blown out cv boot for a year or more and it was already there for a wheel stud replacement (costco said they cross threaded it during the tire installation) I had no desire to crawl under the car to replace it.

I don't know how you do car work and run a full-time cabinet shop at the same time :ROFLMAO:

That *****! Also, for me at least, the stress of mechanical problems on the family vehicle is real. Sometimes you have to leave it to the shop, and when you feel let down by shop, there’s a deep betrayal at play.

Yes, although like you and @Mr. Roboto said, I just misunderstood.

I would wager that your pads and rotors were measured without disassembling anything - that’s the typical method, at least. And, as someone else stated, 99% certain that the shop was referring to the brake rotor heat shield, which is prone to be bent during control arm / ball joint work, and is 1) east to bend back and 2) not worth replacing if bent, since it’s just always sort of flimsy. I think you might have missed what was going on in both cases.

(y)

Your thread is great. I do cringe at some of the popular threads (I can think of 3 off hand) that have uncharitable views of workers. Interestingly, I see it across a range of suspected incomes, from the overextended suburbanite, to the tech millionaire, to the son of a billionaire cosplaying as a craftsman…). Personally not my style. I’d be just as frustrated as you are about the shop sending your car back with the noise - pretty ridiculous, if you ask me - but, I do enjoy life more when I afford even those who fail me some respect.

I would say I do have a general skepticism of auto shops just based on some past experiences, but I always treat people respectfully. I'm sure it's not easy working in an auto shop and everyone makes mistakes. I would be upset if they did actual damage, but this was only the minor inconvenience of having to take it back in. I fully agree it's best to let people have a fair chance to make it right before getting too worked up about it.
 

bdbecker

ALLIANCE MEMBER
Joined
Nov 18, 2015
Messages
5,576
Location
Iowa
As much as I hate seeing a big tree removed, I understand... it's just a matter of time before they start to fail. I'd be surprised if that beast isn't hollow in the middle.

Any plans on saving a few choice pieces and having them milled for future woodworking projects?
 

isonic

Well-known member
Joined
Aug 1, 2018
Messages
213
Location
Ham Lake, MN
Understand not wanting to take the tree....but it is the wrong type of tree to have that close to the house. Enjoy it before it is gone, they are massive trees for sure. I had a huge one looming over my last house as well. So much debris in my gutters/ roof every year I don't miss that.
 

sawduststeve

Well-known member
Joined
Oct 7, 2016
Messages
2,139
Location
Havering-Atte-Bower,London/Essex boarders, England
Nick,
Over here if you had a tree that large that close to a house you’d struggle to get a mortgage, any tree closer than 5mtrs/16ft is deemed too close and will have to be looked at.
Root damage to the foundations is a big worry,
we’ve had three taken down, two were ruining the drive and the largest was starting to cause problems with the house.

I do think you’ll appreciate the light though.

Steve 🍻
 
OP
N

nicholam77

Well-known member
Joined
Dec 18, 2016
Messages
2,673
Location
Minneapolis, MN
Thanks guys, this actually makes me feel a bit better that it's the right choice.

As much as I hate seeing a big tree removed, I understand... it's just a matter of time before they start to fail. I'd be surprised if that beast isn't hollow in the middle.

Any plans on saving a few choice pieces and having them milled for future woodworking projects?

It might be hollow. One arborist said that out of the group.

I've long thought I would save some wood from it, I'm just not sure how. I know I don't want (and my wife doesn't want) a huge log laying around in our yard for a year or more. Hauling away everything is part of the removal service. I could ask them to leave a piece, but I don't even know how to select the right chunk, or have a plan of what I would use it for.

I've also read that people don't like to mill urban trees because of high likelihood of metal fragments that could ruin their blade.

There's a place called Wood From The Hood that reclaims urban trees in Minneapolis, but I haven't contact them to see how it works. I wish I'd had more time to consider this possibility, but they are supposed to be scheduling the crane now, and the tree is coming down sooner than later.

So yes, I've thought about it, but don't really have my act together on how to make it happen other then just asking them to leave a giant log in my backyard.

I think an equal concern would be the root system with a tree that big so close to your home’s foundation.

You’re right to take it. Perhaps you can find some decent remains for a unique project.
Nick,
Over here if you had a tree that large that close to a house you’d struggle to get a mortgage, any tree closer than 5mtrs/16ft is deemed too close and will have to be looked at.
Root damage to the foundations is a big worry,
we’ve had three taken down, two were ruining the drive and the largest was starting to cause problems with the house.

I do think you’ll appreciate the light though.

Steve 🍻

Thanks guys. I try not to think about the root structure or it would keep me up at night. :ROFLMAO:

As far as light, I actually really enjoy the shade it provides, and the dappled light through the back windows in the mornings. The canopy is so high, it provides great shade for the high noon sun, but still lets the morning low angle sun through.

The kitchen (in the back of our house) was an addition, so the tree was not originally that close to the house. And of course it's gotten huge over 80 years or so.

Understand not wanting to take the tree....but it is the wrong type of tree to have that close to the house. Enjoy it before it is gone, they are massive trees for sure. I had a huge one looming over my last house as well. So much debris in my gutters/ roof every year I don't miss that.

I can't wait to be done with the mess every spring and fall. I can't easily reach the gutters on our upper roof safely. They do have leaf guards but I'm sure they are all clogged and need a major clean out. That's something I intend to get down once the beast is gone.
 

Finallygotit

ALLIANCE MEMBER
Joined
Jul 6, 2013
Messages
4,090
Location
Tucson, AZ
.....I can't wait to be done with the mess every spring and fall. I can't easily reach the gutters on our upper roof safely. They do have leaf guards but I'm sure they are all clogged and need a major clean out. That's something I intend to get down once the beast is gone.
You could rent a small boom lift from HD to do that job more safely. Better than a ladder.

YMMV

:beer:
 
OP
N

nicholam77

Well-known member
Joined
Dec 18, 2016
Messages
2,673
Location
Minneapolis, MN
You could rent a small boom lift from HD to do that job more safely. Better than a ladder.

YMMV

:beer:

Interesting... I always forget about options like that. In my case I don't think there's enough space / even ground between my house and the neighbor's house on one side. I was thinking I'd hire someone to go up on an extension ladder. With a good clean out and the tree gone, it shouldn't be an issue for awhile after that.
 
OP
N

nicholam77

Well-known member
Joined
Dec 18, 2016
Messages
2,673
Location
Minneapolis, MN
Airbag Code / Turbo Sounds

Fixed another quick thing that's been bugging me. Ever since I did my 8" radio screen upgrade in the GTI, I've had an airbag light on the gauge cluster.

I used to have a coding tool called OBDEleven, that ran off an Android phone. It was a PITA because I use an iPhone for my phone, so I got a crappy old Android phone and pulled the SIM card and just used it for the OBDEleven app. Second annoyance is it pulled all the code from their servers, and needed an internet connection... which at that point I didn't have in the garage. I actually used it to code a lot of things on my car. But here we are years later, and they've moved to a subscription model, and it's no longer supported on my crappy old Android phone.

I've been wanting to buy a HEX V2 cable + VCDS from Ross-Tech, but that's ~$200 and I need a Windows computer in the garage.

So for now I plugged in an old Chinese VAG reader I bought on Amazon back when I had my Mk4 Jetta to see if it could pull any codes.

IMG-2595.jpg

And what do you know, it did! Honestly this thing was like $20 when I bought it, but it never failed me on the Jetta and it didn't fail me now! It couldn't clear the dash light, but I think that's because the code was for an open circuit with the Passenger Airbag Warning Light and kept recurring.

I took this switch apart during the radio install.

IMG-2597.jpg

Both of the connecters are locking, and they seemed connected fine, but I disconnected and reconnected them, cycled the ignition, and voilà! Dash light gone.

IMG-2598.jpg

Now I can rest easy that my air bags will go off.


The other thing I did is remove the hood insulation. The early Mk7's had under-hood insulation that damps the engine bay sounds. I've heard removing this can increase intake noises, but my shifter and clutch is kinda noisy (from upgraded motor mounts I think), and I didn't want to make that louder. But... I will say it wasn't an issue and the turbo / diverter valve / intake wooshies are way louder!

With the windows down and sunroof open, it's quite loud under boost. Like to the point that I can make my 2 year old giggle with a 2nd gear pull. :ROFLMAO:

I feel like I'm 35-going-on-17-again, but it's highly addictive and I haven't gotten bored of it in the past few weeks. Psssssshhhhh! 💨
 

loganb

ALLIANCE MEMBER
Joined
Dec 29, 2011
Messages
5,591
Location
Omaha, NE
2 yr old giggles are worth a lot...well done!

And as much as it ***** to take a big ole tree like that out....given the situation I agree it sounds like it's time to go and that's way to big and way to risky, both financially and personal injury risk to try and DIY it. It's a painful bill I'm sure...but once you get used to the new scenery you're going to like it and sleep better at night
 

Denwood

Well-known member
Joined
Sep 22, 2014
Messages
4,192
Location
Thunder Bay, Ontario, Canada
Nice catch on the air bag light! It's nice when things are simple.

Like your Mazda, our Highlander was riding like a bag of hammers. I ended up doing the lower control arms and ball joints in my shop, but spent a solid $800 CAD on OEM parts. The issue you had with a brake rotor shield rubbing (and making a nasty racket) is a common one as it's light metal and easy to bend when you're working in that area. On the plus side, it takes about 30 seconds to fix by just bending it back :)
 
To avoid these ads, REGISTER NOW!

jar944

Well-known member
Joined
Jul 26, 2010
Messages
5,943
Location
Northern VA
Thanks guys, this actually makes me feel a bit better that it's the right choice.


It might be hollow. One arborist said that out of the group.

I've long thought I would save some wood from it, I'm just not sure how. I know I don't want (and my wife doesn't want) a huge log laying around in our yard for a year or more. Hauling away everything is part of the removal service. I could ask them to leave a piece, but I don't even know how to select the right chunk, or have a plan of what I would use it for.

I've also read that people don't like to mill urban trees because of high likelihood of metal fragments that could ruin their blade.

There's a place called Wood From The Hood that reclaims urban trees in Minneapolis, but I haven't contact them to see how it works. I wish I'd had more time to consider this possibility, but they are supposed to be scheduling the crane now, and the tree is coming down sooner than later.

So yes, I've thought about it, but don't really have my act together on how to make it happen other then just asking them to leave a giant log in my backyard.


Thanks guys. I try not to think about the root structure or it would keep me up at night. :ROFLMAO:

As far as light, I actually really enjoy the shade it provides, and the dappled light through the back windows in the mornings. The canopy is so high, it provides great shade for the high noon sun, but still lets the morning low angle sun through.

The kitchen (in the back of our house) was an addition, so the tree was not originally that close to the house. And of course it's gotten huge over 80 years or so.


I can't wait to be done with the mess every spring and fall. I can't easily reach the gutters on our upper roof safely. They do have leaf guards but I'm sure they are all clogged and need a major clean out. That's something I intend to get down once the beast is gone.

Perfect excuse to buy a big chainsaw... just looking at that tree I'd guess it's not hollow.

A couple different yard silver maples I've encountered
20141106_154233.jpg031small.jpg
 
OP
N

nicholam77

Well-known member
Joined
Dec 18, 2016
Messages
2,673
Location
Minneapolis, MN
031small.jpg

So my issue is then when I have a giant 1,000 lb log in my yard... then what?

I do feel like it's somewhat a missed opportunity, but I don't even know what I'd do with a big slab at this point. At this current house I don't have space for storage, or even really for large furniture. A dining room table is on hold because the kids are still in destructive mode and I don't want a hardwood table stabbed with forks and painted on.

I think I will try to save something from the tree. Even if it's a smaller piece I can more easily store and make something out of, like a keepsake box.

The removal is potentially happening next Friday, 9/1, just over a week away.

2 yr old giggles are worth a lot...well done!

Agreed!

And as much as it ***** to take a big ole tree like that out....given the situation I agree it sounds like it's time to go and that's way to big and way to risky, both financially and personal injury risk to try and DIY it. It's a painful bill I'm sure...but once you get used to the new scenery you're going to like it and sleep better at night

I've never lost sleep over it, but my wife has when there's a storm. I guess that's worth something.

Besides the loss of shade, it gives the back yard a feeling of protection since the canopy is so high and expansive, it literally enshrouds us. It will be a big adjustment for me, everything will be even more out in the open. This is a particular sore point for me on our postage-stamp-sized lot. I really don't like being so close to and exposed to the neighbors. Losing the tree will amplify that lack of privacy even more. I think it will also amplify the difference in scale between our home and the neighboring homes, which are new builds and tower over us. The tree was so big it gave our house some scale. There are many wonderful things about my neighborhood and location, so as with many things in life, it's a trade off. But yeah, it's going to hurt in the short term.

Nice catch on the air bag light! It's nice when things are simple.

Like your Mazda, our Highlander was riding like a bag of hammers. I ended up doing the lower control arms and ball joints in my shop, but spent a solid $800 CAD on OEM parts. The issue you had with a brake rotor shield rubbing (and making a nasty racket) is a common one as it's light metal and easy to bend when you're working in that area. On the plus side, it takes about 30 seconds to fix by just bending it back :)

Thanks, Dennis! I did look up OEM parts for the Mazda and it was in the $600-$800 range. So that does make me feel better. But... the shop did not use OEM parts, and they charged almost as much.

I'm tracking with the brake rotor shield now, so all is forgiven with the shop I used. It's very close to my house so it was still worth taking it back to them to fix.
 
OP
N

nicholam77

Well-known member
Joined
Dec 18, 2016
Messages
2,673
Location
Minneapolis, MN
Drill Press Dust Collection

A little 3D printed project I've been working on in the background. I've had this Loc Line tubing in my Amazon wishlist for ages. For whatever reason I never pulled the trigger, and then recently came across this flexible tubing model on Printables. As well as this adapter for a drill press column.

I started printing the components.

IMG-2556.jpg
IMG-2564.jpg

I hadn't used the printer for a bit, but everything surprisingly went fine.

IMG-2593.jpg

Side note, I used Cura's tree supports for the first time, and they were awesome!

Me being the dummy I am sometimes, I totally overlooked that the adapter piece might not be the same diameter as my drill press column. And it indeed was not. So, 10 hours of printing and plastic wasted.

And now I had to modify it to work with my drill press. Fortunately the uploader provided STEP files. This lets me get the model into Fusion 360 easily, but doesn't have any "model history" or parametric design. Meaning it just imports as a single object.

I am not a CAD person. For those who are, I'm sure this is laughably easy, but for me it is not. I needed to figure out how to widen the adapter for my larger drill press diameter. Complicating it, the two sides of the adapter have different diameter "inputs", one for the flexible tubing, and the other side is a tapered 35mm input for a vac hose. To top it off, the original model was 40.8mm ID for the flexible tubing side, even though the flexible tubing model was 40mm OD. Which meant a lose fit I needed to fix.

I won't detail everything, but fortunately the model "origin" was in the middle of the model. It must have been mirrored when created or something. So I set up a construction plane based on that, and extruded and moved each half outwards by 10mm. And then drew a new circle for my drill press column diameter, cut that through the existing model, and fixed up the chamfers.

main-part-adapter.png

And then reprint.

IMG-2643.jpg

I was pretty excited to see it came out the right size, and fit my drill press.

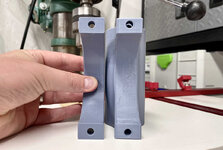
Now to do the second piece, the other half of the ring that clamps it on the column. (If you look at the Printables link at the beginning of the post this will make more sense).

I had a STEP file for this, but I felt like it would be easier to model from scratch to match the new size of the other part. I took some measurements of the existing model, and the bolt hole spacing of my new model, and went to town.

dp-adapter-1.png
clamp-pic-1.png
clamp-pic-2.png

Yeah, I know, it's not super complicated. But I was still pretty pleased with myself for figuring it out.

Parts lined up:

IMG-2658.jpg

And attached with some M6 bolts and nuts.

IMG-2682.jpg
IMG-2687.jpg
IMG-2680.jpg

I printed 12 of the flexible joints. They were a really tight fit at first, but have since loosened up a lot, maybe even too much.

My 35mm Festool hose fits in the back side of the adapter nice and snug.

IMG-2684.jpg
IMG-2681.jpg

Using the CT vac, I can plug the drill press into that, and it will auto turn on the suction when the drill press is turned on.

Doing a few tests, it collected 99% of dust with the 3/8" brad point bit pictured above.

With a 1" Forstner... about 50%. So still lots of chips. But better than nothing. A little disappointed in that, but for smaller holes it should work nicely.

And can sort of be moved out of the way when not needed.

IMG-2685.jpg

While it is somewhat effective, I'd say this project was mostly for fun. And for what it's worth it took me about 40 hrs including printing time and time futzing around with Fusion 360 and fitments.

🍻
 

LeonardY

Well-known member
Joined
Apr 16, 2011
Messages
5,077
Location
Southern California
Drill Press Dust Collection

A little 3D printed project I've been working on in the background. I've had this Loc Line tubing in my Amazon wishlist for ages. For whatever reason I never pulled the trigger, and then recently came across this flexible tubing model on Printables. As well as this adapter for a drill press column.

I started printing the components.

IMG-2556.jpg
IMG-2564.jpg

I hadn't used the printer for a bit, but everything surprisingly went fine.

IMG-2593.jpg

Side note, I used Cura's tree supports for the first time, and they were awesome!

Me being the dummy I am sometimes, I totally overlooked that the adapter piece might not be the same diameter as my drill press column. And it indeed was not. So, 10 hours of printing and plastic wasted.

And now I had to modify it to work with my drill press. Fortunately the uploader provided STEP files. This lets me get the model into Fusion 360 easily, but doesn't have any "model history" or parametric design. Meaning it just imports as a single object.

I am not a CAD person. For those who are, I'm sure this is laughably easy, but for me it is not. I needed to figure out how to widen the adapter for my larger drill press diameter. Complicating it, the two sides of the adapter have different diameter "inputs", one for the flexible tubing, and the other side is a tapered 35mm input for a vac hose. To top it off, the original model was 40.8mm ID for the flexible tubing side, even though the flexible tubing model was 40mm OD. Which meant a lose fit I needed to fix.

I won't detail everything, but fortunately the model "origin" was in the middle of the model. It must have been mirrored when created or something. So I set up a construction plane based on that, and extruded and moved each half outwards by 10mm. And then drew a new circle for my drill press column diameter, cut that through the existing model, and fixed up the chamfers.

main-part-adapter.png

And then reprint.

IMG-2643.jpg

I was pretty excited to see it came out the right size, and fit my drill press.

Now to do the second piece, the other half of the ring that clamps it on the column. (If you look at the Printables link at the beginning of the post this will make more sense).

I had a STEP file for this, but I felt like it would be easier to model from scratch to match the new size of the other part. I took some measurements of the existing model, and the bolt hole spacing of my new model, and went to town.
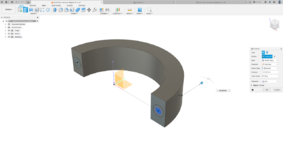
dp-adapter-1.png
clamp-pic-1.png
clamp-pic-2.png

Yeah, I know, it's not super complicated. But I was still pretty pleased with myself for figuring it out.

Parts lined up:
IMG-2658.jpg

And attached with some M6 bolts and nuts.

IMG-2682.jpg
IMG-2687.jpg
IMG-2680.jpg

I printed 12 of the flexible joints. They were a really tight fit at first, but have since loosened up a lot, maybe even too much.

My 35mm Festool hose fits in the back side of the adapter nice and snug.

IMG-2684.jpg
IMG-2681.jpg

Using the CT vac, I can plug the drill press into that, and it will auto turn on the suction when the drill press is turned on.

Doing a few tests, it collected 99% of dust with the 3/8" brad point bit pictured above.

With a 1" Forstner... about 50%. So still lots of chips. But better than nothing. A little disappointed in that, but for smaller holes it should work nicely.

And can sort of be moved out of the way when not needed.

IMG-2685.jpg

While it is somewhat effective, I'd say this project was mostly for fun. And for what it's worth it took me about 40 hrs including printing time and time futzing around with Fusion 360 and fitments.

🍻
Nice job. I've modeled some lineloc style fittings.
Just never got to printing them.
 
OP
N

nicholam77

Well-known member
Joined
Dec 18, 2016
Messages
2,673
Location
Minneapolis, MN
Gutter Improvements

I've had a few ongoing water issues I'm trying to fix this summer. It's a far cry from the amazing work @Trapps is doing on his place, but hopefully I'm solving a few things. If you'll recall last winter, I had a water intrusion through the foundation in the basement corner of my office, because of record snowfall and the downspout extension in that corner was disconnected. It may have happened anyways, due to snowfall melting and egress window, but I think the downspout was a main culprit, dumping all the snow melt from the roof right in that corner.

I have some larger grading and protection of the window I want to do, but for now I replaced part of the downspout and added a very long extension away from the house:

IMG-2478.jpg
IMG-2477.jpg

After the maple tree goes, I'll be getting that top gutter that feeds it cleaned out, which maybe even be clogged after years of whirly birds, despite having gutter guards.

But that got me thinking about my other downspouts, and I extended them all.

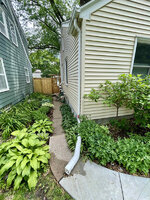
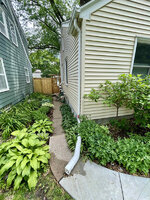
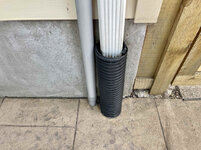
This one on the corner is awkward because of the sidewalk, but I put an accordion extension for now.

IMG-1761.jpg

And this one in the front was too low, and not long enough, so it was probably dumping half the water right by the front stoop. I raised it for more slope, and extended it. Before and after:

IMG-1757.jpg
IMG-1766.jpg

Now it's working much better:


What isn't, though, is my downspout that goes under the patio and exits in the back yard garden:


This was a heavy rain, but yeah, it's bad.

This one collects from half the upper roof gable, and half the back lower roof gable:

IMG-2706.jpg

I had to dig around in the garden to even find the exit, which was buried. But I managed to dig it out, and pull out a big section of compacted dirt and roots that was plugging it up.

IMG-1740.jpg
IMG-1741.jpg

I wasn't even sure if it worked, but I ran a hose and water did come out the other end.

I was thinking about getting a pop up emitter and making the exit more proper, and then getting an inline filter and clean out for the downspout, but after reading more about underground downspouts in my climate, I've realized they are not a great solution due to freezing.

I can't really dig up the patio and make any changes, either.

So now I'm left wondering if I move forward with that plan, but also try to come up with some sort of not-underground diversion for winter? I'm not really sure how to do that because of the constraints.

The gate is right there, so there's no easy path to the side, plus the neighbor's house is right there and I doubt they want me funneling all my rain into their foundation. :ROFLMAO:

IMG-2708.jpg

I could maybe rig something up to run off onto the patio, but it would be clumsy and in the way of foot traffic and snowblower.

I even thought about wrapping it around the side of the house and trying to connect to the downspout in front on that side, but it's a long route and would be ugly.

IMG-2707.jpg

If anyone has any ideas or specific pieces of hardware, I'm all ears!

🍻
 

zanyad

ALLIANCE MEMBER
Joined
Apr 26, 2018
Messages
2,812
Location
NE Ohio
Gutter Improvements
...
I was thinking about getting a pop up emitter and making the exit more proper, and then getting an inline filter and clean out for the downspout, but after reading more about underground downspouts in my climate, I've realized they are not a great solution due to freezing.

I can't really dig up the patio and make any changes, either.

So now I'm left wondering if I move forward with that plan, but also try to come up with some sort of not-underground diversion for winter? I'm not really sure how to do that because of the constraints.
...
If anyone has any ideas or specific pieces of hardware, I'm all ears!

Have you considered installing a rain garden in that area?
 

Trapps

ALLIANCE MEMBER
Joined
Feb 10, 2017
Messages
2,003
Location
The Detroit Zoo
Water is the enemy; the farther away from your home you can get it, the better. It will always follow gravity along the path of least resistance.

1. Can you use some 'roll out' downspout extensions?
2. Clean out as much of the existing system as you can. A hook on a broom handle to reach in and pull more of those roots out...or even rent a snake...
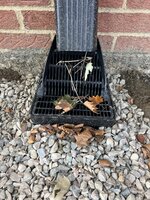
3. I'm using catch basins with debris guards (you reference in-line filter) that seem to be working well. Can you add these to your existing drains? Some excavation required for the basin, but far less than tearing out the whole system or a whole line.

53151165415_b07430a93f_h.jpg

4. Can you run the downspout OVER the gate, then down and out to the front or back in a solid line?
 

loganb

ALLIANCE MEMBER
Joined
Dec 29, 2011
Messages
5,591
Location
Omaha, NE
Nice lunch hour diversion for me :)

First thing that comes to mind is a bit more work...would be to change the run of that upper gutter with an additional downspout and reslope that entire upper gutter to the end, drop a new downspout down the side/column and then run it out there. That likely cuts the amount of water hitting the downspout in question by at least half. It's not exactly a 30 minute project...and involves fun ladder work but can likely make it work by just re-sloping the existing gutter run, plugging the current drop then adding the downspout. Crude markup below

downspout.jpg

After watching a seamless gutter crew install new gutters on our Chicago house when we got a new roof...I'd probably pay someone to do this. Doing that solo and moving ladders, plus not having any of the parts without multiple big box trips...not how I want to spend my time.

A rain barrel at the downspout to help collect and limit the amount that hits the discharge could help...but that comes with it's own problems of emptying it and it looks like it would probably be in the walk path toward the gate. With the amount of roof that's draining, not sure I'd go after the rain barrel without redoing that upper gutter run to allow the barrel to collect a more substantial rain event before overflowing from only needing to handle the lower roof.
 
OP
N

nicholam77

Well-known member
Joined
Dec 18, 2016
Messages
2,673
Location
Minneapolis, MN
Thank you for the ideas, everyone 🍻


@Trapps yes I could use a rollout extension, especially maybe in this front corner to avoid it covering the sidewalk:

IMG_1761.jpg

Thanks for sharing the catch basin. I think this same corner could be a candidate for that. I would have to dig under the sidewalk and have it exit in the front yard, but I think that could be doable. Maybe not this year, but eventually.

The main downspout I'm concerned about is the patio / underground one. That one goes right into the concrete and is right against the foundation, so I don't think I could use a basin like that there.

IMG-2725.jpg

The inline filter I was thinking of is from your buddy the French Drain Man. :ROFLMAO: It has a clean out, and removable cover so it could overflow / release water if the underground line froze, but obviously it would dump it right at my foundation.

I thought about running over the gate. I just can't figure out how to do it without a bunch of bends and it looking atrocious.

IMG-2723.jpg

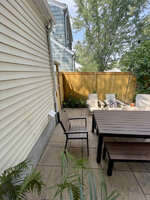
For more context, you can see there is barely any "yard" before the property-dividing fence, and my neighbor's house is quite close. The gate can be accessed from two directions, but there is furniture in the way.

IMG-2724.jpg

@loganb I marked a possible location for a rain barrel, but it would still need a hose going over the gate in a clunky fashion. It's something I've considered. My brother-in-law has a rain barrel, and it stinks horribly it the summer.

I've thought about using the underground system in the summer, and then *mostly* diverting it to a rain barrel during the winter / spring, with something like this. I'm not sure if that could handle all the snow melt or not.

I think your suggestion about changing the upper roof downspout path is a good one. The tree and root bulge have ruled that out for me in the past, but the tree is going soon.

IMG-2726.jpg
IMG-2727.jpg

I would definitely have someone do that for me. I don't particularly like going on ladders or roofs, and that upper gutter is higher than it looks. Plus I don't have a ladder that can reach.

I think it would be cleaner if wrapped around and came down the back of the house instead of the side, but that's an option.


Have you considered installing a rain garden in that area?

I assume you mean where the underground downspout exits in the garden? If so, yes. It already is a large shade garden, but the spot it exits could be made into more of a bowl shape to trap water. I like that idea, but it doesn't solve the underground line freezing. After what happened last winter I'm just extra wary of melting season.

IMG-2729.jpg


I'll keep thinking about all of your suggestions as we get ready to do the tree, but if anyone has any further comments feel free to share1

🍻
 

Trapps

ALLIANCE MEMBER
Joined
Feb 10, 2017
Messages
2,003
Location
The Detroit Zoo
Perhaps it's an optical illusion, but the slope to the right of the 'buried downspout exit' looks like a decent drop. Can you extend the exit farther to the right in your last pic? Steeper slopes don't freeze as easily as lesser gradients. Effectively keeping the water running farther away. I know you've got shed and garage to navigate, but could you run down the fenceline behind or even along the edging of the garden to some convenient daylight?
 
OP
N

nicholam77

Well-known member
Joined
Dec 18, 2016
Messages
2,673
Location
Minneapolis, MN
Perhaps it's an optical illusion, but the slope to the right of the 'buried downspout exit' looks like a decent drop. Can you extend the exit farther to the right in your last pic? Steeper slopes don't freeze as easily as lesser gradients. Effectively keeping the water running farther away. I know you've got shed and garage to navigate, but could you run down the fenceline behind or even along the edging of the garden to some convenient daylight?

Yeah, my whole backyard is sloped towards the alley and garage. There's some lens distortion in that pic because it's wide angle, but the concrete patio has a slight slope, and then where the garden and grass start, past the tree, the yard is pretty much downhill. I have no idea how much slope they built in for the corrugated pipe under the patio, but it should certainly have a more aggressive slope towards the exit in the garden.

I could potentially extend it. Above ground it would be visible seasonally, but I'm not sure how much my wife would like me trenching through her garden to get to the fence. Do you think it's worth it vs. creating some sort of trap / basin / rain garden where it deposits? As it stands now, the exit is kind of in the middle between the house and garage. Going all the way to the alley, along the fence line, behind the garage, would be a pretty long run.

Also, re: the shed and garage — they are a lost cause haha. Downspouts aside, just regular rain water runoff down that hill and sidewalk pool at the driveway gate and at the garage human door threshold.

IMG-2732.jpg

In fact, the door is all rotted and I'm going to be replacing it.

IMG-2733.jpg

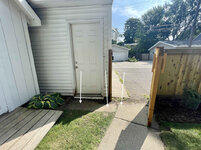
I need a way to divert all the water coming down the yard and sidewalk from catching at the bottom here.

So if I extended the buried extension I think the route would be to go behind the garage (where the dotted arrow is). There's not much room on the other side to go anywhere else with piping.

IMG-2731.jpg
 

sawduststeve

Well-known member
Joined
Oct 7, 2016
Messages
2,139
Location
Havering-Atte-Bower,London/Essex boarders, England
Hi Nick ,
I’m surprised that your rain water from the roof just empties out onto the garden. I would like to see the down pipes enter into something like Trapps suggested , which in turn is the start of 4” soil pipe that is trenched away from the house say 20’ and into a 3ftx3ft x 3ft hole (soak away) with crushed concrete at the bottom with gravel on top and finished with the lawn put back over the top, it’ll also help to drain the garden.
My dad used to make me dig these when we used to build extensions many years ago, whatever mess you made it’ll soon return to as it was, and as has been said, just get the water as far away from the foundations as possible.
Good luck , I know you’ll sort it.
Steve 🍻
 

Trapps

ALLIANCE MEMBER
Joined
Feb 10, 2017
Messages
2,003
Location
The Detroit Zoo
Another idea.

53152682362_3add15893e_h.jpg
53153763993_2c27f128c4_h.jpg
53152695957_698461223e_h.jpg

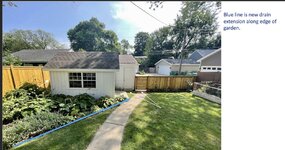
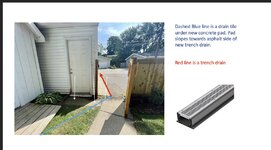
You don't have to tear up the whole garden, just enough to connect to the edge. It would be a small cement pad, sloped to keep water flowing to drive and new trench drain. Drain from garden connects to new trench drain. Trench drain also helps protect garage and gives clear path to alley.
 
Last edited:

jonshonda

Well-known member
Joined
Jul 17, 2017
Messages
4,749
Location
Wisconsin
Our house has downspouts that drain into underground corrugated pipe just like yours, and would freeze up and and cause issues in the spring. My solution was to fish a heat trace wire (they are usually installed on roofs near the gutters to prevent ice dams) through the pipe and when the spring thaw comes just plug it in every once in a while to met the ice. Works like a charm.
 
OP
N

nicholam77

Well-known member
Joined
Dec 18, 2016
Messages
2,673
Location
Minneapolis, MN
Hi Nick ,
I’m surprised that your rain water from the roof just empties out onto the garden. I would like to see the down pipes enter into something like Trapps suggested , which in turn is the start of 4” soil pipe that is trenched away from the house say 20’ and into a 3ftx3ft x 3ft hole (soak away) with crushed concrete at the bottom with gravel on top and finished with the lawn put back over the top, it’ll also help to drain the garden.
My dad used to make me dig these when we used to build extensions many years ago, whatever mess you made it’ll soon return to as it was, and as has been said, just get the water as far away from the foundations as possible.
Good luck , I know you’ll sort it.
Steve 🍻

What you're describing sounds like the proper way to do it, but I would say most houses I've seen, especially in my neighborhood, just have a short downspout extension of 3-6 ft and dump it on top of the yard pretty close to the house. At least where I live. Maybe it has to do with the winter climate?

Another idea.

53152682362_3add15893e_h.jpg
53153763993_2c27f128c4_h.jpg
53152695957_698461223e_h.jpg

You don't have to tear up the whole garden, just enough to connect to the edge. It would be a small cement pad, sloped to keep water flowing to drive and new trench drain. Drain from garden connects to new trench drain. Trench drain also helps protect garage and gives clear path to alley.

Thanks, Mark, for the thoughtful analysis. This is a great solution and probably along the lines of what I'd need to do to fully solve it. It's a lot of work, though. Definitely won't be happening this season. But I'm going to tuck this away in my mind for the future.

Nick, how about this for a wacky idea for the pipe under the concrete?


:beer:
Our house has downspouts that drain into underground corrugated pipe just like yours, and would freeze up and and cause issues in the spring. My solution was to fish a heat trace wire (they are usually installed on roofs near the gutters to prevent ice dams) through the pipe and when the spring thaw comes just plug it in every once in a while to met the ice. Works like a charm.

That is interesting. I didn't know you could do that, but I don't really have any experience with underground downspout extensions. I could probably rig something like this up if I can get it fished through.

One question... does it matter if 4 feet of snow is on top of the exit? Especially if I install something like a pop-up emitter? Some of my snow piles last year were partially solid ice in that early spring season from melt cycles etc. Just curious how that works, even if the line is thawed... how can it get out with a pile of ice on top?
 

jonshonda

Well-known member
Joined
Jul 17, 2017
Messages
4,749
Location
Wisconsin
^mine just drain straight out to daylight, no fancy pop up thingies. But they do exit to an area where I plow snow over the retaining wall, and it will melt snow multiple feet deep above the outlet.

We have too much debris and freeze/thaw cycles for me to think about depending on something popping up. The other thing you can do is a dry well setup, but I would be really curious how that would work in spring and digging below the frost line would be.....not fun.
 
To avoid these ads, REGISTER NOW!
Top Bottom