To avoid these ads, REGISTER NOW!

Between 265 & 485 SQ/FT Nick's Two-Car Detached Vdub Garage

Workspaces sized between 265 and 485 squarefeet.
To avoid these ads, REGISTER NOW!

fourmotioneer

Well-known member
Joined
Mar 19, 2015
Messages
218
Location
Ann Arbor, MI
Ha, that's cool Dennis. I've driven it a few times now and it seems ok I think, but I will keep that in mind if it becomes an issue.

Regarding the GTI... I also want an R lol. Or wish I could have went that route. I'm a fan of the MQB platform and particularly the Golf overall, but several things have bugged me about the GTI from the start:

1) the gear ratios **** (tall, big spreads, especially down low)
2) the clutch ***** (super vague, weak pressure plate, can't hold up to a tune without upgrade)

I'm a ride or die manual transmission guy (I didn't even test drive the DSG) but I actually kind of wish I had. The DSG actually has better ratios and I think the car would feel MUCH quicker. It's a capable motor and chassis, and I think the manual transmission kills that a bit.

The R on the other hand... is up on power from the factory, and has a different gearbox with a more close-ratio transmission! In the 6 speed. Never driven one but I'm sure it's a sweet spot for manual transmission folks.

People have argued to me that the reason they did dumb ratios in the GTI is it doesn't have AWD, but... I call bull-poop. It's disappointing because it just doesn't feel as sporty to drive as it should.

It's a blessing and a curse, VW engineered the car to be very well damped inside. It's quiet, comfortable, dare I even say a hint of Audi-esque luxury. But, that also makes it less sporty and kind of tame. I mean it's supposed to be an enthusiast's car... not that fun if you can't hear the motor, exhaust, or turbo. I've done a few things (like stiffer motor mounts) that help bring it out, but completely stock, the car is on the tame side for what I think should have a *little* more attitude.

Some perspective if it helps :)

Your GTI on the BBS is part of the reason I came around to liking the look of the Mk7 cars - just bought a manual 19 GTI SE w/ DCC in Great Falls Green.

I don't think you'll ever get the GTI to feel like a 'fun' car. It's large, refined, quiet, conservatively styled, and not brutally quick. It trades competence in a variety of areas for outright fun. My brother has a K04/DP/intercooler on his Mk5 and it's still not always that fun to drive. The gear ratios in a Golf R aren't going to help that much, if I had to guess.

Sadly, the most fun modern car I've driven is my 500 Abarth. It's been 100% reliable over 80k miles, but it's so bad at almost everything. Sloppy handling, laggy engine, plastic interior, rattles, rough ride. I don't even think it sounds that good from inside (hot take...). But man, I haven't even considered modding it, because every single minute in it is a blast. Gear ratios are great, the interaction with the turbo is hilarious, and the startup noise is stupid fun. It's fun to just look at.

I wouldn't recommend an Abarth to anyone though haha. So my suggestion would be to clean up a classic from the 80s/90s and keep the GTI for family detail. I swapped a Rabbit pickup over to GTI spec (engine, trans, sway bars) and it's 10x more involving than the Mk7, plus it's great for moving stuff around! An e30 is always a great choice too.
 

Denwood

Well-known member
Joined
Sep 22, 2014
Messages
4,192
Location
Thunder Bay, Ontario, Canada
Graham/Nick my favorite ride ever was a gutted 84 GTI, heavily modified by RPI in Vancouver. It was a raspy, nasty, visceral ride, likely under 1800lbs soaking wet. It was as connected to the pavement as I’ve ever felt. That was over 20 yrs ago so you might say it made an impression :)
 

Trapps

ALLIANCE MEMBER
Joined
Feb 10, 2017
Messages
2,003
Location
The Detroit Zoo
Graham/Nick my favorite ride ever was a gutted 84 GTI, heavily modified by RPI in Vancouver. It was a raspy, nasty, visceral ride, likely under 1800lbs soaking wet. It was as connected to the pavement as I’ve ever felt. That was over 20 yrs ago so you might say it made an impression :)


That sounds like an awesomely fun car!
 

Mr. Roboto

Well-known member
Joined
Dec 11, 2012
Messages
2,160
Location
New Hampshire
Ope!

IMG-2137.jpg

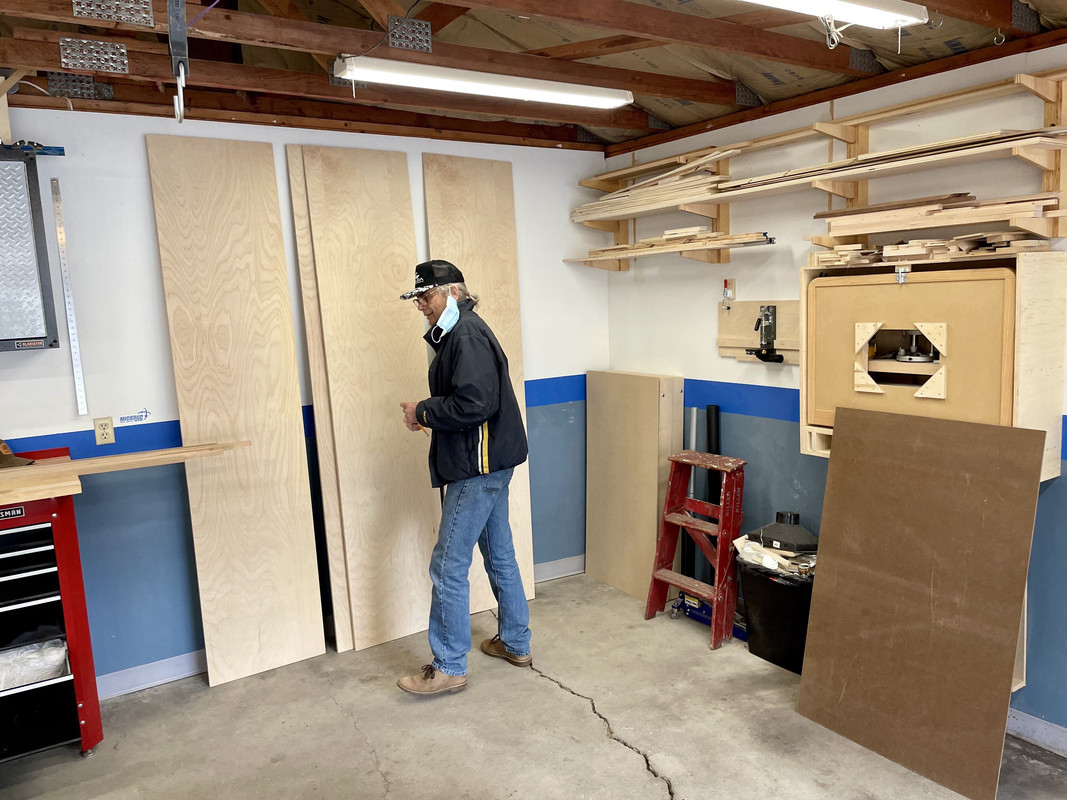
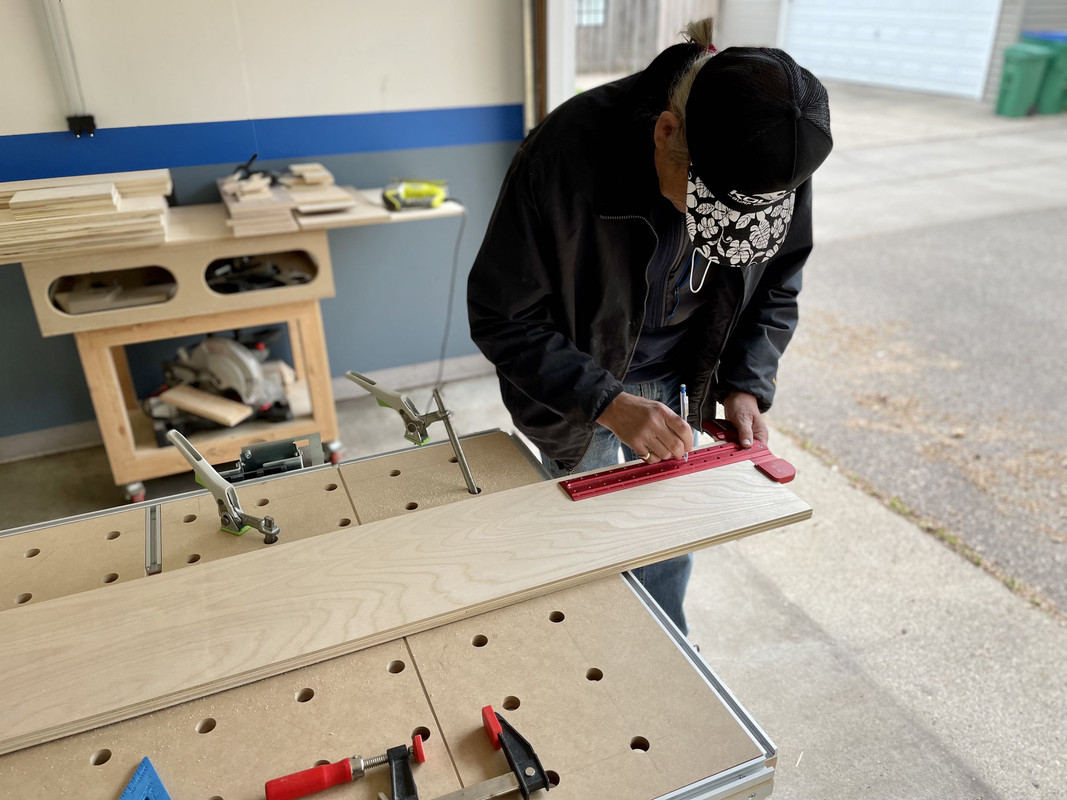
This is awesome, great photo. Enjoy making these memories! I'm sure he loves it just the same. And I'm sure he loves your help with these projects :bounce: Do you notice that your woodworking projects seem to go quicker now that you've built up your tool collection, and have your carts and jigs and shop layout dialed in? And most importantly, as your knowledge has been growing?

As I've been progressing through my Jeep project, I can't help but think how much more quickly and effectively I'm able to get things done. I constantly think at how much longer and more frustrating things used to take when I was working on my back, using jack stands, with limited tools, poor lighting ect... It's kind of humbling.
 
OP
N

nicholam77

Well-known member
Joined
Dec 18, 2016
Messages
2,671
Location
Minneapolis, MN
Some perspective if it helps :)

Your GTI on the BBS is part of the reason I came around to liking the look of the Mk7 cars - just bought a manual 19 GTI SE w/ DCC in Great Falls Green.

I don't think you'll ever get the GTI to feel like a 'fun' car. It's large, refined, quiet, conservatively styled, and not brutally quick. It trades competence in a variety of areas for outright fun. My brother has a K04/DP/intercooler on his Mk5 and it's still not always that fun to drive. The gear ratios in a Golf R aren't going to help that much, if I had to guess.

Sadly, the most fun modern car I've driven is my 500 Abarth. It's been 100% reliable over 80k miles, but it's so bad at almost everything. Sloppy handling, laggy engine, plastic interior, rattles, rough ride. I don't even think it sounds that good from inside (hot take...). But man, I haven't even considered modding it, because every single minute in it is a blast. Gear ratios are great, the interaction with the turbo is hilarious, and the startup noise is stupid fun. It's fun to just look at.

I wouldn't recommend an Abarth to anyone though haha. So my suggestion would be to clean up a classic from the 80s/90s and keep the GTI for family detail. I swapped a Rabbit pickup over to GTI spec (engine, trans, sway bars) and it's 10x more involving than the Mk7, plus it's great for moving stuff around! An e30 is always a great choice too.

Yeah the BBS CO I only saw on one other mk7 online before getting them. Lately I've seen a bunch more. I really think most BBS look good on most cars haha.

I know what you mean about the GTI, probably especially the Mk7. Very high seating position, too. I get that it's not a sports car. But I still have my nitpicks with it :)

I think some of them are my own doing from mods. I did springs with the stock shocks and they are garbage now. I can't tell if the motor mounts and dogbone mount helped or hurt at this point. It's been forever since it was "stock". But overall I think I've ended up with more vibrations, and a clunkier experience.

The Abarth sounds like a riot!

I do plan to keep the GTI long term. New cars are just so expensive, I'll probably get my money's worth out of this one. The ultimate goal would be a family car + sports car / sunday driver, and I would likely go older for that. 997 Carrera is the dream. But there are lots of older cars I'd go for. I do like BMW. Hell even a Miata would probably be more fun and visceral. Just gotta find a place to park a 3rd ride and host a full woodworking shop. No big deal, right?? :lol:

Graham/Nick my favorite ride ever was a gutted 84 GTI, heavily modified by RPI in Vancouver. It was a raspy, nasty, visceral ride, likely under 1800lbs soaking wet. It was as connected to the pavement as I’ve ever felt. That was over 20 yrs ago so you might say it made an impression :)

Sounds awesome, Dennis. As fast and impressive as they are, I think new cars just don't have that feeling as much. Too many computers, fake exhaust notes, touch screens everywhere. It's a different era. And soon the electric revolution will be upon us. :D


This is awesome, great photo. Enjoy making these memories! I'm sure he loves it just the same. And I'm sure he loves your help with these projects :bounce:

Yes he is very eager. I think sometimes forgets I have a full time job and a kid lol. But I very much enjoy it. My dad is the reason I got into any of this stuff, the house, woodworking, etc, and was the one who got me up and running when I didn't know anything. He's been building / making / designing stuff his whole life. But it is fun now to show him the new-fangled tools and MFT and track saw innovations and what not.


Do you notice that your woodworking projects seem to go quicker now that you've built up your tool collection, and have your carts and jigs and shop layout dialed in? And most importantly, as your knowledge has been growing?

As I've been progressing through my Jeep project, I can't help but think how much more quickly and effectively I'm able to get things done. I constantly think at how much longer and more frustrating things used to take when I was working on my back, using jack stands, with limited tools, poor lighting ect... It's kind of humbling.

Without a doubt. Not only quicker, but they turn out better. Stealing valuable time when I can with a young kid has often had my wife asking "can't you at least be making stuff for the house, why are you always just making stuff for the garage?". I did place a lot of emphasis on that, but it makes it so much easier now for the type of work I've mostly done. Banging out the floating shelves in 2 days for example is something that may have taken me weeks in the past, and many trips to the store haha.

I admire your Jeep skills and knowledge. I've pretty much always been frustrated "working" on cars. But then again like you said, I don't have the expansive knowledge or car tools at this time. That lift must be real nice :thumbup:
 
OP
N

nicholam77

Well-known member
Joined
Dec 18, 2016
Messages
2,671
Location
Minneapolis, MN
I'm in the Pacific Northwest now - south of Seattle, nestled in-between the Olympics, North Cascades, and Mount Rainier!

I don't know if its still there, but I used to bike to D'amico and Sons to get dinner for the family when I was growing up. My orthodontist was right above Breadsmith so after they were done cranking down my braces, I'd walk down with a wounded mouth and get myself a warm slice of whatever the daily bread was to soothe the pain. Growing up in Country Club was a fantastic place. I was on Casco Ave (this is now 15 years ago at this point) which was the only non-through street to 50th unlike Arden and Bruce. Enough of my memory lane...

Nice.... mountains!!

D'amico is still there. I actually live like 5-10min from 50th and France. Back in high school I had a friend who worked at that Breadsmith. Edina Country Club is a beautiful neighborhood, we often find ourselves venturing that way on stroller walks with the kiddo. So, I'm well familiar with the area! As a young kid I grew up on Thomas Ave S off of south beach on Calhoun (now called Bde Maka Ska), and then we moved to south west Edina fairly close to the high school. Now I'm in SLP, but barely! Small world!
 

Unruh

Well-known member
Joined
Aug 12, 2017
Messages
1,431
Location
Silverdale, Washington
That photo of your Dad is just right!

I’ll have to agree that having the right/better tools have made working on projects quicker and better. I’d like to add more enjoyable as well. Working with what you have to try to come up with a way to do something that the tool your using isn’t supposed to do (I hope this sentence makes sense) can be very frustrating!
 
OP
N

nicholam77

Well-known member
Joined
Dec 18, 2016
Messages
2,671
Location
Minneapolis, MN
That photo of your Dad is just right!

I’ll have to agree that having the right/better tools have made working on projects quicker and better. I’d like to add more enjoyable as well. Working with what you have to try to come up with a way to do something that the tool your using isn’t supposed to do (I hope this sentence makes sense) can be very frustrating!

Thanks Unruh. The "enjoyable" part is a big key for me as well. I don't mind the "figuring it out" occasionally, as I think that's often how you learn, but with limited time now it's much more satisfying to actually accomplish something vs. just drag the tools out and make a mess and get nowhere.

As much as it's not always fun, I'll add that I've had my fair share of frustrating experiences with woodworking, but I do think they are important as well, as it makes me really appreciate when (anybody, including myself) builds something nice. And appreciate a good tool. I'm guessing that's probably a common thread among people who have tried woodworking. :lol:
 
OP
N

nicholam77

Well-known member
Joined
Dec 18, 2016
Messages
2,671
Location
Minneapolis, MN
Well GJ friends, I haven't found much time lately to get back to the pantry. Two weekends ago I visited my brother in Chapel Hill, NC, who I hadn't seen in almost a year. It was a nice change of scenery amongst the trees:

IMG-2173.jpg


Then this past weekend I found myself up by Lake Bemidji in MN for a high school friend's (outdoor) wedding. They are much behind us in foliage, everything was brown:

IMG-2194.jpg


We brought the kiddo with for that road trip. Man it felt good to get out of the house and go somewhere.

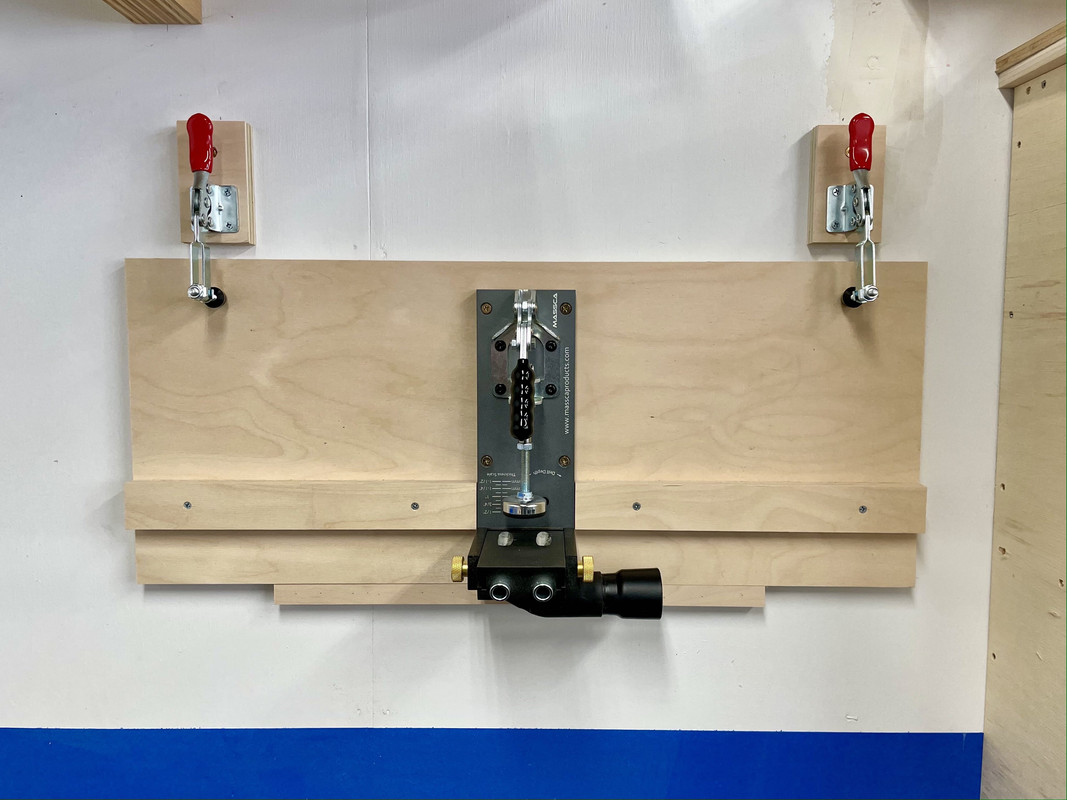
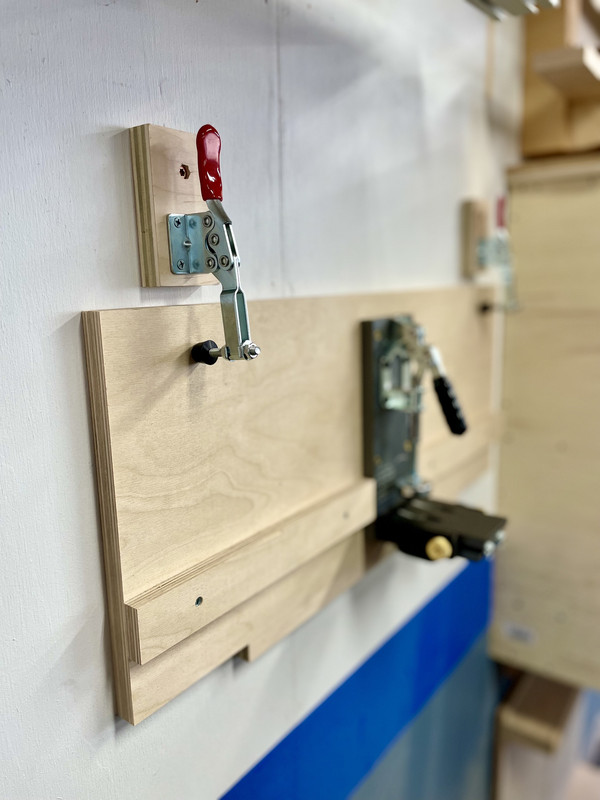
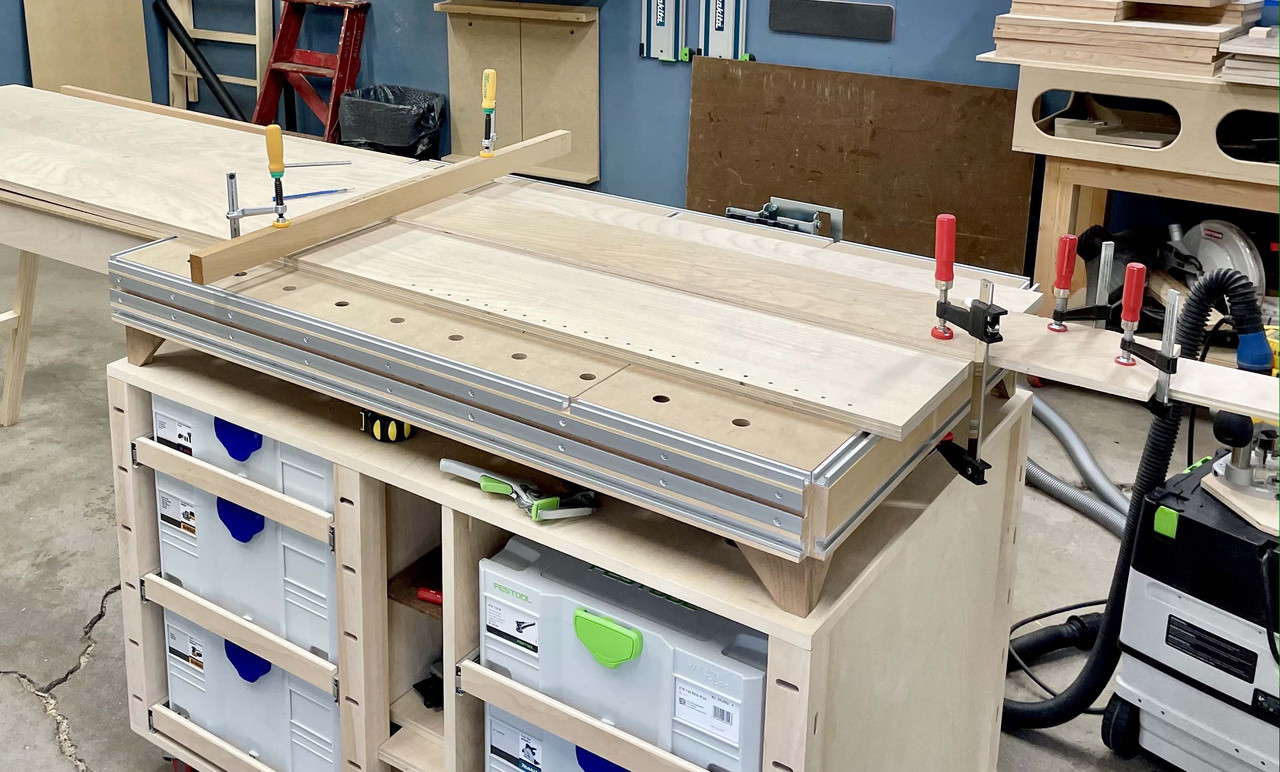
To keep this mildly garage-related, in an effort to clear space off the benches (I need all I can get for my dad's project!) I made a little docking-station-wall-holder for my pocket hole jig. The quick-clamp idea I stole from Trapps!

IMG-2186.jpg


It's not necessarily permanent, but at least it's on the wall for now!

IMG-2187.jpg


Another thing I've been mulling over for awhile is re-painting the garage walls white. Aka getting rid of the blue stripe. I'm not 100% on it but as the space has evolved in purpose from car-centric to woodworking-focused, I thought some of the plywood shop furniture and red tool bench would look nice against a simpler white backdrop.

:beer:
 

Mr. Roboto

Well-known member
Joined
Dec 11, 2012
Messages
2,160
Location
New Hampshire
Nick, side note, but if you want any more of those toggle clamps let me know. I have a ton of them that were purchased for a work project but never used. Carr Lane CL-350-HTC just cover shipping and I'll send you a bunch.

https://www.amazon.com/dp/B00EKJIOL4/?tag=atomicindus08-20

Also... thanks for the kind words about my Jeep “skills” haha, just faking it till I make it!
 
Last edited:

zanyad

ALLIANCE MEMBER
Joined
Apr 26, 2018
Messages
2,801
Location
NE Ohio
Nick, side note, but if you want any more of those toggle clamps let me know. I have a ton of them that were purchased for a work project but never used. Carr Lane CL-350-HTC just cover shipping and I'll send you a bunch.

If Nick passes, I'd be interested in some.
 
OP
N

nicholam77

Well-known member
Joined
Dec 18, 2016
Messages
2,671
Location
Minneapolis, MN
Nick, side note, but if you want any more of those toggle clamps let me know. I have a ton of them that were purchased for a work project but never used. Carr Lane CL-350-HTC just cover shipping and I'll send you a bunch.

https://www.amazon.com/dp/B00EKJIOL4/?tag=atomicindus08-20

Also... thanks for the kind words about my Jeep “skills” haha, just faking it till I make it!

If Nick passes, I'd be interested in some.

Thanks Roboto, although I actually have some extras still from a pack I bought. I don't have an immediate use so I think I'll pass but I appreciate the offer!

:beer:
 

bj383ss

Well-known member
Joined
Sep 29, 2011
Messages
3,166
Location
TX
IMG-2187.jpg


Another thing I've been mulling over for awhile is re-painting the garage walls white. Aka getting rid of the blue stripe. I'm not 100% on it but as the space has evolved in purpose from car-centric to woodworking-focused, I thought some of the plywood shop furniture and red tool bench would look nice against a simpler white backdrop.

:beer:

This has been bugging me for some time. I didn't want to say anything as it is your garage and the way you want it. But I have looked at the stripe at thought I wonder if Nick still sees this as a garage aimed at cars as it has truly evolved into a wonderful workshop making sawdust and all other things.

Glad to know it is kicking around in your head. I am suffering from analysis paralysis as BD calls it. I can't decide whether to paint the 2 sections of pegboard I have left that are not painted the Blue I choose for the garage or the off white I painted the tool wall that is leftover from painting the shed. I like the color contrast of the Blue but my aging eyes really like the brightness of the off white. I dunno...

Bret
 
OP
N

nicholam77

Well-known member
Joined
Dec 18, 2016
Messages
2,671
Location
Minneapolis, MN
This has been bugging me for some time. I didn't want to say anything as it is your garage and the way you want it. But I have looked at the stripe at thought I wonder if Nick still sees this as a garage aimed at cars as it has truly evolved into a wonderful workshop making sawdust and all other things.

Glad to know it is kicking around in your head. I am suffering from analysis paralysis as BD calls it. I can't decide whether to paint the 2 sections of pegboard I have left that are not painted the Blue I choose for the garage or the off white I painted the tool wall that is leftover from painting the shed. I like the color contrast of the Blue but my aging eyes really like the brightness of the off white. I dunno...

Bret

Ha, I guess you read my mind! I've actually been thinking about it since taking the miter station down... just haven't prioritized the PITA of moving and cleaning everything over other projects. I don't have anything against "racing stripes", but yeah, over the past few years doing a deep internet dive of workshops on forums, Pinterest, YouTube, and of course Garage Journal... a lot of woodworking shops are painted white. And it makes sense. If I knew it was bugging you, too, I woulda got on it sooner!

:lol_hitti

With the shop lights, the high contrast of the white and dark gray pose an issue for photos, too. It's better with my current phone, but my last phone really struggled. I always edit every single one of my photos to bring up the blacks / shadows so it looks more consistent like real life. A solid white backdrop would make exposures better.

I'm not sure on your pegboard, but if you're like me you'll end up thinking about it for another year or two!

:lol:
 
OP
N

nicholam77

Well-known member
Joined
Dec 18, 2016
Messages
2,671
Location
Minneapolis, MN
Drill Press Storage

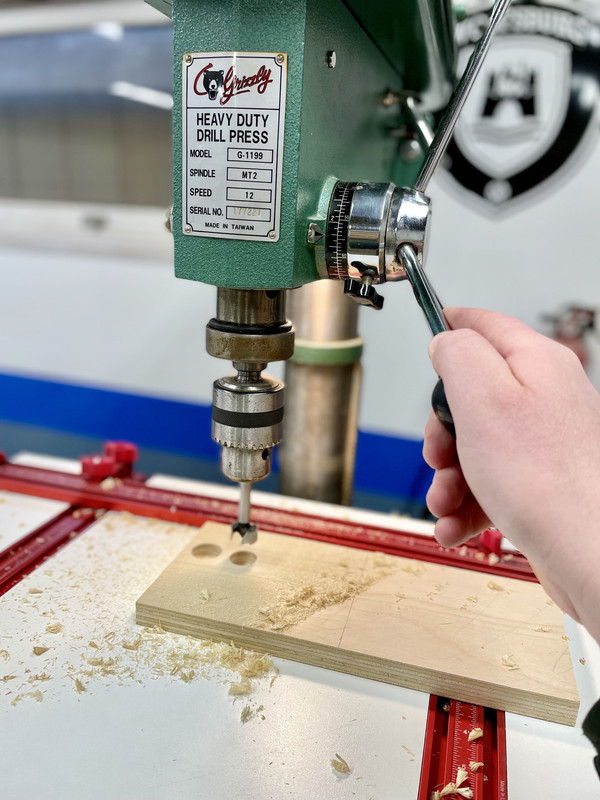
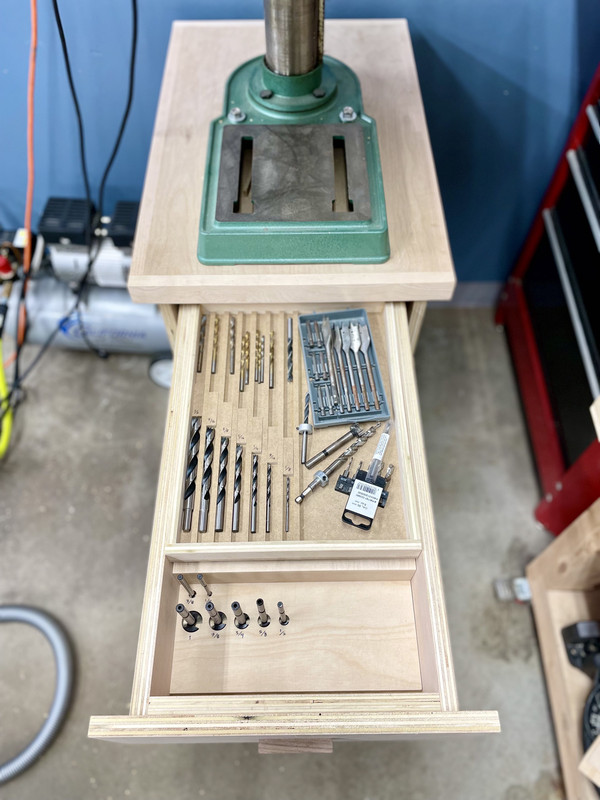
Another quick shop project. So I built the drill press cart last summer, and put stuff in it. But it was basically just thrown in the drawers as a jumbled mess. Today I tried to tackle the drawer with my drill bits.

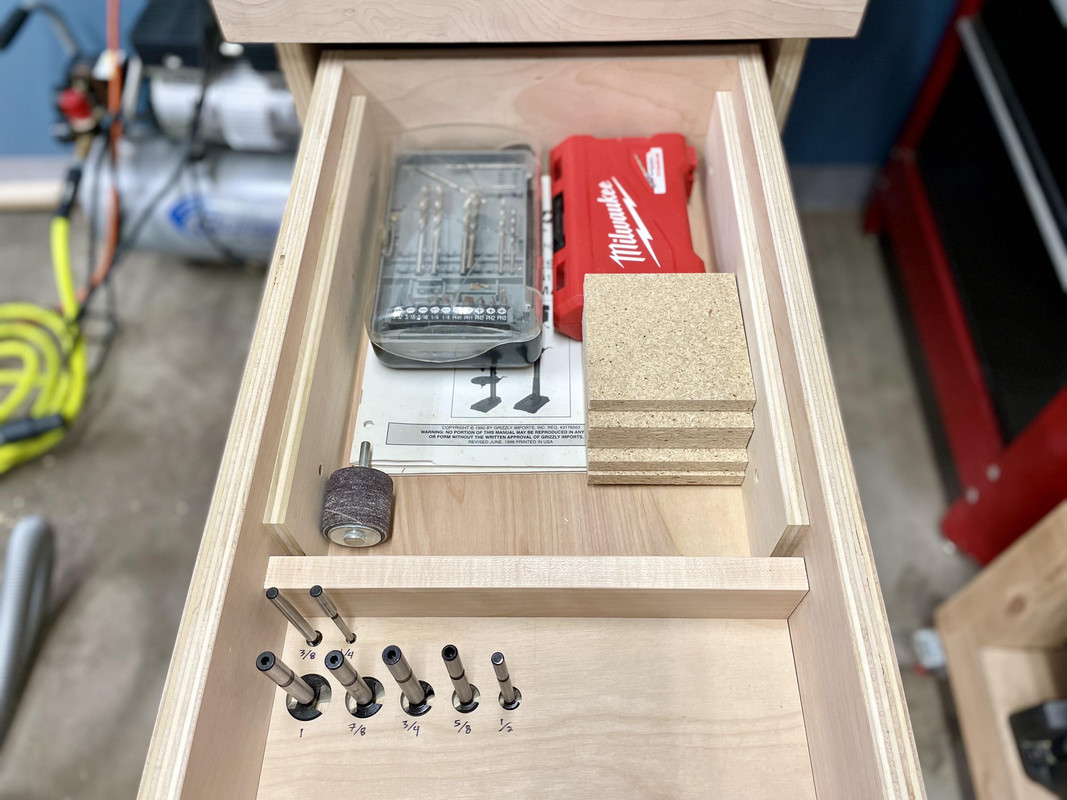
The drawers have some depth, so for the Forstner bits I just drilled holes for the heads in a piece of plywood and stood them upright:

IMG-2235.jpg


IMG-2243.jpg


I only have the 7, but I left space for some larger ones and future metric versions. I also put two side runners in the back area of the drawer, and a little divider behind the Forstner bit section.

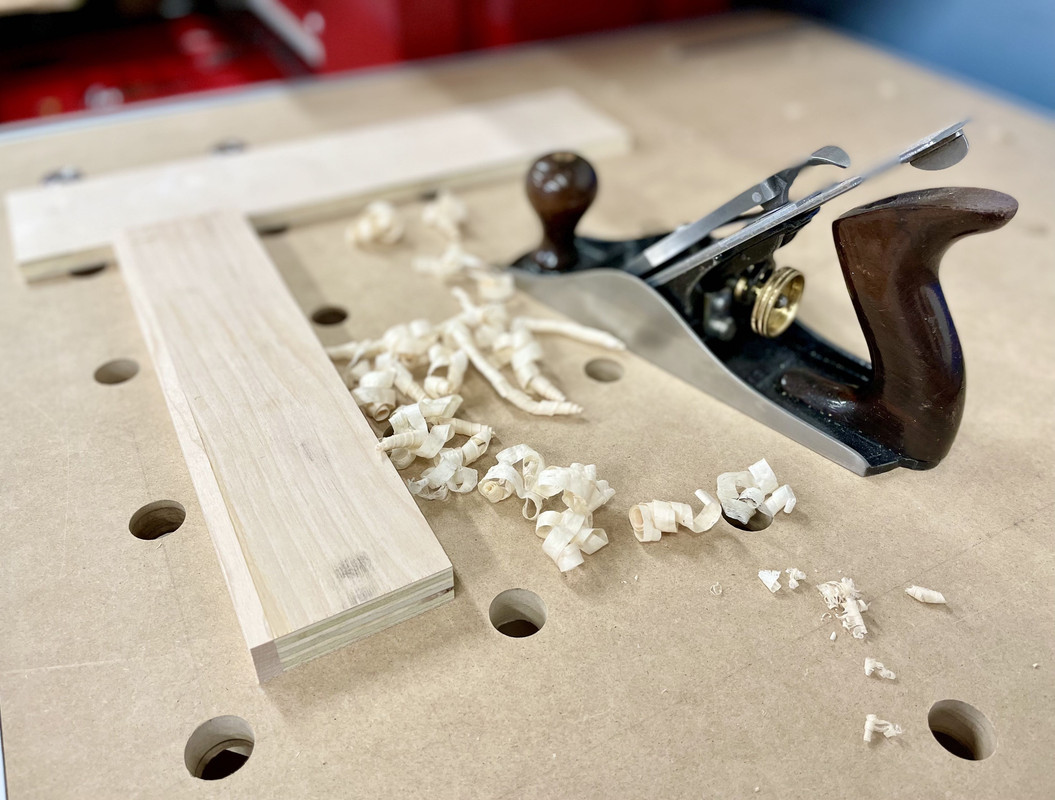
On this divider I capped the plywood with a strip of maple I had that was just over the thickness of the plywood. No reason really, but I did give the hand plane another go to flush it up:

IMG-2236.jpg


Worked well, pretty sweet!

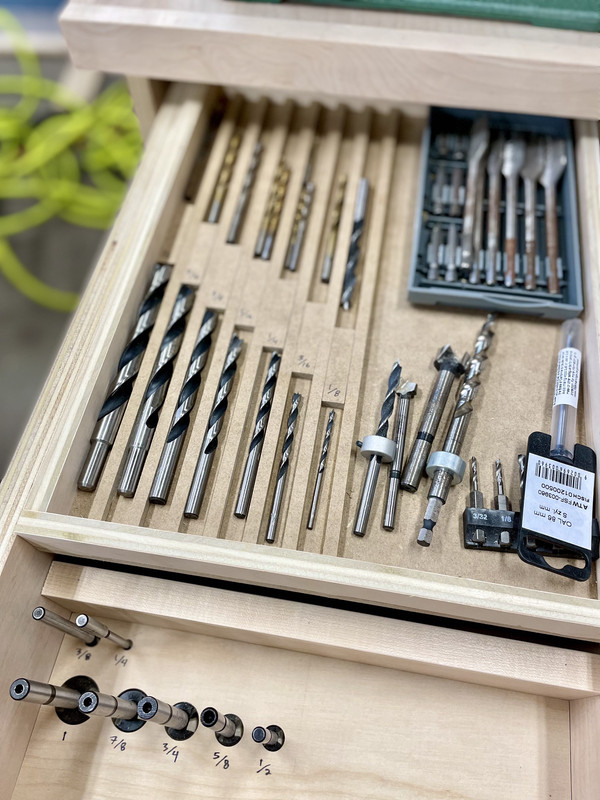
Next I made a sliding drawer compartment thingy for brad and twist bits + some miscellaneous stuff:

IMG-2244.jpg


And wrote the sizes on the wood with a fine point sharpie:

IMG-2239.jpg


This way I can take the tray out and still store stuff underneath it.

If I know I'll be acquiring more of something someday (like drill bits), I always struggle building or planning storage for it. I get anxiety that I'll run out of room or won't predict it right. But anything is better than piled on top of each other in a mess. It feels so good to do little organizational things like this, I think I just need to take some leaps and realize that if it doesn't work out down the line I can always rebuild it.

Plus it's these projects that are the perfect use for plywood and MDF scraps. :D

:beer:
 
OP
N

nicholam77

Well-known member
Joined
Dec 18, 2016
Messages
2,671
Location
Minneapolis, MN
Pantry Project - part 2

Got through a few more steps.

Making sense of all the pieces:

IMG-2250.jpg


Dad taking the Woodpecker goods for a spin:

IMG-2247.jpg


Cutting out toe kicks with a jig saw:

IMG-2254.jpg


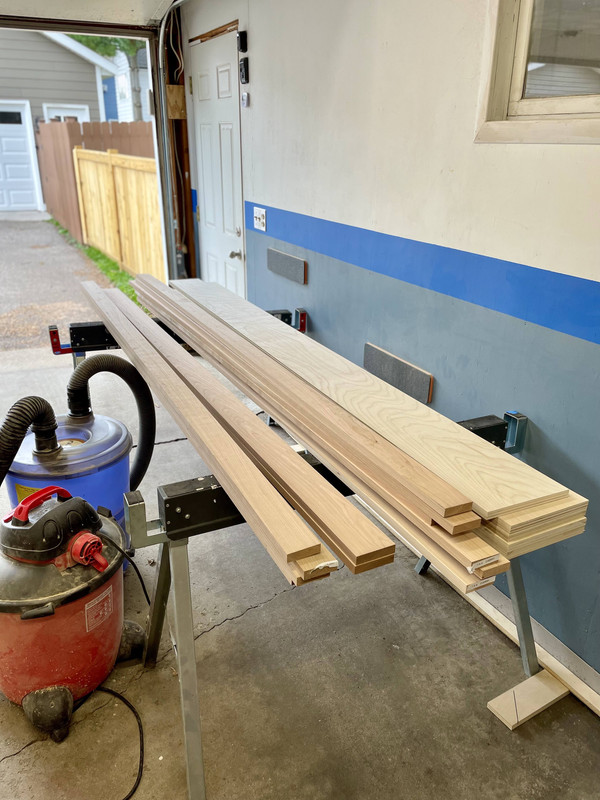
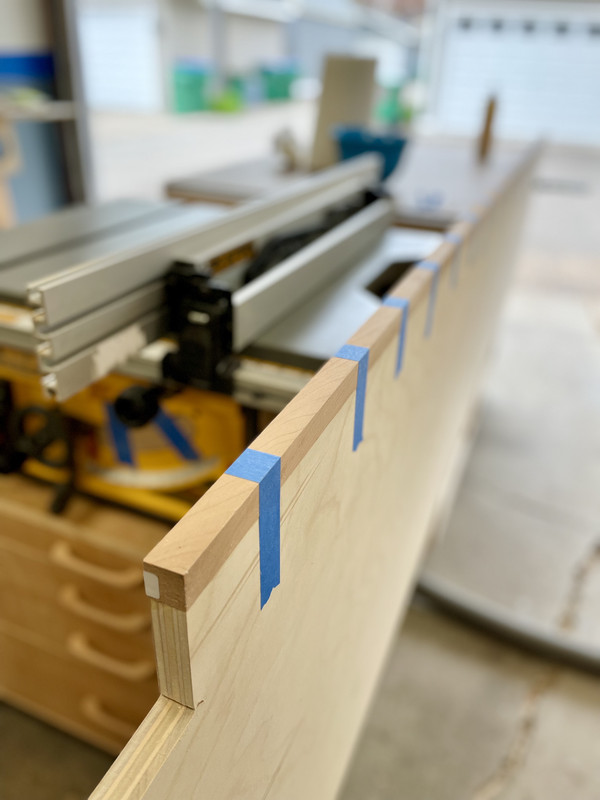
A bunch of cherry boards we ripped for 3/4" thick hardwood edge banding on all the faces. The offcuts will be used for the rail and stile doors.

IMG-2251.jpg


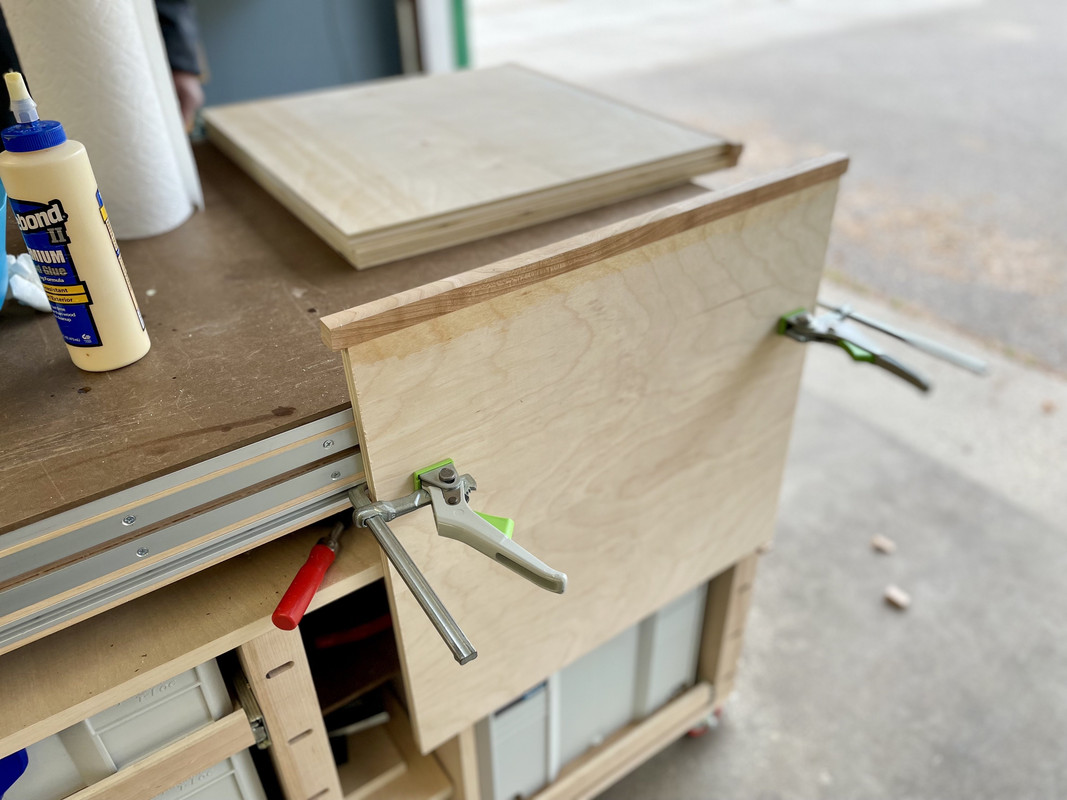
Edge banding:

IMG-2255-2.jpg


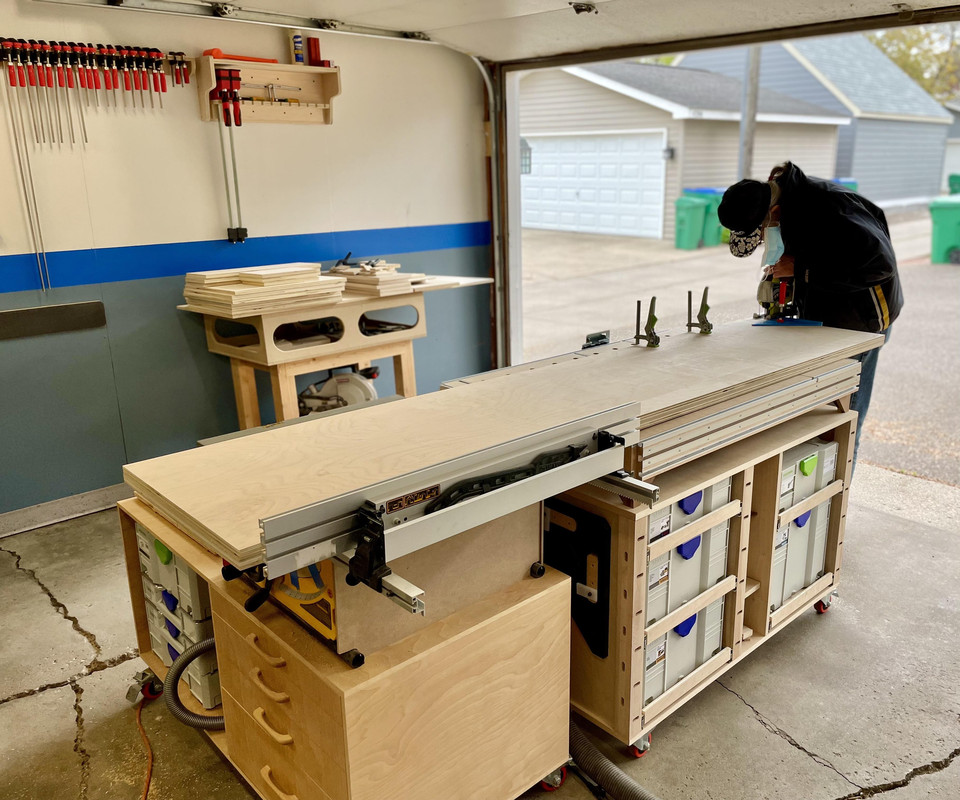
That's right, the MFT can even clamp these almost 8' pieces! :rocker:

IMG-2256.jpg


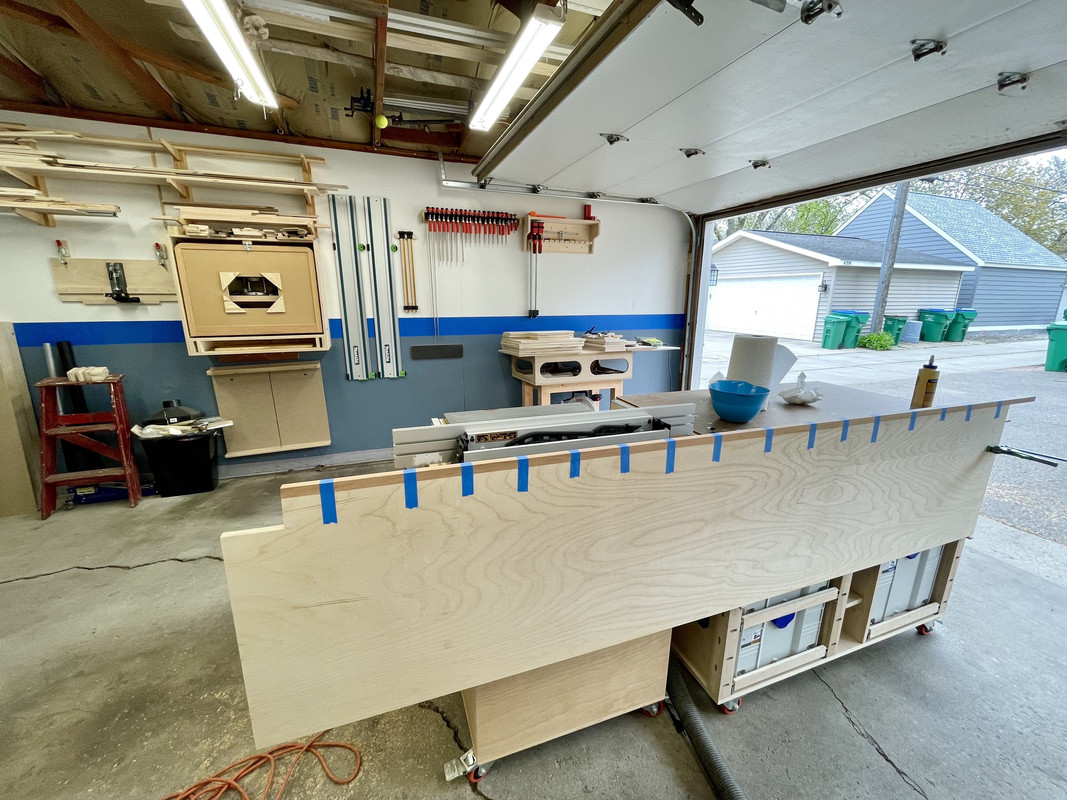
I tried to use some blue tape on the first one to space out the pin nails, but that got real old real quick, so for the rest I just used more pins.

They'll be covered by the doors anyways, so :dunno:

And the horizontal pieces:

IMG-2258.jpg
 

bj383ss

Well-known member
Joined
Sep 29, 2011
Messages
3,166
Location
TX
Nick both projects look awesome. So glad you are spending this precious time with your dad that the two of you can enjoy and look back on. I always enjoy working with my dad whenever I can. He has been the greatest teacher along with my grandpa I lost when I was 18. In the future you will be the one teaching your kids so make sure you pay attention to his wisdom.:D

Bret
 

jake28

Well-known member
Joined
Aug 28, 2018
Messages
487
Location
SF, CA
[mention]fourmotioneer [/mention] [mention]nicholam77 [/mention] I snapped these photos for you earlier, re: golf r.

Needed to pick up some steel to finish welding a table. Had the supplier cut down 20’ to 8’ and change, and made my way back via city streets.

df5adb1472225598d6ff0ad90a363492.jpg
a2bddf8e808f3ad72cb973163beb66e8.jpg
cfdca5c5b0ddbe2796845640b95c0a8e.jpg
 

Attachments

  • df5adb1472225598d6ff0ad90a363492.jpg
    df5adb1472225598d6ff0ad90a363492.jpg
    127.3 KB · Views: 5
  • cfdca5c5b0ddbe2796845640b95c0a8e.jpg
    cfdca5c5b0ddbe2796845640b95c0a8e.jpg
    175.8 KB · Views: 2
  • a2bddf8e808f3ad72cb973163beb66e8.jpg
    a2bddf8e808f3ad72cb973163beb66e8.jpg
    123.8 KB · Views: 2
To avoid these ads, REGISTER NOW!
OP
N

nicholam77

Well-known member
Joined
Dec 18, 2016
Messages
2,671
Location
Minneapolis, MN
Roger that, should the need arise in the future, the offer still stands!

Thanks!

Nick both projects look awesome. So glad you are spending this precious time with your dad that the two of you can enjoy and look back on. I always enjoy working with my dad whenever I can. He has been the greatest teacher along with my grandpa I lost when I was 18. In the future you will be the one teaching your kids so make sure you pay attention to his wisdom.:D

Bret

100 percent agreed, Bret.

Needed to pick up some steel to finish welding a table. Had the supplier cut down 20’ to 8’ and change, and made my way back via city streets.

df5adb1472225598d6ff0ad90a363492.jpg

Awesome Jake. You must have really cranked on those F-clamps. Now lets see some full sheets of plywood! :lol:

That gray (can't remember what it's called) is a nice look on the R.
 

Attachments

  • df5adb1472225598d6ff0ad90a363492.jpg
    df5adb1472225598d6ff0ad90a363492.jpg
    121.5 KB · Views: 5
OP
N

nicholam77

Well-known member
Joined
Dec 18, 2016
Messages
2,671
Location
Minneapolis, MN
Pantry Project - part 3 - flushing the edge banding

IMG-2298.jpg


IMG-2299.jpg


IMG-2301.jpg


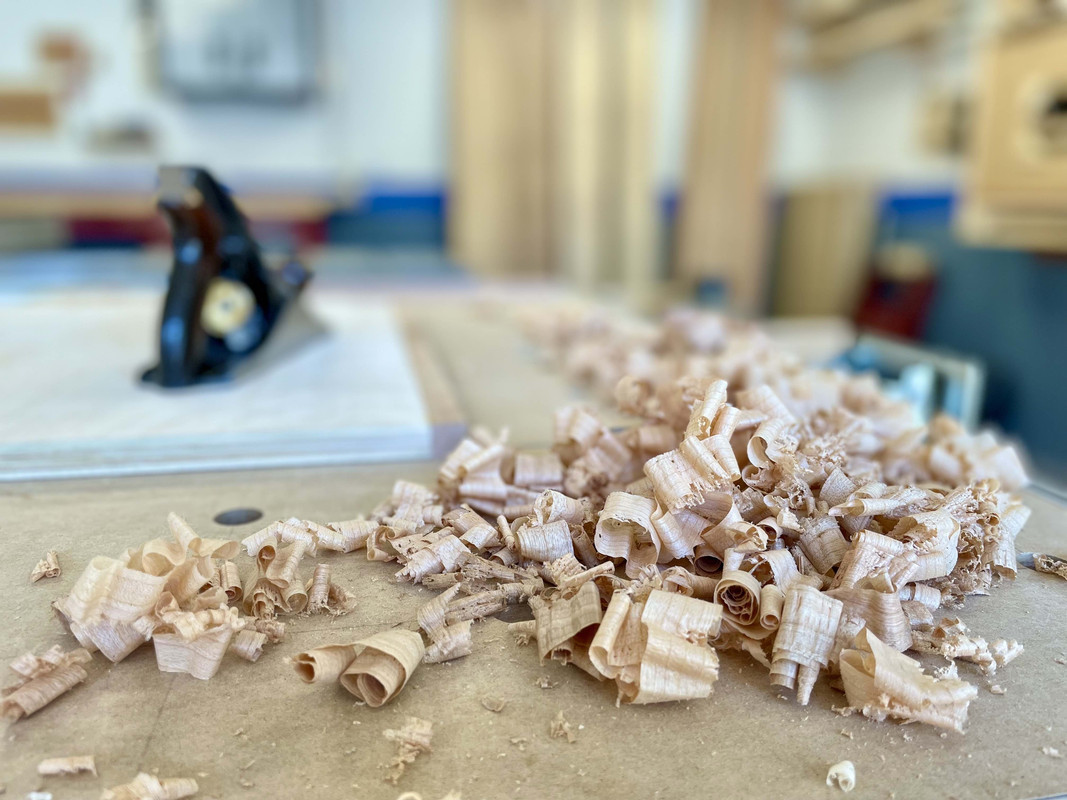
In an effort to make sanding go quicker.

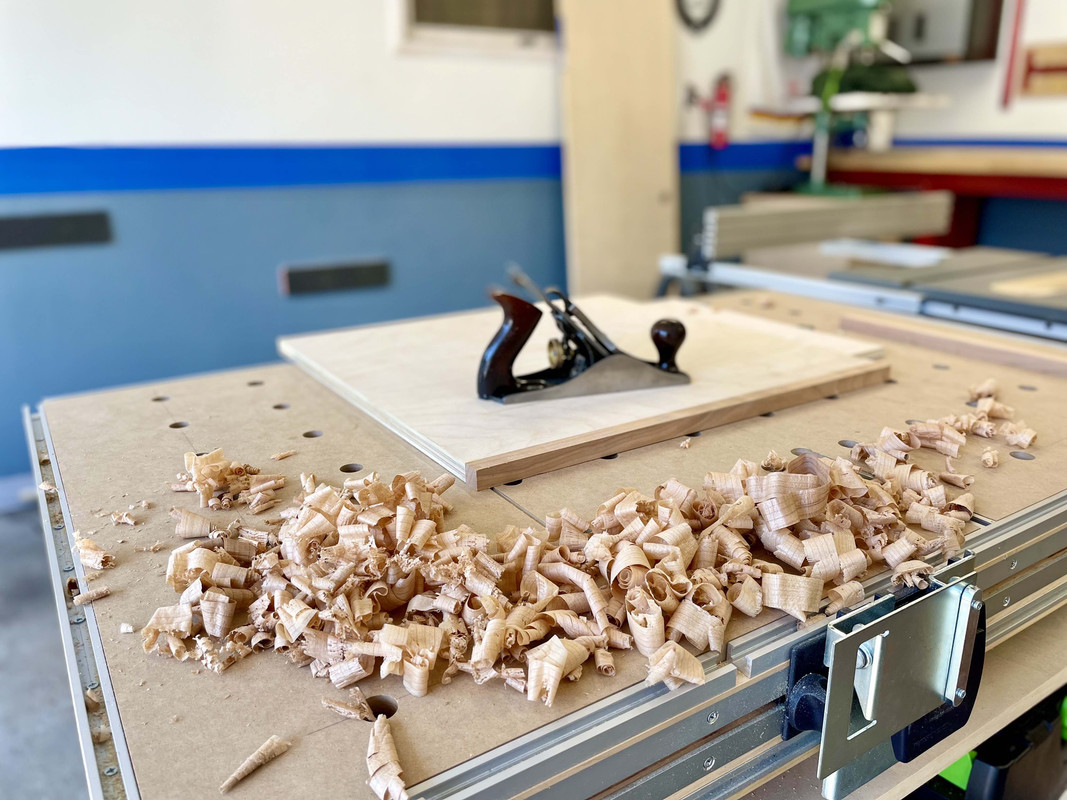
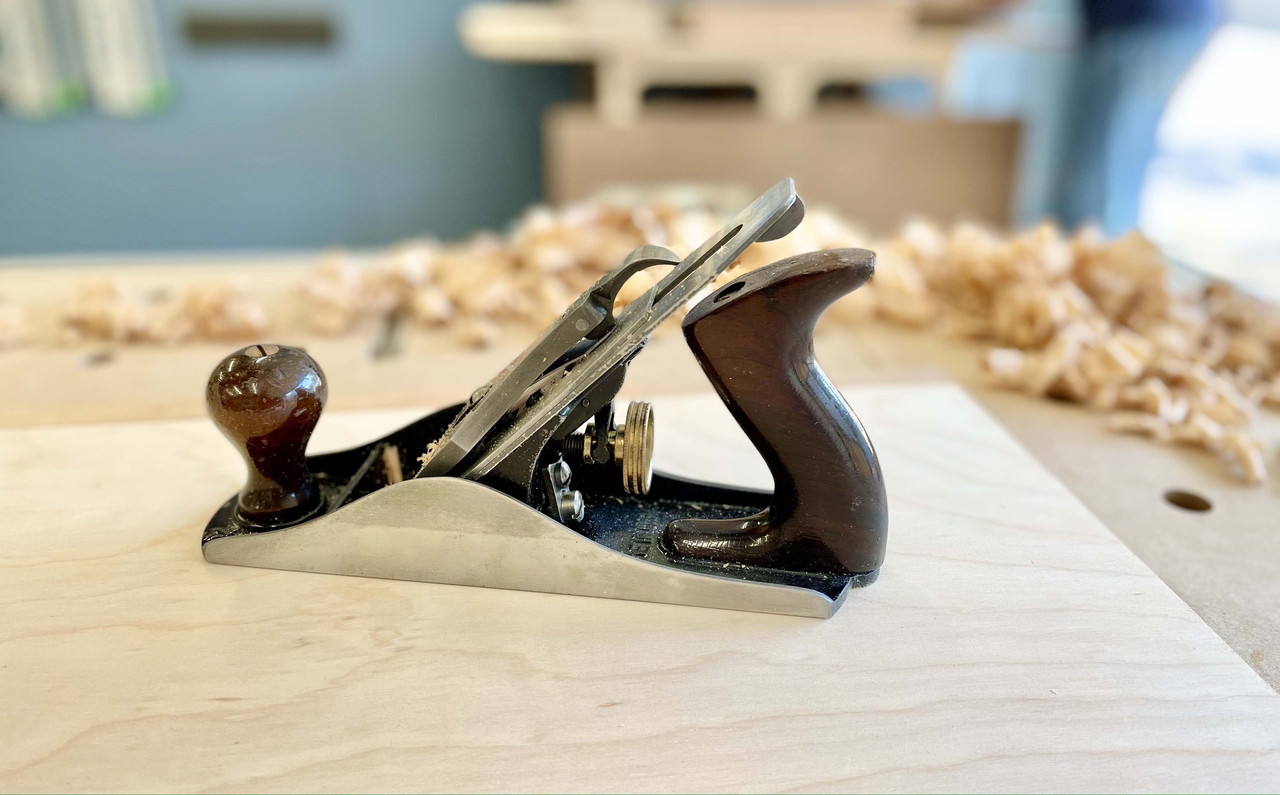
There are many, many more shavings not pictured. Like a ton more. Did the 8' carcass sides as well. Got some sweeeeet 4' shavings on those. It was a good couple hours of work. First time really using the No. 4 and it was exceedingly fun. My weak @$$ shoulder is gonna be sore tomorrow.

I probably could have found a more efficient way to do it (router??), but I thought it would be fun to use my grandpa's tool on my dad's project.

:D
 

loganb

ALLIANCE MEMBER
Joined
Dec 29, 2011
Messages
5,574
Location
Omaha, NE
I probably could have found a more efficient way to do it (router??), but I thought it would be fun to use my grandpa's tool on my dad's project.

:D

Super cool...the extra time spent doing it with a tool with that connection is well worth it....and even if it wasn't your grandpa's...hand planes are fun!
 
OP
N

nicholam77

Well-known member
Joined
Dec 18, 2016
Messages
2,671
Location
Minneapolis, MN
Good to see the plane in action. :thumbup:

Yeah, thanks for the advice on getting it tuned up! Tools are meant to be used! But holy **** did my forearms hurt last night. Kept me up at night actually, had to pop some Tylenol! Idk if it's my bench height or just unused muscles but I really felt it.

Super cool...the extra time spent doing it with a tool with that connection is well worth it....and even if it wasn't your grandpa's...hand planes are fun!

Yeah, very satisfying indeed :rocker:
 
OP
N

nicholam77

Well-known member
Joined
Dec 18, 2016
Messages
2,671
Location
Minneapolis, MN
Pantry Project - part 4 - shelf pins for the win

Got some more time in this afternoon. First I trued up some of the parts. The track saw rip cuts (with two 55" rails connected) had not come out at accurate as I'd like, again. Some had a sag in the middle. I'm bummed I didn't just save up and go for the 118" rail.

I didn't want anything to come out sloppy in the end, so I ended up running everything through the table saw and shaving an 1/8" off to get a nice parallel edge to the fronts. A huge plus of the track saw is NOT having to do this with large pieces on a tiny table saw, so I need to figure out something to correct it on these long parts in the future.

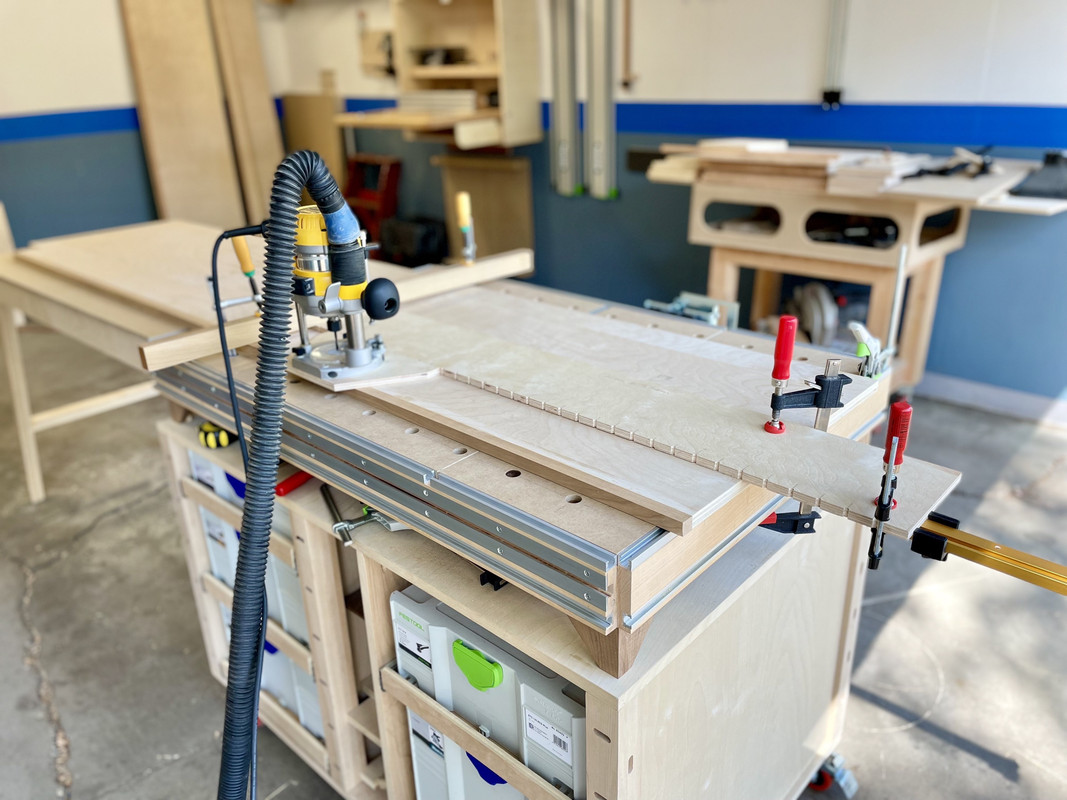
After that, started on the shelf pins:

IMG-2306.jpg


IMG-2307.jpg


Definitely some head scratching to get my "DIY-32" jig set up and clamped correctly. I think it's still going to produce good results, but in the future if I keep building cabinets I'm likely going to give it a rethink. Once it's configured though, the holes go fast and easy and dustless.

:beer:
 

Bakafish

Well-known member
Joined
Feb 7, 2017
Messages
477
Location
Tokyo
Even a long rail will easily deflect 1 or 2 mm if you don't get the pressure of the saw directly over the rail. Body positioning is very critical and being clamped only on the ends over a long span leads to bowing even with a tiny amount of pressure. They make the "Gecko" clamp that I think would help a lot as a mid-span brace, even a couple strips of masking tape to keep the rail(s) from drifting in the middle will help. But joining rails is likely not the cause of your troubles.
 

Trapps

ALLIANCE MEMBER
Joined
Feb 10, 2017
Messages
2,003
Location
The Detroit Zoo
Perhaps a rail square centered and combined with a pair of rail clamps at each end...I like the looks of the Benchdogs' stuff, but it's pricey and a long way to ship.

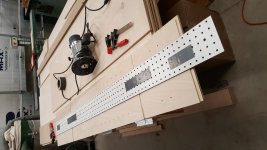
You might also be able to use your Dog Holes with just a simple clamp in the middle. like this or even just a rail mountable dogs to control lateral movement.

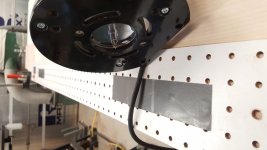
Because I'm looking ahead to built in cabinets in the studio/office build, I just picked up 32mm rail index tool that also fits my rail router adapter:

51176734581_69054f38db_h.jpg


As you know, that Bosch rail adapter runs on Makita tracks and will mate to a DeWalt router. What I don't know is if the 32mm indexing tool will play nicely with the Makita 32mm rail.

:beer:
 
OP
N

nicholam77

Well-known member
Joined
Dec 18, 2016
Messages
2,671
Location
Minneapolis, MN
Even a long rail will easily deflect 1 or 2 mm if you don't get the pressure of the saw directly over the rail. Body positioning is very critical and being clamped only on the ends over a long span leads to bowing even with a tiny amount of pressure. They make the "Gecko" clamp that I think would help a lot as a mid-span brace, even a couple strips of masking tape to keep the rail(s) from drifting in the middle will help. But joining rails is likely not the cause of your troubles.

Good point, I was worried of this, too. I was actually looking up those Gecko clamps. Expensive, but cool.

Some of my cuts were out by 1/8" in the middle so at least 3mm, and not necessarily consistent, so I ended up with some long parts, that when compared against one another, were almost 1/4" off from each other in the middle.

The best thing I have to align two rails is a 4' level, so I still think a 118" rail would get me closer right off the bat, plus easier setup.

That's a good idea on using some tape in the middle, and I'll try to pay attention to my body positioning more next time.

Perhaps a rail square centered and combined with a pair of rail clamps at each end...I like the looks of the Benchdogs' stuff, but it's pricey and a long way to ship.

You might also be able to use your Dog Holes with just a simple clamp in the middle. like this or even just a rail mountable dogs to control lateral movement.

Because I'm looking ahead to built in cabinets in the studio/office build, I just picked up 32mm rail index tool that also fits my rail router adapter:

As you know, that Bosch rail adapter runs on Makita tracks and will mate to a DeWalt router. What I don't know is if the 32mm indexing tool will play nicely with the Makita 32mm rail.

:beer:

Thanks for the ideas, Mark. I actually picked up a used gen 1 Woodpecker rail square on Craigslist a bit ago. It doesn't auto-align with the spring clip, though. I agree the Benchdogs one looks very nice, but I've been holding back on spending that much $$$. Because of my workbench and desire for repeatability I don't actually use a rail square that often, mostly just for truing up a factory edge at 90°.

I have to confess I'm not sure I understand what you're saying with the rail square though. I do use the underside clamps on both ends of the rail, but when the rail is in the middle of the plywood I'm not sure how a rail square or clamp could attach in the center.

The scenario I struggle with the most is full length rips on the foam insulation backing, so not a lot of great clamping options.

IMG_1154.jpg


I am very eager to see how your Bosch 32mm plunger system works.

I've totally been eyeing that Bosch rail adapter, but am having trouble committing. I had some issues with my DIY-32 jig the other day, and am second guessing the value and expense of another home brewed solution.

If you use your Bosch setup for something besides arbitrary shelf pins (like proper 37mm setback for hinge plates and drawer slides) I will be curious to see how that goes. Getting the front and back rows of holes parallel is going to require some sort of end stop, too. And because the rail has to be flipped 180° instead of flipped over, the end stops need to be extremely accurate on both ends of the rail.

Part of me thinks that Bosch base looks awesome, I already have a Makita rail, and I like my DeWalt plunge router. But I'd still be missing those extra "stops" components, and a hole-y rail. (The Makita rail does not have holes, nor do they sell one). I could try to drill holes in one, but there is the issue of accuracy. So I'd have a DIY rail and components from 3 different brands. Idk, I'm still thinking on it!
 
OP
N

nicholam77

Well-known member
Joined
Dec 18, 2016
Messages
2,671
Location
Minneapolis, MN
Continuing on with shelf pins:

I don't have detailed pics as I was focused on moving the work forward instead of documenting, but I am a bit disappointed and didn't get the results I wanted.

IMG-2323.jpg


One row of these cabinets is very narrow / shallow. Like 9" deep. So the jig can't be clamped on the back with the MFT dog holes. And the cabinets are so long I can't clamp the jig on the end that falls in the middle. So it required some creative and fiddly clamping, including the usage of a caul:

IMG-2321.jpg


Aside from the ease-of-use frustrations, there were some accuracy issues. I had used one of my 3D printed Incra TT+ parallel guides as an "end stop", clamped to the jig, for drilling the holes in the first orientation. When it came time to flip the jig over and drill the opposite row of holes, I had to flip the end stop to the other side of the jig, but when I drilled the next row they came out about 2mm off from the opposite row.

:headscrat

I assumed it was some sort of error with the end stop, so on the next one I drew parallel lines over with a T-square, and re-positioned the jig by eye and re-set the end stop.

Better... but still off a bit, maybe .5mm or 1mm. This doesn't sound like much, but it is not good for shelve pins. They should be almost exact.

I've produced essentially perfect results with the jig before, so I was scratching my head on what was happening and how to fix it.

What I think may have happened is when installing the router onto the baseplate, the bit may not have been perfectly in center with the indexing pin. Even 0.5mm off and it would propagate to 1mm overall because the baseplate faces a different orientation for the front row of holes vs. the back row of holes.

To set the baseplate I've just been plunging the bit through the existing 5mm hole and then tightening the screws, but the hole may have widened a hair with use.

The Festool LR32 base has a much wider opening and uses a "centering mandrel" to center the bit. I'm realizing the importance of this.

Another frustration was my jig, the long board piece, has warped and would not lie flat, which made lining it up a chore.

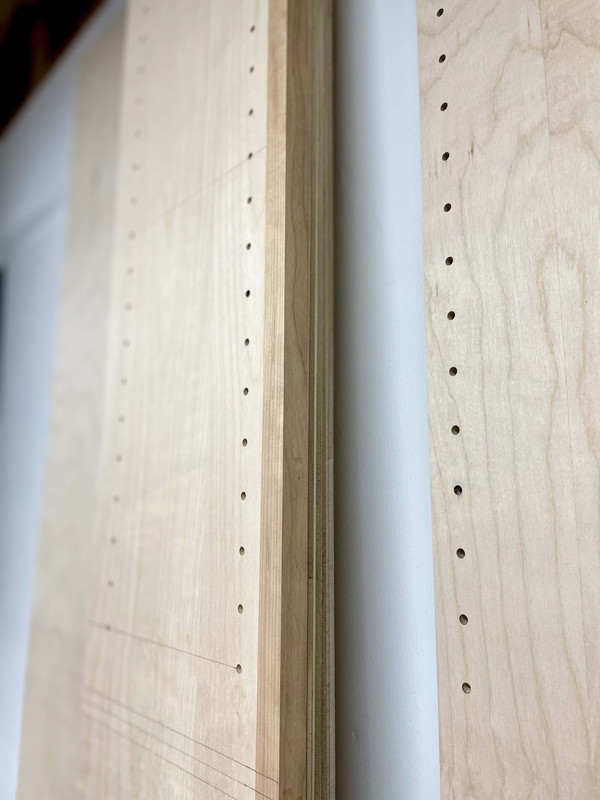
Overall the holes got machined very nicely:

IMG-2320.jpg


And any inaccuracies won't affect the doors. But some of the shelves might require some tape to shim them level if they end up rocking a bit. We shall see...

I think ultimately I'll end up building more cabinets for myself, and I'd like to crack this nut without shelling out for something like the LR32 which costs a small fortune. Either a more thoughtful redesign of this plywood jig with better materials and dimensions, or a rail-based solution with 3D printed parts like Bakafish has executed, or perhaps a hybrid solution with some pre-existing products like Trapps was suggesting. Too late for this project, but food for thought!
 
OP
N

nicholam77

Well-known member
Joined
Dec 18, 2016
Messages
2,671
Location
Minneapolis, MN
Just a quick test of the new forum posting.

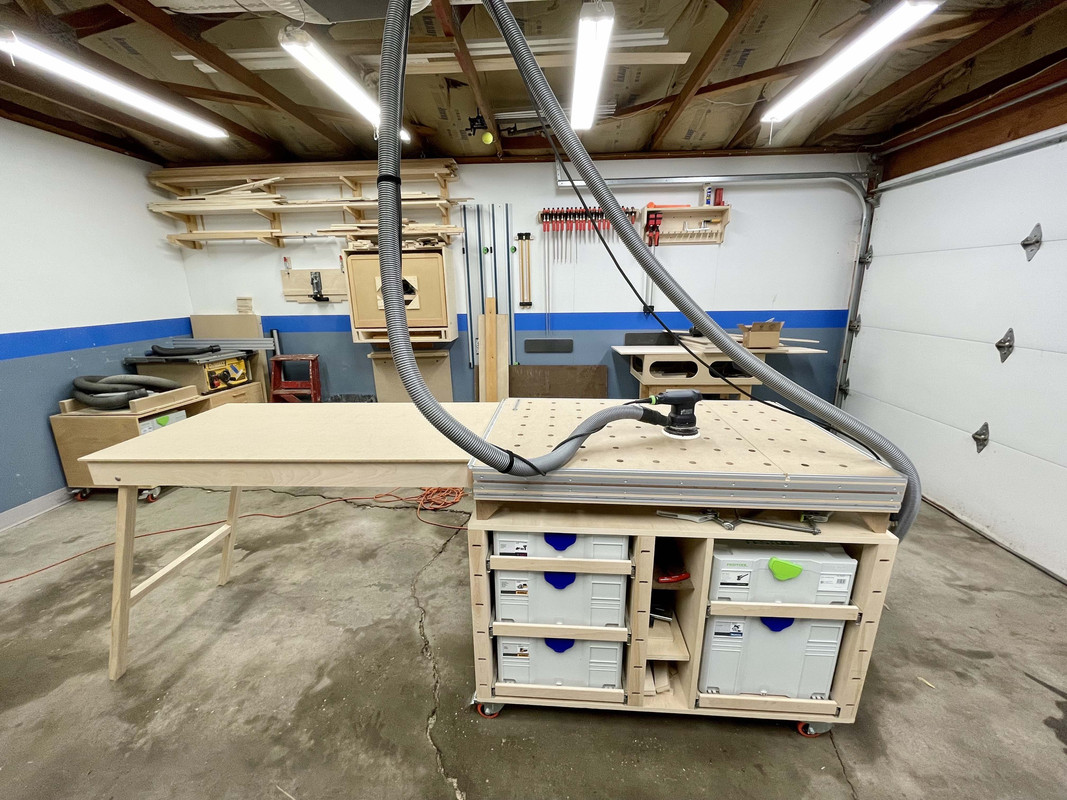
I've been completely slammed at work and was super sick over the weekend. So... not much to report. Yesterday while I was working I did set my dad up to do some sanding on his own:

IMG-2373.jpg


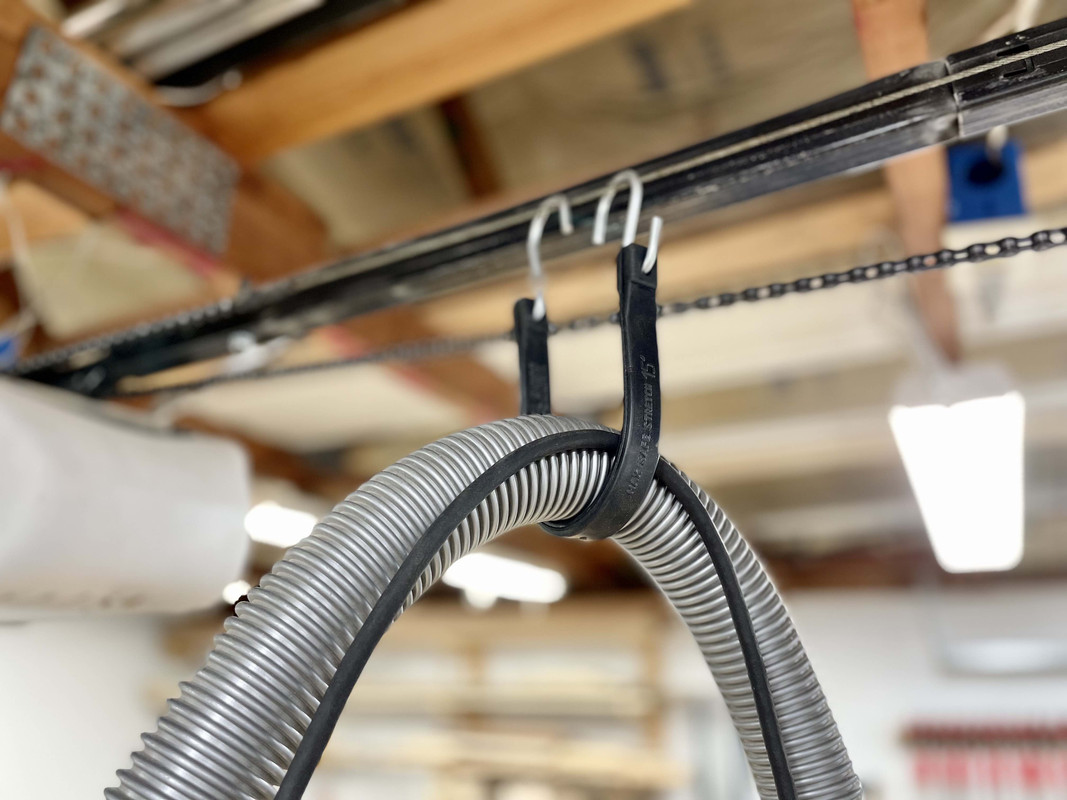
Until I build a boom arm I'm using this rubber strap and the garage door wire to suspend the vac hose:


IMG-2375.jpg


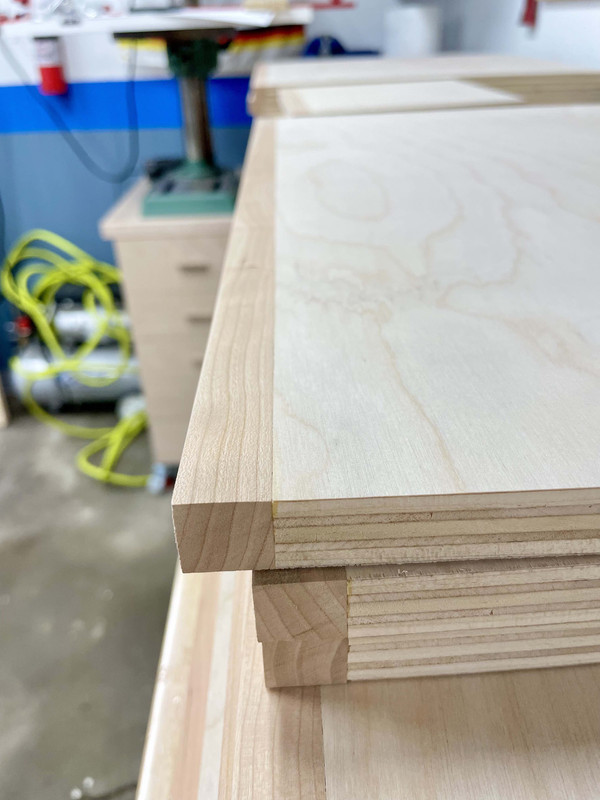
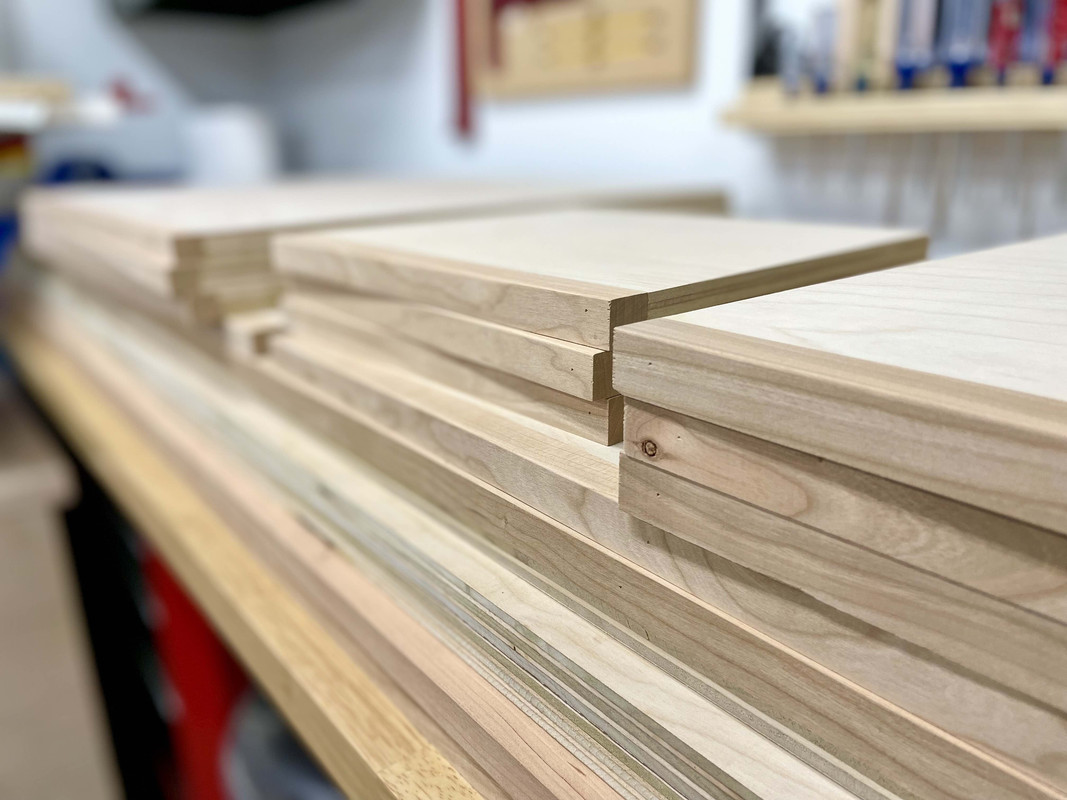
He managed to sand everything to 120 grit and do the final flushing on the cherry edge banding.

IMG-2372.jpg


IMG-2371.jpg


It's all looking pretty good. Need to continue the shelf pins when we can, but I have so much going on, not sure when I'll be able to next.

On a positive note, yay for new forum software!

🍺
 

Trapps

ALLIANCE MEMBER
Joined
Feb 10, 2017
Messages
2,003
Location
The Detroit Zoo
I have to confess I'm not sure I understand what you're saying with the rail square though. I do use the underside clamps on both ends of the rail, but when the rail is in the middle of the plywood I'm not sure how a rail square or clamp could attach in the center.

The scenario I struggle with the most is full length rips on the foam insulation backing, so not a lot of great clamping options.
...

I've totally been eyeing that Bosch rail adapter, but am having trouble committing. I had some issues with my DIY-32 jig the other day, and am second guessing the value and expense of another home brewed solution.

If you use your Bosch setup for something besides arbitrary shelf pins (like proper 37mm setback for hinge plates and drawer slides) I will be curious to see how that goes. Getting the front and back rows of holes parallel is going to require some sort of end stop, too. And because the rail has to be flipped 180° instead of flipped over, the end stops need to be extremely accurate on both ends of the rail.

Part of me thinks that Bosch base looks awesome, I already have a Makita rail, and I like my DeWalt plunge router. But I'd still be missing those extra "stops" components, and a hole-y rail. (The Makita rail does not have holes, nor do they sell one). I could try to drill holes in one, but there is the issue of accuracy. So I'd have a DIY rail and components from 3 different brands. Idk, I'm still thinking on it!
If you were closer you could borrow it to evaluate.

Re; the rail solutions, I was really thinking, shortsightedly, that you could simply attach a rail-dog and drop it down through the foam and into a dog hole. Obviously this would only work if your workpiece was close enough to the track edge to allow it, ie. not possible for mid sheet rips but might work if you're near the edge. On the square I was thinking a parallel guide - ish way to fix the midpoint of the rail at or near the joint. Even one parallel guide attached and clamped to the back side of the sheet plus clamps at each end might work.
 

loganb

ALLIANCE MEMBER
Joined
Dec 29, 2011
Messages
5,574
Location
Omaha, NE
As I saw somewhere and like to repeat...."Experience is what you get when you don't get what you want" so you're now more experienced in the areas of shelf pins!

No amazing solutions here that don't involve spending more money....though there is a soon to be fired up CNC router in a 1926 Dairy Barn in Wisconsin that should be able to put holes in a Makita rail pretty easily....right TJ?
I also appreciate you sharing your struggles with the connector on the rails for longer rips....I've been looking at that long makita rail and the closet project I'm working on may be enough to justify in my head pulling the trigger on that.
 

Bakafish

Well-known member
Joined
Feb 7, 2017
Messages
477
Location
Tokyo
As I saw somewhere and like to repeat...."Experience is what you get when you don't get what you want" so you're now more experienced in the areas of shelf pins!

No amazing solutions here that don't involve spending more money....though there is a soon to be fired up CNC router in a 1926 Dairy Barn in Wisconsin that should be able to put holes in a Makita rail pretty easily....right TJ?

I also appreciate you sharing your struggles with the connector on the rails for longer rips....I've been looking at that long makita rail and the closet project I'm working on may be enough to justify in my head pulling the trigger on that.
I think directly machining the rail is likely the best solution, assuming the ability to achieve the proper precision. My choice to use a seperate extrusion was done because it was reversible (cheap Makita rails had not yet been released in Japan so my Festool rails may as well have been made from gold) and because my mill is the size of an undernourished gerbil. If I were to do it again I would create a jig with a pin that was fixed to the mill's table that had a reference edge to keep the rail parallel, and the pin would fit in the newest hole and establish the 32mm offset to the end mill making the holes. This would make any errors consistent across all the holes, although you should be able to set it up pretty precisely. The Festool design uses those offset bars bolted underneath the rail which are referenced to the holes themselves, so the relationship to the edge of the rail and total rail length doesn't really matter, I think these could be 3d printed with no real compromise over the metal Festool parts.

One of the most challenging aspects of making shelf holes is how big of a deal a half a millimeter error ends up being, it will jump up and smack you in the face when you see it. Humans are really good at seeing pattern deviation, and wobbly shelves scream of poor workmanship. The precision required can be daunting, and with Festool style rails being single sided you are often forced to flip them in order to work on most cabinet panels comfortably. This will double any errors in the pattern, whereas being able to keep it in a single orientation will basically make any errors inconsequential because the shelf will have the same error on all four corners.

I've never used the Festool solution first hand, but I know my systems limitations and I still don't think anyone has found the best solution to this challenge (short of a really good CNC router.) But I think the more people work on the problem, the sooner we will find something that is closer to the goal of stress free System32.
 
OP
N

nicholam77

Well-known member
Joined
Dec 18, 2016
Messages
2,671
Location
Minneapolis, MN
My choice to use a seperate extrusion was done because it was reversible (cheap Makita rails had not yet been released in Japan so my Festool rails may as well have been made from gold) and because my mill is the size of an undernourished gerbil. If I were to do it again I would create a jig with a pin that was fixed to the mill's table that had a reference edge to keep the rail parallel, and the pin would fit in the newest hole and establish the 32mm offset to the end mill making the holes. This would make any errors consistent across all the holes, although you should be able to set it up pretty precisely. The Festool design uses those offset bars bolted underneath the rail which are referenced to the holes themselves, so the relationship to the edge of the rail and total rail length doesn't really matter, I think these could be 3d printed with no real compromise over the metal Festool parts.

I've been thinking about doing this with a jig like that and my drill press. I have a 2nd 55" Makita rail I'd be willing to drill holes in. I just don't know if I trust myself to nail the jig precision. :ROFLMAO:

I found someone made some 3D printed end stops to use with Blum's specs:


I'm sure that would work just fine if only I had a 3D printer haha.

One of the most challenging aspects of making shelf holes is how big of a deal a half a millimeter error ends up being, it will jump up and smack you in the face when you see it. Humans are really good at seeing pattern deviation, and wobbly shelves scream of poor workmanship. The precision required can be daunting, and with Festool style rails being single sided you are often forced to flip them in order to work on most cabinet panels comfortably. This will double any errors in the pattern, whereas being able to keep it in a single orientation will basically make any errors inconsequential because the shelf will have the same error on all four corners.

@Bakafish , you've nailed it. I haven't done a lot of testing with actual shelves, but just checking with a square I'm surprised at how you can see half a millimeter and certainly a millimeter.

The nice part about the plywood jig I made is you can flip it over, so any errors in the hole pattern are equal on the opposite row of holes. Another thought I had is instead of drilling the track saw rail, to drill a separate extrusion like you did that attaches flush with the end of the rail. Then for the opposite row of holes, you could remove the extrusion, flip the rail around, and re-attach flush with the opposite rail edge. You would need some sort of consistent end stop to position the rail, but would have a similar effect of canceling any error in the pattern. But... annoyance of removing and reinstalling the extrusion a lot.

I think the main options I'm considering are:

1) re-build my current jig with better materials (baltic birch or something else?), maybe have a place that offers services like SendCutSend machine it, and then come up with better design for clamping and end stops. And add a "centering mandrel" feature in the router base.

2) use a jig to drill holes in my Makita rail, and then either **** it up and get the LR32 baseplate, or make a home-made one out of better materials, and source some 3D printed end stops

I won't be able to attack this for awhile, so still some time to think about it 😁

For those interesting in this discussion, I'm going to leave two interesting links I came across:

3D printed LR32 clone:


Homemade LR32 base w/Makita Router + Festool Rail:

 
OP
N

nicholam77

Well-known member
Joined
Dec 18, 2016
Messages
2,671
Location
Minneapolis, MN
As I saw somewhere and like to repeat...."Experience is what you get when you don't get what you want" so you're now more experienced in the areas of shelf pins!

No amazing solutions here that don't involve spending more money....though there is a soon to be fired up CNC router in a 1926 Dairy Barn in Wisconsin that should be able to put holes in a Makita rail pretty easily....right TJ?

I also appreciate you sharing your struggles with the connector on the rails for longer rips....I've been looking at that long makita rail and the closet project I'm working on may be enough to justify in my head pulling the trigger on that.

Love that bit about "experience".

Yes, $$$ is the hold up here for me, I really want accurate shelf pins but I'm not willing to spend $400 on it right now. The only bad thing about the LR32 I've heard is just setup time and clunkiness, a lot of moving parts, but as far as results everyone seems to be happy. But so expensive.

If you can spare the change I'd go for the long rail! I think like @Bakafish was saying some sort of clamp or support mid-rail would still be beneficial, but it can't hurt to start with a known straight extrusion!
 

topcok88

Well-known member
Joined
Jun 3, 2013
Messages
660
Although I’m a fan of the Festool 32mm setup why not just use the Woodpeckers jig with drill bit? For under $150 with both 5mm and 1/4” drill it’s fast, accurate, and easy.


Sent from my iPhone using The Garage Journal mobile app
 

jar944

Well-known member
Joined
Jul 26, 2010
Messages
5,935
Location
Northern VA
This was my solution for drilling shelf pin holes before I acquired a line boring machine. I had the kreg jig before this, and was never happy with the tearout. I ended up picking up a Bosch colt with plunge base just for pin holes. The slight variation is hole spacing is irrelevant as long as you start from exactly the same point on all roles of holes.20170318_182929.jpg
20170318_181854.jpg
 
OP
N

nicholam77

Well-known member
Joined
Dec 18, 2016
Messages
2,671
Location
Minneapolis, MN
Although I’m a fan of the Festool 32mm setup why not just use the Woodpeckers jig with drill bit? For under $150 with both 5mm and 1/4” drill it’s fast, accurate, and easy.


Sent from my iPhone using The Garage Journal mobile app

Hmmm I sorta forgot about that one. I really enjoy the speed of using the router, and the quality of cut, dust collection, and guaranteed perpendicularity of the bit. I've used a self-centering bit style with a Rockler jig, and my plywood router jig is significantly faster, with zero dust. But... if I can't make something else work I think the Woodpecker kit is a good option. Still a bit more than I want to spend for shelf pins -- part of me thinks I could just get the LR32 base for that much $$$ and make a custom Makita rail for it.

This was my solution for drilling shelf pin holes before I acquired a line boring machine. I had the kreg jig before this, and was never happy with the tearout. I ended up picking up a Bosch colt with plunge base just for pin holes. The slight variation is hole spacing is irrelevant as long as you start from exactly the same point on all roles of holes.20170318_182929.jpg

Nice idea @jar944

I agree, a brad point bit in a router seems to leave really pristine holes.
 
OP
N

nicholam77

Well-known member
Joined
Dec 18, 2016
Messages
2,671
Location
Minneapolis, MN
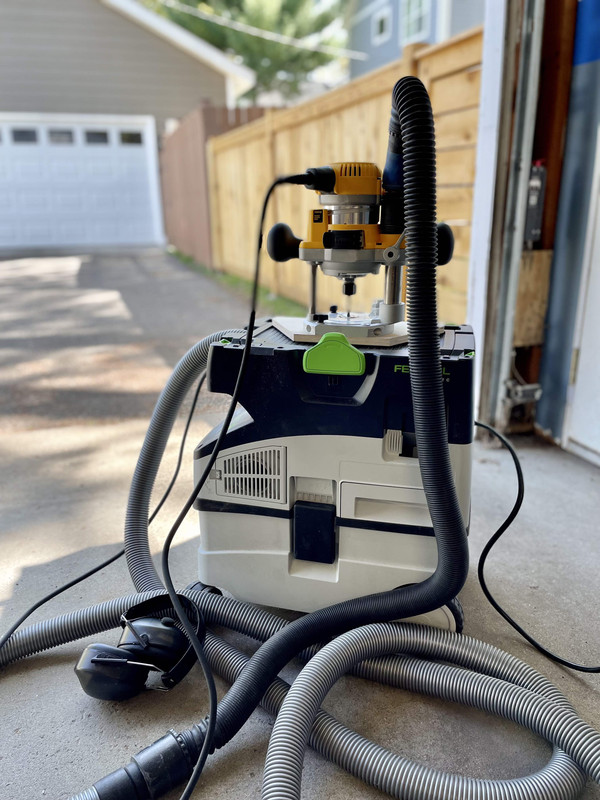
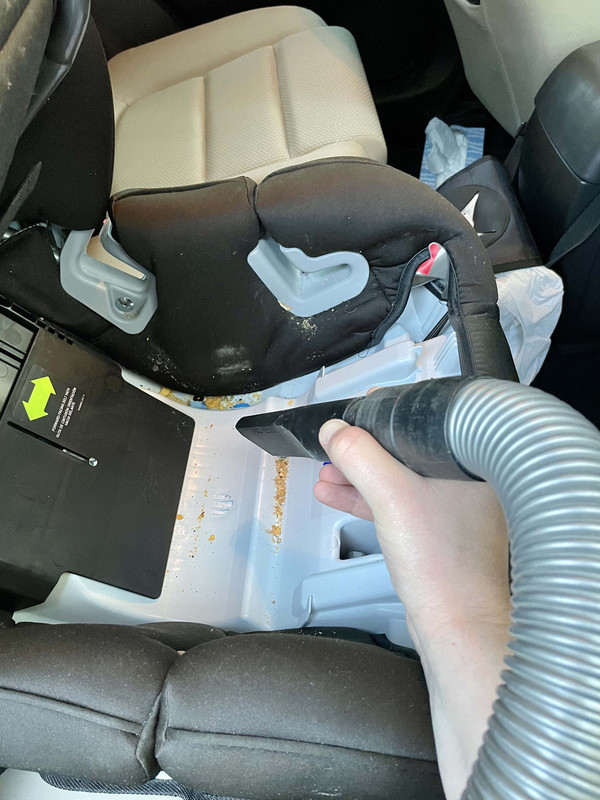
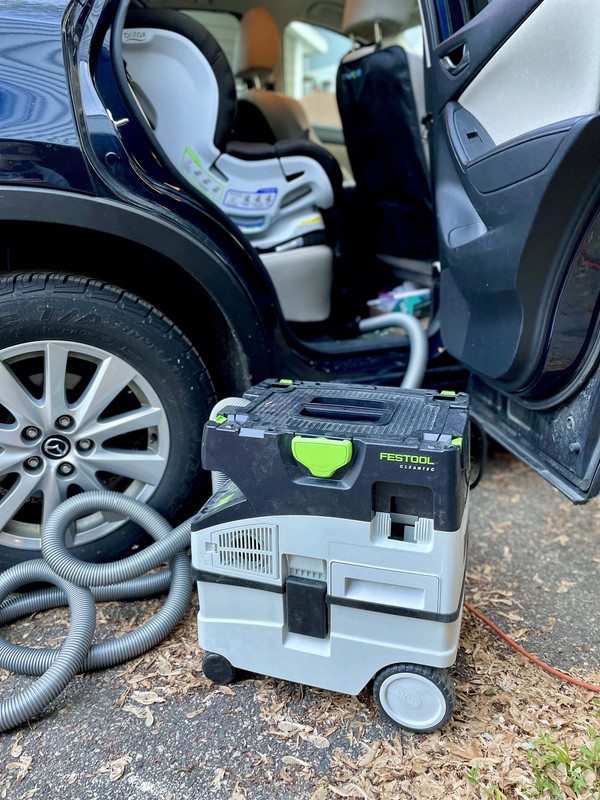
When you need full HEPA to vacuum out the car seat. Can't be inhaling Goldfish crumbs. 😁

IMG-2424.jpg


IMG-2426.jpg


Sorry, that's all the content I can muster this week. :ROFLMAO: Been working a bajillion hours so no time for GJ projects.

In all seriousness, I discovered the CT15 makes a sweet car vac.

Have a great Memorial Day weekend everyone!

🍻
 
To avoid these ads, REGISTER NOW!
Top Bottom