To avoid these ads, REGISTER NOW!

Below 265 SQ/FT Nobody’s tool storage, maintenance & recreation lair.

All workspaces below 265 squarefeet.

johnre

Well-known member
Joined
Dec 1, 2016
Messages
1,060
Location
Portland, OR
What a transformation you've done for that space!

The time spent dealing with that pipe seemed way out of proportion to the total effort; I was just dragging through that part wanting it to be over.

Ausgezeichnete arbeit!
 
To avoid these ads, REGISTER NOW!
OP
N

Nobody-named-Olli

Well-known member
Joined
Jan 9, 2025
Messages
1,653
Location
North Rhine-Westphalia; Germany
I totally understand that from a reader‘s perspective. And I apologize if you feel those parts dragged on for too long in this thread.

From my perspective it still was the most time consuming and most important part of the whole build. Because had I been left with a moist/wet basement, none of the further build would have made any sense and I would have scrapped the whole idea/ project. Additionally, now in retrospect I know a lot more about the whole issue than I did when I started. Had I known then, what I learned over the time of this build/ dealing with the issue, I would have tackled that steel tube once and for all in one take right away. :)

Kind regards,
Olli
 
Last edited:

Jgaz

Well-known member
Joined
Dec 16, 2016
Messages
1,713
Location
AZ
Impressive build and exceptional documentation.
I enjoy looking at the different fixtures and building material that you’ve used.

Welcome to the site
 

rharman

Well-known member
Joined
Apr 22, 2012
Messages
8,920
Location
SoCal
I totally understand that from a reader‘s perspective. And I apologize if you feel those parts dragged on for too long in this thread.

From my perspective it still was the most time consuming and most important part of the whole build. Because had I been left with a moist/wet basement, none of the further build would have made any sense and I would have scrapped the whole idea/ project. Additionally, now in retrospect I know a lot more about the whole issue than I did when I started. Had I known then, what I learned over the time of this build/ dealing with the issue, I would have tackled that steel tube once and for all in one take right away. :)

Kind regards,
Olli
I don't think it was meant as a comment on your postings. I think we all felt that that small task really took a lot of your time and work. Of course, it was worth it in the end and, definitely, needed to be done for your build to be successful.

Amazing how the small stuff can have such a big impact.
 
OP
N

Nobody-named-Olli

Well-known member
Joined
Jan 9, 2025
Messages
1,653
Location
North Rhine-Westphalia; Germany
Thank you! :)


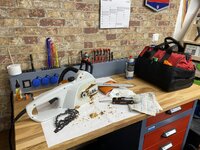
I‘d like to show a fairly recent addition to my shop. As I mentioned I do mainly tool maintenance and setup/ build kits to take to wherever I’m working around the house and garden - or over to the other work room.

Until recently, when I would work on a chainsaw for example I‘d get a large piece of paper (old calendar sheets, packaging material …) to catch mainly leaking oil/fluids and the debris. Obviously that works, but I didn‘t exactly like it.

IMG_1203.jpeg

So I looked around and found a manufacturer of washable/re-usable oil absorbent mats. They make them in any size or shape that one wants and they will generally absorb about 10 l of oil/ workshop fluids per square meter. (351 fl.oz. per 10.7 square feet.) If you do own a separator, like most pro-shops do (at least around here), you can clean the mats with a high pressure cleaner and corresponding solvent yourself for re-use, once they have reached their capacity limit. Otherwise the manufacturer does offer a cleaning service.

Heres what that mat looks like.

IMG_3027.jpeg

This one I purchase to try it and see if I’m happy with it - which I am. I will now order a custom sized mat to fit the shelving in my shed, so the chainsaw can sit on it - and I can get rid of the cardboard there as well.

They also have pouches to store/transport these mats, as there are vintage car lovers who use them to protect garage and other floors from potential leaks.

Kind regards,
Olli
 
Last edited:

Jgaz

Well-known member
Joined
Dec 16, 2016
Messages
1,713
Location
AZ
Thank you! :)


I‘d like to show a fairly recent addition to my shop. As I mentioned I do mainly tool maintenance and setup/ build kits to take to wherever I’m working around the house and garden - or over to the other work room.

Until recently, when I would work on a chainsaw for example I‘d get a large piece of paper (old calendar sheets, packaging material …) to catch mainly leaking oil/fluids and the debris. Obviously that works, but I didn‘t exactly like it.

IMG_1203.jpeg

So I looked around and found a manufacturer of washable/re-usable oil absorbent mats. They make them in any size or shape that one wants and they will generally absorb about 10 l of oil/ workshop fluids per square meter. (351 fl.oz. per 10.7 square feet.) If you do own a separator, like most pro-shops do (at least around here), you can clean the mats with a high pressure cleaner and corresponding solvent yourself for re-use, once they have reached their capacity limit. Otherwise the manufacturer does offer a cleaning service.

Heres what that mat looks like.

IMG_3027.jpeg

This one I purchase to try it and see if I’m happy with it - which I am. I will now order a custom sized mat to fit the shelving in my shed, so the chainsaw can sit on it - and I can get rid of the cardboard there as well.

They also have pouches to store/transport these mats, as there are vintage car lovers who use them to protect garage and other floors from potential leaks.

Kind regards,
Olli
Interesting oil absorption mat. I’ve never heard of the separator you mention.

I really like the metal enclosure on the back of your bench. It appears to be some sort of electrical raceway? It also appears to incorporate some electrical outlets as well as some ingenious storage.
 
OP
N

Nobody-named-Olli

Well-known member
Joined
Jan 9, 2025
Messages
1,653
Location
North Rhine-Westphalia; Germany
Thank you!

There are different types of separators for waste water, depending on what you do. Restaurants for example have grease separators, a car wash or shop most likely a separator for light oils, and so on. Over here you can‘t just put that stuff down the drain, commercially. We also can‘t wash our cars on the street or in a driveway. I mean we can, but if someone rats you out - it’s gonna be more expensive than a couple of washes at the car wash. ;)

Here‘s the first US based manufacturer I found for such separators. https://www.washbaysolutions.com/vehicle-washing-oil-water-separators.php

And here’s another one with some more in depth content: https://www.rkfdseparators.com/oil-separators/


That rack in the back is made by the same manufacturer as the bench. It’s a simple design fabricated from sheet metal. They just made some cut outs that a typical multi-outlet extension would fit through and secured it with 2 u-bolts. (The 4 bolts you can see.) So they don‘t need electrical certification as the extension is already certified and they also don’t need to worry about grounding the rack/ risk of electrical shock. In essence it’s just a power strip attached to a workbench. Very simple add on but the storage for bits and pieces is amazing. Link to manufacturer: https://www.friedrich-kuepper.de/produkte.html?product_id=981&parent_id=96

Kind regards,
Olli
 

Jgaz

Well-known member
Joined
Dec 16, 2016
Messages
1,713
Location
AZ
Thank you!

There are different types of separators for waste water, depending on what you do. Restaurants for example have grease separators, a car wash or shop most likely a separator for light oils, and so on. Over here you can‘t just put that stuff down the drain, commercially. We also can‘t wash our cars on the street or in a driveway. I mean we can, but if someone rats you out - it’s gonna be more expensive than a couple of washes at the car wash. ;)

Here‘s the first US based manufacturer I found for such separators. https://www.washbaysolutions.com/vehicle-washing-oil-water-separators.php

And here’s another one with some more in depth content: https://www.rkfdseparators.com/oil-separators/


That rack in the back is made by the same manufacturer as the bench. It’s a simple design fabricated from sheet metal. They just made some cut outs that a typical multi-outlet extension would fit through and secured it with 2 u-bolts. (The 4 bolts you can see.) So they don‘t need electrical certification as the extension is already certified and they also don’t need to worry about grounding the rack/ risk of electrical shock. In essence it’s just a power strip attached to a workbench. Very simple add on but the storage for bits and pieces is amazing. Link to manufacturer: https://www.friedrich-kuepper.de/produkte.html?product_id=981&parent_id=96

Kind regards,
Olli
Thank you for the details
 

gatewaysysop

Well-known member
Joined
Nov 11, 2008
Messages
3,299
Location
Arizona
Hope this was interesting and you enjoyed reading & looking at the pictures. Thank you for the chance to add my little lair here - I will now start participating in the other sections as well. If there is any interest, I will add for the actual workshop and storage room to this thread.

Just got through all this and my hat is off to you. What a fantastic transformation of the space. You have put a ton into that build and done it up proper. Absolutely amazing. :bowdown:
 
Last edited:

zanyad

ALLIANCE MEMBER
Joined
Apr 26, 2018
Messages
2,842
Location
NE Ohio
Thanks for sharing! I look forward to further updates, about projects working on and working in the space.
If there is any interest, I will add for the actual workshop and storage room to this thread.
Count me in!
Impressive build and exceptional documentation.
I enjoy looking at the different fixtures and building material that you’ve used.
:+1:
 

drivesitfar

Well-known member
Joined
Oct 23, 2013
Messages
36,077
Location
Pacific Northwest
welcome to GJ from another DIYer. since I own a concrete block home that we bought almost 40 years ago it seems like every project always has it's special challenges and need for special tools and stuff. that said I see you have just joined and it looks like you have spiffed up a nice room for yourself. Well Done!!
 
OP
N

Nobody-named-Olli

Well-known member
Joined
Jan 9, 2025
Messages
1,653
Location
North Rhine-Westphalia; Germany
#Nobody’s Project Workshop

0. I’d like to document a couple of things that might (or might not) be interesting, before going into the actual makeover.

0.1 Hensel Electric

I was introduced to Hensel Electric by an electrician who had the fairly unrewarding job of partly rewiring an underground parking, which we happen to be the owners of a single bay in, with a really bodged and badly aged electrical installation.

This was way before I started on the ‘Lair’.

Hensel was nice enough to send me their hard paperback full catalog and a ton of flyers upon inquiry. I’m old school when it comes to researching and deciding on materials as well as tools, so bonus points for any company/ supplier that still offers printed catalogs.

I use PDF day in day out for safety data sheets and quick reference, but when sitting down to plan, I still prefer printed catalogs. I dig being able to quickly note something next to a product, so my catalogs over time have really become a ‘chronicle’ of what I have bought at which price compared to the (sometimes) listed MSRP and what I think of it/ if I’m going to buy that product again.

Hensel Electric is a high-quality manufacturer of distribution panels, housings, junction boxes, (…) and for the most part Made in Germany.

The ‘Lair’ has the surface mounted distribution panel and a conduit install in the back/ working area for practical reasons. Everything else runs inside the walls.

The ‘Project Workshop’ electrics will be done as full conduit install - the reason behind that I will share once I get to the point of posting about the electrical installation within the makeover series of postings.

What I want to do in this post, is to showcase three products. One which I have used before, the other being a ‘miniature’ of the ’Lair’s’ distribution panel and one where I have used that type of cable gland before, but not from Hensel.

(Just to be safe these days: I’m not sponsored/paid, I paid for all of the products - be it for the ‘Lair’ or now for the Project Workshop. I just happen to believe in this manufacturer and really like their products. Since there are more international members here on GJ, that might (or might not) be interesting to some.)

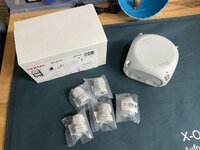
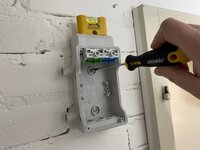
Hensel DK 0404 W junction box. I consider this a real gem because it comes with DIN rail, Wago connectors and Wago connector DIN rail mounts. This is (obviously) larger than a typical small junction box but offers more space to do the connections and the option of drilling out the flexible seals to replace with cable glands. It also comes with caps/seals for the screws if you decide to mount it via the internal screw holes. Also two latches are supplied, those can be used if you rather want to mount it externally. Last but not least it comes with an optional retention strap for the cover.

IMG_4080.jpeg

IMG_4081.jpeg

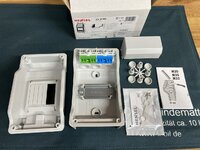
Next is the KV 9103 ‘distribution panel’ - I’m gonna call it a breaker box because of its really small size. But it does come with the same connectivity features that the big ones do. Which was the key driver behind purchasing this product. Again it comes with caps/seals for the screws and plugs to retain IP rating if you should re-wire in the future and remove a cable from one of the flexible seals. Lid is sealed all around, you can buy a separate lock kit as accessory, the box comes pre-cut/ ready to install a lock - all you have to do is push it through the handle from the inside.

IMG_3994.jpeg

IMG_3995.jpeg

IMG_3998.jpeg

IMG_3999.jpeg

IMG_4001.jpeg

IMG_4002.jpeg

For size reference of this cute little breaker box (KV9103), next to my KV 9336. Isn’t it the cutest? ;) ;) ;)

IMG_4031.jpeg

Last but not least the AKM20 cable gland. Not much to say about it, except that the seal consists of two parts and depending on the diameter of your cable you can either use them combined or remove the outer sleeve and use that on its own for thicker cables. I really like this thoughtful feature!

IMG_4084.jpeg

Kind regards,
Olli
 
Last edited:
OP
N

Nobody-named-Olli

Well-known member
Joined
Jan 9, 2025
Messages
1,653
Location
North Rhine-Westphalia; Germany
#Nobody’s Project Workshop

0.2 Schnabl Stecktechnik GmbH ( https://www.schnabl.works/index.php?lang=en )

I’m subscribed to various magazines catering to different trades. Some years ago I saw an advertisement by Schnabl for their quick & easy system to mount cables, conduit and pipes. Drill a (6mm) hole and push in whatever consumable/accessory you need. No classic wall plugs and screws required. Incredibly time saving.

They did ship me the whole test package back in the day, as in actually several years ago, and since then I’m hooked. I did some personal testing regarding the necessary pullout forces and was amazed over the capabilities of these.

A lot of the Schnabl products can be found with all major industrial/trades suppliers.

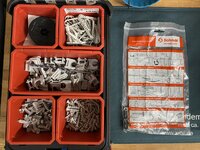
Here’s a little overview of what I buy & use.
IMG_4194.jpeg

IMG_4196.jpeg

Base plug, can be used with a cable tie to secure cable to it, but generally serves as base for conduit clips. Conduit clips can be slightly adjusted on the base plate.

Plug, is used instead of wall plug & screw. Can be used with conduit clips and many, many other electrical installation components.

Last but not least, cable loop. I use these to run cables in walls/ and to hold them firm when running cables ‘under plaster’

As said earlier, all of this only needs a 6mm hole in concrete or brick, and then you push it in.

The conduit install in the project workshop will be done - almost - exclusively with base plugs and conduit clips by Schnabl. These, and the cable loops, have also been used extensively on the ’Lair’ build and during various other projects I did so far.

Overview over a majority of their offerings

IMG_4195.jpeg


0.3 Profix AG Switzerland

Profix manufacturers all sorts of fasteners. Two types I found especially interesting and they are for fastening to concrete, brick and drywall without the use of wall plugs.

One is called ‘electrician’s screw’ which in essence is a really tiny ‘concrete anchor’ with pan-head, suitable to fit all sorts of electrical installation materials. It features a combination drive Torx 20 and a slot for VSM size 4 slotted/ flat head screwdrivers. In concrete/brick you drill a 4mm hole and drive the screw in, in drywall you don’t need to drill, just drive the screw in. I got my samples in early ‘24 and have been using them ever since, although they are not as easy to come by here. I have two little use cases for these on the ‘Project Workshop’. They have not been used on the ‘Lair‘ build. ( https://shop.profix.swiss/shop/de/23-spezialschrauben/elektrikerschrauben-profix.html ) They have been used on other projects and are a great option when I feel the push-in dowl by Schnabl isn’t ‘enough’ for certain use cases.

IMG_1118.jpeg

IMG_1119.jpeg

The other is called a baseboard/ skirting board screw. As the name suggests, it’s a fastener that makes attaching baseboards a breeze, as it doesn’t require a wall plug. Concrete/brick just drill a hole and fasten. Drywall no drilling required. It has a fairly small head, not as small as GRK’s Fin/Trim (that I love, BTW.), but small enough not to catch too much unwanted attention - it’s also available in a couple of different colors so it blends in with he baseboards/ skirting boards of your choice. T15 drive, round countersunk head. These won’t be used on the ‘Project Workshop’, also they haven’t been used on the ‘Lair’ (although they were going to be used according to initial planning), they have been used on a different project. ( https://shop.profix.swiss/shop/de/23-spezialschrauben/sockelmauerschrauben-profix.html )

Sorry, no links in English language for the Profix website.

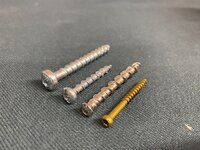
Picture for comparison:

Top to bottom: Heco MMS+ pan head concrete anchor 6.0x50; Profix pan head ‘electrician‘s screw’ 5.0x40; Profix round countersunk head ‘baseboard screw’ 6.0x50, GRK Fin/Trim #8x1-1/2”.
IMG_4233.jpeg


Kind regards,
Olli
 
To avoid these ads, REGISTER NOW!
OP
N

Nobody-named-Olli

Well-known member
Joined
Jan 9, 2025
Messages
1,653
Location
North Rhine-Westphalia; Germany
#Nobody’s Big Shed

1. Stihl 12V (10.8) battery powered and 230V Equipment - tool wall.

1.1

IMG_1217.jpeg

What currently still is our main house and property has a 10m wide and about 25m long garden. It’s not accessible by car or trailer as I have said before and everything in or out has to be wheelbarrowed, either manually or motorized. Mini excavators and mini dumpers will barely fit the ‘dirt road’ from which the garden can be accessed if you don’t go through the house. It’s an urban area/ garden so there is no need for gas powered equipment, the volume isn’t there.

I decided to go with Stihl’s 12V and 230V equipment for our needs at this house & property.

The GTA 26 I’m running is in it’s 4th year now, the MSE 141 C in it’s 3rd year, HSA 40 in it’s second year and the FSA 30 in it’s first year.

I’m very happy with the GTA 26 and I’m actively thinking about upgrading that to the newer GTA 40 that runs at a even higher speed and is powered by 2 12V batteries. Also has a built-in oiler now. Not that I ever run into any troubles because of the requirement to manually oil the bar on that GTA 26, and oiling it once or twice a day works great for me and my use case. The main reason to buy it was what I wrote in this posts introduction, I need to move everything in bins, by wheelbarrow or via the city’s provided waste bin which means cutting, cutting and more cutting. It is a matter of convenience to do just that with the GTA 26.

IMG_2859.jpeg

When it comes to capability, I haven’t found anything yet, within reason, that the GTA couldn’t handle. It has become an essential tool and has proven itself time and time again.

IMG_3200.jpeg

IMG_3206.jpeg

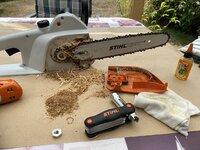
When I had to remove a tree that was definitely not going to be cut with the GTA 26 I decided to go with a 230V Stihl and bought the MSE 141 C. I know there is not much love for these but lets face it: Urban garden, low volumes, more time spent sitting on a shelf waiting to be used than actual use. Now I could have bought the smallest gas powered Stihl, use the canned/‘special’ gas and maybe I’d gotten away with keeping it running for a year or three tops before I would need to actually service and clean it thoroughly - and I don’t mean the usual maintenance after use. I decided against gas powered and went with 230V - I don’t regret it. Saw cuts what I need it to cut quickly and efficiently, clean after use, store, and next time I need it, it powers right up. I keep a bit of bar oil in it but try not to store it filled to the brim.

IMG_3882.jpeg

With the MSE I purchased Stihl’s version of the Wiha ‘Toolie’ which I find is a great tool to keep on the Shed’s tool wall with the equipment for quick adjustments and basic maintenance. Back then, my lair wasn’t finished. It’s the 19-13 variant.

IMG_3832.jpeg

IMG_3891.jpeg

The HSA 40 has to be the most battery-efficient tool among my Stihl 12V equipment. It runs an incredible long time of one battery and spared me countless cable runs - since I also need to maintain part of that mentioned ‘dirt road’.
I keep it oiled and sprayed down with a ‘gum’/‘resin’ solvent and the blade sharp - that works wonders in terms of cutting capacity. I cut better and more efficiently with this, than I did with a 230V hedge trimmer that we used before. The light weight of the HSA 40 is a real blessing - and a curse sometimes. It really makes you want to operate it one-handed at times just to reach that one little patch. …

IMG_1228.jpeg
 
Last edited:

bobg03

Well-known member
Joined
Aug 29, 2020
Messages
3,420
Location
conway sc
Sir what an amazing job you did, Water is the worst adversary known to man. It is especially tough when you're trying to correct issues done by a previous owner, (ask me how I know, there was no internet back then to even record the nightmares we encountered) it looks great.
 
OP
N

Nobody-named-Olli

Well-known member
Joined
Jan 9, 2025
Messages
1,653
Location
North Rhine-Westphalia; Germany
#Nobody’s Big Shed

1. Stihl 12V (10.8) battery powered and 230V Equipment - tool wall.

1.2

Let’s continue with the FSA 30 string/ trimmer. Based on my experience with GTA 26 and HSA 40 I decided I would stick to the 12V platform for the trimmer as well. Again, urban gardening. Keeping the edges of the lawn and walkway clean - nothing more, nothing less. This thing is powerful and from the three tools so far I would say they least efficient per battery. Obviously, that power has to come from somewhere and it’s the battery. This trimmer drains them rather fast and hard. It’s the first time ever I wasn’t able to charger batteries directly after pulling them from the tool. Now that isn’t a bad thing: I can trim the edges on both sides of the lawn, on the patio as well as the walkway and our little round patch in the back with two batteries and have some juice left in the second. However, the first won’t be fully charged by then, as it has to cool down significantly before it will charge again. For me that is not a problem, as I run double chargers and multiple batteries anyway.

IMG_2527.jpeg

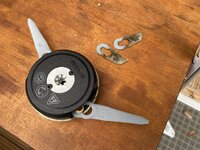
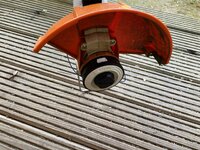
I have two heads for the trimmer, one uses blades and the other is your typical string type. Not that it matters much, but the first time I used the blades on the very over grown walkway, I was able to do the full length on one set of blades. But after that, they were gone as you can see.

IMG_2542.jpeg

I’ve used the string type some, but really can’t say much about it other than it works. No real idea about longevity, it says to water the strings before use, to get more ‘life’ out of them but I haven’t tried that yet and on the other hand I don’t feel like I’m using excessive amounts of string?

IMG_2861.jpeg

Another indispensable tool from that tool wall is the Tajima G-Saw 240. This thing cuts everything you’ll find in a garden like a hot knife goes through butter. The blade is sharp as hell, holds an edge really well - yet it is highly flexible. This thing won’t shatter. I’ve literally had it S-bend because a cut closed on me just as I was pushing it forward and it just straightened back out the second I stopped pushing and relieved it. No teeth missing either. I was videotaping that cut, so I actually have evidence:

Enlight6272.jpeg

Enlight6266.jpeg

Running this saw for many years now, and I’m still on it’s first blade - although I have a spare at hand that I bought last year during a re-stock of consumables.

I really, really like this saw! Over head, on a ladder - I don’t want anything else.

IMG_3335.jpeg

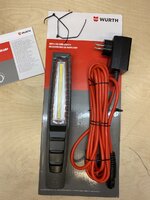
The one tool we haven’t spoken about yet from that tool wall is the Wuerth hybrid (battery & 230V) work light.

IMG_0544.jpeg

There’s really not much to say about it other than it is a practical work light with 2 settings for the strip light and a spot light. It can be run of the built-in battery as well as 230V. When run on 230V the high setting for the strip light doesn’t deliver as much light as when the light is running of it’s battery. My guess - I don’t know! - is overheating concerns when run non-stop on high while fed by mains. What I like about it is the hybrid function and the long cord. Makes life in and around the shed much easier and I know it will never run out of power. I keep it charged, cycle it a couple of times a year and the cord is right there when I need it. This one - unlike the Stihl batteries - stays out in the shed 24/7/365. And so far it keeps up with what I and climate are throwing at it.

IMG_0556.jpeg

As I said, I’m using this thread to document a couple of things as I find the time. This was one of those posts and I hope you’ll find that interesting. So long, see you on the next one!

IMG_3345.jpeg


Kind regards,
Olli
 
Last edited:

69charged

Well-known member
Joined
Sep 20, 2007
Messages
469
Location
carberry, manitoba
Olli, awesome transformation on the shop space. I just found your thread now. Not sure how I missed it!!!
Being in Canada, I particularly enjoy reading threads of others around the world and seeing the different building methods compared to here. So interesting to me. And the electrical. And the silicate wall panels. Very cool stuff.
Thanks for posting.
I would agree with you that that water pipe would make or break that project, and was no doubt the most important thing to take care of. If not it would come back to haunt you constantly!! 😂
 
OP
N

Nobody-named-Olli

Well-known member
Joined
Jan 9, 2025
Messages
1,653
Location
North Rhine-Westphalia; Germany
Olli, awesome transformation on the shop space. I just found your thread now. Not sure how I missed it!!!
Being in Canada, I particularly enjoy reading threads of others around the world and seeing the different building methods compared to here. So interesting to me. And the electrical. And the silicate wall panels. Very cool stuff.
Thanks for posting.
I would agree with you that that water pipe would make or break that project, and was no doubt the most important thing to take care of. If not it would come back to haunt you constantly!! 😂

Thank you very much! Glad you enjoyed the journey so far & I guarantee there is a lot more to come. :)

Kind regards,
Olli
 
OP
N

Nobody-named-Olli

Well-known member
Joined
Jan 9, 2025
Messages
1,653
Location
North Rhine-Westphalia; Germany
#Nobody’s Big Shed

1. Stihl 12V (10.8) battery powered and 230V Equipment - tool wall.

1.3

I almost forgot about this little gem, the Fiskars X5 XXS hatchet. Also indispensable and highly capable. This Fiskars X5 is a ‘worry free’, easy to clean and sharpen garden hatchet. It cuts great with little effort, will even split if given the chance and also has its place on the tool wall for everyday garden use. (Maybe I should talk about Fiskars next, I have plenty of their gardening tools and I’m as fond of these as I am of the Stihl stuff. Very great usability, fantastic ergonomics and built to last.)

IMG_4316.jpeg

IMG_3498.jpeg

IMG_3505.jpeg

Kind regards,
Olli
 

bobg03

Well-known member
Joined
Aug 29, 2020
Messages
3,420
Location
conway sc
I have the Sthil BGA 57 and BSA 57, and love them. I also have a regular lawn guy so mostly use the blower to keep the driveways and patios clear btw visits. He then blows them to the street for pick up by the City as it's a free weekly service w/no bagging needed.

I had the smaller blower w/internal Battery that you plugged in and upgraded after 7 years when that one got weak, as I have a lot more leaves to than I did when I built 11 years ago. I purchased the trimmer w/the blower to get an extra battery, I don't use the trimmer much but a separate battery for the blower was as much as the trimmer w/another battery so I went for it.

I also wore out the plastic blades quickly on the trimmer and switched to the string cartridge...
 
OP
N

Nobody-named-Olli

Well-known member
Joined
Jan 9, 2025
Messages
1,653
Location
North Rhine-Westphalia; Germany
#Nobody’s Project Workshop

1. Electrical work

1.1 Disconnect of old feed

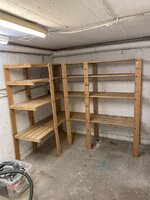
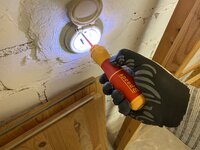
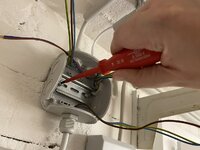
Behind the partly dismantled shelving is a little black outlet hiding that served to feed the outlets over the workbench, two outlets on the patio directly above the basement and a light on the outdoor staircase.

In the first picture you can also see the old lights and part of the old wiring.

IMG_3873.jpeg

IMG_3874.jpeg

For quick & small jobs like this I really like using a combination of my Scan Grip headlamp and the Snap-On (under hood) batten light.

IMG_3883.jpeg

IMG_3885.jpeg

This outlet was fed through from another room and will remain permanently removed.

IMG_3865.jpeg

IMG_3935.jpeg

Outlet/ old feed.

IMG_3895.jpeg

Old light fixtures.

IMG_3906.jpeg

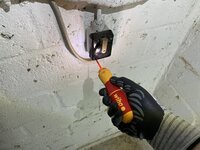
Old feeds cut and terminated.

IMG_3947.jpeg
 
OP
N

Nobody-named-Olli

Well-known member
Joined
Jan 9, 2025
Messages
1,653
Location
North Rhine-Westphalia; Germany
#Nobody’s Project Workshop

1. Electrical work

1.2 New feed

1.2.1 Part one

The project workshop needs two feeds, one for outlets one for lighting. These have to come from a nearby junction box. Outlets will be fed by a 3 core 2.5 mil, lights will be fed by a 5 core 1.5 mil. Reason for the 5 core is that it will allow me to have 2 switched hots, one permanent hot (for the outdoor staircase light).

Pulling old feed.

IMG_4158.jpeg

IMG_4161.jpeg

Wiring new switches.

IMG_4167.jpeg

New feed entering the project workshop.

IMG_4189.jpeg

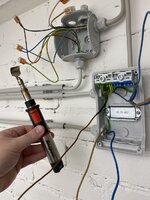
Since the old patio outlets feed was too short for the new installation I needed to splice/ tie in with a new wire.

IMG_4204.jpeg

IMG_4206.jpeg

IMG_4207.jpeg

The Schnabl system being used.

IMG_4208.jpeg

IMG_4209.jpeg

IMG_4210.jpeg
 
OP
N

Nobody-named-Olli

Well-known member
Joined
Jan 9, 2025
Messages
1,653
Location
North Rhine-Westphalia; Germany
#Nobody’s Project Workshop

1. Electrical work

1.2 New feed

1.2.2 Part two

Drilling 4 mm holes for using the ProFix ‘electrician’s screw’ to directly fasten into masonry.

IMG_4215.jpeg

Drilling the breaker box in appropriate spots to accept the cable glands.

IMG_4217.jpeg

Mounting.

IMG_4218.jpeg

Breaker box and junction box (for the lights) mounted.

IMG_4221.jpeg

Temporarily wired.

IMG_4255.jpeg

IMG_4225.jpeg

IMG_4254.jpeg
 
Last edited:
OP
N

Nobody-named-Olli

Well-known member
Joined
Jan 9, 2025
Messages
1,653
Location
North Rhine-Westphalia; Germany
#Nobody’s Project Workshop

1. Electrical work

1.2 New feed

1.2.3 Part three

IMG_4370.jpeg

While mounting the DIN rail, I thought there was enough space for the wires go behind it on the left. There wasn’t.

Insulation damaged, no damage to the core.

IMG_4374.jpeg

Peeling back the insulation.

IMG_4375.jpeg

Easy fix with a heat shrink ferrule.

IMG_4376.jpeg

IMG_4378.jpeg

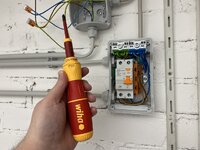
All wired & torqued to spec.

IMG_4379.jpeg

GFCI in & tested.

IMG_4384.jpeg

Done.

IMG_4401.jpeg
 
Last edited:
OP
N

Nobody-named-Olli

Well-known member
Joined
Jan 9, 2025
Messages
1,653
Location
North Rhine-Westphalia; Germany
#Nobody’s Project Workshop

1. Electrical work

1.4 Wiring the new lighting and the old outdoor staircase lighting.

IMG_5474.jpeg

Mounting DIN rail.

IMG_5475.jpeg

Wago DIN rail adaptors mounted, connectors installed & wired. The hots on the left, two switched, one permanent (outdoor staircase). Neutral and ground on the right. Since my intention was to be able to switch the workshop lighting separately I ended up with a 3 core going into a junction box on the ceiling for the two main lights (workbench and middle of the room). This way you have a switched hot, neutral & ground. The third light was so close to the main junction box, that I wired it directly - hence the different cable. Sine these don’t require ground/ earth protection because of the way they are build, this is not an issue.

IMG_5481.jpeg

All buttoned up.

IMG_5482.jpeg

Kind regards,
Olli
 
Last edited:

drivesitfar

Well-known member
Joined
Oct 23, 2013
Messages
36,077
Location
Pacific Northwest
Great job wiring up your new shop space. I’m guessing you have more than a few dollars invested in your electrical tools if that bag in one picture is yours that is full of them?

Is all your wiring 110/120 volts or is Europe’s electricity double that for your power tools and regular shop outlets?
 
OP
N

Nobody-named-Olli

Well-known member
Joined
Jan 9, 2025
Messages
1,653
Location
North Rhine-Westphalia; Germany
Thank you very much! Yes, my electrical bag, my tools. ;)

Speaking of Europe, voltage is 230 V @ 50 Hz .

For Germany, where I live, it’s 230 V @ 50 Hz at the outlet. Incoming supply is 3 phase/ 400V (between two phases) also 50 Hz obviously.

(There are also specialities like SELV, PELV, FELV which are below 50 V AC/ below 120 V DC … Whole different story, not generally applicable.)

In our case, cooking top & 2 flow heaters utilize the three phase. Everything else is single phase 230 V. ’Shop’ or ‘living room’ - doesn’t make a difference.

I expressly had the sub panel feed for the lair specified as three phase so if ever needed, I could install a three phase outlet either right in the lair or wire it from there. The project workshop shares a wall with the lair, so easy peasy if I want to do it at some point in future.

Kind regards,
Olli
 
Last edited:
OP
N

Nobody-named-Olli
Well-known member
Joined
Jan 9, 2025
Messages
1,653
Location
North Rhine-Westphalia; Germany
#Nobody’s Project Workshop

2. Makeover

2.1 Dust containment & masking.

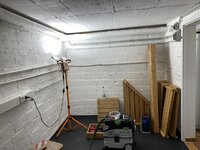
Since we are living in this place, the rest of the basement and it’s rooms needed to remain functional during the makeover and especially during all the work that would create dust, overspray and so on. Most importantly, the laundry room had to remain dust free.

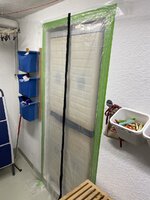
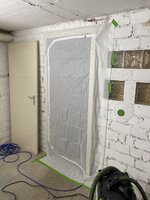
One of the first steps was to ‘isolate’ the room known as project workshop.

I always use a layer of FrogTape on delicate surfaces to serve as base for the double sided tape to install dust proof doors.

IMG_3931.jpeg

IMG_3932.jpeg

IMG_3933.jpeg

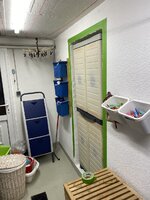
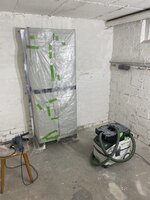
For the most of the makeover the cabinet holding cleaning supplies would remain in place, so that had to be wrapped as well.

IMG_3938.jpeg


IMG_3939.jpeg

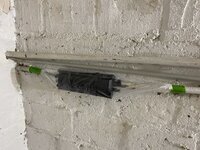
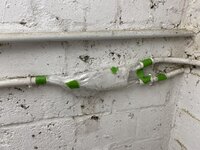
Some might remember that pesky telecommunication line from the posts of my work in the lair. Well it also travels through the workshop and laundry room. Since it still is critical/ important to/for some of the neighbors I took extra good care while wrapping it’s weak points. A more recent splice, which should be fine in theory as these are buried in dirt/soil all the time, and a very, very old splice - that is a lot more delicate.

More recent splice.

IMG_3940.jpeg

Very, very old/ delicate splice.

IMG_3941.jpeg

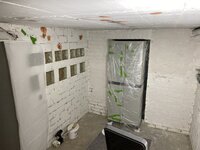
And dust doors installed.

IMG_3944.jpeg

IMG_3945.jpeg
 
OP
N

Nobody-named-Olli

Well-known member
Joined
Jan 9, 2025
Messages
1,653
Location
North Rhine-Westphalia; Germany
#Nobody’s Project Workshop

2. Makeover

2.2 Surface prepping.

2.2.1 Part one.

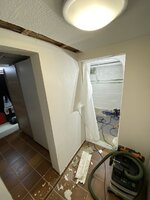
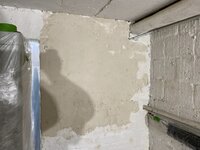
One small ‘issue’ that irked me since forever was that someone at some point tried to smoothen the walls, probably with some leftover filler or whatever and did a hideous job. Now was the time to do something about it, or it would never be done. However, since this is a workshop after all, I was not going to plaster or drywall all the walls.

IMG_3949.jpeg

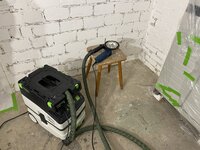
Angle grinder, diamond cup wheel, dust shroud and dust extractor.

IMG_3950.jpeg

After a couple of minutes, much better. Still a little rough.

IMG_3953.jpeg

IMG_3970.jpeg

Next up was priming a couple of spots and plastering/ smoothening that rough patch.

IMG_3977.jpeg

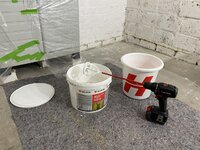
Primer.

IMG_3979.jpeg

Plaster.

IMG_3980.jpeg

Primed.

IMG_3981.jpeg

IMG_3983.jpeg

Plastered.

IMG_3991.jpeg
 
To avoid these ads, REGISTER NOW!
Top Bottom