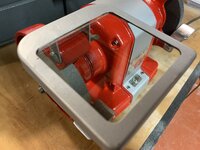
Here is my 1/4hp from ‘57, just picked it up at a garage sale on Saturday, along with those four Peterson Vise-Grips, for $20. I clocked the slowdown time at 3 minutes and 58 seconds so I’m guessing I’ll need to get some oil/grease into the bearings somehow.
It has been painted sometime in its history with some crappy “wrinkle” paint, and the cord has been replaced as well, other than that she appears stock. Glass is intact as well.
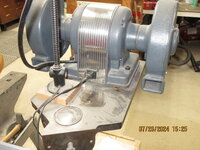
Needs a cleaning up for sure and I need to build a stand for it. Seen a couple pics of grinder stands made from old crankshafts and that looked pretty neat.


")


.JPG")