To avoid these ads, REGISTER NOW!

Raising the Rat Shack

OP
P

Platonic Solid

Well-known member
Joined
Nov 29, 2014
Messages
3,587
Location
CT-USA
FWIW

6" TimberLok (LTOK06) = 940 (lbf) shear, 1,300 (lbf) Tensile
3-5/8" & 5" LedgerLok (LL358 & LL005) = 1,235 (lbf) shear, 1,833 (lbf) Tensile
 
To avoid these ads, REGISTER NOW!

lakeroadster

Well-known member
Joined
Jan 19, 2015
Messages
5,166
Location
Central Colorado
I don't have the option of letting the original column rest on the foundation timbers as that is where the concrete pier threaded rods are located. I could put a piece of 4x4 or 4x6 in the space between the threaded rod and original post attached to sistered PT on sides.

The cuts on the original posts were done with a sawzall, thus are far from straight.

I've used flat steel bar (clamped or temporarily screwed) on both sides of a 4x4 as a cutting guide to make straight cuts with a sawzall. Works very well.

Yes, its hard on the blades, but it gets the job done.

It would seem prudent to get the building shimmed and bearing upon solid materials, prior to adding the sistering boards.
 
OP
P

Platonic Solid

Well-known member
Joined
Nov 29, 2014
Messages
3,587
Location
CT-USA
How about this?

I could cover all of that with a 2x8.

Might be able to do something similar to the corner 4x4s. The anchor rods could be more of an interference issue there as they're not exactly perfectly oriented.
 

Attachments

  • SHED.JPG
    SHED.JPG
    61.8 KB · Views: 157
Last edited:

RickP

Well-known member
Joined
Jan 15, 2013
Messages
1,547
Location
Annapolis, MD
Your foundation looks good -- nice work on it so far.

I'd probably make the 2x6 sill plates pretty short -- about the width of the post. They don't need to go all the way along the exterior of the shack. I'm not sure why you're planning to use 24" tall PT sheathing behind the new siding. You could just use a strip of PT plywood about 6" tall instead -- that would be plenty to connect the old siding to the new siding -- it doesn't need to go all the way down to the sill plate.

The new siding should extend down past the top of the 4x6 beam, so water can't get into the foundation on top of that beam. The siding can be attached to the beam instead of the sill plate. if you're worried about rain getting in through the siding, you could attach Tyvek to the inside of the siding.

Are you planning to make the floor level with the lower section in the doorway?
 
Last edited:
OP
P

Platonic Solid

Well-known member
Joined
Nov 29, 2014
Messages
3,587
Location
CT-USA
RickP – Making a pseudo half wall with full sill and plywood will make straightening/aligning the walls easier as the foundation isn’t in ideal alignment with the walls in all locations. I will attach it to the existing posts, beams and siding – push walls to desired location – then secure sill to foundation.

Though the floor may not happen till spring, my current thinking is a free floating floor:
Bring gravel up to lower section in doorway (tamp)
Cover with vapor barrier (tape to foundation)
Place 2” insulating sheathing (tape seams)
Glue T&G plywood to insulating sheathing

This will raise the floor 2.75” from the current garage door sill pictured.
 
OP
P

Platonic Solid

Well-known member
Joined
Nov 29, 2014
Messages
3,587
Location
CT-USA
Here I am waiting for the weekend to get stuff done and Saturday's temps are 23° at 7:00 AM, 35° @ 11:00, maxing out at 39° by 2:00. Think I'll be spending some quality time inside HD picking up supplies in the AM.
 
OP
P

Platonic Solid

Well-known member
Joined
Nov 29, 2014
Messages
3,587
Location
CT-USA
Progress Pics:

Prefabricated the first support wall on the ground and put it in place. A bit awkward getting it placed as the lifting frame is in my way. Found it a little easier to push it in from the exterior. It isn't actually attached to anything yet.

Before making the wall I lifted the right side another 3/4" as this is my last chance to get it right. Since the right lifting shore is maxed out, I used a bottle jack and stuffed a 3/4 shim on top of the lifting frame.


Prefabricating walls might work well for new builds, but it didn't work out so well for this structure. After building the wall and fitting the bottom into place, I found the existing center post is not straight. Fortunately I used screws to attach the plywood to the new posts (the rest is attached with nails). I ended up removing the screws and using the sawzall to cut the 2x4 so I could angle the new post to match existing post.


OP
P

Platonic Solid

Well-known member
Joined
Nov 29, 2014
Messages
3,587
Location
CT-USA
oldironfarmer - Thanks LOL. Heck yeah! I watched a couple youtube videos so now I'm an expert - NOT. I'm a bit of a perfectionist, so letting the small stuff go and moving on in favor of progress is a challenge.

I was originally going to make the plywood portion 24" tall, but ended up going for 16" to use less material.
 
OP
P

Platonic Solid

Well-known member
Joined
Nov 29, 2014
Messages
3,587
Location
CT-USA
Progress Pics:

The front right wall is now attached to the foundation and existing posts. Used 5" LedgerLoks in new 4x4s counterbored 1.5” deep to give proper 3.5” grip into existing posts. Sill attached with 3-5/8" LedgerLoks every 16”.


Figured it would be easier to make a half wall for the right rear since I have to cover the openings. I placed the 2x6 sill on the foundation and marked the locations for each post and stud. Clamped 12’ 2x4 to underside of mid-wall beam. Rough cut wall studs. Held each stud in its intended placement and marked finish cut length. Cut length about 1/16 shorter to make sure I can actually get the wall in after is assembled (hopefully).


When assembling the wall I put 1 screw in top and bottom to keep it in place - then nailed everything together using two 16D 3.5" HDG nails per end.


I pulled the wall into the shed as I wasn’t sure I’d be able to lift it after attaching plywood. Didn’t have time to finish attaching plywood as I was rapidly losing daylight.

 
Last edited:

Firebrand

Well-known member
Joined
Feb 23, 2010
Messages
294
Location
New Hampshire
Solid work! I can speak from experience as I learned to lift buildings from a pro when I had to replace sills and patch posts on my 32'x70' barn. Having to lift parts of my house walls to patch in new sill pieces was a cinch after that project! Keep the faith and don't let the small stuff bog you down. Keep your eyes on the prize.
 

sublime68charger

Well-known member
Joined
Sep 9, 2014
Messages
5,415
Location
SW Wisconsin
Nice work on this so far!

just found this thread and read through all of it in the last 2 day's!

Better get the rest of this finished up the Clock is ticking more towards Winter and snow and cold cold day's!
 

couch67

Well-known member
Joined
Mar 18, 2016
Messages
1,398
Location
Ontario Canada
100_2635-r.jpg


Platonic, I thought I was **** but could not help notice you had laid down a tarp to put together your shortwalls! I'm not alone :beer:

Great job on this revival.

couch
 
OP
P

Platonic Solid

Well-known member
Joined
Nov 29, 2014
Messages
3,587
Location
CT-USA
Progress Pics:

Half wall is in and bolted into place. Slid it on a simple 12' 2x6 ramp. Fit perfectly without modification. Also walled off the upper man door opening. Kinda hard to get good pics inside with the lifting frame in there. Lucked out on the weather = 50° and rain held off till almost sunset. Have to watch the weather closely as I don't think my new Dewalt miter saw is water proof.

 
OP
P

Platonic Solid

Well-known member
Joined
Nov 29, 2014
Messages
3,587
Location
CT-USA
Progress Pics:

Had to do some sawzall massaging to get the rear wall in. Good thing I didn't save the rear wall till last as there's no way I could have gotten it in there without the remaining side gap. It isn't fully fastened yet as I ran out of daylight.

 
To avoid these ads, REGISTER NOW!

m32825

Well-known member
Joined
Jul 26, 2015
Messages
1,009
Location
Central FL
I used to think I was a"big projects" kind of guy... Thanks for the reality check! :)

Nice work, thanks for the update!

-- Carl
 

xtremek

Well-known member
Joined
Apr 13, 2012
Messages
11,603
Location
St. Johns, Mi
That's incredible. You're doing a great job of "eating the elephant". And it looks like the "elephant" tastes pretty good. :thumbup:
 
OP
P

Platonic Solid

Well-known member
Joined
Nov 29, 2014
Messages
3,587
Location
CT-USA
Thanks for the encouragement :D

Today's Progress Pics:

Accidentally installed the 8ft strip of plywood rough face out. Realized I did it right after I finished nailing it on. I assume it doesn't make that much difference. If it does, I can still fix it as the rear and side walls are not fastened to anything yet. It's all going to be covered with something (still haven't decided) anyway.

 
OP
P

Platonic Solid

Well-known member
Joined
Nov 29, 2014
Messages
3,587
Location
CT-USA
Thinking towards the future with respect to best way to finish the 19 inch section between the existing siding and top of cement piers. I'm carrying below quote over from my other thread about how to work with PVC. PVC is still an option, just not likely worth the hassle.

Pvc expands and contracts way too much if you have any real lengths of the stuff fastened at both ends. My recommendation would be treated 1x or plywood and cover with something called ground breaker. It's a textured fiberglass sheet that comes in 1ft and 2ft high 50 or 100ft long. I used it on my last house to protect the pink board I put against my house foundation. Held up great to 10+ years of string trimming. Fades a little but other than that no complaints. That's what I'd use. They have a good selection of accessories for it at menards but you said those aren't near you. Maybe home depot?
http://www.homedepot.com/p/12-in-x-...ic-Foundation-Protection-Kit-GB-1-K/205735697

If I go above route I still need to do some kind of trim work to the bottom of existing siding (Water table trim, drip cap, J-channel ?).

I've also considered T-111 mounted horizontally. Mounting it vertically would look like turd IMO.

If it makes a difference, I can still slide Tyvek or tar paper in between existing siding and new PT plywood.
 
Last edited:

oldironfarmer

Well-known member
Joined
Jun 25, 2016
Messages
6,664
Location
Terlton, Oklahoma
A z roof trim to go behind the existing siding then over the new siding would keep water from getting behind the new siding. But if you do that leave a 1/8" gap or more below the existing siding to the metal to let the bottom of the existing siding dry out.

T-11 or T-111 horizontally would not last long IMHO. The grooves need to be vertical. Hardy board would fit there nicely.
 
OP
P

Platonic Solid

Well-known member
Joined
Nov 29, 2014
Messages
3,587
Location
CT-USA
Oh good, Hardie Board, another product I know nothing about and the only thing that comes up on HD website when I search cement board is backer board.
 

bored350

Well-known member
Joined
Mar 17, 2011
Messages
222
Location
Arkansas
Oh good, Hardie Board, another product I know nothing about and the only thing that comes up on HD website when I search cement board is backer board.
Platonic, Hardie is a very good option as mentioned before and other than the need for a fiber cement blade, not too difficult to work with. It is in fact made from cement (and fiber), so you will want to be upwind of the dust and wearing an N95 respirator wouldn't hurt when cutting. It can be screwed or nailed in place, comes primed or you can order it prepainted from Hardie. I used it as a skirt around a shed and installed it with deck screws before painting it. For your application, I would install a thin kickout strip along the bottom of where the board will sit to aid water runnoff away from the building. Any seems that require caulking should be caulked with OSI Quad. When siding my house, I used some thin sheet stock and bent a lip along the top edge to sit behind the boards at any standing seams to keep water from penetrating to the wall.

James HardieHardiePlank HZ10 5/16 in. x 12 in. x 144 in. Fiber Cement Select Cedarmill Lap Siding
https://homedepot.app.link/W2bqFfAdnI
SKU# 202293956

OSI9.5 fl. oz. #001 White QUAD Max Window Door and Siding Sealant
https://homedepot.app.link/Cv8KJ7yenI
SKU# 205761607

Deck Mate#8 x 1-5/8 in. Star Flat-Head Wood Deck Screws
https://homedepot.app.link/hwkWQfJenI
SKU# 300884062


313e51b551648bed5f70a5ba07d1f375.jpg

Sent from my Moto G (5) Plus using Tapatalk
 

Attachments

  • 313e51b551648bed5f70a5ba07d1f375.jpg
    313e51b551648bed5f70a5ba07d1f375.jpg
    181.4 KB · Views: 2
OP
P

Platonic Solid

Well-known member
Joined
Nov 29, 2014
Messages
3,587
Location
CT-USA
Great post bored350. Thank you.
Unfortunately my prior search yielded the same HD link you posted and it says:
"This item is not available in any stores within 100 miles".
Only option is to request a quote for installation:
https://www.homedepot.com/p/James-H...Cement-Shingle-Siding-HSINSTJHCEMSS/300175884

Wait. I see I can actually order it from Lowes:
https://www.lowes.com/pl/Fiber-cement-siding-Siding-stone-veneer-Building-supplies/4294512288

and they have fairly detailed installation instructions:
http://pdf.lowes.com/installationguides/727396081894_install.pdf

I guess it depends on which product I choose as the above instructions show flashing at joints and state:
"Caulking at HardiePlank lap siding **** joints is not recommended for ColorPlus for aesthetic reasons as the caulking and ColorPlus will weather differently."

Wow, long delivery time - The Lowes site says if I order it now I should have it by Dec.26.
 
Last edited:

bored350

Well-known member
Joined
Mar 17, 2011
Messages
222
Location
Arkansas
"Caulking at HardiePlank lap siding **** joints is not recommended for ColorPlus for aesthetic reasons as the caulking and ColorPlus will weather differently."

That's the great thing about quad. Get clear quad and paint it, then the paint will weather evenly. I can tell you that from experience. FIL used it on his house well over 10 years ago with no issues.


Sent from my Moto G (5) Plus using Tapatalk
 

smalltown

Well-known member
Joined
Jul 9, 2015
Messages
985
Location
Western Maine
Platonic your doing a yeoman's job on this. I must admit (as I'll bet a lot were) in thinking this building looks pretty shaky at the start. Glad to see that you might be able to at least get it closed in for the winter.
I can't wait for you to ask about a lighting plan :lol:
 
OP
P

Platonic Solid

Well-known member
Joined
Nov 29, 2014
Messages
3,587
Location
CT-USA
smalltown - :lol: Lighting Plan. The interior walls aren't just bare wood, they're almost black! I'd like to close the door and set off a giant white paint bomb in there. I already miss the open wall as I could actually see what I was doing.
 
OP
P

Platonic Solid

Well-known member
Joined
Nov 29, 2014
Messages
3,587
Location
CT-USA
I found a good detail image of the siding transition.

Siding-Transition-Flashing-t.jpg

I was hoping to find a way to put a horizontal trim piece over the bottom of the old siding (there's probably a name for that).

At the moment I'm thinking cedar shingles for the lower siding portion to match existing house.
 
Last edited:
OP
P

Platonic Solid

Well-known member
Joined
Nov 29, 2014
Messages
3,587
Location
CT-USA
The rear and left rear walls are now attached. 2x6 sills are notched in the corners to fit together. 4x4 blocks will fill the space between threaded rod and posts.

Right Rear Corner


-----------------------------------------------------------------
Left Rear Corner


OP
P

Platonic Solid

Well-known member
Joined
Nov 29, 2014
Messages
3,587
Location
CT-USA
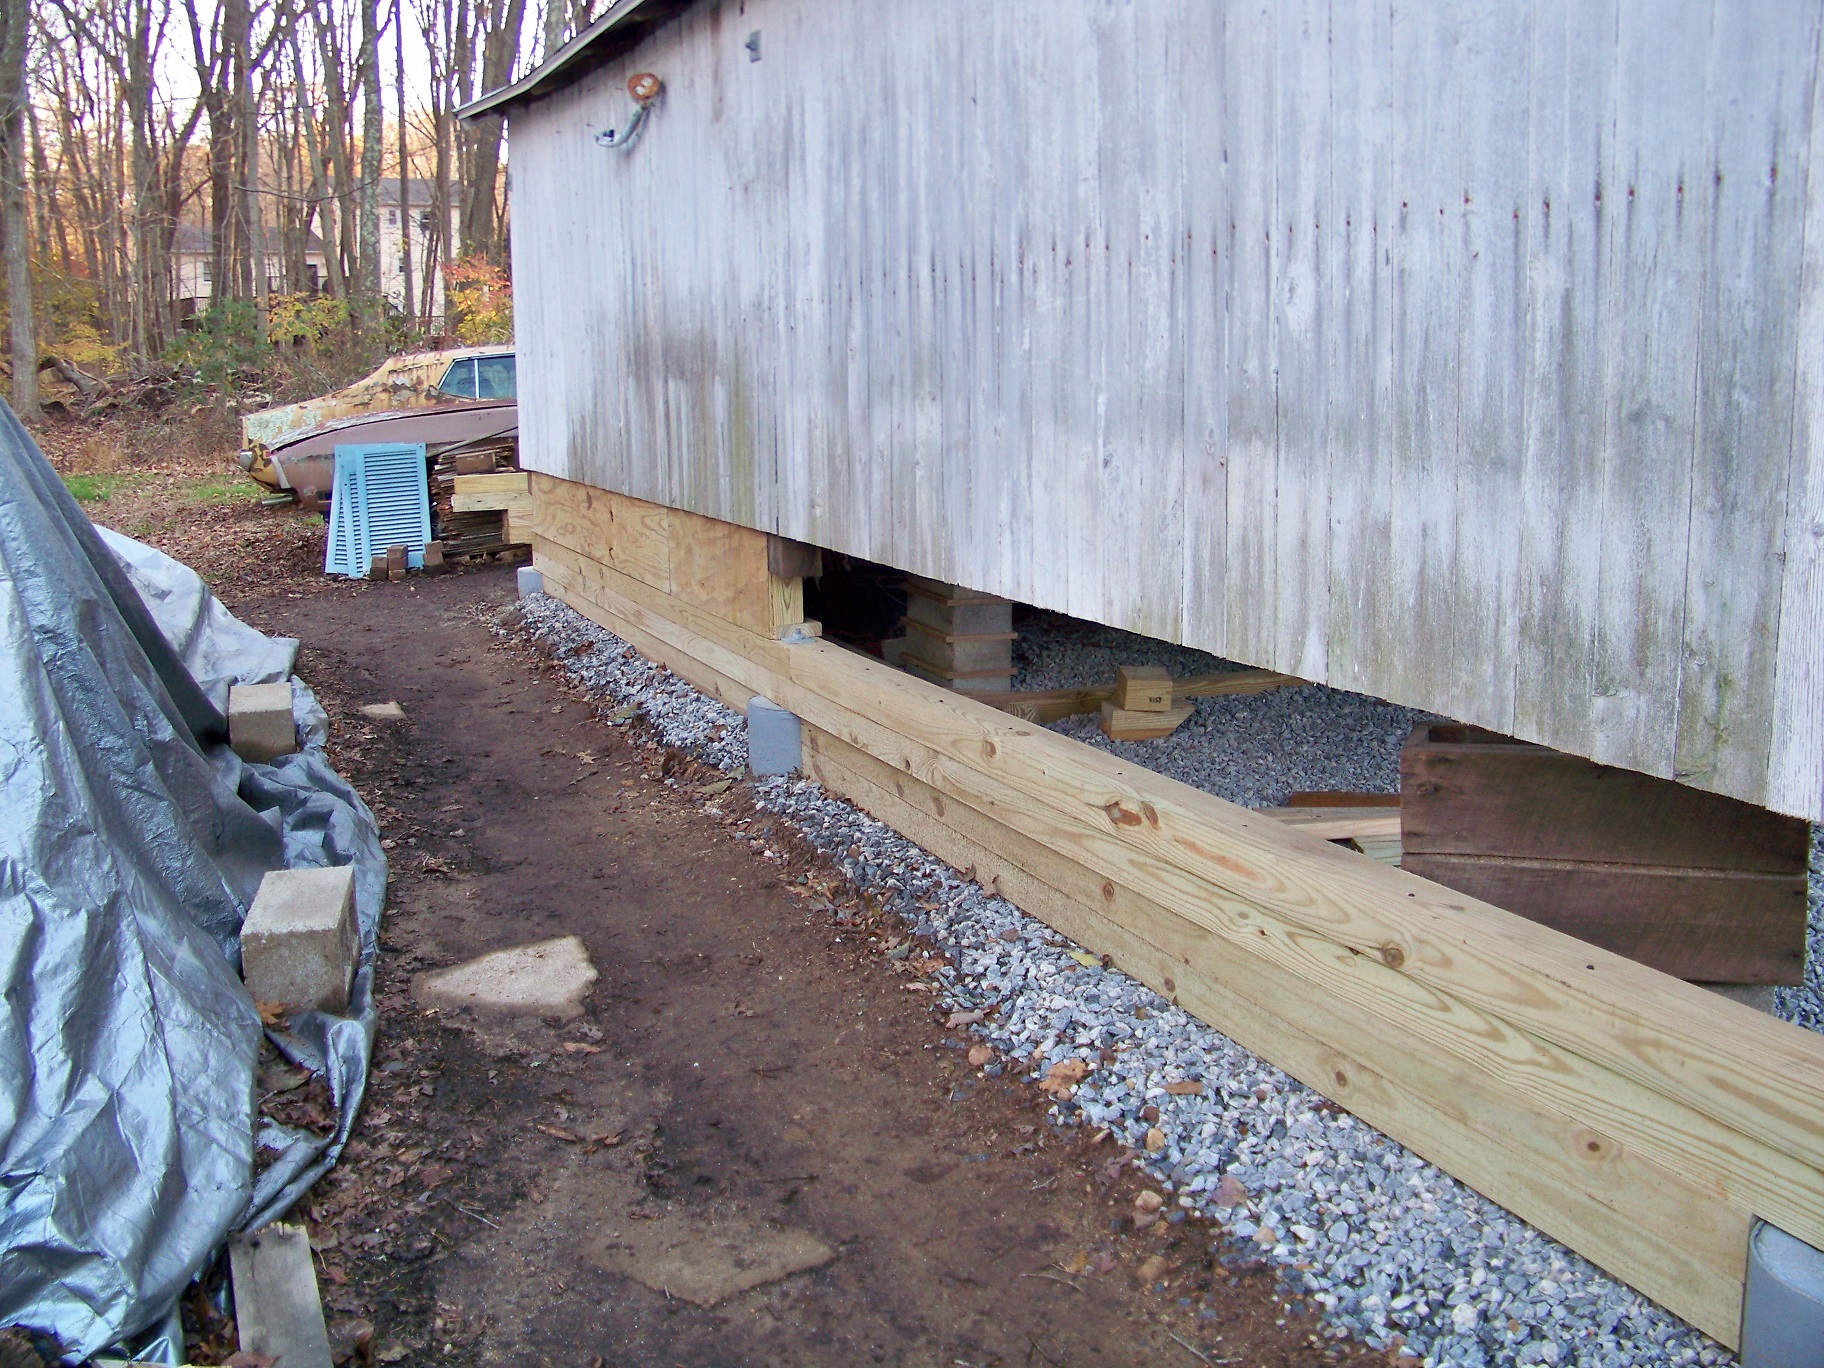
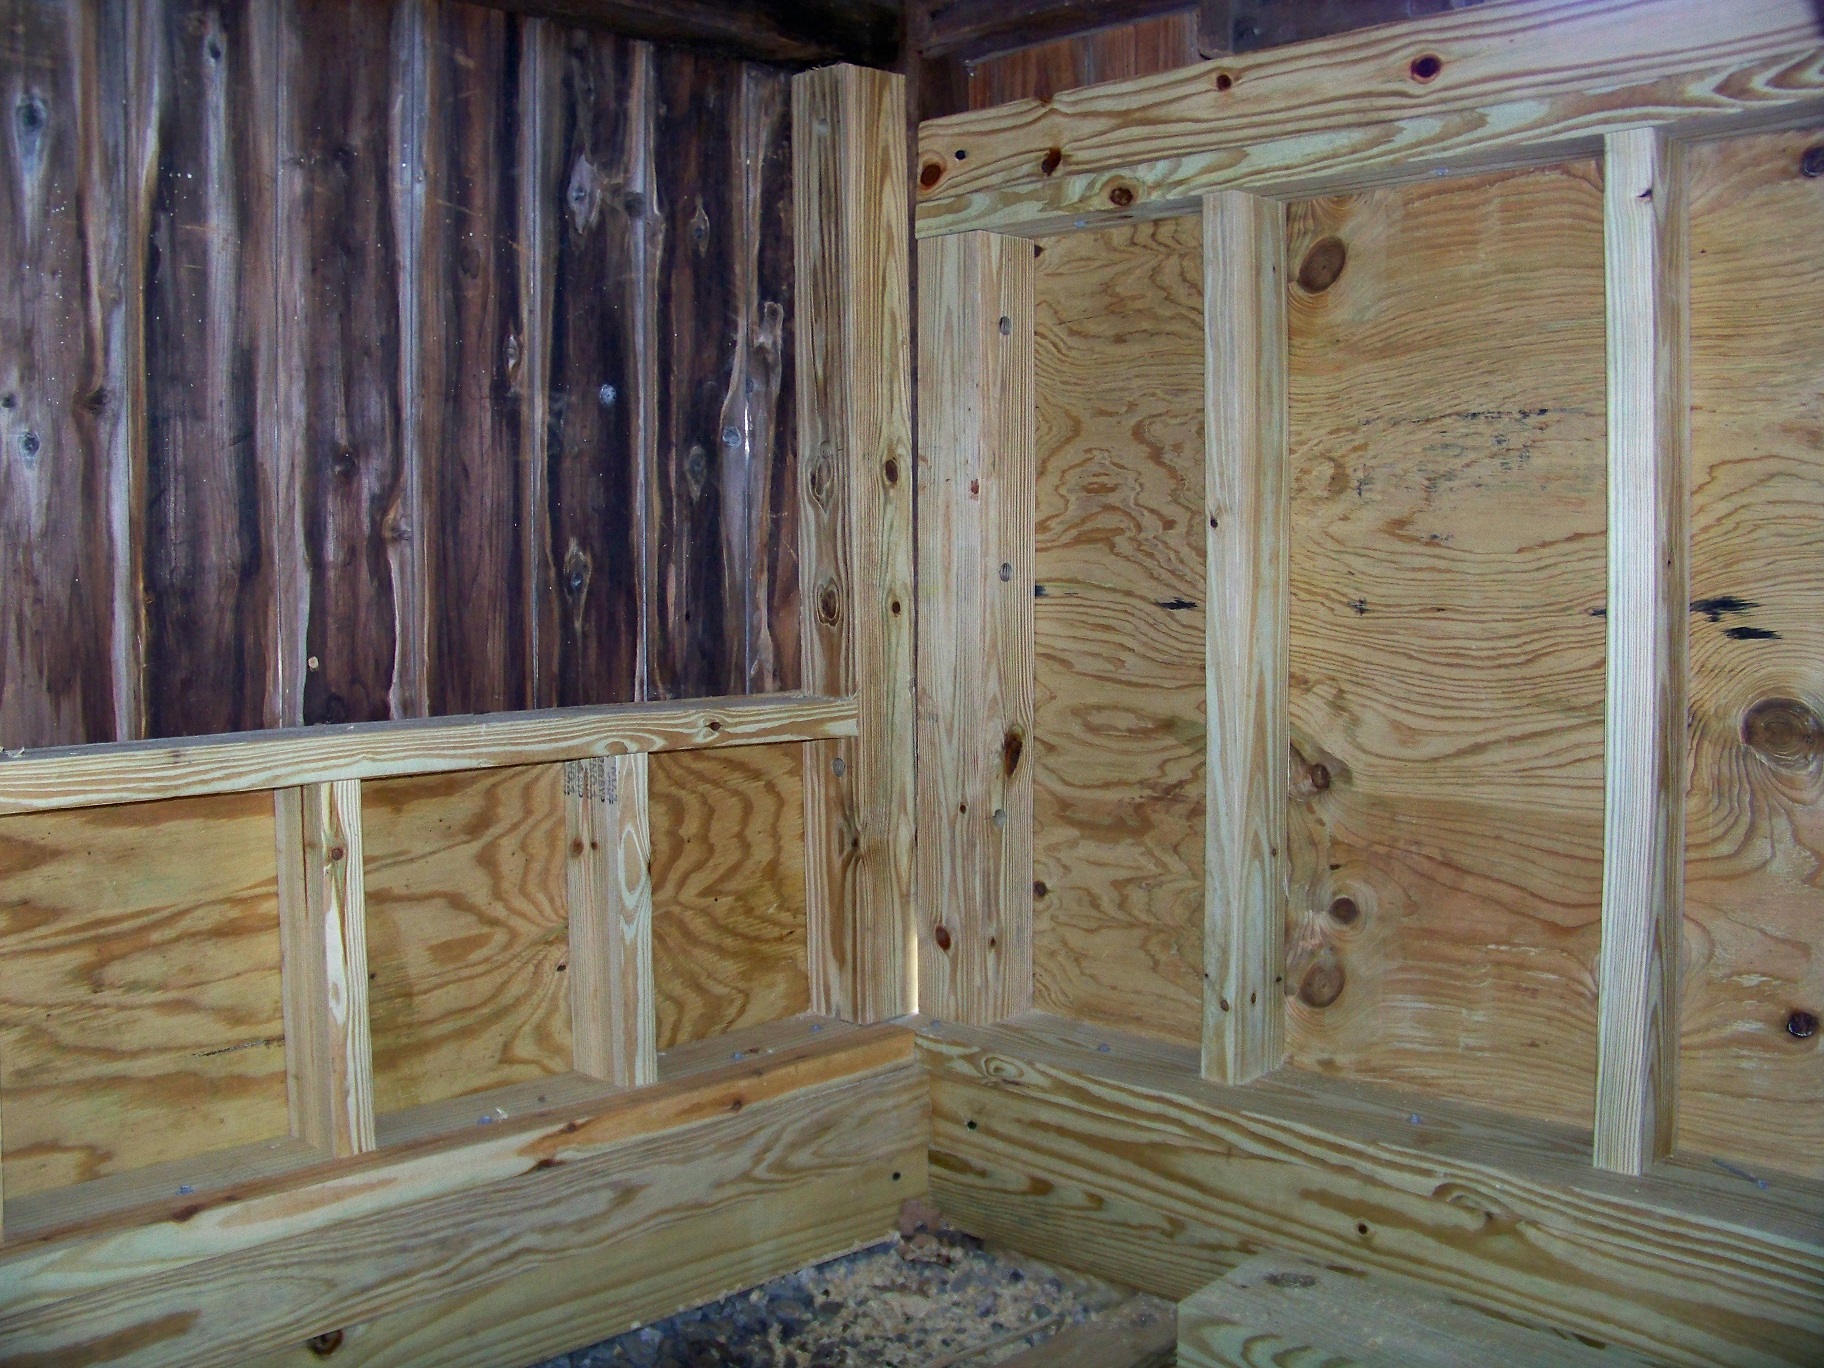
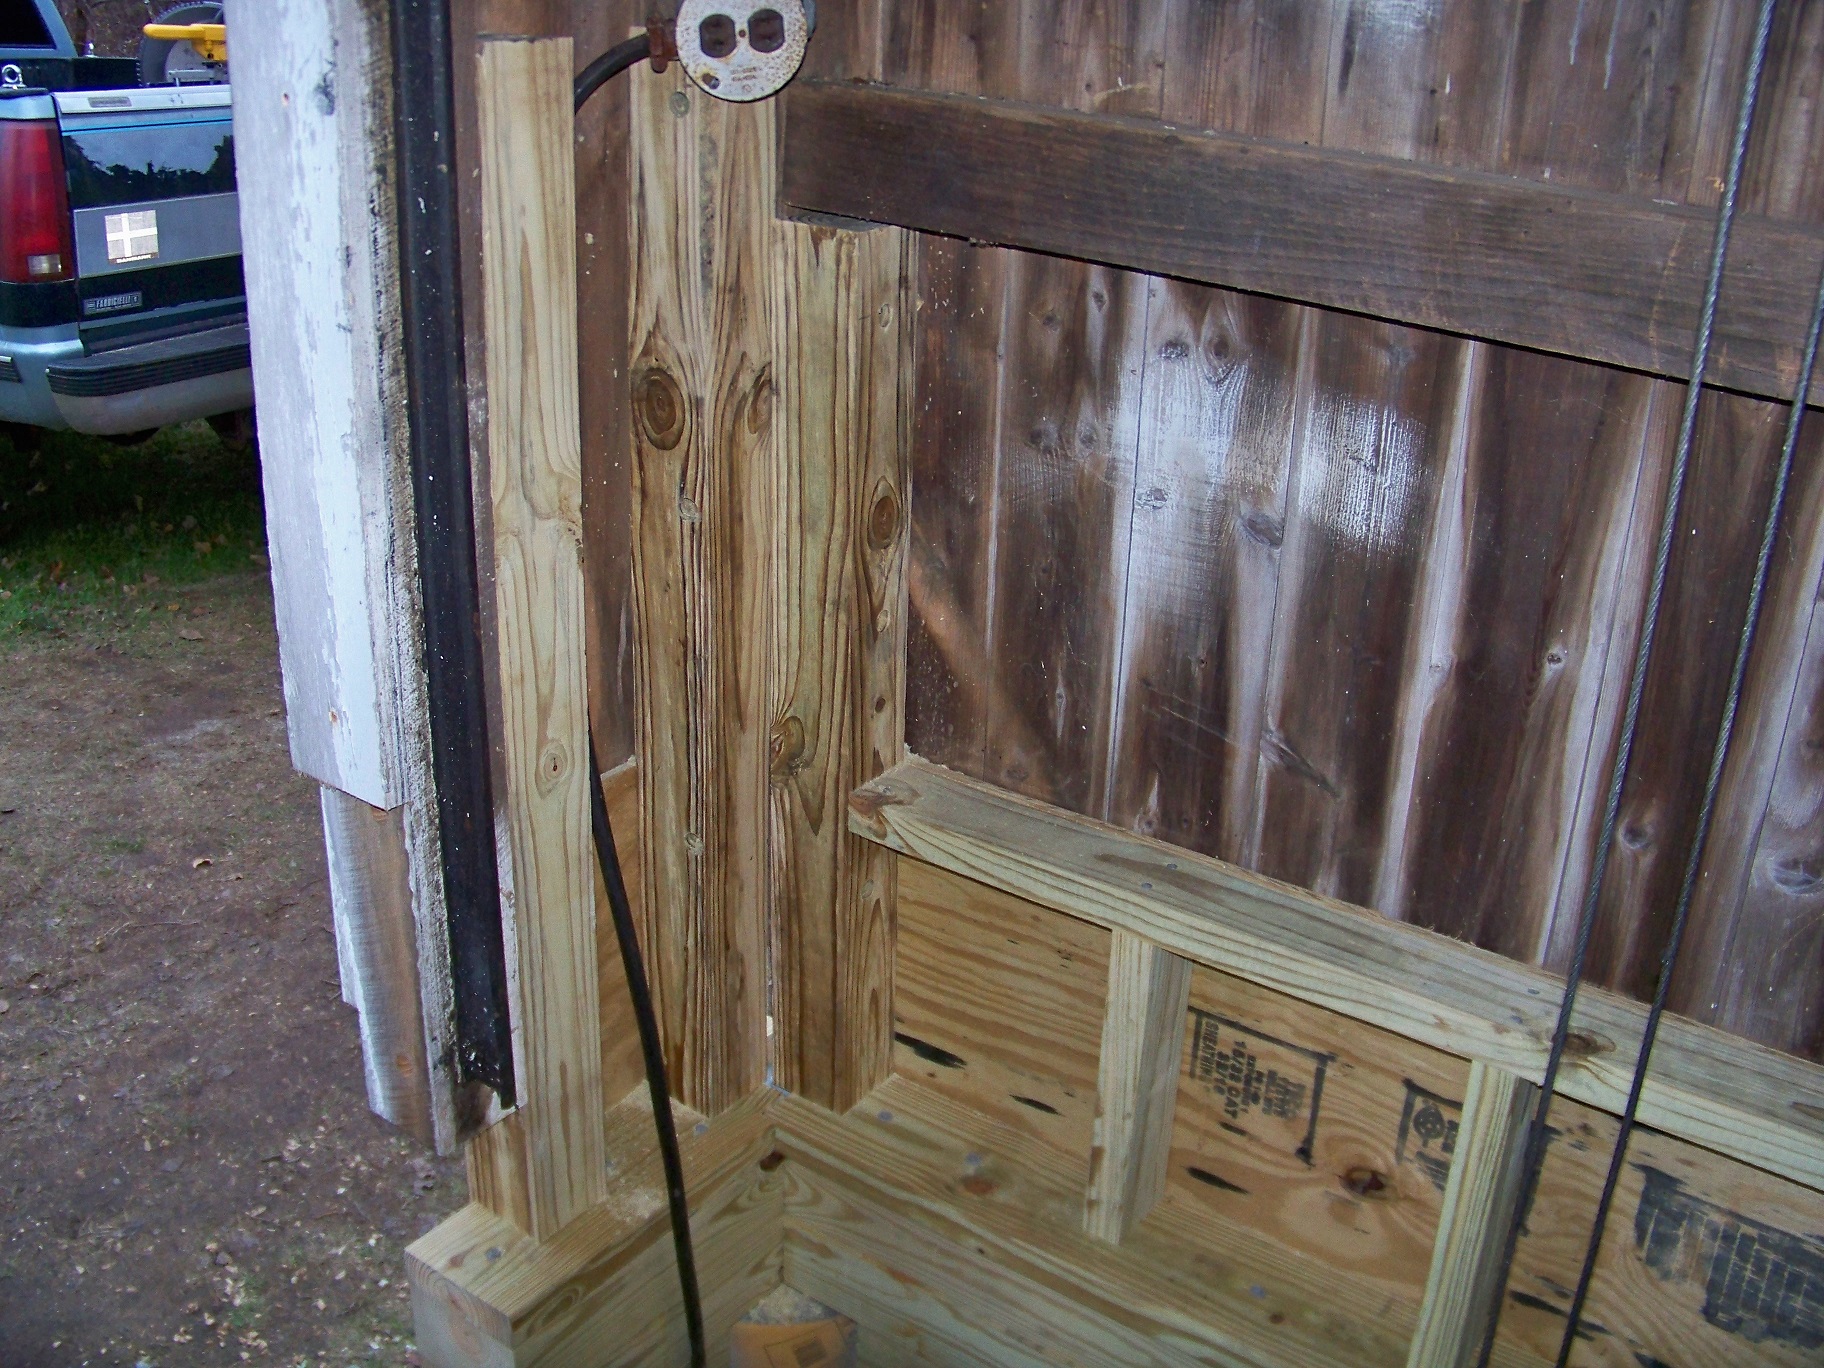
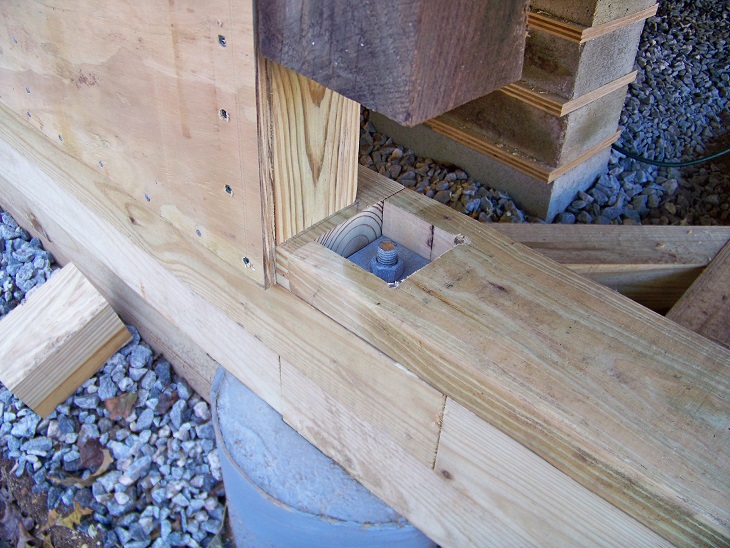
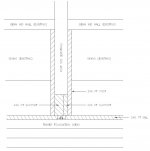
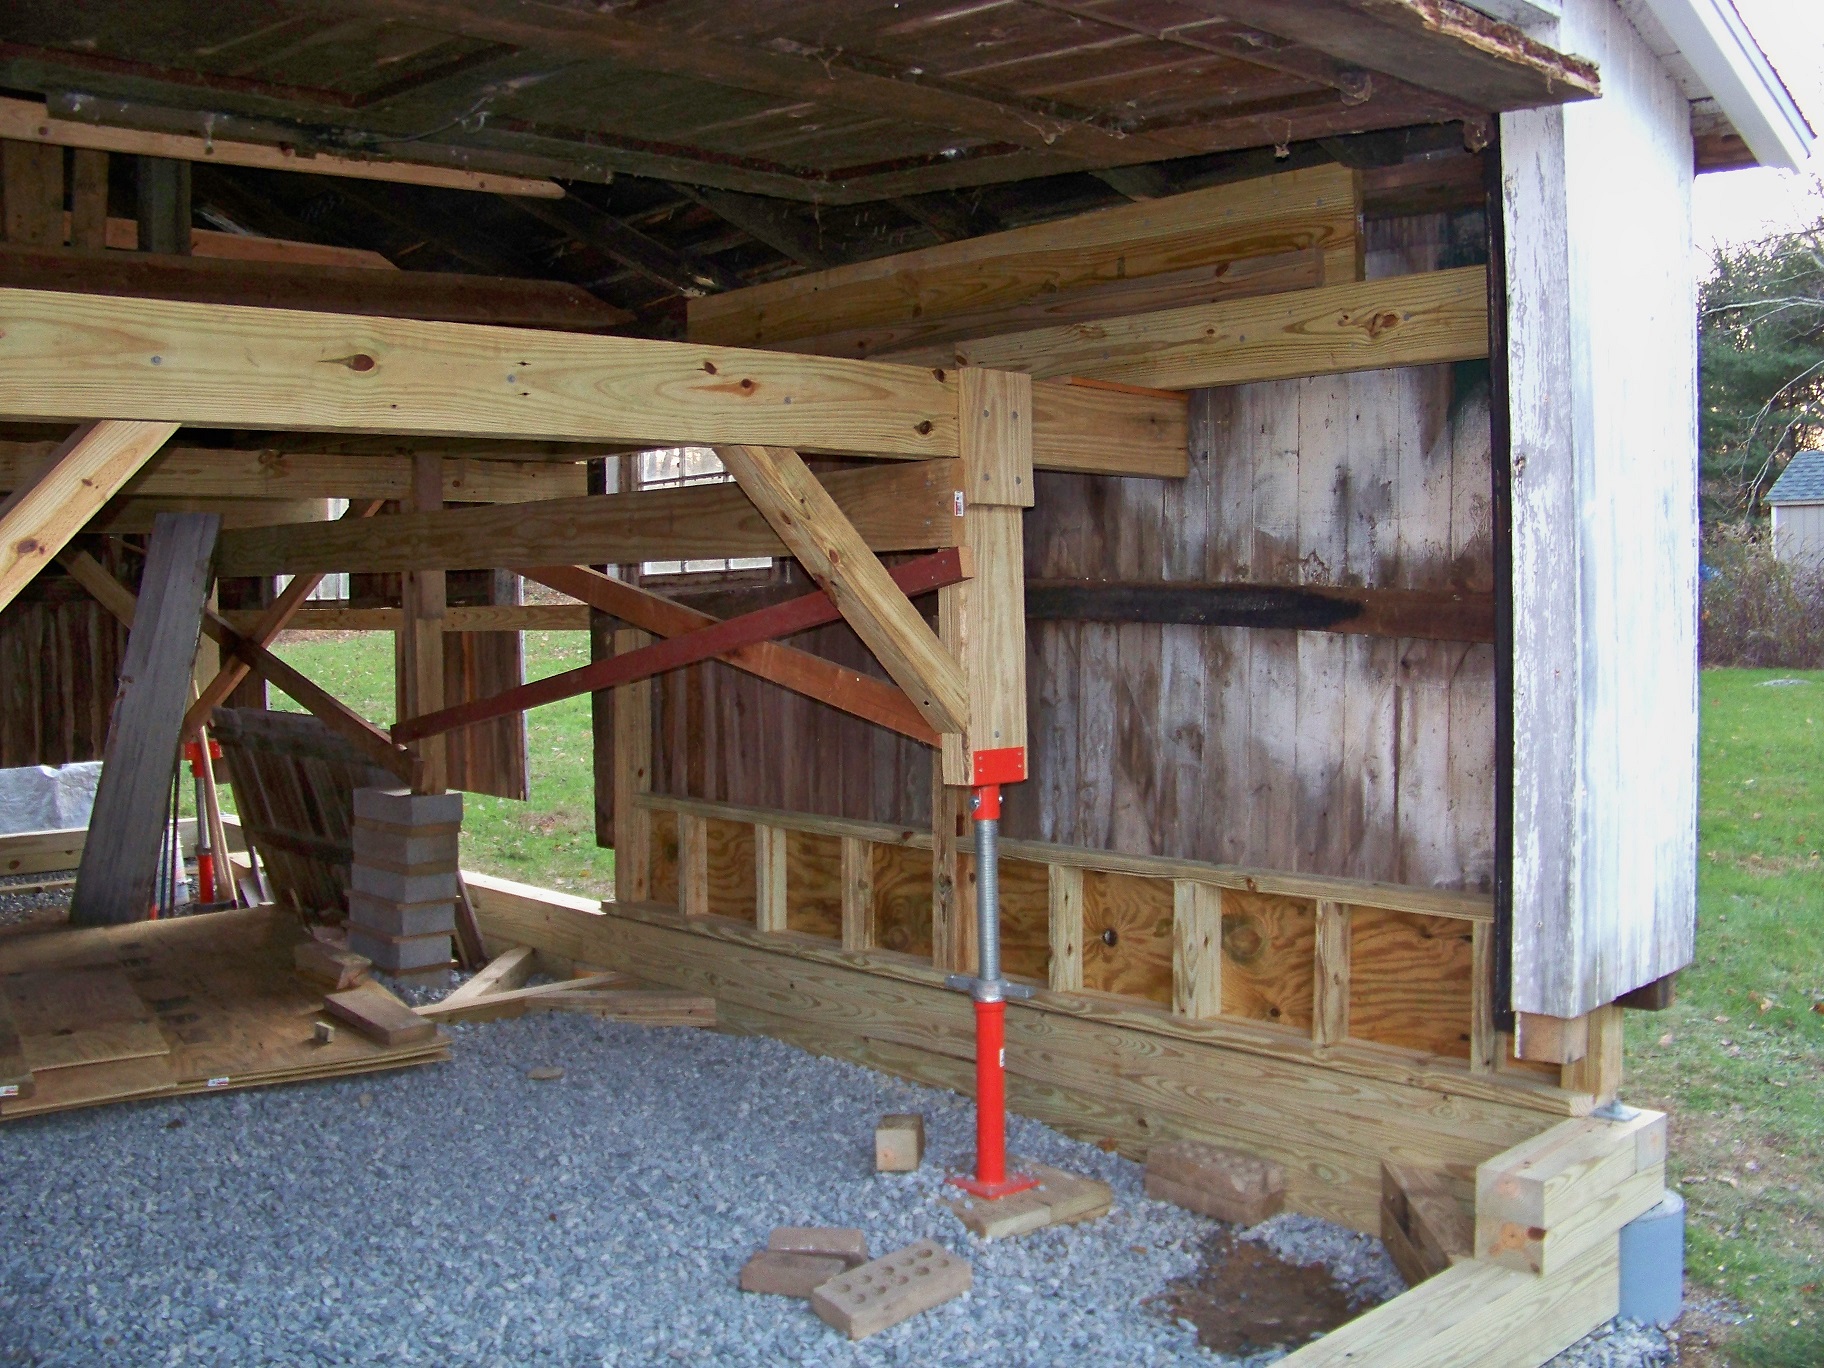
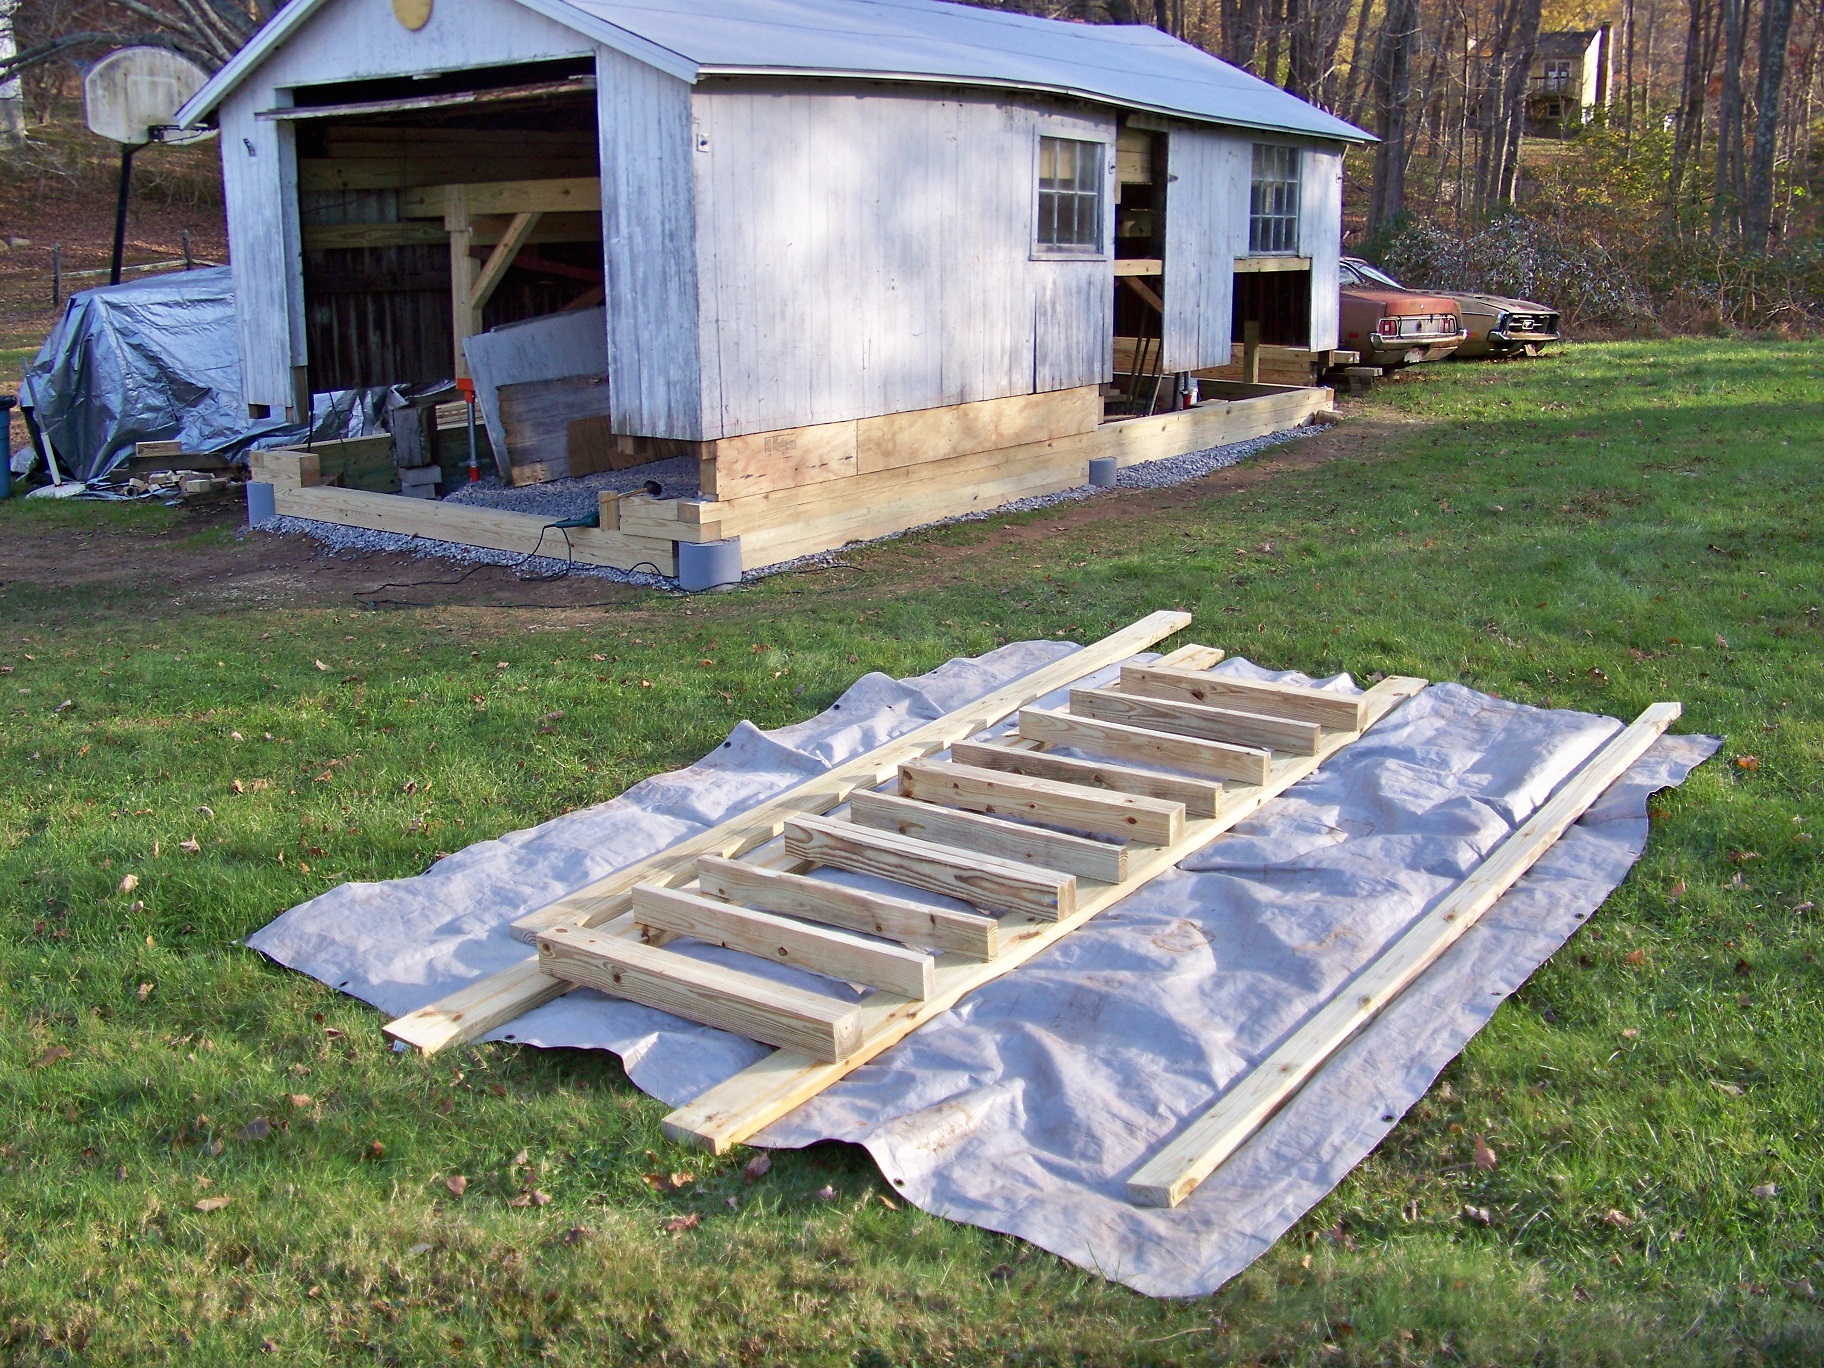
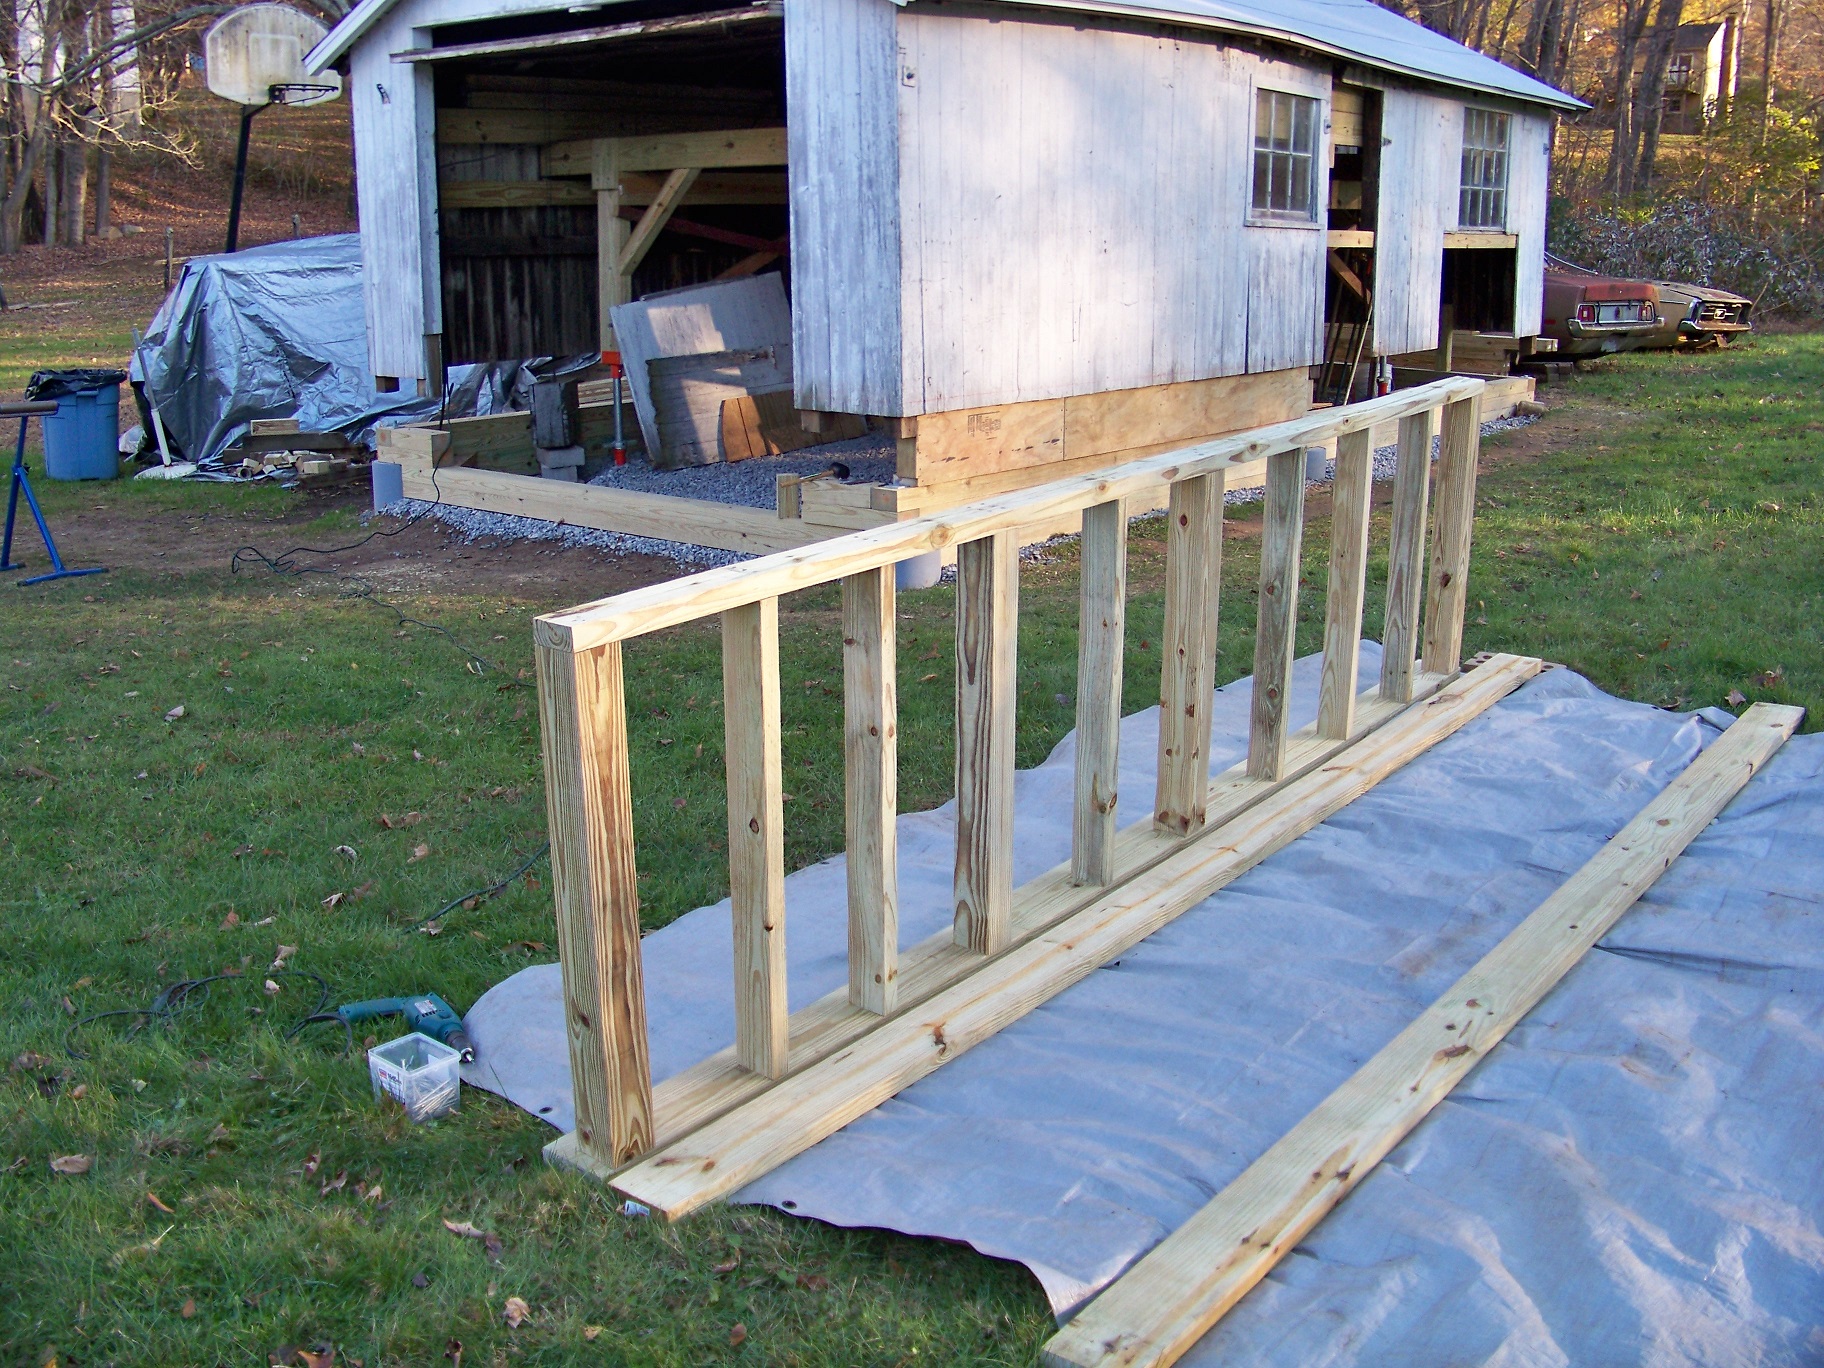
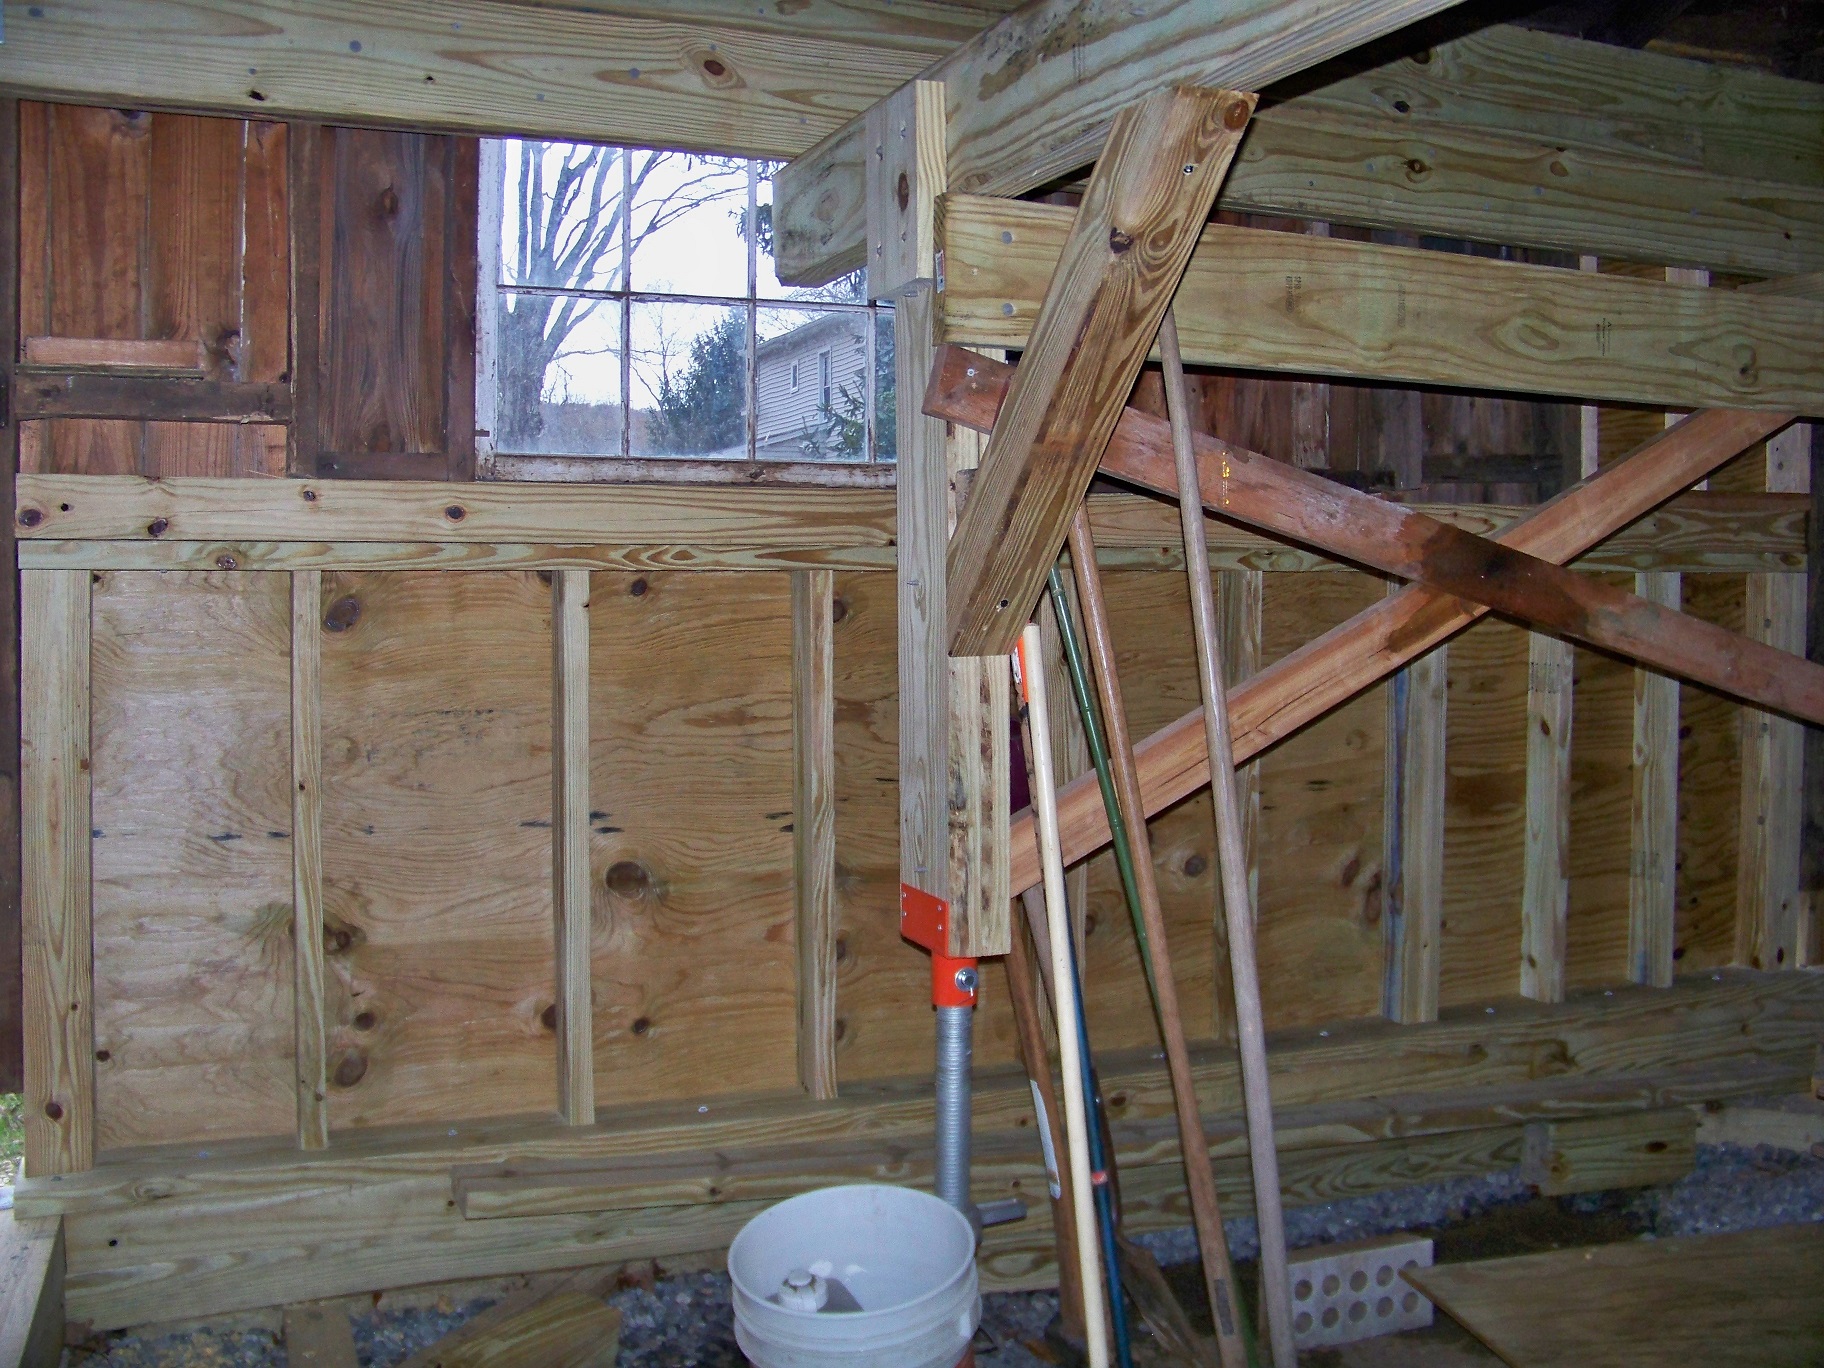
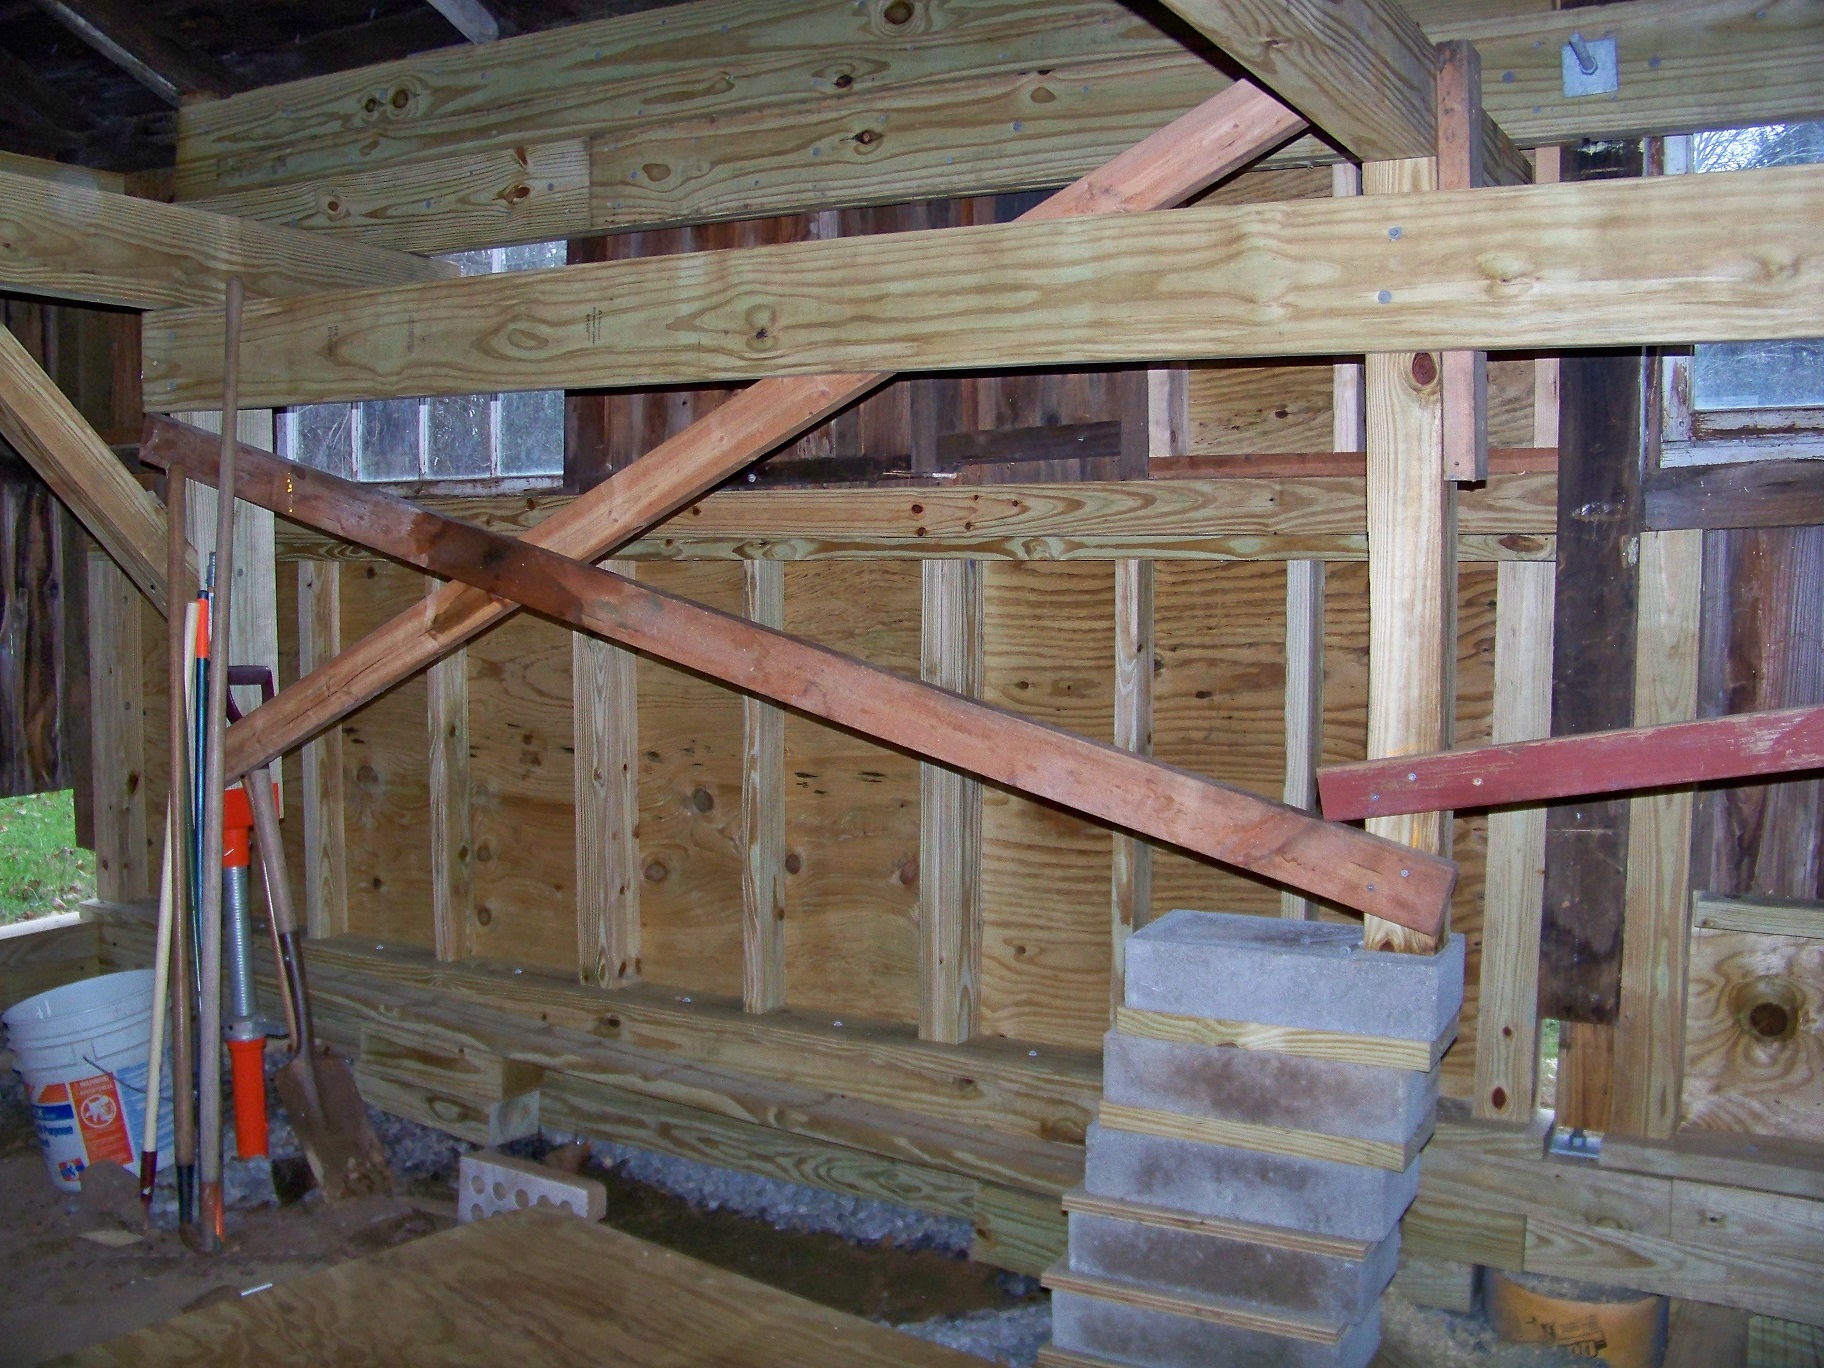
The left center and front threaded rods not being as close to the edge gave me the option of notching the 2x6 sills around the bearing plates. To give me a fighting chance of installing the notched wall I made it in 2 pieces - an 8ft section and 4ft section. I had previously cut the threaded rod down to 1.5 inch.


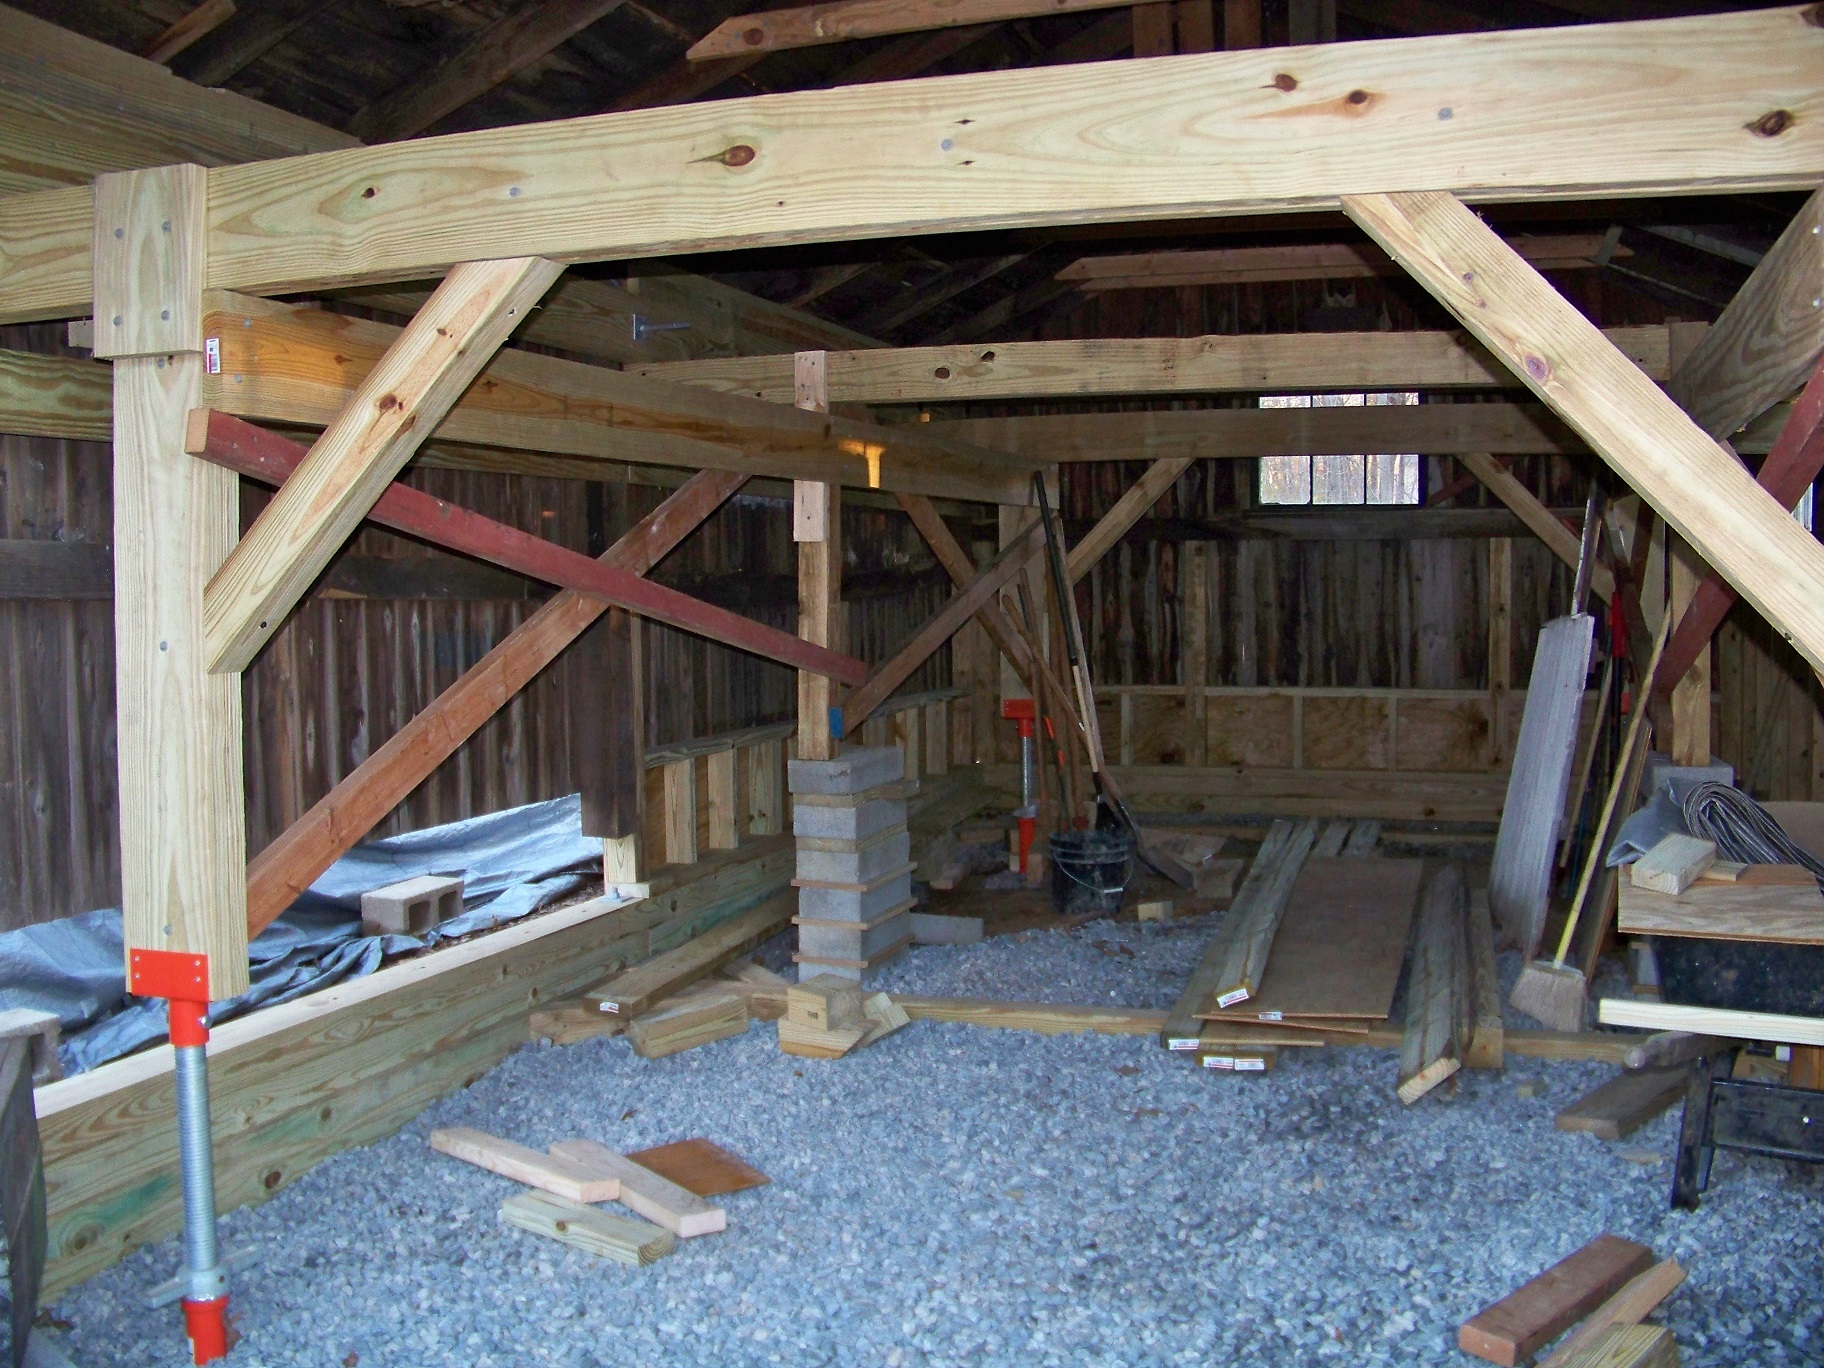
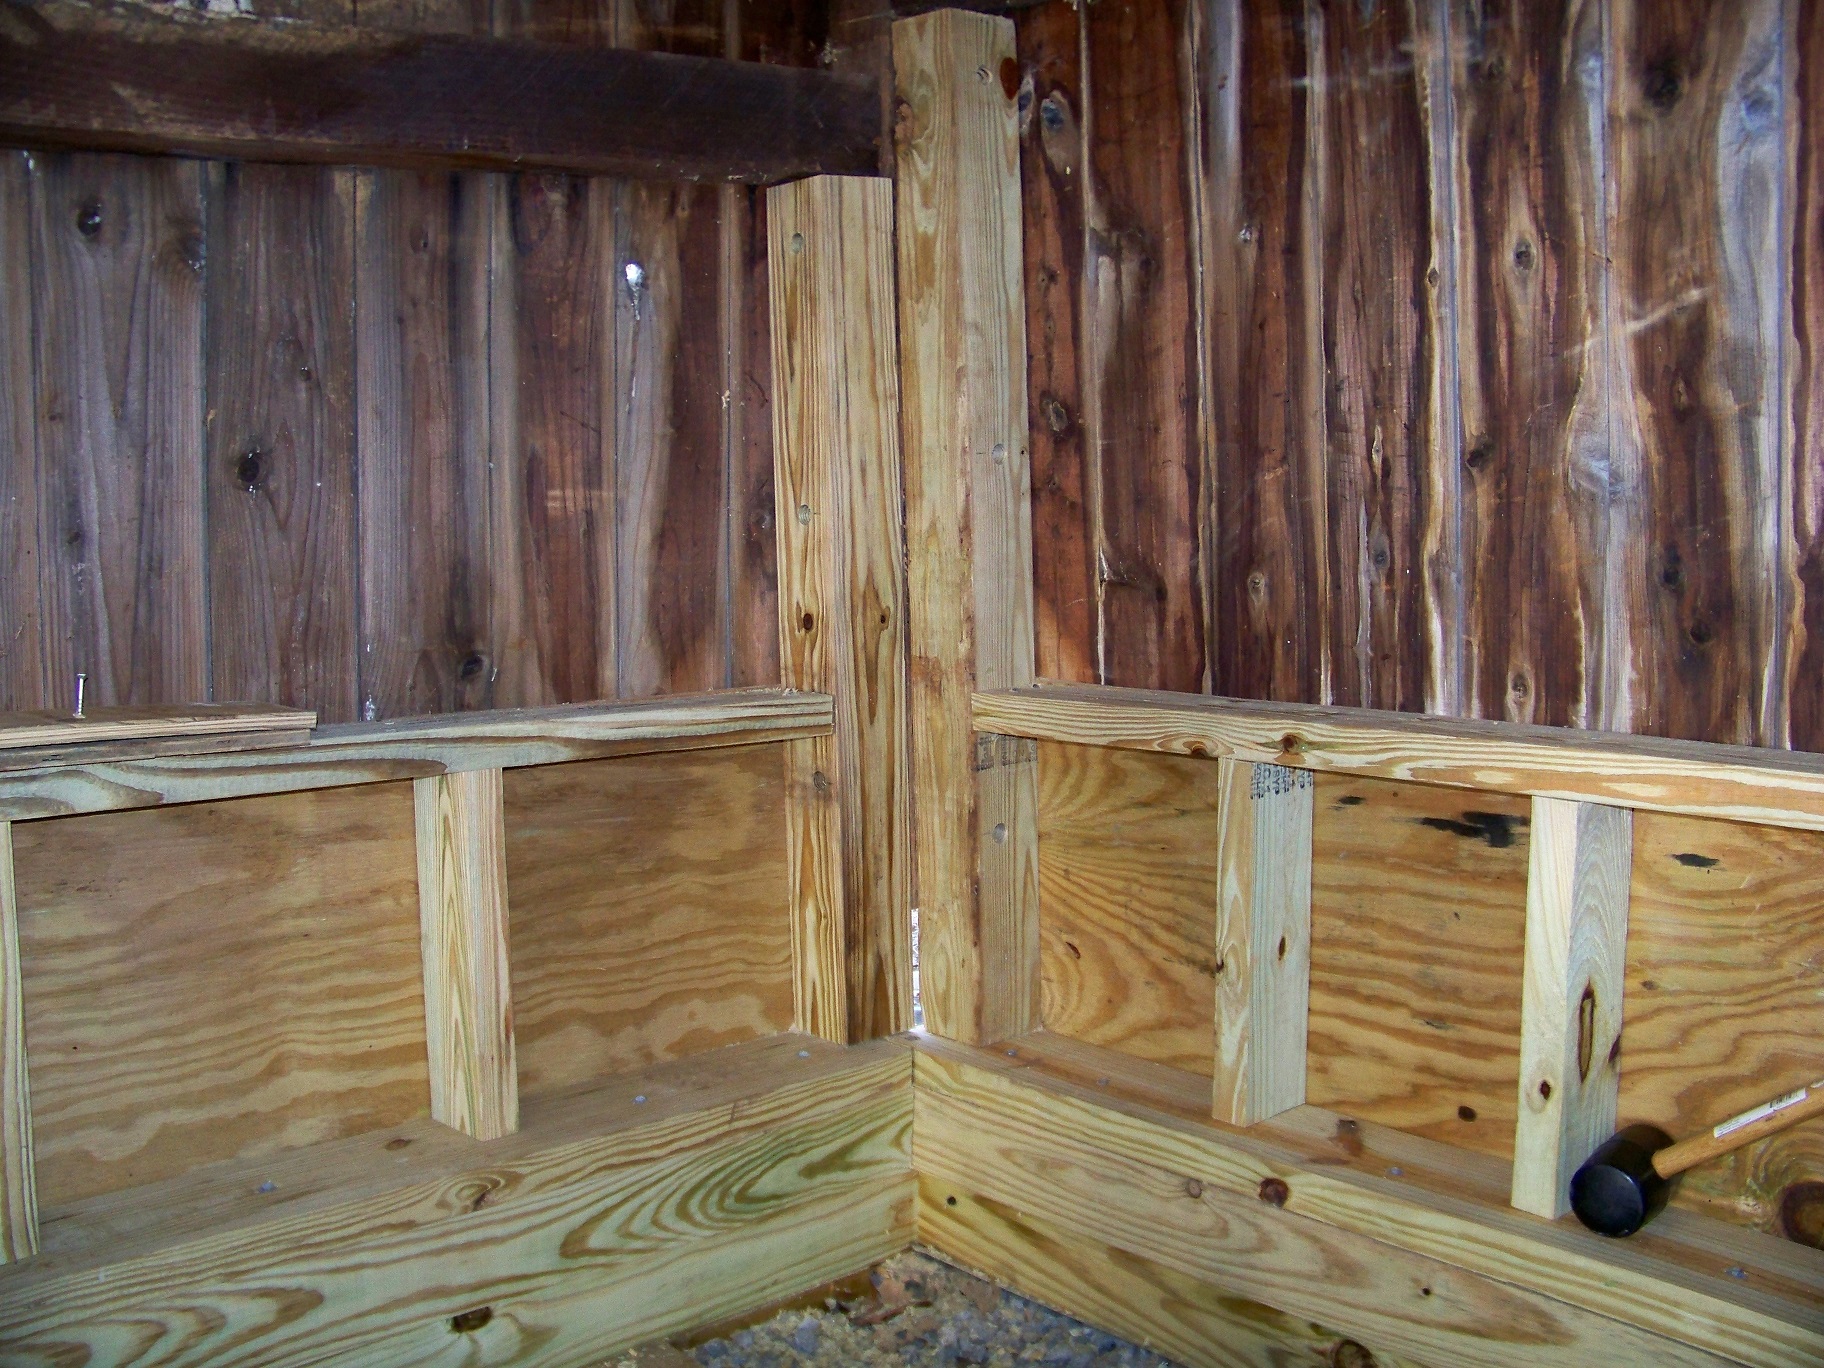
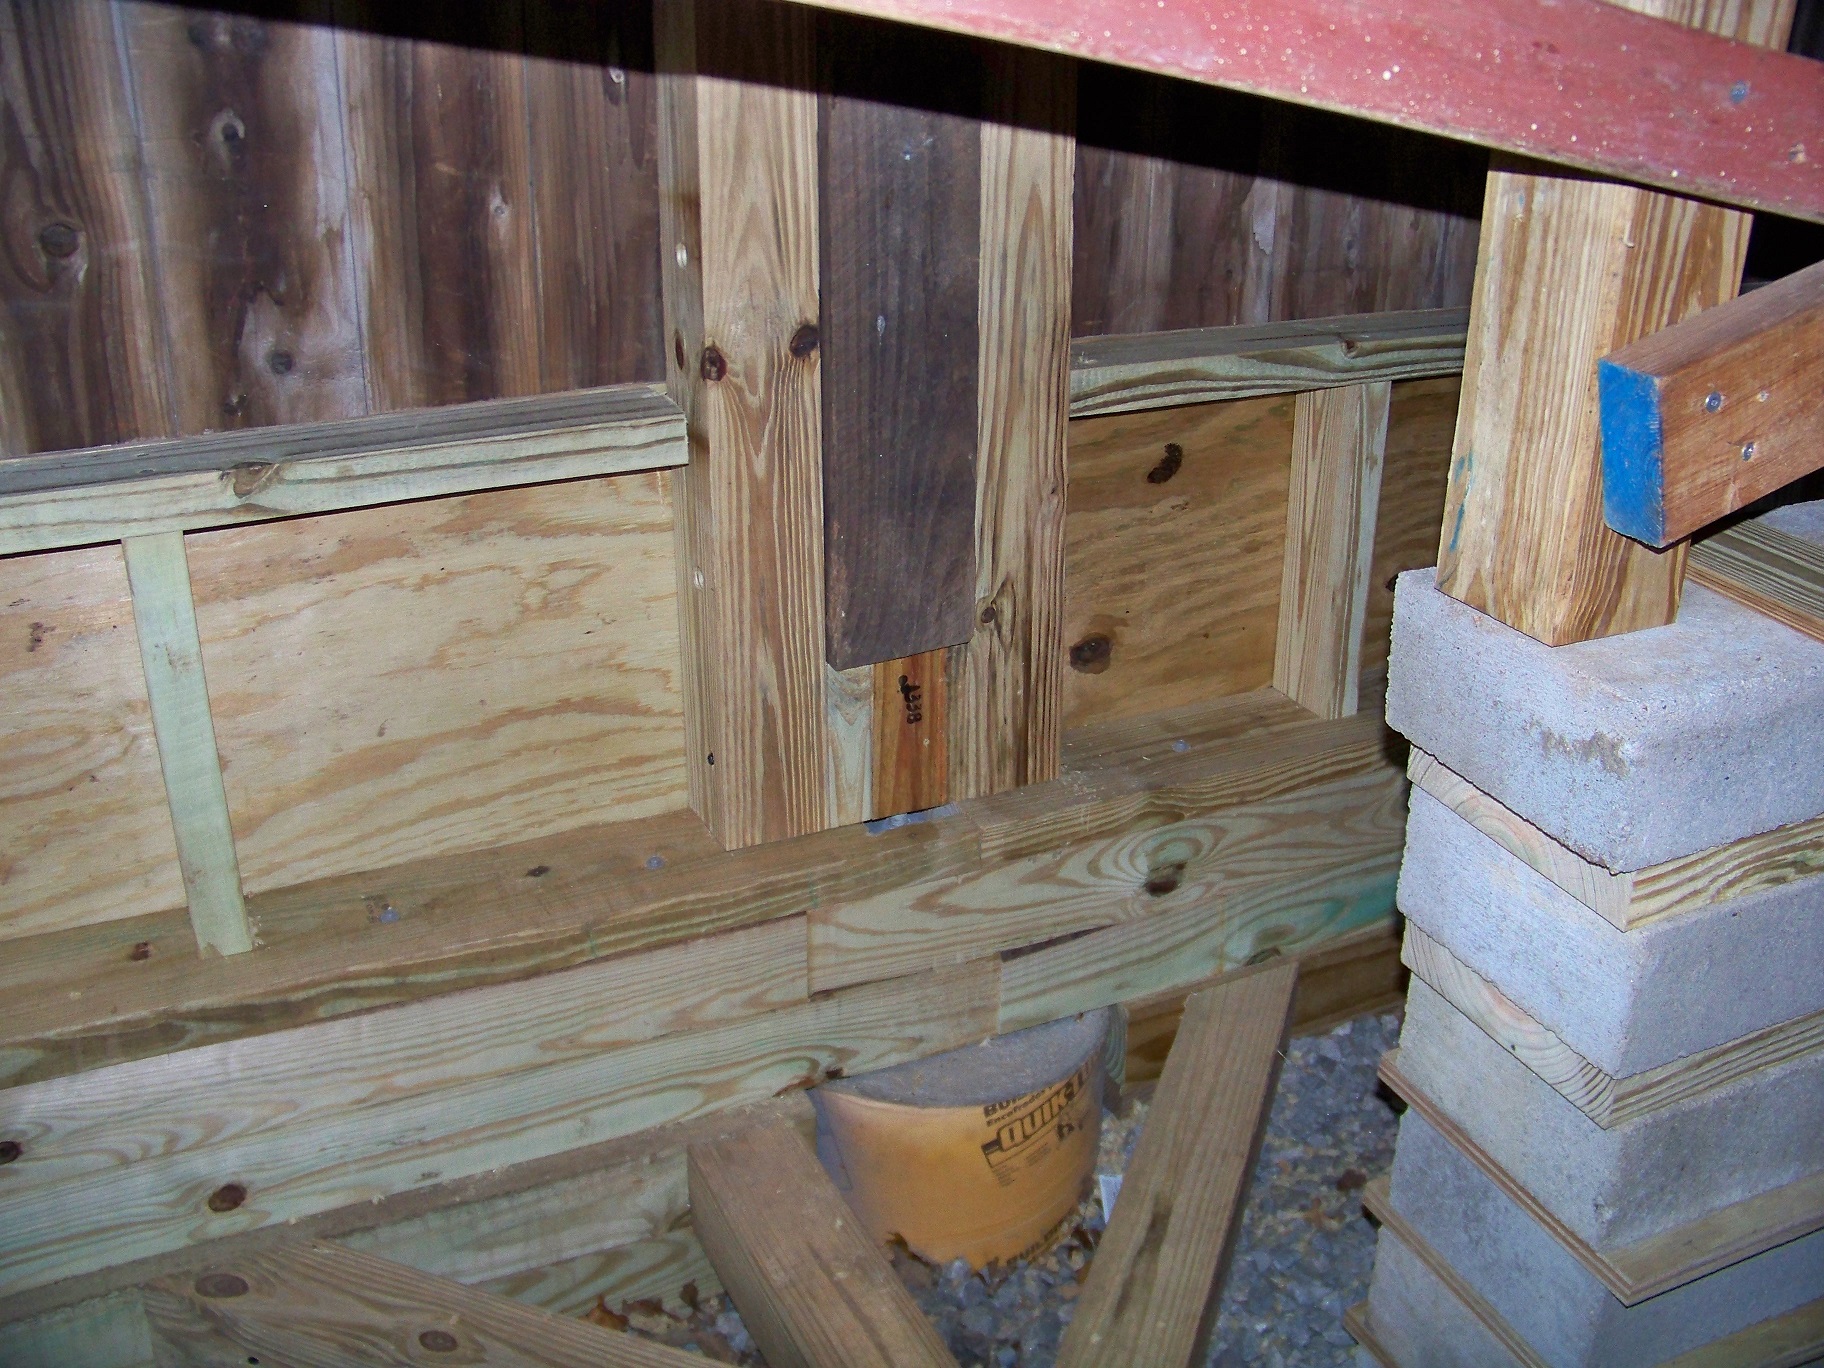
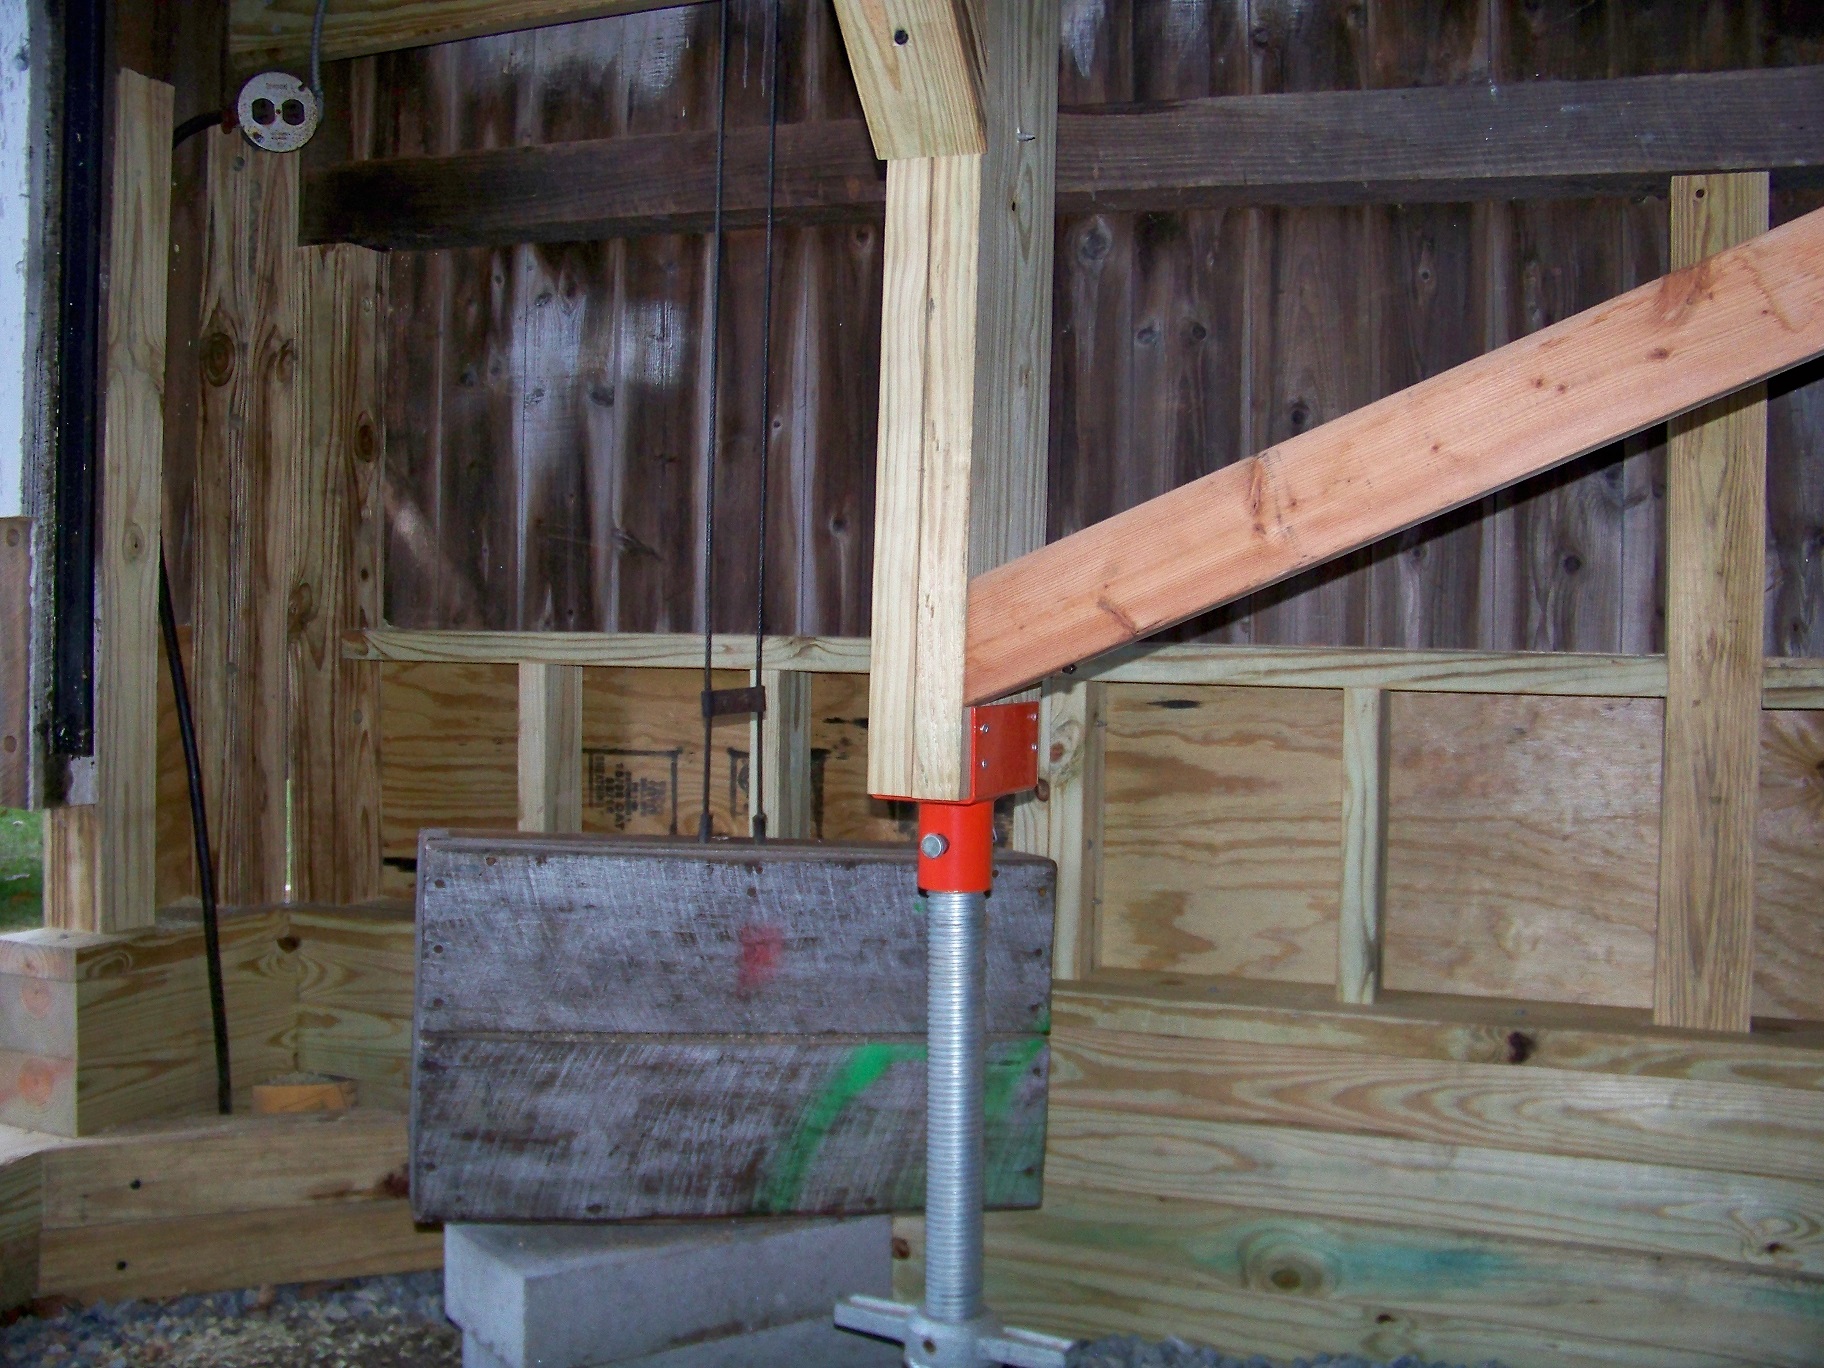
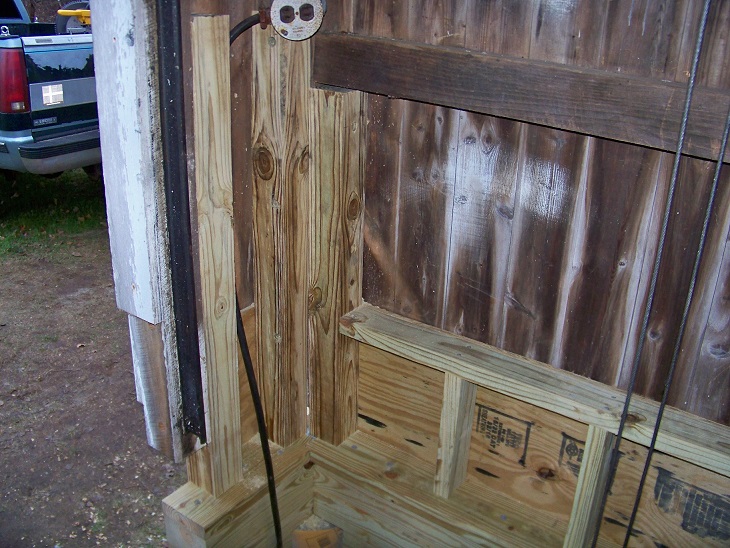
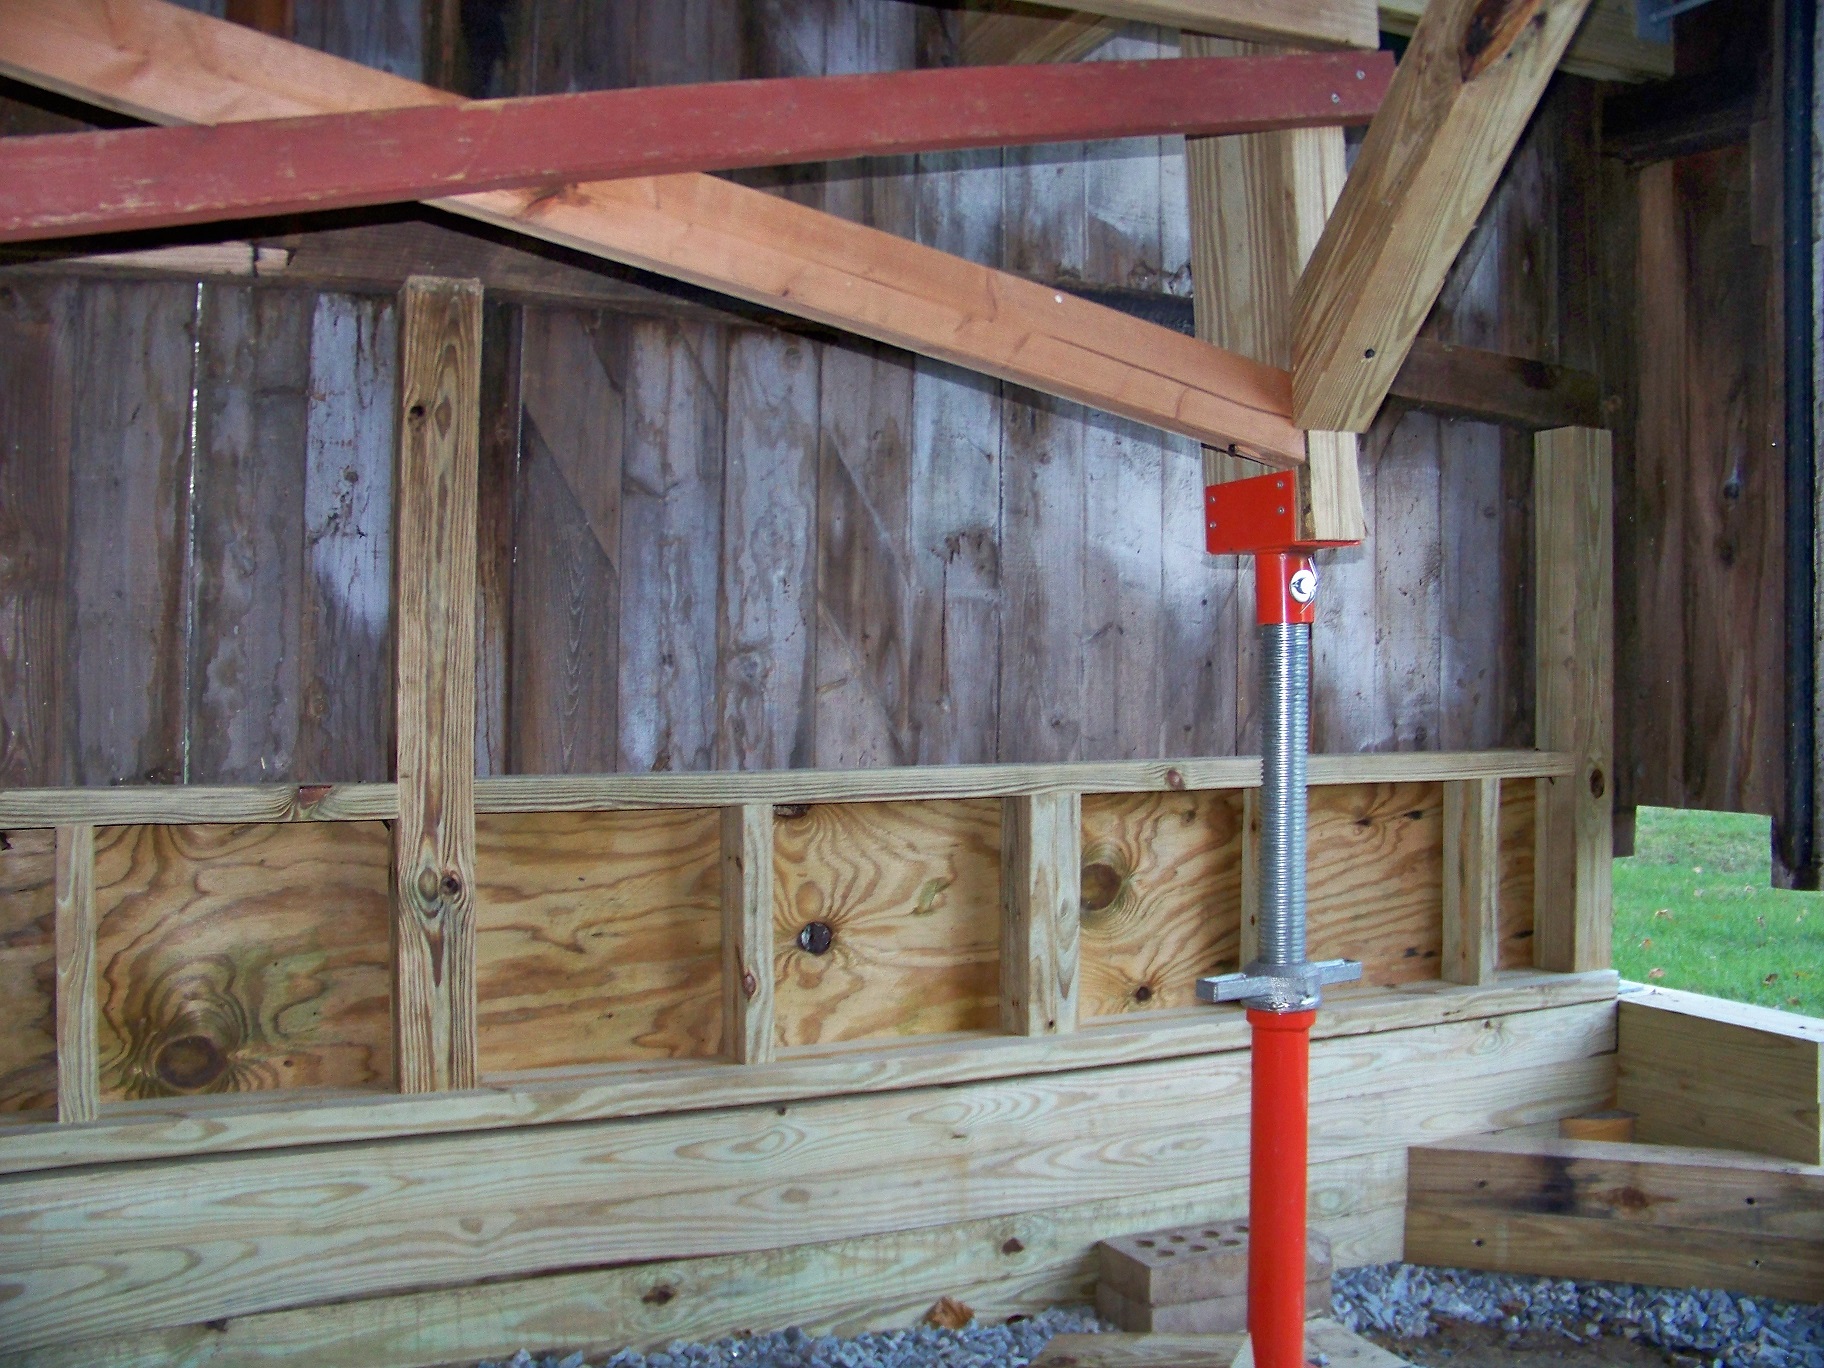
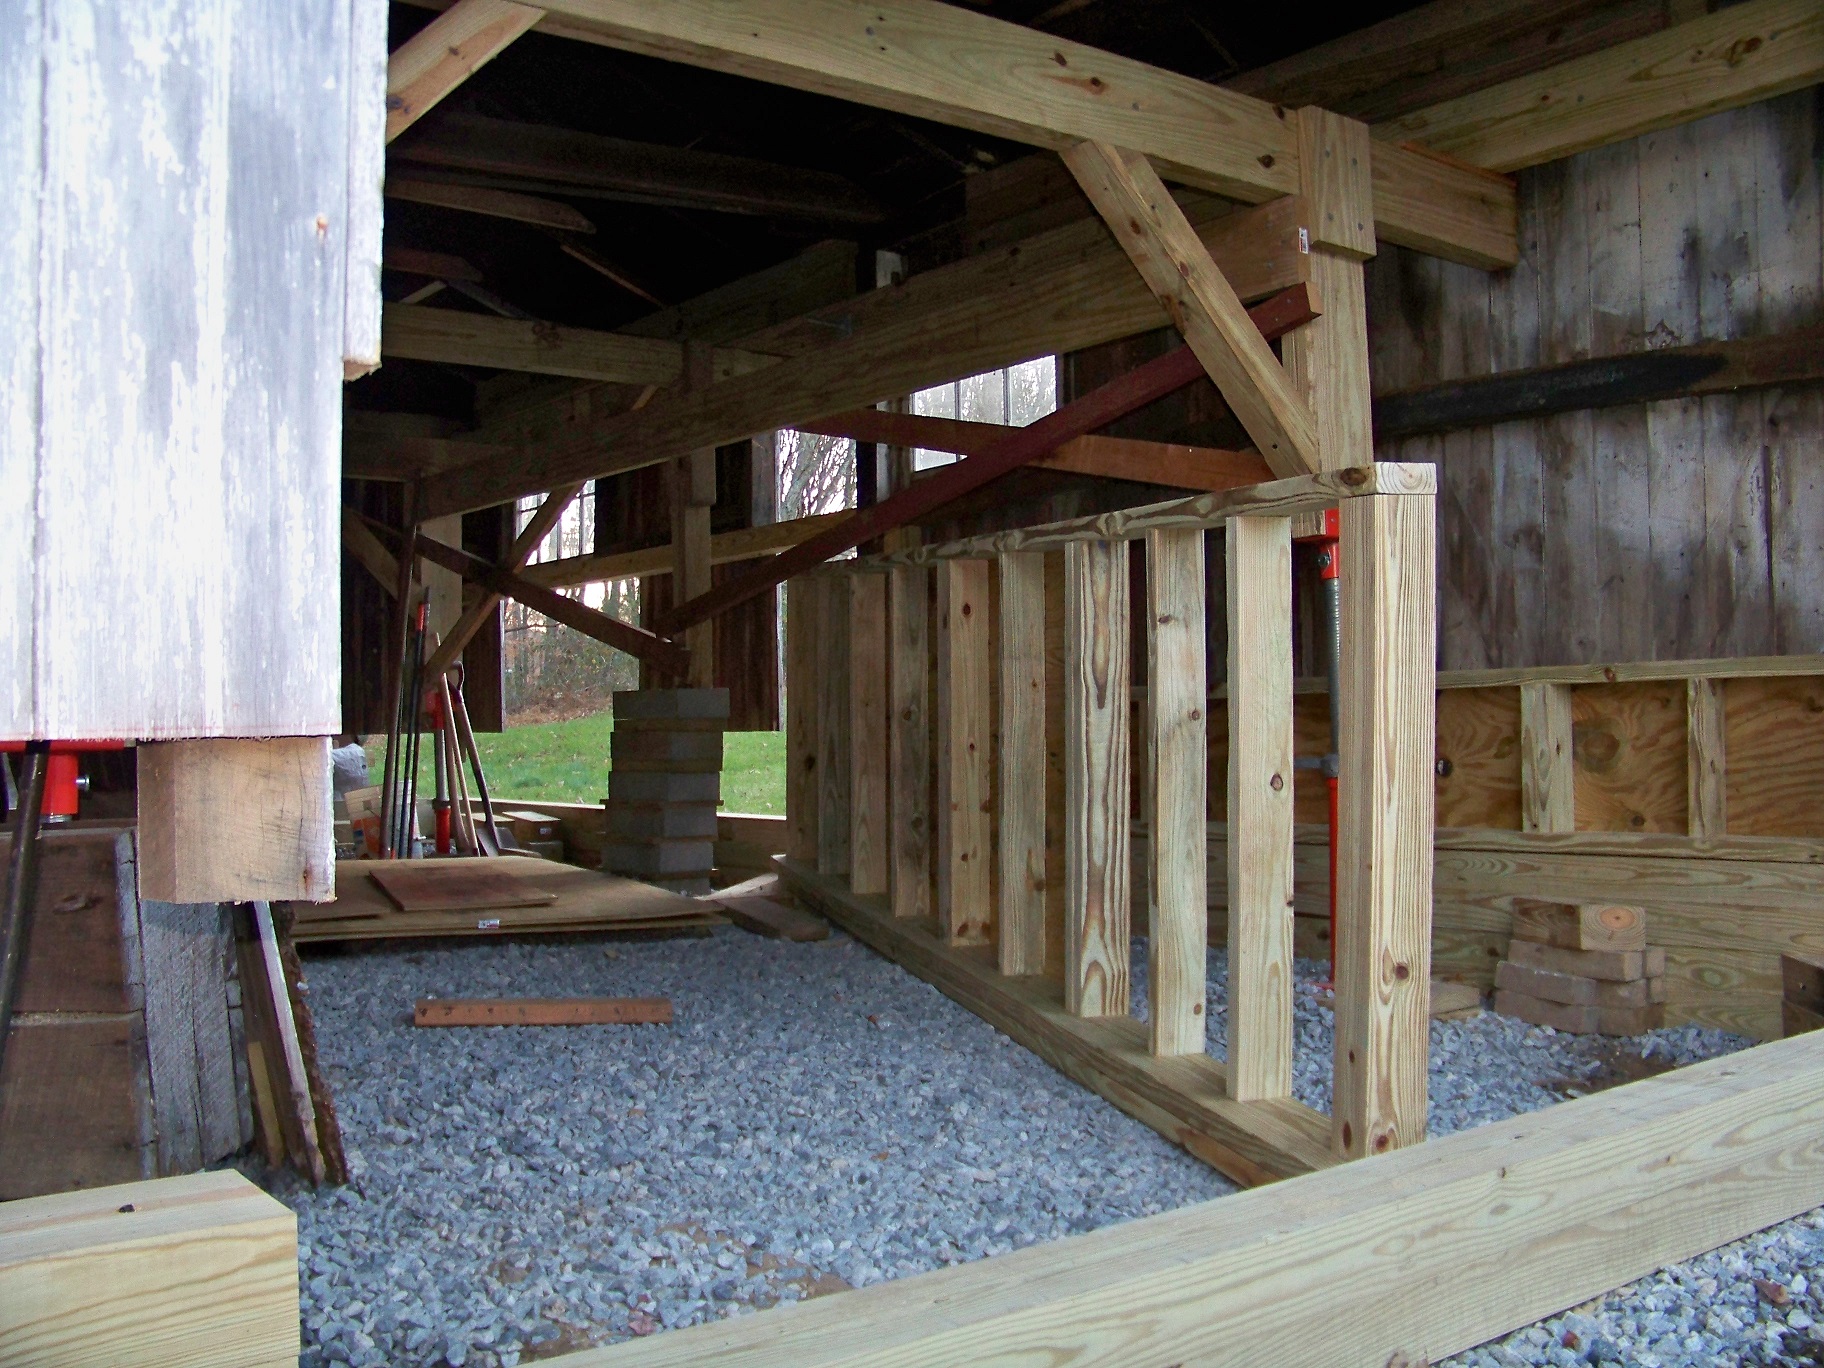
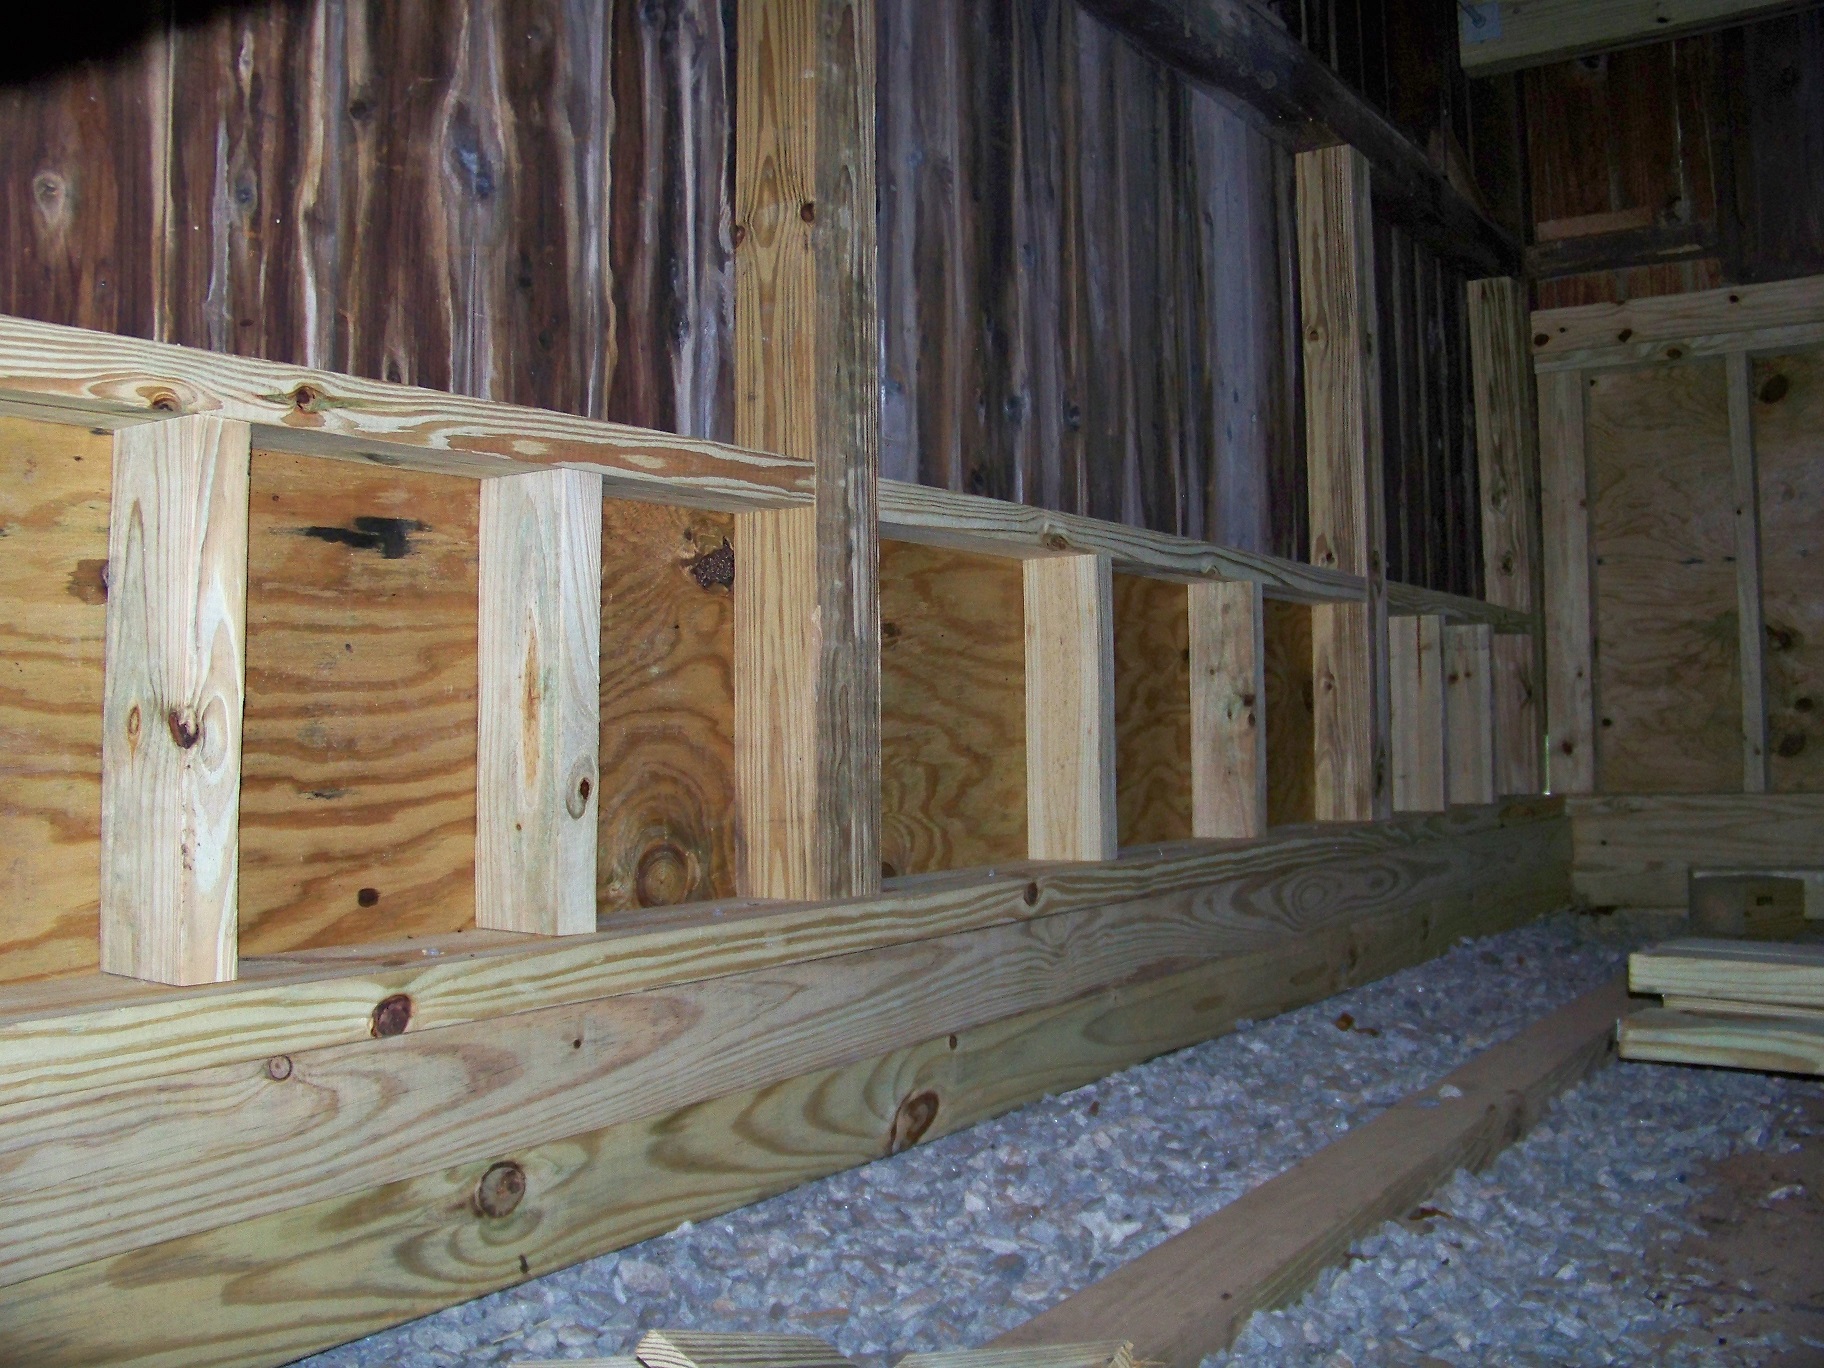
A piece of 4x4 and 2x4 fit perfectly under the post. Each is sistered to their respective posts and a 10 inch Timberlok driven through to whole thing. Had to use a socket wrench for the last 2 inches of that one. All post bolts are hit with the socket wrench before moving on. Just like the right hand wall earlier, I had to get out the sawzall and cut the 2x4 so I could angle the post. I'll fill that space later.


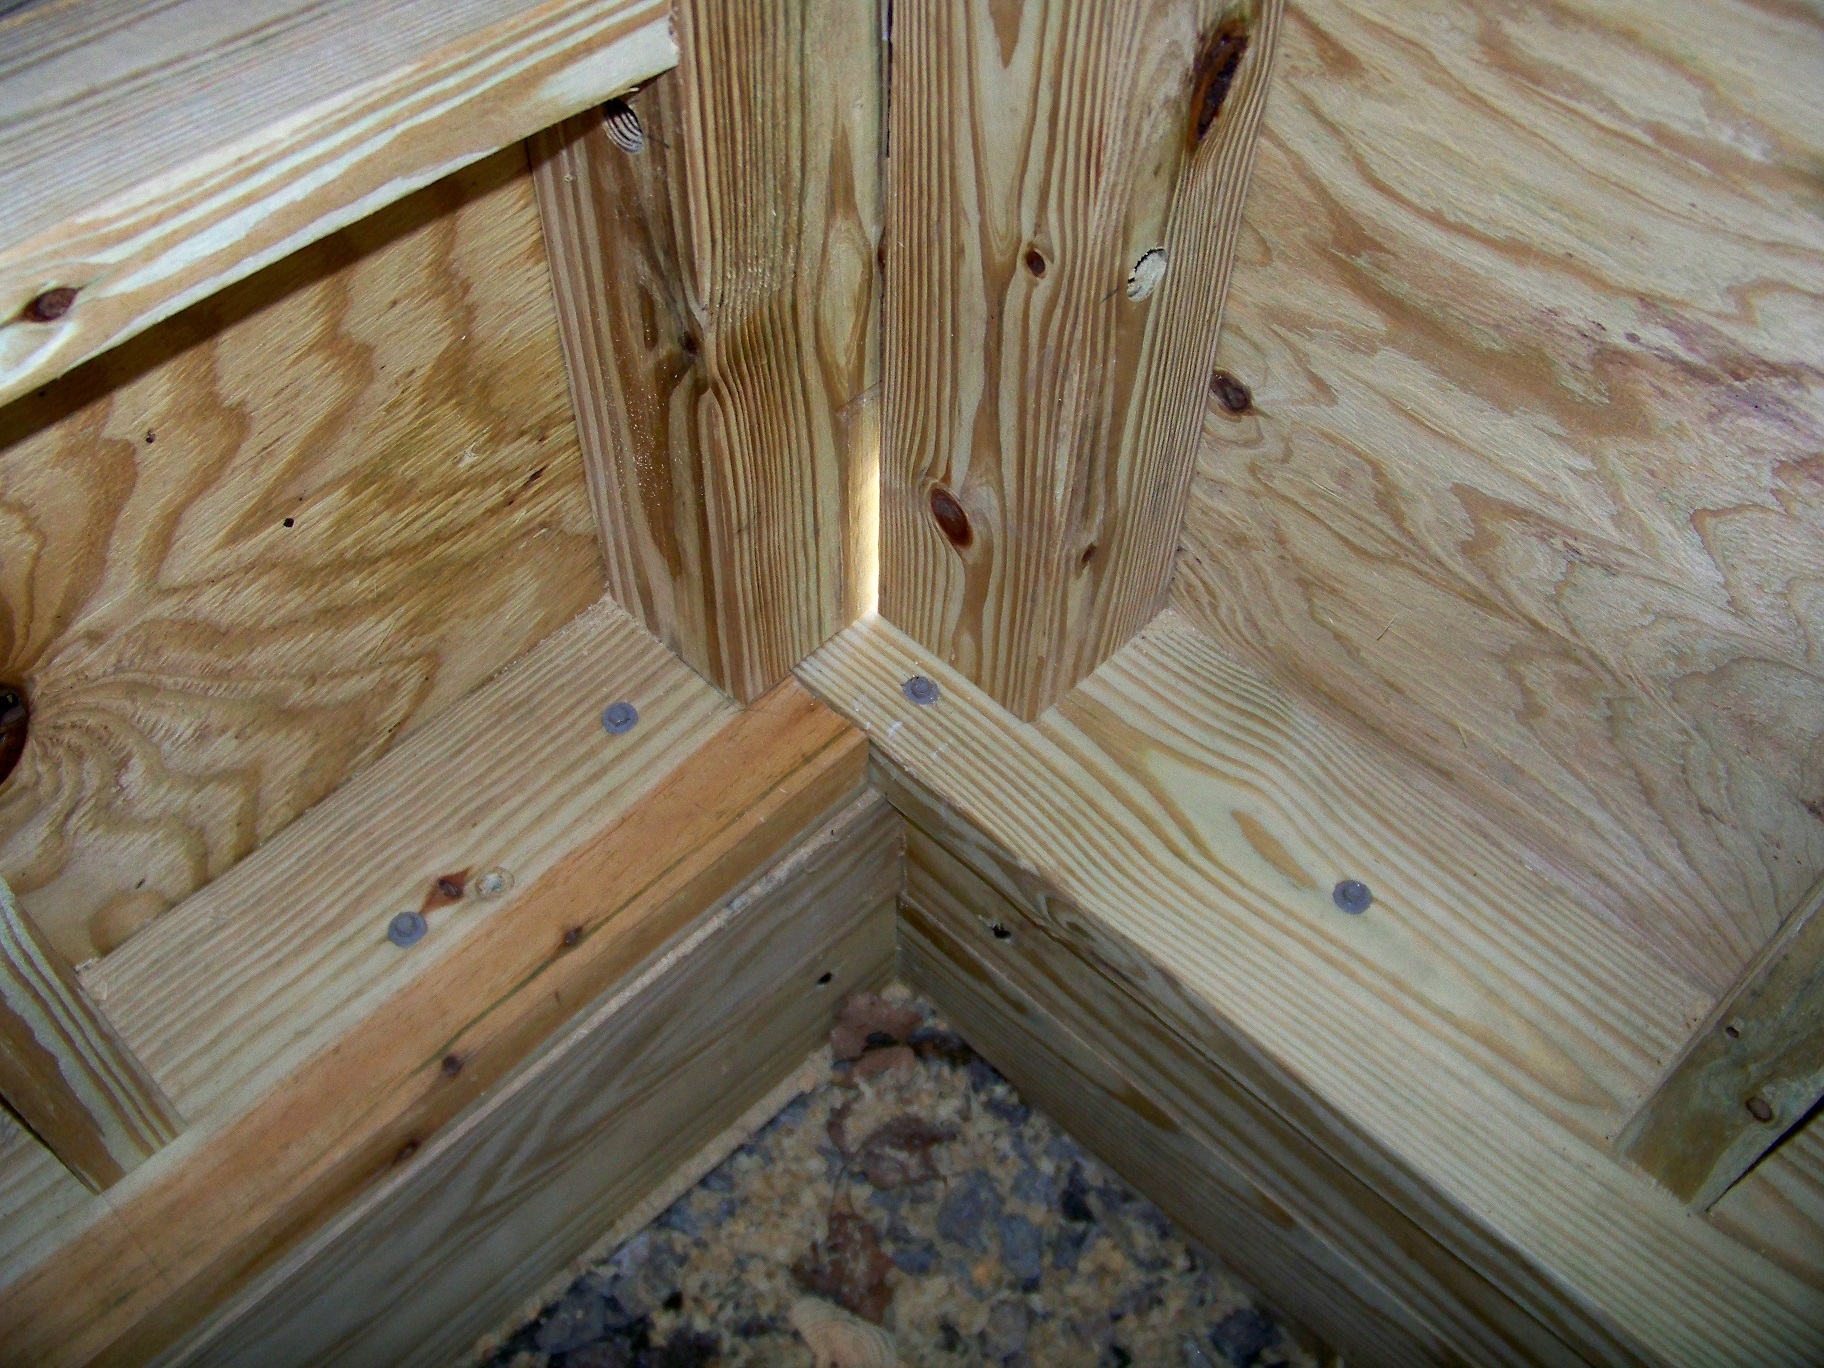
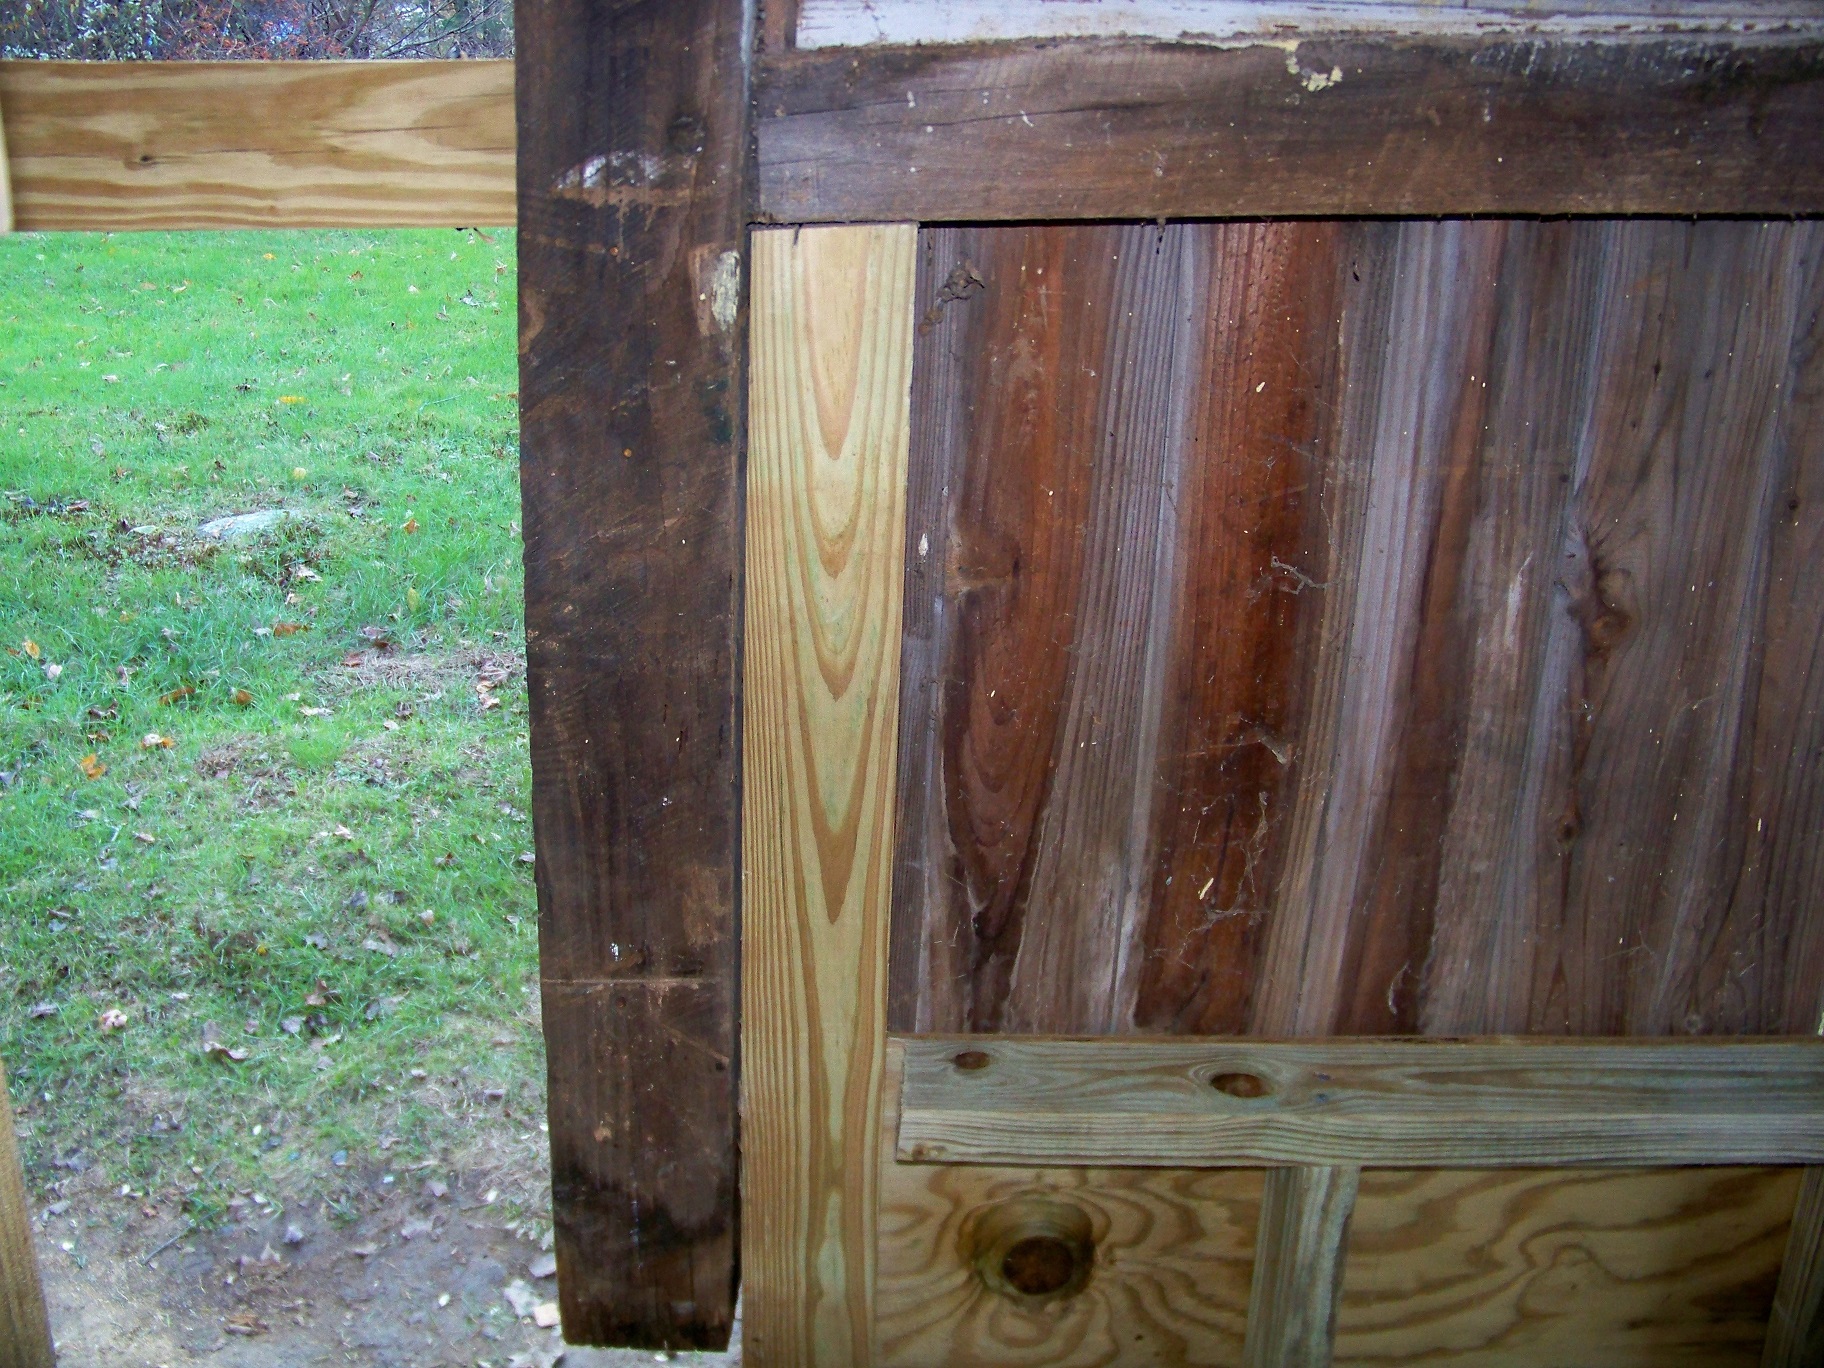
Rather than try to even out the sawzall post cuts I scribed the angle on the filler pieces and miter cut them.


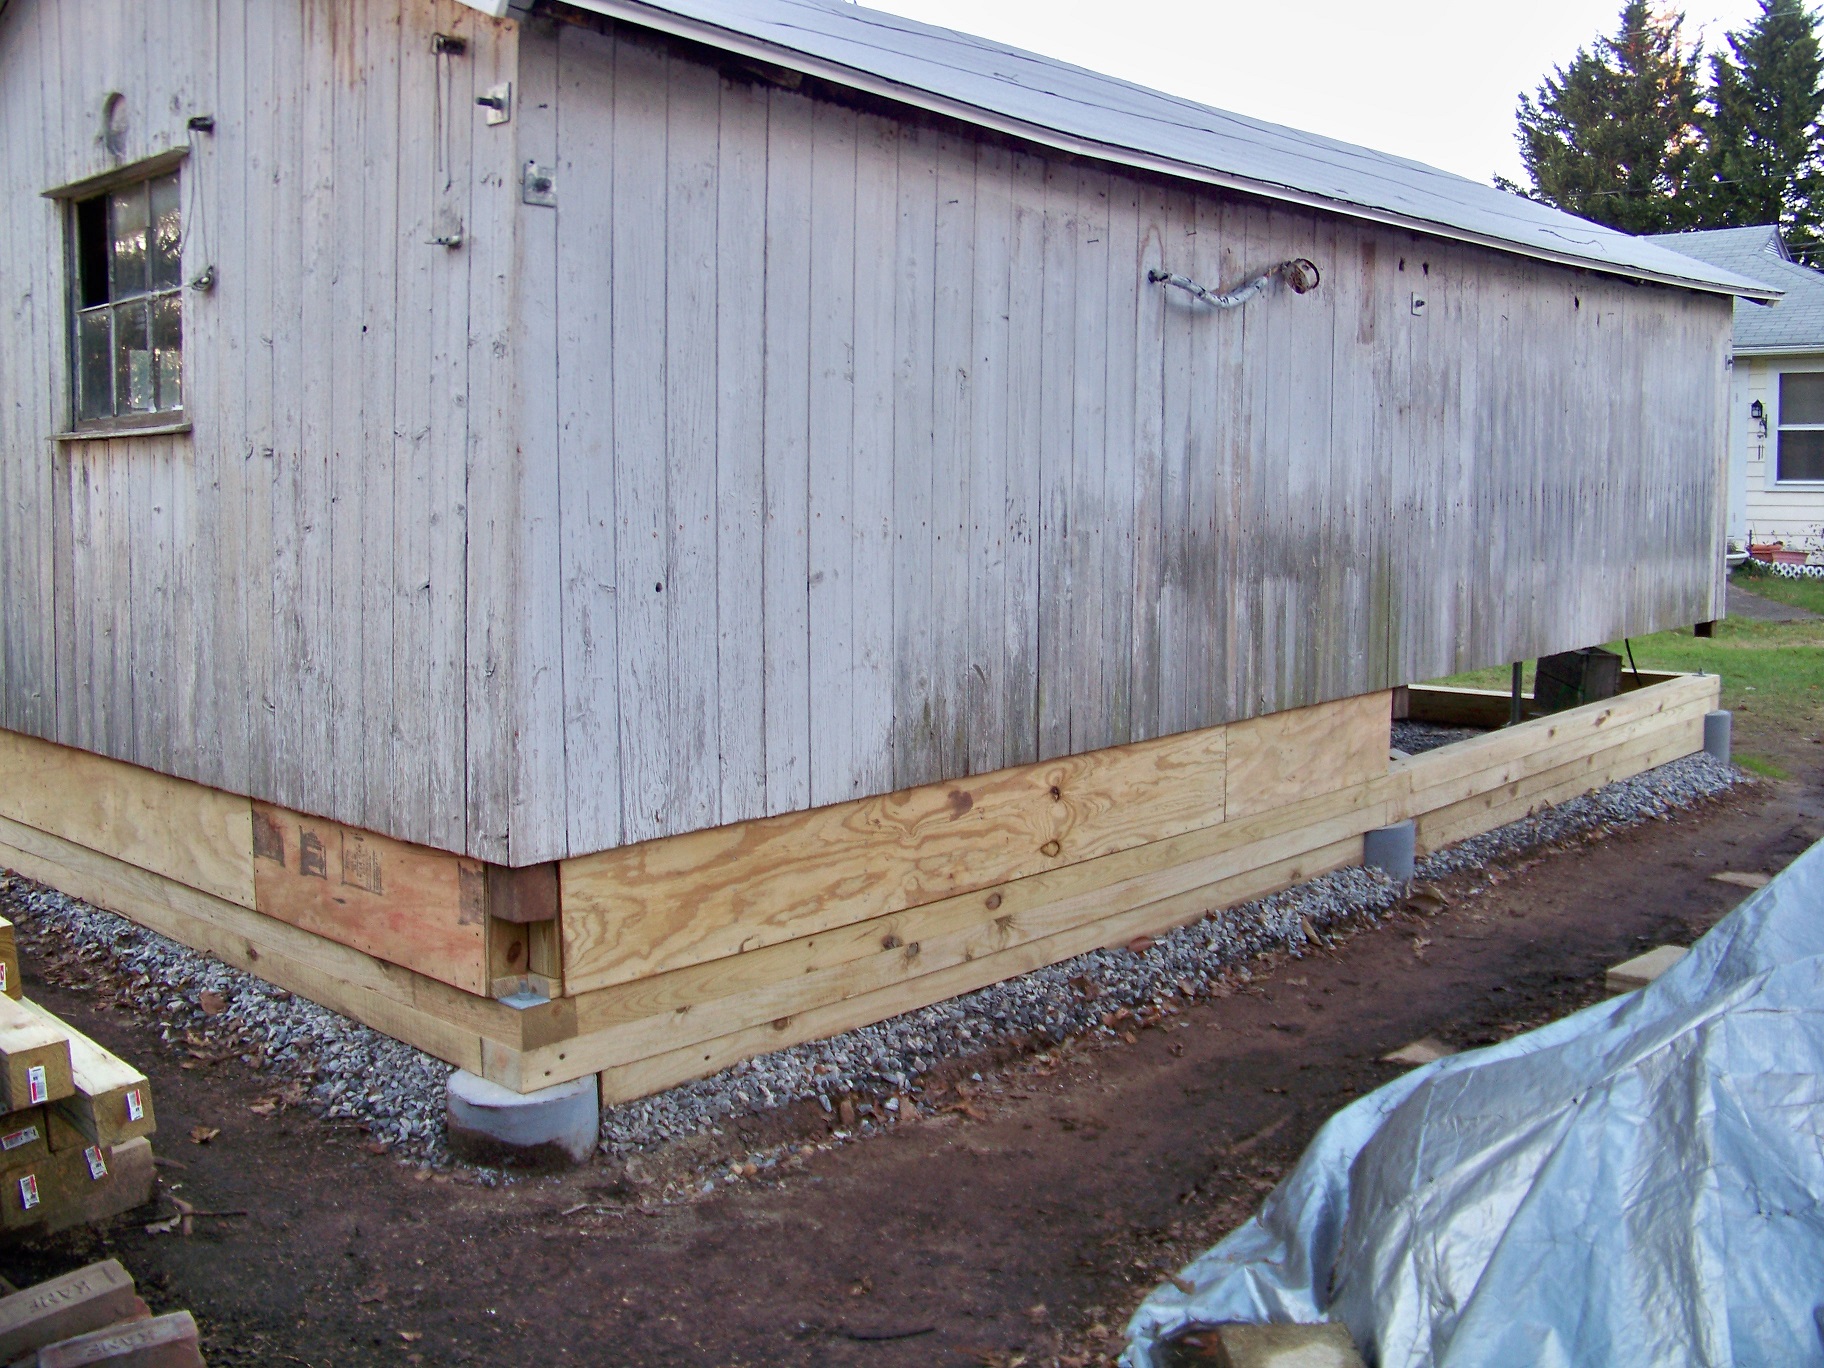
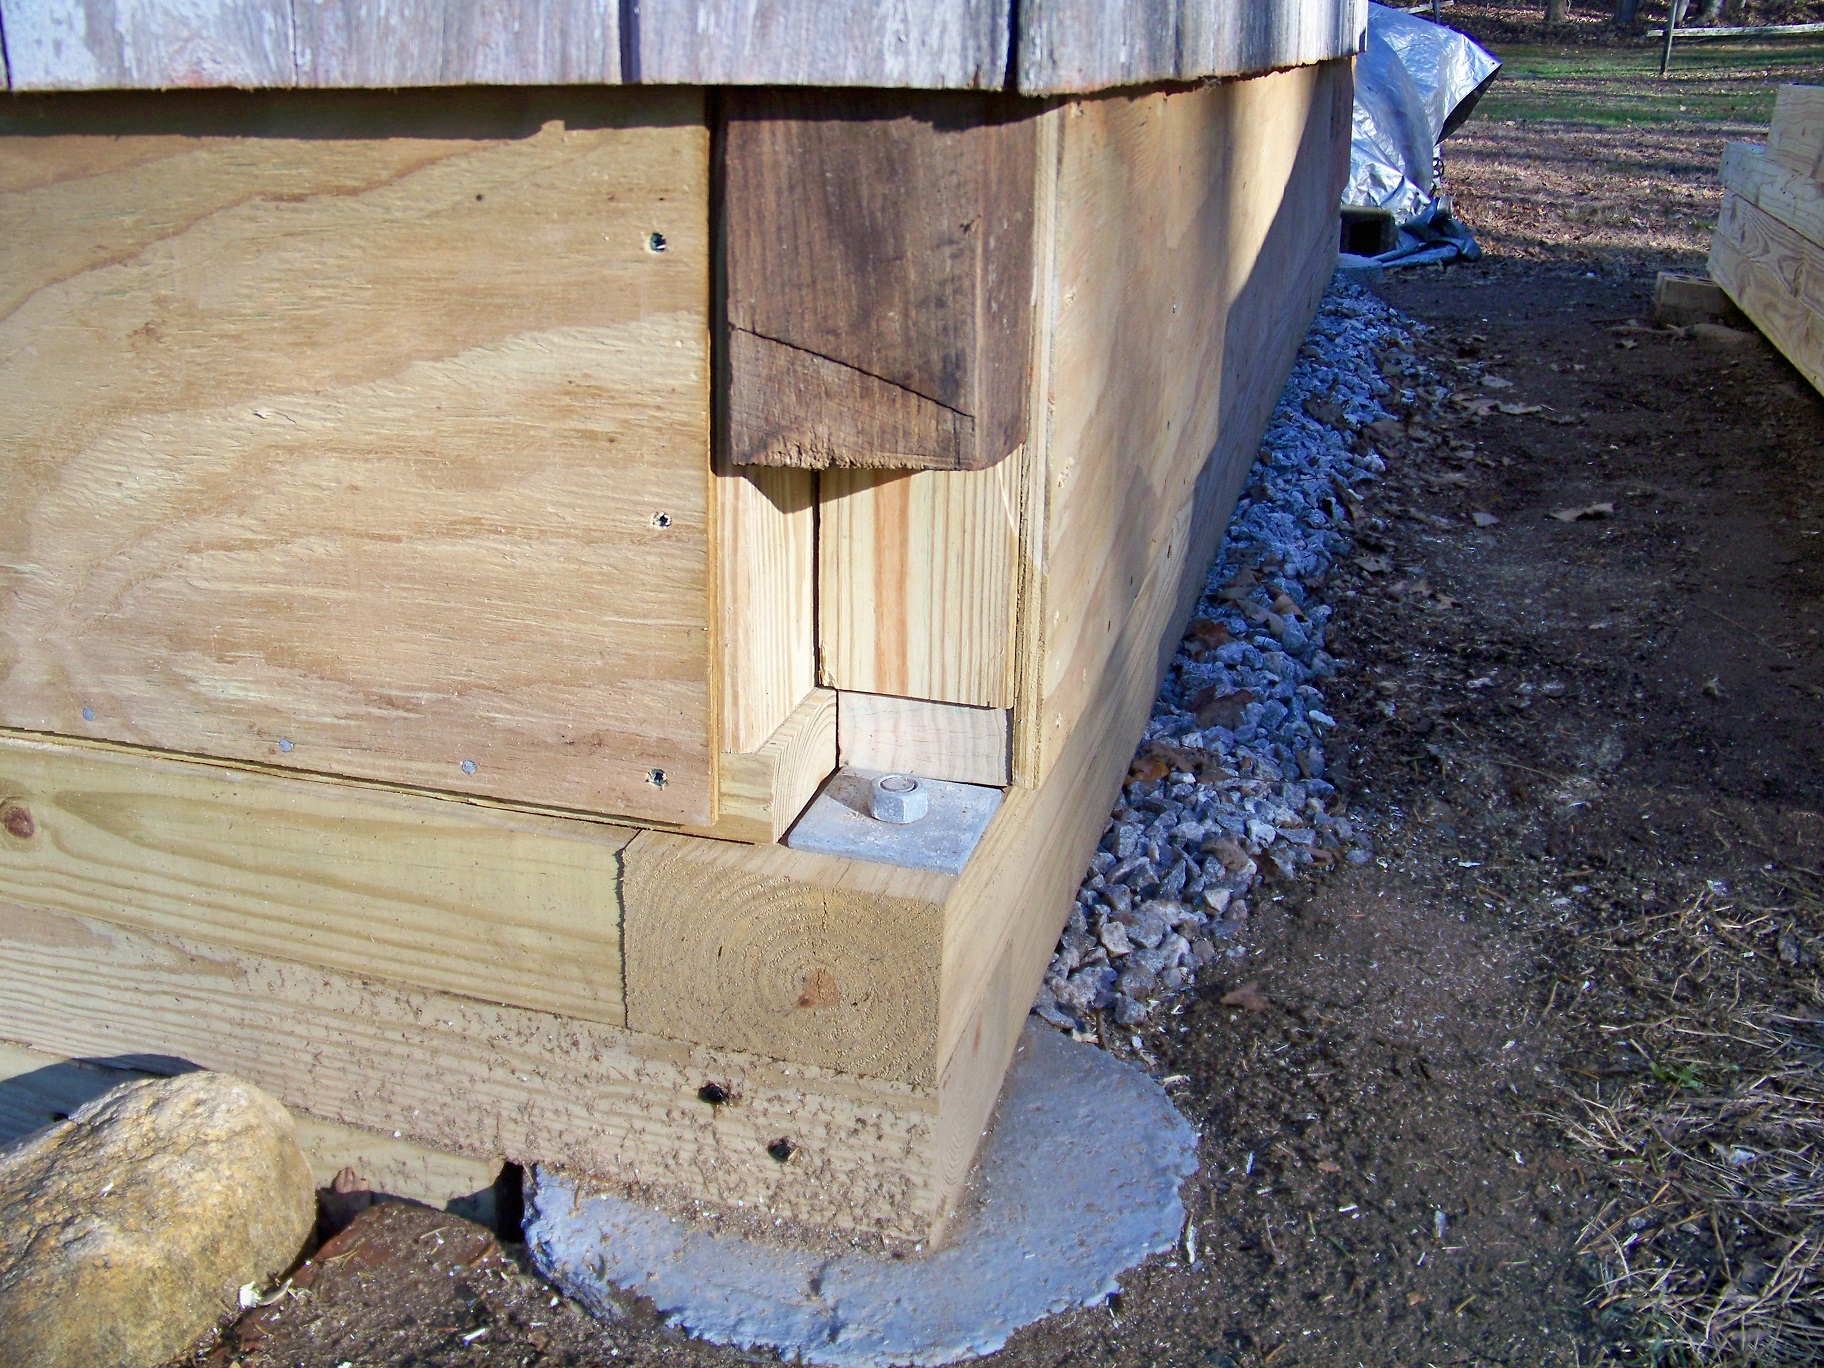
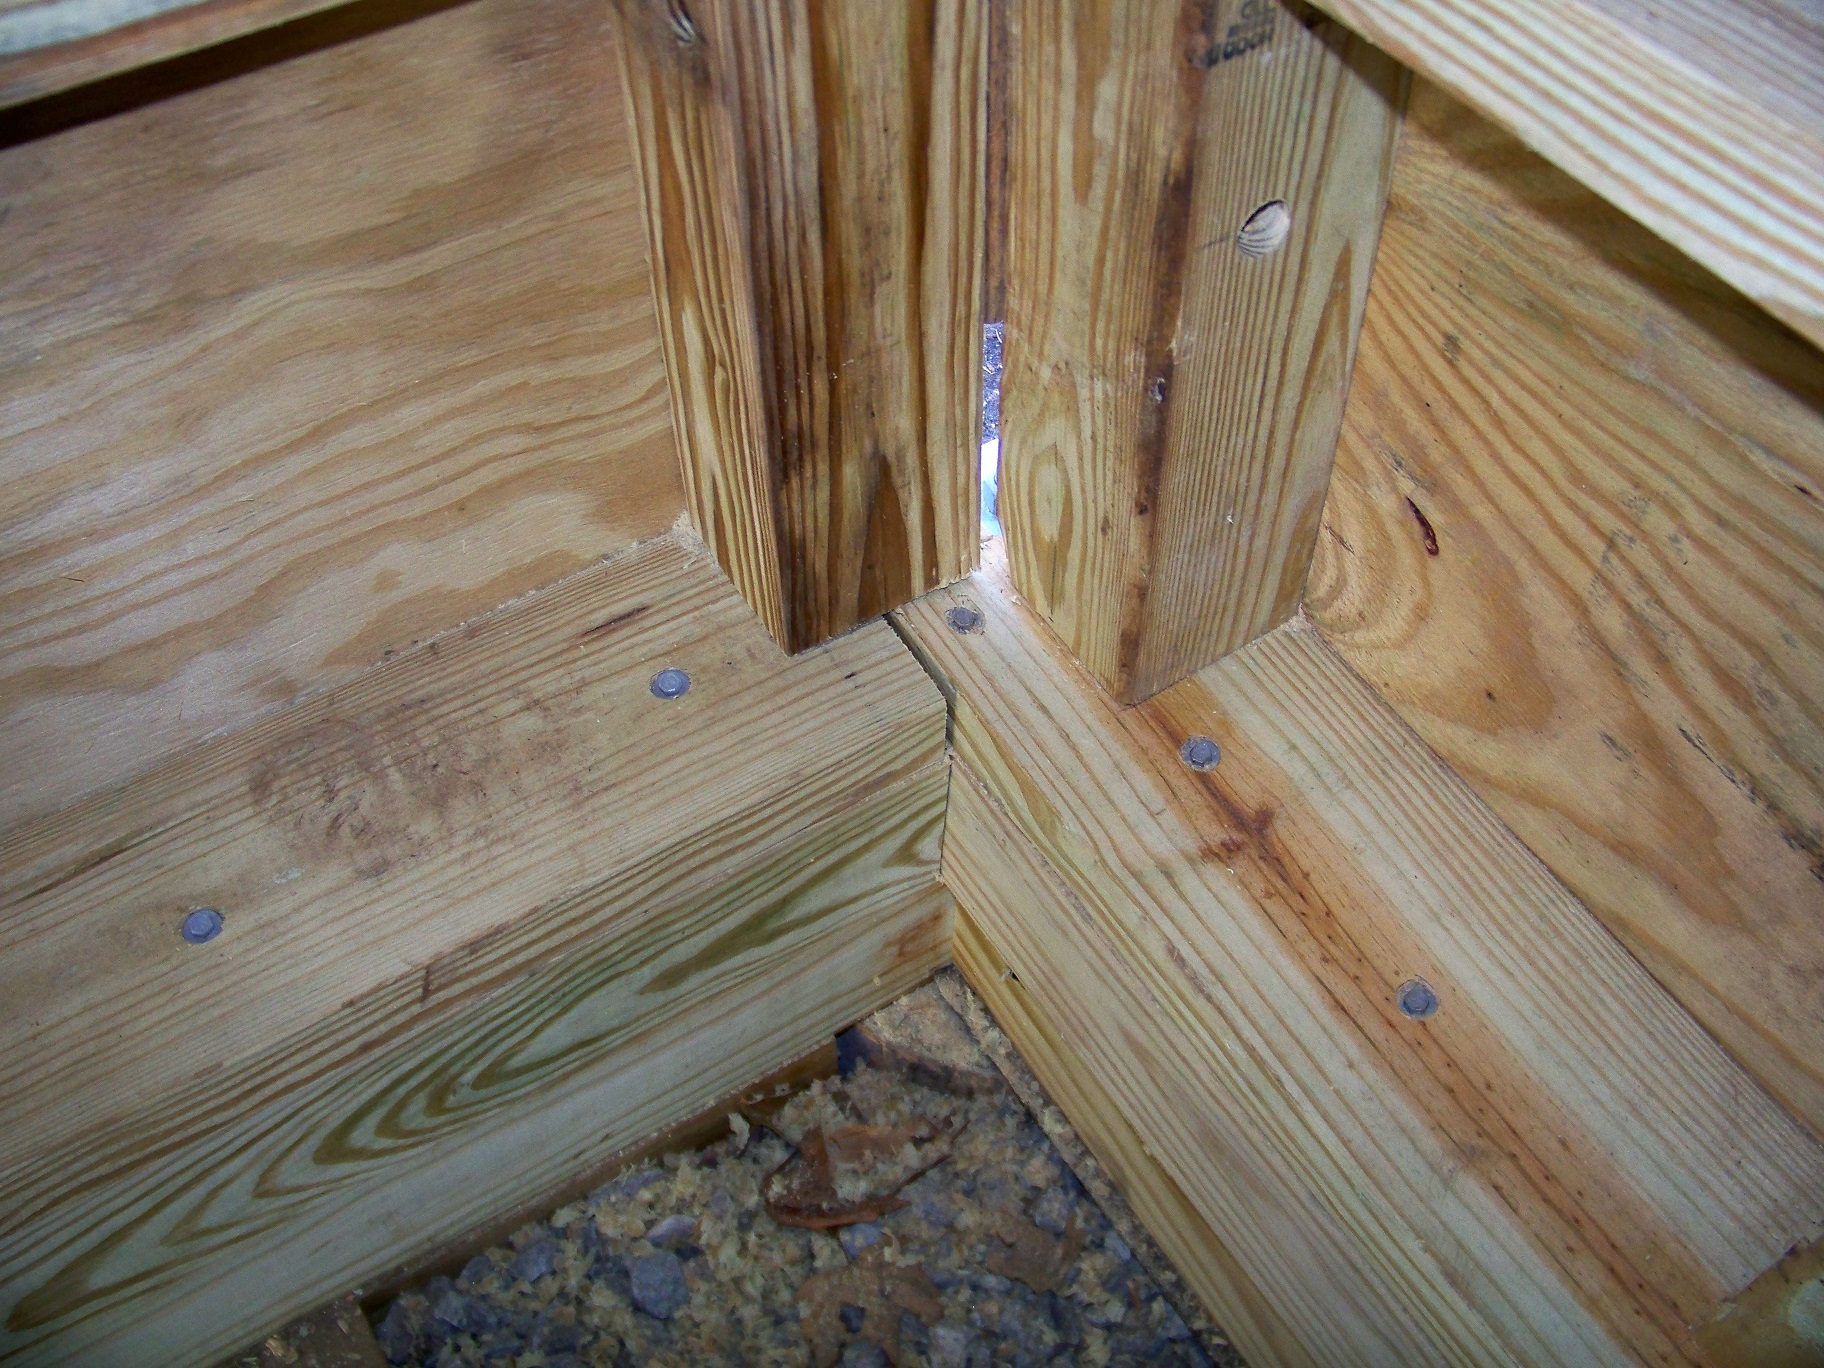
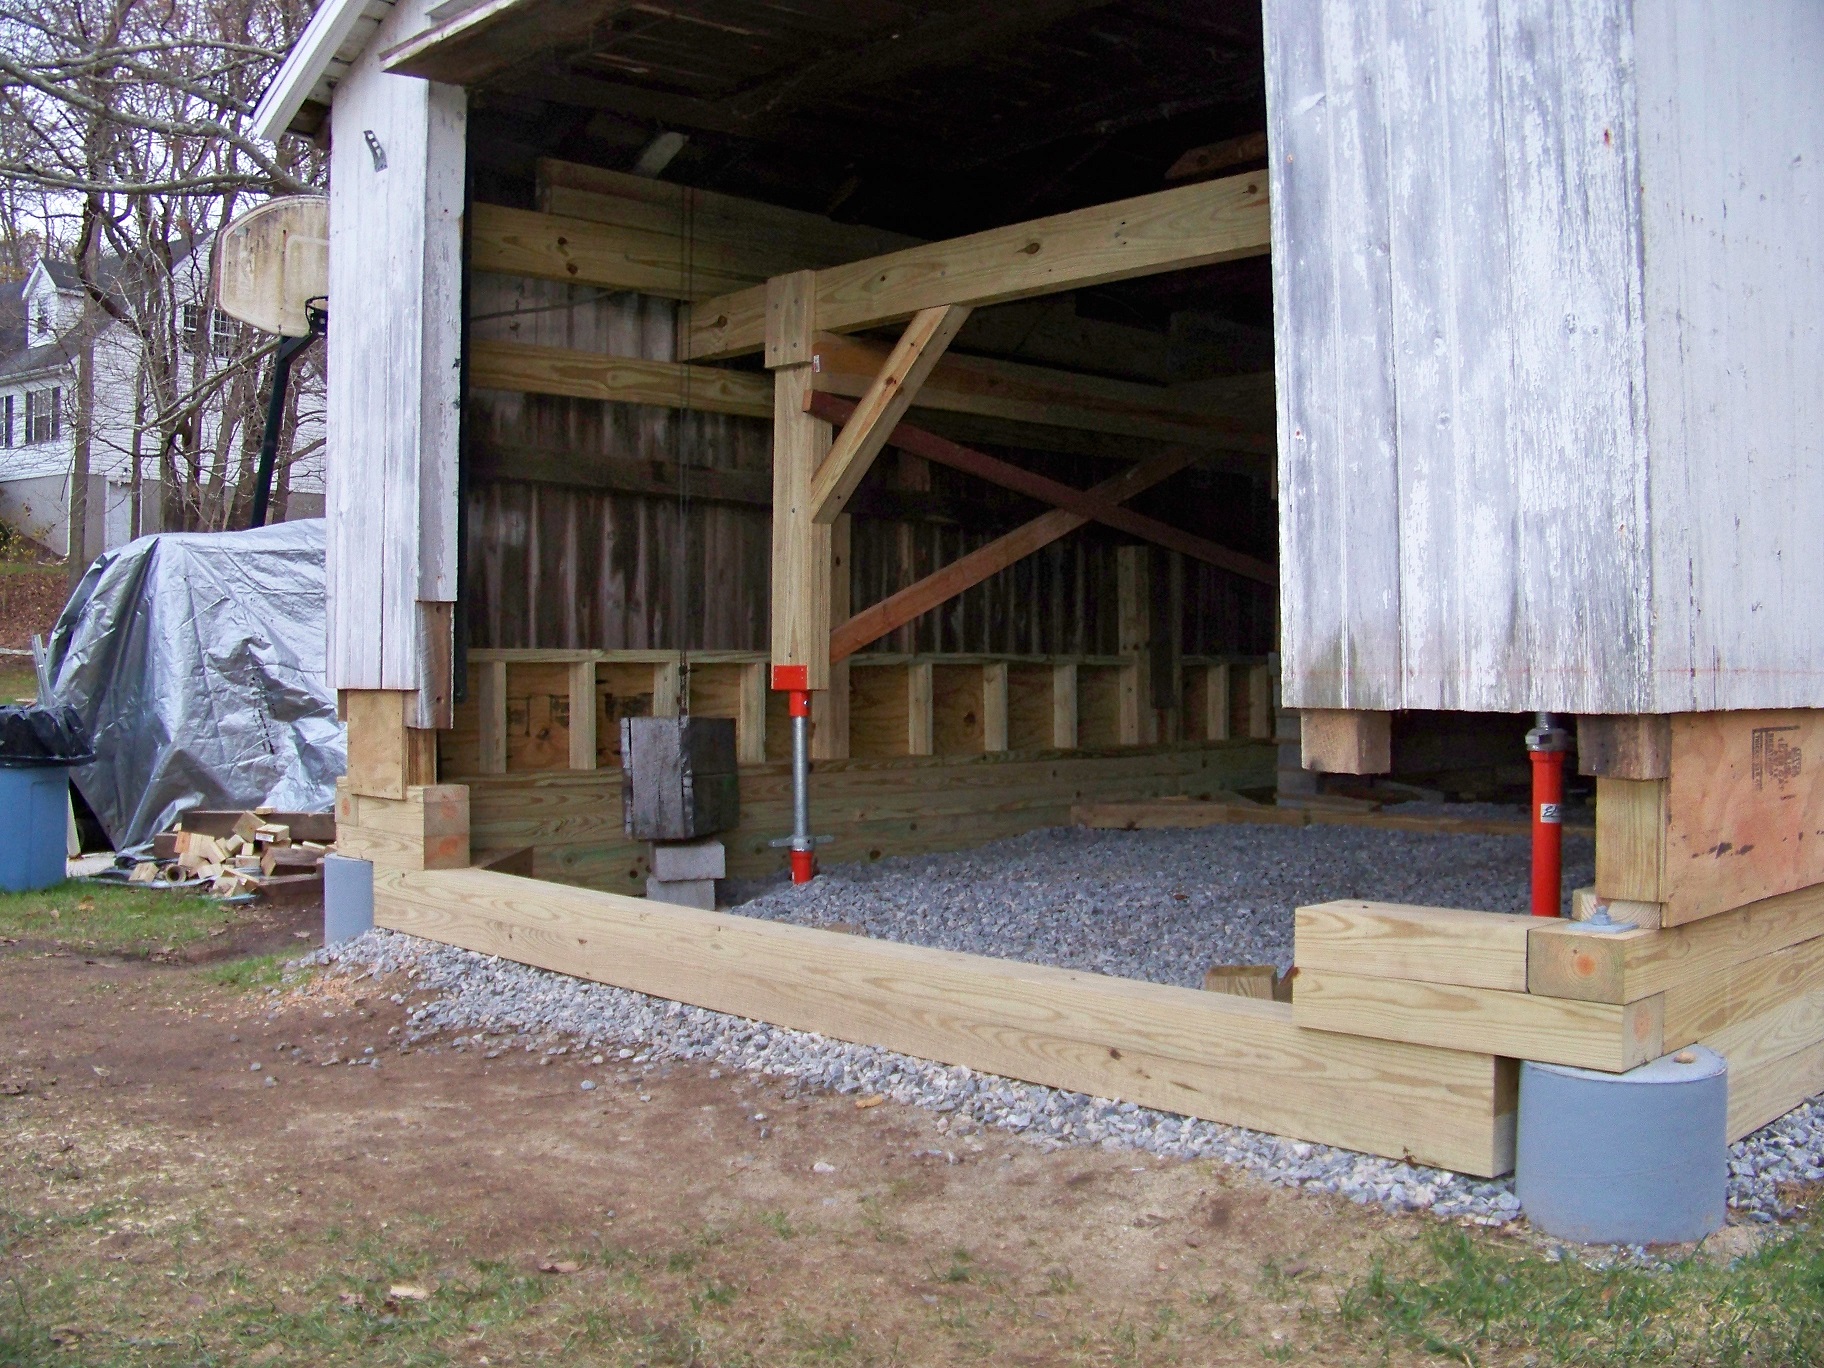
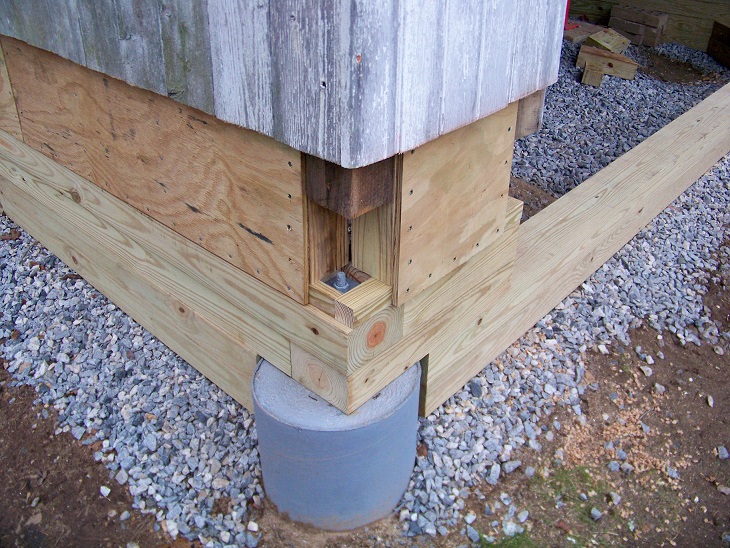
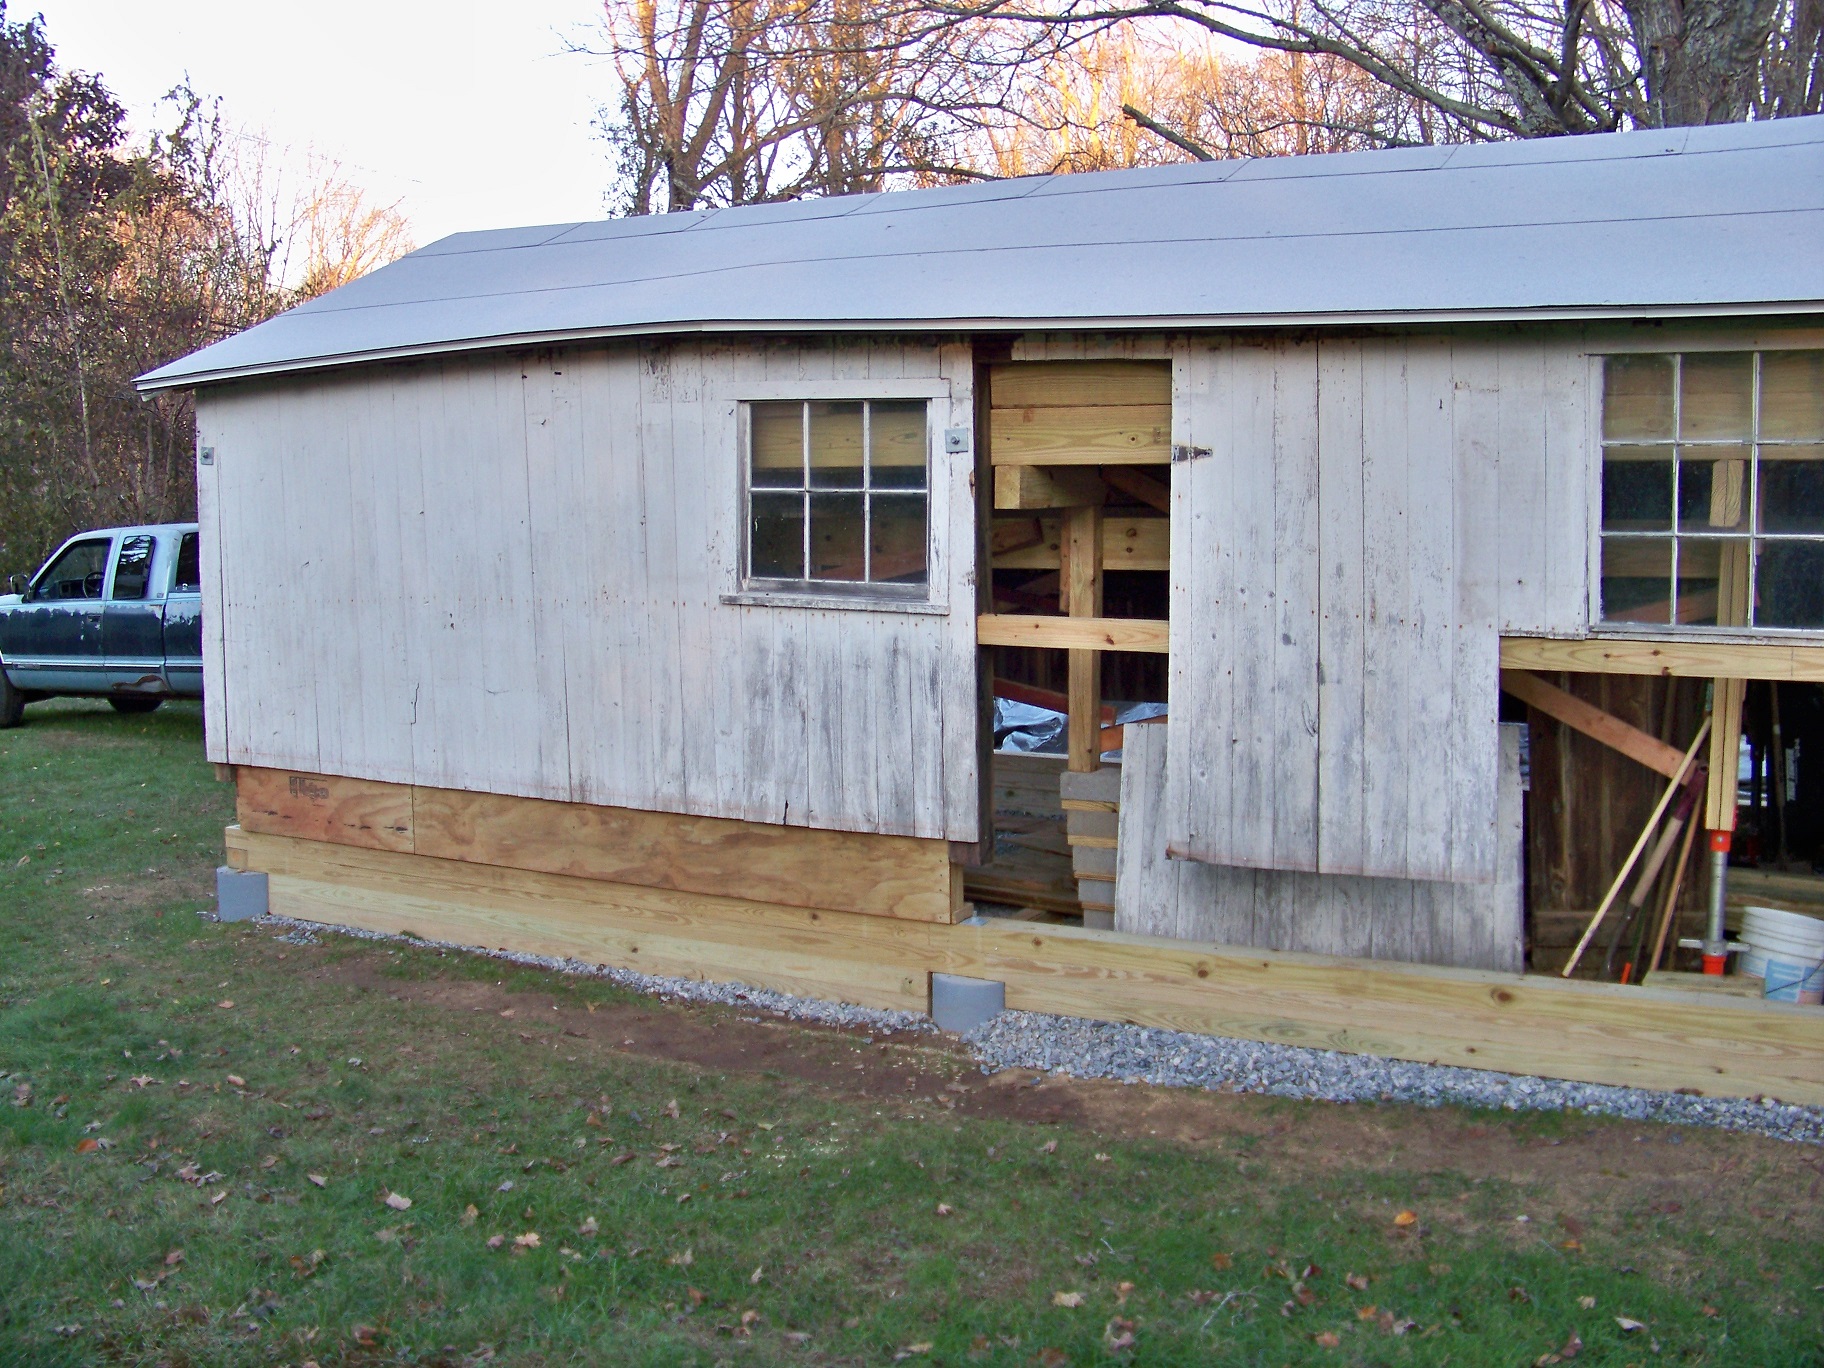
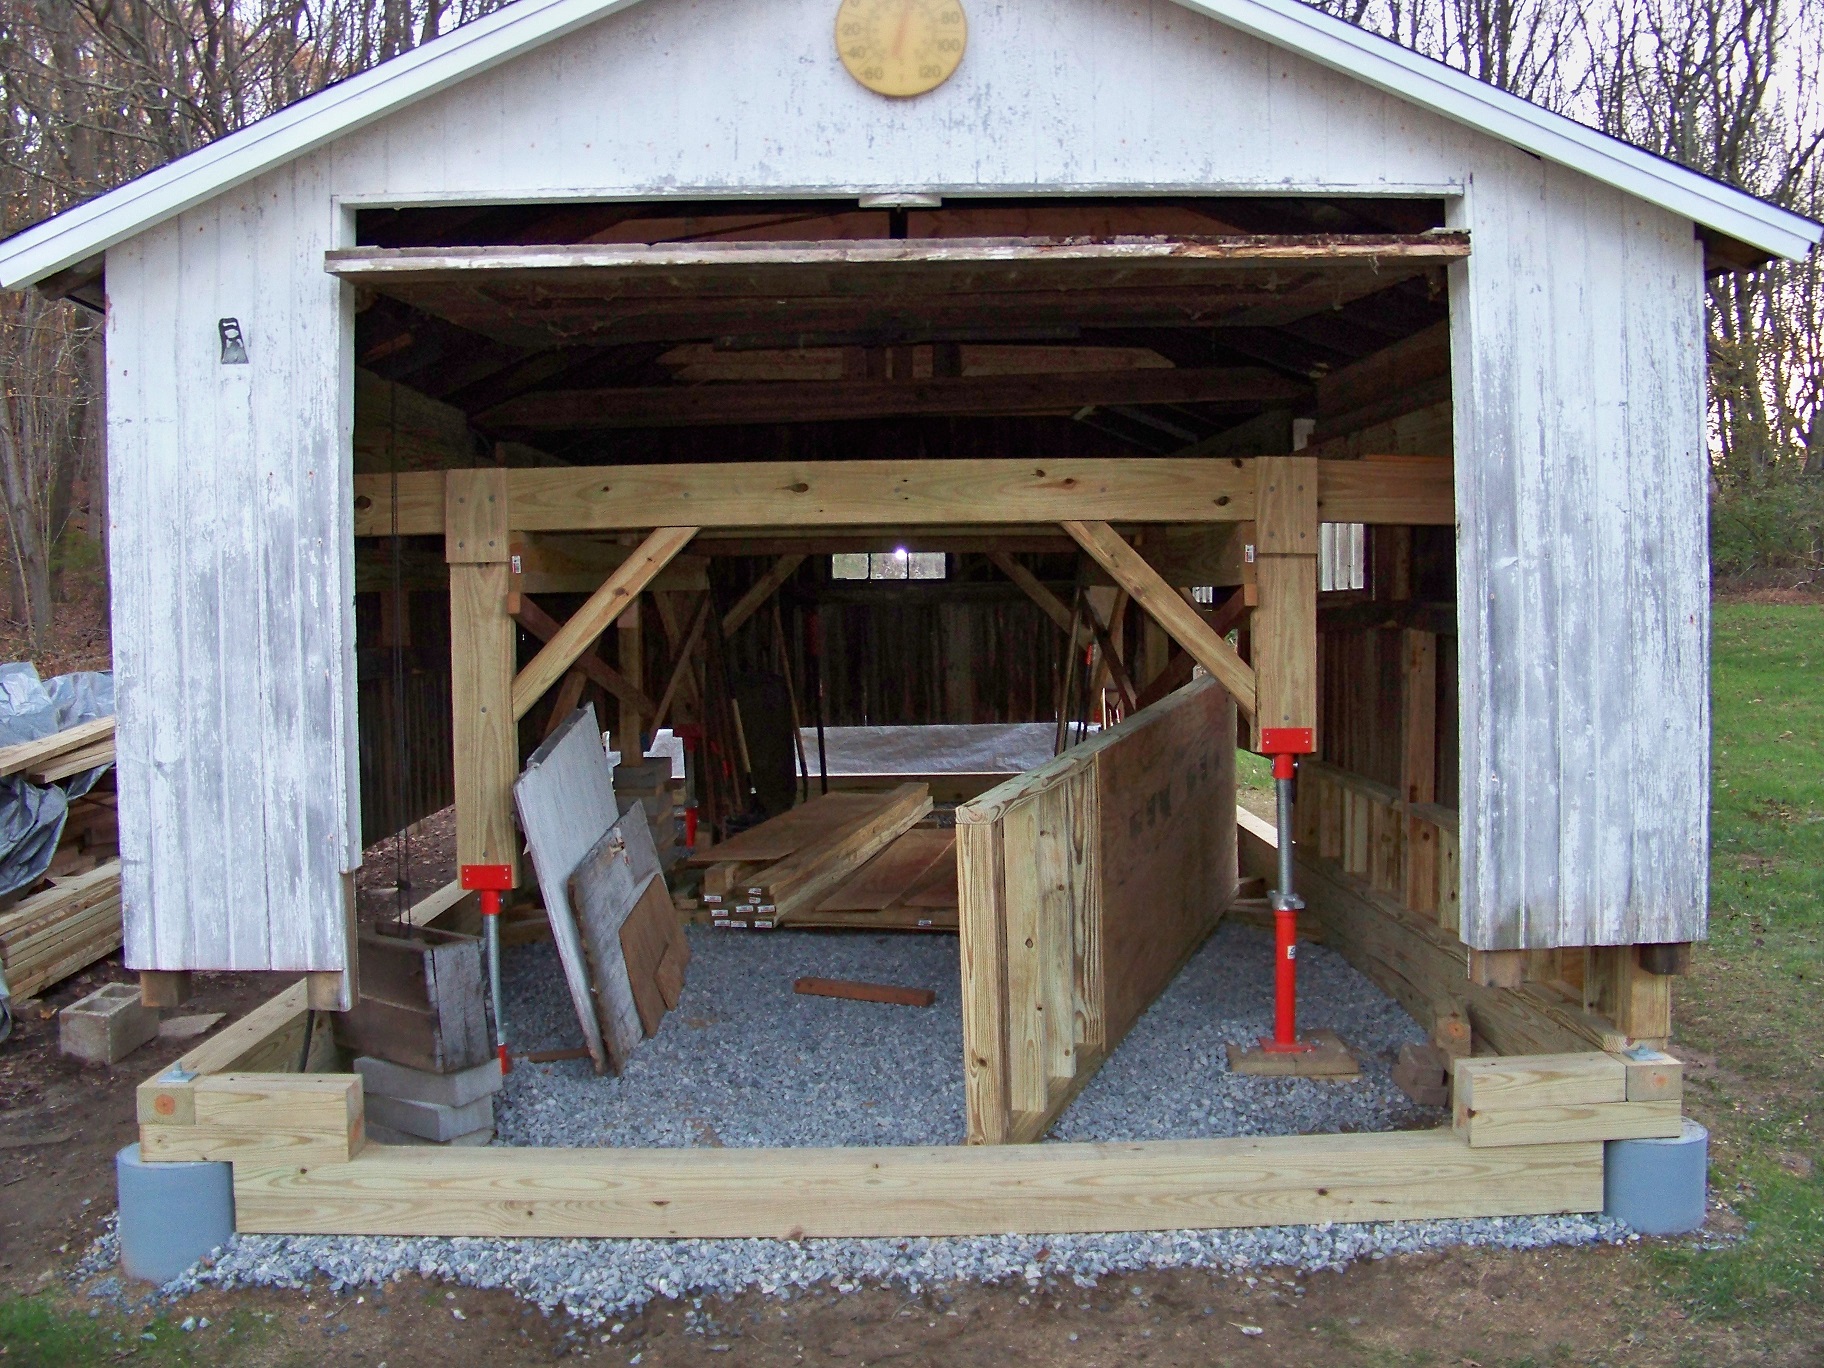
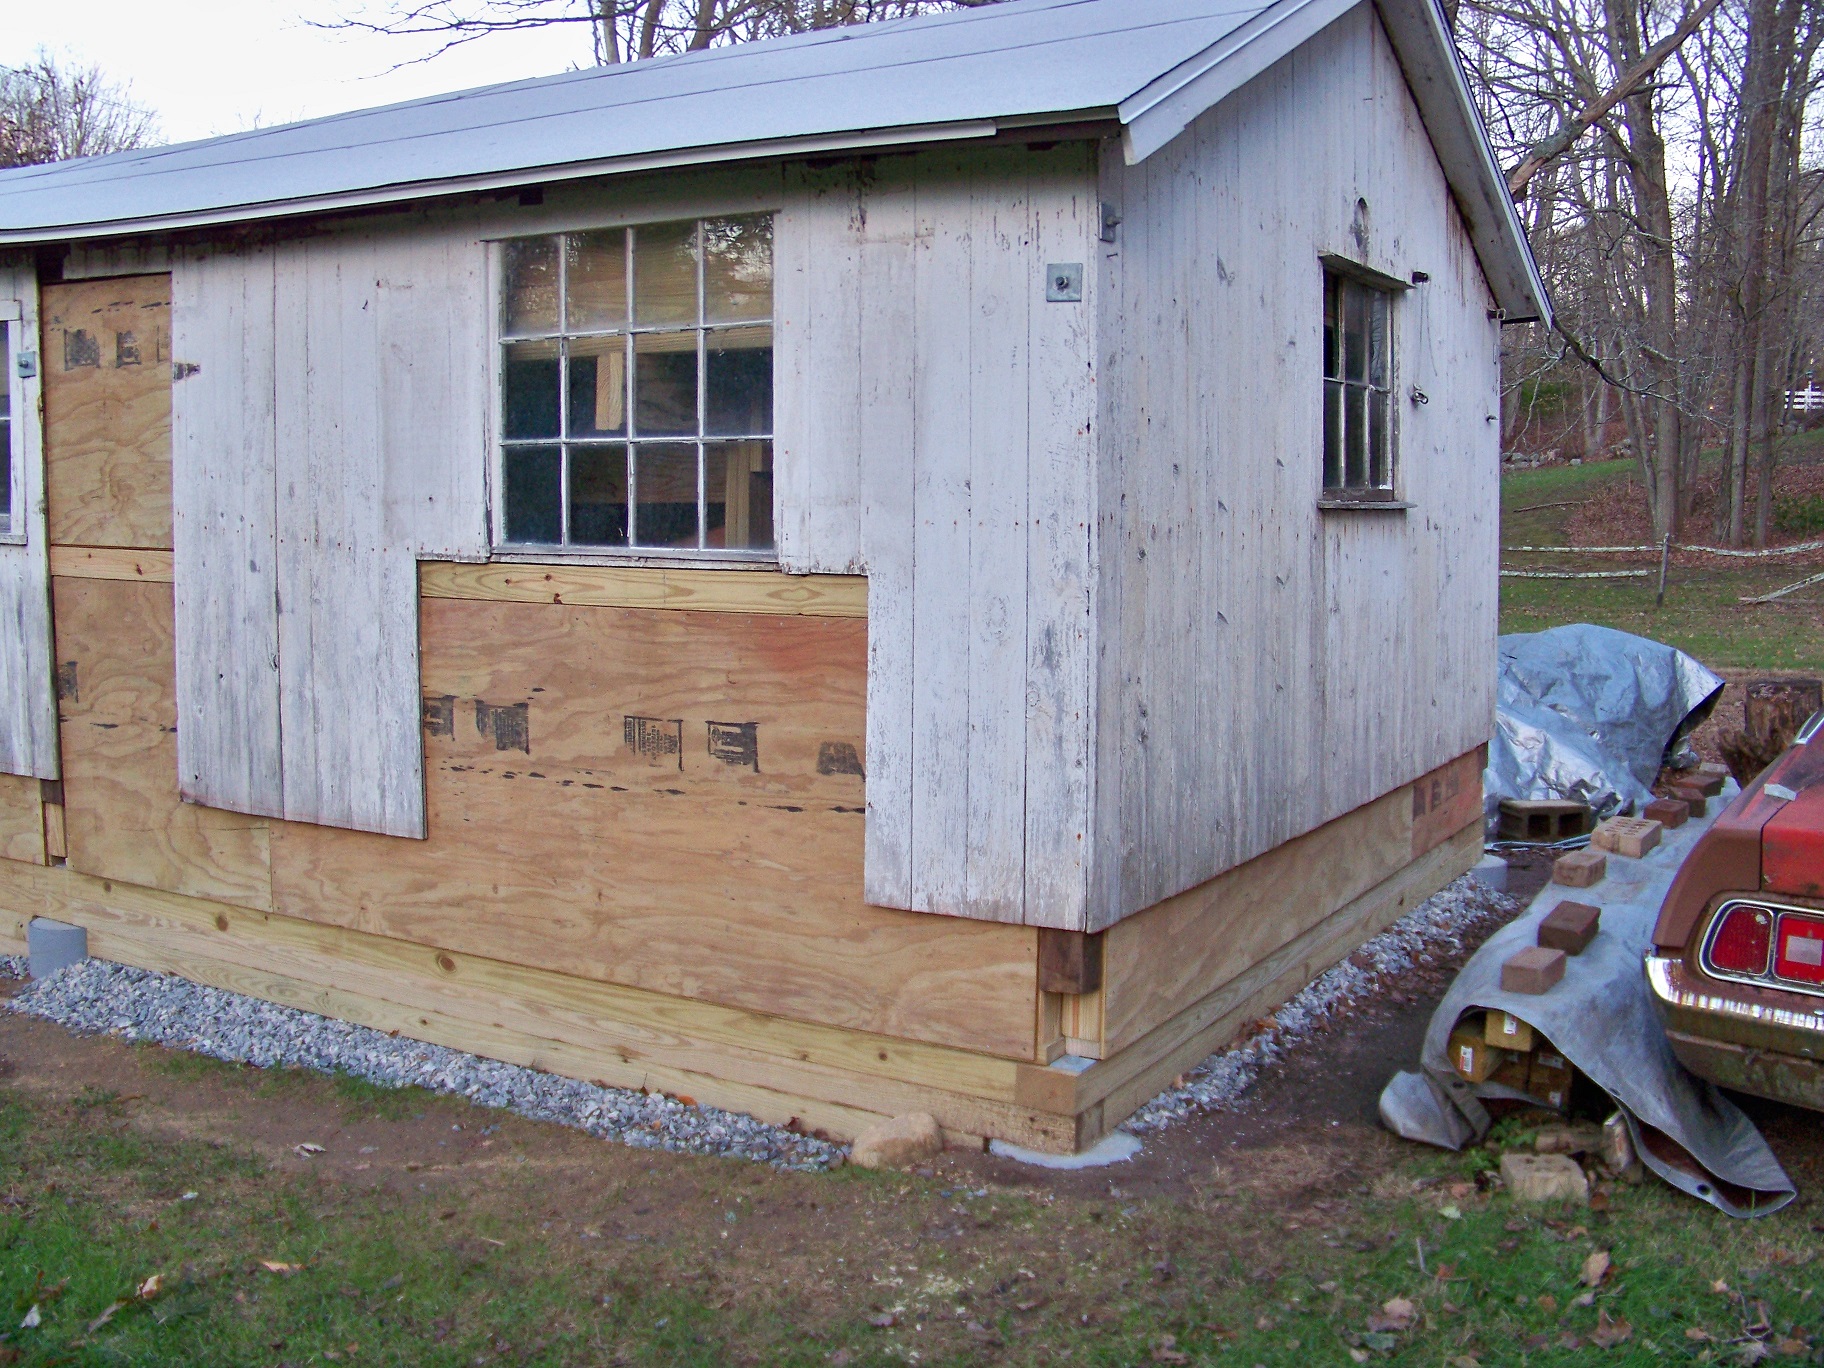
Front left corner support is attached. Though my intent was to have the plywood stand proud of the 4x6 base, that just didn't happen in all locations.


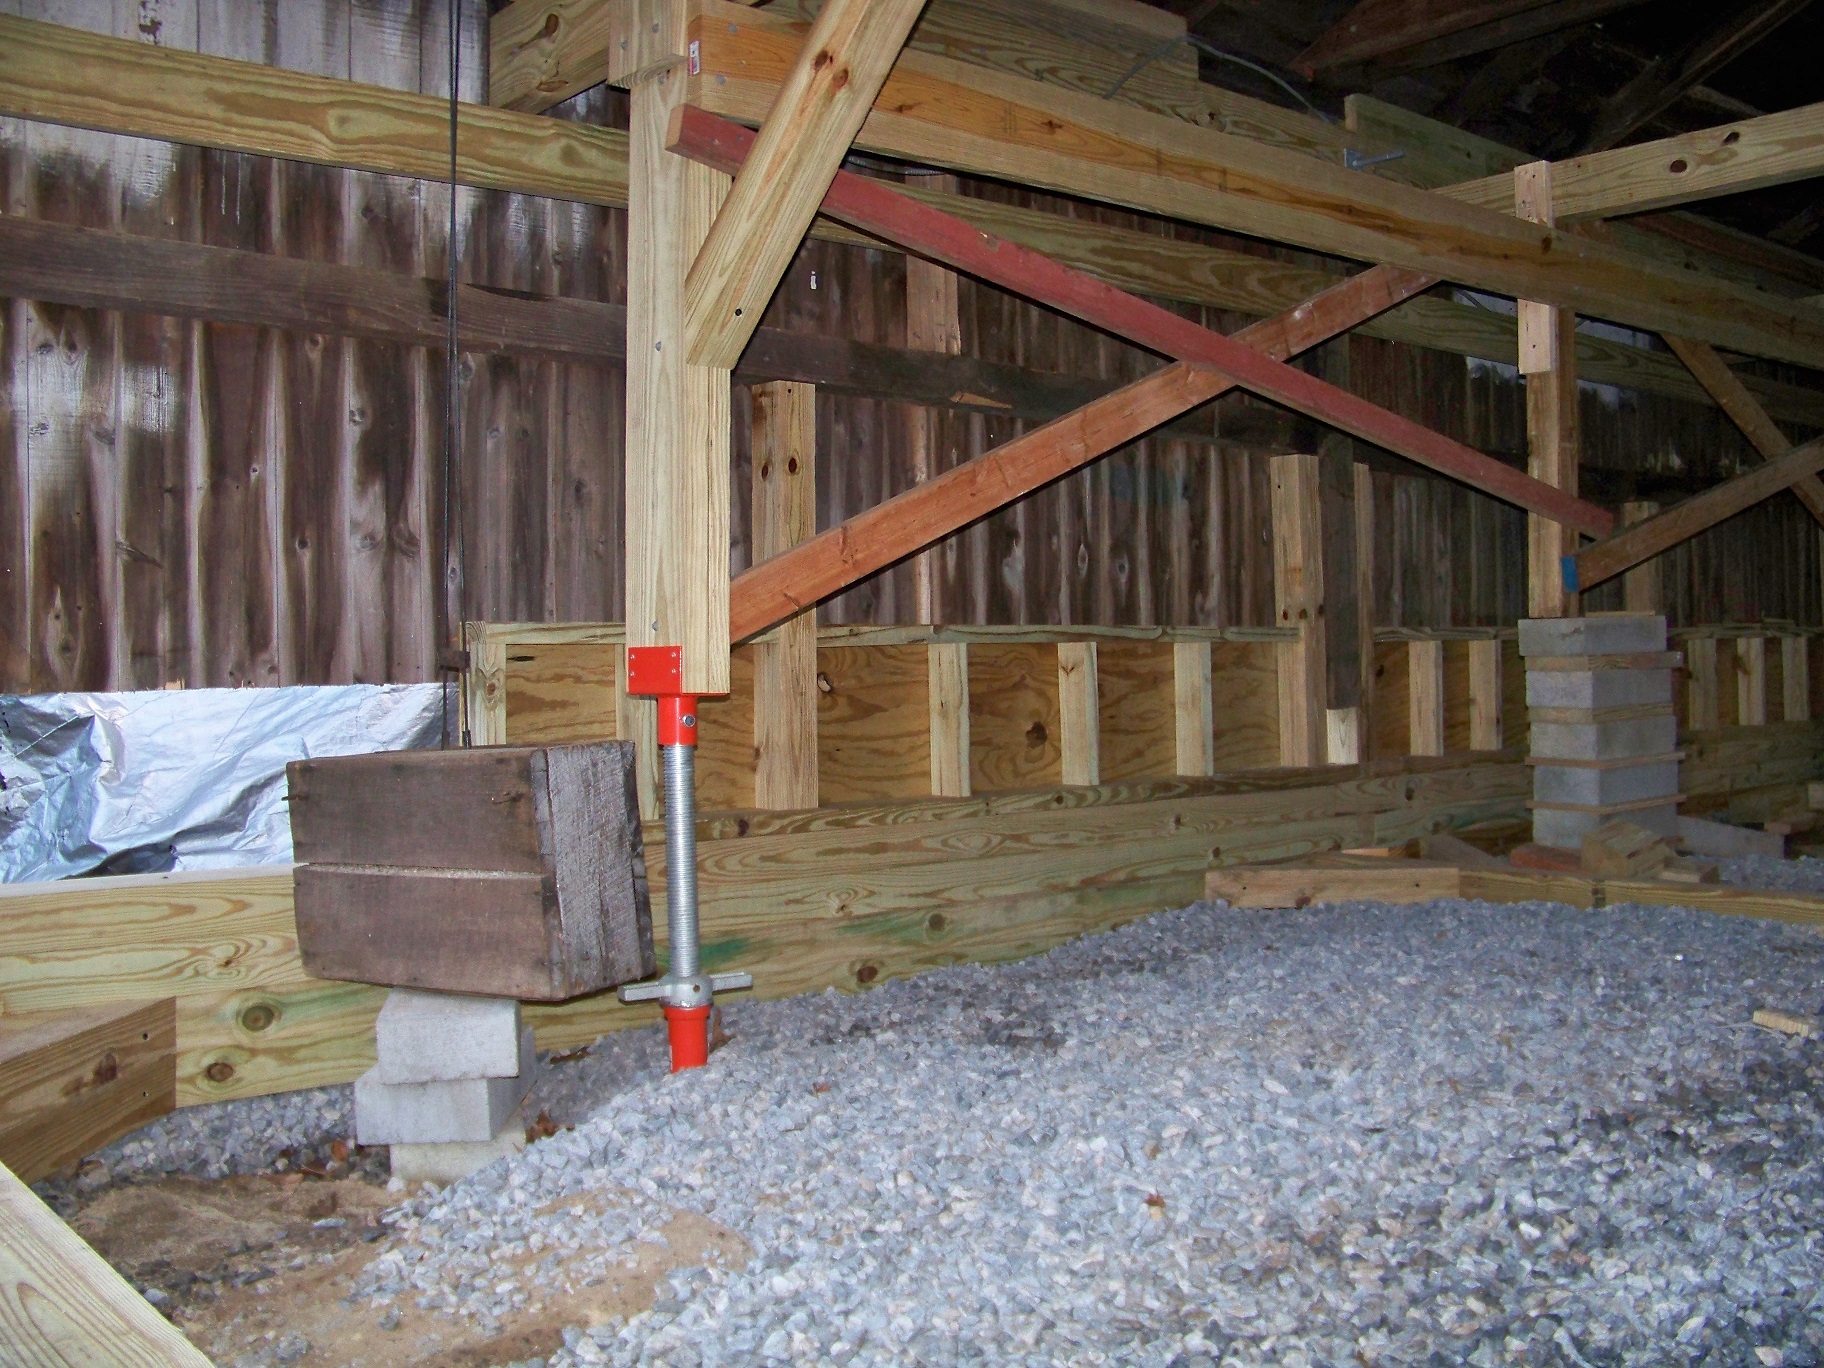
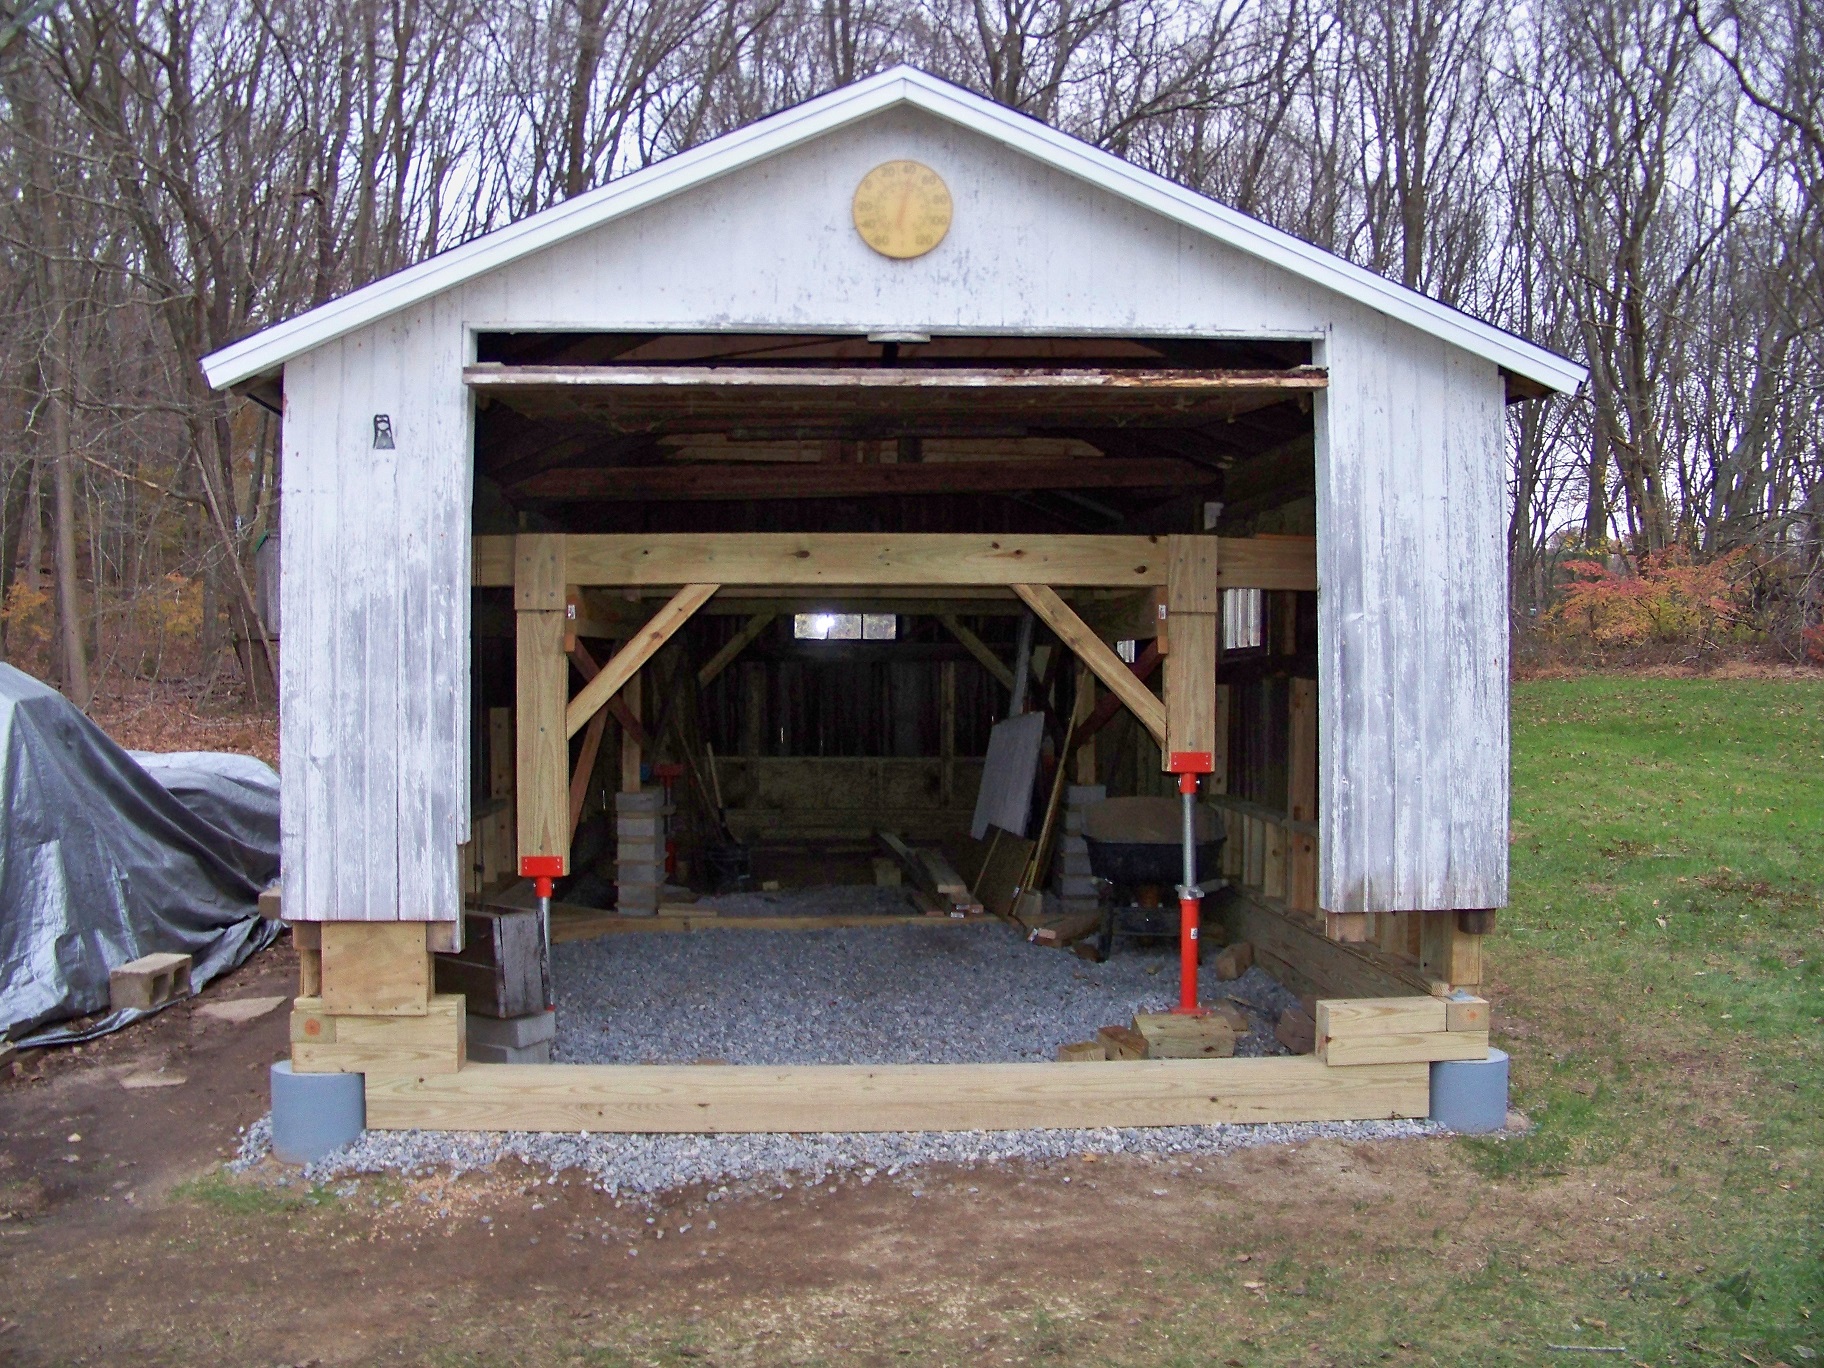
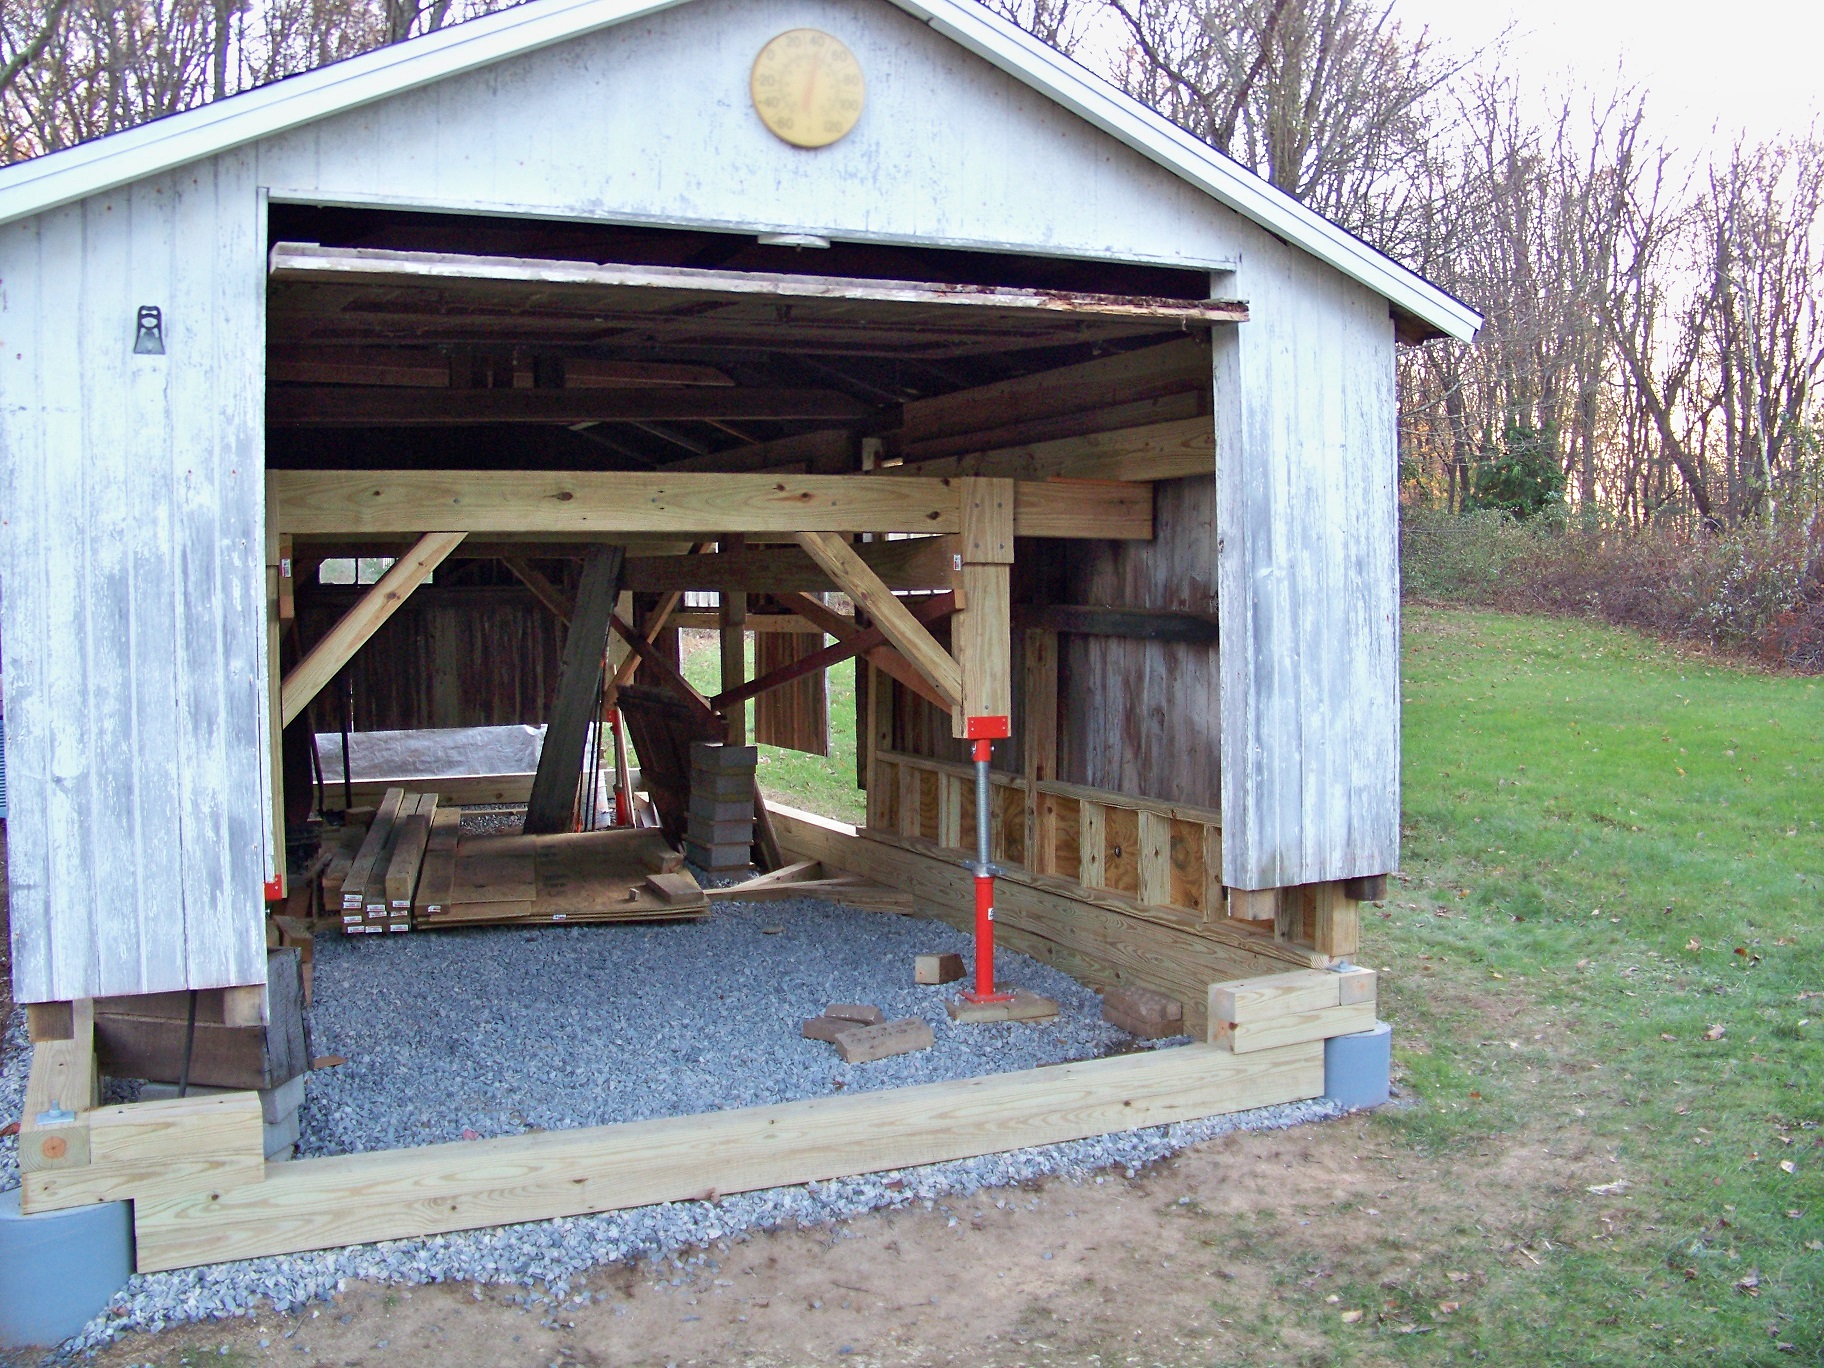
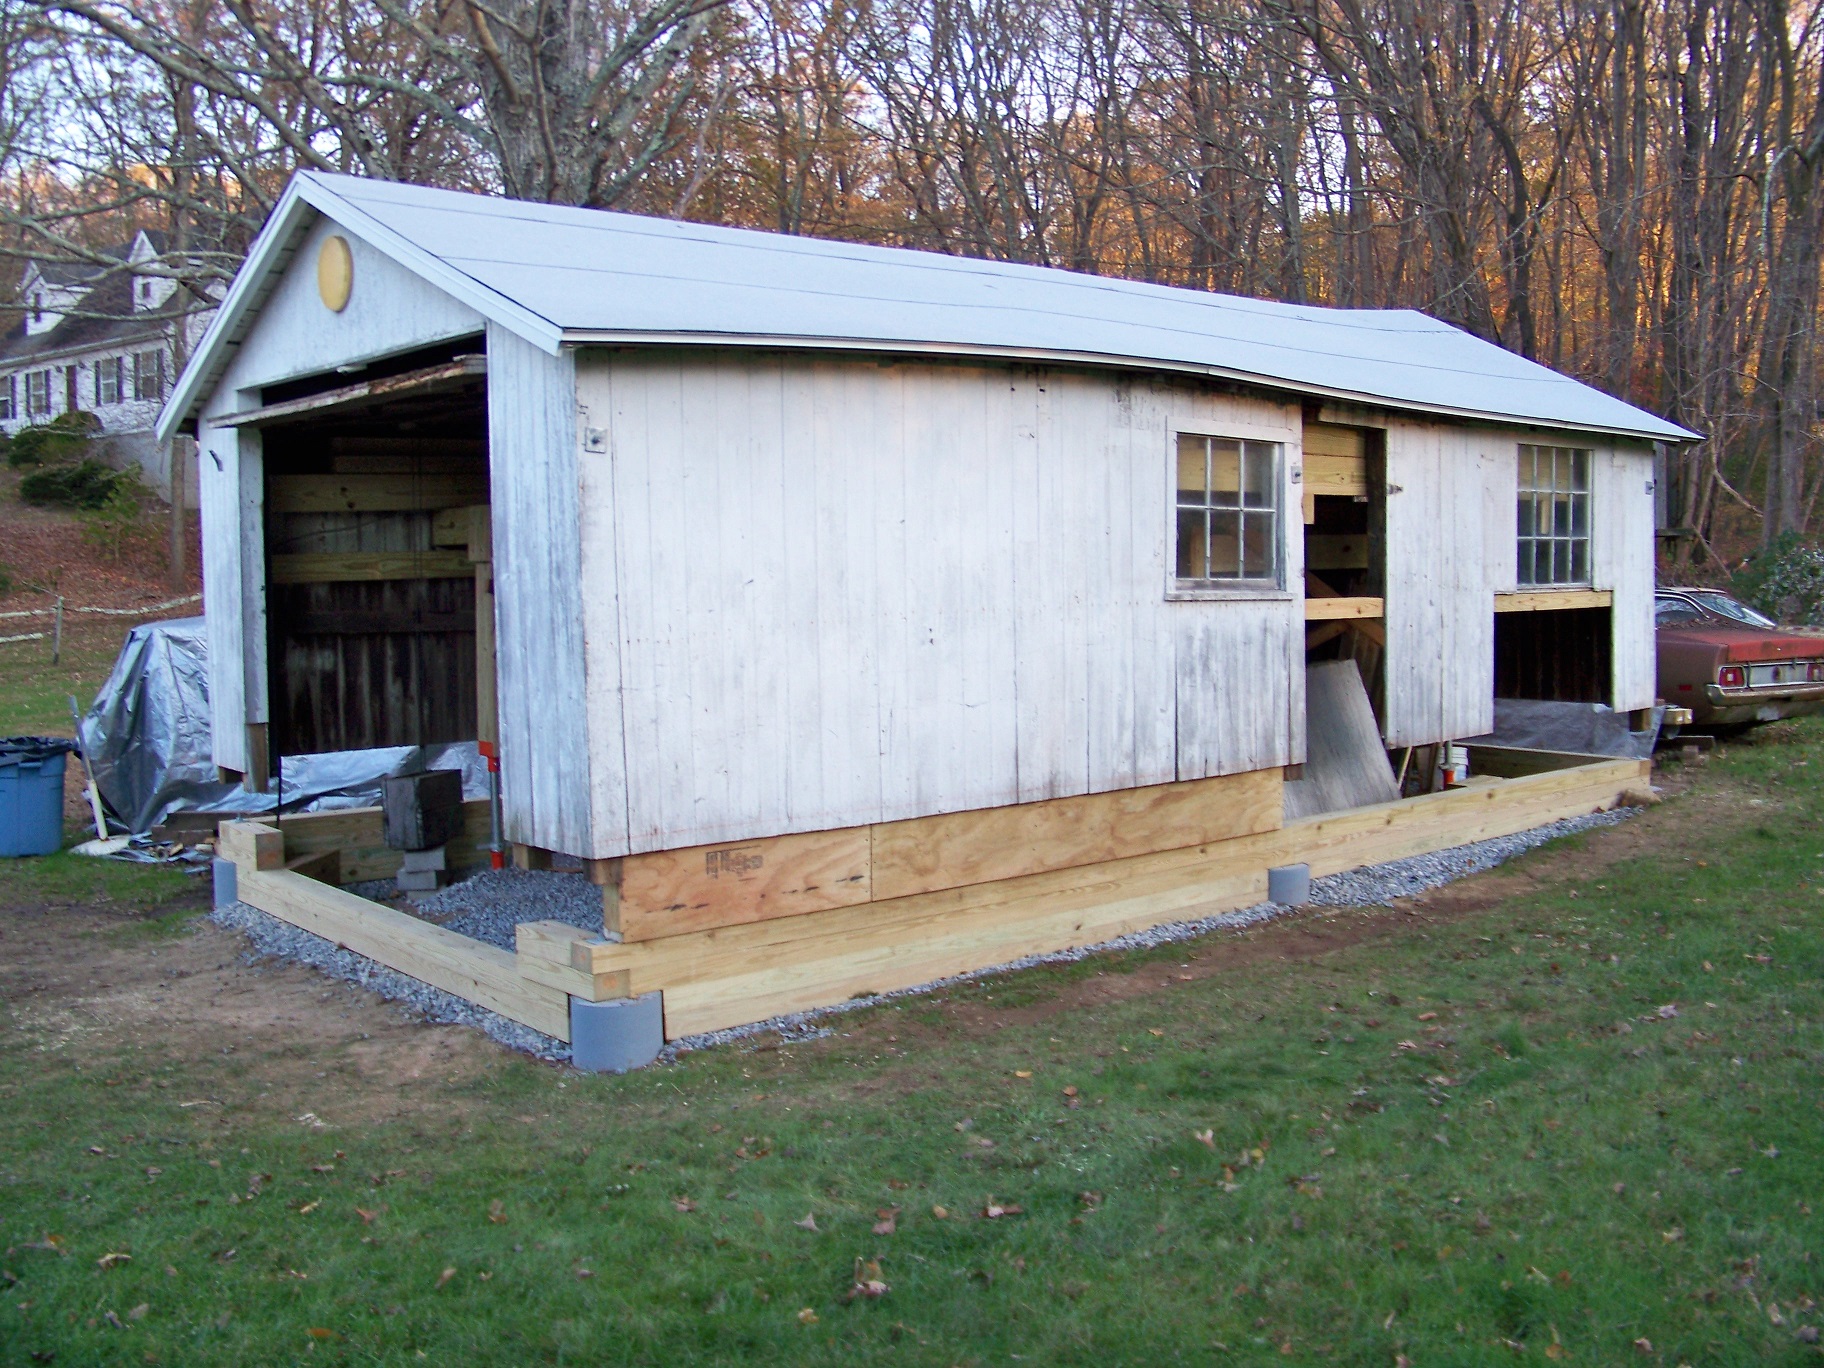
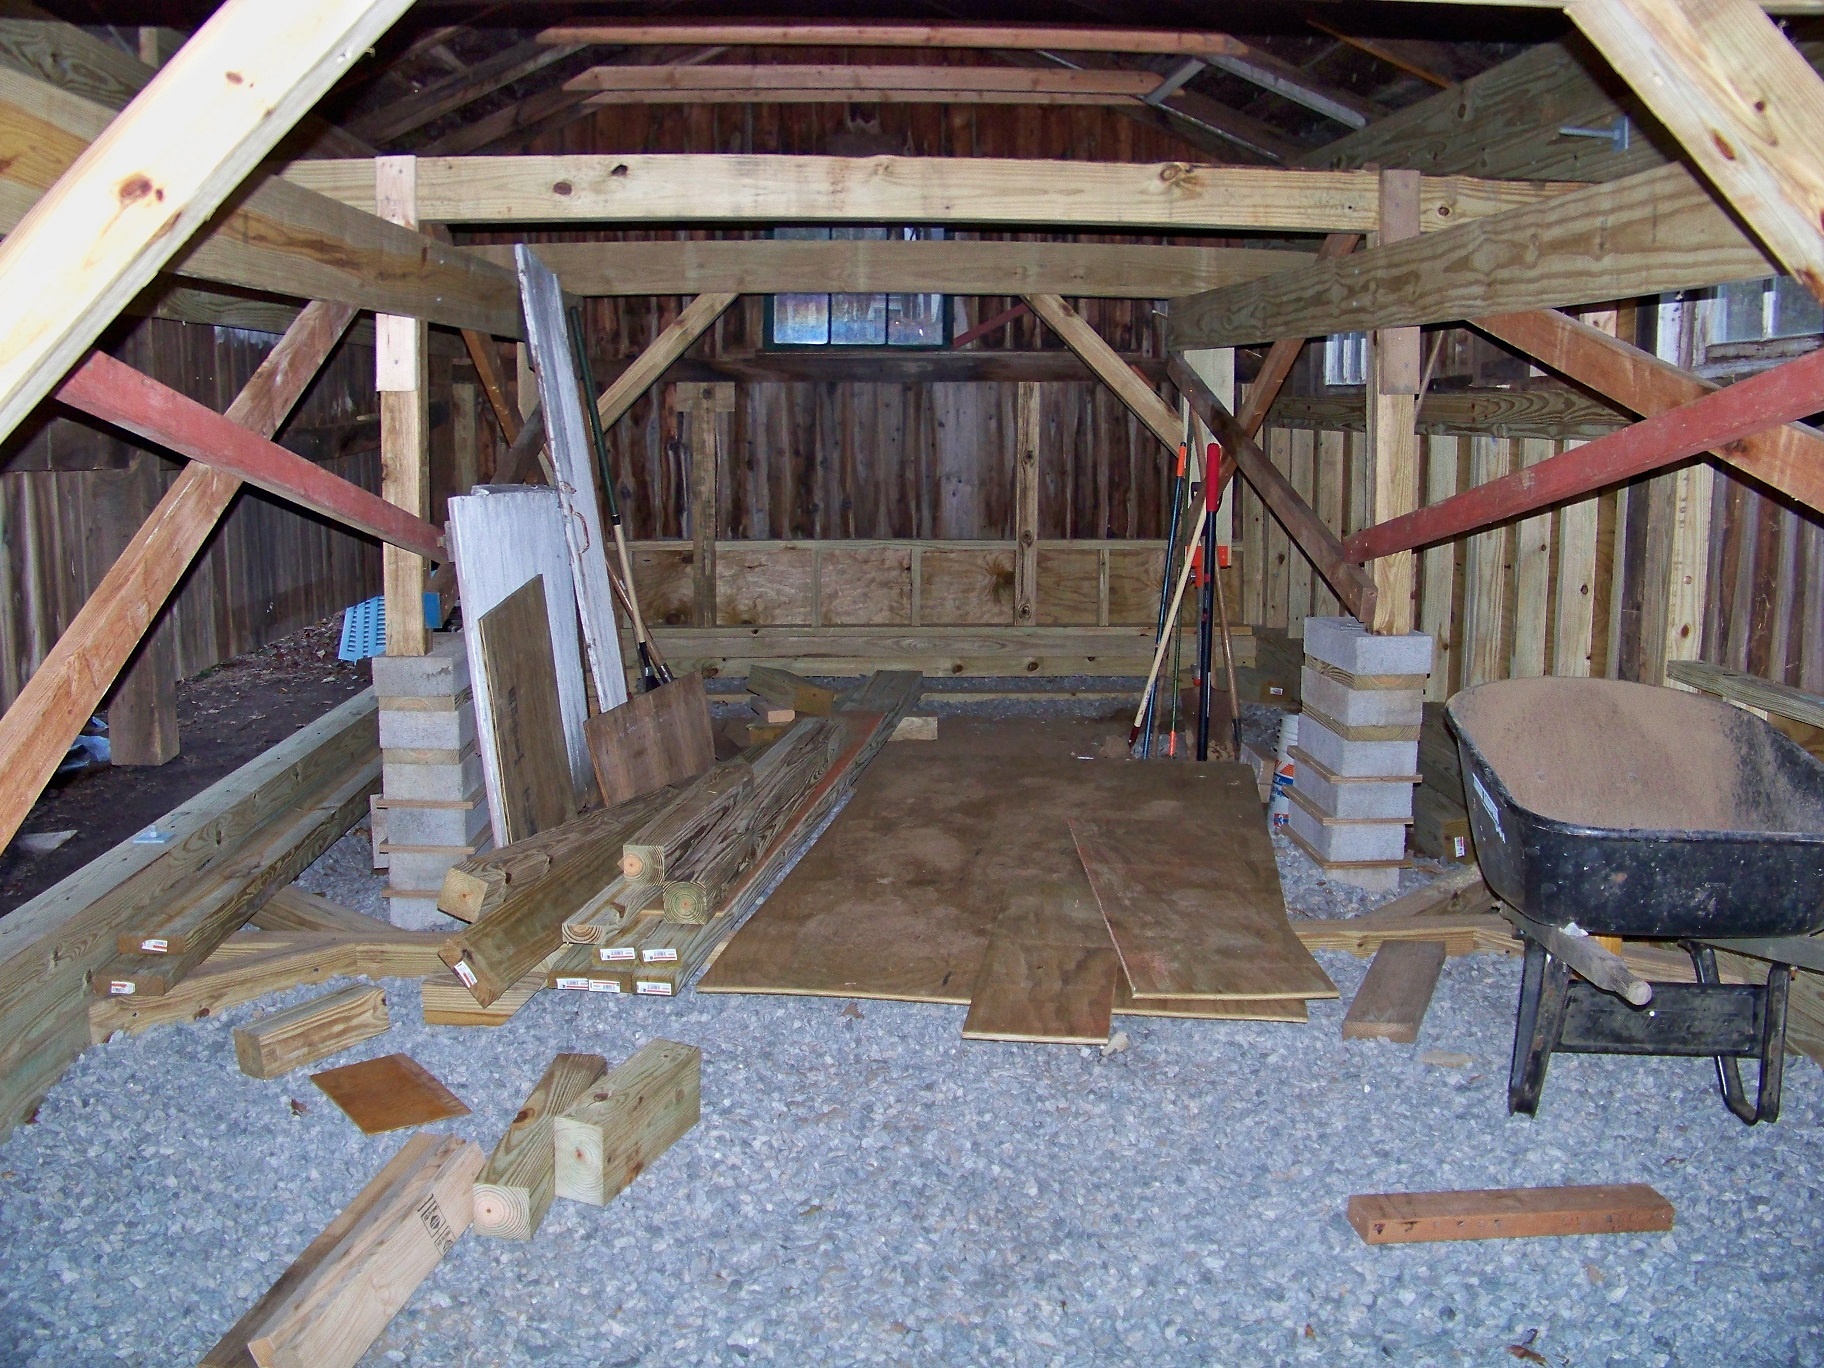
Getting real close to being able to remove the lifting frame. Had hoped to get to that stage over this holiday weekend, but apparently my imagination works much faster than my body.


Shiftless

Well-known member
Joined
Mar 9, 2014
Messages
14,444
Location
East Bay SFO
Amazing progress P.S. :beer:
I've been following your build since posting #1

I can hardly wait to see your lighting installation! ;)
 

ambenz

Well-known member
Joined
Dec 12, 2010
Messages
4,236
Location
NW Chicago Suburbs
Well I will be very curious how much actual dollar cost you will be in for to raise the Rat Shack.
Considering the price of teardown and new, $4K to $7K...I think you're still ahead of the price war game, not considering the free labor your giving.
...hope you get it enclosed before too long, enough to keep the snow out.
Looking good!
 
To avoid these ads, REGISTER NOW!
Top Bottom