
You are using an out of date browser. It may not display this or other websites correctly.
You should upgrade or use an alternative browser.
You should upgrade or use an alternative browser.
rattle_snake's random shop projects v0.1
- Thread starter rattle_snake
- Start date
TimeWarpF100
Well-known member
Awesome as usual! I need that same setup for Eco2. I really need to get back on that project.Back to work on high steer setup for old Ford. Need a longer drag link to reach knuckle. OCD had me not totally happy with Y-link style TRE on pass side. Would be more-better-er with regular 1T GM TRE to match other side.
I had previously bough 4' of 1.5 x 0.25 wall DOM and 7/8 tube inserts to rebuild the track bar. So had material on hand for a longer tie rod.
Measure, cut, bevel. But right before I welded them on I noticed that the threaded inserts were 7/8-14 for heims and the tie rods are 7/8-18. Poo. So ordered some similar types from Ruff Stuff and welded them up.
Old tie rod to be shortened to become the new drag link.
My welding kung-fu has improved over the years and now I feel comfortable doing life-and-death steering welds. I weld with three beads, 120* at a time, 2 flats of the hex nut. So a slight up and slightly down path that won't look consistent unless you adjust travel speed.
The right bevel is key, leave 30% or so unbeveled. Goal is full fill, and full adhesion to available surface area.
Can see the heat signature by looking at inside. start-stop points, cold spots, ect.
I like this type of threaded insert that has no thread where the weld joint is. Threads that far back do nothing (smart people say only the first few thread so anything). I have another type from Sky's offroad that is fully threaded, and would worry about heat warpage.
Installed and torqued arm. Tight fit.
Now drag link is quite flat. Even with track bar in flattest position it's not enough. Test drive confirmed bad bump steer. Have to extend the fame and/or axle brackets to dial it in.
Looks like it will clear frame when at bump on pass side. Steering wheel will still turn 95% of the 4 turns lock to lock using inner hole on arm. This means that before I was limited by box. Now it hits stops and tire just touches at full lock. So I gained some steering angle. Does seem to have a bit less assist force as expected. Will see how it does on the trail and if a ram is needed.


OP
rattle_snake
Well-known member
That is a great idea however the top is far from flat so I don't think glass would work in this case.What about a glass top?
Thinking lots of layers of polyurethane, pour on epoxy or similar.
OP
rattle_snake
Well-known member
In parallel with desk, wake board bench and a few other projects made some progress on the outdoor workbench.
Why would one need yet another?
Especially for clean freak who won't allow anything to be left sitting on it?
Anyway I glued a 2 piece panel and milled the frame and legs in a similar fashion as the desk. Glued interlocking corners.

Assembled frame and set top on. Plan to only break edges and do minimal sanding. Not going in the house to be scrutinized by SWMBO.
Overlooked lower shelf aspect, needs to figure out a scheme for it...

Why would one need yet another?
Especially for clean freak who won't allow anything to be left sitting on it?
Anyway I glued a 2 piece panel and milled the frame and legs in a similar fashion as the desk. Glued interlocking corners.
Assembled frame and set top on. Plan to only break edges and do minimal sanding. Not going in the house to be scrutinized by SWMBO.
Overlooked lower shelf aspect, needs to figure out a scheme for it...
OP
rattle_snake
Well-known member
Got the TIG welder sold. It belonged to my neighbor like some of the other equipment in my shop. TIG rarely got used, and didn't justify the space it took up. I have access to a modern TIG. So down the road it went. Rather have the CNC plasma.
Plan is for him to get a decent variable speed drill press. TIG money will offset some of the cost.

Plan is for him to get a decent variable speed drill press. TIG money will offset some of the cost.
ntsqd
Well-known member
That's a Lincoln 300/300? Sounds a bit like a DC-3 on take-off when running? Not much in the way of modern options, but when you need POWER y'all better stand back!
Fond memories of running one of those fixing Sprint Car cyl heads, '26 Hudson exhaust manifolds, cracked Iron Duke blocks, etc.
Fond memories of running one of those fixing Sprint Car cyl heads, '26 Hudson exhaust manifolds, cracked Iron Duke blocks, etc.
Last edited:
OP
rattle_snake
Well-known member
Yes an IdealArc 300. Yes fan was loud, and also the Bernard chiller fan. It would put some heat in when you mashed the pedal.
ntsqd
Well-known member
I once melted the return coolant on what I later realized was a 200A torch welding something aluminum and big. Hot coolant burnt a line on the top of my forearm. Machine was nowhere near maxed out. Oops!
OP
rattle_snake
Well-known member
Installed lower shelf on wood workbench. Notched the legs to retain the twisted slab. Not as easy to make a square hole, used a skill saw like a stump grinder and finished out with a chisel.
Cut top to size and finished surfaces. It's not very flat and did some work to bottom side to minimize shims needed to secure top. Don't want to load frame with forces of pulling top flat.

Original plan was to place here, use outdoor sealer same as the sink. Going to try a test on a scrap and see what it looks like. Temped to let it weather first. Perhaps discolor with vinegar.
Already has a light above and an outlet. Considering a small HF airless compressor to put in sink cabinet to have air to dry things and perhaps use air tools on the wood bench.

Cut top to size and finished surfaces. It's not very flat and did some work to bottom side to minimize shims needed to secure top. Don't want to load frame with forces of pulling top flat.
Original plan was to place here, use outdoor sealer same as the sink. Going to try a test on a scrap and see what it looks like. Temped to let it weather first. Perhaps discolor with vinegar.
Already has a light above and an outlet. Considering a small HF airless compressor to put in sink cabinet to have air to dry things and perhaps use air tools on the wood bench.
Boosted1
Well-known member
That looks too nice to leave outside.
OP
rattle_snake
Well-known member
Had those thoughts as I went to far sanding and bring it up to my 'level'.
after putting it in place the light color isn't what I want. So will stain or treat with acid then waterproof like the sink.
Problem is, the plastic shed now looks out of place. Grand scheme is to build a wider but shallow wooden shed that better matches the rest of the space. Roof over the area. Just need time and money.
OP
rattle_snake
Well-known member
Fit and installed drawer into desk. Was able to hold 1/16 tolerance with 1/8 intentional gaps on side and back even with warped lumber. Used a small shim under on glide. Drawer operates smoothly Face floats so can adjust independently,

Brought the piece into the house to see how it looks in relation to the chairs and surrounding elements. Was going to do a clear epoxy/poly finish but now I think I will stain it first. Started doing some test on remnants of different colors to see how it would look

Brought the piece into the house to see how it looks in relation to the chairs and surrounding elements. Was going to do a clear epoxy/poly finish but now I think I will stain it first. Started doing some test on remnants of different colors to see how it would look
OP
rattle_snake
Well-known member
Refilled the plasma table with some cutting fluid to mitigate rust. SterlingCool plasma cool. Table holds roughly 10-11 gallons. Recommended mixture is 5-10%. I split the 5g, $180 pail with my friend who has same table. Can get 8 treatments at 6.25%, 4 each which come out to about $20 per batch.
Now it has the typical Chernobyl/spent fuel rod storage pool look to it. Miller blue.

Now it has the typical Chernobyl/spent fuel rod storage pool look to it. Miller blue.
Boosted1
Well-known member
Table looks good inside.
OP
rattle_snake
Well-known member
Found the issue I was having with out of round holes on the plasma table. The X-axis lead nut was snug but not tight allowing it to rotate and incur backlash. Torqued and now it's all good. Played some more with 360 on importing images and cutting on 26 ga. Can't really dial down the air pressure below 50 as the machine will flag it as an error and not cut. 150 i/m @ 20A works well enough.

Last edited:
OP
rattle_snake
Well-known member
Finished out the outdoor workbench project. Waffled on color for awhile. Did some custom mixing and applied to some scraps including topcoats. Decided on darker color (Early American) and applied. Top coated with oil based sealer applied with a small hand pump sprayer.

Put it in it's home. On to the next project.

Put it in it's home. On to the next project.
MadeByMiller
Well-known member
Glad you solved the plasma table issue!
OP
rattle_snake
Well-known member
Yes, was happy to find some thing simple and definitive.
OP
rattle_snake
Well-known member
Finished up the Dad/daughter knife project. 7-1/2" Damascus coffin Bowie blade (bought). Finger guard is aluminum, handle is walnut.
She didn't really want ultra-perfection like some other people. It was a fun project and time well spent with her. I guess she thinks Dad is still cool enough to hang out with at 13. I think we will do another of some other style.


She didn't really want ultra-perfection like some other people.
It was a fun project and time well spent with her. I guess she thinks Dad is still cool enough to hang out with at 13. I think we will do another of some other style.OutlawDrifter
Well-known member
Awesome!
OP
rattle_snake
Well-known member
Wanting to expand my garden area and backyard has lots of curves. Contemplated getting a tubing roller to build a corresponding curved garden fence. Prices have gone up a bit so decided I could make my existing bender work, the HF tube kinker. There are a few modifications that can be done to improve results. Securing pipe/tube to die. Should work on on square tube.
Last use was bending 0.25 wall DOM which bend the bottom plate. And HF orange just doesn't go with my shop color scheme.

For some reason I decided now was the time to fix it and do something with the dies. I used the press to flatten the damage but only so much. Next step was to clamp and weld in sections to help flatten the base. Added some 1/4x2 flat bar to provide some support.

Went to some extra effort on paint job to keep the orange from coming through. Broke all sharp edges. Reamed holes. Full sand, clean, primer, paint. No longer an eye sore.

Played with idea of building rolling chassis for bender and storing dies on. Or adapt to engine stand. Preferred method is to lay the bender down on the ground. Decided to keep is simple and store dies someplace else. Dies just make it heaver and more cumbersome. Made a simple rack.

Prepped dies in similar fashion. Sanded down all machined surfaces, TLC. Then some primer and black paint.

so decided I could make my existing bender work, the HF tube kinker. There are a few modifications that can be done to improve results. Securing pipe/tube to die. Should work on on square tube.Last use was bending 0.25 wall DOM which bend the bottom plate. And HF orange just doesn't go with my shop color scheme.
For some reason I decided now was the time to fix it and do something with the dies. I used the press to flatten the damage but only so much. Next step was to clamp and weld in sections to help flatten the base. Added some 1/4x2 flat bar to provide some support.
Went to some extra effort on paint job to keep the orange from coming through. Broke all sharp edges. Reamed holes. Full sand, clean, primer, paint. No longer an eye sore.
Played with idea of building rolling chassis for bender and storing dies on. Or adapt to engine stand. Preferred method is to lay the bender down on the ground. Decided to keep is simple and store dies someplace else. Dies just make it heaver and more cumbersome. Made a simple rack.
Prepped dies in similar fashion. Sanded down all machined surfaces, TLC. Then some primer and black paint.
OP
rattle_snake
Well-known member
My first arty-fartsy graphic import project left me with a negative that looked like it would make a good stencil.
I hacked a chuck of pine off and hit it with some paint, flames and clear. 15 min project start to finish.

I hacked a chuck of pine off and hit it with some paint, flames and clear. 15 min project start to finish.
OutlawDrifter
Well-known member
Tubing bender turned out nice!
I dig the brand art as well
I dig the brand art as well
Justin, you're welcome to borrow my roller if you're going for long radius bends or if no bigger then 1" my tight radius set I used on the jeep fender build. BTW, I have that same bender too and unless its a heavy wall tubing, it no work so good.
OP
rattle_snake
Well-known member
Thanks Marc. Can't handle the old HF orange. Luckily they changed paint colors.
Thanks Cam, I'll keep that in mind. yes only large radius. Planning on 1" square tube. Should be one day job? (haha)
Yes the HF kinker is a turd. Sadly it does work just well enough that I have kept it around for 20 years now (hmm, that make me sound 'old'). Used it for stuff it was not designed for, like a general purpose press.
Some ideas on how to improve:
OP
rattle_snake
Well-known member
Attempted to ride the motorcycle to work today. No power, brand new battery at 0.0v Poo. Charge line contacted exhaust and depleted battery.
So rolled it back in garage and got keys for my dad's V star 950. It wouldn't start either, one weak turn. It has known intermittent starter issue. Attempted push starts until it fired and off I went. Will see how it goes at 5p.
So rolled it back in garage and got keys for my dad's V star 950. It wouldn't start either, one weak turn. It has known intermittent starter issue. Attempted push starts until it fired and off I went. Will see how it goes at 5p.
lilscorpion
Well-known member
Love the color choices. Them are very useful tools when used correctly (e.g. not for roll cages). I put serious miles on mine. Mine was ugly tho.
OP
rattle_snake
Well-known member
I think you're right on this one Cam. Appreciate the offer! Project is likely a few weeks or months out. I'll let you know when I get closer. Pavers need to be done first.Brother, borrow my roller and hole hawg and and you won't need to learn any new cuss words. I'm in Cali this week but back in town the first of next.
Thanks. A turd of a tool but can be 'polished' like many other things.Love the color choices. Them are very useful tools when used correctly (e.g. not for roll cages). I put serious miles on mine. Mine was ugly tho.
Ya I did use it to build a cage 20+ years back.

OP
rattle_snake
Well-known member
Got the Raider's battery restored and charged. Fired up. The fuse on charge line was open. Makes me wonder how batt got to 0.0V, as I measured directly on the terminals. Guess it flowed less than melt point for some time then finally thermally opened.
Old man's 950 did start after work. But I stopped at Lowes and had to push start. It started easy, not sure the 1900 would be the same.
Old man's 950 did start after work. But I stopped at Lowes and had to push start. It started easy, not sure the 1900 would be the same.
OutlawDrifter
Well-known member
My 1100 V-Star generally took a lot of motion to get it started.
OP
rattle_snake
Well-known member
Took the truck out for a quick & simple desert camp trip with one of my daughters. Against better judgement I decided to try to mod platform and install camper the day I was trying to go. I had previously built a bed platform for use in my 2014 F250, in conjunction with the old camper shell. Didn't fit the 2014 well and leaked. Platform got revamped and modified for the 72 bed. Had to make it taller to work with spare tire, cutouts, brackets and so on.

Left side holds an isolated battery and a power panel. Main use is for high power audio system. Don't want to run off starting battery for obvious reasons. Cigar, dual USB, volt meter.

Using a 30Ah motorcycle battery with a voltage sensing isolator. The aux battery only gets charged when truck is running and alternator supply over 14v. I tapped into the trailer charge circuit at the rear bumper. Used a chunk of foam to hold battery in place, temporarily.

Got the old shell put on, cleaned up and sealed. home sweet home.

400W amp needs short heavy gauge wire to not sag voltage when sub hits. Luckily the sub box fits under the platform now.

Drove out to camp site near Peralta trail. It rained for a bit, stuff stayed dry so a win. New exhaust is too loud for long trips.

There were some trails with washes and some climbs so I took groups of peeps out for some wheeling.

Took one dog and she had a good time but passed out in footwell on the way home.

Left side holds an isolated battery and a power panel. Main use is for high power audio system. Don't want to run off starting battery for obvious reasons. Cigar, dual USB, volt meter.
Using a 30Ah motorcycle battery with a voltage sensing isolator. The aux battery only gets charged when truck is running and alternator supply over 14v. I tapped into the trailer charge circuit at the rear bumper. Used a chunk of foam to hold battery in place, temporarily.
Got the old shell put on, cleaned up and sealed. home sweet home.
400W amp needs short heavy gauge wire to not sag voltage when sub hits. Luckily the sub box fits under the platform now.
Drove out to camp site near Peralta trail. It rained for a bit, stuff stayed dry so a win. New exhaust is too loud for long trips.
There were some trails with washes and some climbs so I took groups of peeps out for some wheeling.
Took one dog and she had a good time but passed out in footwell on the way home.
MadeByMiller
Well-known member
So awesome! I've got a thing for toppers/shells/caps whatever you want to call them, and it suits your truck excellently.
OP
rattle_snake
Well-known member
Finished up the desk project. Stained and started putting on layers of polyurethane. Tried to fill in the holes and cracks even though I new better.
At some point OCD flared up and I was forced to satin the underside and drawer.

After 5 coats of brush on poly and sanding I finished it out with spray can of same stuff. Matte finish. Brand was done with black paint and sanding to make it look old-er.

matches the chairs well. Wife is happy, so I am free to move on to her other requests.

At some point OCD flared up and I was forced to satin the underside and drawer.
After 5 coats of brush on poly and sanding I finished it out with spray can of same stuff. Matte finish. Brand was done with black paint and sanding to make it look old-er.
matches the chairs well. Wife is happy, so I am free to move on to her other requests.
zmotorsports
ALLIANCE MEMBER
The truck looks AWESOME outside in her element Justin.
Glad the trip was a success.
Glad the trip was a success.
OutlawDrifter
Well-known member
Love it with the camper shell. Looks like a fun trip!
Well...Ultraflows come in a 24" case also...or there is always the 5x11x22 magnaflow/mag knockoffs.
After that, you're down to using the big case Super Turbos if you want quieter...Maybe the chambered Magnaflows?
Well...Ultraflows come in a 24" case also...or there is always the 5x11x22 magnaflow/mag knockoffs.
After that, you're down to using the big case Super Turbos if you want quieter...Maybe the chambered Magnaflows?
ntsqd
Well-known member
Truck looks great!! Friend with a High Boy made his platform full width, but only the needed length, which left him room at the rear for boots and what-not.
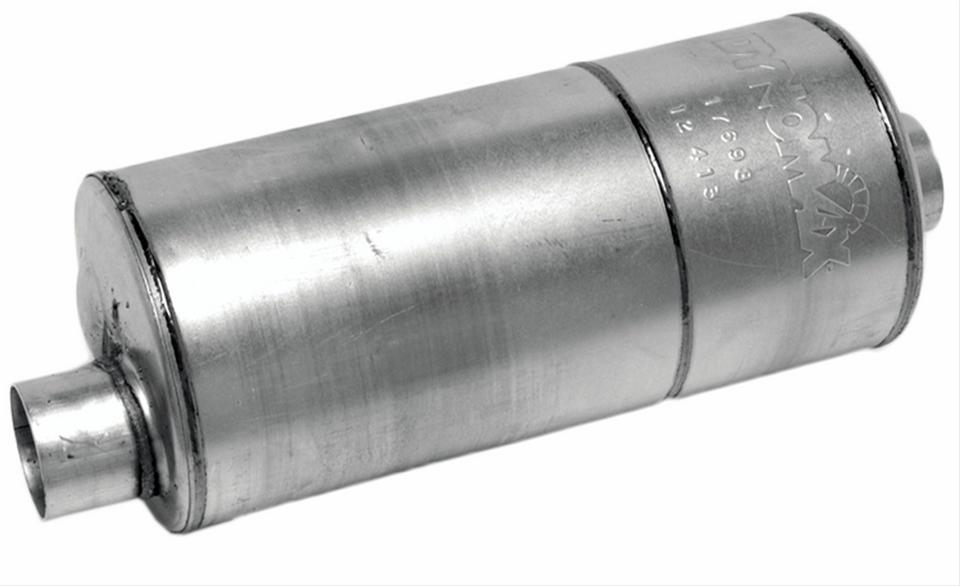
I've run this muffler on a couple Suburban 350ci's as a single 3" exhaust and have one for the Bronc-up, and have been very happy with it. Quiet going down the road at part throttle, but makes appropriate noises when at WOT.
 www.summitracing.com
I've run this muffler on a couple Suburban 350ci's as a single 3" exhaust and have one for the Bronc-up, and have been very happy with it. Quiet going down the road at part throttle, but makes appropriate noises when at WOT.
Dynomax Performance 17698 Dynomax Super Turbo Mufflers | Summit Racing
Free Shipping - Dynomax Super Turbo Mufflers with qualifying orders of $99. Shop Mufflers at Summit Racing.
Trapps
ALLIANCE MEMBER
Desk and workbench turned out great, Justin!
LOVE that Punch driving the RF sub!
LOVE that Punch driving the RF sub!
plain2car
Well-known member
Justin, a few take aways from the latest updates:
"New exhaust is too loud for long trips." yea... ok old man! LOL!!!!
"Luckily the sub box fits under the platform now" the most important part to any rebuild/modification to any vehicle!
"..... she had a good time but passed out in footwell on the way home" BOY!! you are lucky that the members here would NEVER take that outta context!!
thanks for the updates!!
Boosted1
Well-known member
Agree truck looks great.
Table does too.
Table does too.